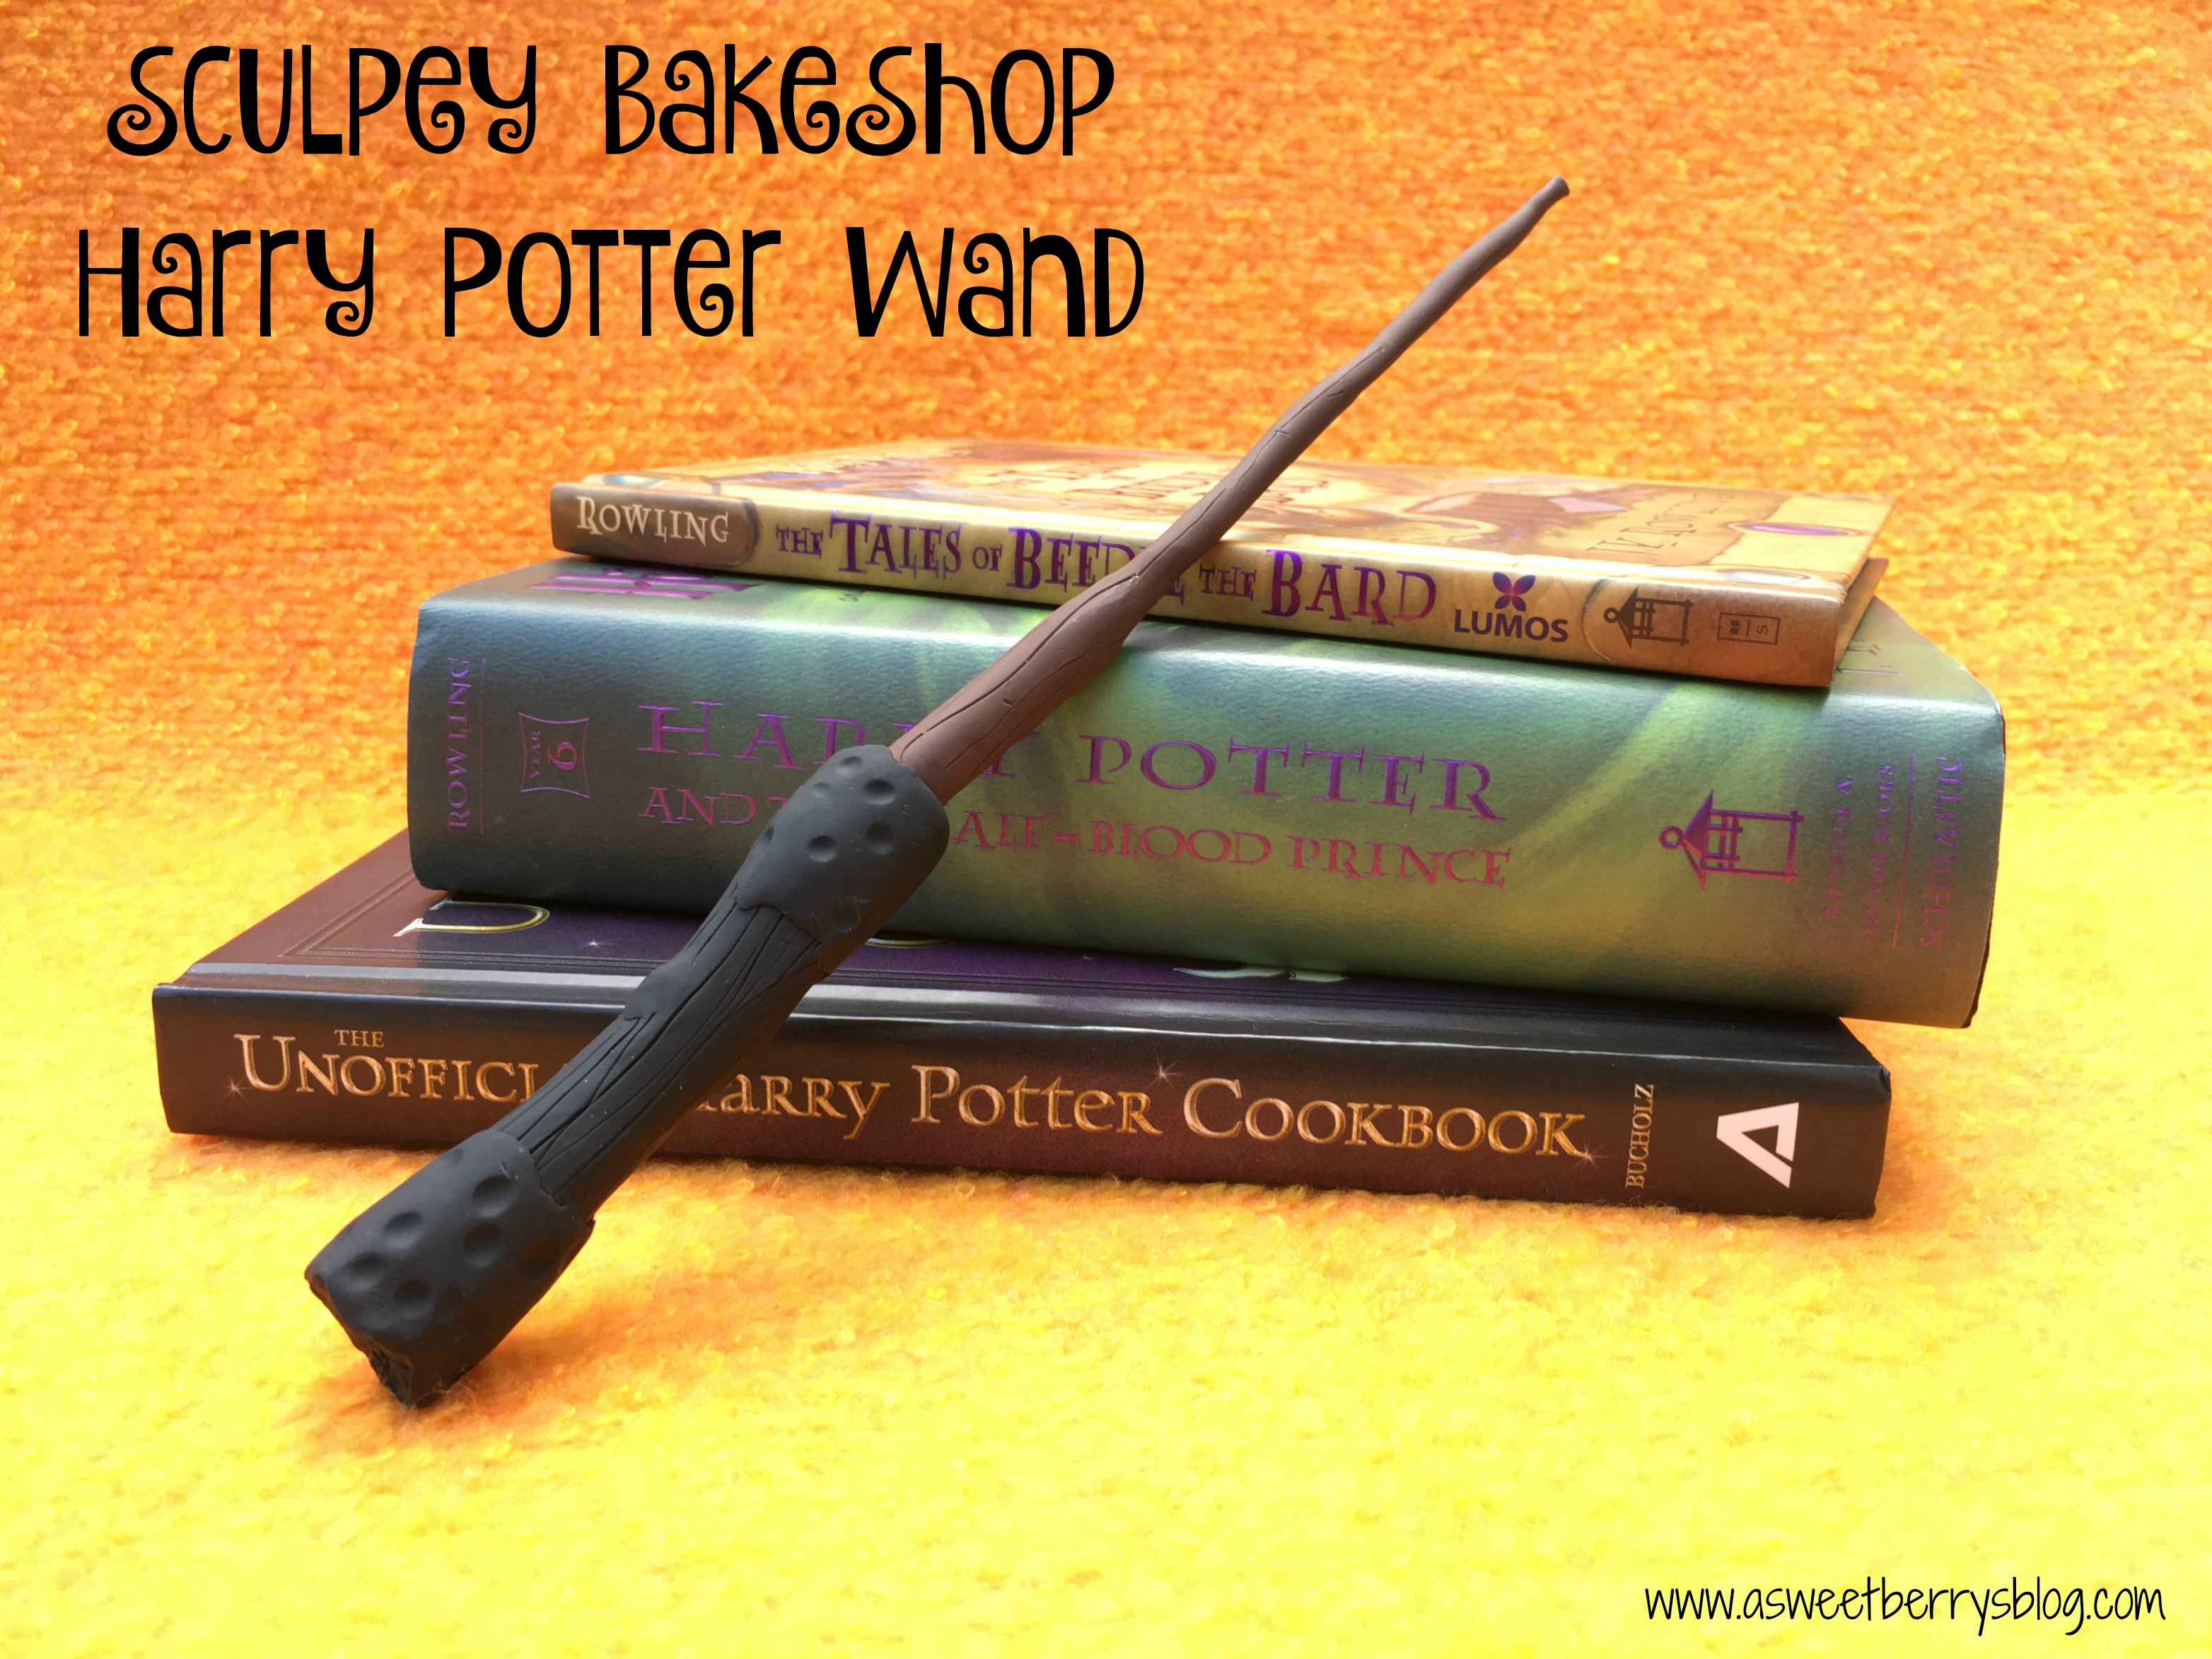
I got the chance to participate in a Happy Harry Potter Blog series! This happens every July in preparation for Harry Potter’s Birthday! And since we are headed to Universal Studios in the fall, Harry’s Wand is the big topic of discussion in our house quite frequently. So, I decide to make my own Harry Potter Wand using Sculpey BakeShop clay and I am super excited about how it turned out!
Materials needed:
Sculpey Bake Shop Oven Bake Clay
Clay tools
Oven (I just use our toaster oven)
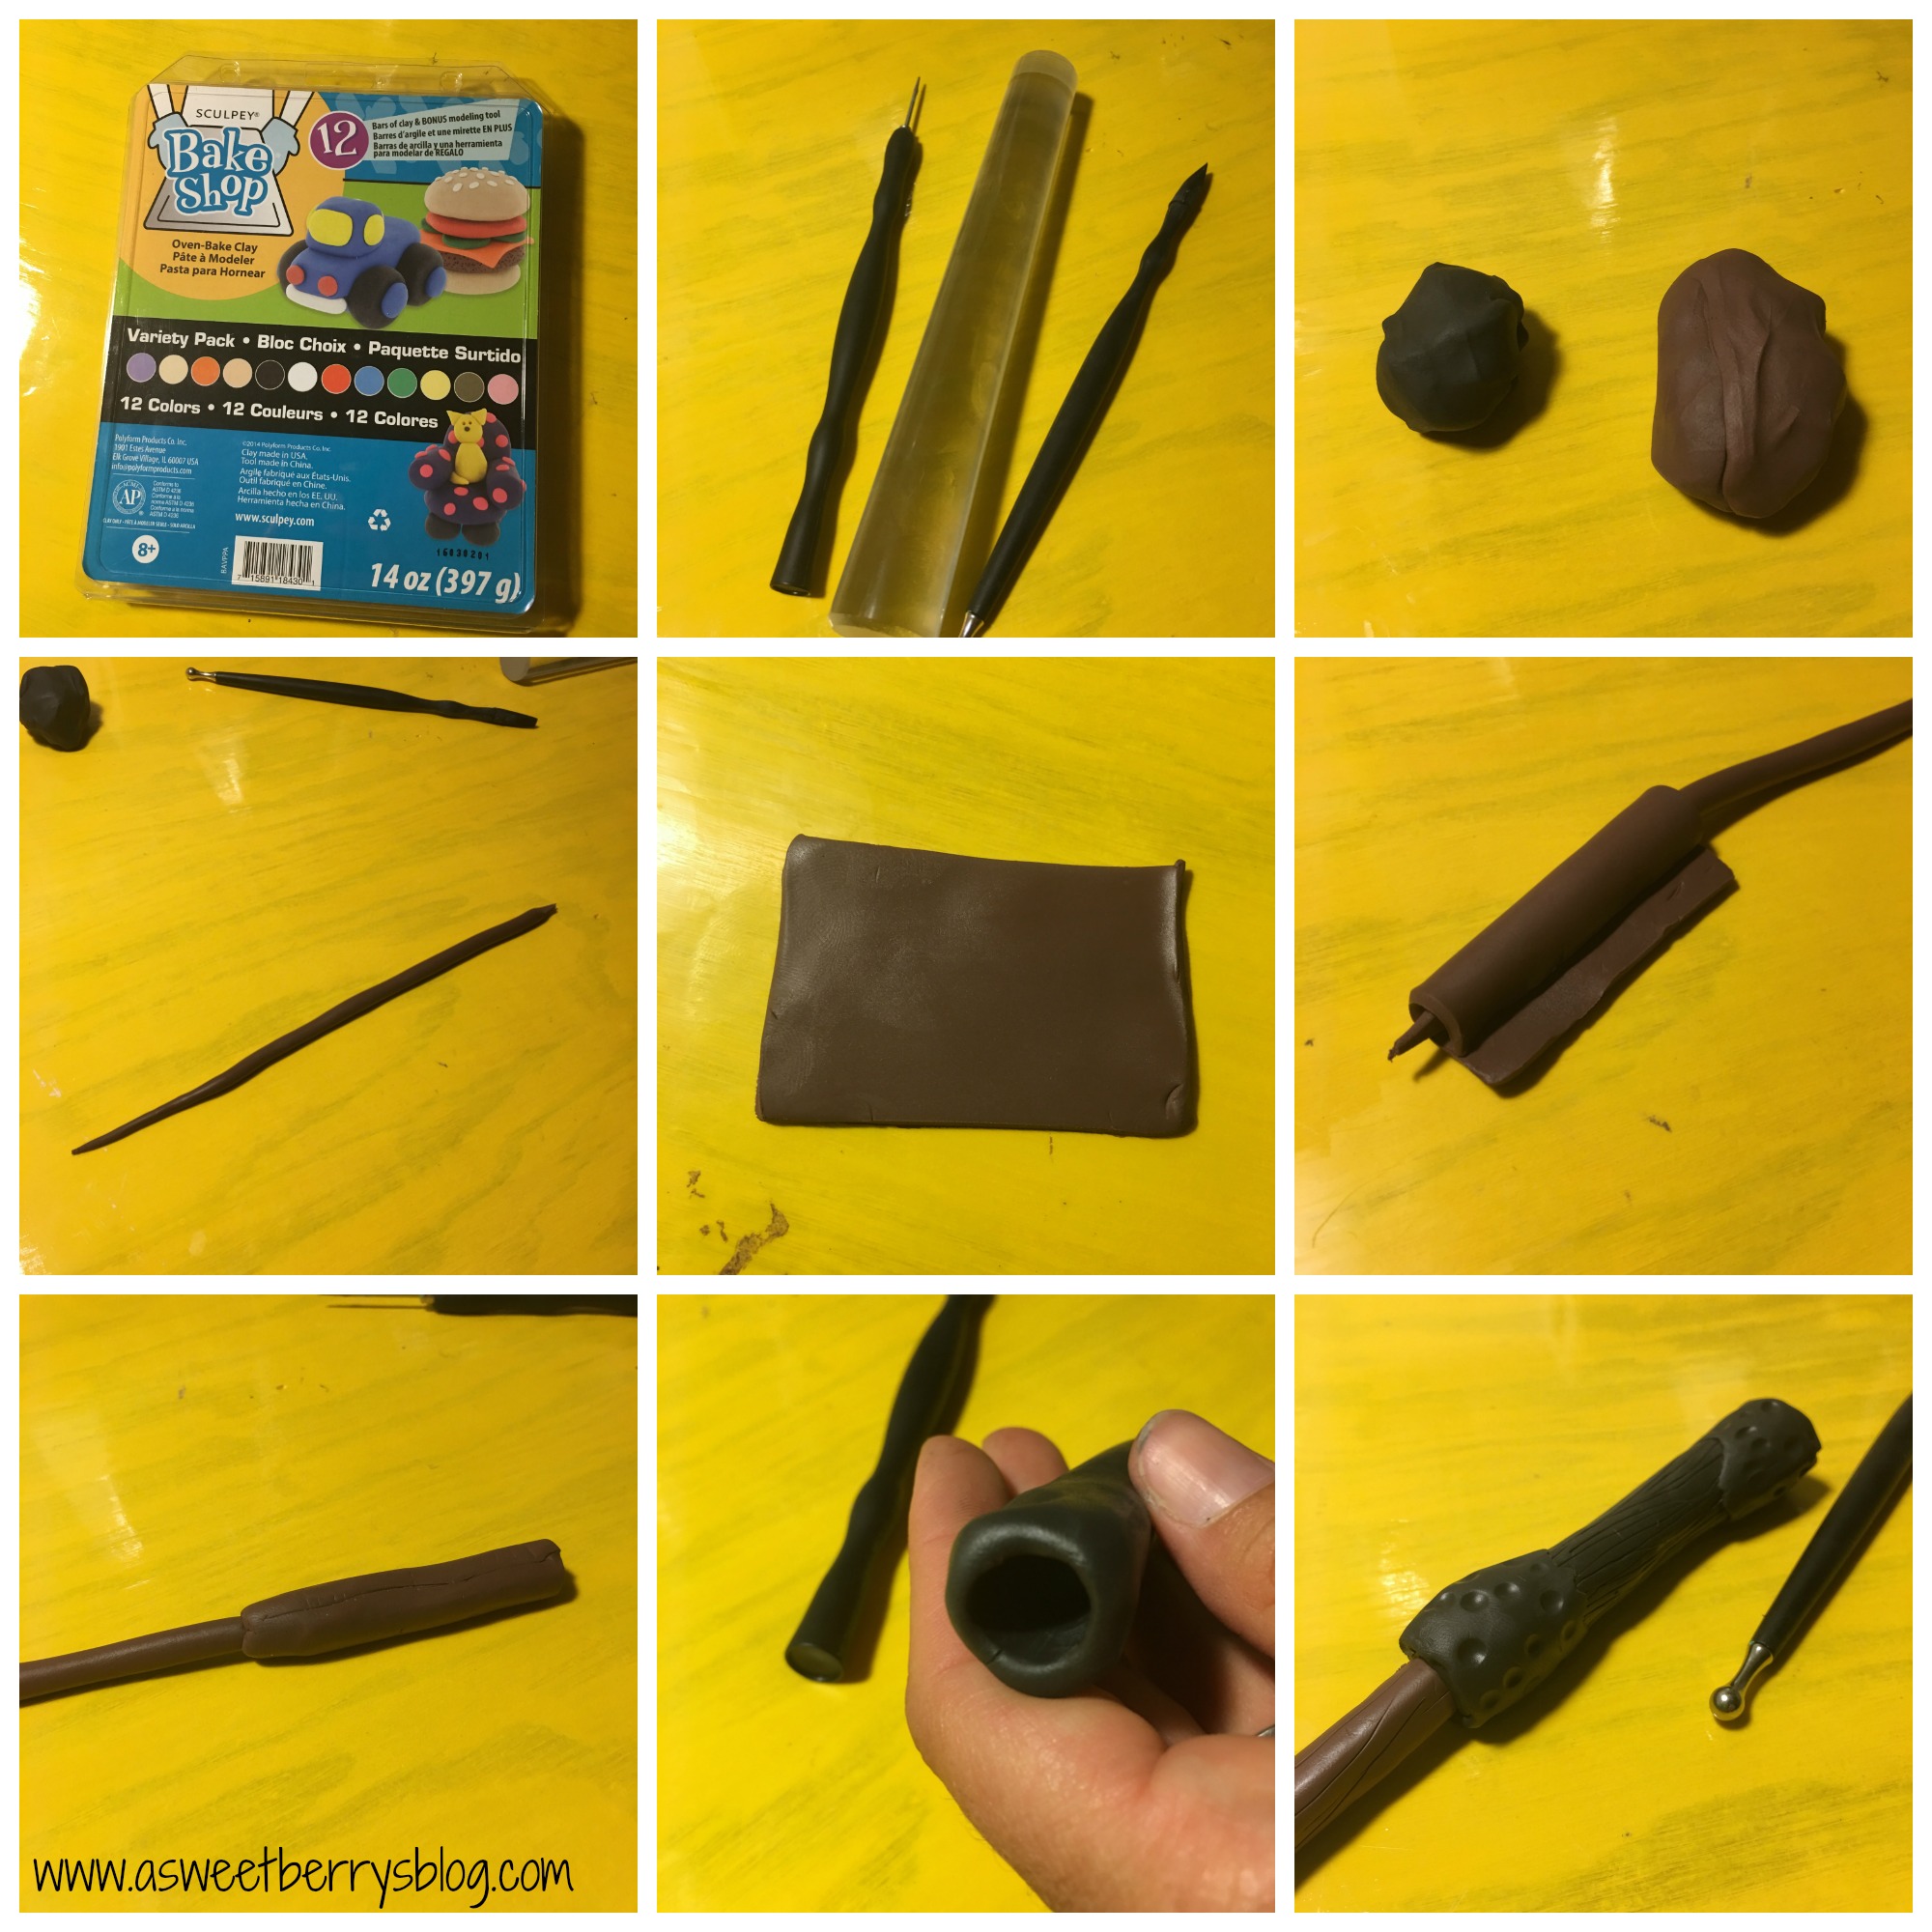
I decided to use black and brown clay, so I kneaded the two colors until they were soft and easy to work with. I rolled out the wand part first, making it thin but not too thin. I didn’t want it to break easily or be floppy. Then, I added rolled an additional piece of clay that I rolled flat to widen the wand a little towards the bottom. Using my black clay, I rolled it using my hand until it was cylinder like. Then, I took one of the tools and pressed one end in to create a hole. I then put my thin piece of wand into the black piece and then pressed them together slightly.
Once my wand was together, I used my tools to add detail to my wand. I wanted it to have more of a piece of wood feel.
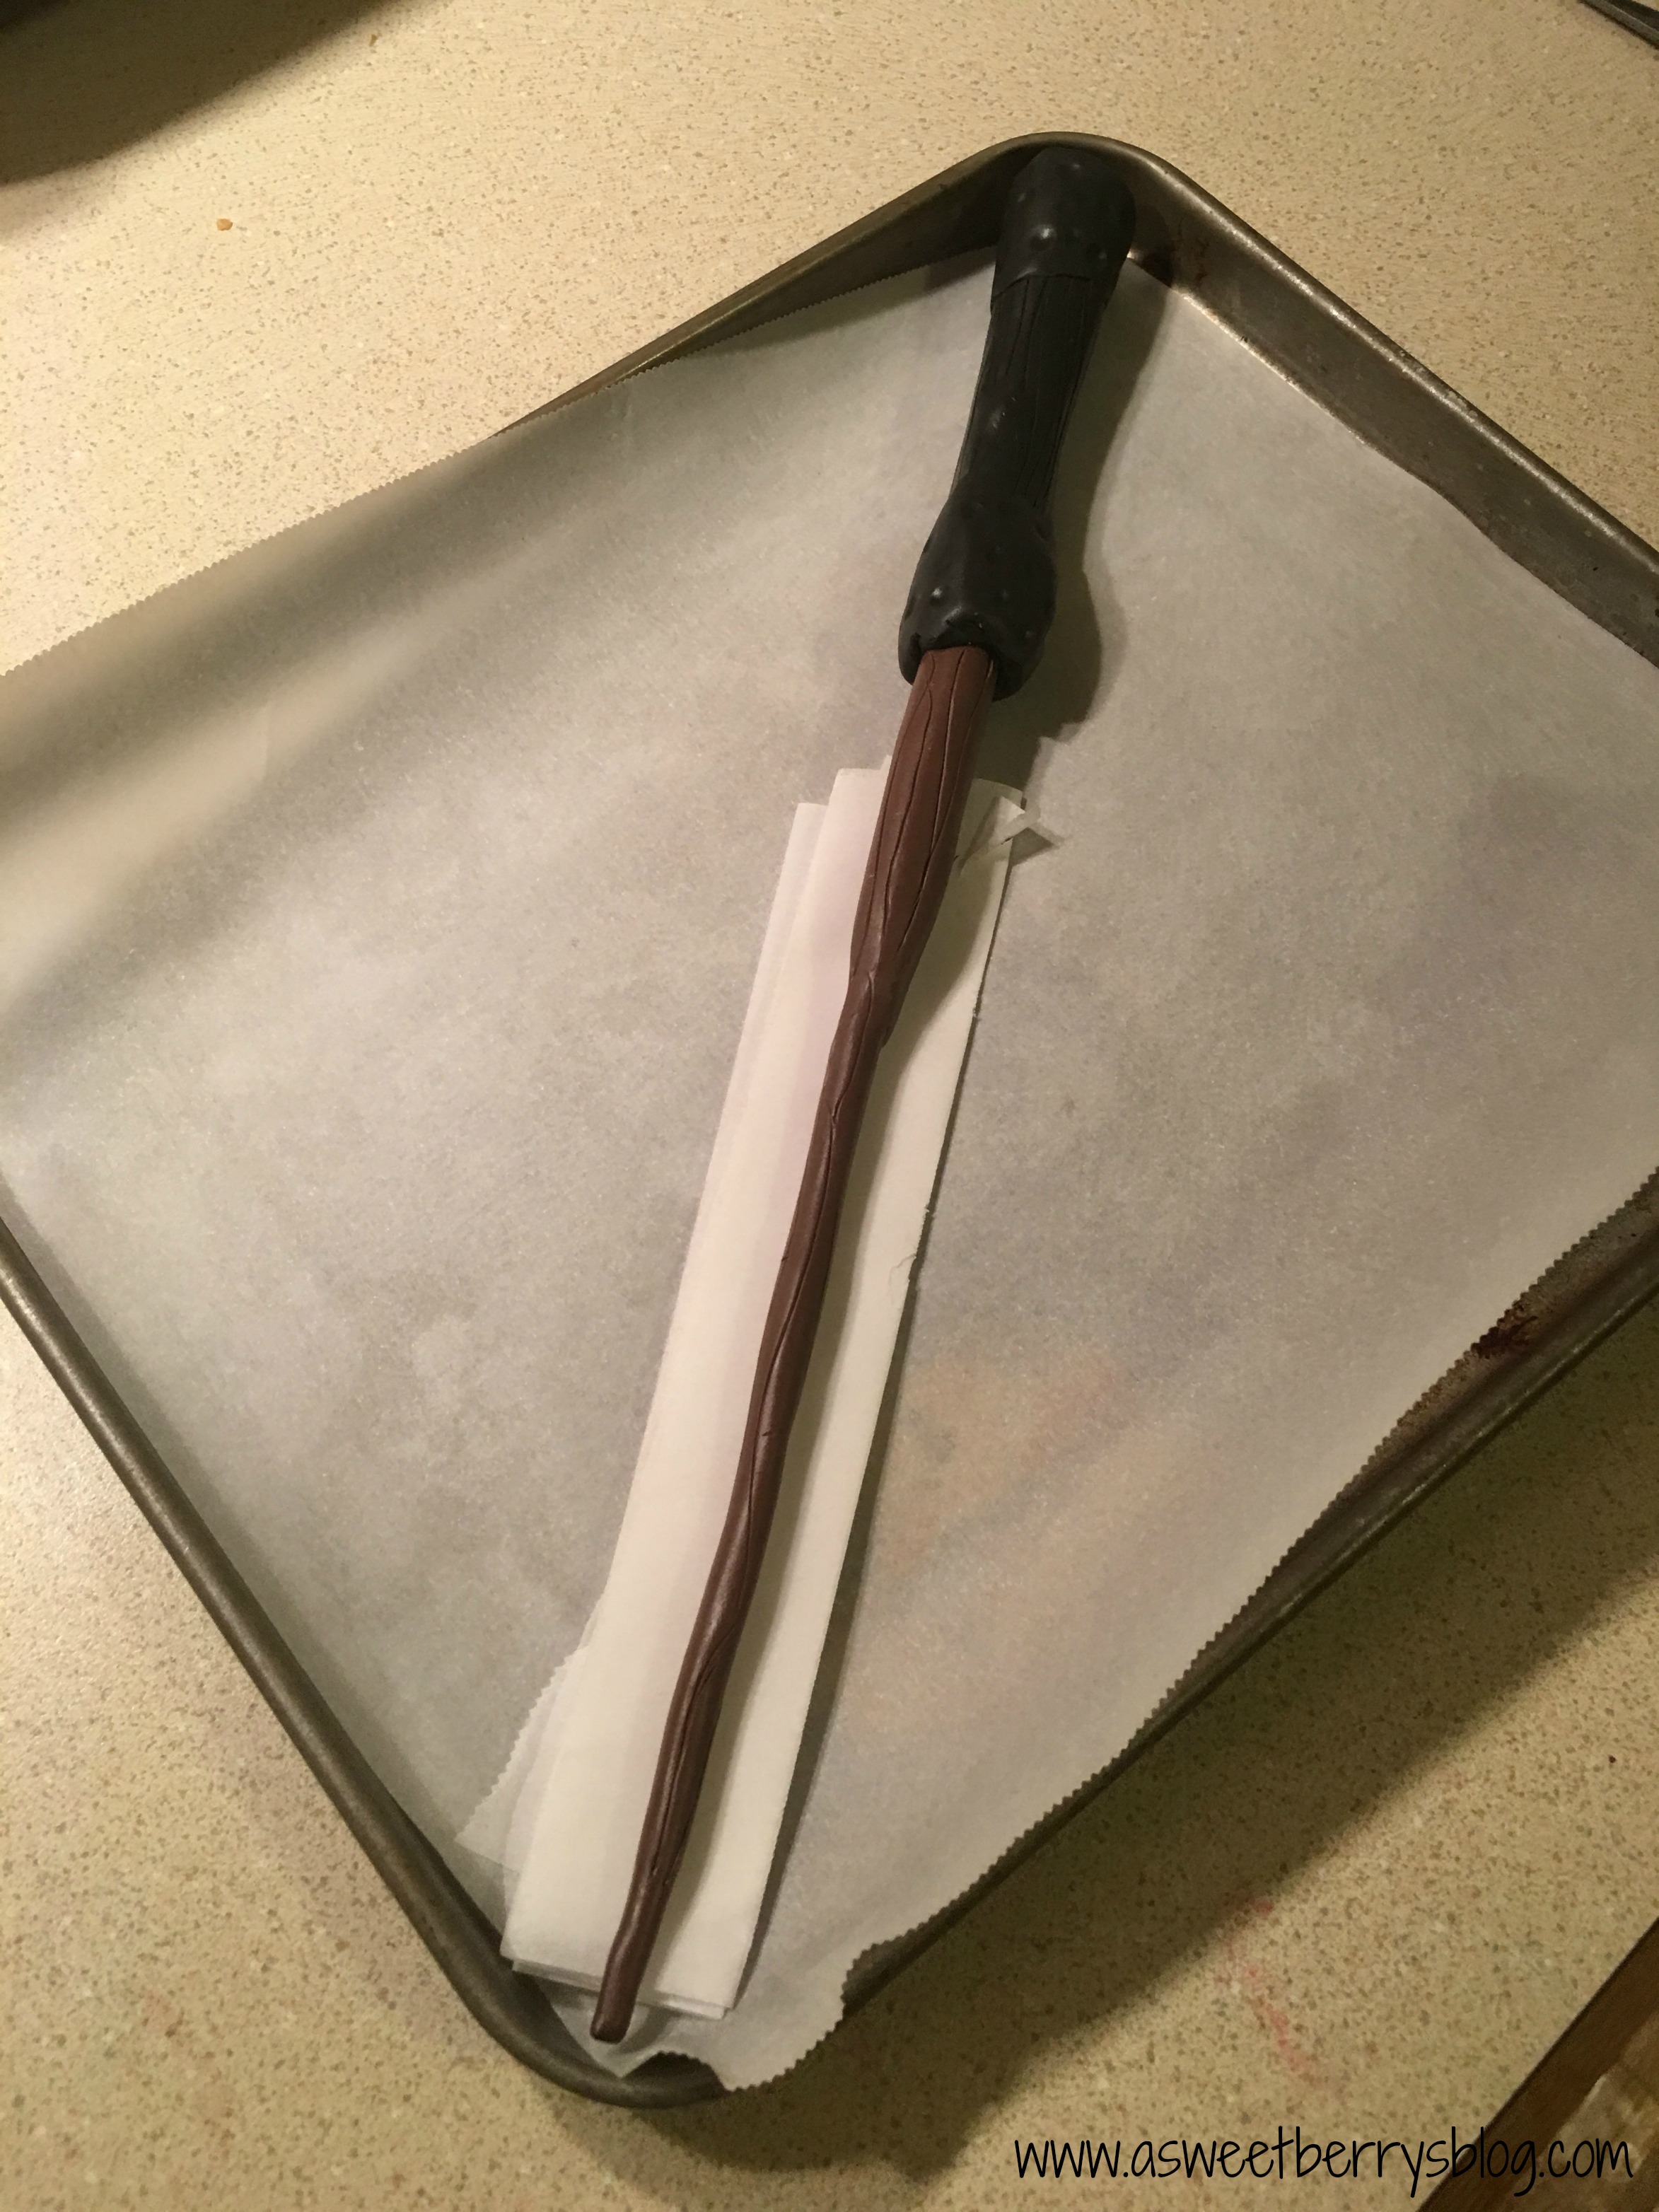
When I was done with the details, I baked it following the instructions for the clay, making sure that I put a piece of folded parchment paper under the thin end to keep it even.

The good thing about DIY wands is that you can make them anyway that you want to. You can add as much or as little details as you’d like.
I am extremely happy with how my wand turned out. My kids love it and want it for themselves. Of course, I will let them make their own! They love working with Sculpey Clay and they are obsessed with Harry Potter. We can’t wait to go to Harry Potter world soon!
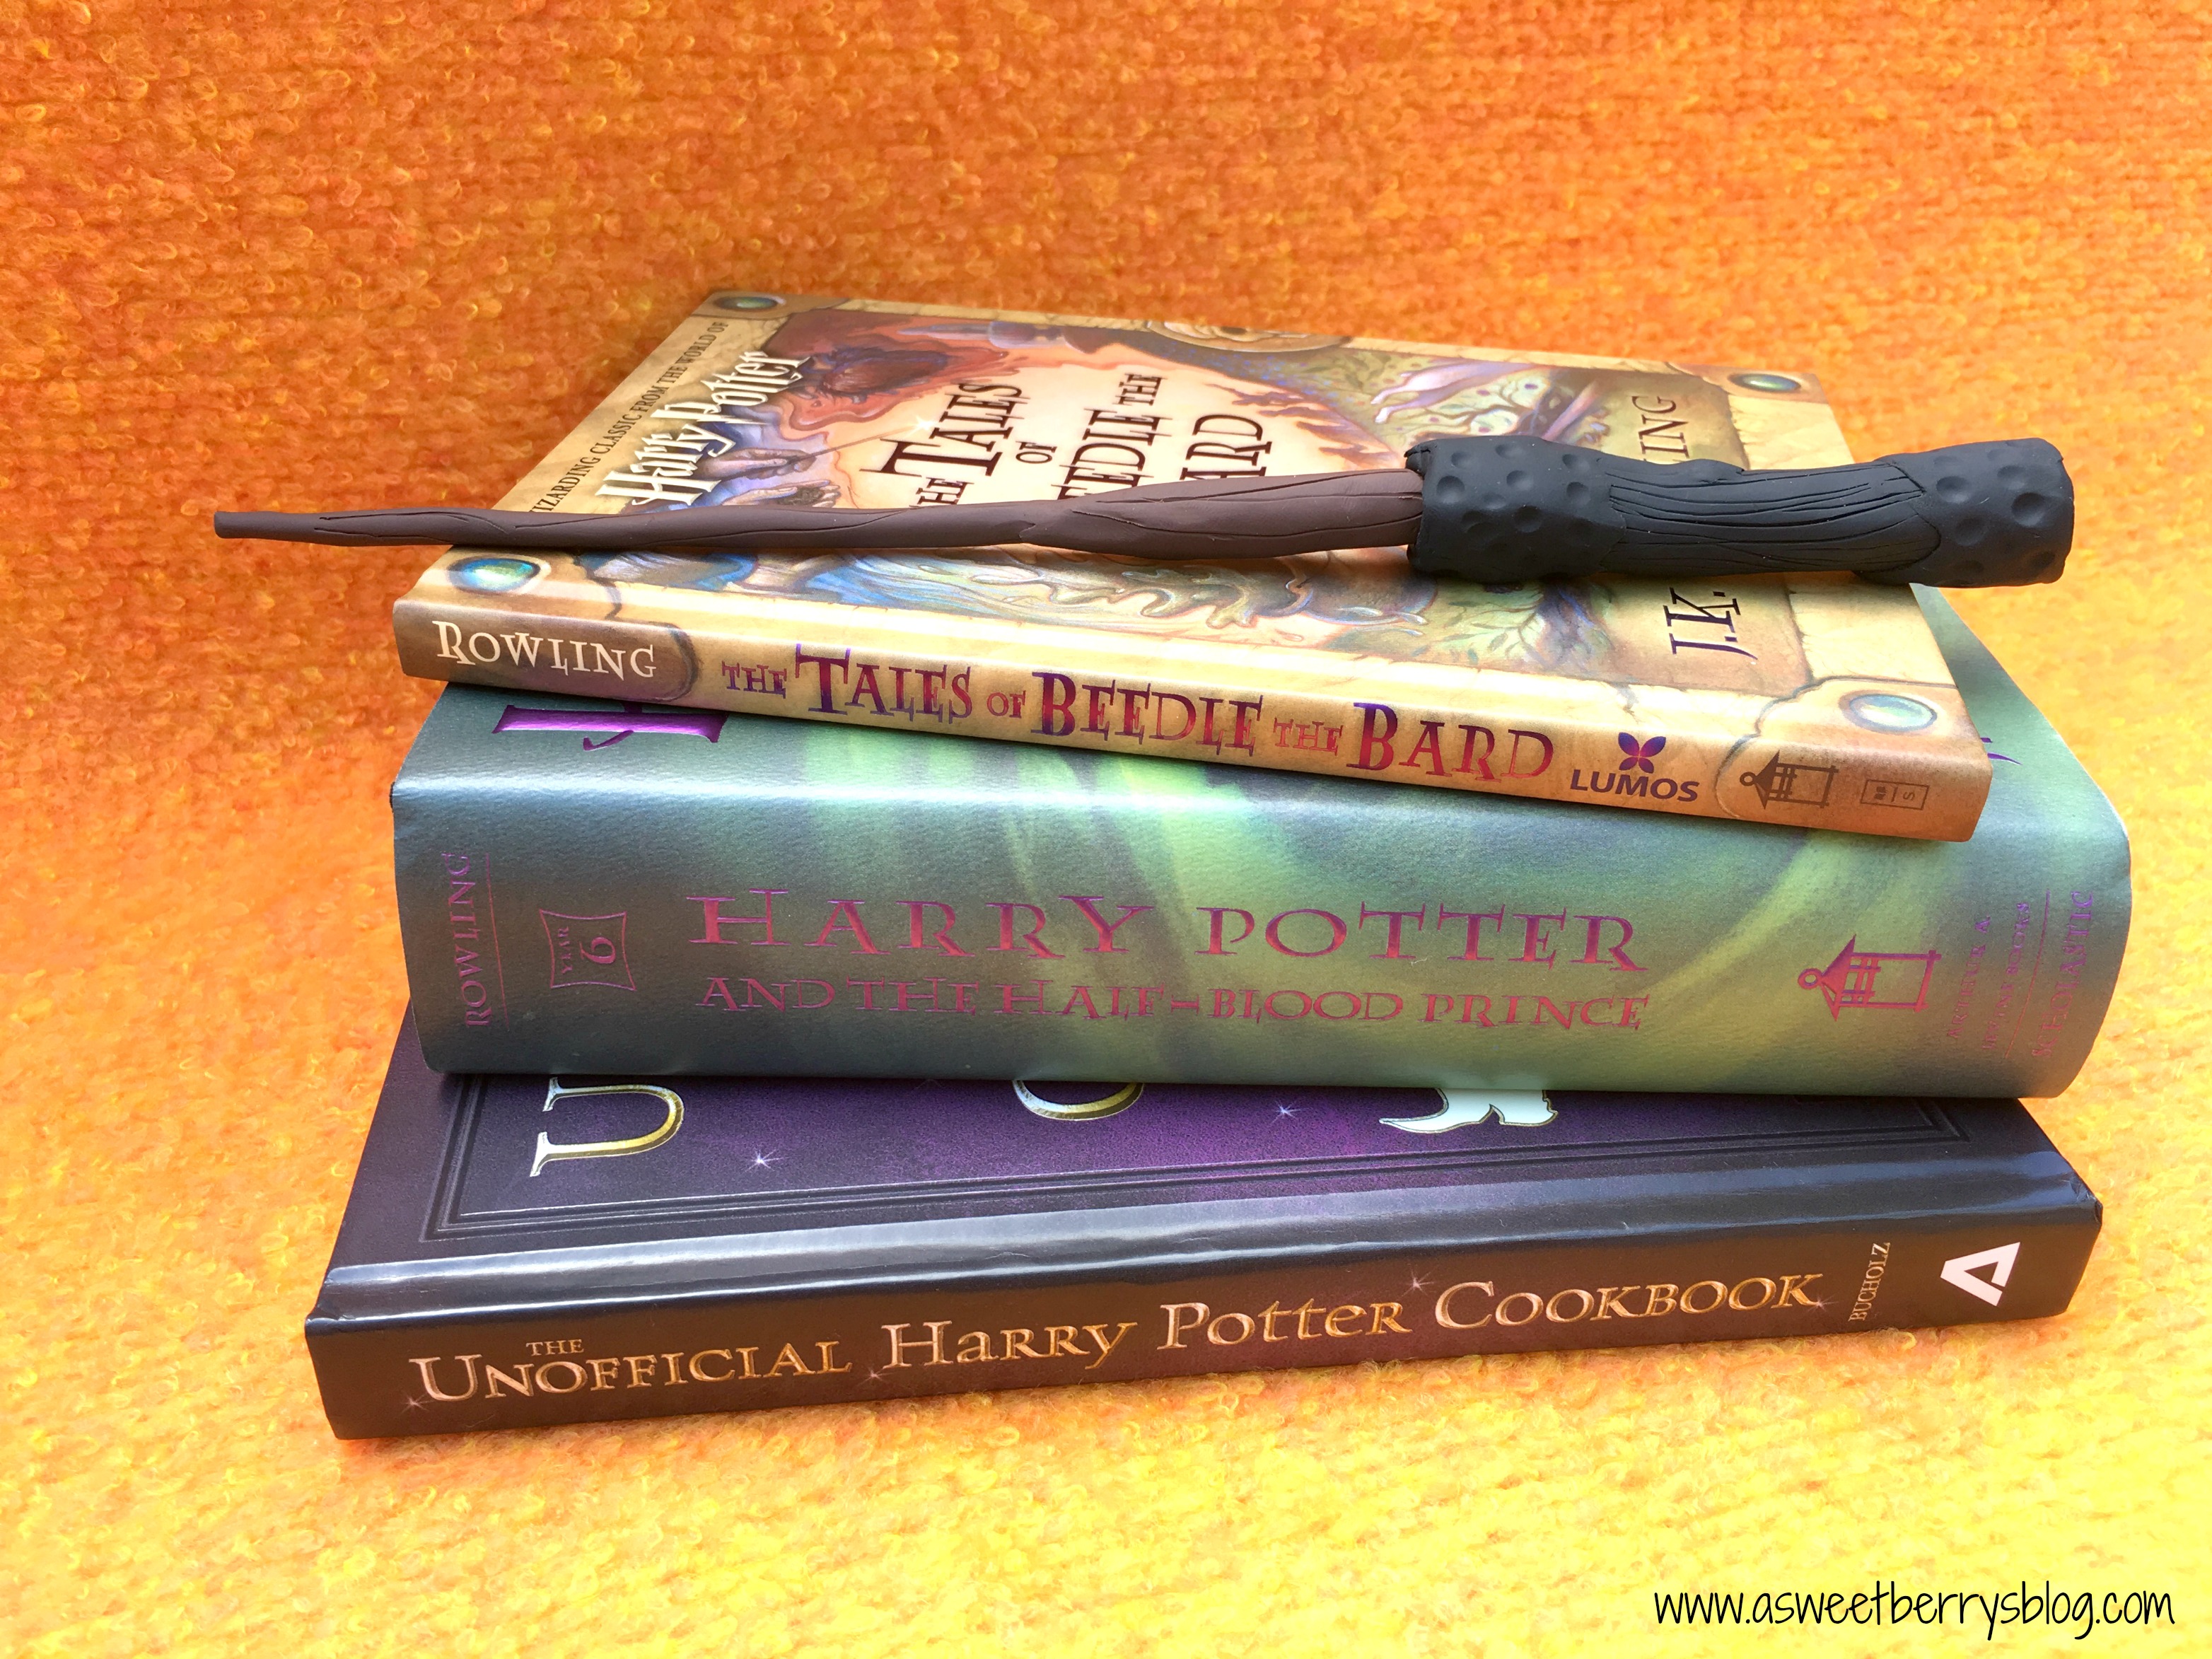
I hope that you like my Sculpey BakeShop Harry Potter Wand!
Click HERE to check out other great Harry Potter crafts and ideas!
There are two awesomely amazing prize packs! Make sure you enter to win!
Chance #1 to win:
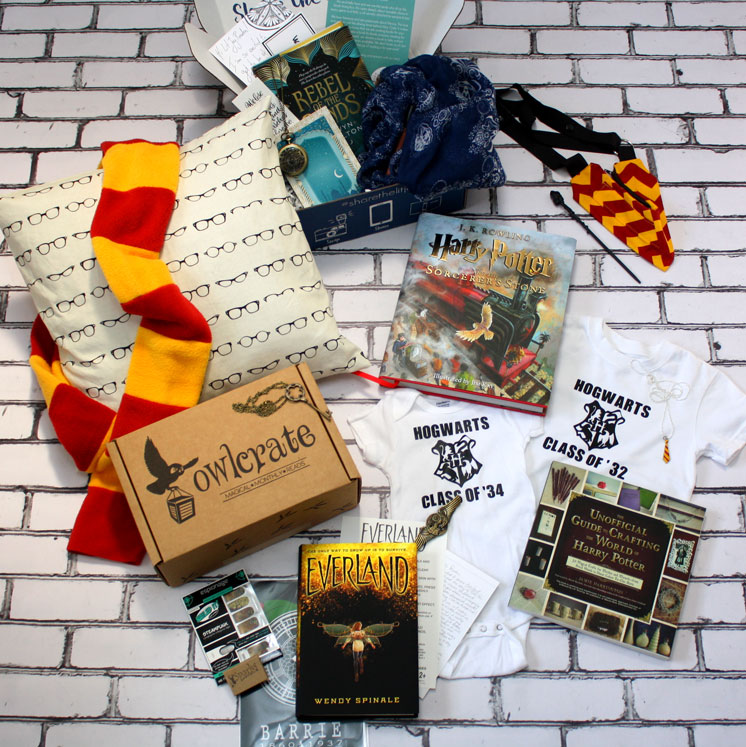
Prize Pack #1
See more about each prize and sponsor at this giveaway post and be sure to enter the other equally awesome prize pack while you’re there! Winner must have a US address or be willing to pay for international shipping.
- Maroon and Gold Magic Wand Holster and Magic Wand (toddler, child, or adult sizes available)
- Hogwarts House Scarf (choice of which house)
- Hogwarts Graduation Year Shirt (choice of baby to adult size with custom graduation year)
- Librarian Glasses Pillow
- The Unofficial Guide to Crafting the World of Harry Potter
- Personalized Hogwarts Acceptance Letter
- Illustrated Harry Potter and the Sorcerer’s Stone
- Hogwart’s House Tie Necklace (choice of colors)
- Owl Crate Upcoming August Box
- Lit Joy Crate May Box
- Classic Maillot Swimsuit SEWING PATTERN
Chance #2 to win:
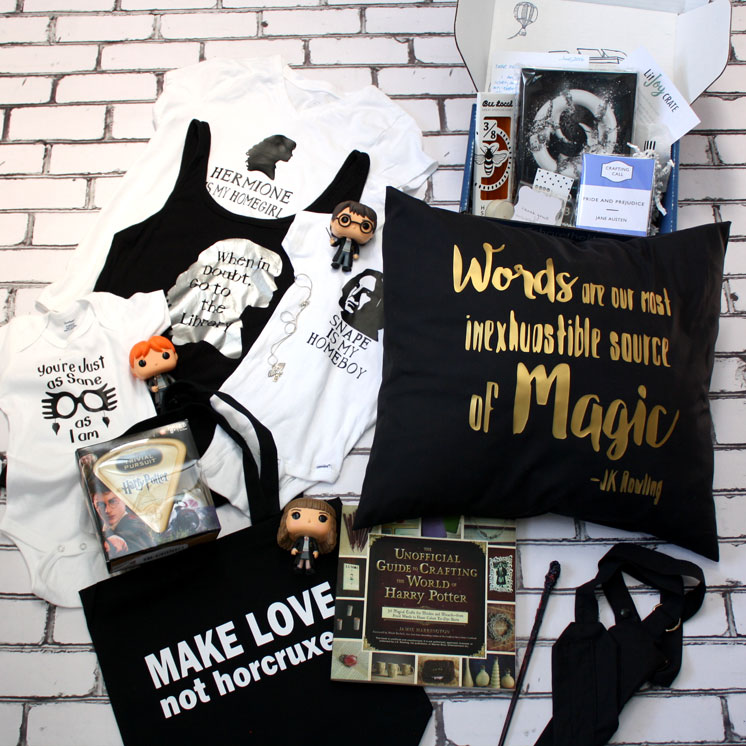
Prize Pack #2
See more about each prize and sponsor at this giveaway post and be sure to enter the other equally awesome prize pack while you’re there! Winner must have a US address or be willing to pay for international shipping.
- Black Wand Holster and Magic Wand (toddler, child, and adult sizes available)
- Character Shirt (Choice of Snape, Hermione, or Luna)
- Make Love Book Bag
- Words are Magic Quote Pillow
- The Unofficial Guide to Crafting the World of Harry Potter
- Personalized Hogwarts Acceptance Letter
- World of Harry Potter Trivial Pursuit
- One Dozen Harry Potter Cookies
- Hedwig Owl Post Necklace
- Lit Joy Crate June Box
- Harry Potter Character Funko of Choice (restrictions apply)
- 10$ Worth of Harry Potter Art Prints
- Classic Maillot Swimsuit SEWING PATTERN
Until next time……..