Tag Archives: Cardstock

Easy Christmas Gift Tags

Christmas Tags

Christmas is upon us and the shopping has begun! These adorable and super easy gift tags are going to look awesome on the gifts below my Christmas tree!   If you have a Sizzix Eclips2, then you most likely use Sure Cuts A Lot eCAL2 for your software.  Well, if you do then all of these cut outs are included in the software.

collage

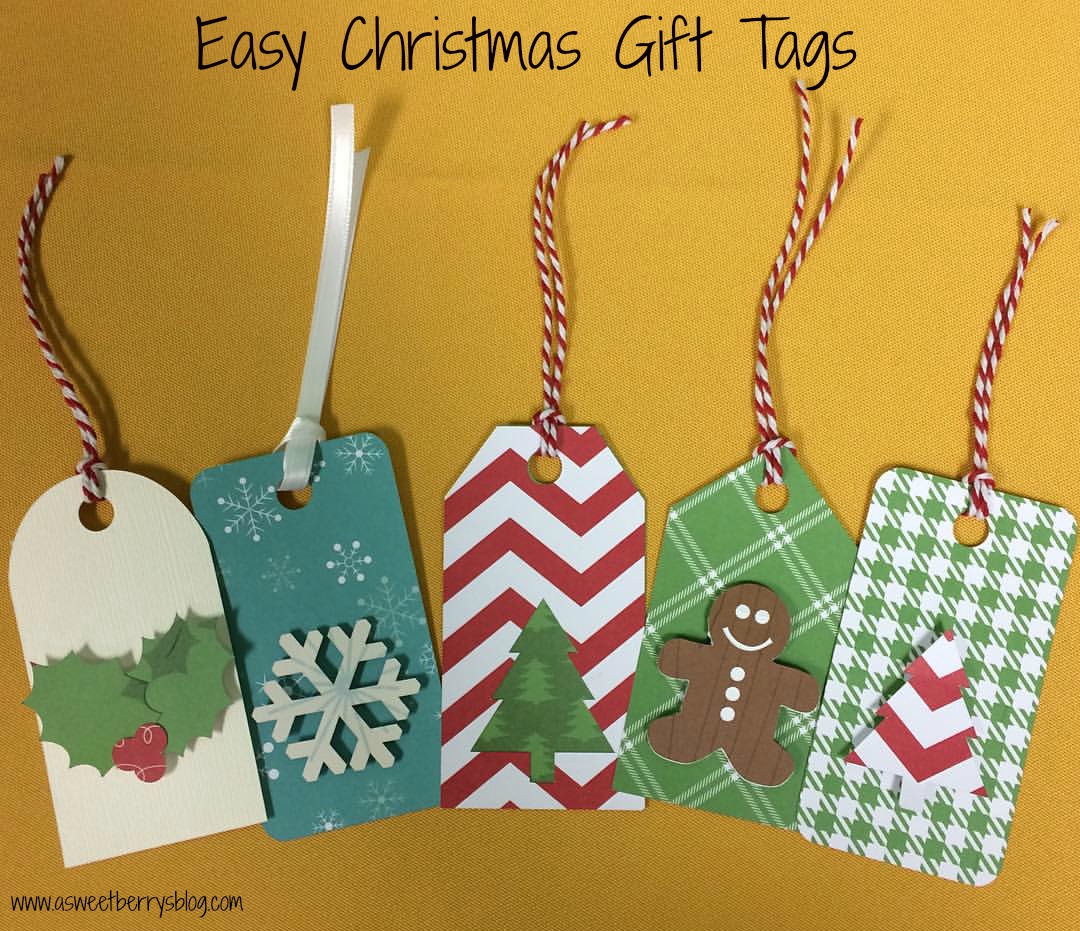
The process was pretty easy……

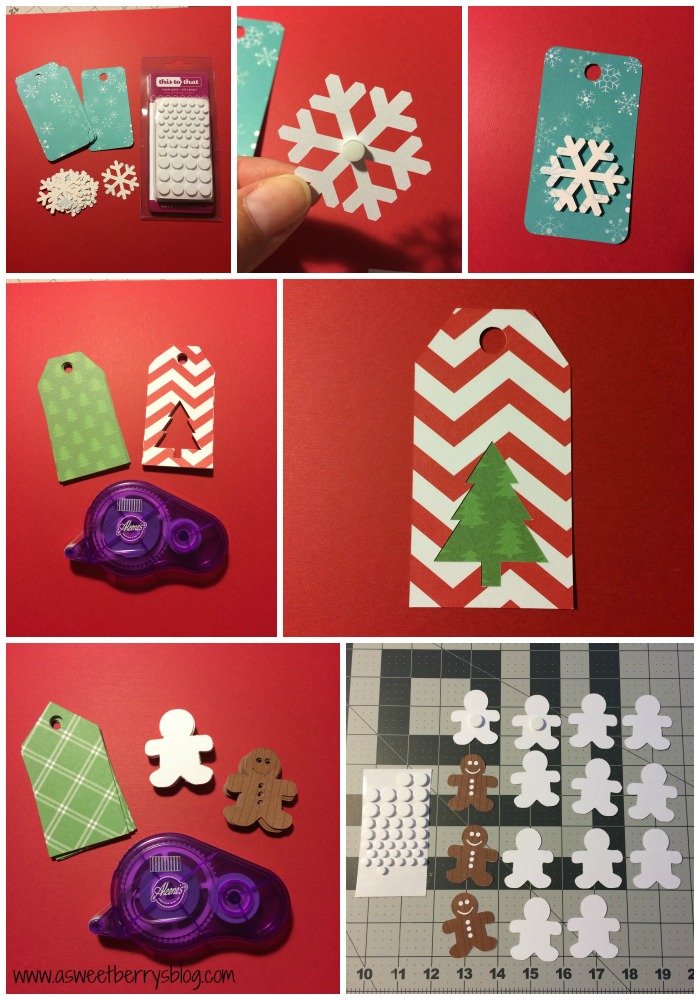
The snowflake:  I just cut the tag and snow flakes out separately.  I used a foam dot to get the snowflake a little dimension.  Then, I added a white ribbon.

The Christmas tree cutout:  I cut the tags with the Christmas Tree Cut out together and then cut the same tag, minus the tree.  I put them together using an Aleene’s tape runner.  Then, I added a piece of twine.

The Gingerbread Man:  I cut out a tag.  Then I cut out the gingerbread man on brown card stock.  Then, in the software, I removed the face and buttons from the gingerbread man and just cut out the outline on white card stock.   Using the tape runner, I attached the white gingerbread man cut out to the back of the brown one.  Then using a foam dot, I added it to the tag.  To finish it up, I added a piece of twine.

The Raised Christmas Tree:  I cut out some tags.  Using the Christmas Tree scraps from the Christmas Tree cutout tag, I just added a foam dot to the back of the tree and added it to the tag. Then, I added a piece of twine.

The Holly Tag:   I cut out some tags.  Cut the Holly leaves and berries out and used a foam dot on each piece and then attached it to the tag.   Then I added a piece of twine.

Christmas Tags

I hope you like these adorable little Christmas Tree Tags!   I made some last week and sold them at an Artisan Fair that my Church was hosting and everyone loved them!

Until next time………..

Happy Halloween Pumpkin Cut Out Art

Halloween will be here before we know it!   And I am super excited.  I love to pull out the Halloween decorations!

While I was at Target one day, I saw a popup heart piece in the framed art section and I thought it was so cute.  I had not seen anything like it with Halloween designs and I don’t think the heart one had any words.   I thought I’d make a Halloween one with cute little pumpkins and a font that was a little ghoulish! final
Materials needed:
A shadowbox frame
cardstock (I used four pieces….black, white, green, orange)
Aleene’s glue and a adhesive runner,
Electronic Cutting Machine (I used the Sizzix Eclips2)
Halloween .svg file that I created.   (comment if you’d like the file) cutting
Once my file was cut and removed from the cutting mat, I lightly folded the cut parts upwards.  I also saved the inside pieces of the letters. bending
Once all of my pieces were folded up, I cut strips of orange and green just big enough to fit across the back of my 12×12 piece.  I used green for the stems and orange for the pumpkins.  Using an Aleene’s adhesive runner, I attached the strips to the back, being careful not the squash my folded up pieces flat. aleenes
Because the insides of the letters were small, I used Aleene’s Tacky Glue to glue those to the green.
letters
After all of my pieces were put together, I placed them into 12×12 shadowbox frames.   black and white
This photo is just to show them from each side, so that you can see that the orange and green can be seen from under the folded upward pieces of pumpkin. both at different angles
I love them both, but truth be told, the black one is my favorite.  It looks more Halloween-ish!
final
I hope you liked my Happy Halloween Pumpkin Cut Art.  If you’d like the .svg file, just let me know in a comment and I will be sure to get that to you!

Until next time……