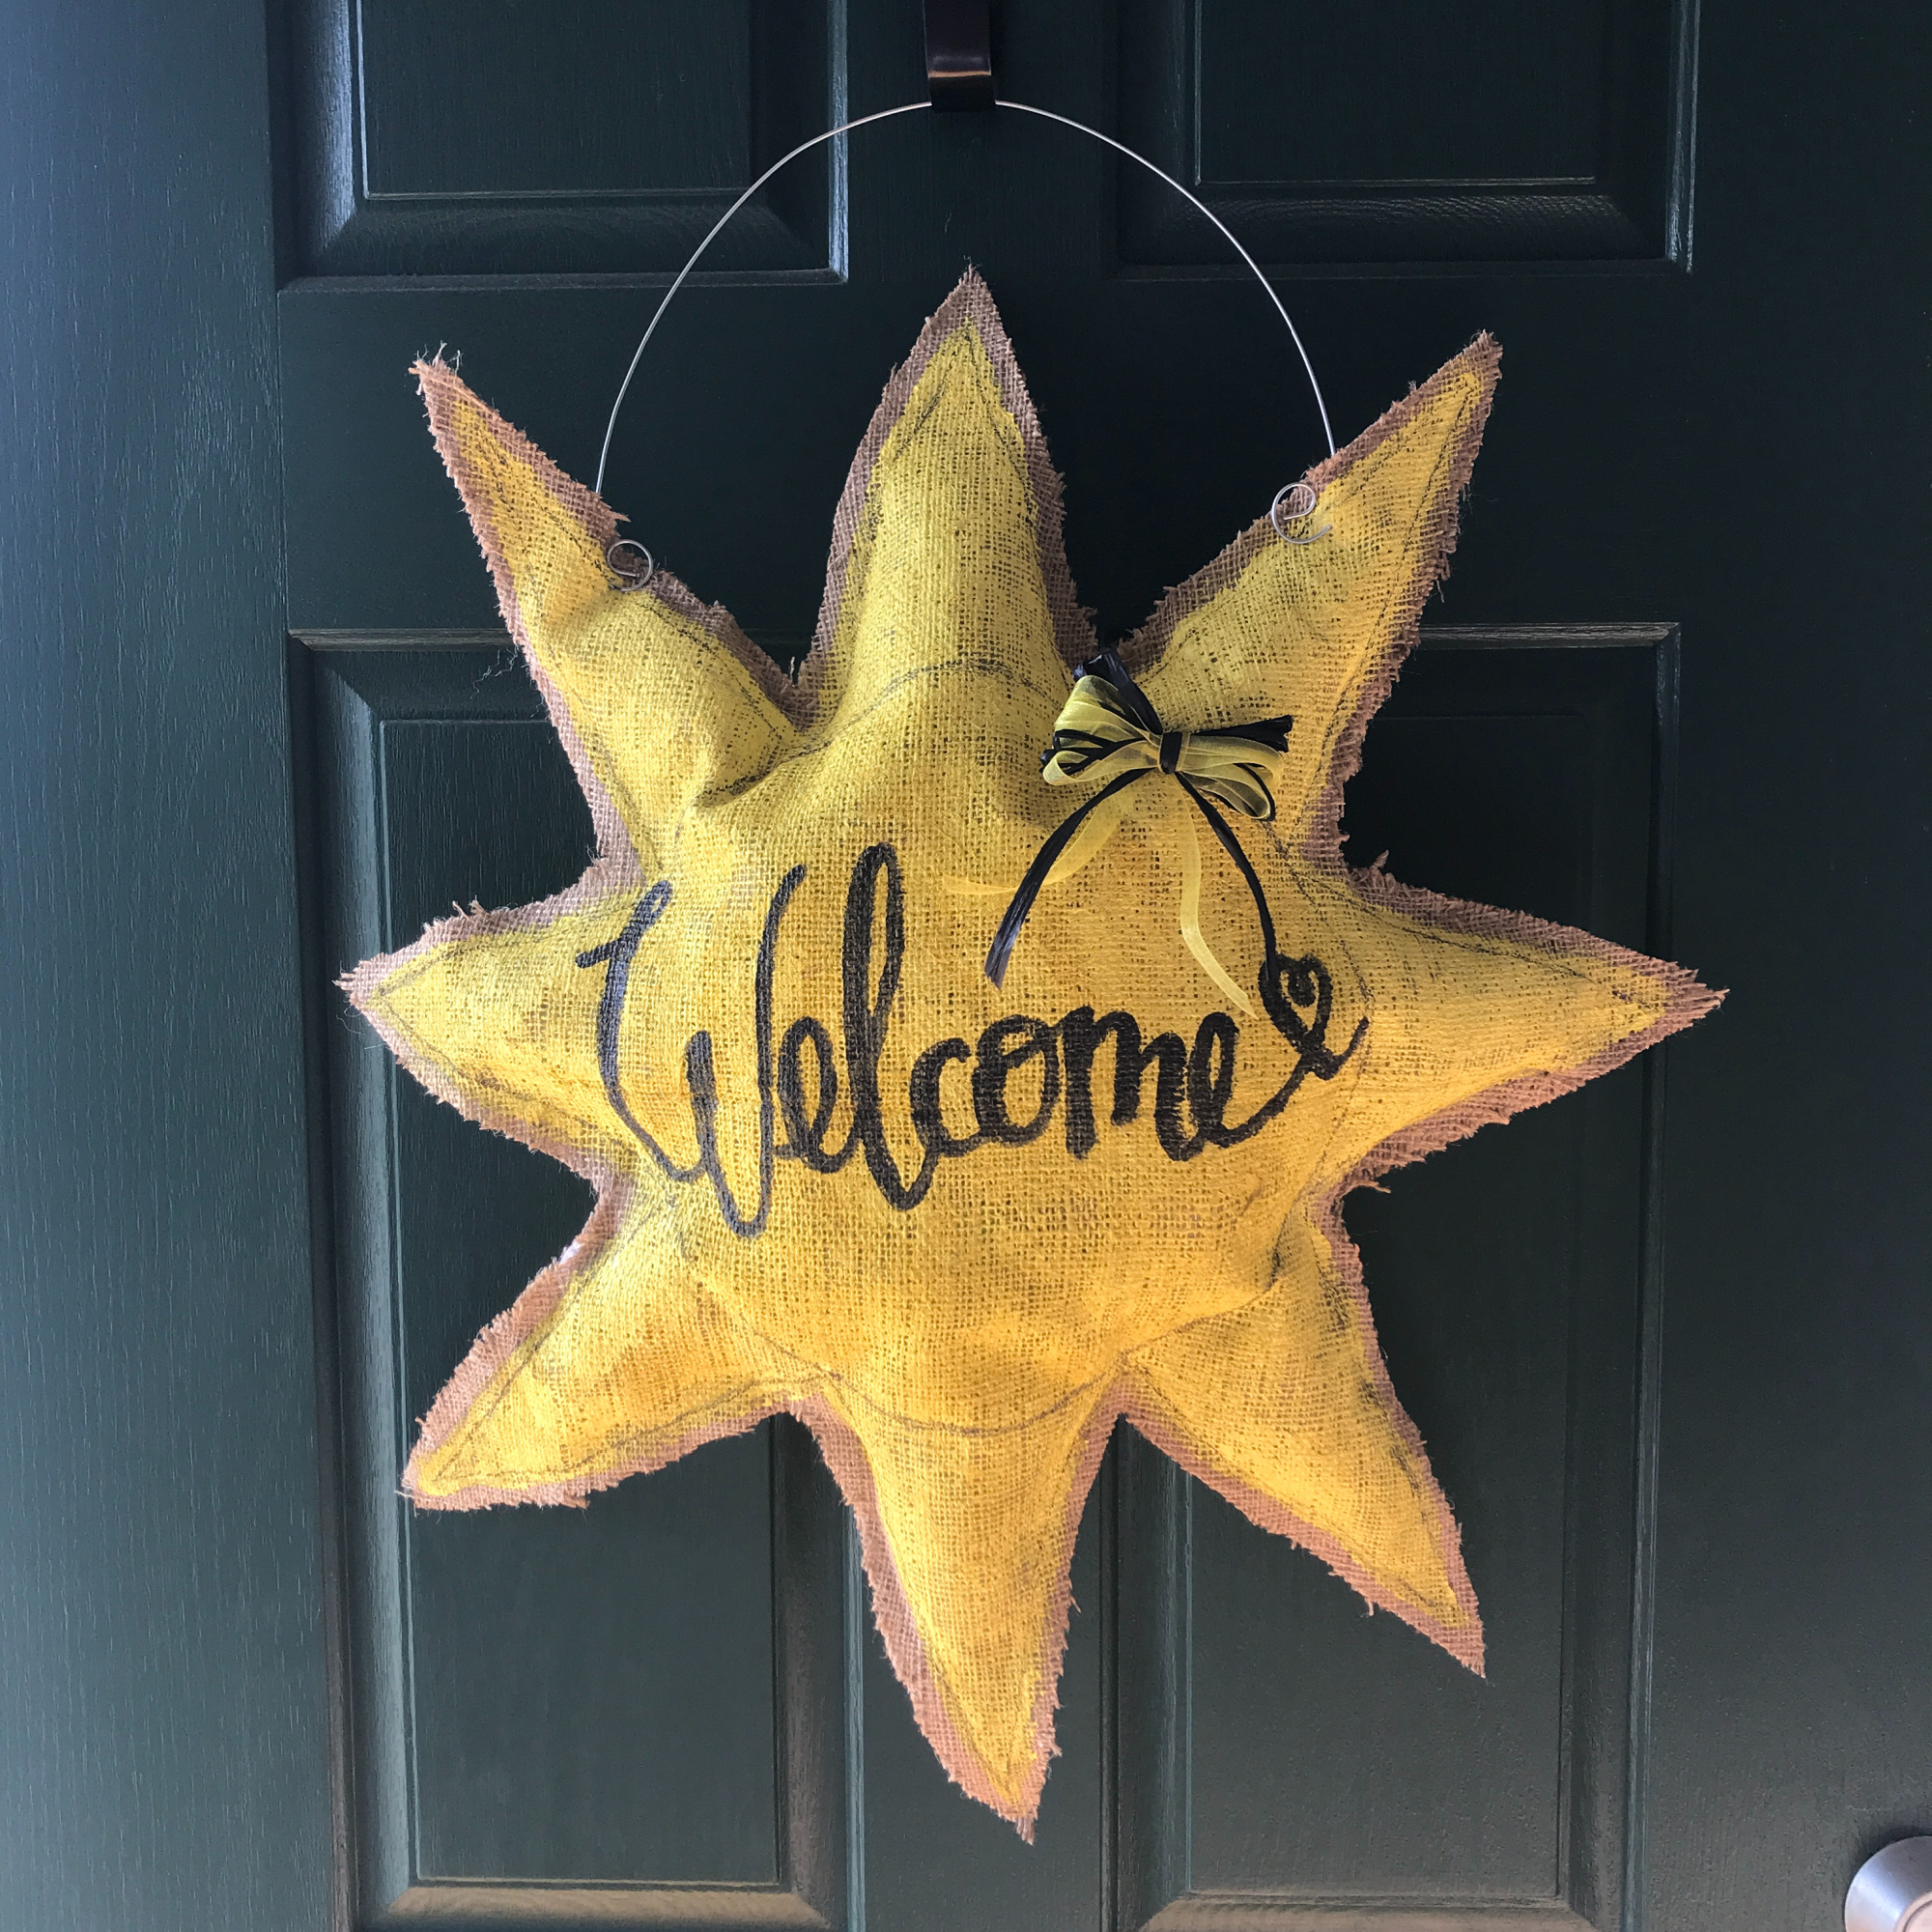
Anything related to the sun makes me happy lately, so I decided that a burlap sun welcome door hanger on my front door would be the perfect touch of happiness! I’m a big fan of painted burlap door signs!
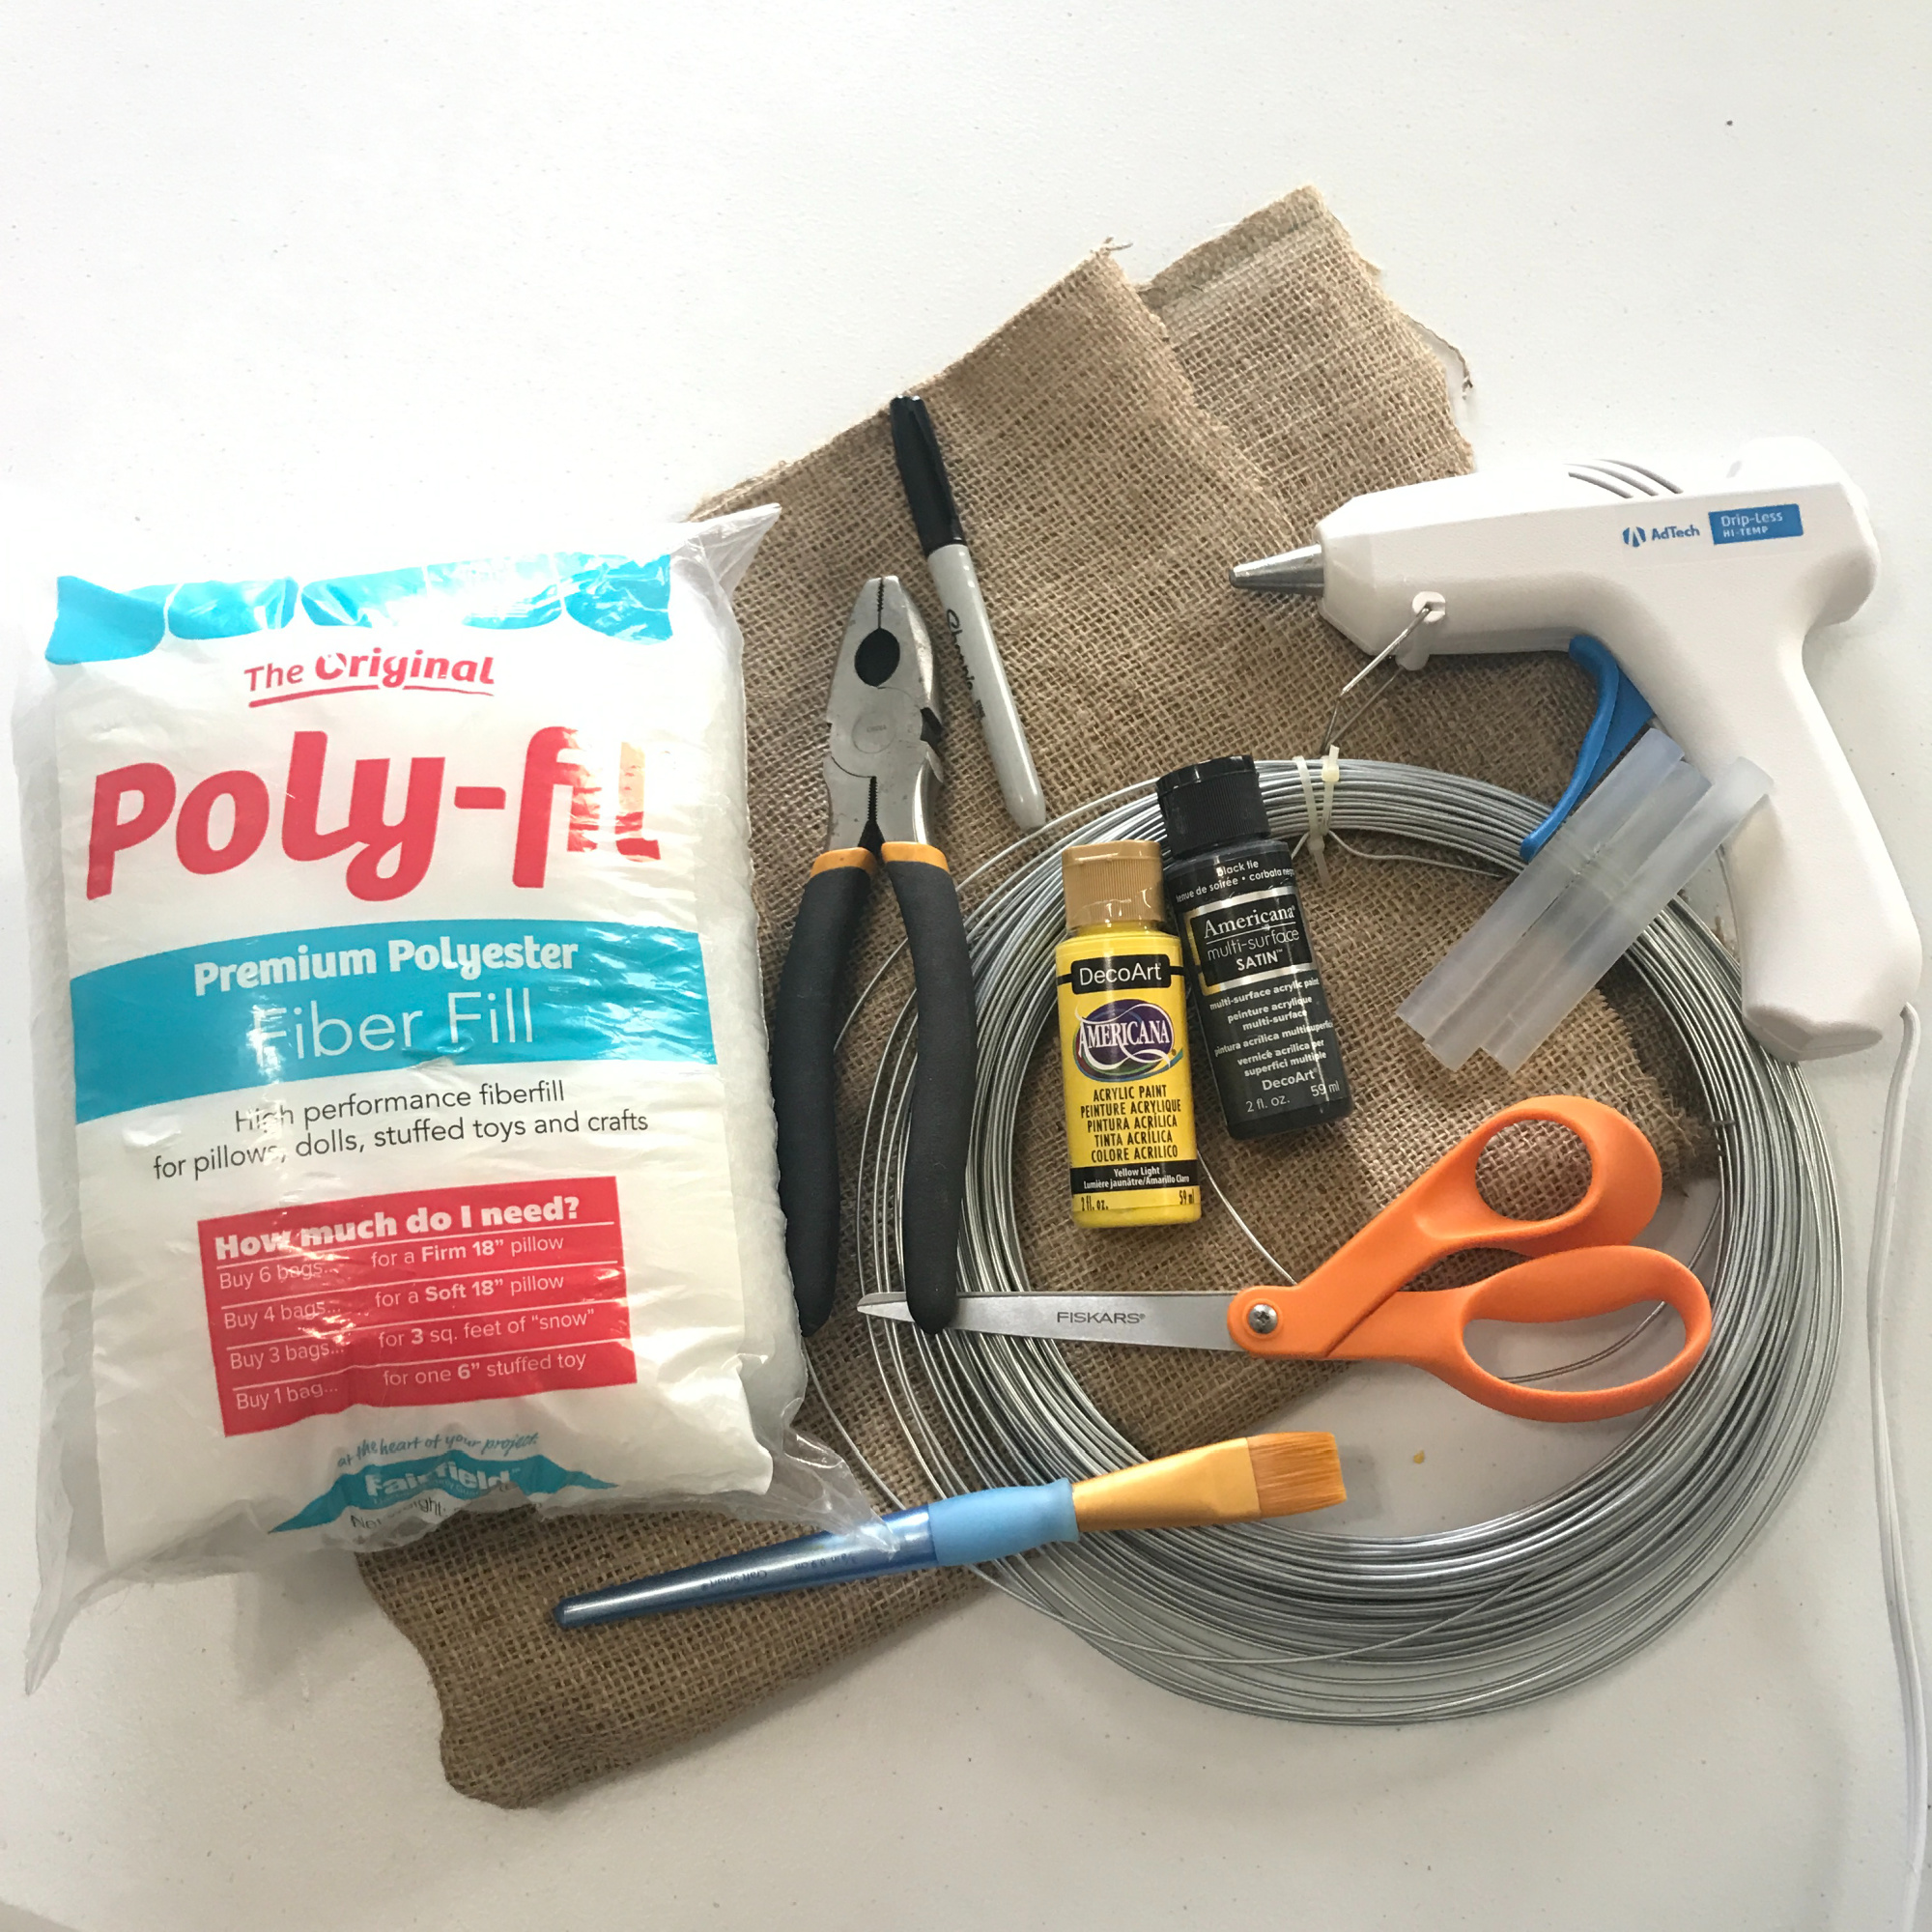
Materials used:
- Burlap
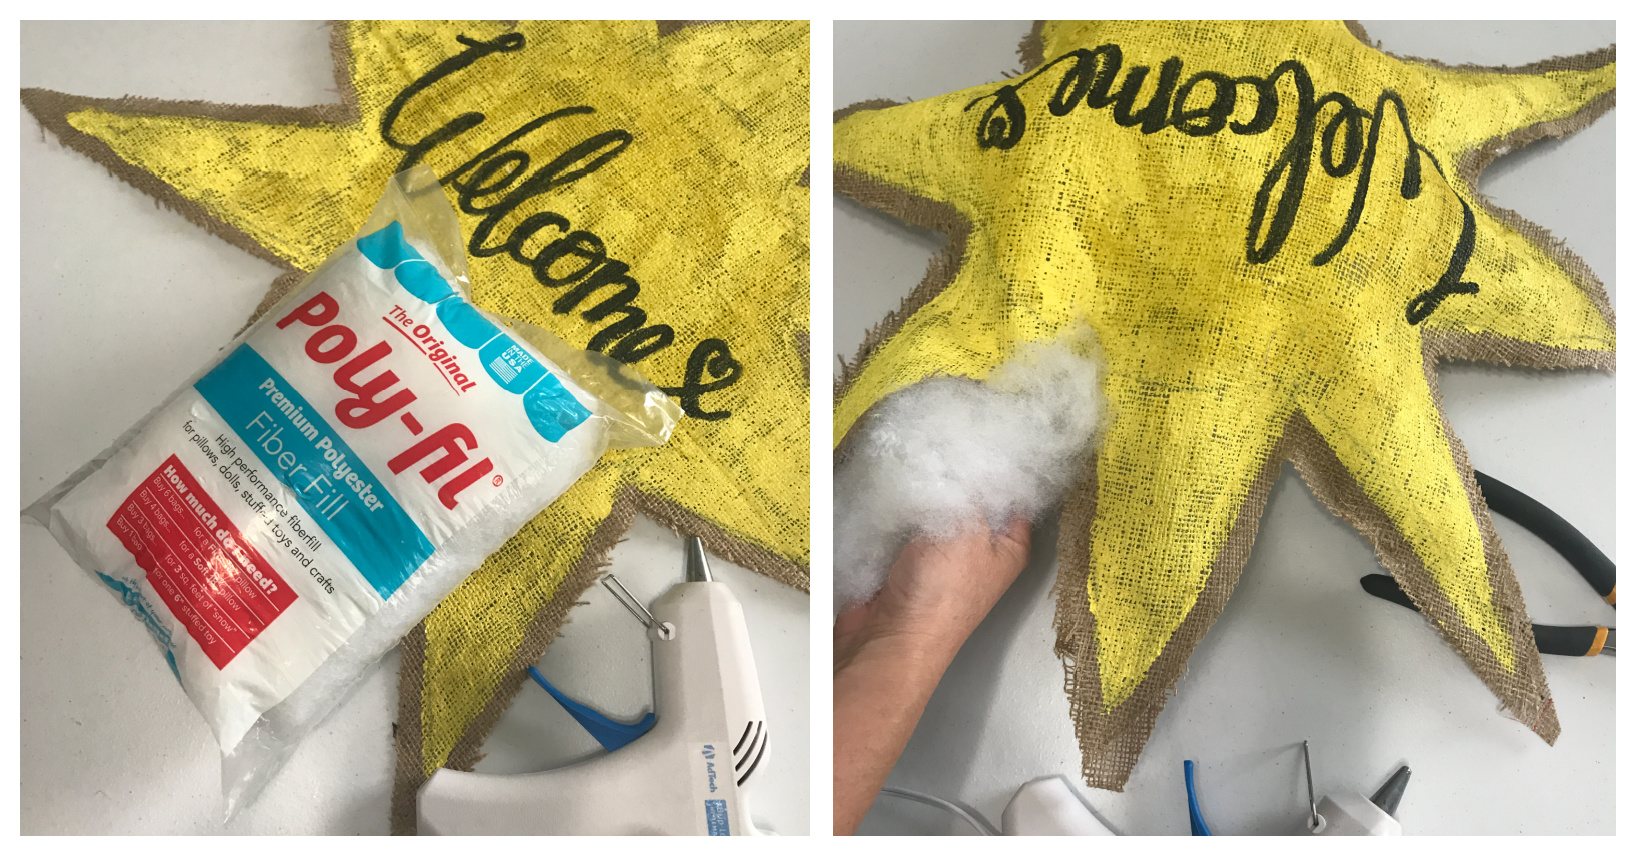
- Fairfield World’s Poly-fil® Fiber Fill
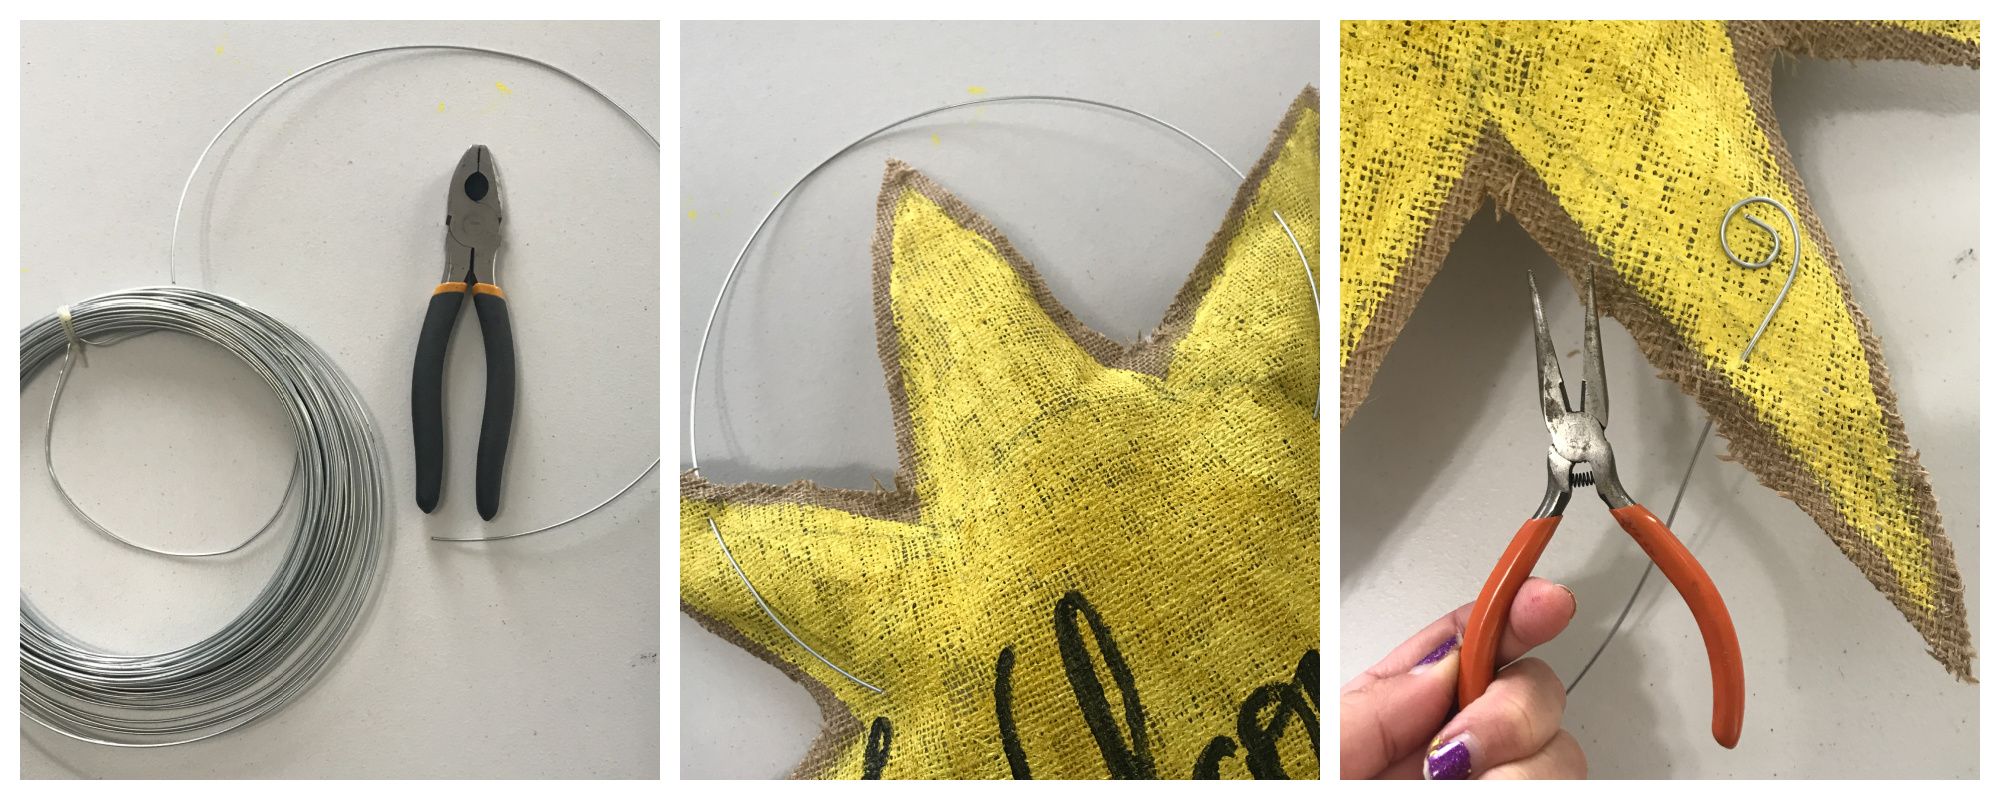
- Wire
- Wire cutters
- Needle Nose Pliers
- Paints (I used yellow and black paints from DecoArt)
- Hot Glue Gun and Glue Sticks
- Scissors
- Paint Brushes
- Permanent Marker
- Pencil
- A round object to trace a circle
- A work area you don’t mind getting paint on (I used a plastic container lid)
- Ribbon (I used sheer yellow ribbon and black raffia ribbon)
How I made it:
With my burlap folded in half like it came off of the bolt from the store, I cut about 30 inches for my sun and kept the burlap folded so that I would have 2 pieces of the same pattern after it was cut out.
Using a frisbee and a permanent marker, I traced a circle. TIP: You can use any round object to do the circle or you can just freehand one. This frisbee just happened to be the perfect size that I wanted. I freehanded the triangles of the sun.
Using my scissors, I cut the sun out leaving about half an inch around the lines.
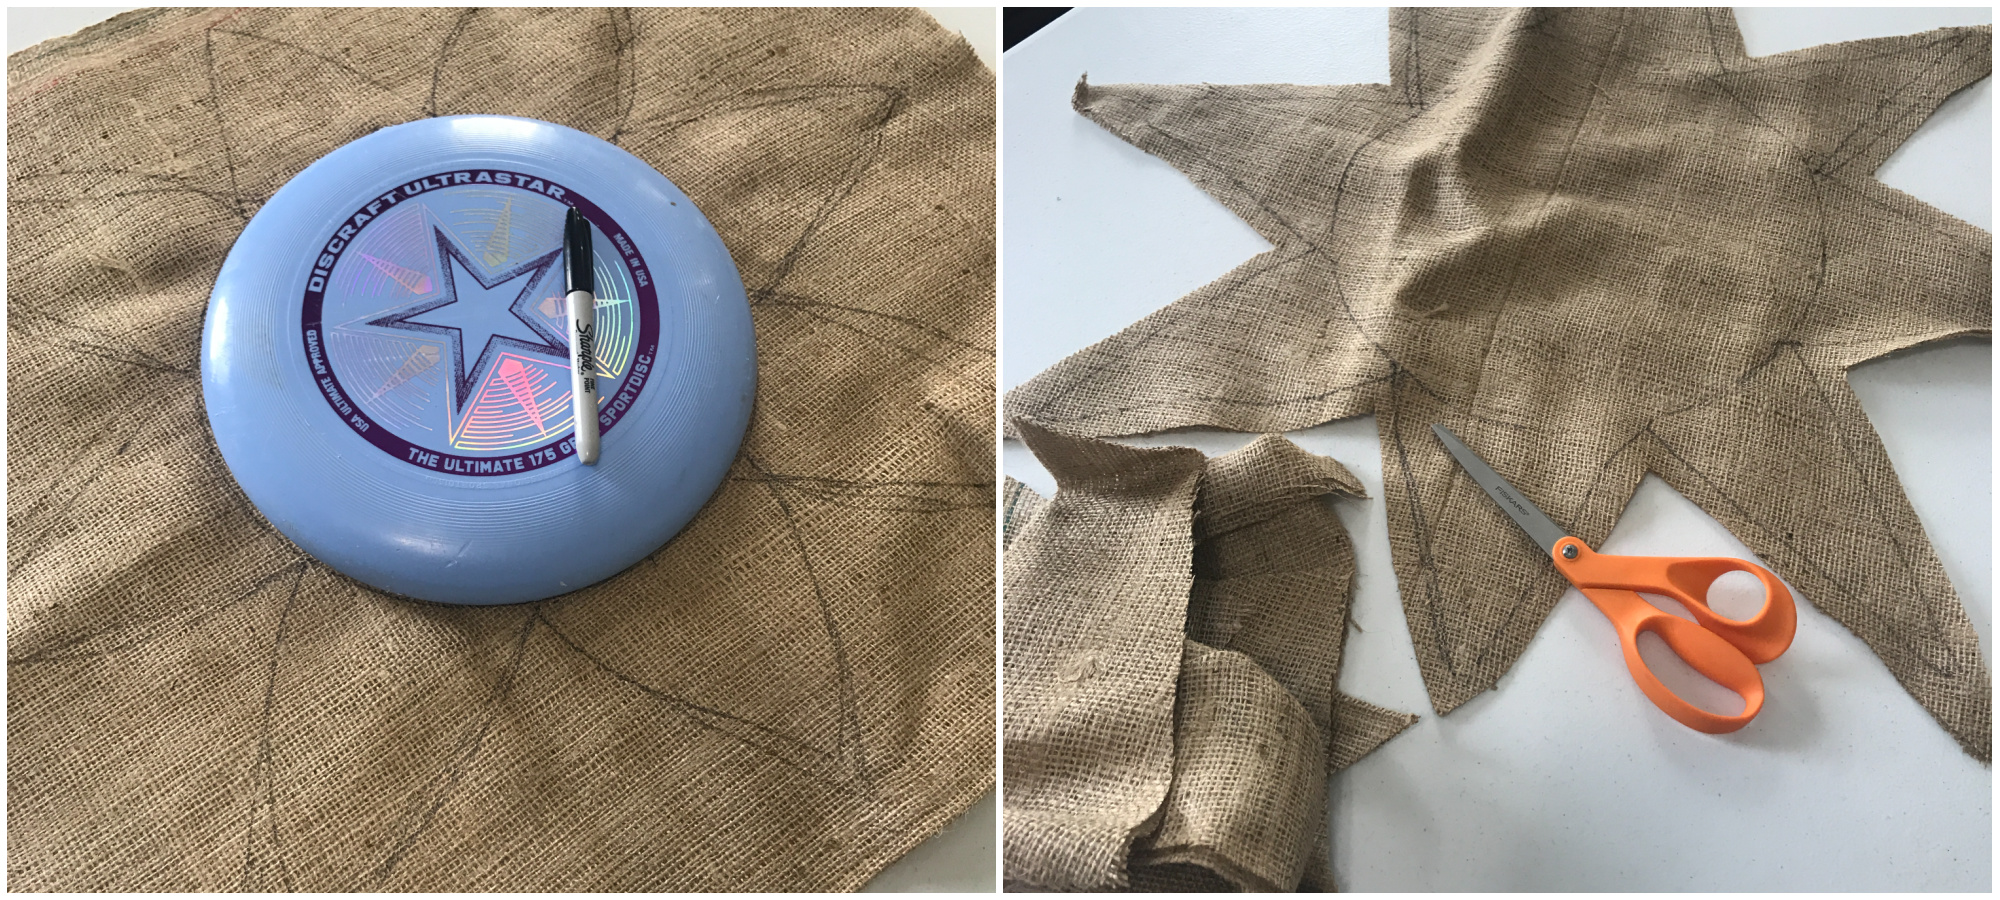
I separated the two pieces of burlap and set the one that does not have the drawn sun aside. This one will be the back piece.
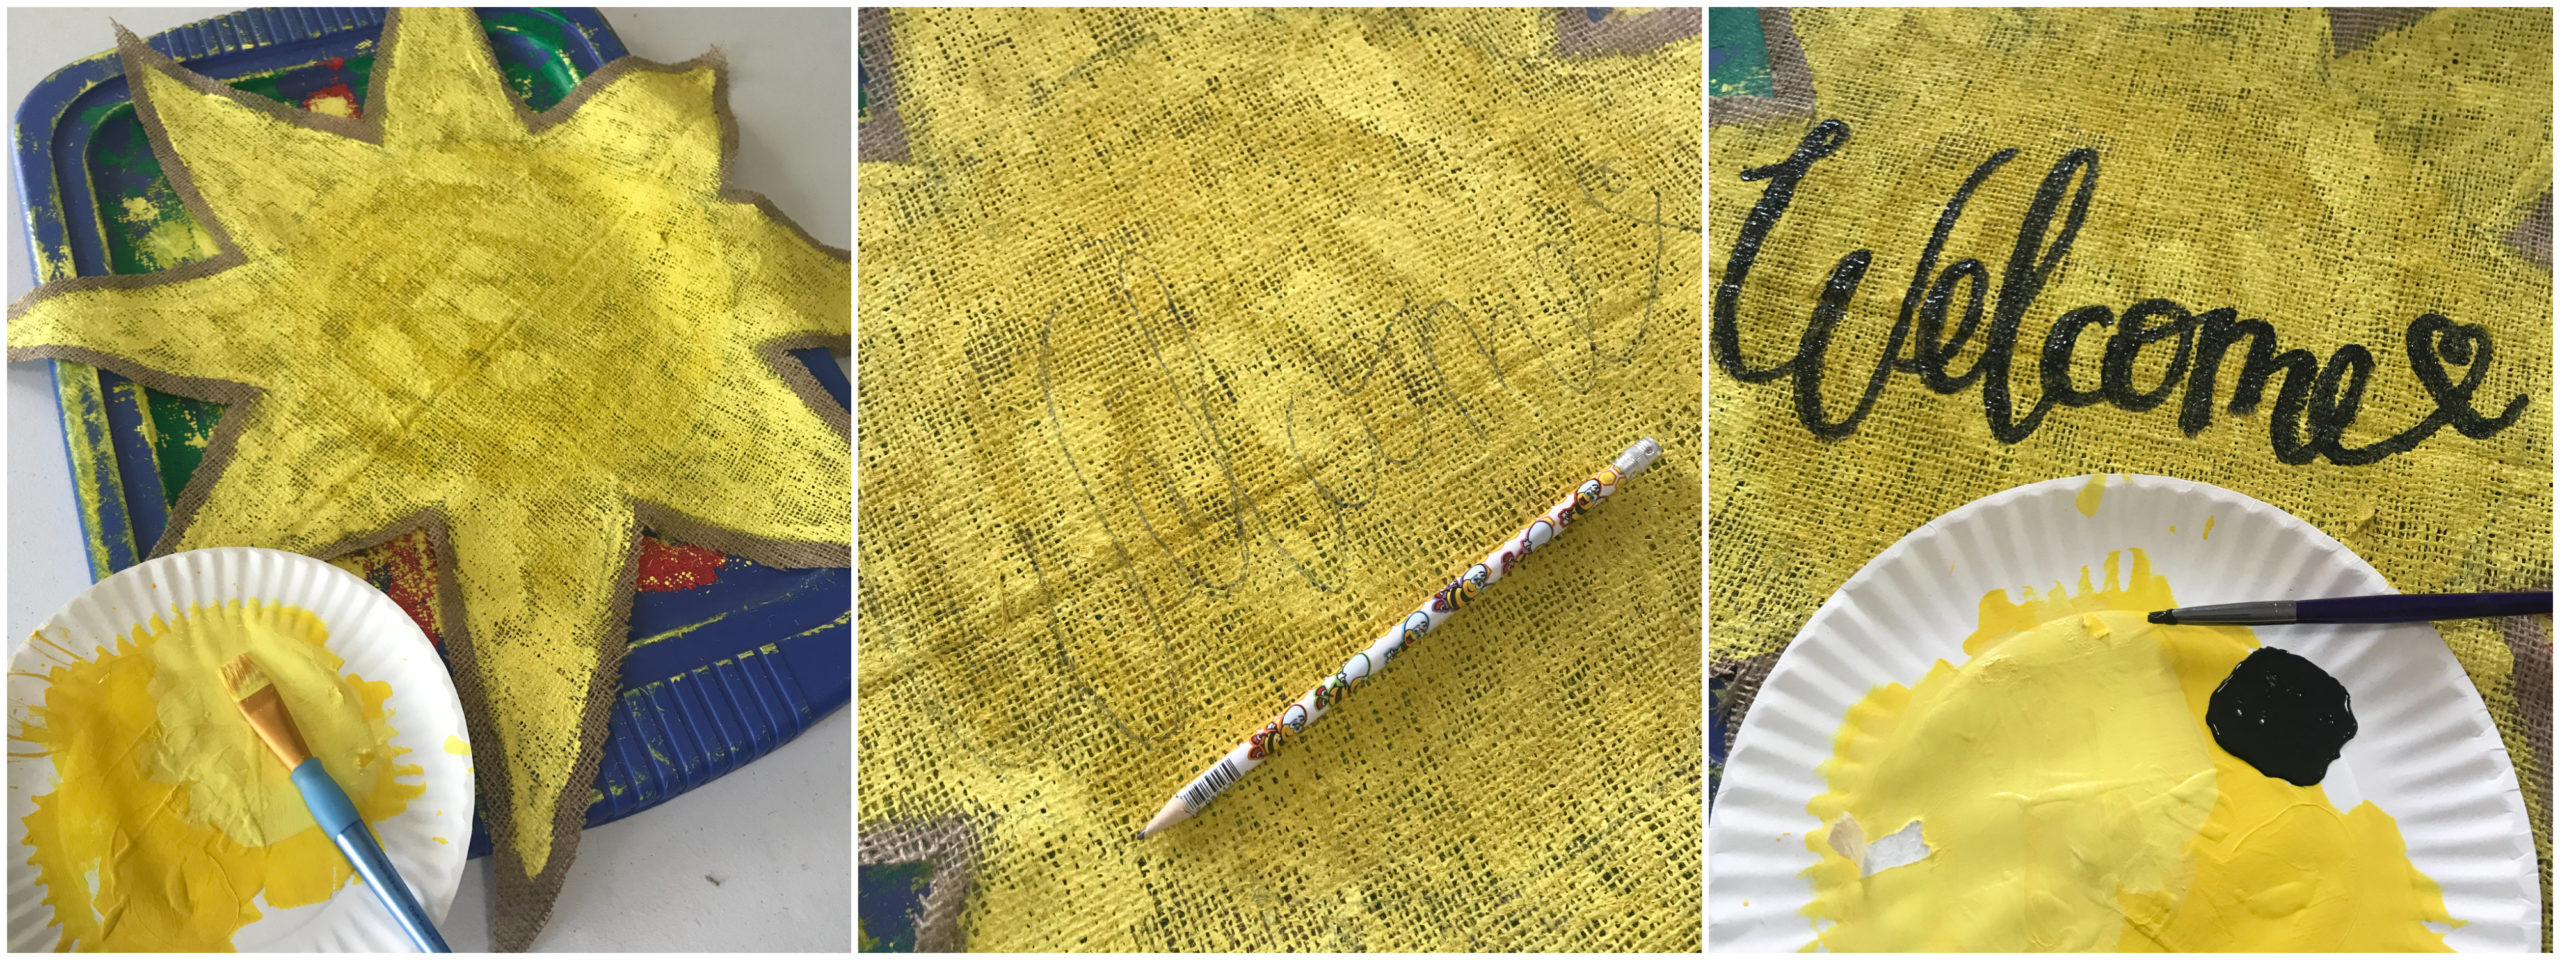
Using a bright sunny color yellow paint, I painted within the lines. TIP: I used an old plastic bin top that I didn’t care about anymore to paint my burlap on top of. Since burlap has holes in it, the paint seeps through and it’s easy to pull the burlap up after it dries.
With a pencil, I wrote out Welcome and then painted it with black paint.
Once the sun piece was dried, I put the two pieces back to gather, making sure to align them correctly.
I then hot glued the edges together, leaving one of the triangles open so that I could stuff it.
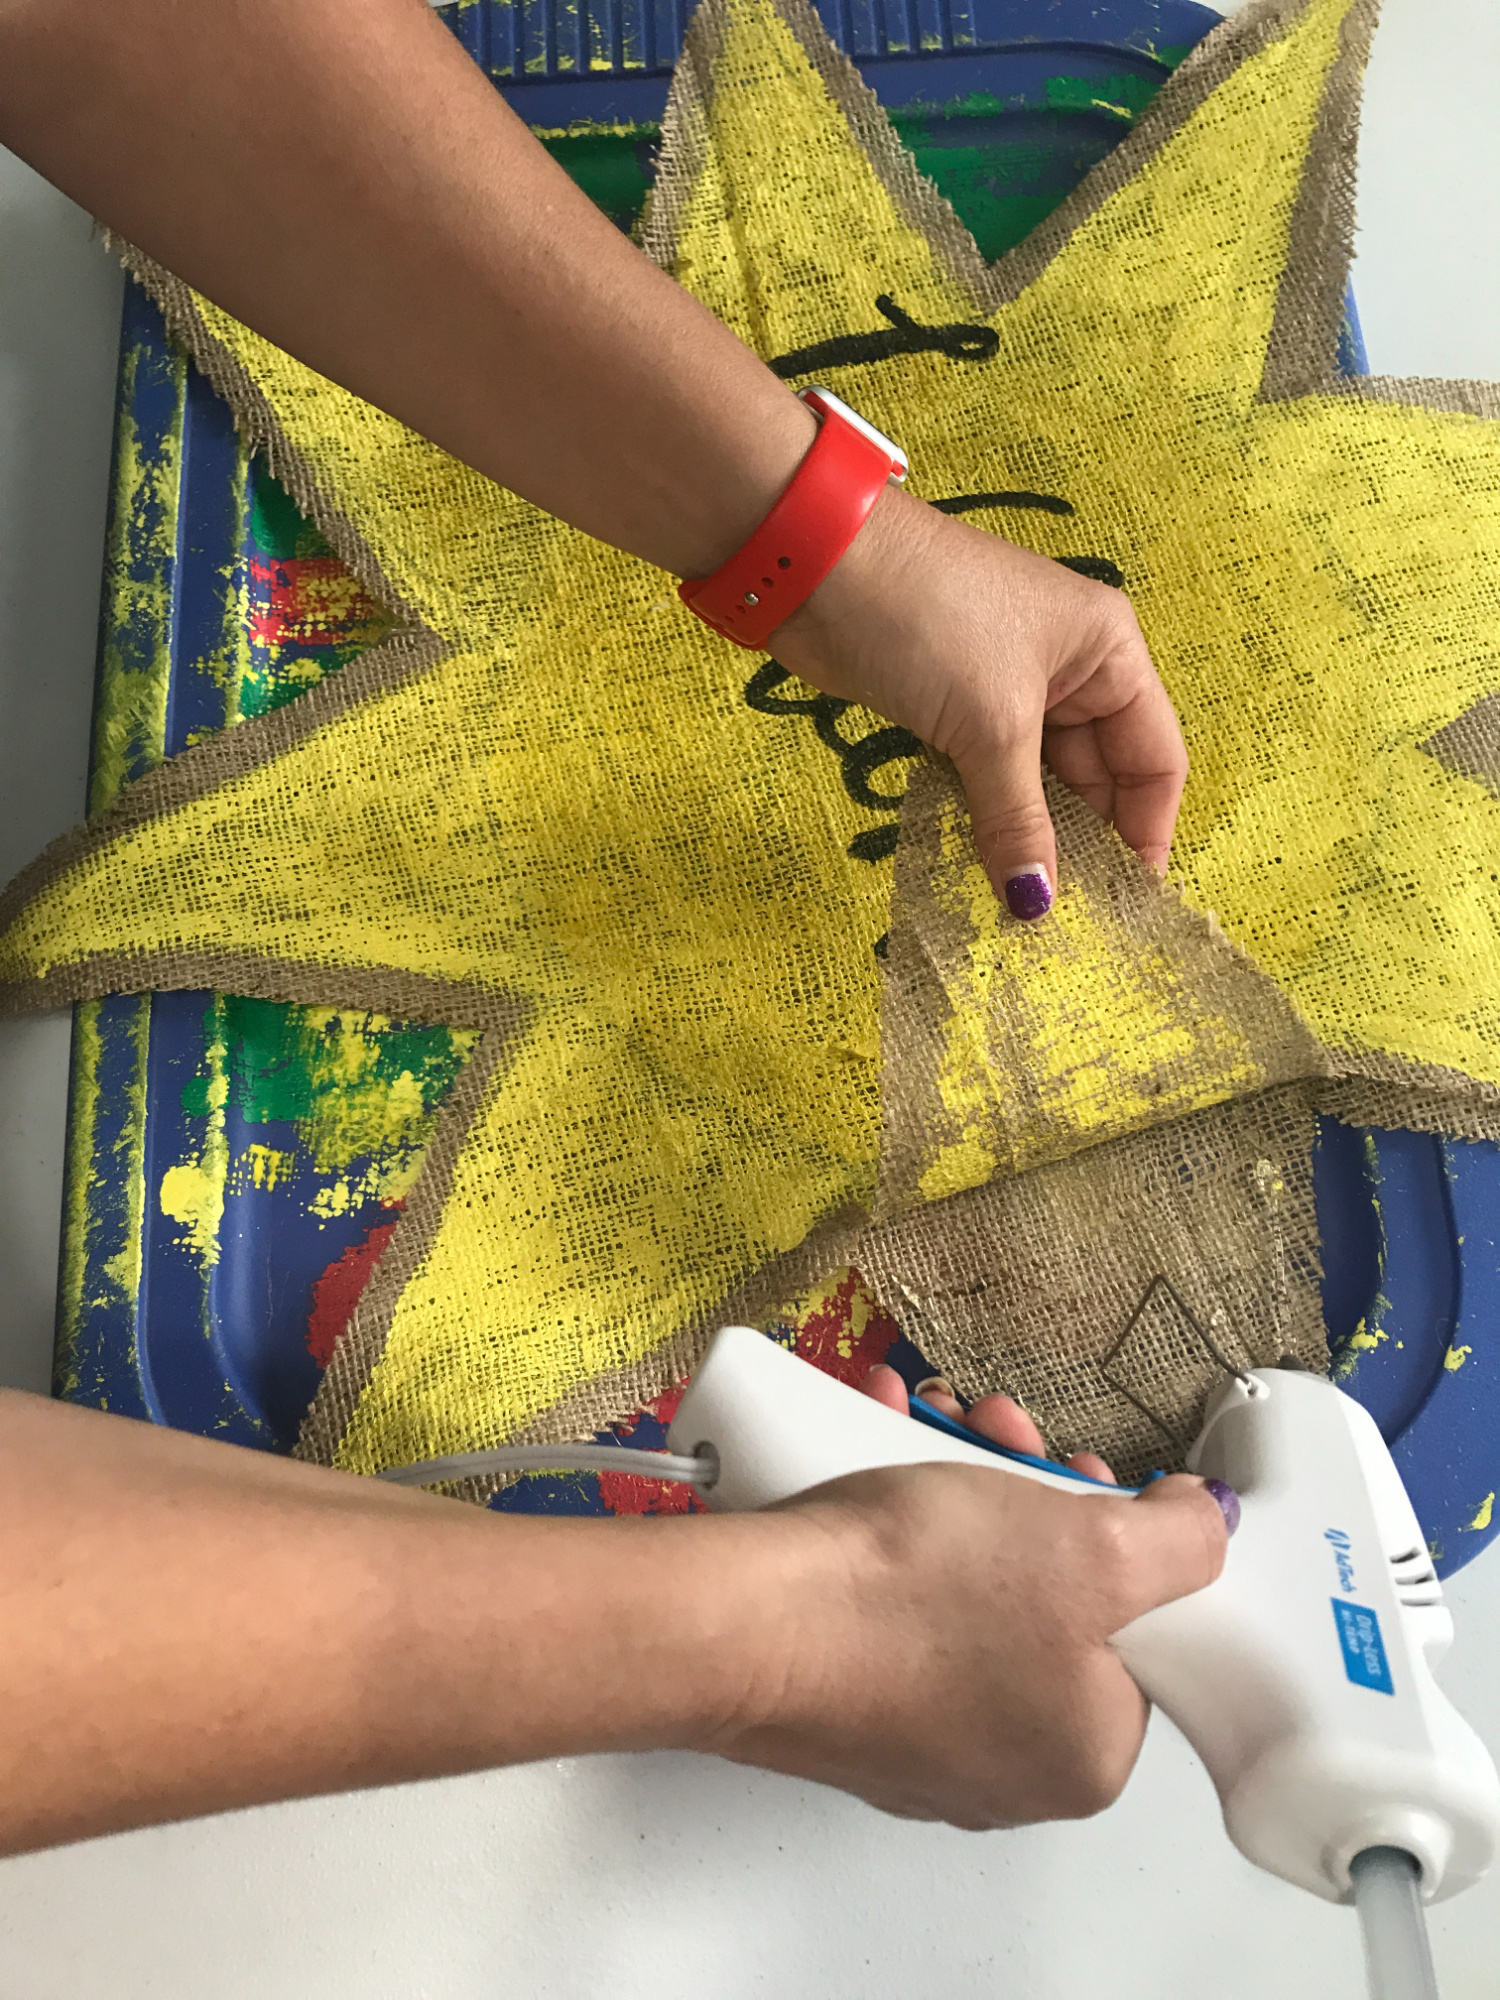
Then, I stuffed it full of Poly-fil® Fiber Fill, making sure to stuff the triangles as much as I could. I wanted the triangles to be stiff so they wouldn’t flop over.
Using wire cutters, I cut my wire to the length I wanted.
I pushed the wire through the back of the burlap, up through the front. Using needle nose pliers, I curled the ends so that it doesn’t back out of the burlap.
TIP: I hung my sign on my front porch and wasn’t happy with the length. It was too long, so I trimmed it with the wire cutters and curled the end again. It’s better to cut it a little longer, so that some can be cut off!
Using my marker, I retraced the circle and the triangles so that it gave it more of a whimsical sun look.
I also trimmed off all of the ragged edges to give it a cleaner edge look.
I actually went back and added a small layered bow!
Then it was ready to hang up!

Did you know Poly-fil® is made with recycled material that is re processed into Polyester and then extruded and expanded to make the Poly-fil® we all know and love!
Until next time….Happy Crafting!