Category Archives: Decor

Hello Pumpkin Sign featuring Fairfield World’s Oly*Fun® and Project Foam

Pumpkin season is here and this Hello Pumpkin sign made with Fairfield World’s Oly*Fun® and Project Foam is perfect to add to your decor! It can be hung on the wall, the door or set on a shelf or table. I love it as a door hanger!

Materials used:

How I made it:

I first started by drawing a pumpkin and stem with a marker on the Project Foam. I knew that my sign was only 14″x14″ so I needed to make it smaller than that. I cut it out with my scissors.

I laid the foam pumpkin and stem shapes on the orange and brown Oly*Fun® and traced around them, adding about a 1/2″.

Once everything was cut out, I sewed the pieces together with a 1/4″ seem and leaving an opening for inserting the foam.

I flipped the sewn Oly*Fun® so the seam was inside and them inserted the foam.

I sewed the openings closed. I then sewed a curved line on each side, giving it a more realistic pumpkin look.

Then I glued the stem to the pumpkin.

Using my Glowforge, I cut out the Hello Pumpkin letters and painted them orange.

Then it was time to glue everything down to the sign.

I love how the sign turned out! Fall decorations are my favorite decorations! I hope you like it too! You could make lots of different size pumpkin signs and make a collage! There is a variety of Oly-Fun® colors!

Until next time….Happy Crafting!

Upcycled Welcome Sign Using an Old Sign

Welcome Signs for front doors are very popular right now and this adorable upcycled welcome sign is perfect on my door! I’m joining some of my favorite crafters for the 9th edition of Creative Crafts – Recycled Crafts Edition to create upcycled crafts. I made this sign from a sign that I recently took down from my craft room.

Materials:

  • An old sign
  • Welcome cut out that I cut on my Glowforge and then painted black
  • 9″ x 12″ craft cut of Kunin Felt® Classicfelt: (1) Peacock, (1) Apple Green
  • Acrylic Paint
  • E6000 glue
  • Paint Brush
  • Scissors

How I made it:

I started by painting my sign. I picked this bright yellow paint from DecoArt. Bright colors are just making me so happy lately! Before painting, I pulled the wire up front the front so that I didn’t paint the little curls in the ends. I ended up having to do three coats of paint to get it covered to my liking.

Next, I made felt flowers. There are plenty of options for making felt flowers but these are the ones I picked. The first one I cut a circle from the blue felt and then cut it to create a spiral. I then wrapped it from the center outward, gluing it in place as I went. The second flower I cut a long strip of the blue felt, folded it in half and glued it on the ends and along the edges. Using my scissors, I cut short slits in the folded side, making sure not to cut all the way to the edge of the glued side. I then rolled it up, gluing it as I rolled. I cut leaves from the green felt.

Once everything was ready, it was time to glue everything into place using the E6000. You can use any glue, but E6000 is my favorite glue!

Once the glue was dry, it was ready to hang up on my front door! I love how it turned out! I hope you do too!

Be sure to click on the on the Team Creative Crafts button below to check out other recycled crafts!

Then, enter to win below!

a Rafflecopter giveaway

Until next time….Happy Crafting!

Weighted Desk Sitter

I’ve been really into making desk or shelf sitters lately, especially if it’s words of wisdom or kindness or a word of the year and these weighted desk sitters are perfect!. I created these two desk sitters, one for business and one for fun using Fairfield World’s Poly-fil® Poly-Pellets®! I can even use the one for business at vendor events by sitting it on my table; that way everyone will know how to find me on social media! They can even be placed on a shelf!

Materials used:

How I made it:

Step 1: Cut the pieces needed to create the boxes. Two for the front and back, two for the sides and two for the top and bottom. You can make the box any size that you’d like.

Step 2: Using pins, pin the pieces together at the edges. For the green one, I pinned all of the pieces together except for the back. For the pink one, I pinned all of the pieces together except for the sides.

Step 3: Sew the pieces together. I did my stitches on the outside. You could do the stitches on the inside and then turn it right side out after you have stitched it. A two inch gap needs to be left opened so that it can be filled with the poly-pellets® and fiber fill.

Step 4: Once all of the sides are sewn, except for the 2 inch opening, pour the Poly-Pellets® into the opening. I filled it about half way.

Step 5: I filled the rest of box with Poly-fil Fiber Fill. I used the handy little stuffing tool to push the Fiber Fill to the sides and corners.

Step 6: Once it is stuffed to liking, the two inch gap gets sewn closed.

Step 7: Using either scissors or a dye cutting machine, cut letters to put on the box. I used my Glowforge laser to easily cut my letters. TIP: You can print out your letters on printer paper, cut them out and use them as templates for your felt.

Step 8: Use Fabric or Felt Glue to adhere the letters to the box and then let it dry flat.

When it’s completely dry, put it on your desk or a shelf and enjoy!

Be Kind A Sweet Berry Designs Desk Sitter

Hope you liked this little tutorial on how to make a felt desk sitter filled with Poly-pellets®!

Quick Be Mine Valentine Banner

Woah! Valentine’s Day is coming up quick and an easy Be Mine banner is the perfect addition to your decor. You can get heart cut outs of wood or even felt and make this banner! I just happened to make my hearts on the Glowforge and I’m using Therm O Web’s deco foil® to decorate it!

Materials I used:


How I made it:

  1. I painted the hearts with the dye. And let it dry. TIP: I used a heat gun to help the drying process go a little faster!

2. Once the dye was dry, I used the deco foil® Liquid Adhesive to draw out the letters for BE MINE. This adhesive does have to dry before you can apply the foil. So, let it dry about an hour.

3. Cut the foil into pieces that would fit on your adhesive. Cutting it to size helps cut down on waste of the extra foil. Apply the foil over the dry adhesive and smooth down making sure to get the sides of the glue as well. Remove the waste.

4. String the hearts on the twine. TIP: If you are using hearts from felt or store bought hearts that don’t have holes in it, you an just hot glue the hearts to the twine or ribbon.

5. Then hang it up and look at your quick, easy and cute project!!!

Be sure to click the button below to check out other last minute Valentine craft ideas!

Also, be sure to enter to win this awesome craft supply stash!!!

a Rafflecopter giveaway

Engraved Happy Fall Pumpkin Canvas Sign

As I have gotten older, fall has become one of my most favorite times of the year and this engraved Happy Fall Pumpkin canvas sign is perfect for a little pop of decor in any space!

As most of you know, I am obsessed with my Glowforge Pro. I’ve found it great that I can engrave, cut or score lots of different items. I mean, come on….who would have thought that you can use a laser to engrave on canvas?! It is amazing!

Materials used:

  • Glowforge Pro (it can be any Glowforge model)
  • Computer with Glowforge software
  • Mix the Media Canvas Sign from Hampton Art
  • Illustrator or any design program
  • Pumpkin SVG (I purchased this one on Etsy)

How I made it!

First, I created my file in Illustrator using a font that I have and a pumpkin svg file that I purchased on Etsy.

I placed the canvas in my Glowforge Pro, adjusting as needed. I had to remove the Glowforge crumb tray and stack some scrap wood to allow for the height.

I then inserted my file into the Glowforge web based software, got everything lined up and set the appropriate settings for engraving on Canvas. TIP: When engraving on things other than wood, you either must research or do trial and error. I’ve done canvas before so I kind of knew what settings to use.

Settings:

  • Speed: 1000
  • Power: 15
  • LPI: 270

Then I hit the magic button for it to engrave!

After it was done engraving, it was ready to hang. TIP: The kids could also color it!!!

Be sure to click the Create Fall Crafts button below and check out other fall crafts!

Until next time…..

Wooden Pumpkin Door Hanger

This week I’m joining my creative friends for the Creative Crafts Halloween Edition and my craft is this adorable little wooden pumpkin door hanger with a “B” in the middle. I am one of those crazy pumpkin lovers! I love the way they look, I love the way they taste and I love the way they smell!

As most of you may know, I love to work with wood. My Glowforge laser is like one of my best friends! So, my craft was created using the Glowforge.

Materials:

  • Plywood (This is 1/8″ Baltic Birch)
  • Glowforge or other laser machine. (If you cut thinner wood, you could possibly do this on the Cricut Maker)
  • Computer with software to add letter and weld it (I use Illustrator)
  • Pumpkin SVG file (I got this one from Etsy, and the file comes with 6 different pumpkins!)
  • Paint
  • Paint Brushes
  • Strong gripping glue (I used Beacon Multi-Grip)
  • Twine, Ribbon or String

Here is how I made it:

I downloaded the pumpkin svg file that I purchased from Etsy. I added the letter that I wanted in the middle and made sure to weld it to the center circle. I wanted this pumpkin to look layered so I created an offset path (set to 0) the same size as the original pumpkin. That gave me an extra pumpkin to use as a backing. I removed all of the extra pieces from the extra one. I then welded the stem and vines in place. I also added two circles to the solid pumpkin backing.

Next, I uploaded the file into the Glowforge Software, resized it to the biggest size that I could make it and hit the magic button to cut.

Don’t mind the silly mask. It keeps me from inhaling the fumes from the Glowforge! And well, mask are a thing now!

Once everything was cut out , it was time to paint it. I painted each piece individually.

Once the paint was dry, I used Beacon Multi-Grip glue to glue it all together.

Next was my favorite part…..adding the twine and hanging it up!

Oh my goodness, I love it so much!!!!! It’s definitely going to be hanging on my door for the next couple of months!

Be sure to click below to see other Creative Halloween Crafts.

A special thanks to my crafty friends Laura Kelly Designs, Makeable Crafts, Ann Butler Designs and Creatively Beth for hosting another addition of Creative Crafts!


Until next time……

New Machine, New Beginning and a New Year

First of all, I’d like to wish everyone a Happy New Year!!!!   2018 seems like it flew by but I am totally ready for 2019!

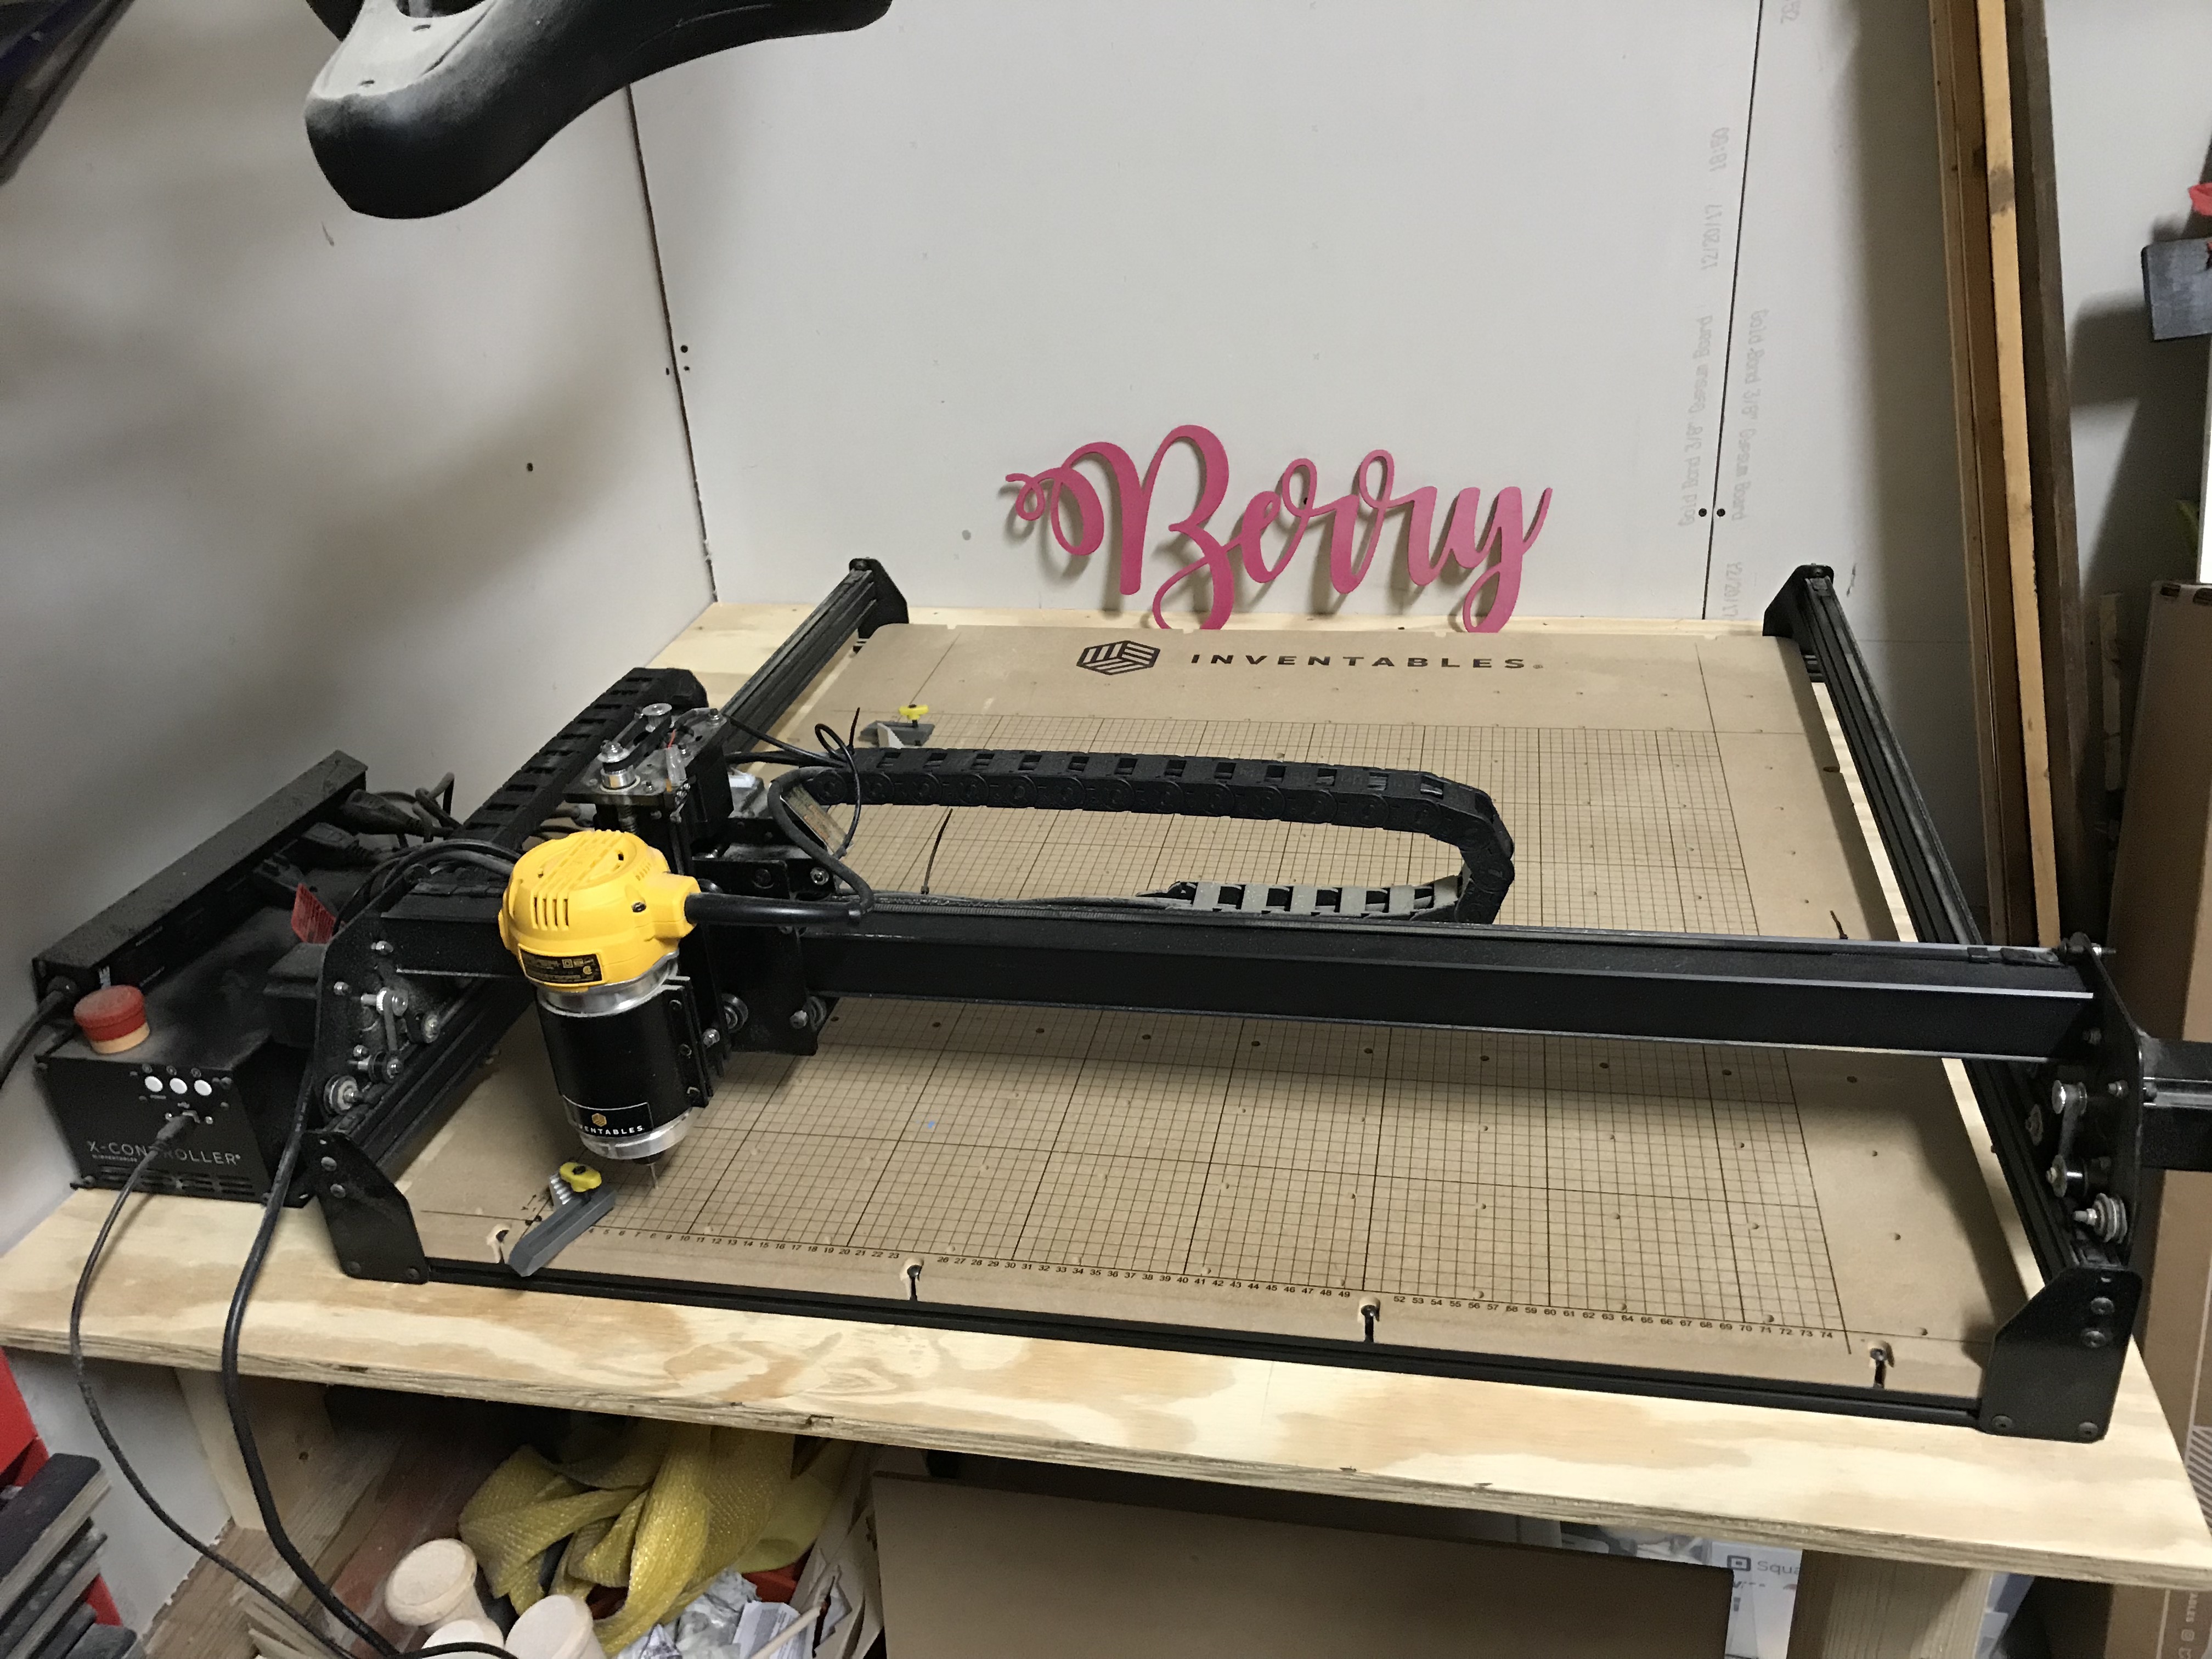
Last year I decided to make a big purchase to hopefully help A Sweet Berry Designs grow.  The Inventables X-Carve has brought me lots of joy in the last couple of months!

The Inventables X-Carve is a CNC Router machine that you program via the computer.  Why did I buy a CNC router you may ask!   Some of you may know this, but my dad was a master carpenter at the University of South Carolina for many many years!   In his spare time at home he would build furniture and other wood items.  He would build shelves, entertainment centers, desk and even lake docks!  He has installed shelves in my garage as well as some neighbors garages. We have several of his shelves in the house!  He even built my desk that is in my “office” space.  He has slowly started passing down some of his power tools to me and I have been using them like crazy the last couple of years!  Some of the items I have made, such as my North Carolina cut out ornaments are repetitive cuts and the X-Carve helps with that and save my back in the process!

So, after lots and lots of research and youtube watching, I ordered one!!!!   Over the next couple of weeks, boxes started coming but I made myself wait to open any of them until everything arrived.  Inventables has different size X-Carves.  I decided to get the big one.  I had a feeling that if I got the smaller one, I’d want the bigger one!  But they all came just before we were going on a big trip to Chicago so I had to wait a little while to get it together.

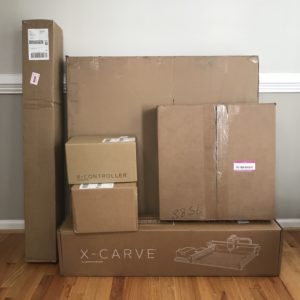
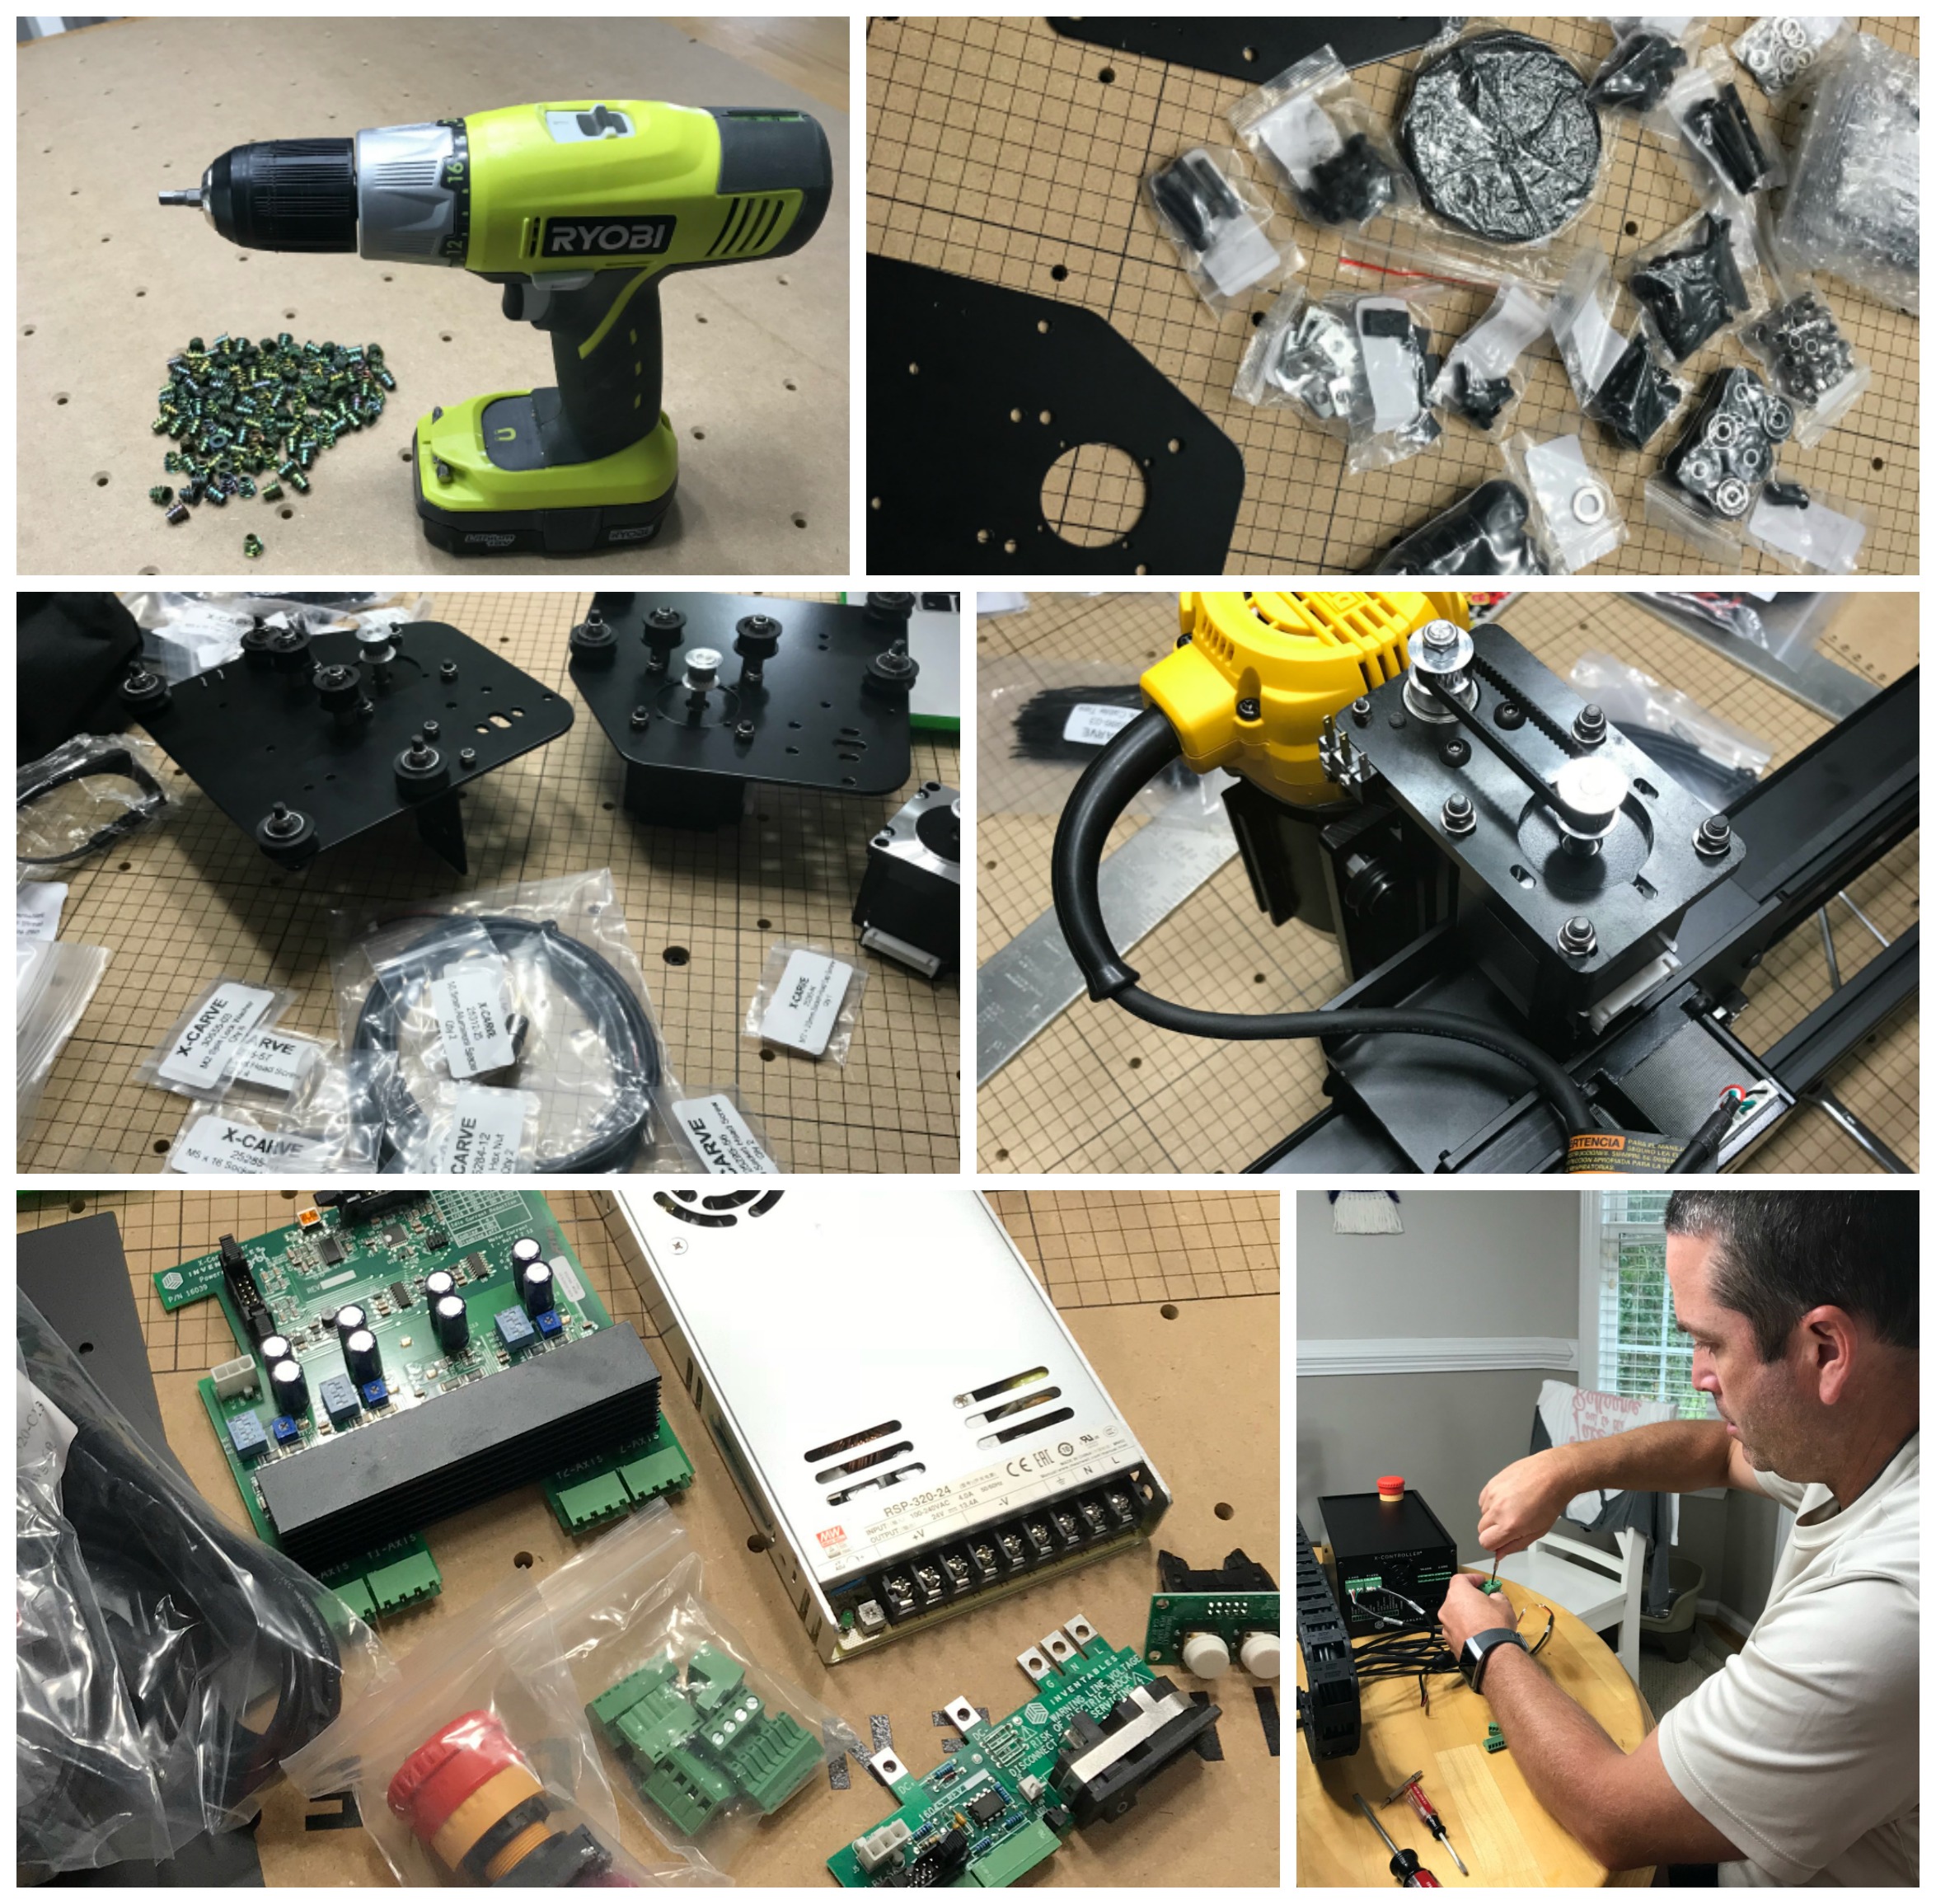
And guess what?   Everything had to be put together, from the railings to the circuit boards.  It was crazy!   It was definitely a family effort!  Lots of little bags of screws, nuts and washers.  Stepper motors, homing switches and wheels.  My mom even had a part in it!

So, after about 7 or 8 hours or so, it was complete and ready for it’s first run.  I was nervous as heck but it was worth the nail biting to make sure it was going to work!  Oh yeah, I also bought a new ShopVac!  The online software for the X-Carve had a test carve that was super cute (see pic below).   

The boys thought the amount of saw dust was amazing and loved being able to vacuum it up!   They’ve been awesome helpers when I am carving!  Give them the vacuum and they are set!

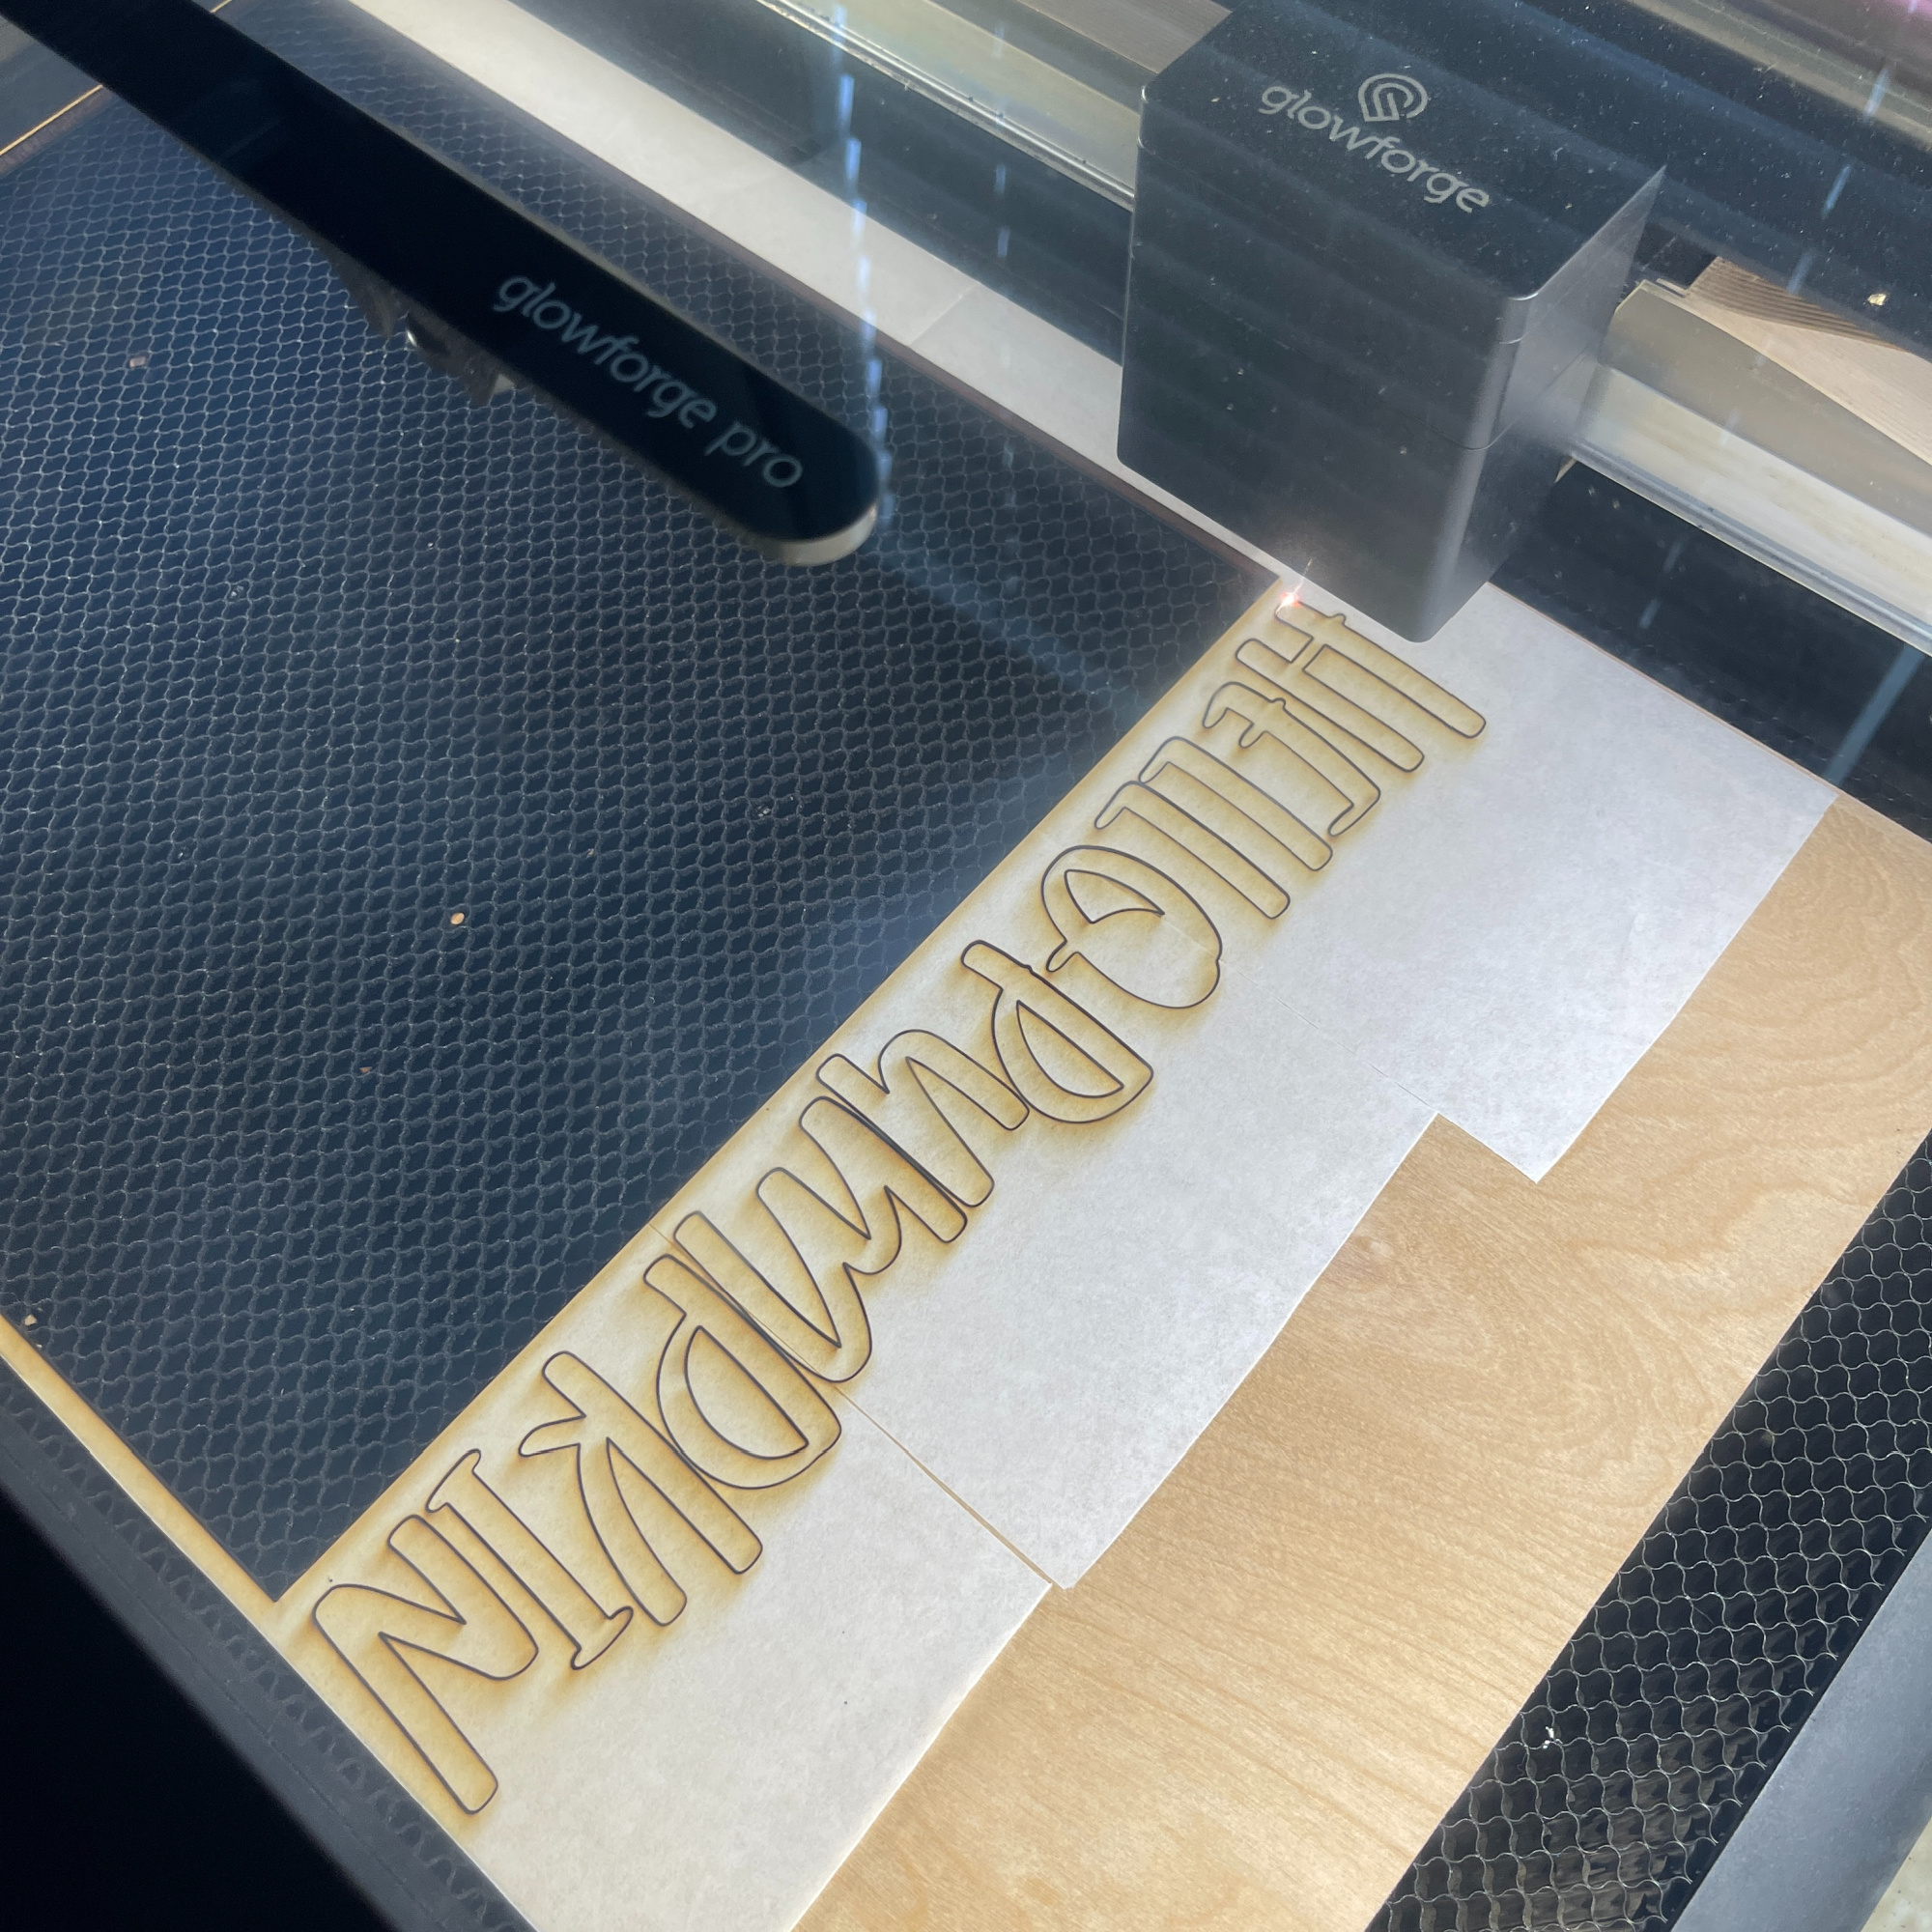
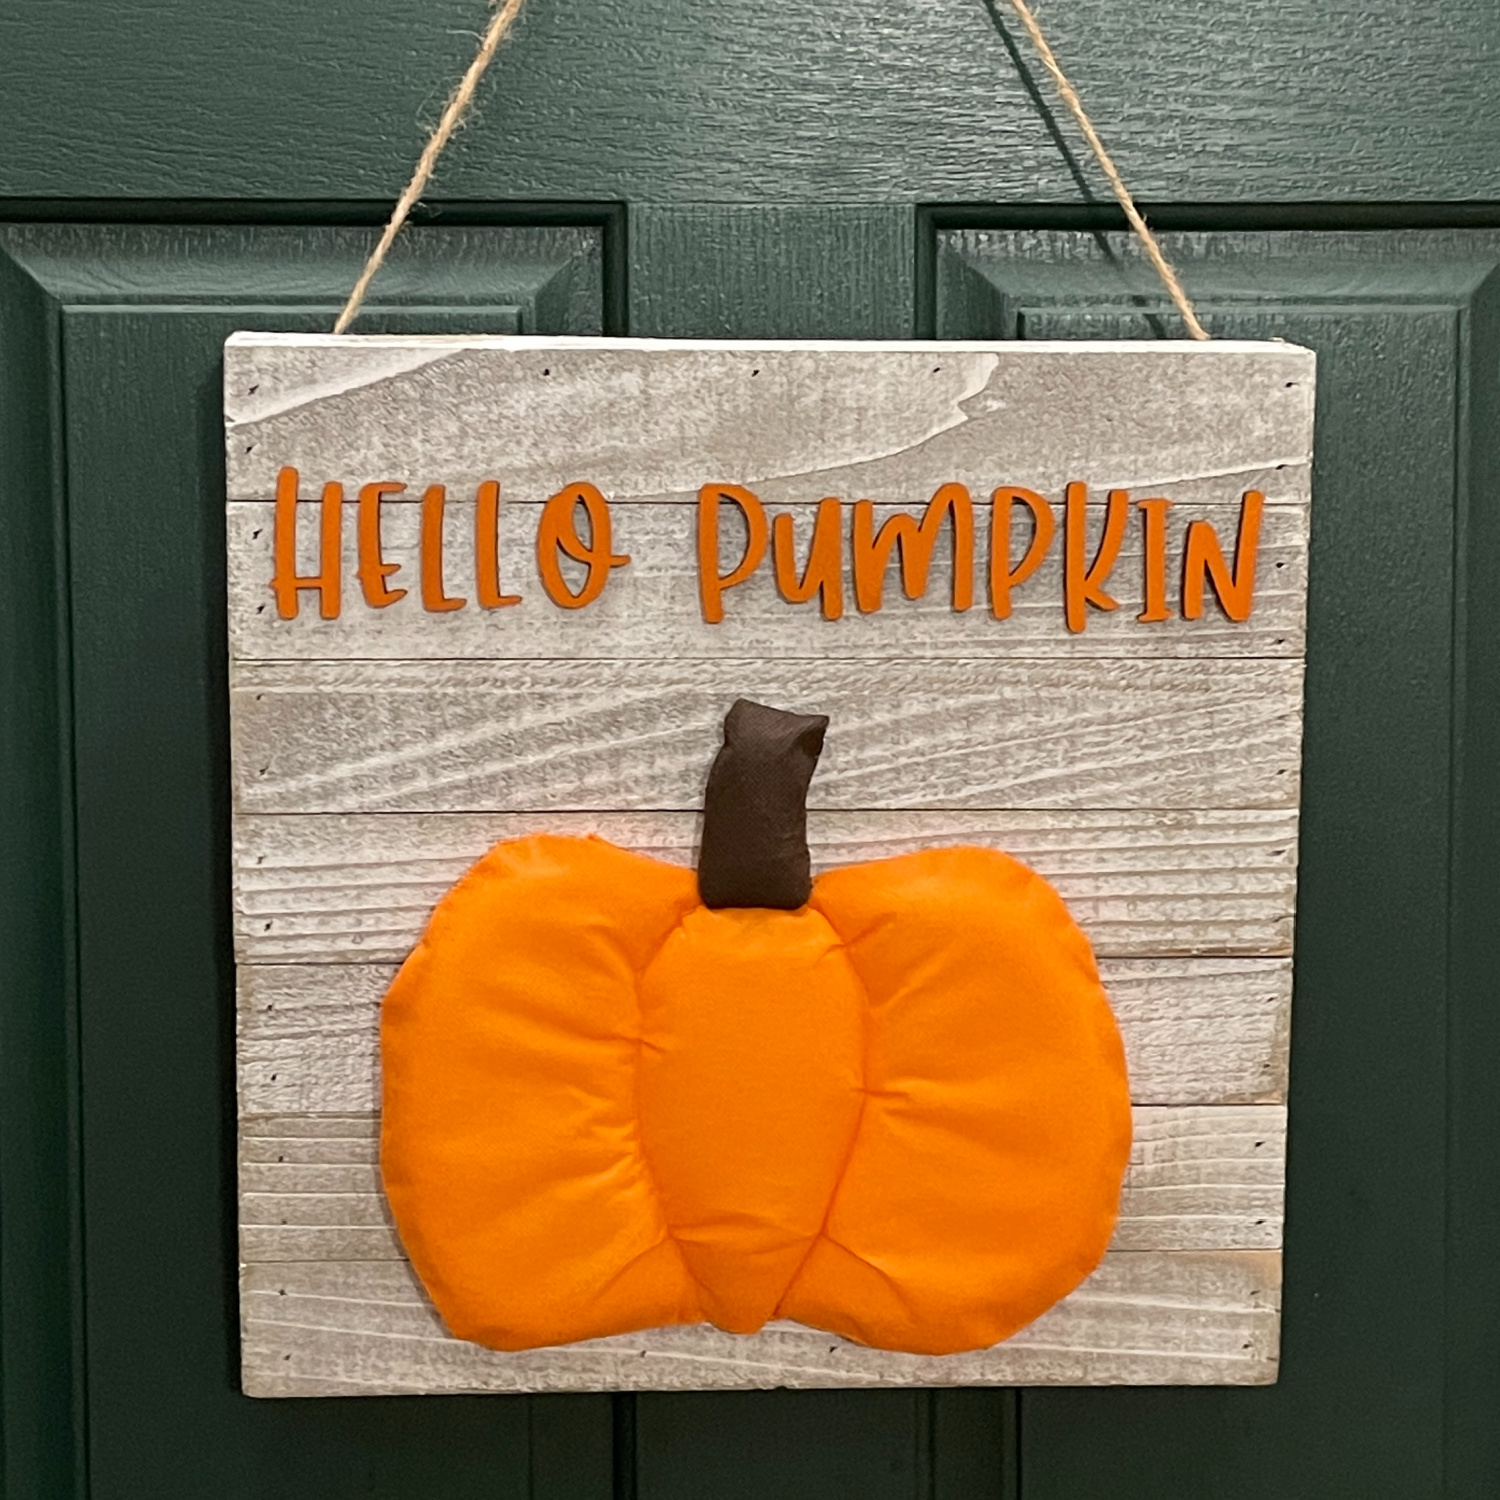
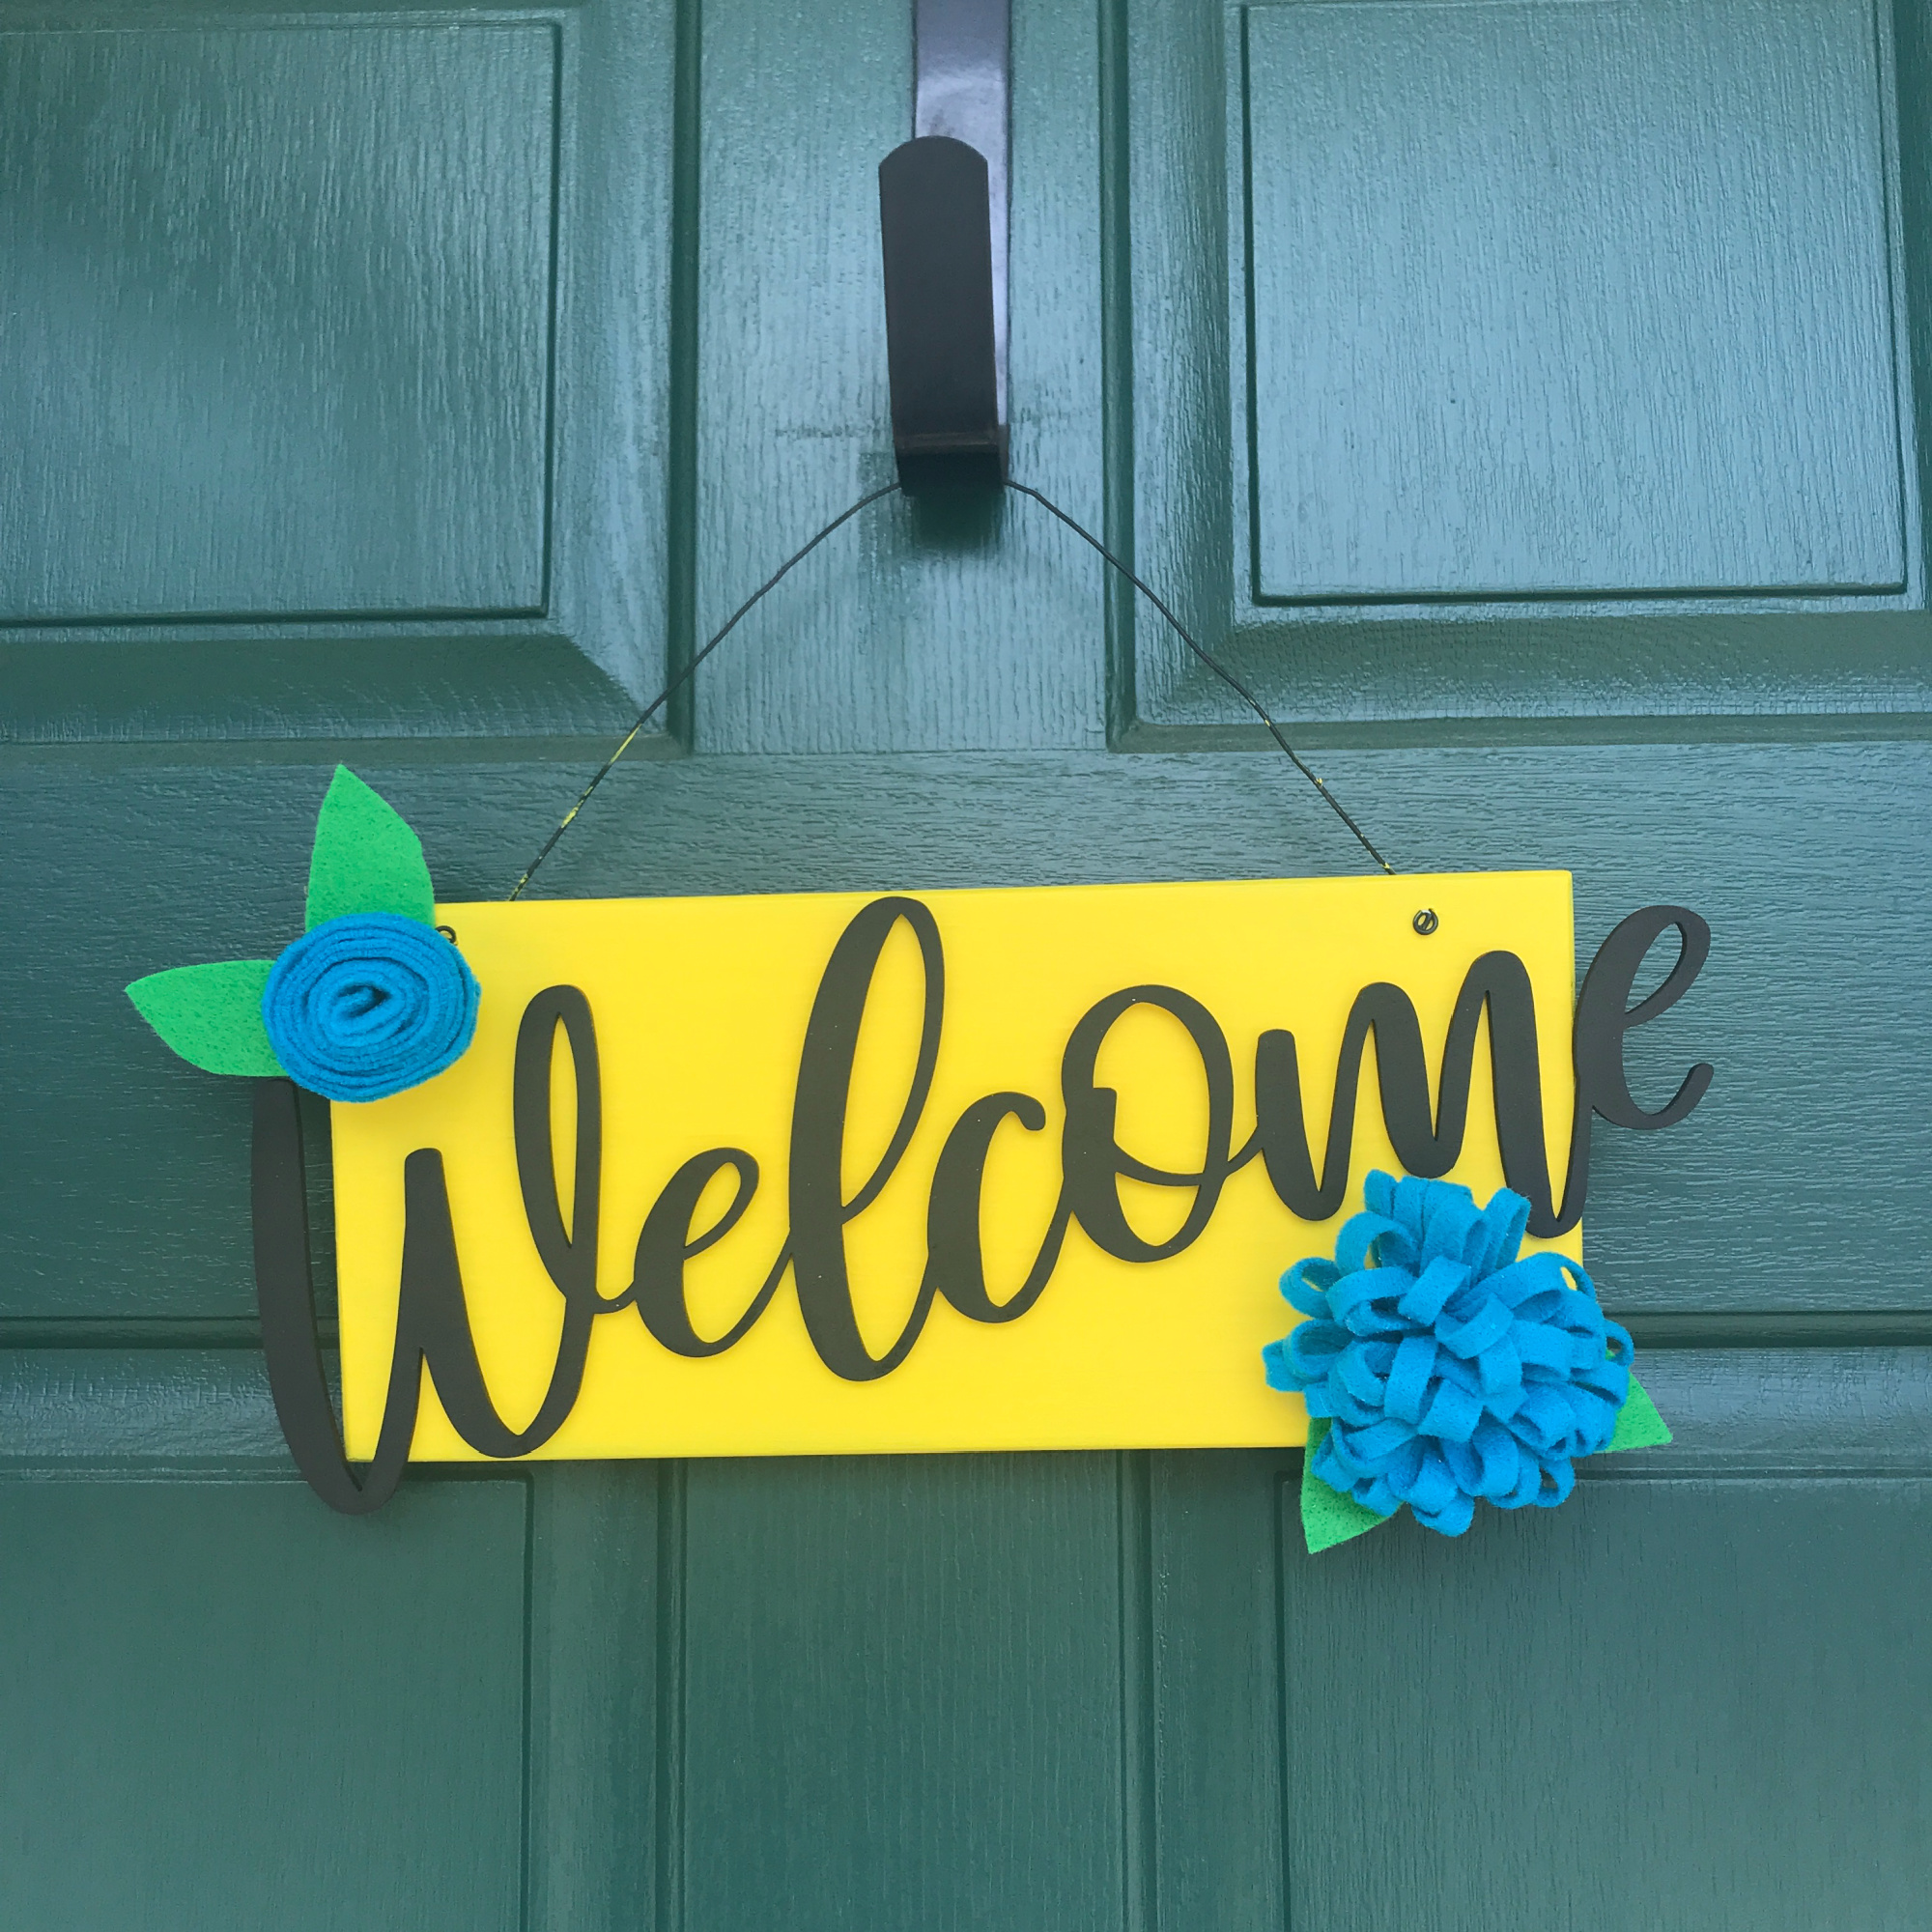
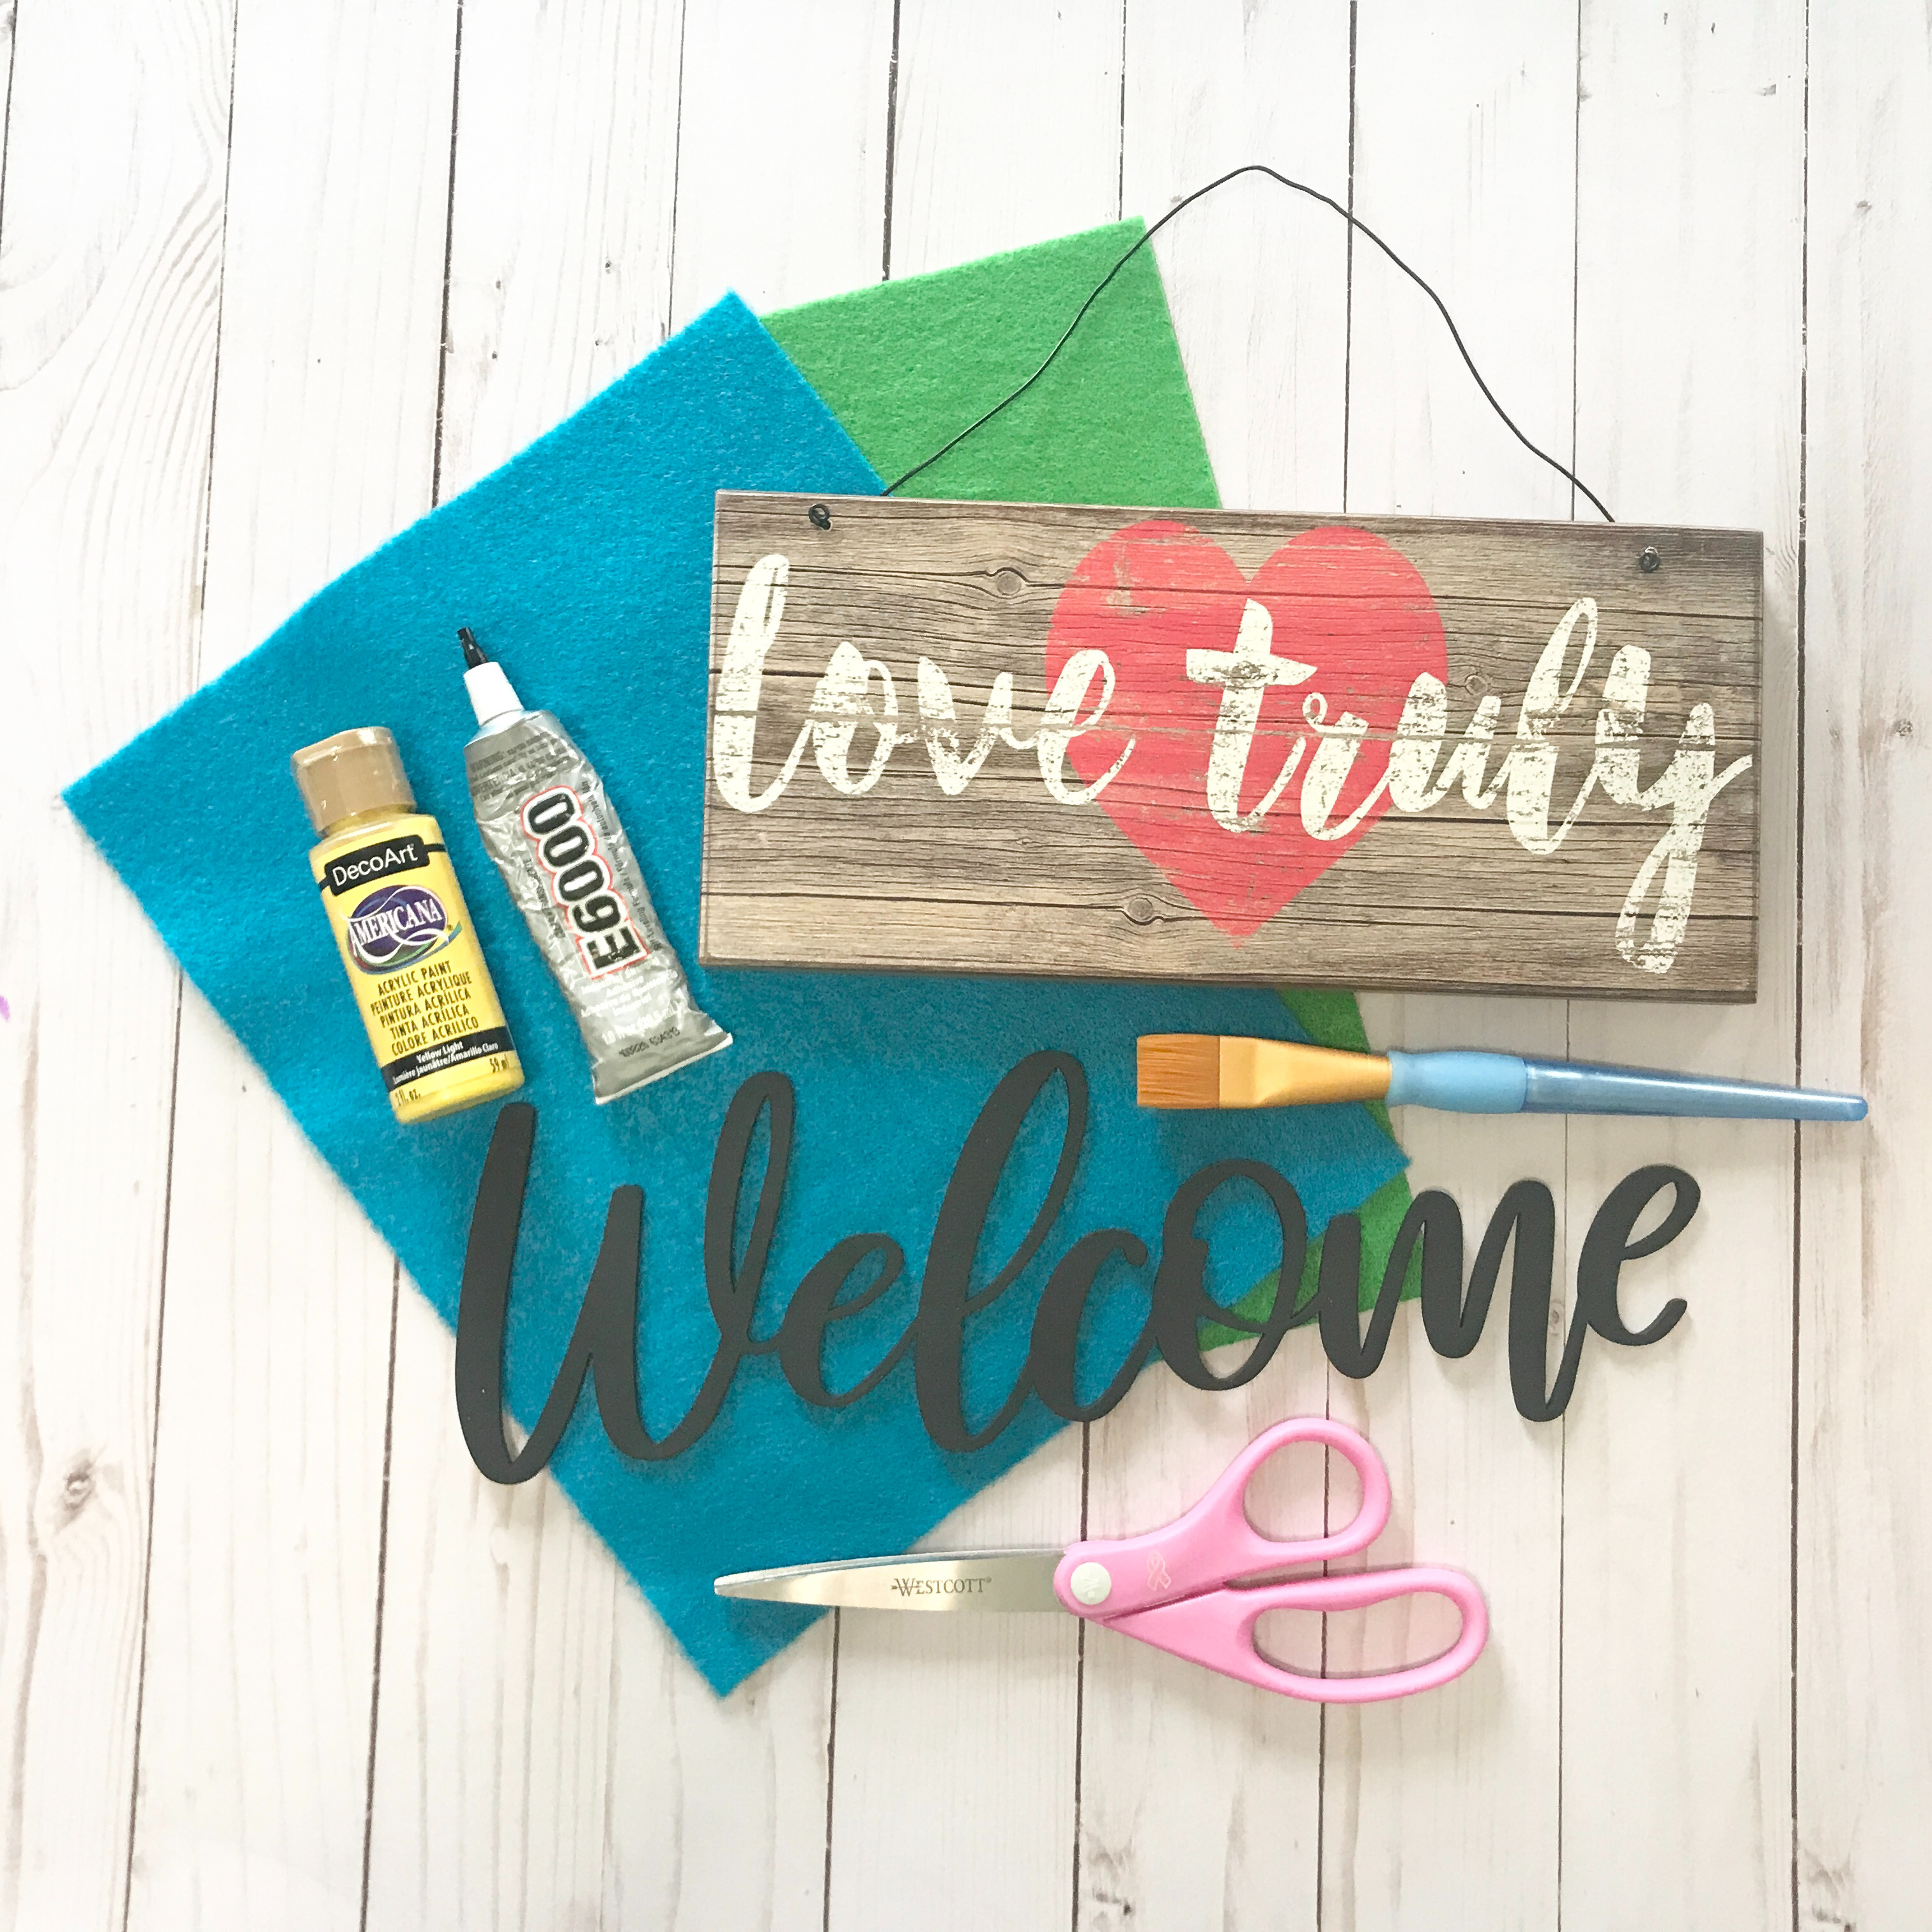
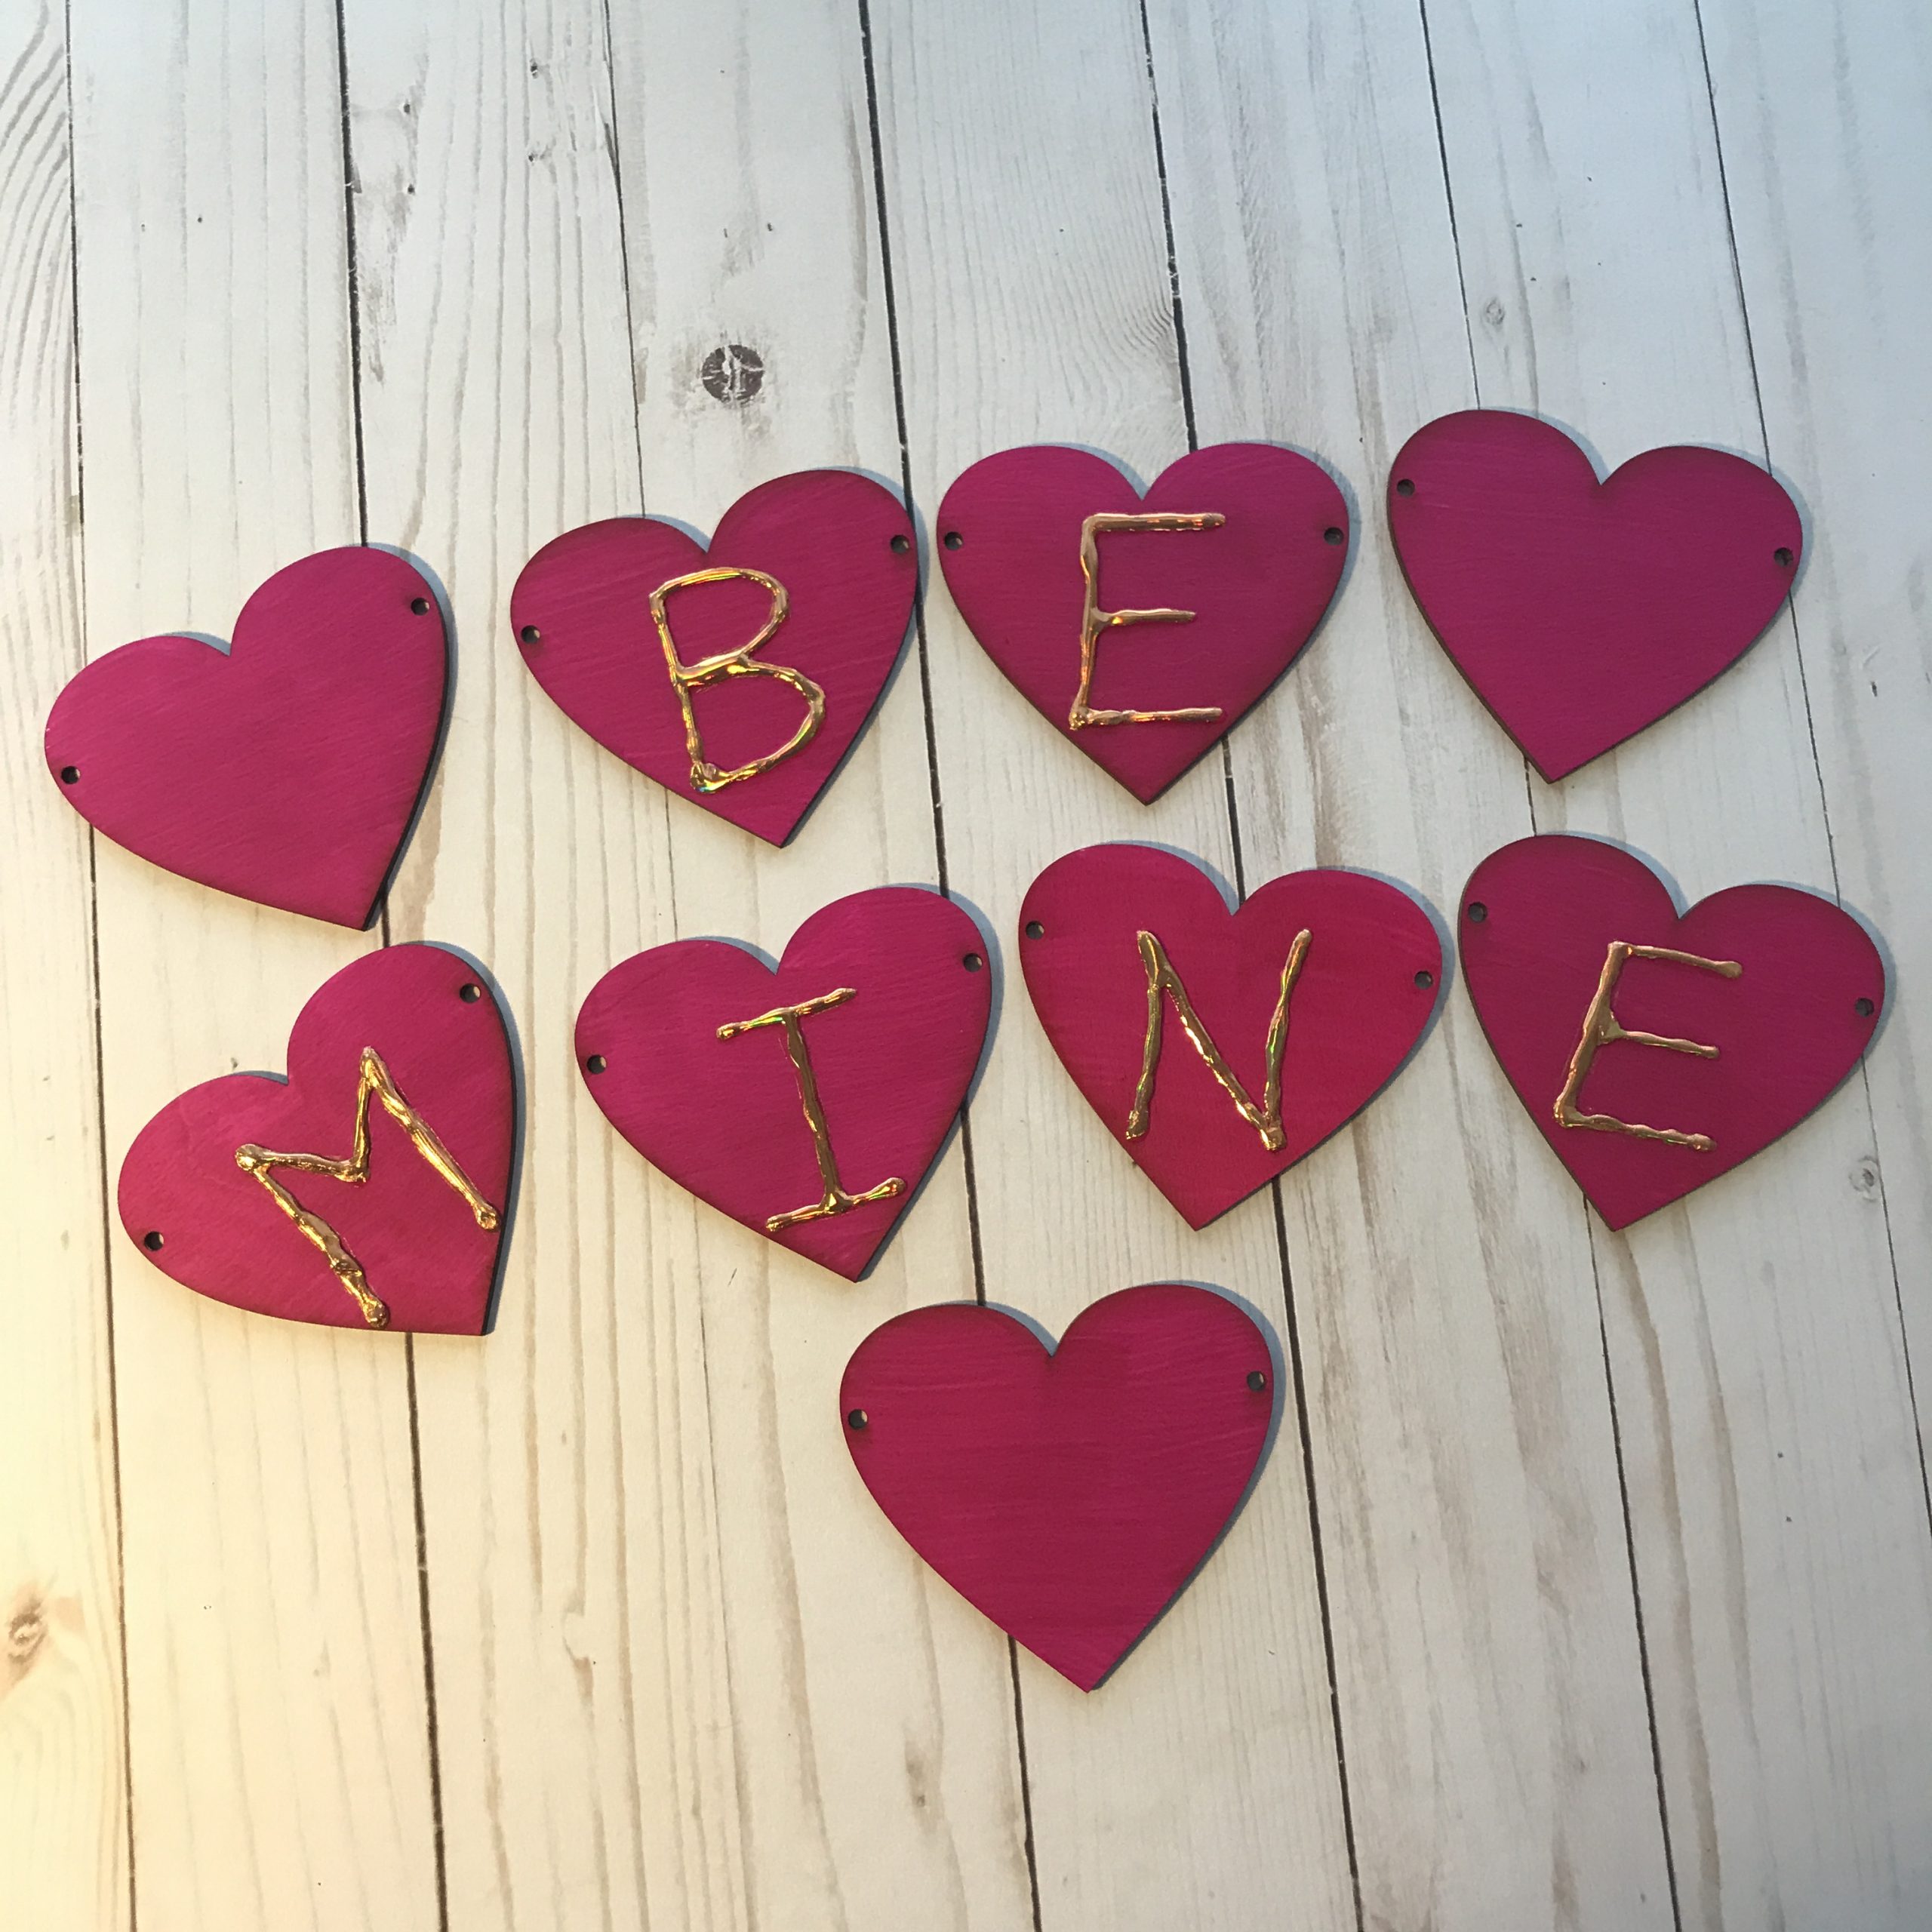
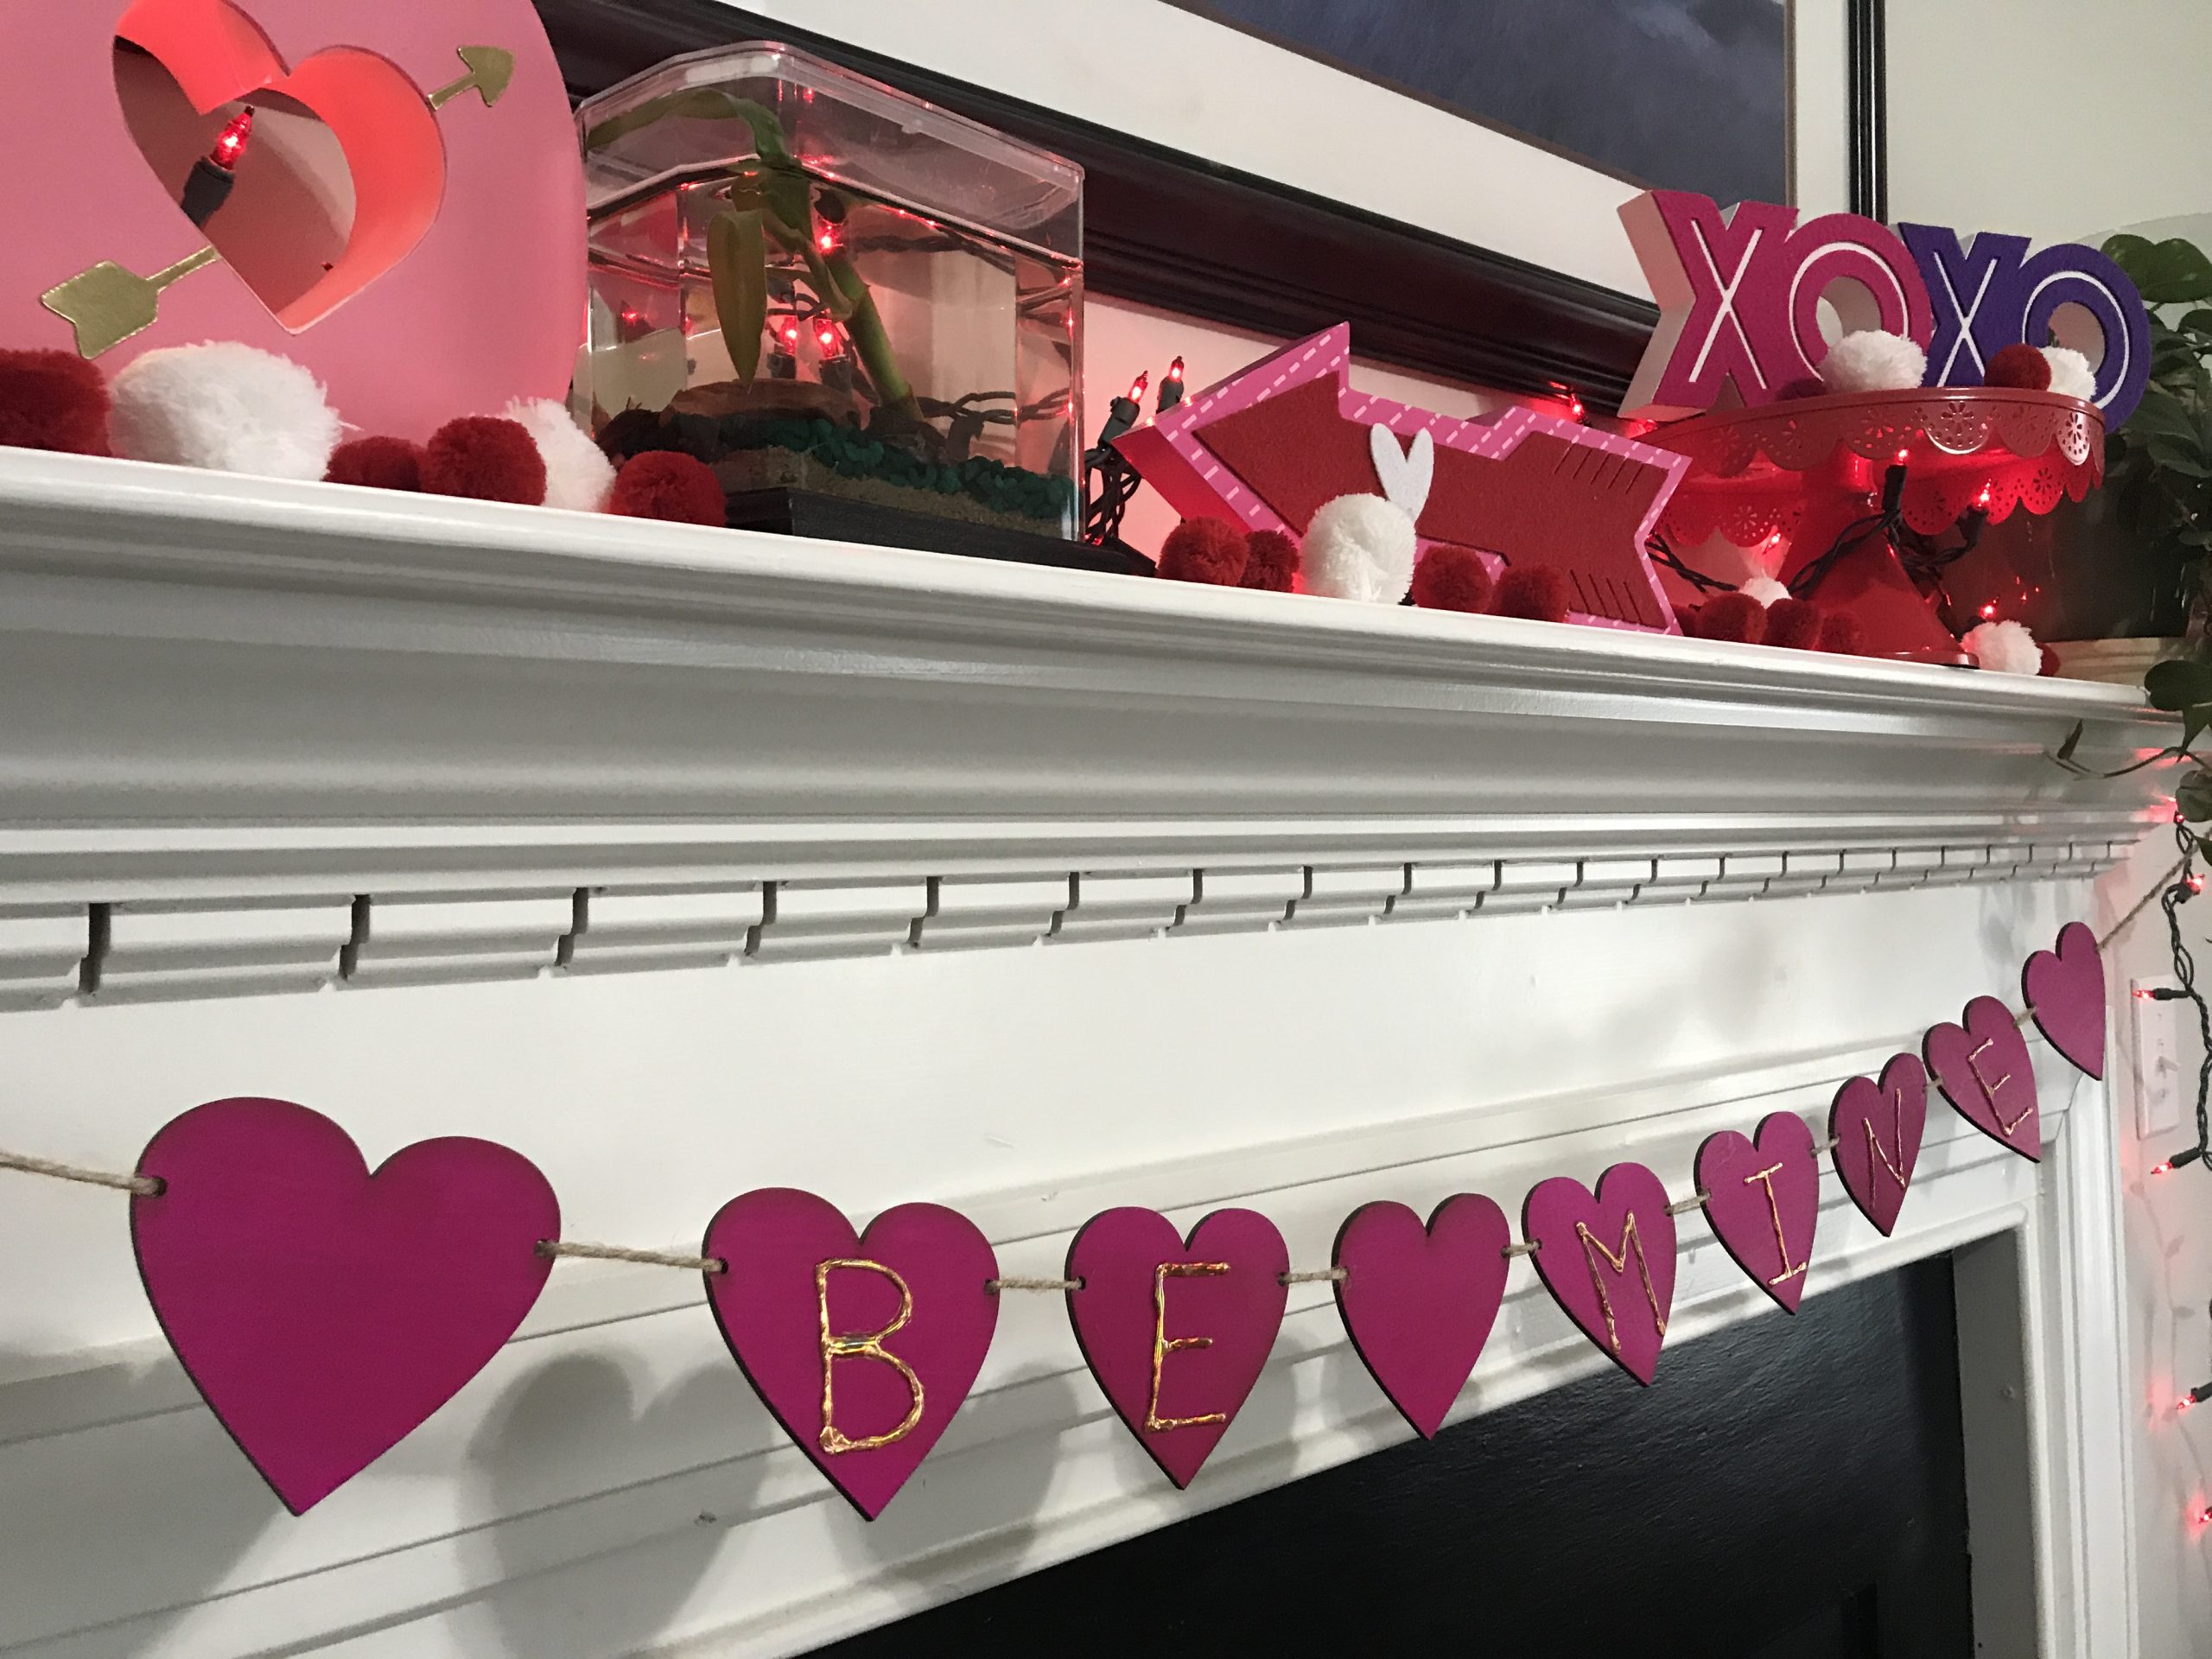
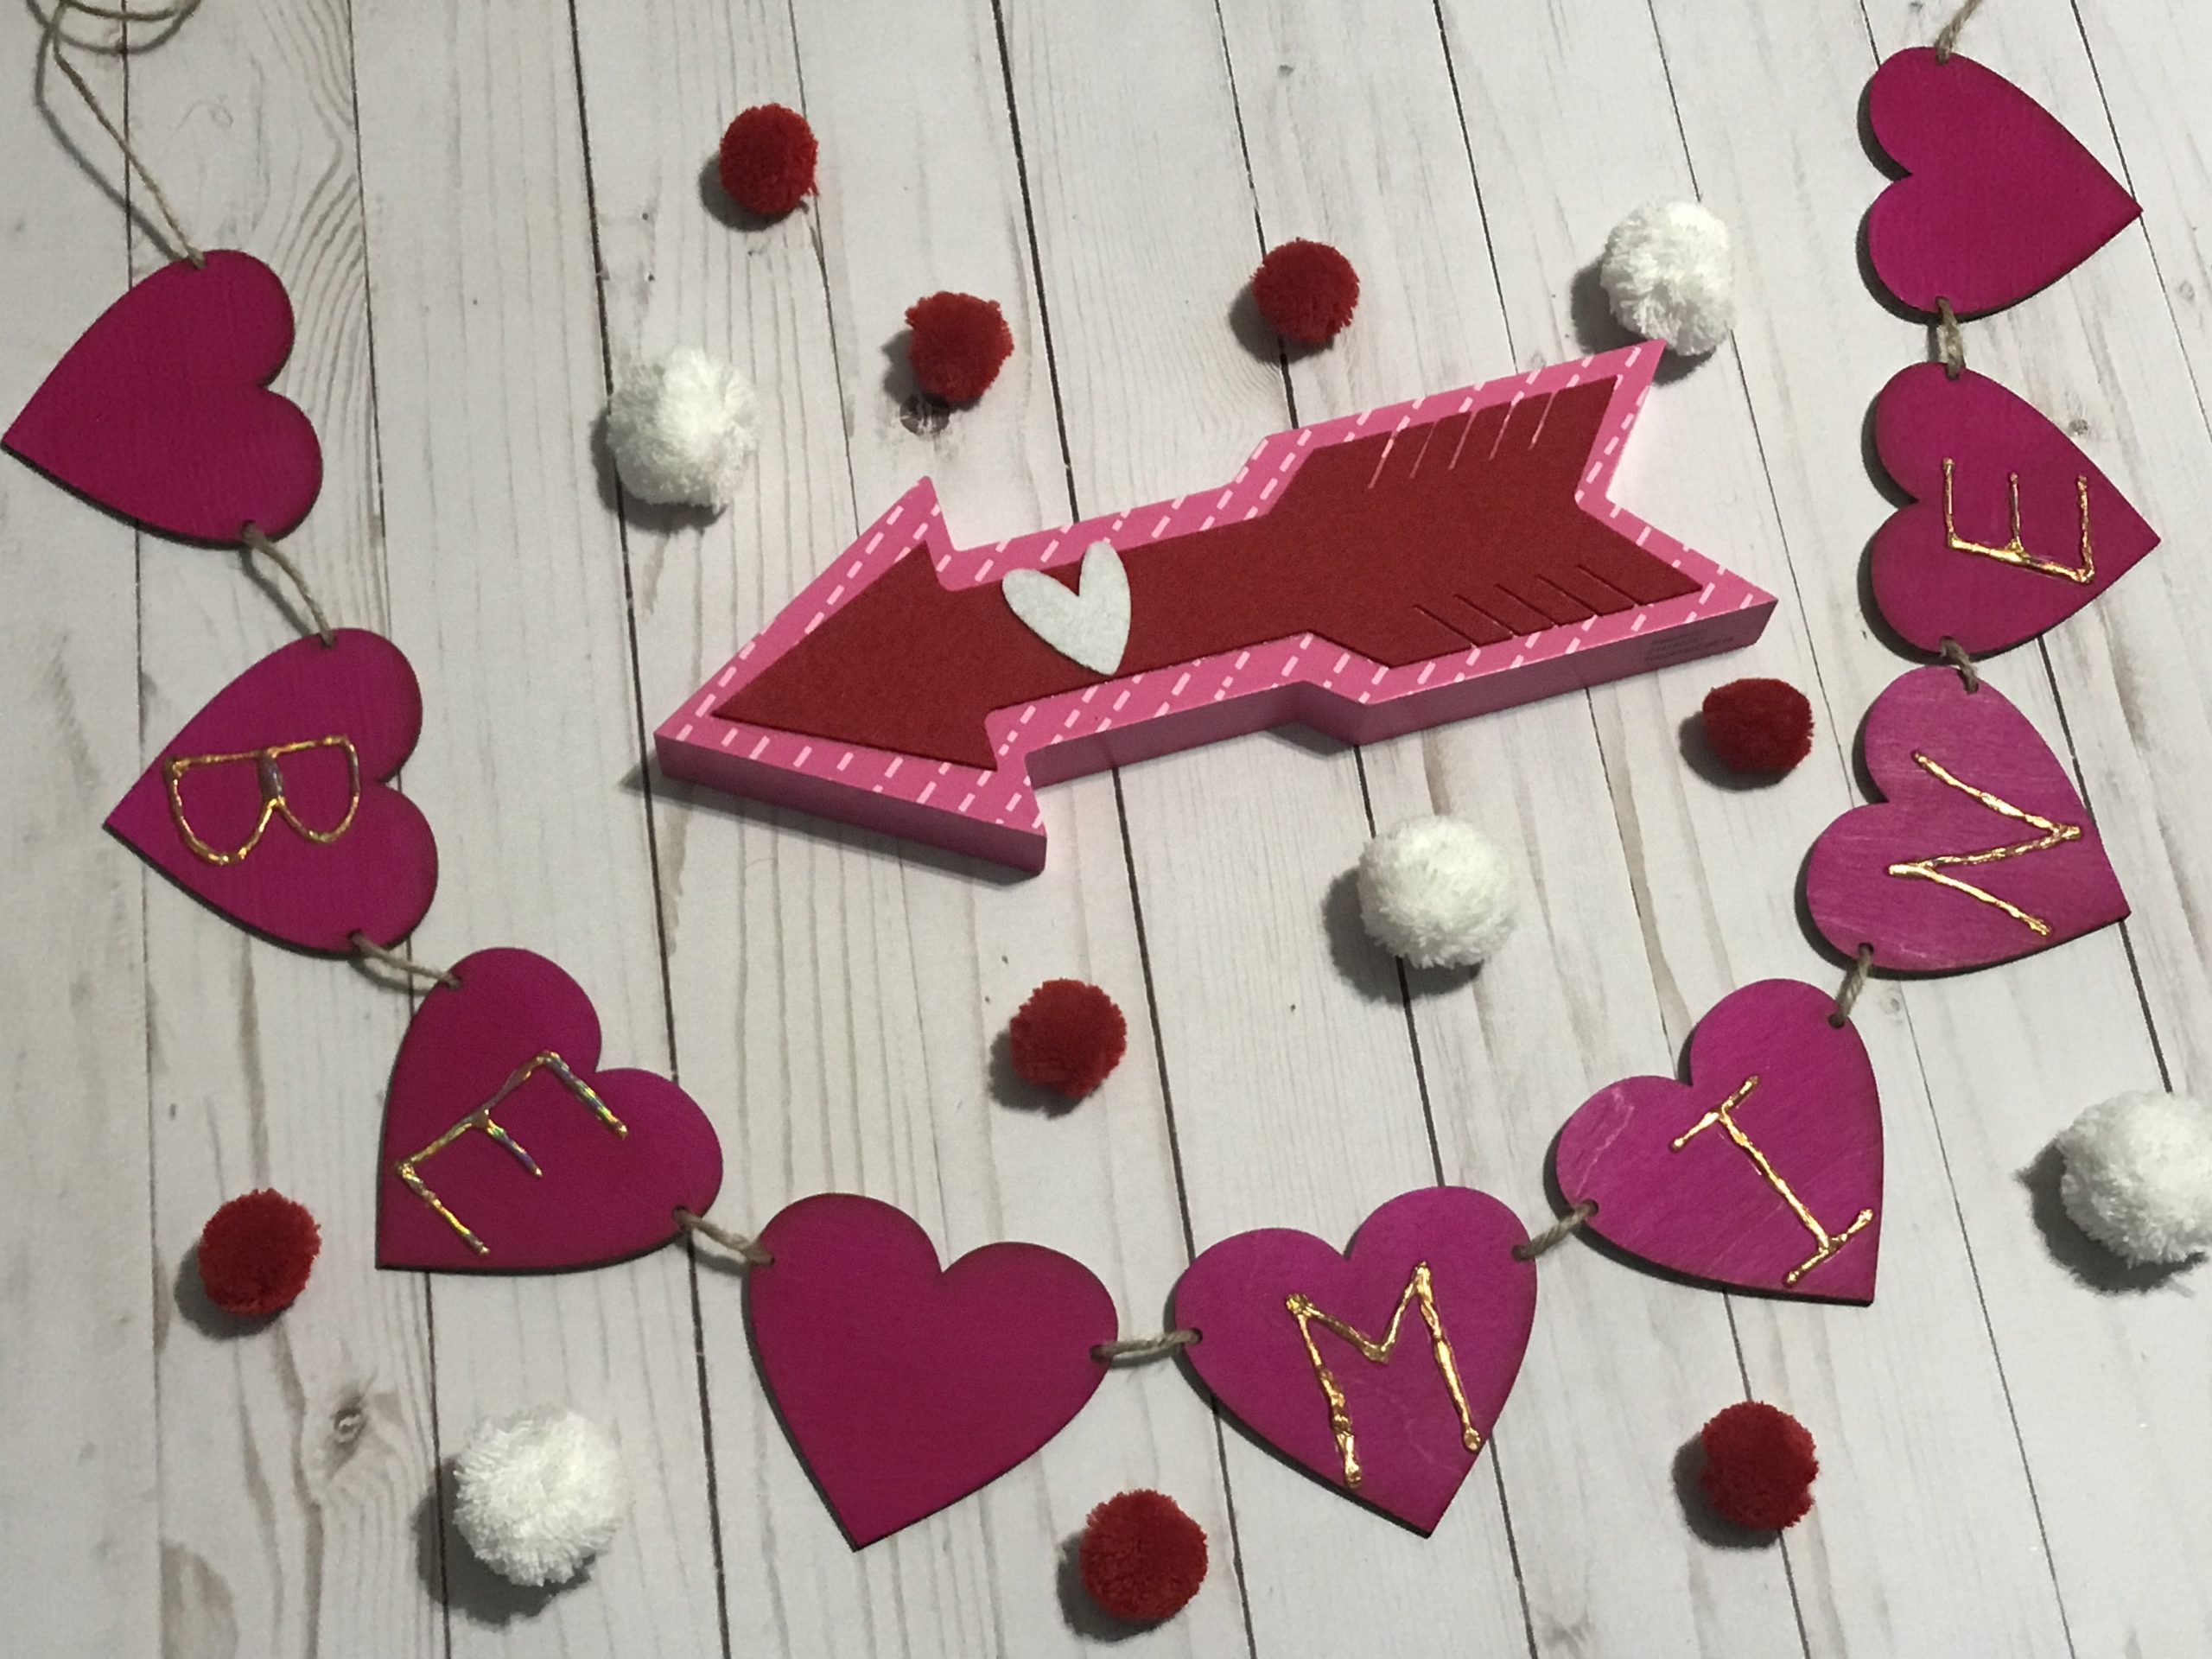
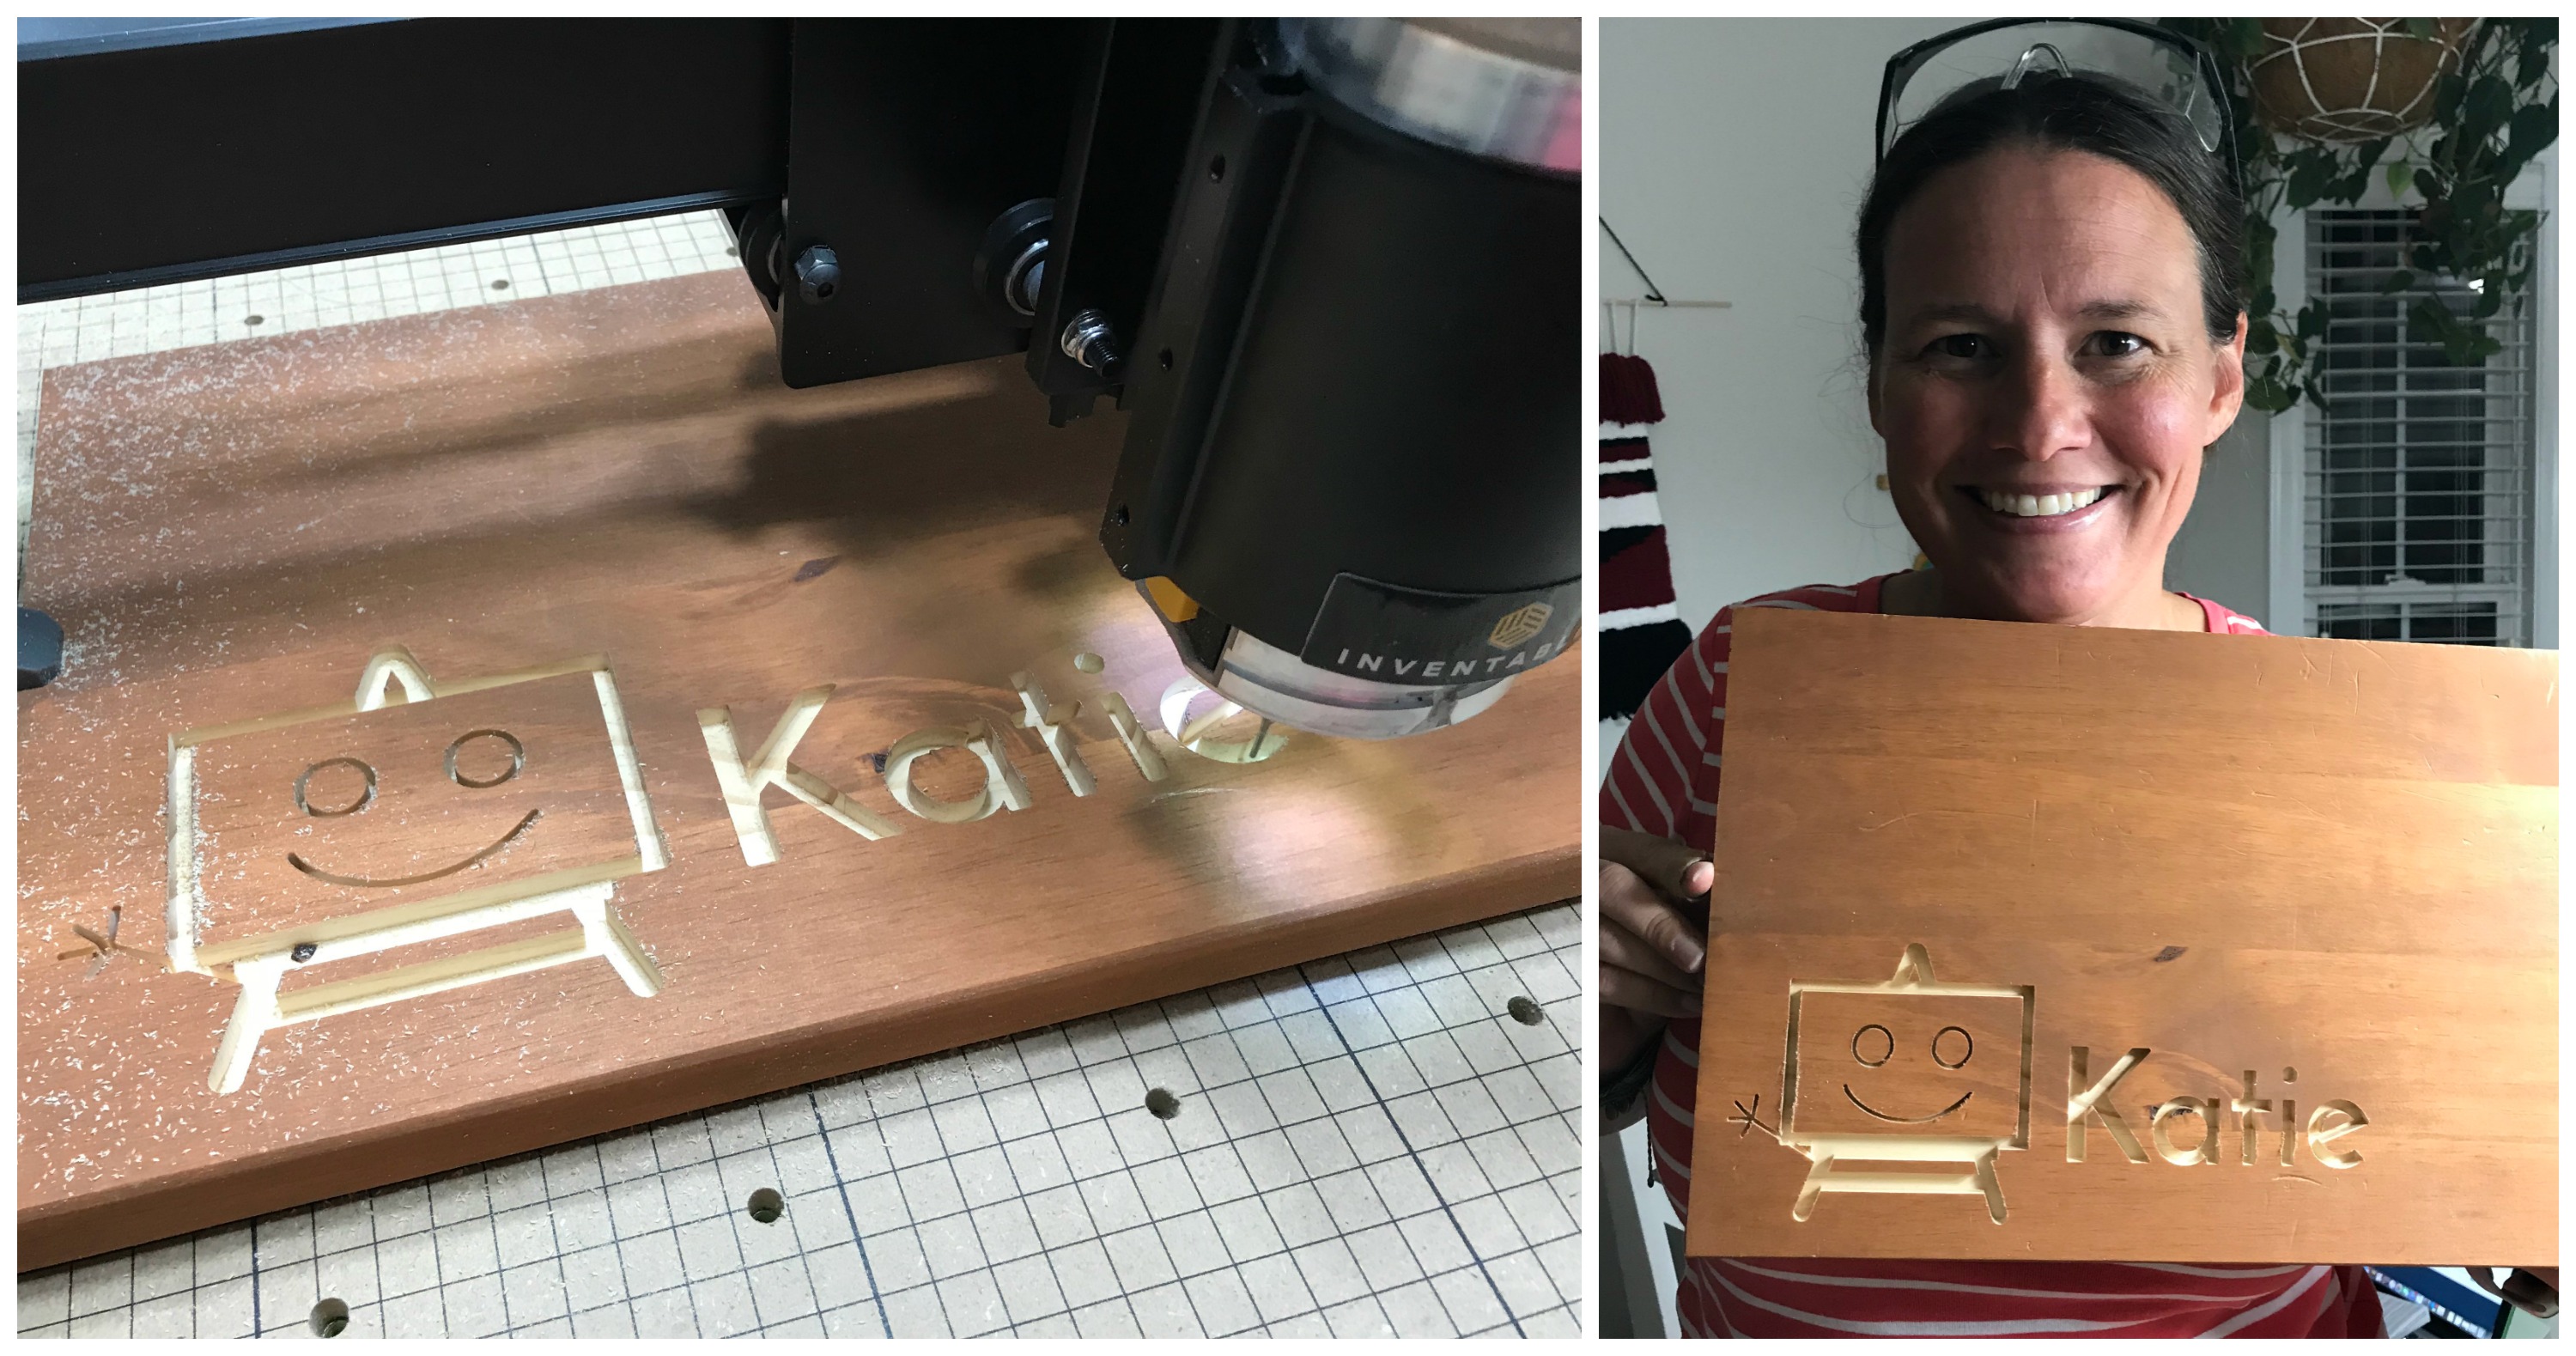
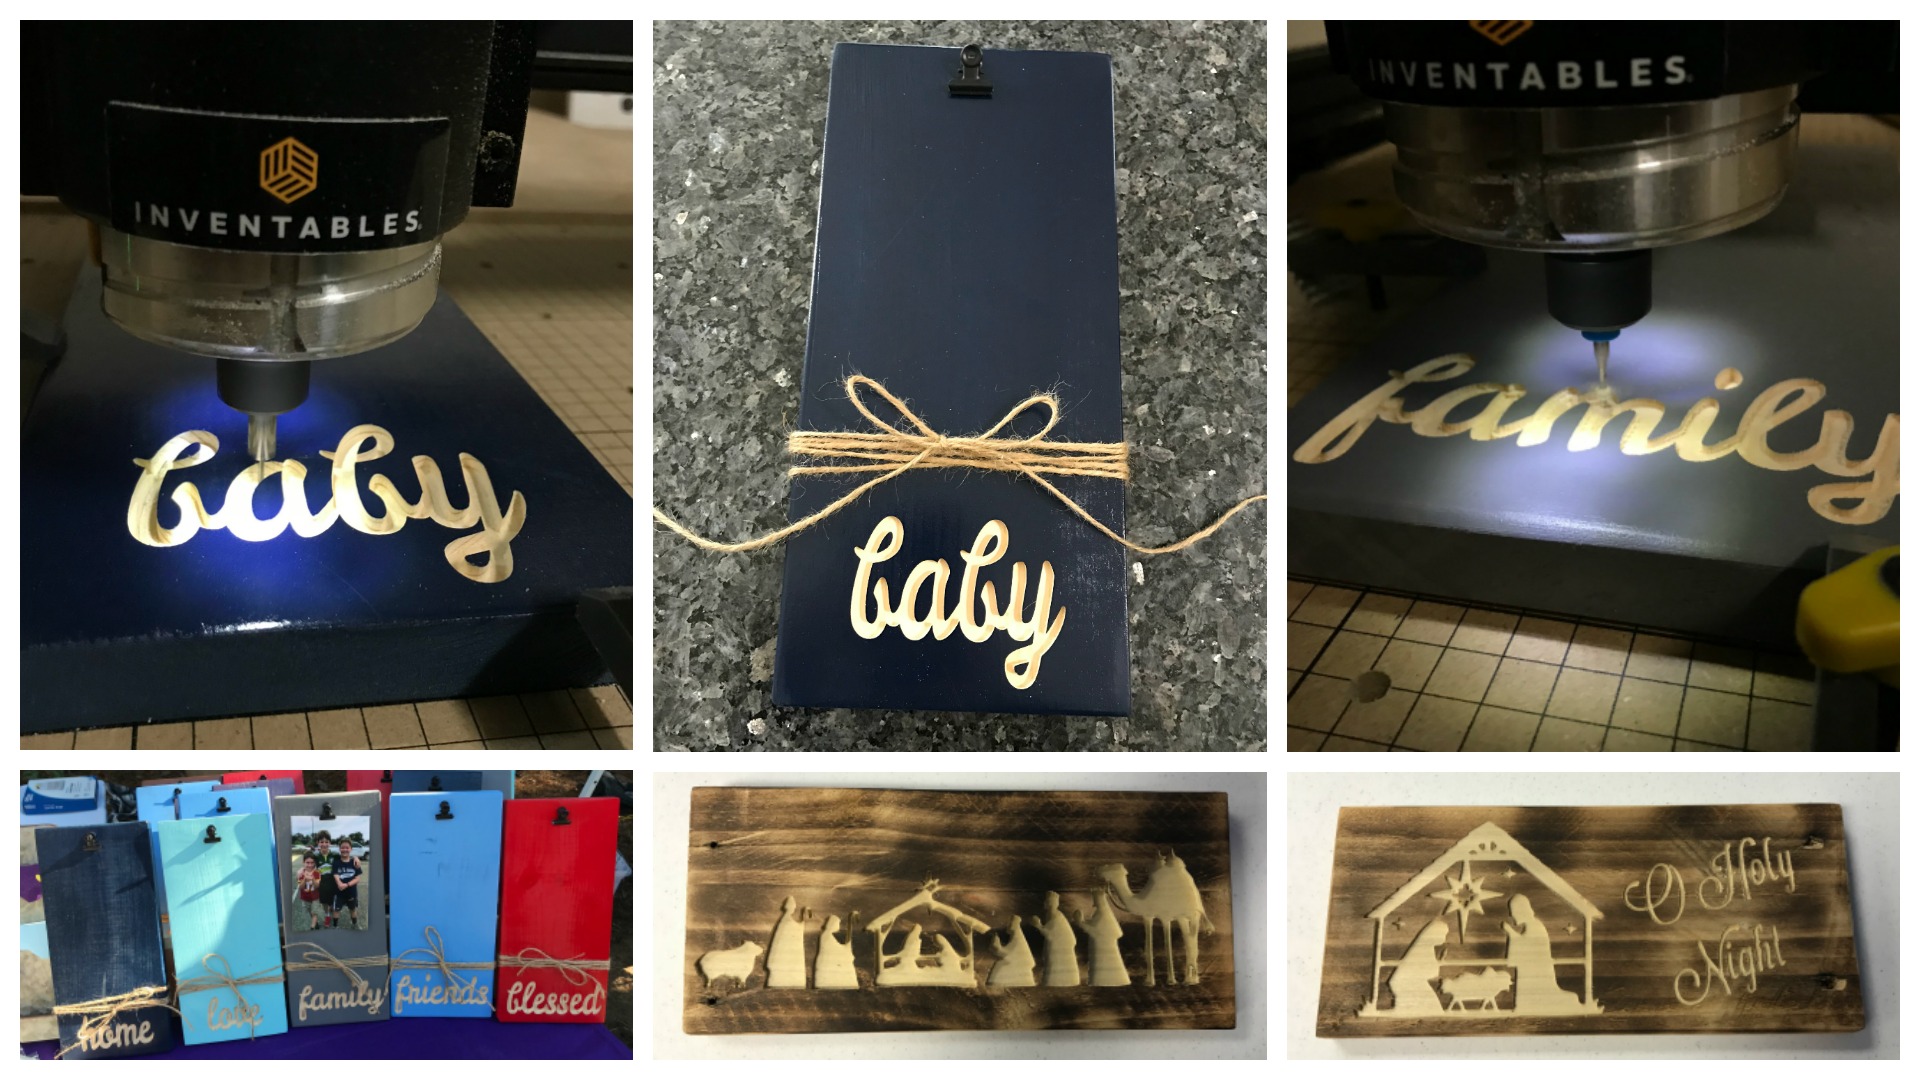
Here are a few projects that I have done and a lot of them that have sold!!!  I have lots of plans for the new year!

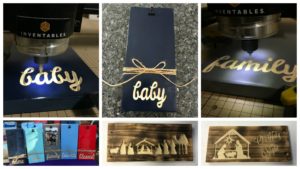
Letters, words and detailed cross ornament cut outs!

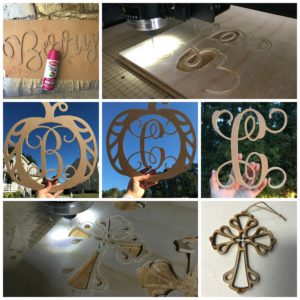
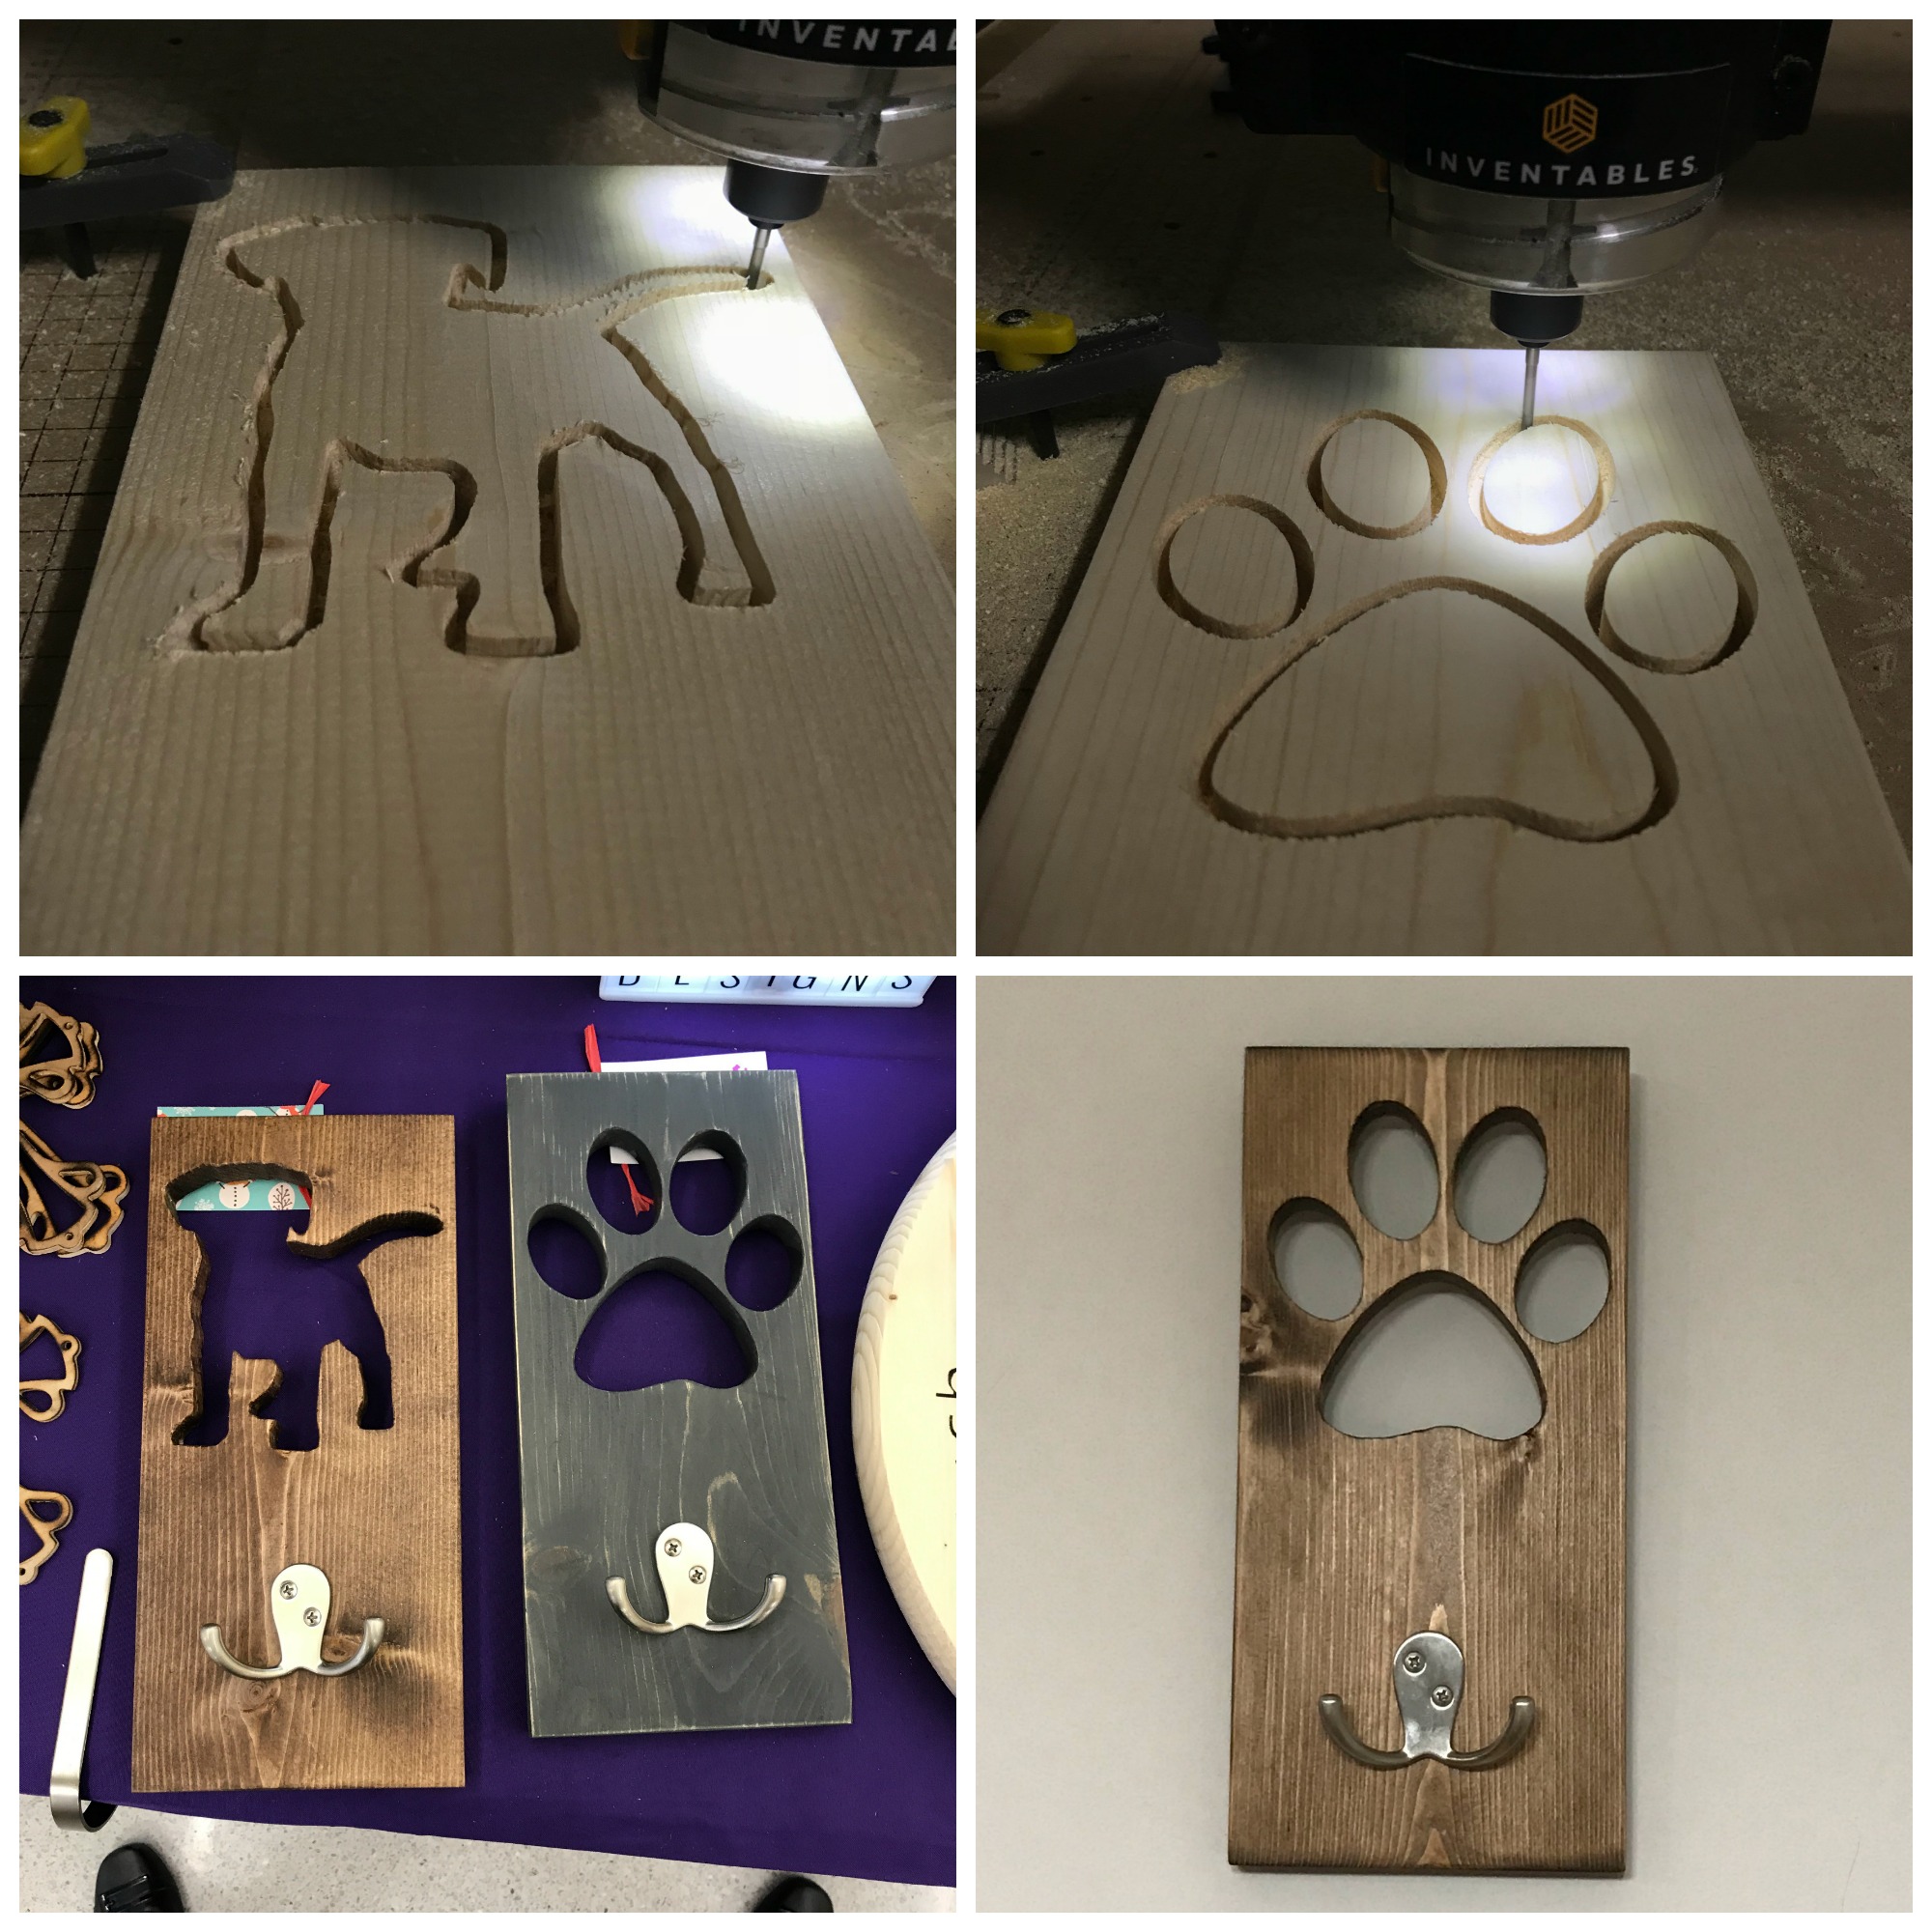
Puppy and Dog Paw cut out Leash Holders!

Christmas cut outs on a wood round!

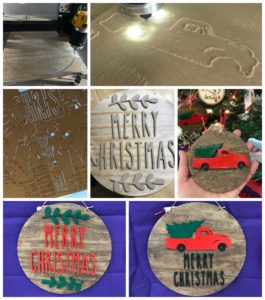
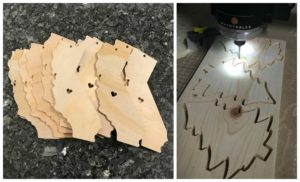
State and tree cut outs!  I’ve cut out NC, VA, CO, CA and FL.

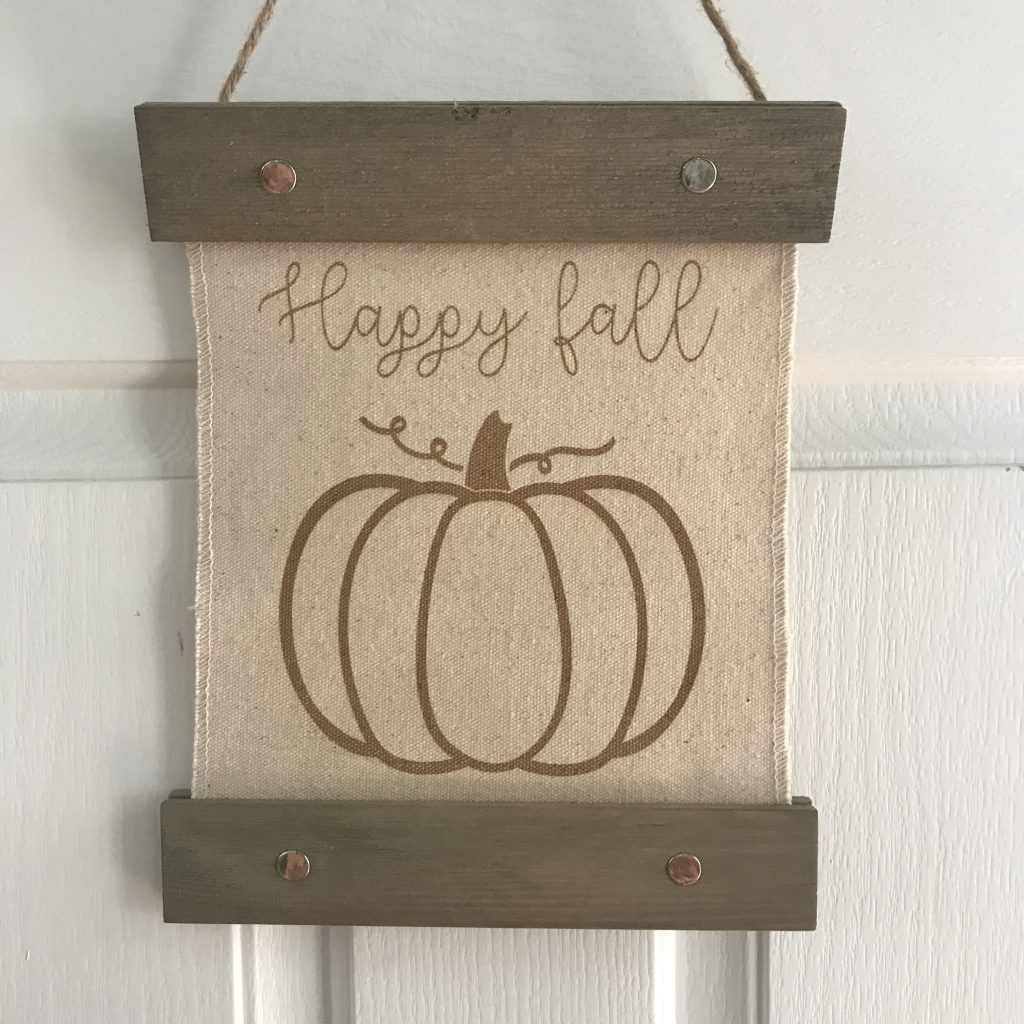
Engraved items:  Photo boards and Nativity boards

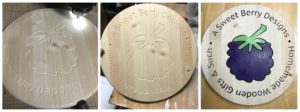
I put my logo on a store bought wood round!

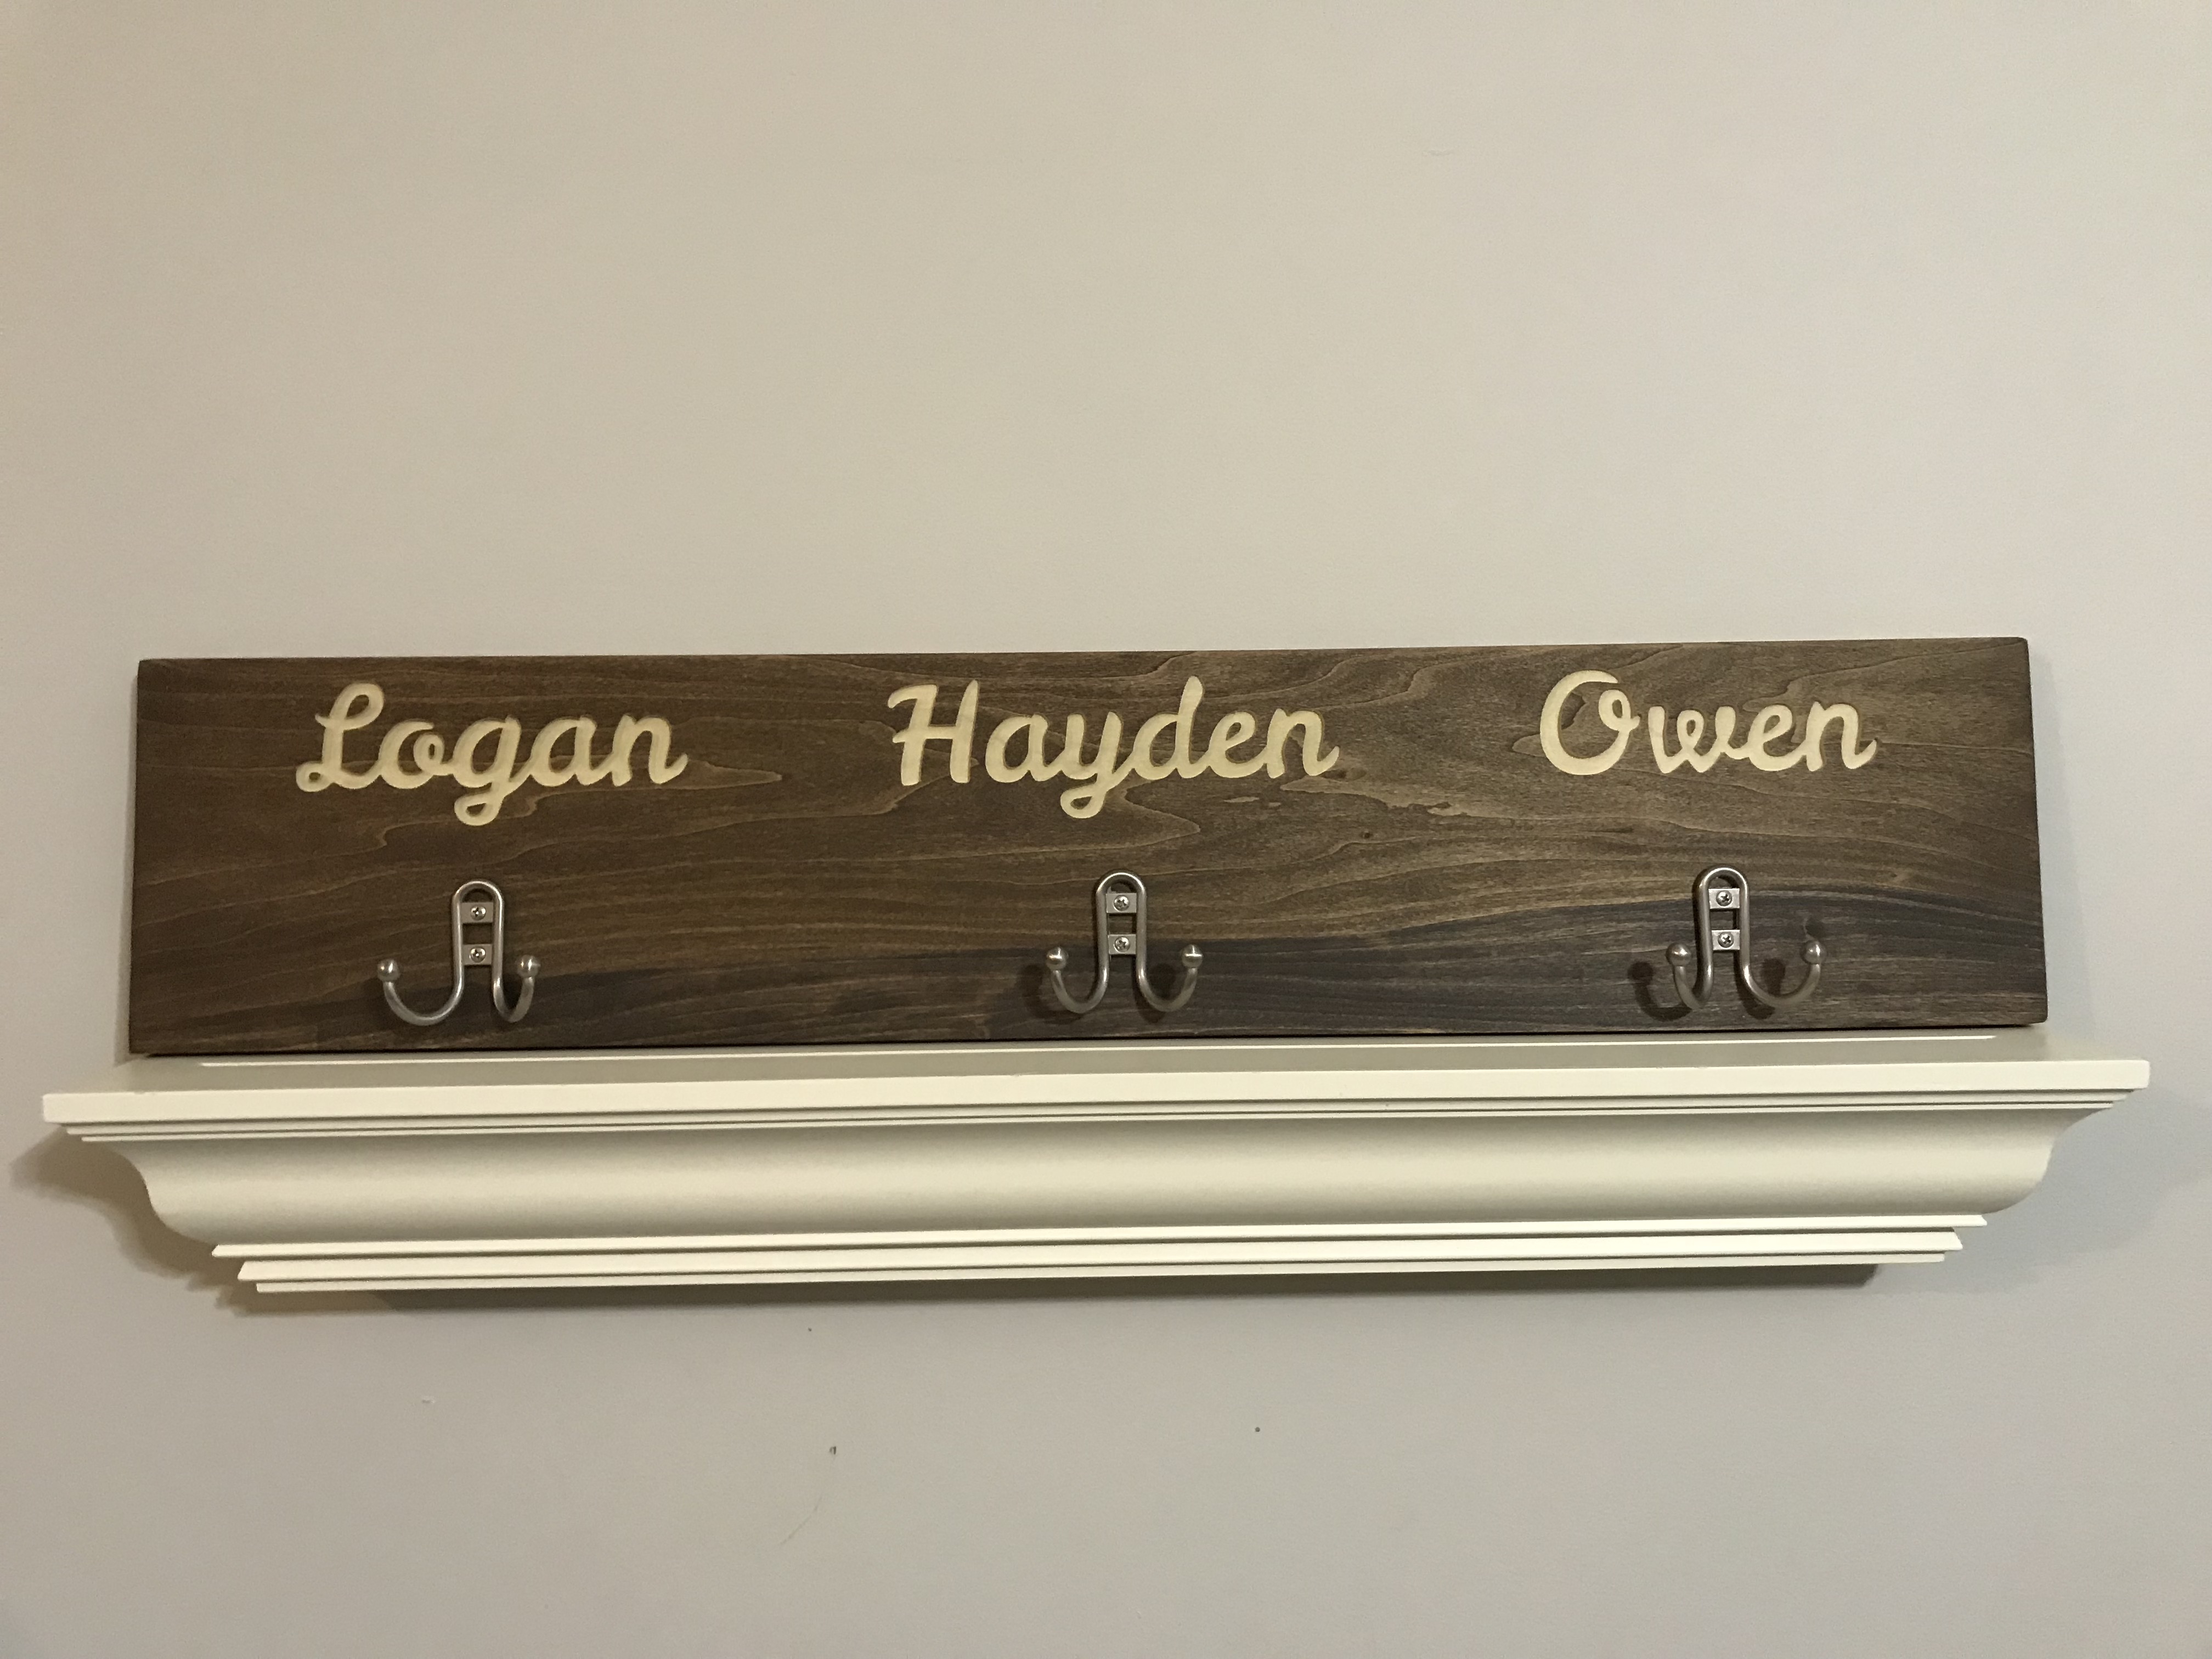
And today, on day 1 of a new year, I created……

This Personalized Backpack Holder for a friend!  She is going to hang it right by her front door so that her kids can hang their backpacks up as soon as they walk in the door!  I sat and watched the names being engraved the entire time.  It’s very mesmerizing and therapeutic!  

2018 was fun, but 2019 is going to be an awesome year!  I definitely hope to blog a little more in the new year!   I’m also working to add items to my Etsy shop!!

So, if there is anything that you think you might want carved or engraved and made, let me know and I can tell you what the possibilities are!!!

Well, until next time……


Freedom Felt Banner

Disclosure:  This post contains affiliate links for Sizzix.com

It’s Craft Lightning time again and this one is Patriotic Crafts!  This Freedom Felt Banner was super easy and took barely anytime to make!   And I love a cute seasonal banner!
Materials:


How to make it:

  1.  Using the die cutting machine, cutting pads and dies, cut out each of your pieces!  I cut seven bookmarks, seven badges and the letters to spell Freedom.  I used the rectangular badge because I thought it looked like a burst from a firework!
  2. Assemble your pieces so that you know where your want to glue them!  
  3. Glue your pieces and buttons to the bookmark.
  4. Let dry!
  5. Using twine and small clothespins, hang them up to create a patriotic felt banner! Easy Peasy!!!   Now I have a banner for Memorial Day as well as the 4th of July!  Hope you like this Craft Lightning project!   Be sure to click the photo below and check out other Patriotic Craft Lightning projects!


Kunin Felt Welcome Banner

Spring is just days away and it’s time to change out the winter front door decor to something bright and Springy!!!!   Check out this adorable Welcome Banner I made for my front door!  Be sure to CLICK HERE (or the photo) to find out how I made this banner using products from Kunin Felt Group!!!!


Initial Cork Boards

Sometimes cork boards can look boring and blah.  I decided to brighten them up!  These Initial Cork Boards were super easy and turned out super cool!

Complete
Materials:
4 Cork Tiles
Letter Stencils
Exact-o Knife
Pins to hold the letters in place
Spray Paint
Command Strips
cutting
Using my Sizzix Eclips2, I cut out the letters “K” and “B”.  Using pins, I placed my letters on the cork boards.  Then, I used an Exact-o Knife to cut the letters out.
painting
I chose two different colors of Krylon and spray painted the boards.  Krylon is by far my favorite brand of spray paint and these two colors are from the 2015 color palette!  
hot glue
Once my boards were dry, I used my hot glue gun to glue the letter boards to the solid ones.  Then I attached a Command Strip to the back and hung them on the wall.
command strip
These cork boards added a nice pop of color to my workspace!  Hope you like!

Until next time……