Tag Archives: Banner

Quick Be Mine Valentine Banner

Woah! Valentine’s Day is coming up quick and an easy Be Mine banner is the perfect addition to your decor. You can get heart cut outs of wood or even felt and make this banner! I just happened to make my hearts on the Glowforge and I’m using Therm O Web’s deco foil® to decorate it!
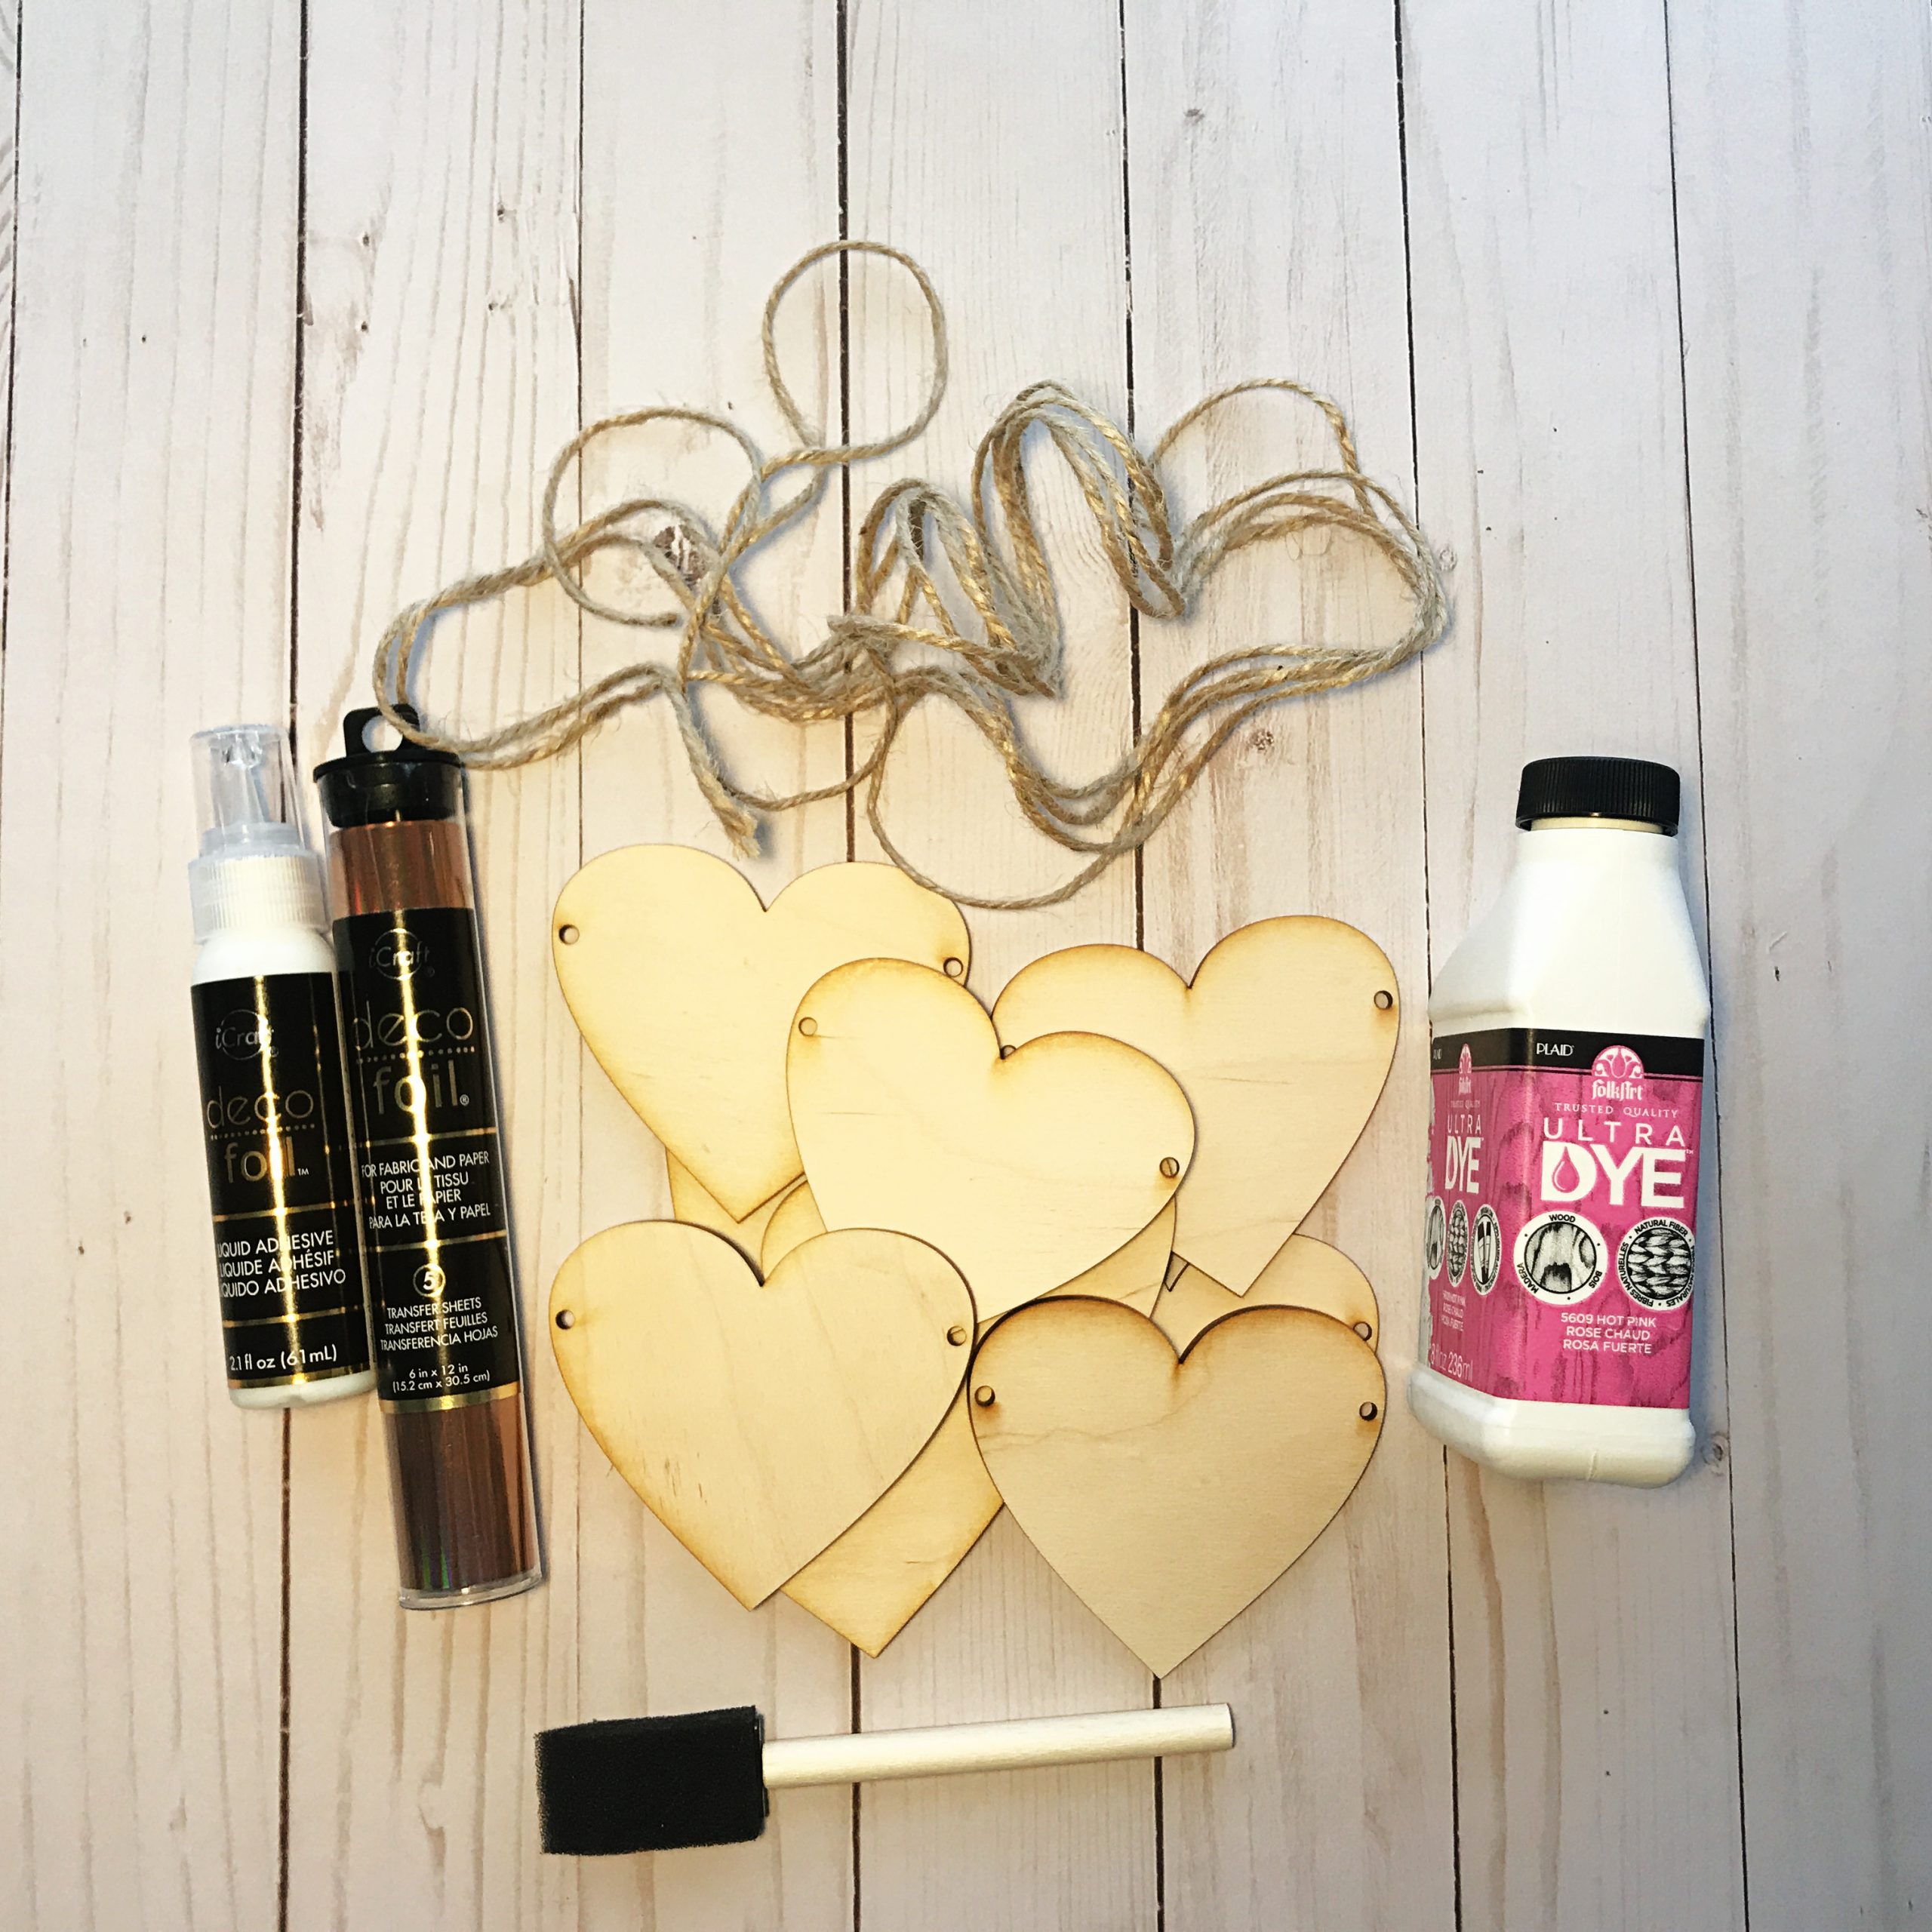
Materials I used:


How I made it:

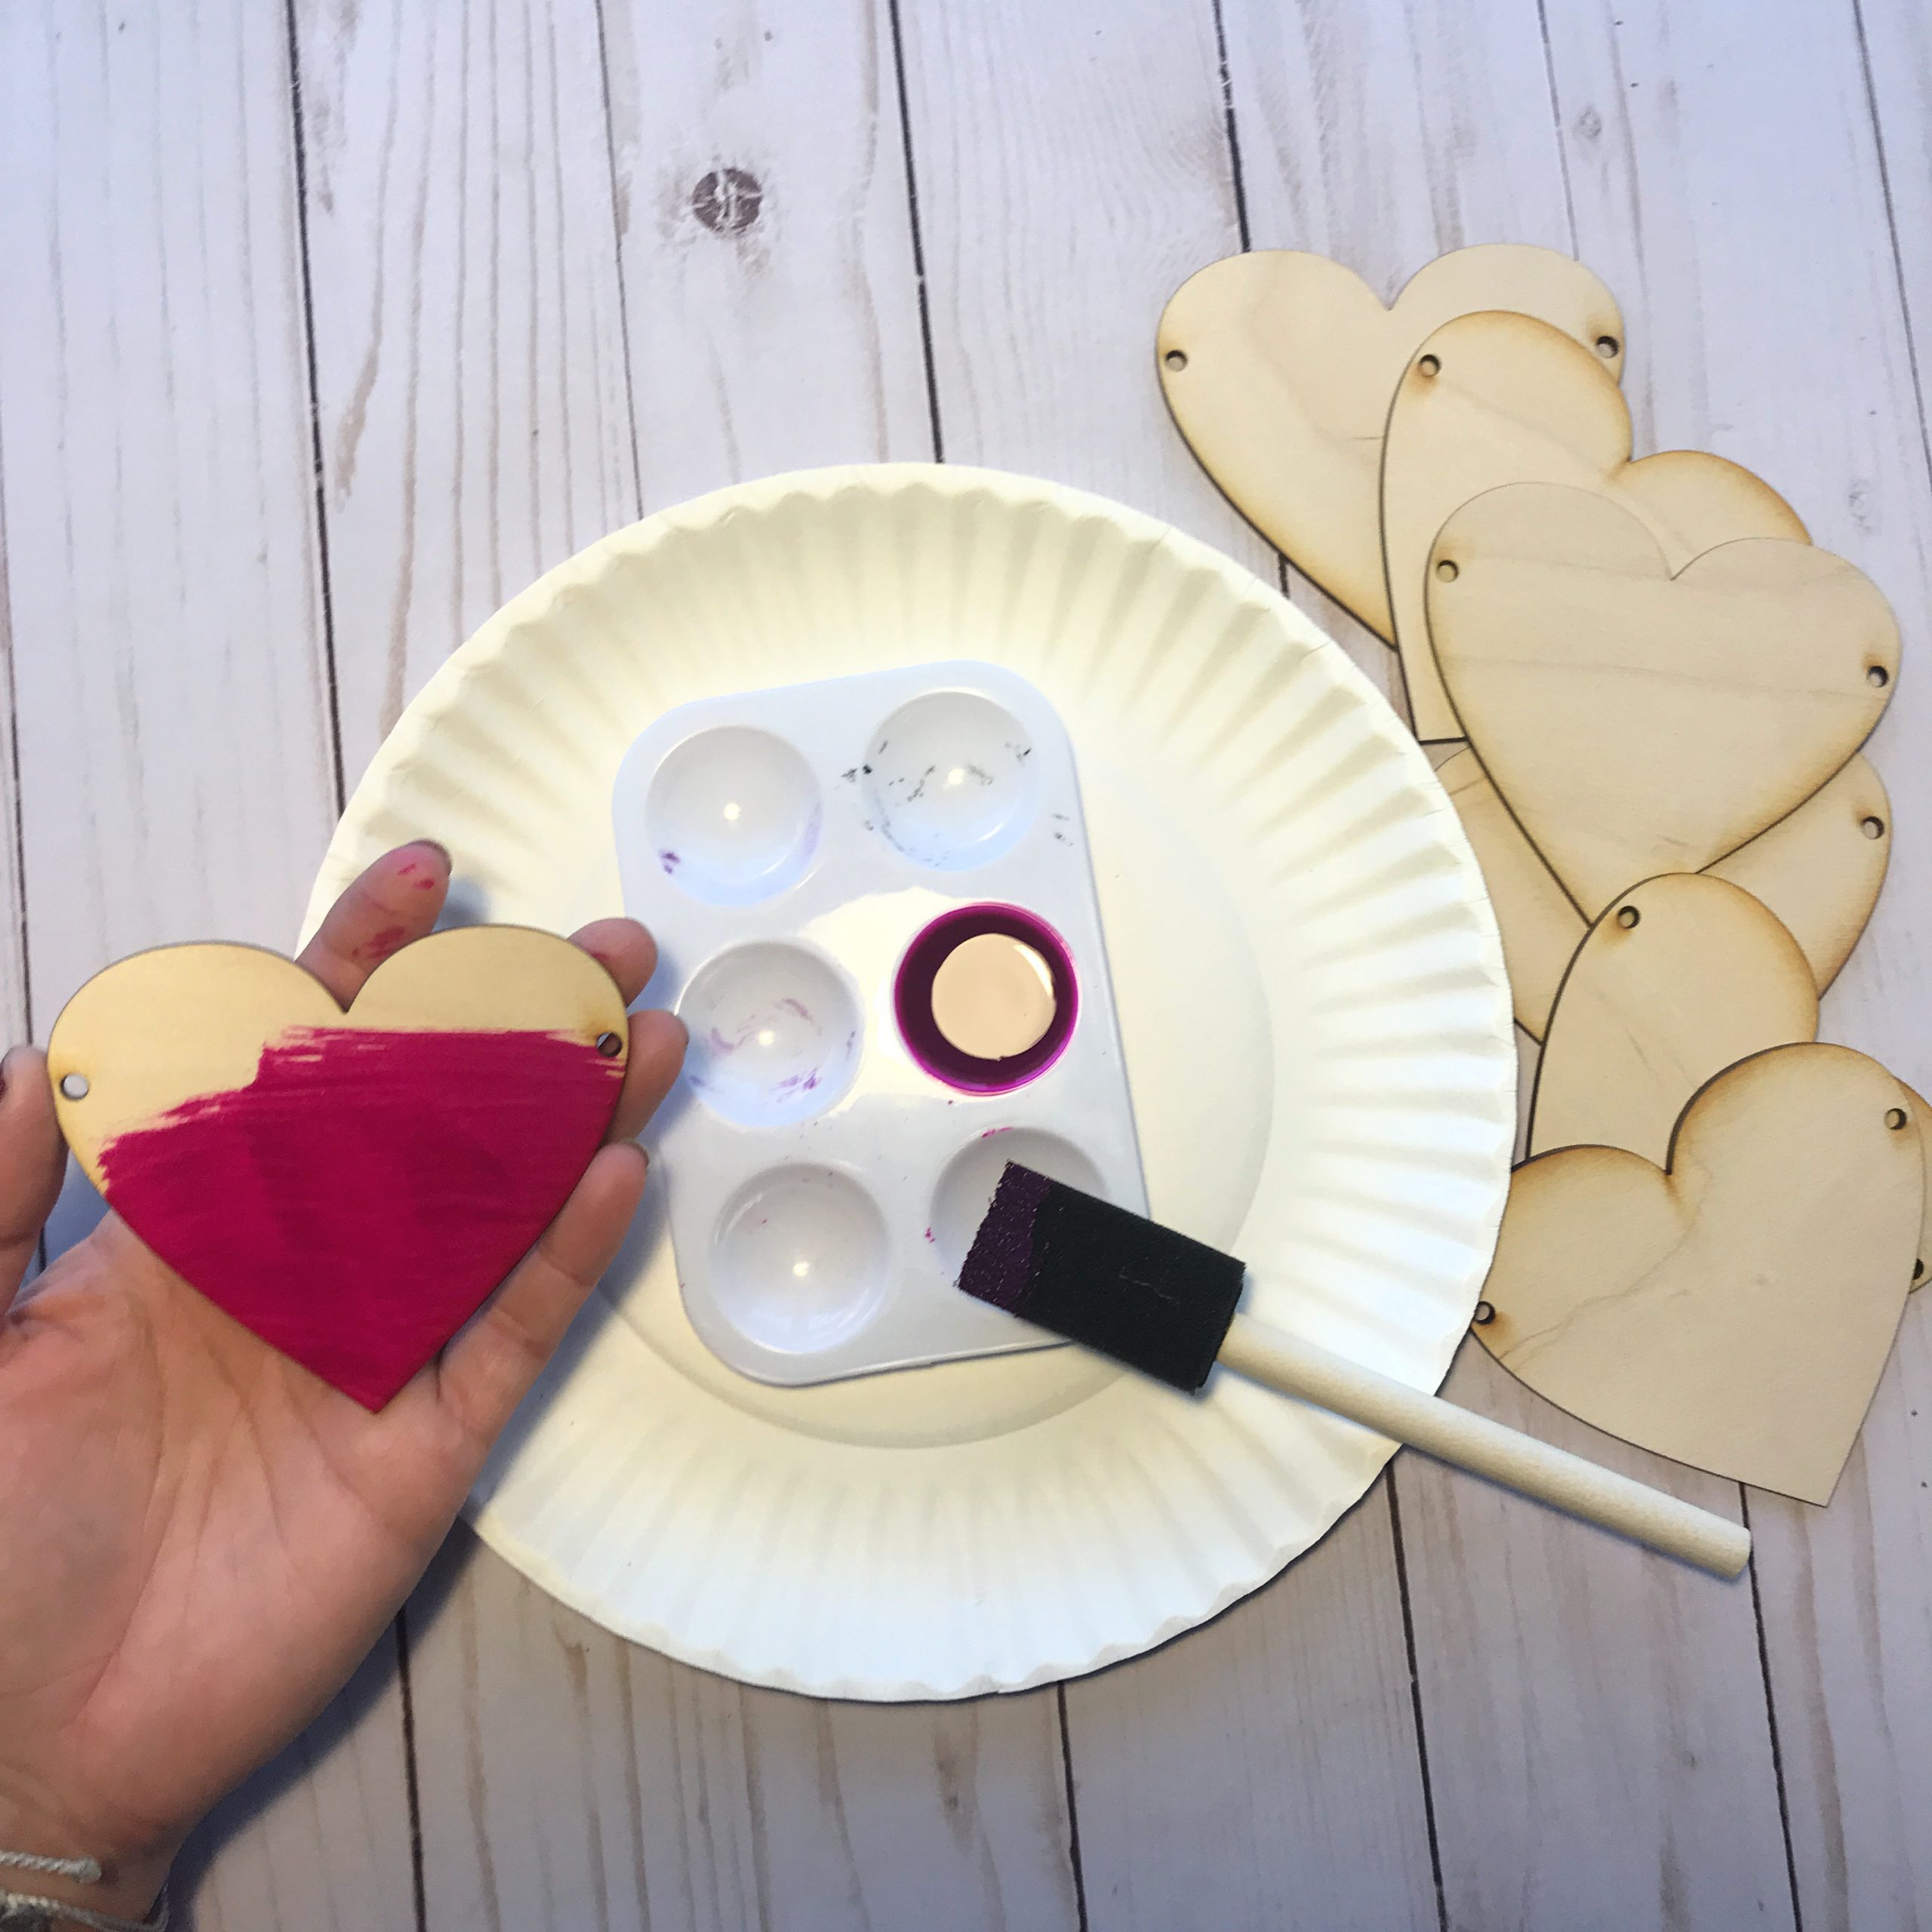
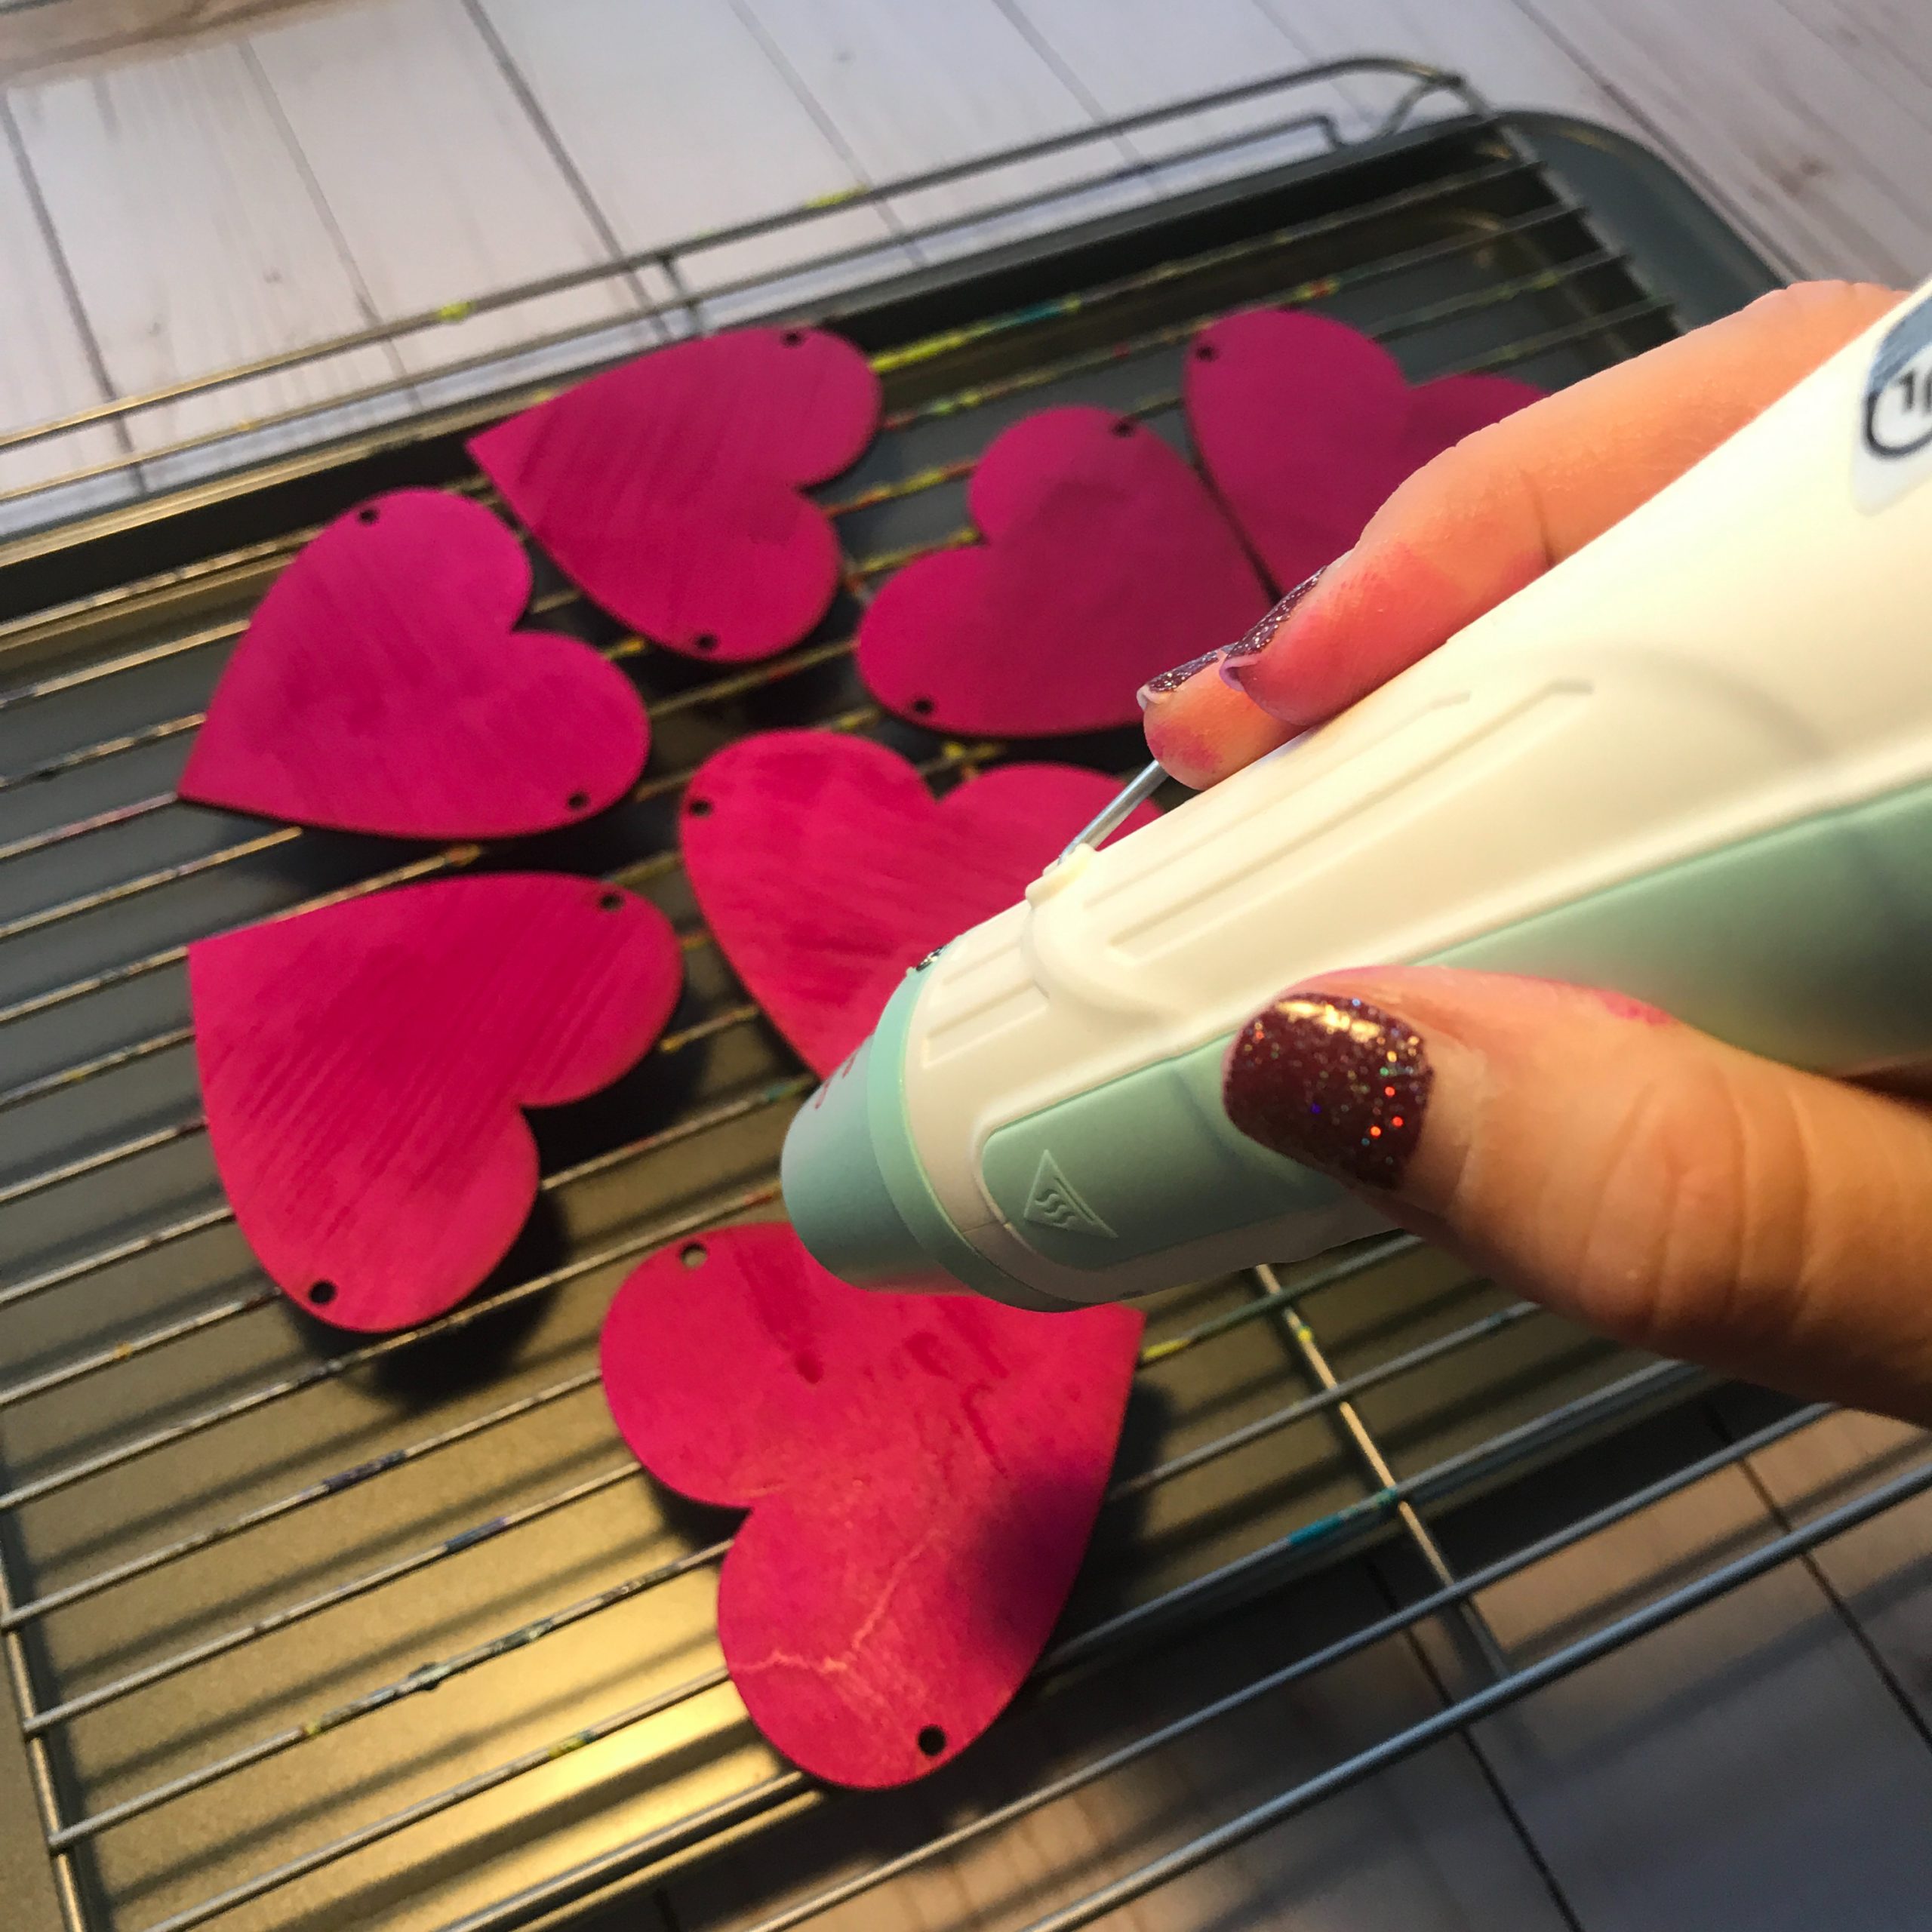
  1. I painted the hearts with the dye. And let it dry. TIP: I used a heat gun to help the drying process go a little faster!

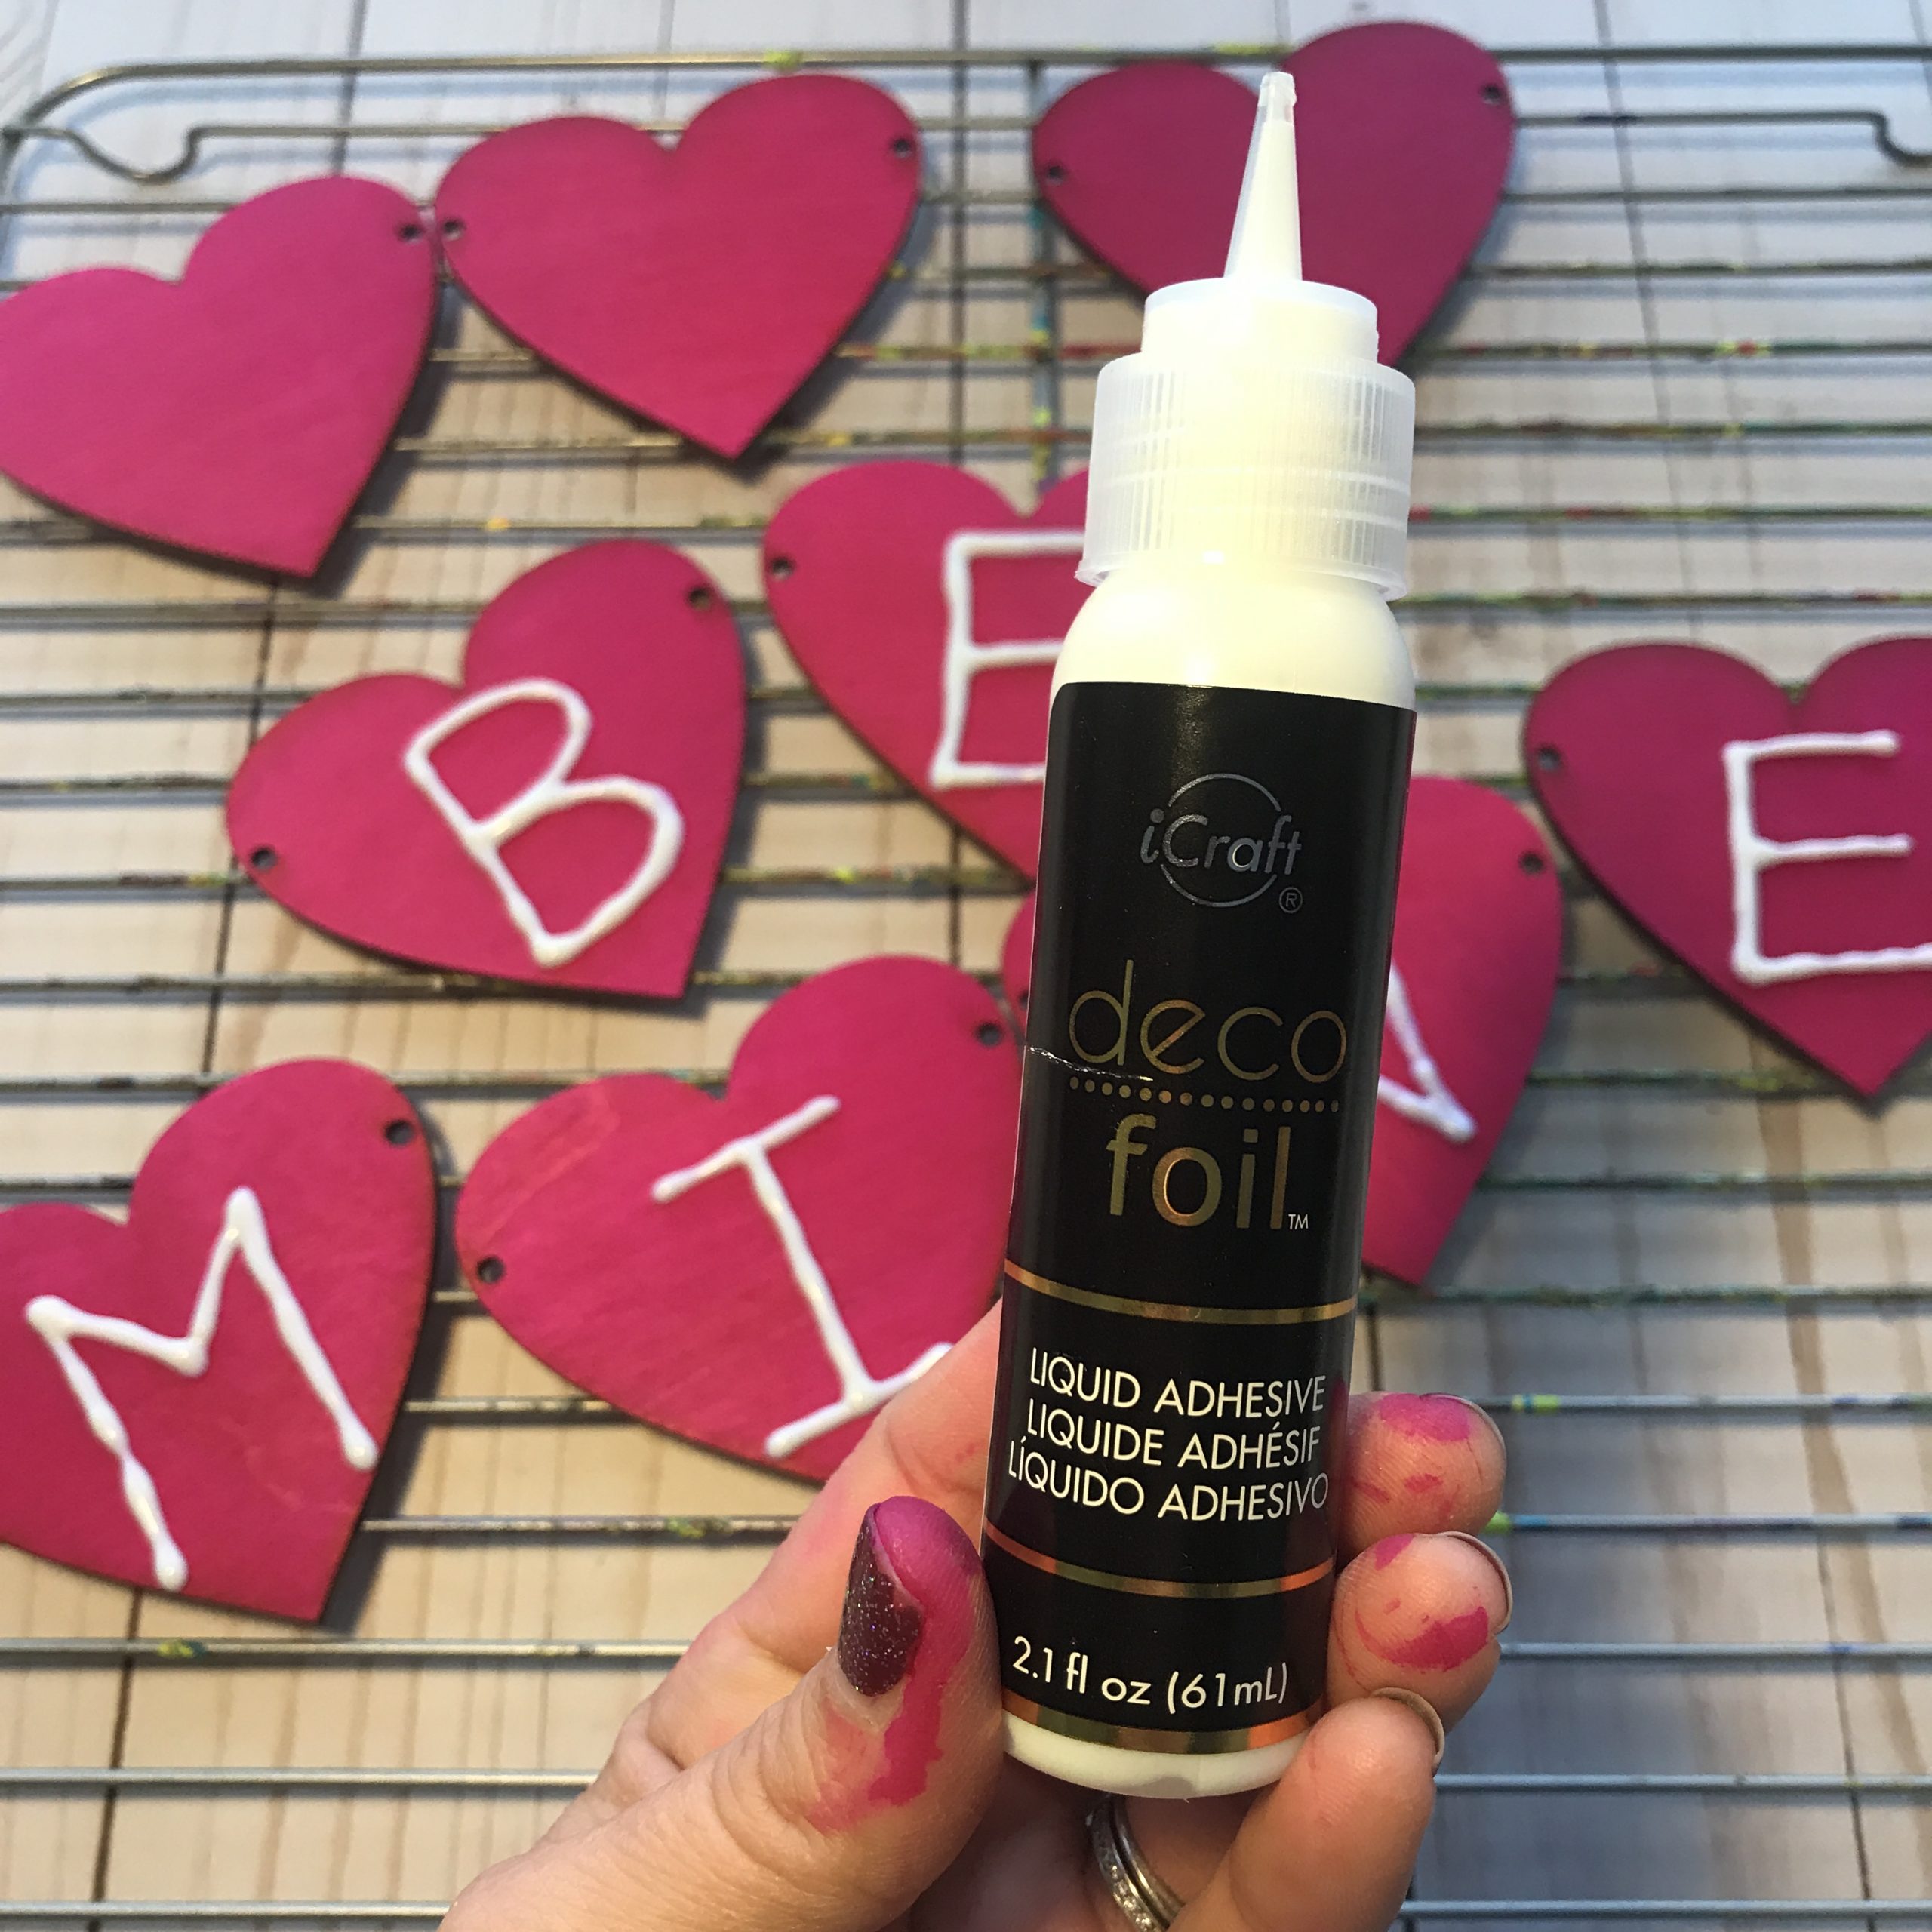
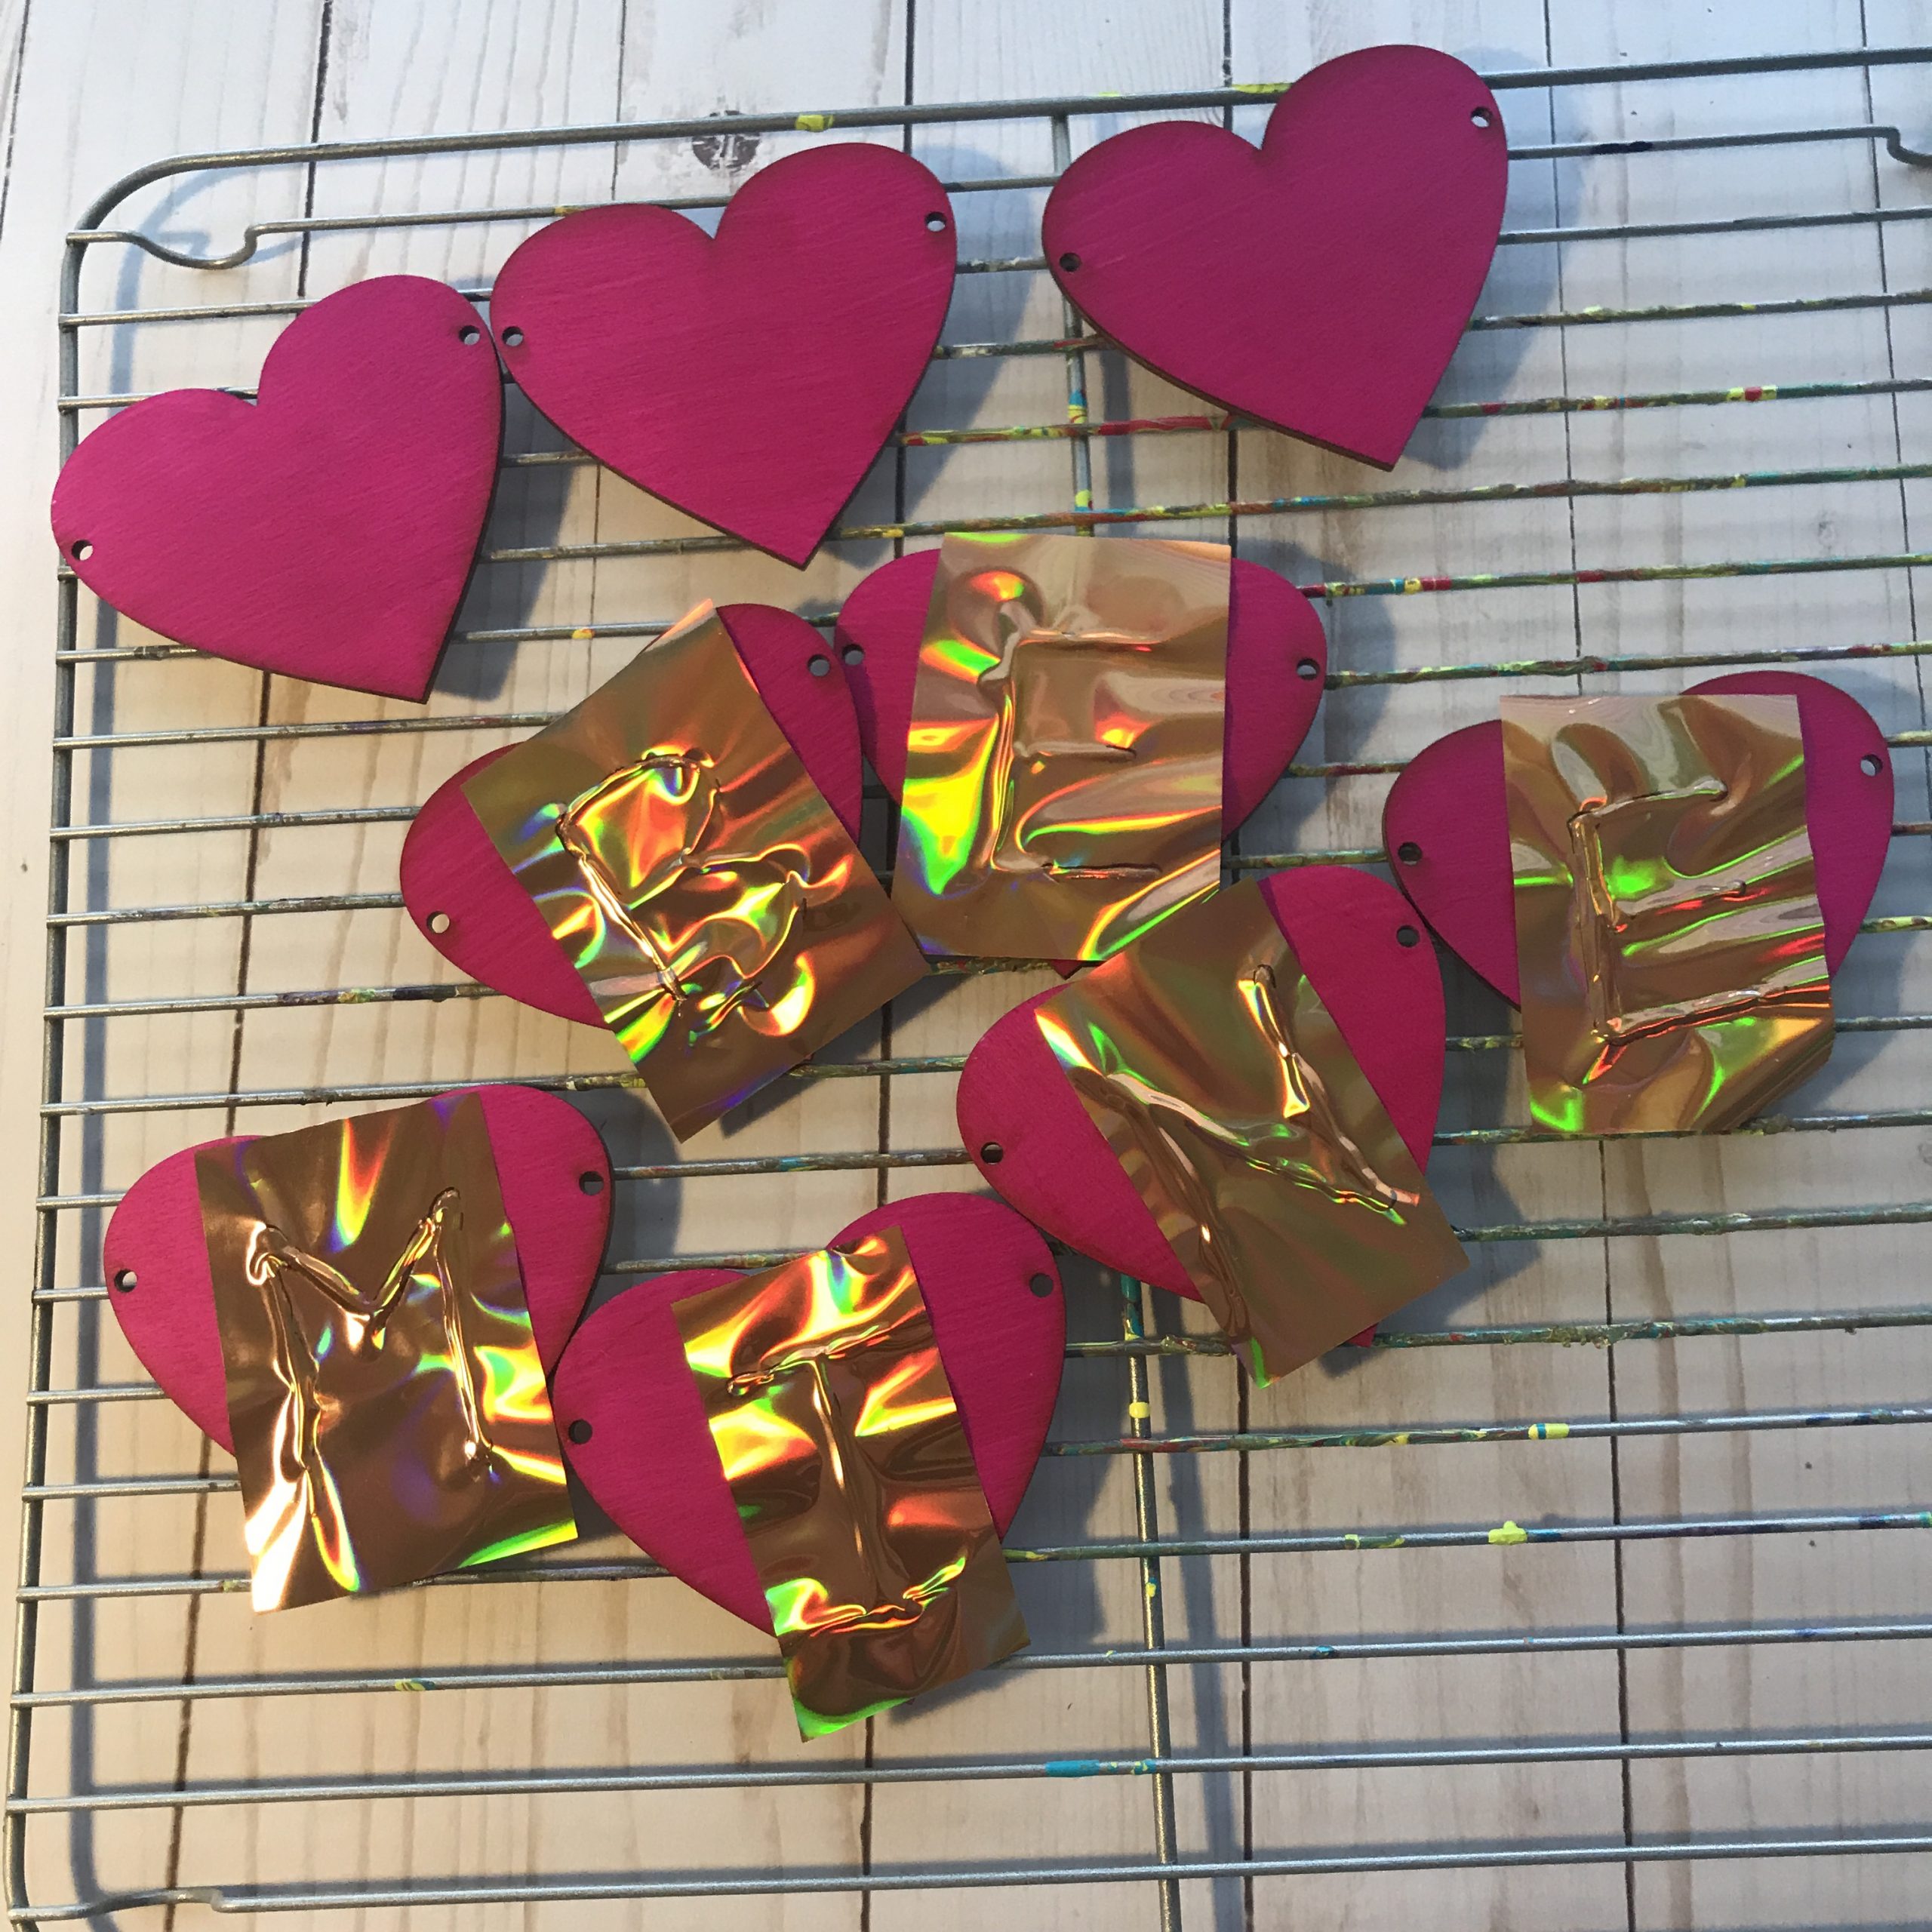
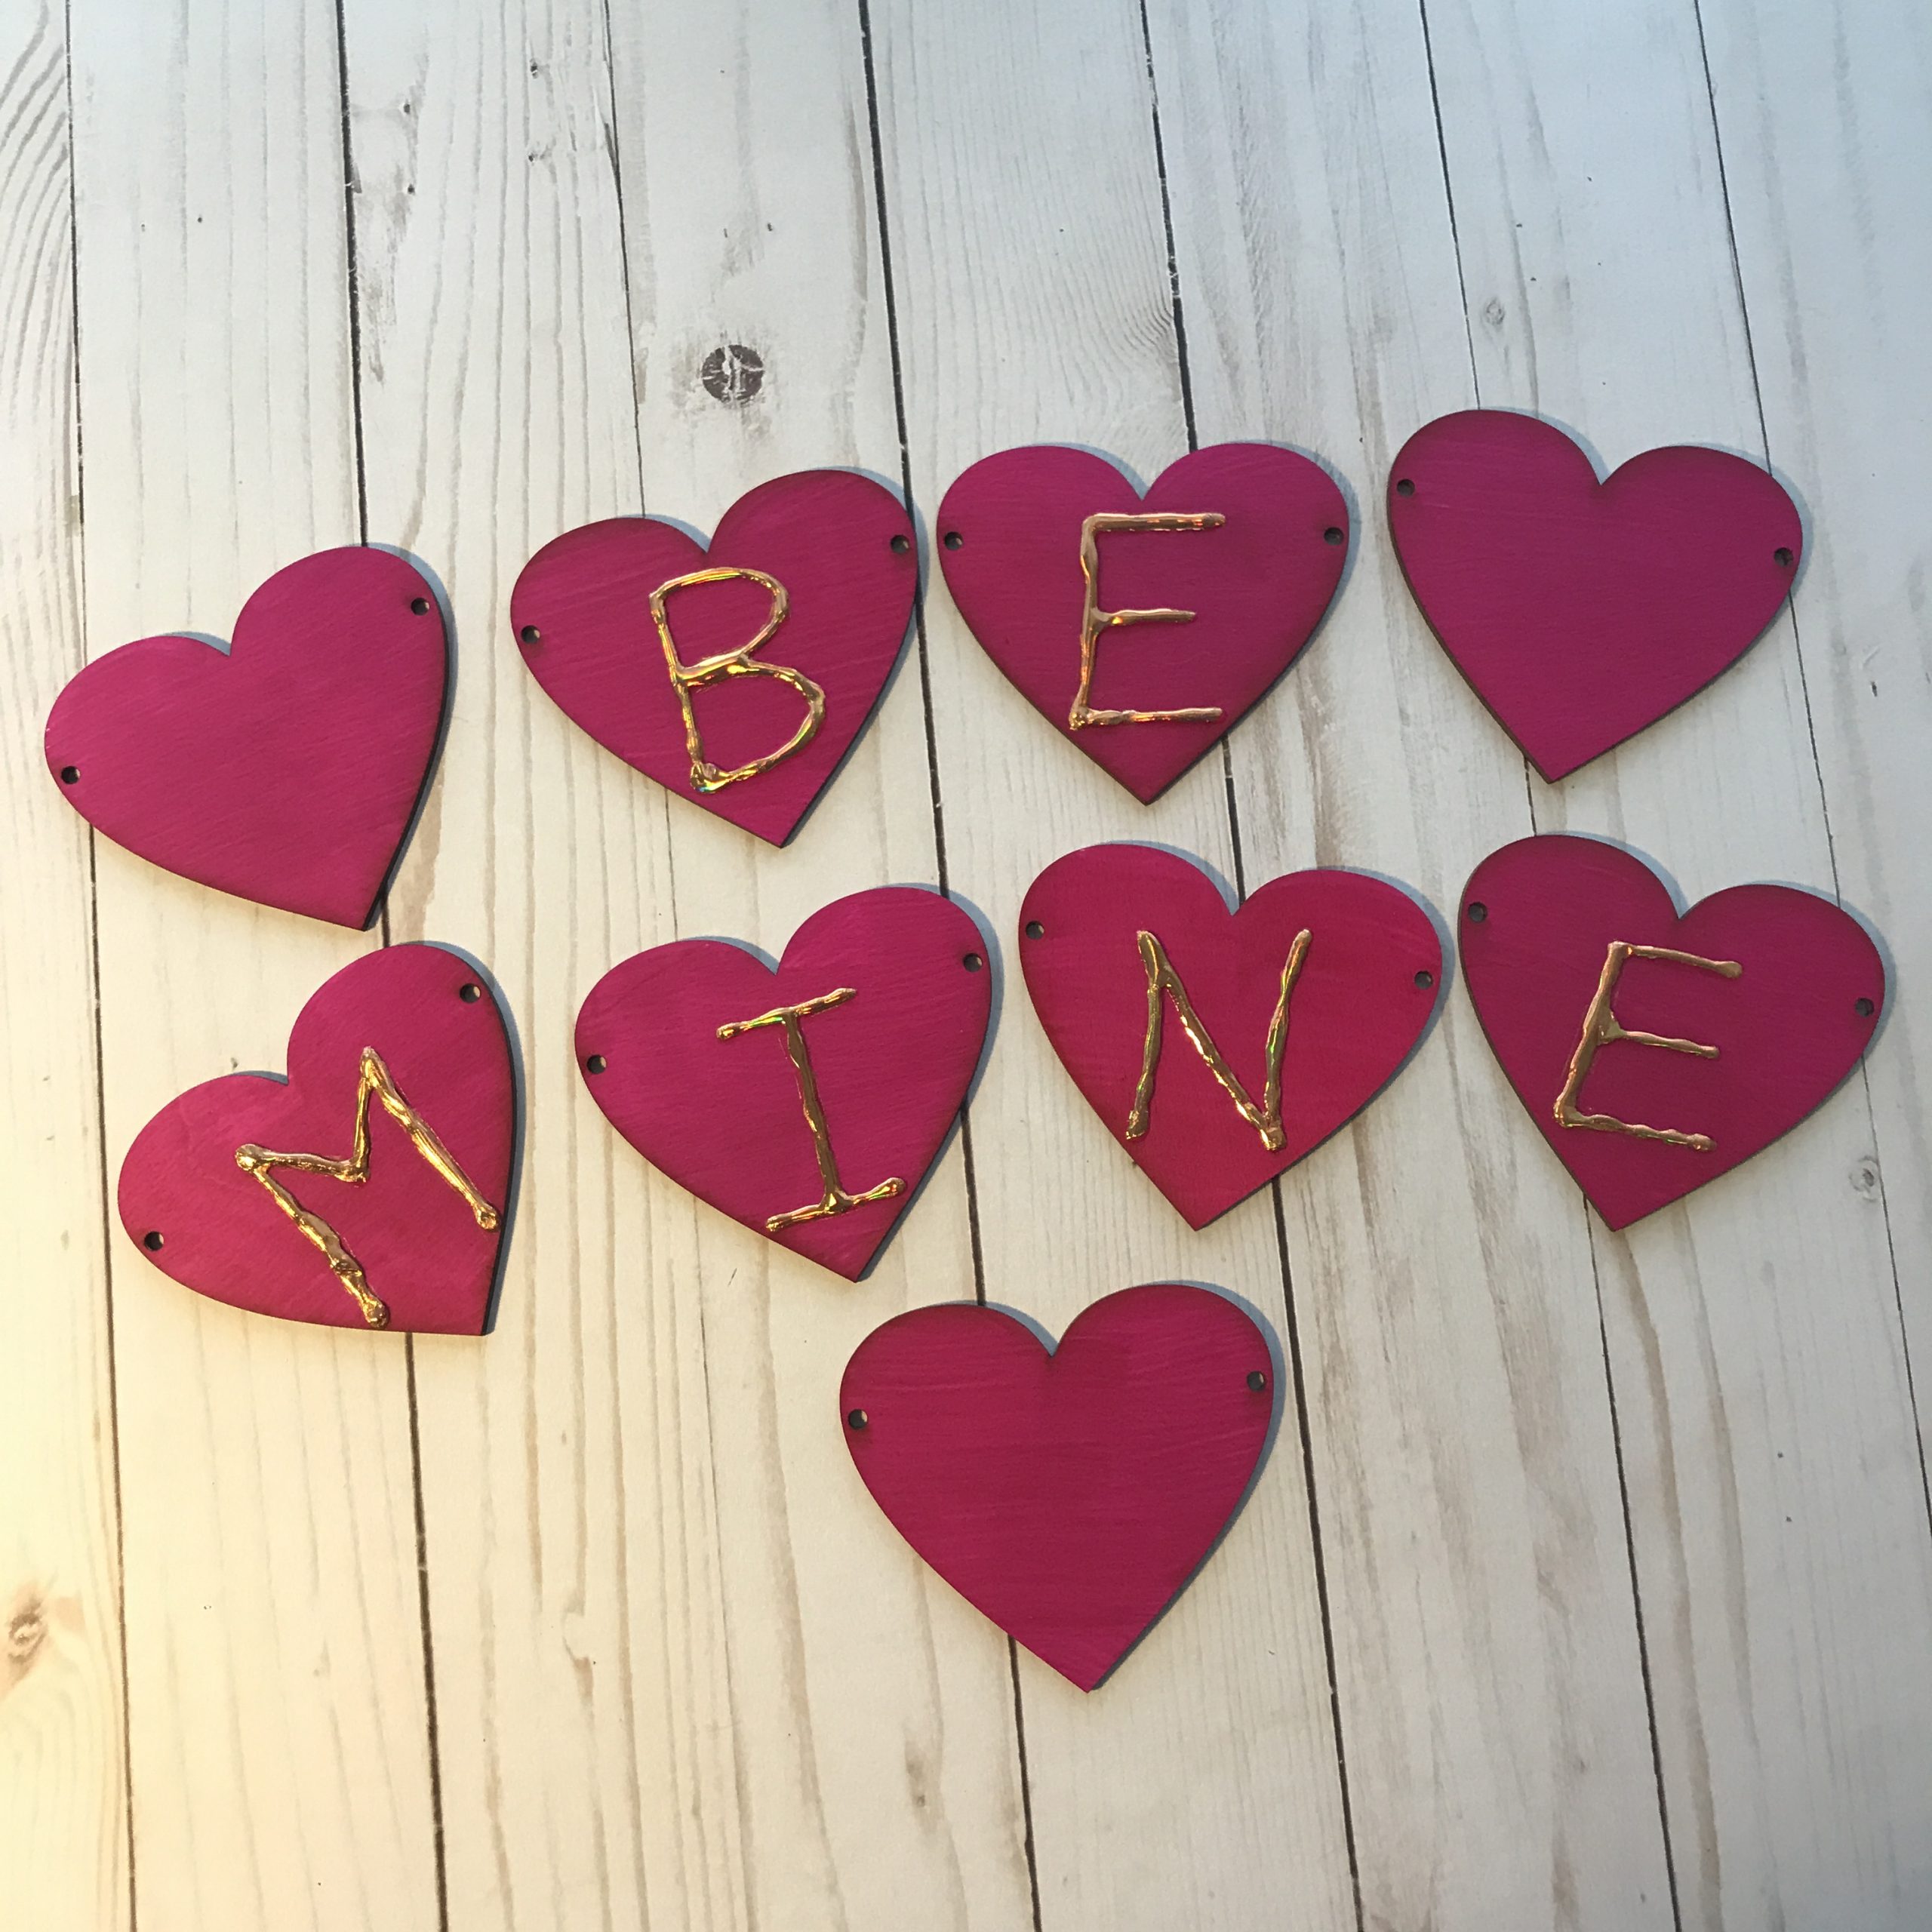
2. Once the dye was dry, I used the deco foil® Liquid Adhesive to draw out the letters for BE MINE. This adhesive does have to dry before you can apply the foil. So, let it dry about an hour.

3. Cut the foil into pieces that would fit on your adhesive. Cutting it to size helps cut down on waste of the extra foil. Apply the foil over the dry adhesive and smooth down making sure to get the sides of the glue as well. Remove the waste.

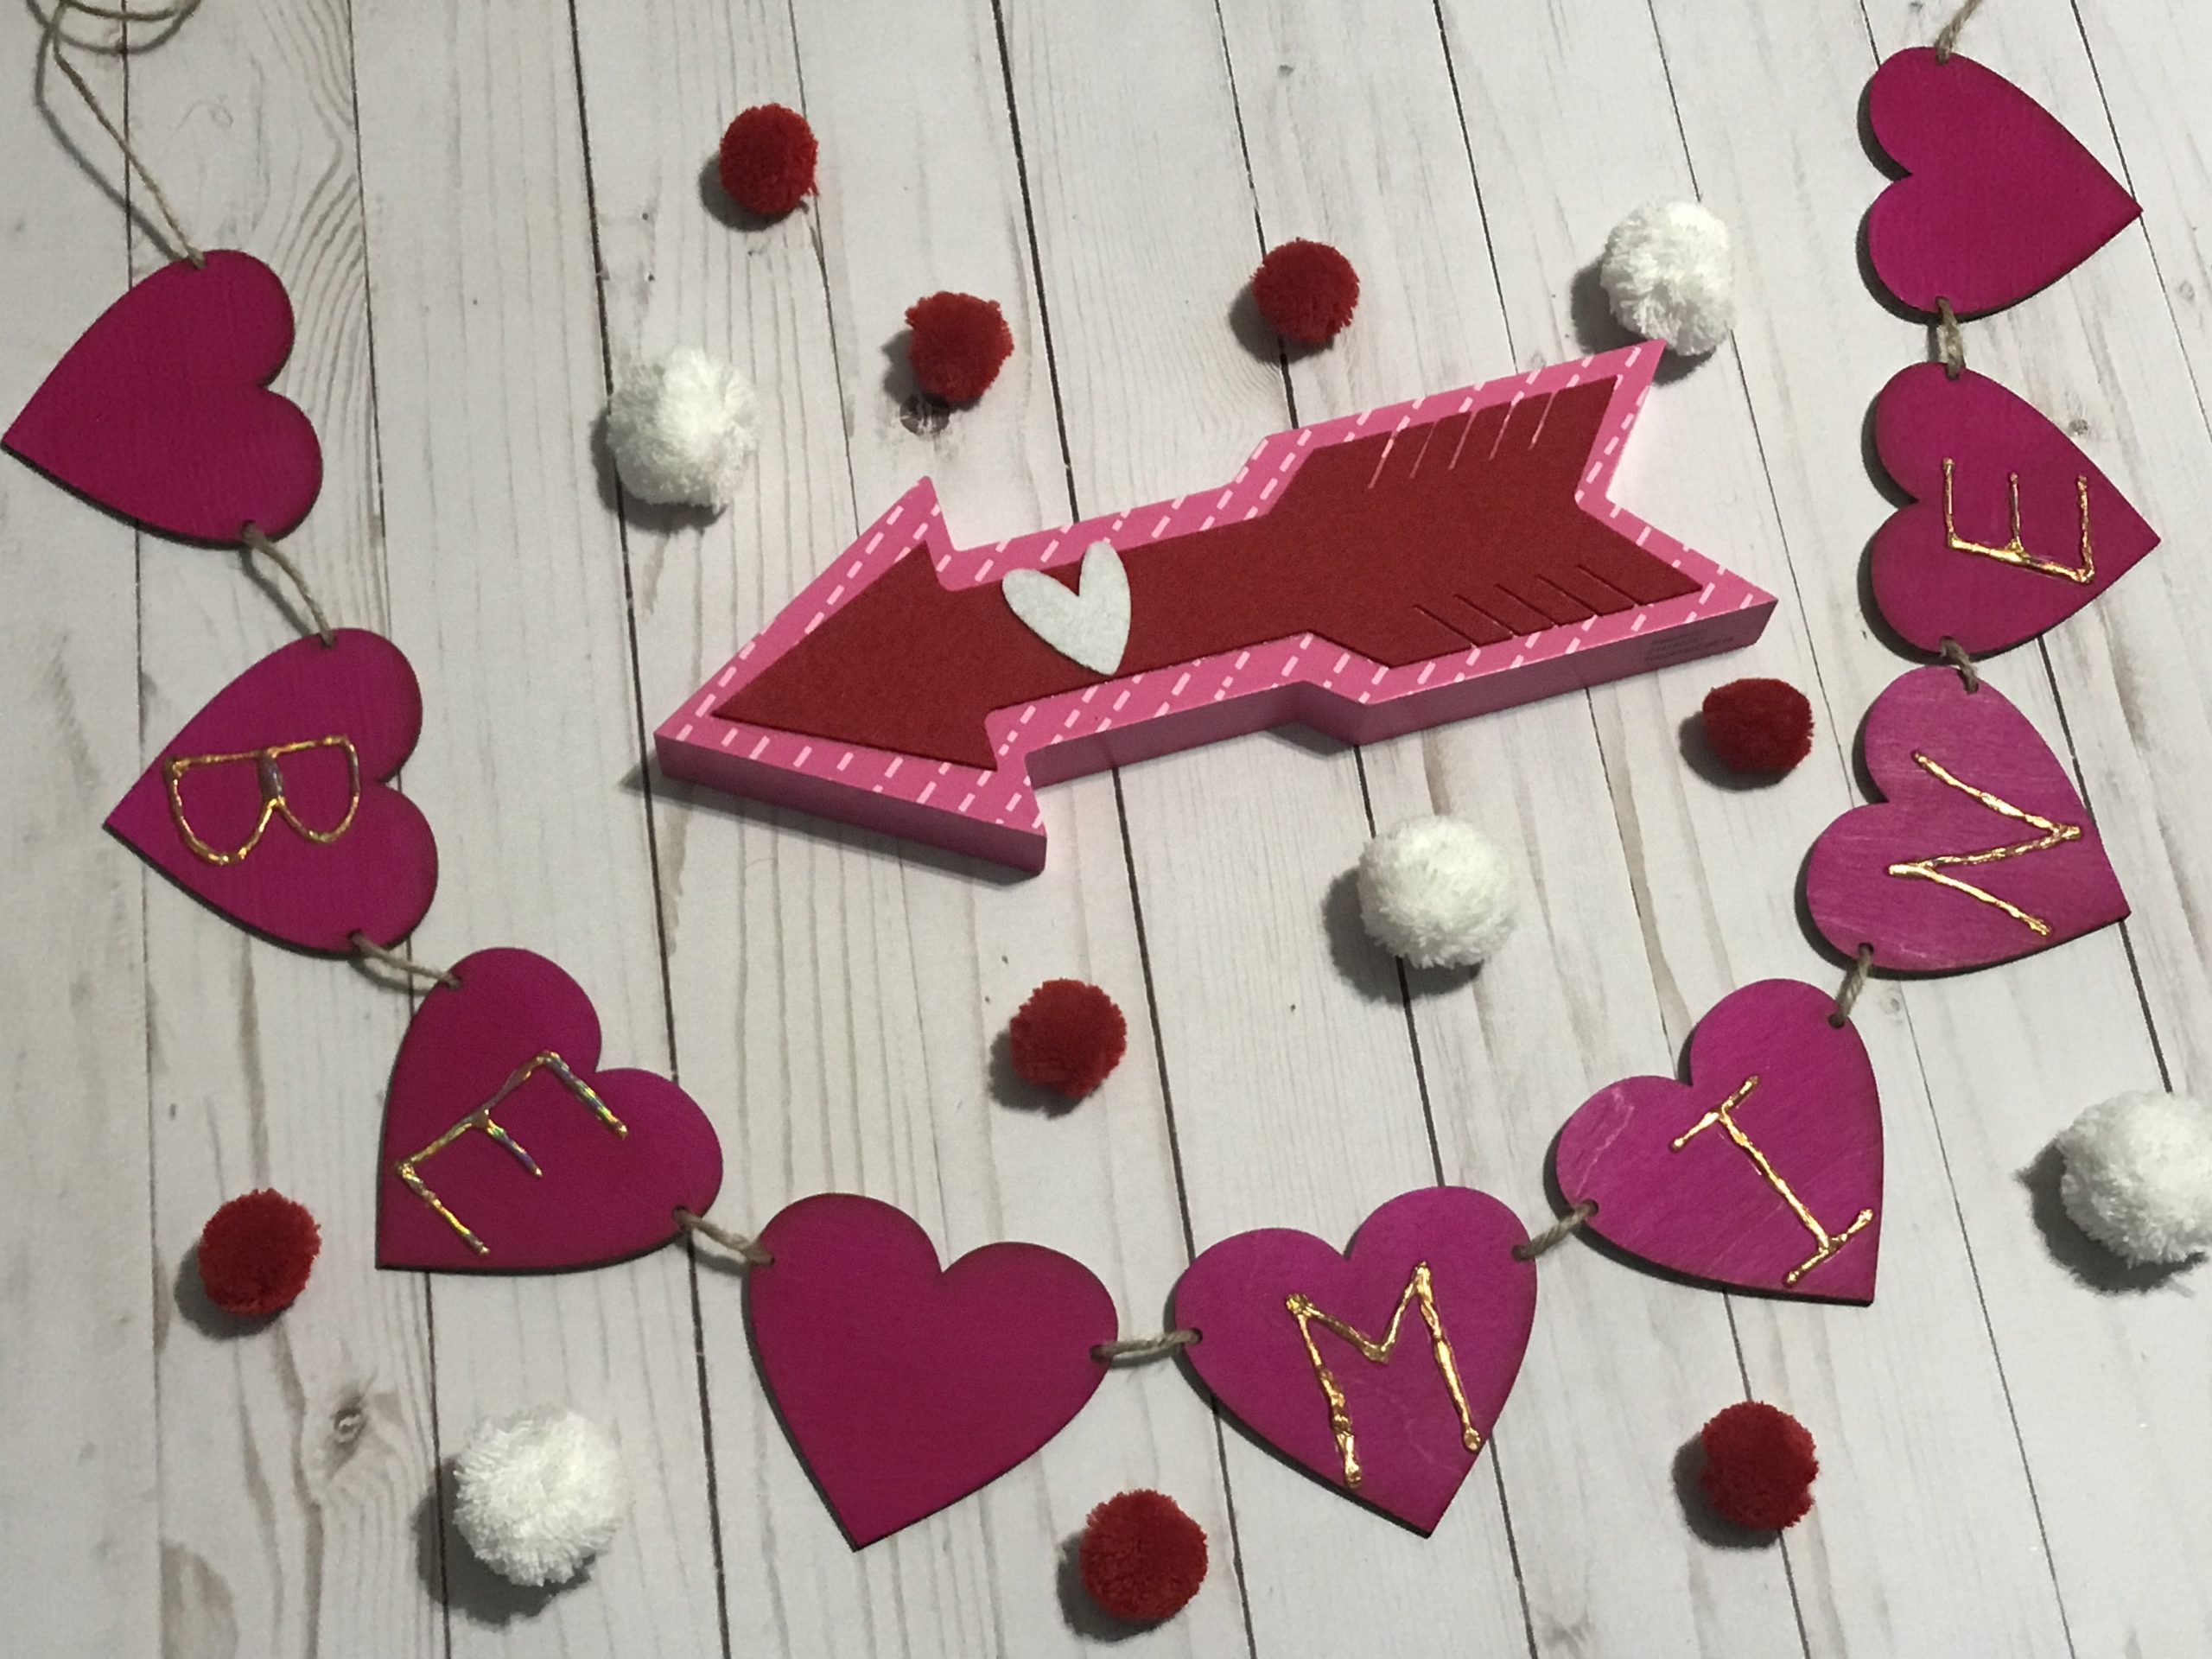
4. String the hearts on the twine. TIP: If you are using hearts from felt or store bought hearts that don’t have holes in it, you an just hot glue the hearts to the twine or ribbon.

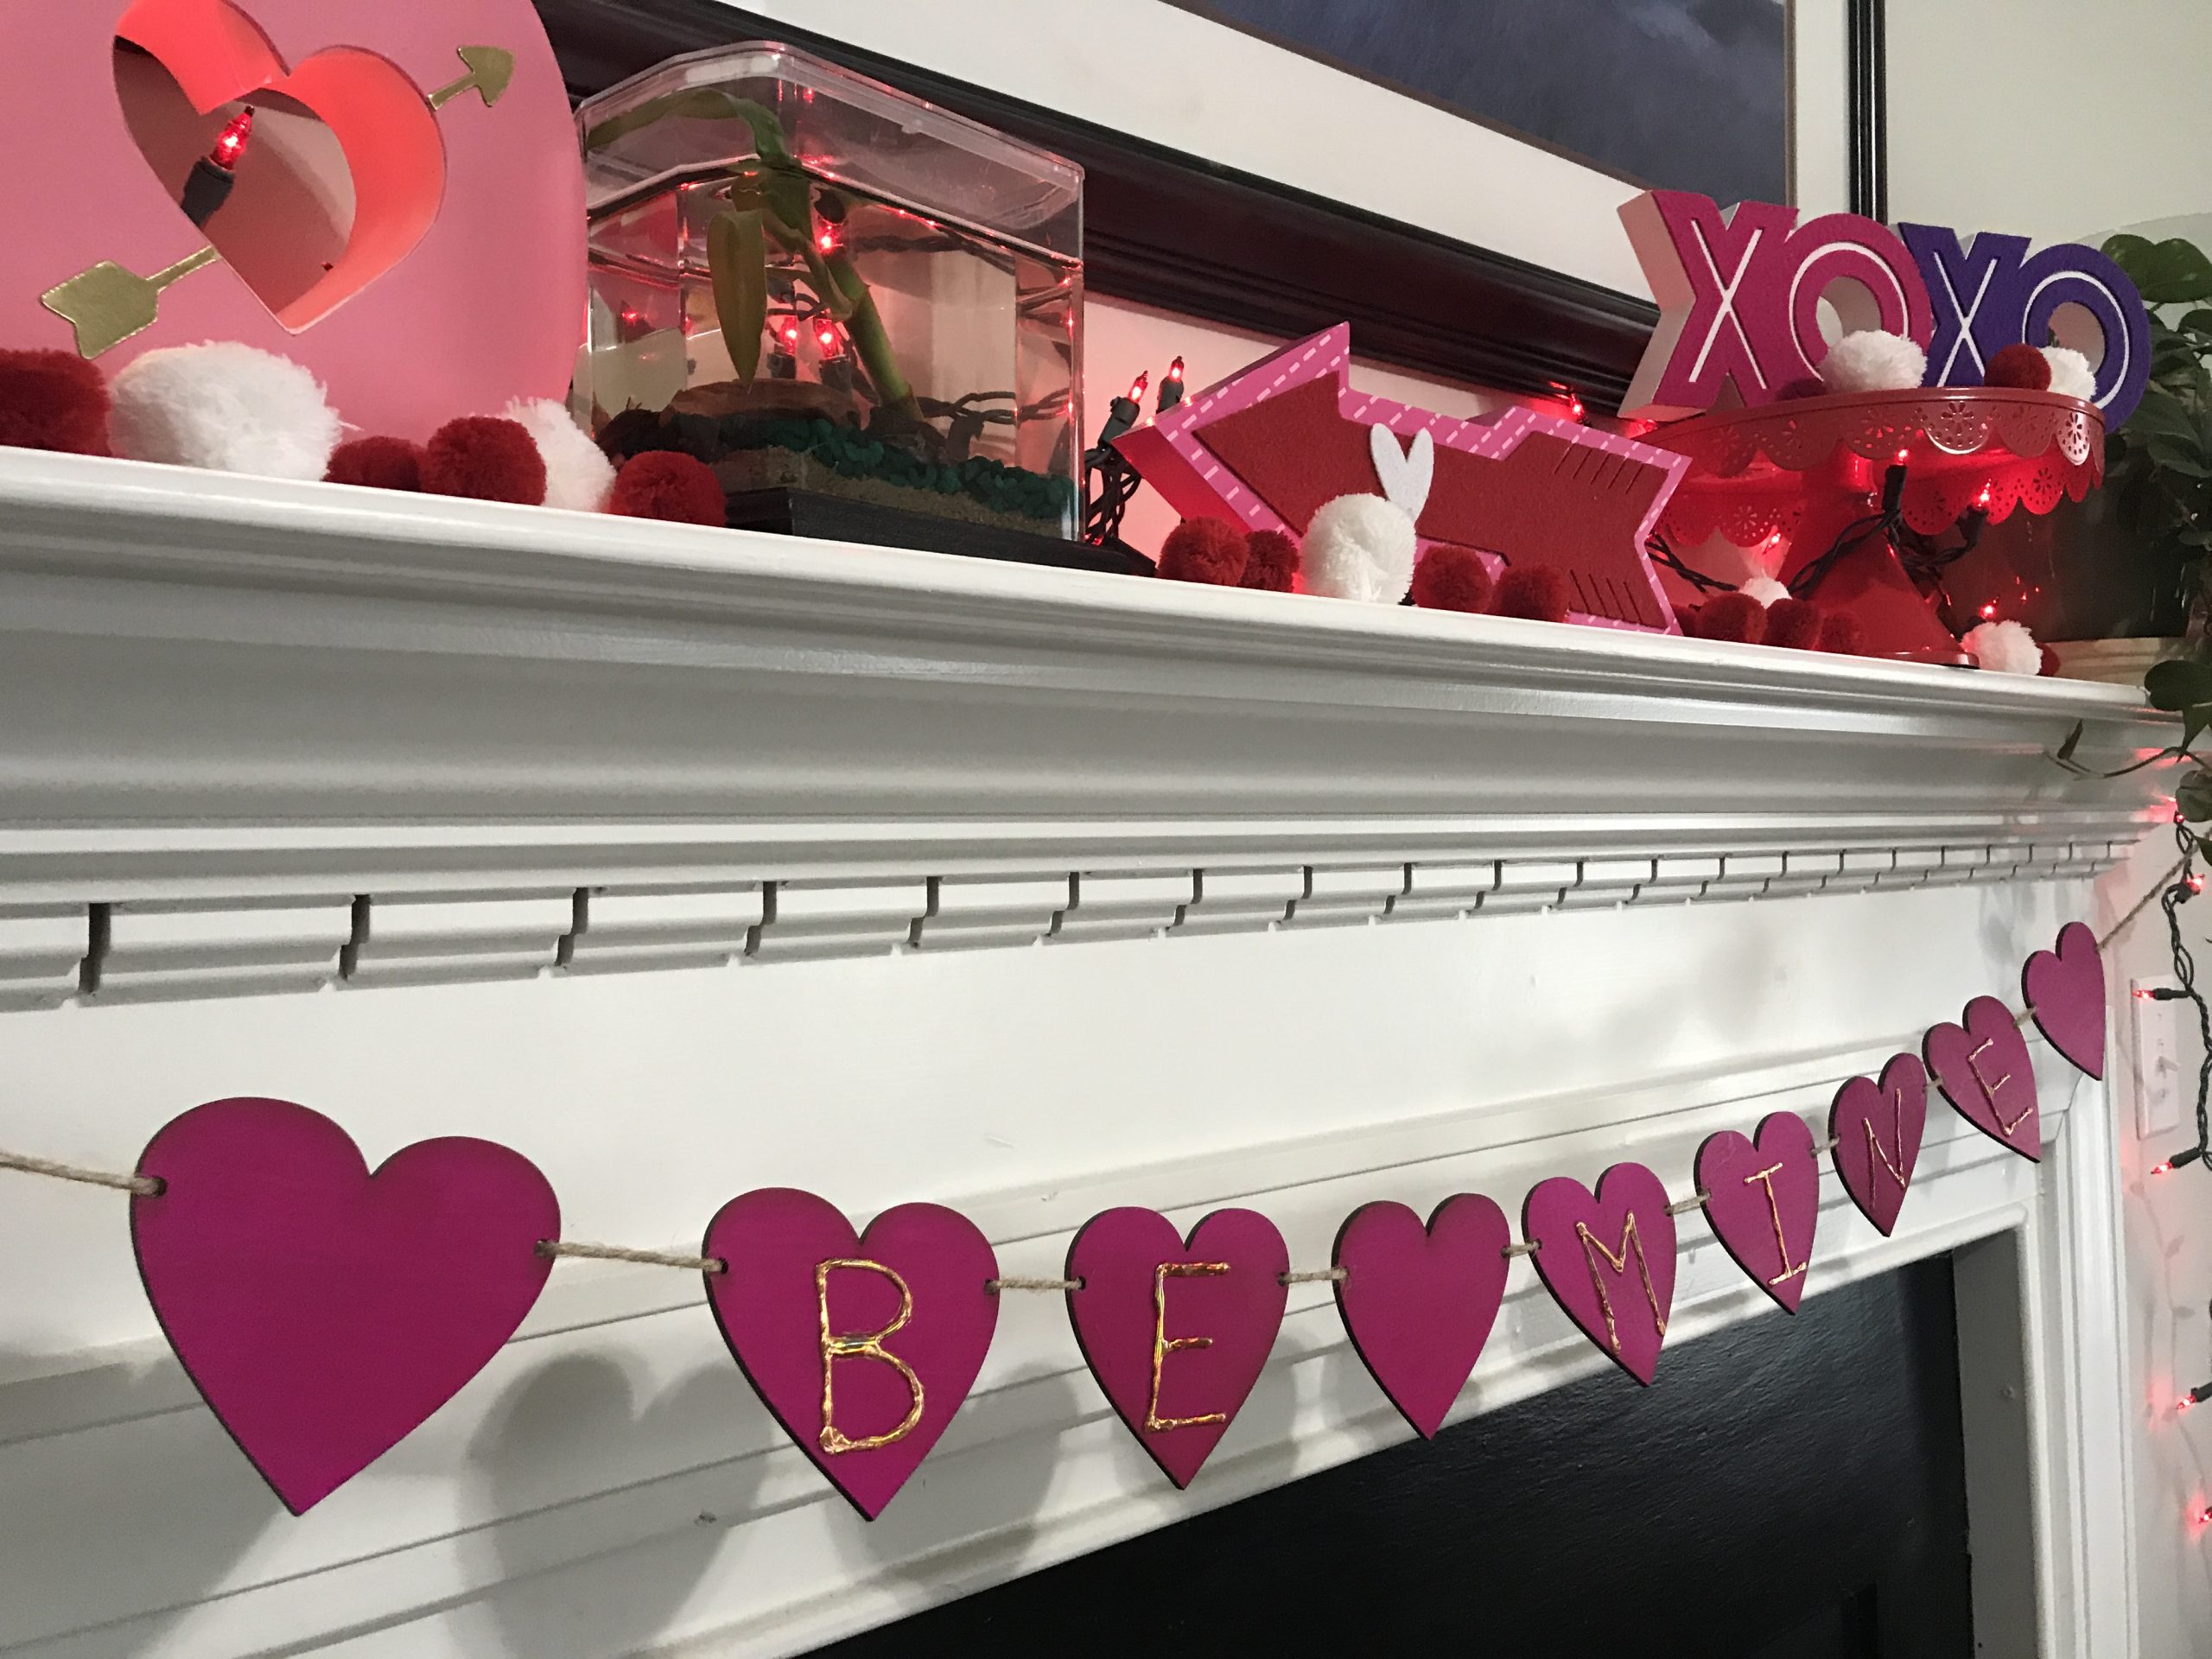
5. Then hang it up and look at your quick, easy and cute project!!!

Be sure to click the button below to check out other last minute Valentine craft ideas!

Also, be sure to enter to win this awesome craft supply stash!!!

a Rafflecopter giveaway

Happy Halloween Banner featuring Cricut

Disclosure:  This blog post contains affiliate links.

Halloween in near and it’s also Craft Lightning time!  This Craft Lightning features Cricut!   So, I made a Happy Halloween Banner with pumpkins and letters cut with my Cricut Explore.  It was quick, easy and fun.  Even the kids could get in on helping making this adorable Happy Halloween Banner!  And this banner is perfect for a kids party!

Materials needed:
Cricut Explore, Air or Maker
Cricut Cutting Mat
Cricut Tools for removing yardstick from mats
Computer with Cricut Design Space installed
Cardstock (orange and black)
Yarn
Small Clothespins
Glue

How I made it:

  1.  I chose a pumpkin from the Images category.  This pumpkin was free with Cricut Access.  I also chose a font for my letters.  This particular font is from my font book via my computer.  I picked one that looked a little spooky.  I laid everything out in Design Space and then cut it all out, the pumpkins first and then the letters.  I hid the letters while I cut out the pumpkins.  And then I hid the pumpkins while I cut the letters.   I cut out two sheets of pumpkins.

2.  Once everything was cut out, I glued the letters to the pumpkins using Aleene’s Fast Grab Tacky Glue.

3.  I let the glue dry and then it was time to hang it up using the yarn and the small clothespins.

I love a good banner, so I keep Command Hooks in my dinning area where we have gatherings and such.  It’s super easy to throw up a cute banner for whatever the occasion is.  This Happy Halloween Banner is perfect for a Halloween Party for the kids.  I hope you like it!   

Side note:  The pumpkins can be decorated.   That may take a little longer than the fifteen minutes allowed for Craft Lightning!  🙂

Click the button below to check out other quick Craft Lightning Cricut Halloween ideas!

Also, be sure to enter to win a new Cricut Maker!

a Rafflecopter giveaway

Until next time…….

 
Cricut Maker Machine

Shark Week Shark Banner

Disclosure:   This post contains affiliate links.

Shark week is next week and the Berry family is ready!  To get ready, I made this adorable Shark Week Shark Banner using my dear friend Laura Kelly’s dies from Sizzix/Ellison and felt from the Kunin Group!  It was super duper easy!  Check it out!  You can make you own!

Materials needed:

How I made it:

Using the Super Star Die Cutting Machine and Cutting Pads, I cut my felt sharks from Laura Kelly’s Shark Die.  I also cut the sharks teeth out of white felt.

Then I cut out the letters “SHARK WEEK” from Laura Kelly’s Lemonade Capital Alphabet Die using red felt.

Once I had all of my pieces cut out, I used Beacon Felt Glue to put everything together!  I added wiggly eyes to make the sharks look silly!

Once everything was dry, I hung them up on two strands of jute rope!  I had an extra shark, so I added him to the middle!

Hope you like this super easy Shark Week Shark Banner!  I love using these dies and Kunin felt!

Freedom Felt Banner

Disclosure:  This post contains affiliate links for Sizzix.com

It’s Craft Lightning time again and this one is Patriotic Crafts!  This Freedom Felt Banner was super easy and took barely anytime to make!   And I love a cute seasonal banner!
Materials:


How to make it:

  1.  Using the die cutting machine, cutting pads and dies, cut out each of your pieces!  I cut seven bookmarks, seven badges and the letters to spell Freedom.  I used the rectangular badge because I thought it looked like a burst from a firework!
  2. Assemble your pieces so that you know where your want to glue them!  
  3. Glue your pieces and buttons to the bookmark.
  4. Let dry!
  5. Using twine and small clothespins, hang them up to create a patriotic felt banner! Easy Peasy!!!   Now I have a banner for Memorial Day as well as the 4th of July!  Hope you like this Craft Lightning project!   Be sure to click the photo below and check out other Patriotic Craft Lightning projects!


Thankful Burlap and Felt Banner

Disclosure:   As a member of the Laura Kelly Design Team, I received product from Sizzix/Ellison for use in my blog posts.  The opinions are my own.  This post may contain affiliate links.

Thanksgiving is upon us.  And I’m feeling really thankful this season.   I’m thankful for my family and my friends.  I’m thankful for a house to live in, food to put on the table and a bed to sleep in.  I’m thankful for a car to drive.  I’m thankful for my husband’s job and for my job.  I’m thankful for my church and church family.  I’m thankful that my children go to a great school.  And I’m thankful to be healthy!  My list of thankfulness could go on and on and on.

banner-final

Lately I’m obsessed with banners!  I love to make them as much as I love hang them in my house!  They are easy to make and you can make them any ways that you want!   They can really make a difference in your home, even if it’s just for a little color!

Just recently Sizzix sent me this amazing banner die designed by Lori Whitlock.  I used it, along with some of my favorite dies by Laura Kelly, to create this amazing Thankful banner!  This banner die might be one of my favorite dies ever!

Materials used:

Directions:

  1. First, I cut out all of the pieces needed for the banner.   The ShaggiChic felt is a little thicker so I cut them individually.  Sometimes you can cut multiple pieces in one run through of the Big Shot. 

pumpkin-die

With the burlap I placed a piece of paper underneath the burlap each time I did a cut.  I didn’t want the fibers of the burlap to get all over the die.   Putting the paper underneath really helped.

banner-die

2.  Once all of my pieces were cut out, I started putting the banner together.  I glued the pumpkins to the burlap banner pieces.  Then I added the letter and the stem.

letters-and-gluing

3.   Usually I like to use ribbon for my banners, but lately I’ve liked using jute rope.  Jute rope goes really well with the burlap!  And I love the natural look of the jute rope!

unclose

I hope you like my Thankful burlap and felt banner.   I love it so much that I want to keep it out longer than just the Thanksgiving season.  I hope that you and your family have a Happy Thanksgiving!

Katie-Signature-2

Accordion Circle Pumpkin Banner

It’s time for Craft Lightning again and I had the chance to join in the fun!   For the Halloween 2016 Craft Lightning, I made this quick Accordion Circle Pumpkin Banner!  I love making Accordion circles!  They are so fun, easy and are perfect for decorating!

banner

Using scrapbook paper that I got at A.C.Moore, I cut my paper down to 3 inch strips.  Then, using my paper scoring kit, I scored both sides, alternating every half inch.  After the scoring was done, I created the accordion fold.

cutting-and-folding

Because you need a way to hold the accordion fold down and together, I cut circles from the same paper.  I also cut my pumpkin face pieces from black paper.   To put together the accordion circle, I first glued the ends of paper together, creating a circle.  A hot glue gun works best for this.  Once the ends were glued together, I laid it on its side and pressed down, causing the middle opening to close and the paper to lay flat.  Using my hot glue gun, I glued a circle in the center of the front and the back of my accordion circle.  Then I glued the eyes, nose and mouth to each accordion circle!

putting-it-together

Once all of my pumpkins were created, I added a piece of green paper for the stem and clipped it to a piece of burlap string using little black clothespins!  It’s perfect for my mantel.  You could create different faces for each one or you could make more accordion circles and add letters.  You could make them bigger or smaller, depending on what you want to do with them!

I hope you like my Accordion Circle Pumpkin Banner!

Be sure to click the button below to check out other Halloween Craft Lightning projects!

Teacher’s Name Banner featuring Laura Kelly’s Apple #2 Die from Sizzix

Disclosure:  I am a member of the Laura Kelly Design Team and received product to provide product reviews and to write about in blog posts.  

 
Final
If your children aren’t in year round school like mine, it’s time for yours to go back to school!   I am excited to share this Teacher’s Name Banner that would be perfect for a teacher to hang in their classroom or right outside of the classroom.   It’s super simple and is a no sew project!  Your children could even help with cutting out the pieces!   I love making homemade crafts for my children’s teachers.  

Materials used:

Sizzix Big Shot
Laura Kelly’s Apple #2 Die from Sizzix
Laura Kelly’s Lemonade Capital Alphabet Die from Sizzix
Cutting Pads  (short and long)
Kunin Felt
Ribbon
Ad-tech Hot Glue Gun and Glue Sticks
Fiscar Scissors

Die Cuts 1.  First, I use the Sizzix Big Shot, Cutting Pads, Felt and Apple Die to cut out all of my pieces.  I did a full cut for the apple and then for the stem and leaf, I just placed my felt over the steel blade and ran it through the Sizzix Big Shot.  

2.  Then, I used Laura’s Lemonade Alphabet Die and Long Cutting Pads to cut the letters (Mrs. Winter, one of our favorite teachers!!) Adtech 3.  Once everything was cut out, I used my Ad-tech Hot glue gun and glue sticks to glue the stem    and leaves down to the apples.  

4.  I then glued them to a long piece of ribbon. Hallway

I hope you like my Teacher’s Name Banner featuring Laura Kelly’s Apple Die #2.   I had so much fun making it.  

Until next time…..

Katie-Signature-2

Scotch Tape Pumpkin Banner

Halloween is right around the corner!  It’s one of my favorite times of year.  I made this super cute Scotch Tape Pumpkin Banner to hang in my house!  The good thing is…..it can stay up until Thanksgiving! Final
Materials used:
Scrap pieces of paper (at least 6″x6″)
Scotch Expressions Masking Tape and Washi Tape 
Laura Kelly’s Pumpkin die from Ellison/Sizzix
Sizzix Big Shot supplies
Placing my 6″x6″ pieces of paper, I put them on top of the pumpkin die to gauge where the stem of the pumpkin was and how much tape I needed to place on the paper.  Once I got the tape down, I used the Sizzix Big Shot and the pumpkin die to cut out my pumpkins.
pumpkin
Using small clothes pins, I added them to a piece of ribbon to make this cute little pumpkin banner!
Final
Hope you like my adorable Scotch Tape Pumpkin Banner!  It was super easy and super fun!

Until next time……

National Watermelon Day 2015

National Watermelon Day is here!  I love that Watermelon has its own special day of celebration each year!   We will be celebrating at our house!
square final photo
My friend Laura Kelly is an amazing artist and has designed these awesome Wacky Watermelon Printables with some of her adorable watermelon art.  I cut them up and used them to decorate my party table! Laura Kelly Wacky Watermelon
While I was at the store today, I saw that Pillsbury now has a Funfetti Gluten Free Sugar Cookie mix!   OMG, they are delicious!   How cute are these watermelon cookies?!  I baked them, cut the tops off of some to make them look like a watermelon half, and then cut two sides off to make angles for a wedge!   Not realizing it, I picked up the Pillbury Sugar Free Vanilla frosting!   The kids had no clue and there were no complaints!!!  I love how they came out! cookies
Using Kunin felts, I made this adorable Watermelon Banner!  Click the photo below to see how I made it! watermelon banner
Did you see those adorable lollipops in the photo?  Those are from Lollipics, with Laura Kelly designs on them.  You can get your own with custom designs!  They are great for parties , weddings, or gifts! Lollipics
Hope you like what we have in store for National Watermelon Day!   And I hope you have a wonderful Yummy Watermelon filled day!

Until next time….

Kunin Felt Watermelon Banner

In honor of National Watermelon Day on Monday, August 3rd, I made this adorable Watermelon Banner with Kunin Felt! watermelon banner
Using eCals2, I designed a half and a wedge watermelon slice.  I made three different layers, one for the rind, one for the white part and one for the red part.   Using my Sizzix Eclips2, I cut the pieces out to use as a template.   felt cutting
Instead of sewing my watermelons together, I used Aleene’s Fabric Fusion.  Super and easy and quick. fabric fusion
Once all of my watermelons were glued together and dried, I used mini clothes pins and red baker twine to hang the watermelon pieces. melons and twine
The watermelon banner is perfect for a watermelon party for any summer fun get together!  My boys will be celebrating National Watermelon Day 2015 with some yummy watermelon, Watermelon Sugar Cookies, Laura Kelly’s Wacky Watermelon Printables and some awesome Lollipops from Lollipics!  Click on the photo below to learn about these goodies!
square final photo Hope you like my Kunin Felt Watermelon Banner!   And Happy National Watermelon Day!

Until next time…..