Decoupage Make A Wish Jar

Craft Lightning is here and it’s all about Decoupage! People have been using Decoupage for years and years and years. My grandmother was a big crafter and used Decoupage a lot. She is where I got my love of crafting from. I’m joining in with others to create quick and easy Decoupage projects.
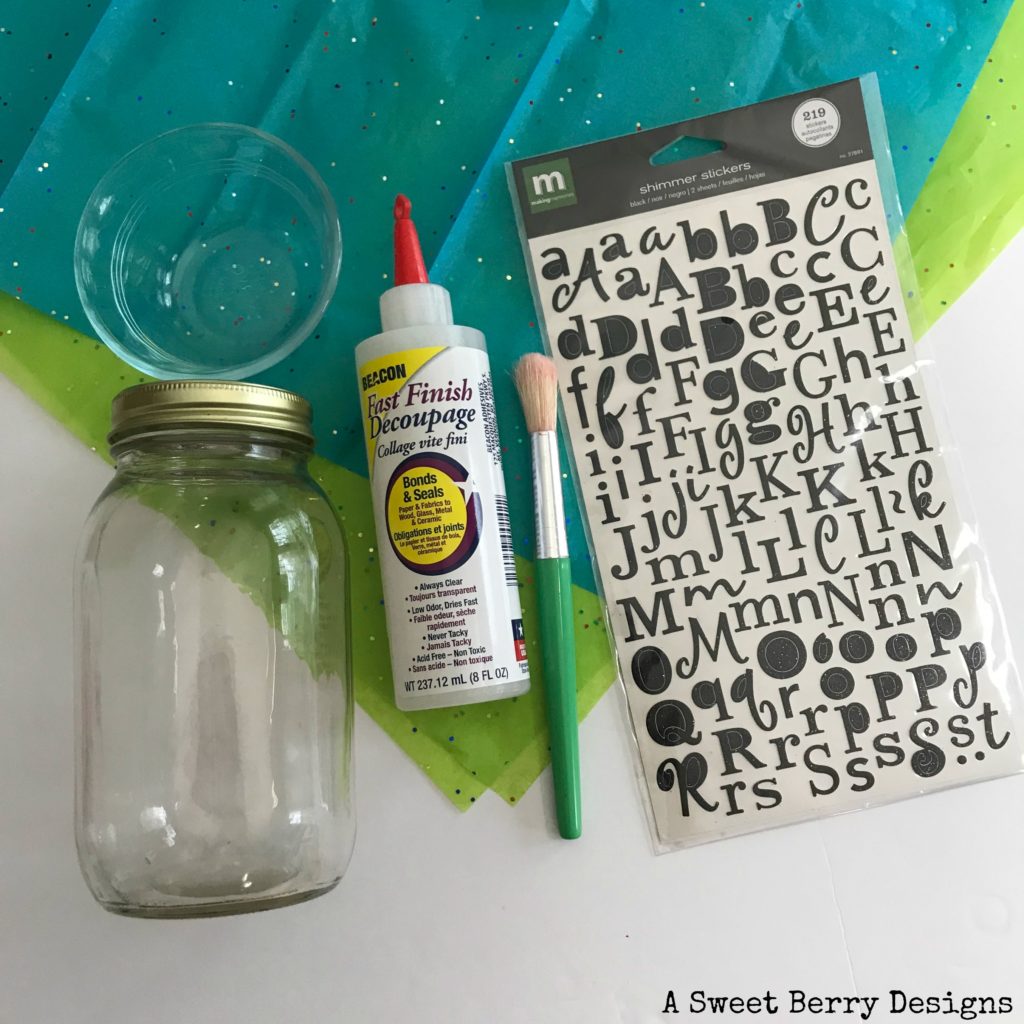
Materials used:

  • Mason Jar
  • Beacon’s Fast Finish Decoupage
  • Bristle Brush
  • Colorful Tissue Paper
  • A tray or bowl for your decoupage
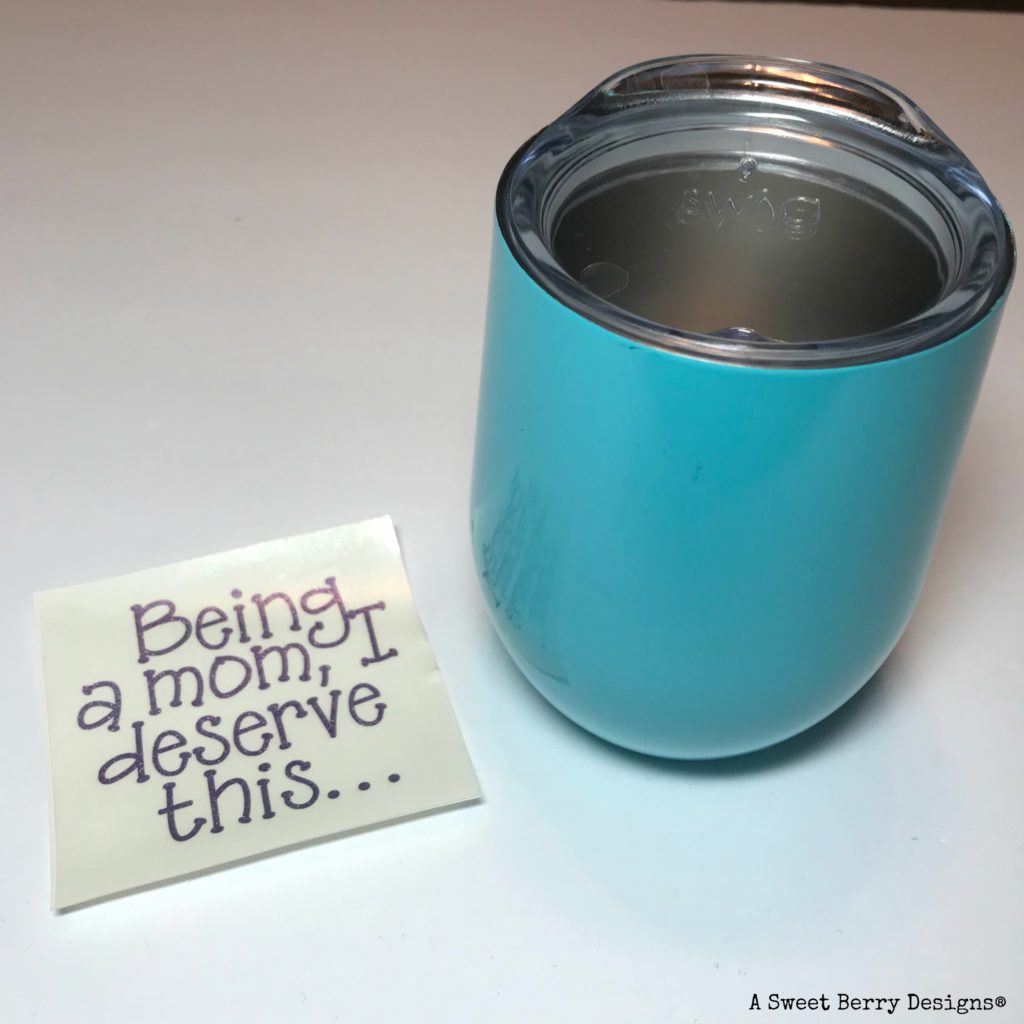
  • Sticker or Cut Out Letters
  • Table Cloth or Paper to protect your workspace
  • Small pieces of paper and pens for wishes!

How I made it:

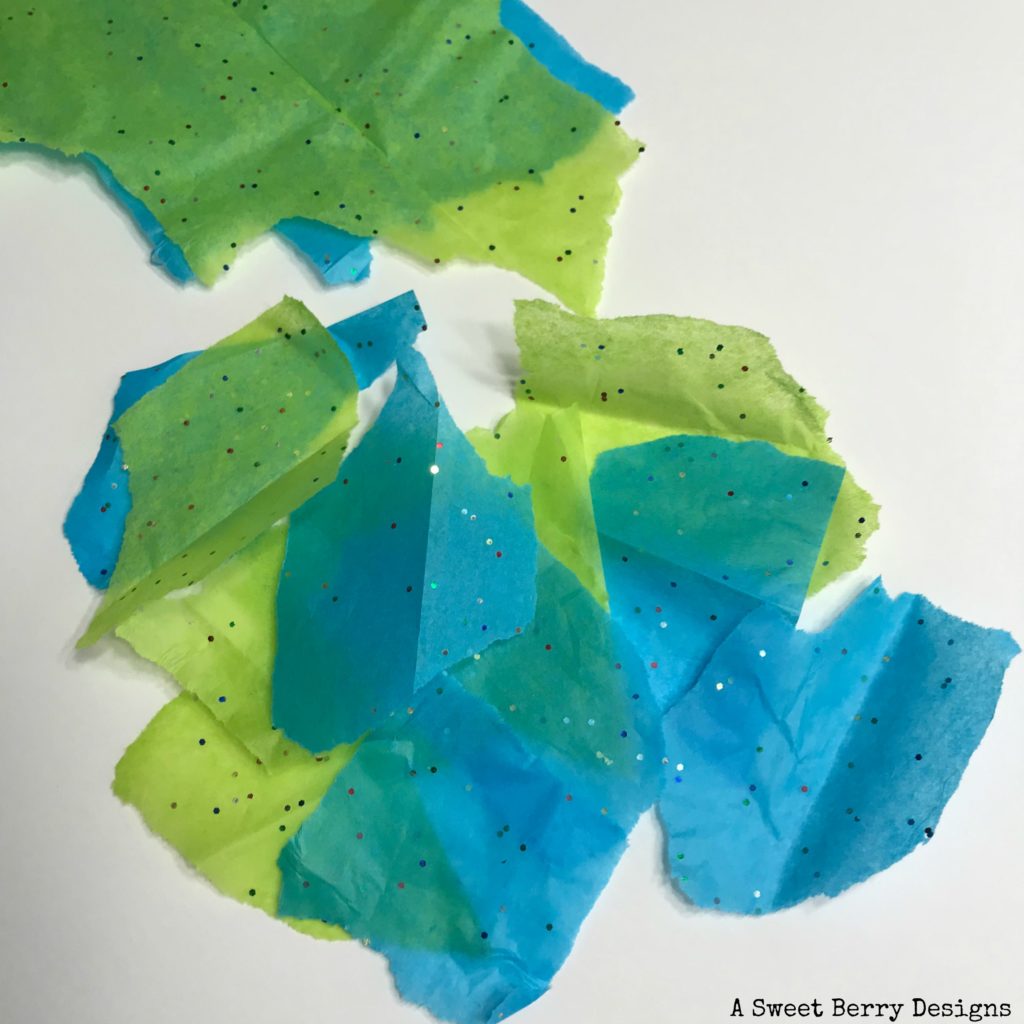
Make sure your mason jar is clean and dry. Tear your tissue paper into small pieces.

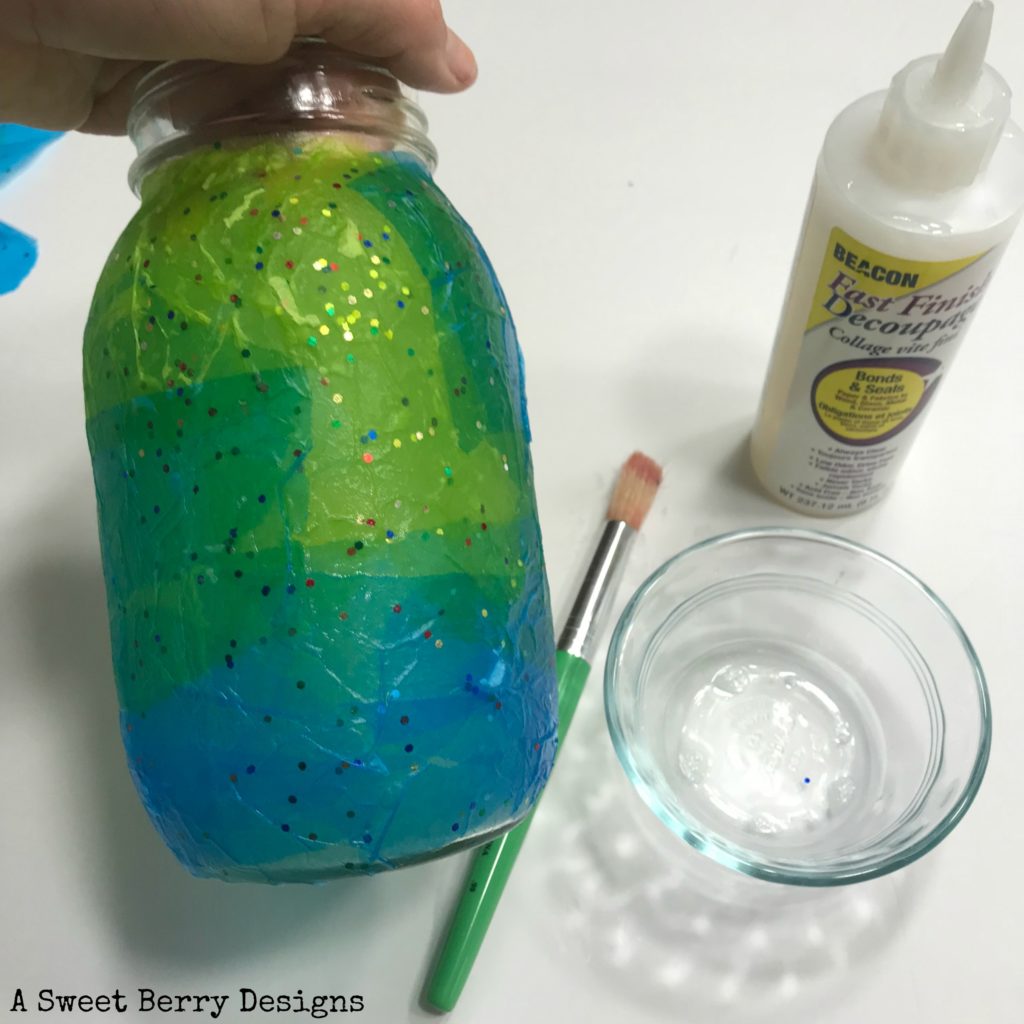
Pour Decoupage into your tray or bowl. Lightly dampen your bristle brush with water and apply a layer of the Beacon’s Fast Finish Decoupage to the jar. TIP: Do not cover the threads of the jar for the lid.

Place the small pieces of tissue paper onto the wet surface of the jar.

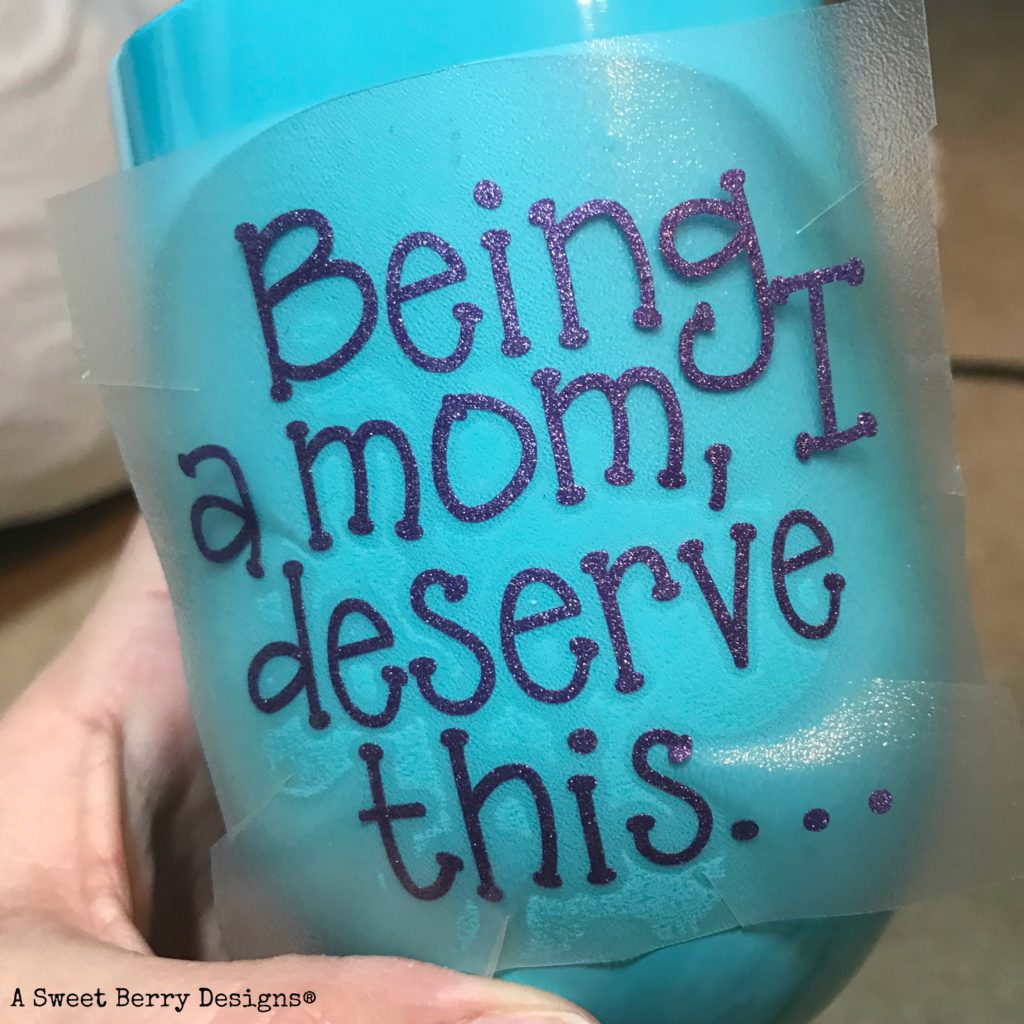
You can do one of two things…..You can take this time to apply your sticker or cut out letters or you can wait until the end. If you choose to apply them now, place them where you’d like to and then apply another layer of Decoupage over the letters and the tissue paper. If you want to apply them at the end, apply the Decoupage all over the tissue paper and allow to dry before you place the letters on the jar.

Set your jar aside to dry.

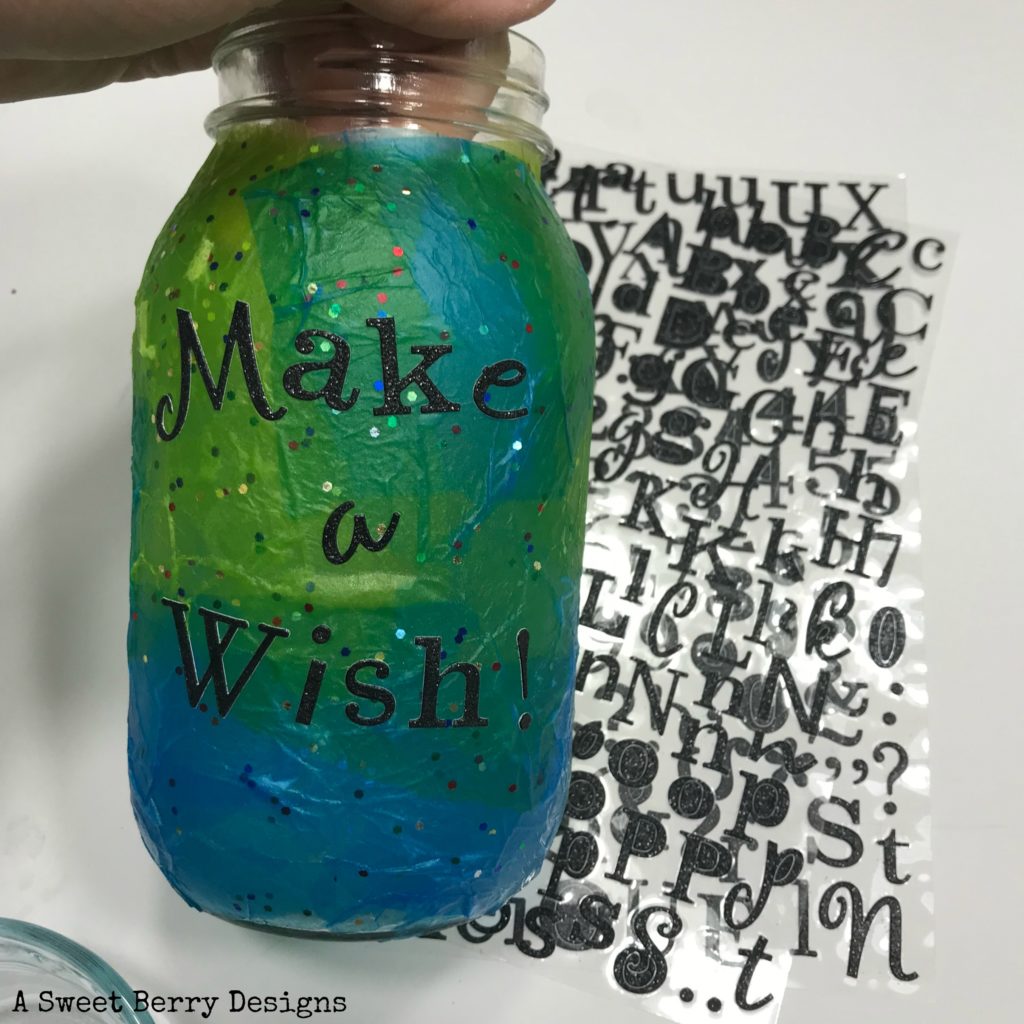
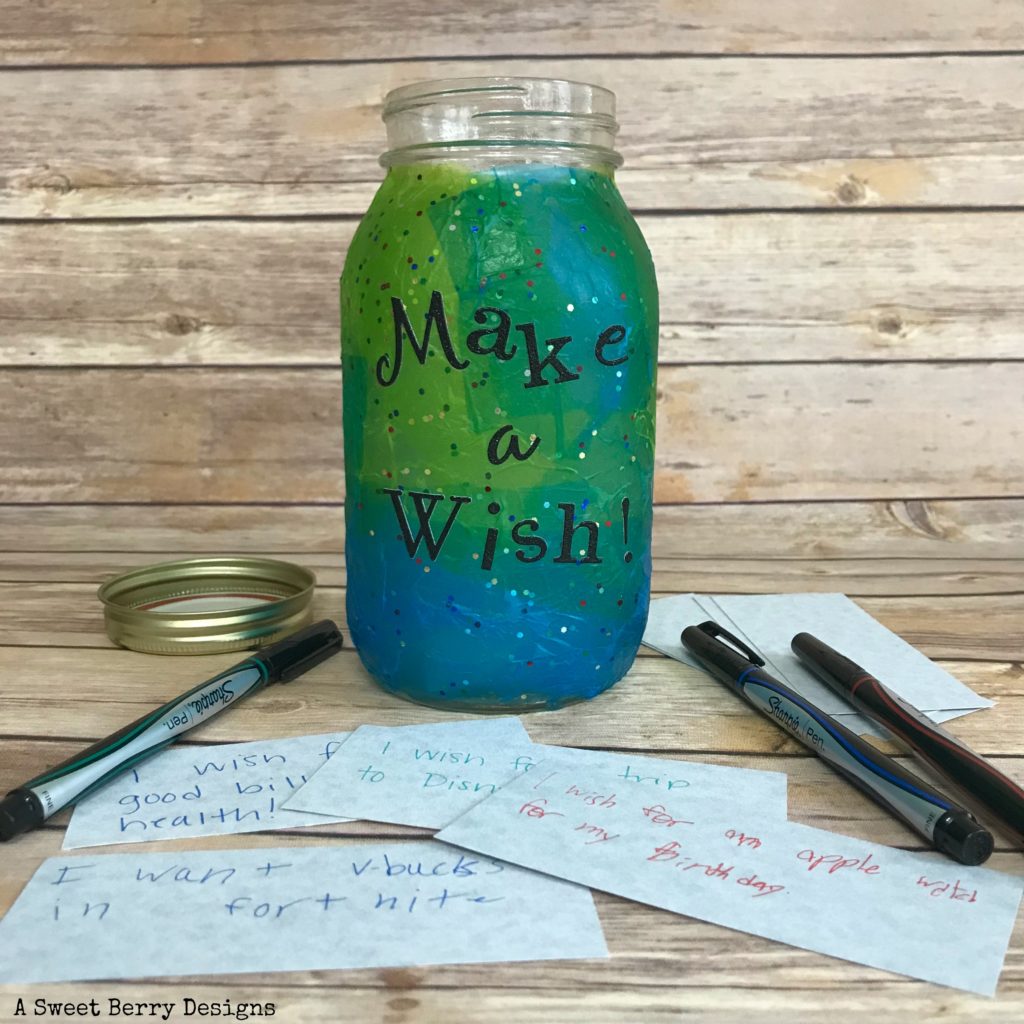
I hope you enjoyed seeing how I made this awesome Make a Wish! Wishing Jar! This was super easy and super quick. The kids could even jump in on helping make it and decorate it however! They can help cut up pieces of paper to added their wishes to! Lots of fun for the whole family and everyone can add their wishes to the jar!

Be sure to click the photo below to see other Craft Lightning Decoupage projects!


Until next time…..

Cricut Mother’s Day Being A Mom Wine Tumbler

This post contains an affiliate link. If you click on the link and purchase something from that site, I will earn a percentage of the sale. Thanks for supporting A Sweet Berry Designs.

Mother’s Day is near and I’ve joined up with some other Cricut users to make awesome Mother’s Day crafts using our Cricut machines.

Being A Mom, I Deserve This... Main Photo

Materials Needed to make your own!

How I created this masterpiece!

  1. Using my Cricut Design Space, I uploaded the SVG file that I have provided and sized the file so that it would fit on my tumbler.
Cricut Design Space

2. I got my mat ready, applying my vinyl to the mat and inserting it into the Cricut.

Cutting Vinyl With Cricut

3. Once my design was cut out, I weeded away the unneeded pieces of vinyl using my weeding tool.

4. I covered my vinyl design with transfer tape and made sure that I burnished it really good using my fingers so that the vinyl adhered to the transfer tape.

Weeded Vinyl Saying and Swig Tumbler

5. I peeled the transfer tape away from the backing. TIP: I snipped the transfer tape in a few different places so that when I laid it on my tumbler, it was easier to work with. Round odd shaped cups can be a little tricky to work with.

Applying Vinyl to Tumbler

6. I started by placing the transfer tape down in the center and then worked my way around the outside making sure all of the letters got placed without any wrinkles. A good rubbing with my fingers to make sure the letters would stick to the tumbler and then it was time to remove the transfer tape.

Vinyl Wine Tumbler and Bottle of Wine

My kids can be a handful sometimes, but how true is this statement: Being a mom, I deserve this….. What do you deserve as a mom? Wine? Beer? Chocolate? A vacation? All of the above? Wouldn’t it be nice to have those things on Mother’s Day?

Be sure to check out other Cricut Mother’s Day projects by clicking the photos below and also register to win a Cricut for you and one for your mom, plus two $125 gift cards How amazing is that giveaway?! !

LINKY PARTY CODE
Inlinkz Link Party

RAFFLECOPTER CODE:
a Rafflecopter giveaway

Until next time….. 


Will You Be My Gumdrop? Valentine

Craft Lightning is here again and this time it’s to celebrate obscure holidays!  I picked National Gumdrop day, February 15th, which just happens to be the day after Valentine’s Day!   So, why not make a Will You Be My Gumdrop Valentine!  I’ve created this cute card using my Cricut Explore.  Here is how you can make your own, even if you don’t have a Cricut!

Materials:

Cardstock:  white, pink, yellow, orange, green, a bright colored piece

Cricut Explore (or Maker) or a pair of scissors

Cricut cutting mat

Cricut Marker, Regular Marker or Stamps

Adhesive (I’m using a Xyron Sticker Maker and an Aleene’s tape runner)

Will You Be My Gumdrop? .svg cut file or .pdf file if you don’t have a Cricut

Box of Grumdrops!

Instructions:

Download the files and cut the pieces or cut them out by hand.

Using a Xyron Sticker maker, I made my gumdrops into stickers and attached them to the card.  

You can write the words with your Cricut, you can hand write them or you can do what I did and use stamps.

Using a tape runner, I attached the Valentine cardstock cut out to a colorful piece of cardstock!

Then it was ready to give to a sweet little Valentine just in time for National Gum Drop Day!

Hope you like this quick and easy Valentine for National Gum Drop Day!

Be sure to check out other quick and easy Obscure Holiday Craft Lightning projects by clicking the photo below!

Until next time…..

New Machine, New Beginning and a New Year

First of all, I’d like to wish everyone a Happy New Year!!!!   2018 seems like it flew by but I am totally ready for 2019!

Last year I decided to make a big purchase to hopefully help A Sweet Berry Designs grow.  The Inventables X-Carve has brought me lots of joy in the last couple of months!

The Inventables X-Carve is a CNC Router machine that you program via the computer.  Why did I buy a CNC router you may ask!   Some of you may know this, but my dad was a master carpenter at the University of South Carolina for many many years!   In his spare time at home he would build furniture and other wood items.  He would build shelves, entertainment centers, desk and even lake docks!  He has installed shelves in my garage as well as some neighbors garages. We have several of his shelves in the house!  He even built my desk that is in my “office” space.  He has slowly started passing down some of his power tools to me and I have been using them like crazy the last couple of years!  Some of the items I have made, such as my North Carolina cut out ornaments are repetitive cuts and the X-Carve helps with that and save my back in the process!

So, after lots and lots of research and youtube watching, I ordered one!!!!   Over the next couple of weeks, boxes started coming but I made myself wait to open any of them until everything arrived.  Inventables has different size X-Carves.  I decided to get the big one.  I had a feeling that if I got the smaller one, I’d want the bigger one!  But they all came just before we were going on a big trip to Chicago so I had to wait a little while to get it together.

And guess what?   Everything had to be put together, from the railings to the circuit boards.  It was crazy!   It was definitely a family effort!  Lots of little bags of screws, nuts and washers.  Stepper motors, homing switches and wheels.  My mom even had a part in it!

So, after about 7 or 8 hours or so, it was complete and ready for it’s first run.  I was nervous as heck but it was worth the nail biting to make sure it was going to work!  Oh yeah, I also bought a new ShopVac!  The online software for the X-Carve had a test carve that was super cute (see pic below).   

The boys thought the amount of saw dust was amazing and loved being able to vacuum it up!   They’ve been awesome helpers when I am carving!  Give them the vacuum and they are set!

Here are a few projects that I have done and a lot of them that have sold!!!  I have lots of plans for the new year!

Letters, words and detailed cross ornament cut outs!

Puppy and Dog Paw cut out Leash Holders!

Christmas cut outs on a wood round!

State and tree cut outs!  I’ve cut out NC, VA, CO, CA and FL.

Engraved items:  Photo boards and Nativity boards

I put my logo on a store bought wood round!

And today, on day 1 of a new year, I created……

This Personalized Backpack Holder for a friend!  She is going to hang it right by her front door so that her kids can hang their backpacks up as soon as they walk in the door!  I sat and watched the names being engraved the entire time.  It’s very mesmerizing and therapeutic!  

2018 was fun, but 2019 is going to be an awesome year!  I definitely hope to blog a little more in the new year!   I’m also working to add items to my Etsy shop!!

So, if there is anything that you think you might want carved or engraved and made, let me know and I can tell you what the possibilities are!!!

Well, until next time……


All I Want To Do Is Wrap! Shirt featuring Cricut!

Christmas is around the corner and it will soon be time to wrap up all of the gifts that you purchase!  How about making a shirt to wear while you are doing the wrapping!!!

Materials:

Cricut
Cricut Cutting Mat
Cricut Iron-on
Cricut weeding tool
Cricut EasyPress
Shirt
SVG File
Towel

Directions:

Upload the svg file to your Cricut Design Space.  Size it to your liking.

Make sure to attach the file so that it cuts just like it is on the screen.

Also make sure that you mirror the image.

Add the Cricut Iron-on to your mat, shiny side down.  Insert the mat into your cricut and cut!

Once the file is completely cut out, remove it from the Cricut and weed the excess Iron-on.

Heat the EasyPress to 320 degrees.  Place a towel below your shirt.  Warm the shirt before adding the Iron-on.  Place the Iron-on with the design side down and the shiny side up.   Using the EasyPress, apply pressure to the Iron-on and set the timer for 30 seconds.

And now it’s time to wear!!!

Click the photo below and check out other Cricut Holiday Projects!


Until next time……

Hot Glue Love Wood Sign

Yay!  It’s Craft Lightning time again!

In honor of a book that my crafty friends Angie Holden (The Country Chic Cottage) and Carolina Moore (30 Minute Crafts) recently wrote together, Hot Glue Hacks and Crafts, this months Craft Lightning theme is Hot Glue!!!!!

For my Craft Lightning project, I created a Hot Glue Love Wood Sign!

What I used:

  • Hot Glue Gun
  • Glitter Hot Glue Sticks
  • Paint Brush
  • Paint
  • A piece of wood 
  • Sawtooth Picture Hanger
  • Pencil

How I made it:

I painted the board.  I used Folk Art Color Shift Acrylic paint.  Let it dry.

Warm up the glue gun and insert the glitter glue stick.

Using a pencil, I drew out the word that I wanted to write.  TIP:   You could use any word, I chose “love”.

Using the hot glue gun, trace over the pencil strokes.  Allow the hot glue to dry.

Turn over the board and attach the sawtooth picture hanger.   

Clean up all of the little hot glue strings.

Now it’s time to hang up or give it as a gift!

Be sure to click the photo below and check out other great Hot Glue Craft Lightning projects.  Also, be sure to check out Angie and Carolina’s book on Amazon and at Barnes & Noble.  It’s full of lots of crafts that make using hot glue fun!   There are so many ways that you can use Hot Glue other than using it to glue stuff together!

Until next time…..

Quick Sew Burlap Gift Bags

Craft Lightning is here again!  And it’s burlap crafts with my awesome friend, Beth Watson from Creatively Beth!!!!   Weird Not So Fun Fact: Some may know this, but I have a mild allergy to burlap and if I touch the burlap, I get a tad bit itchy and then if I touch my lips, they get itchy to!   Who knew that you could be allergic to burlap?!  I had no clue, but I LOVE burlap and just deal with the allergy and try not to touch my lips!  Anyways, I made these cute little quick sew burlap gift bags with this adorable painted burlap that I found at my local A.C. Moore.

Skill Level:   Easy + Basic Sewing Skills
Time to Complete:  Less than 15 minutes

Materials:

Burlap 
Cutting Mat
Cutting Ruler
Rotary Cutter
Sewing Machine loaded with thread
Ribbon

How I made it:

I cut the burlap in strips at 7.5″x10″ using my mat, ruler and rotary cutter.  

I folded the burlap with the painted side on the inside..

Using the sewing machine, I sewed only the sides closed.

I turned the bags right side out.

Then they were ready for a gift and a ribbon tied at the top to close it!  You could also use twine or jute rope.  

These bags were super easy and took less than 15 minutes.  You can do what I did and find already painted burlap or you could get regular burlap and decorate it yourself!  This a super easy project for the kids!   They will have lots of fun filling them with gifts to give to their friends or teachers!

Be sure to click the photo below to see more Craft Lightning Burlap projects!

Until next time……

Cricut Iron On Wine Bottle Bag

Disclaimer:  This post includes affiliate link(s).   

Are you obsessed with your Cricut Explore or Maker?   What about your Cricut EasyPress?   I know that I am.  Today I made this adorable “Only My Best Friends Get To Wine!” Canvas Wine Bottle Bag using my Cricut Explore and EasyPress!   See how I made it below!

Materials:

Cricut Explore (or other Cricut machine)
Cricut Design Space
Cricut EasyPress
Cricut Pink Glitter Iron On
Cricut Weeding Tool
Cricut Cutting Mat
Canvas Wine Bag (I got this at ACMoore)
Towel (or you could use the Cricut Mat)
Only My Friends Get To Wine! SVG cut file (I made it using Illustrator, but I like to share!!!)

How I made it:

Cut the design out with the Cricut Explore and Cricut Iron On.  TIP:  Be sure to mirror your image!

Weed the design using the Cricut weeding tool.  First I peel away the large part and then work on the letters.

Using the EasyPress Recommended Settings Guide, adjust your temps and time on the the Cricut EasyPress.  

Preheat the bag and then apply your design, shiny side up.   Press firmly with the EasyPress for the recommended time.   Turn the bag over and heat the back with the EasyPress.  Remove the transfer backing while still warm.

And there you have it!   Add a bottle of wine and give it to a friend!!!

Be sure to click below to check out other Cricut Iron On ideas.  And enter to win!!!!

a Rafflecopter giveaway

Christmas in July

Decorated Letter Decor

Craft Lightning is happening and the theme this month is Wood.  Wood is my favorite material to work with.   I usually like to do the cutting and designing, but today I’m using a wooden letter that I got from my local craft store.

Materials used:

Wooden Letter
Paint (I used Plaid’s FolkArt Color Shift in Yellow Flash)
Paint Brush
Felt (I use KuninFelt)
Hot Glue Gun and Hot Glue Stick
Scissors

How I decorated it:

I applied two coats of paint to the letter, allowing the first coat to dry before applying the second coat.

I cut the felt for my felt flowers.  I just used a simple tutorial that I found online.

Then I put the flowers together using the hot glue gun.

I glued the flowers to the letter.

And then it was time to hang it up!!!!   This particular letter had a hanging hole on the back but you could also hang it by using ribbon or jute rope! 

This decorated flower decor took less than 15 minutes, excluding the drying time.  This would be a super easy project for a kids party or a girls night in!

Be sure to click the photo below for more Craft Lightning Wood projects!

Until next time….


Peace Out 5th Grade Shirt featuring Cricut Products

Disclaimer:  This post includes affiliate links.  Opinions in this post are mine.

The end of the school year is near for us and it’s hard to believe that I have a 5th grader going in to 6th grade.  While my oldest has loved his teachers this year, he is ready to be done with 5th grade!  With that said, I made this Peace Out 5th Grade shirt for him to wear on his last day!!!  Cricut makes it super easy to make fun shirts at home!

Materials used:

Cricut Explore and cutting mat
Cricut Iron-On HTV in white
Cricut Weeding Tool
Cricut Easy Press
Cricut Design Space and a Computer
T-shirt
Towel

How to make it:

Using my laptop and Cricut Design Space, I laid out my design.  

With my Cricut Explore, I cut my design out.  Before cutting, I remembered to mirror my image!  I have forgotten to do this once in the past.  Not good.

After it was finished cutting, I weeded the excess iron-on HTV using my Cricut weeding tool.

The Cricut Easy Press is super easy to use and takes up very little space for storage.   I have also found that using the Easy Press works best on my granite counter top with a towel under the shirt. Cricut has a list of heating settings on their website.  I love it!

 
Shop new arrivals from Cricut!
 

Now it’s ready to wear!

Landon loves this shirt and is super excited to wear it.   Hope you like it!  

Be sure to click the below to find other End of the School Year Cricut ideas!


Shop new arrivals from Cricut!

Until next time……