Category Archives: Craft Lightning

Busy Kid Project – Painted Door Signs

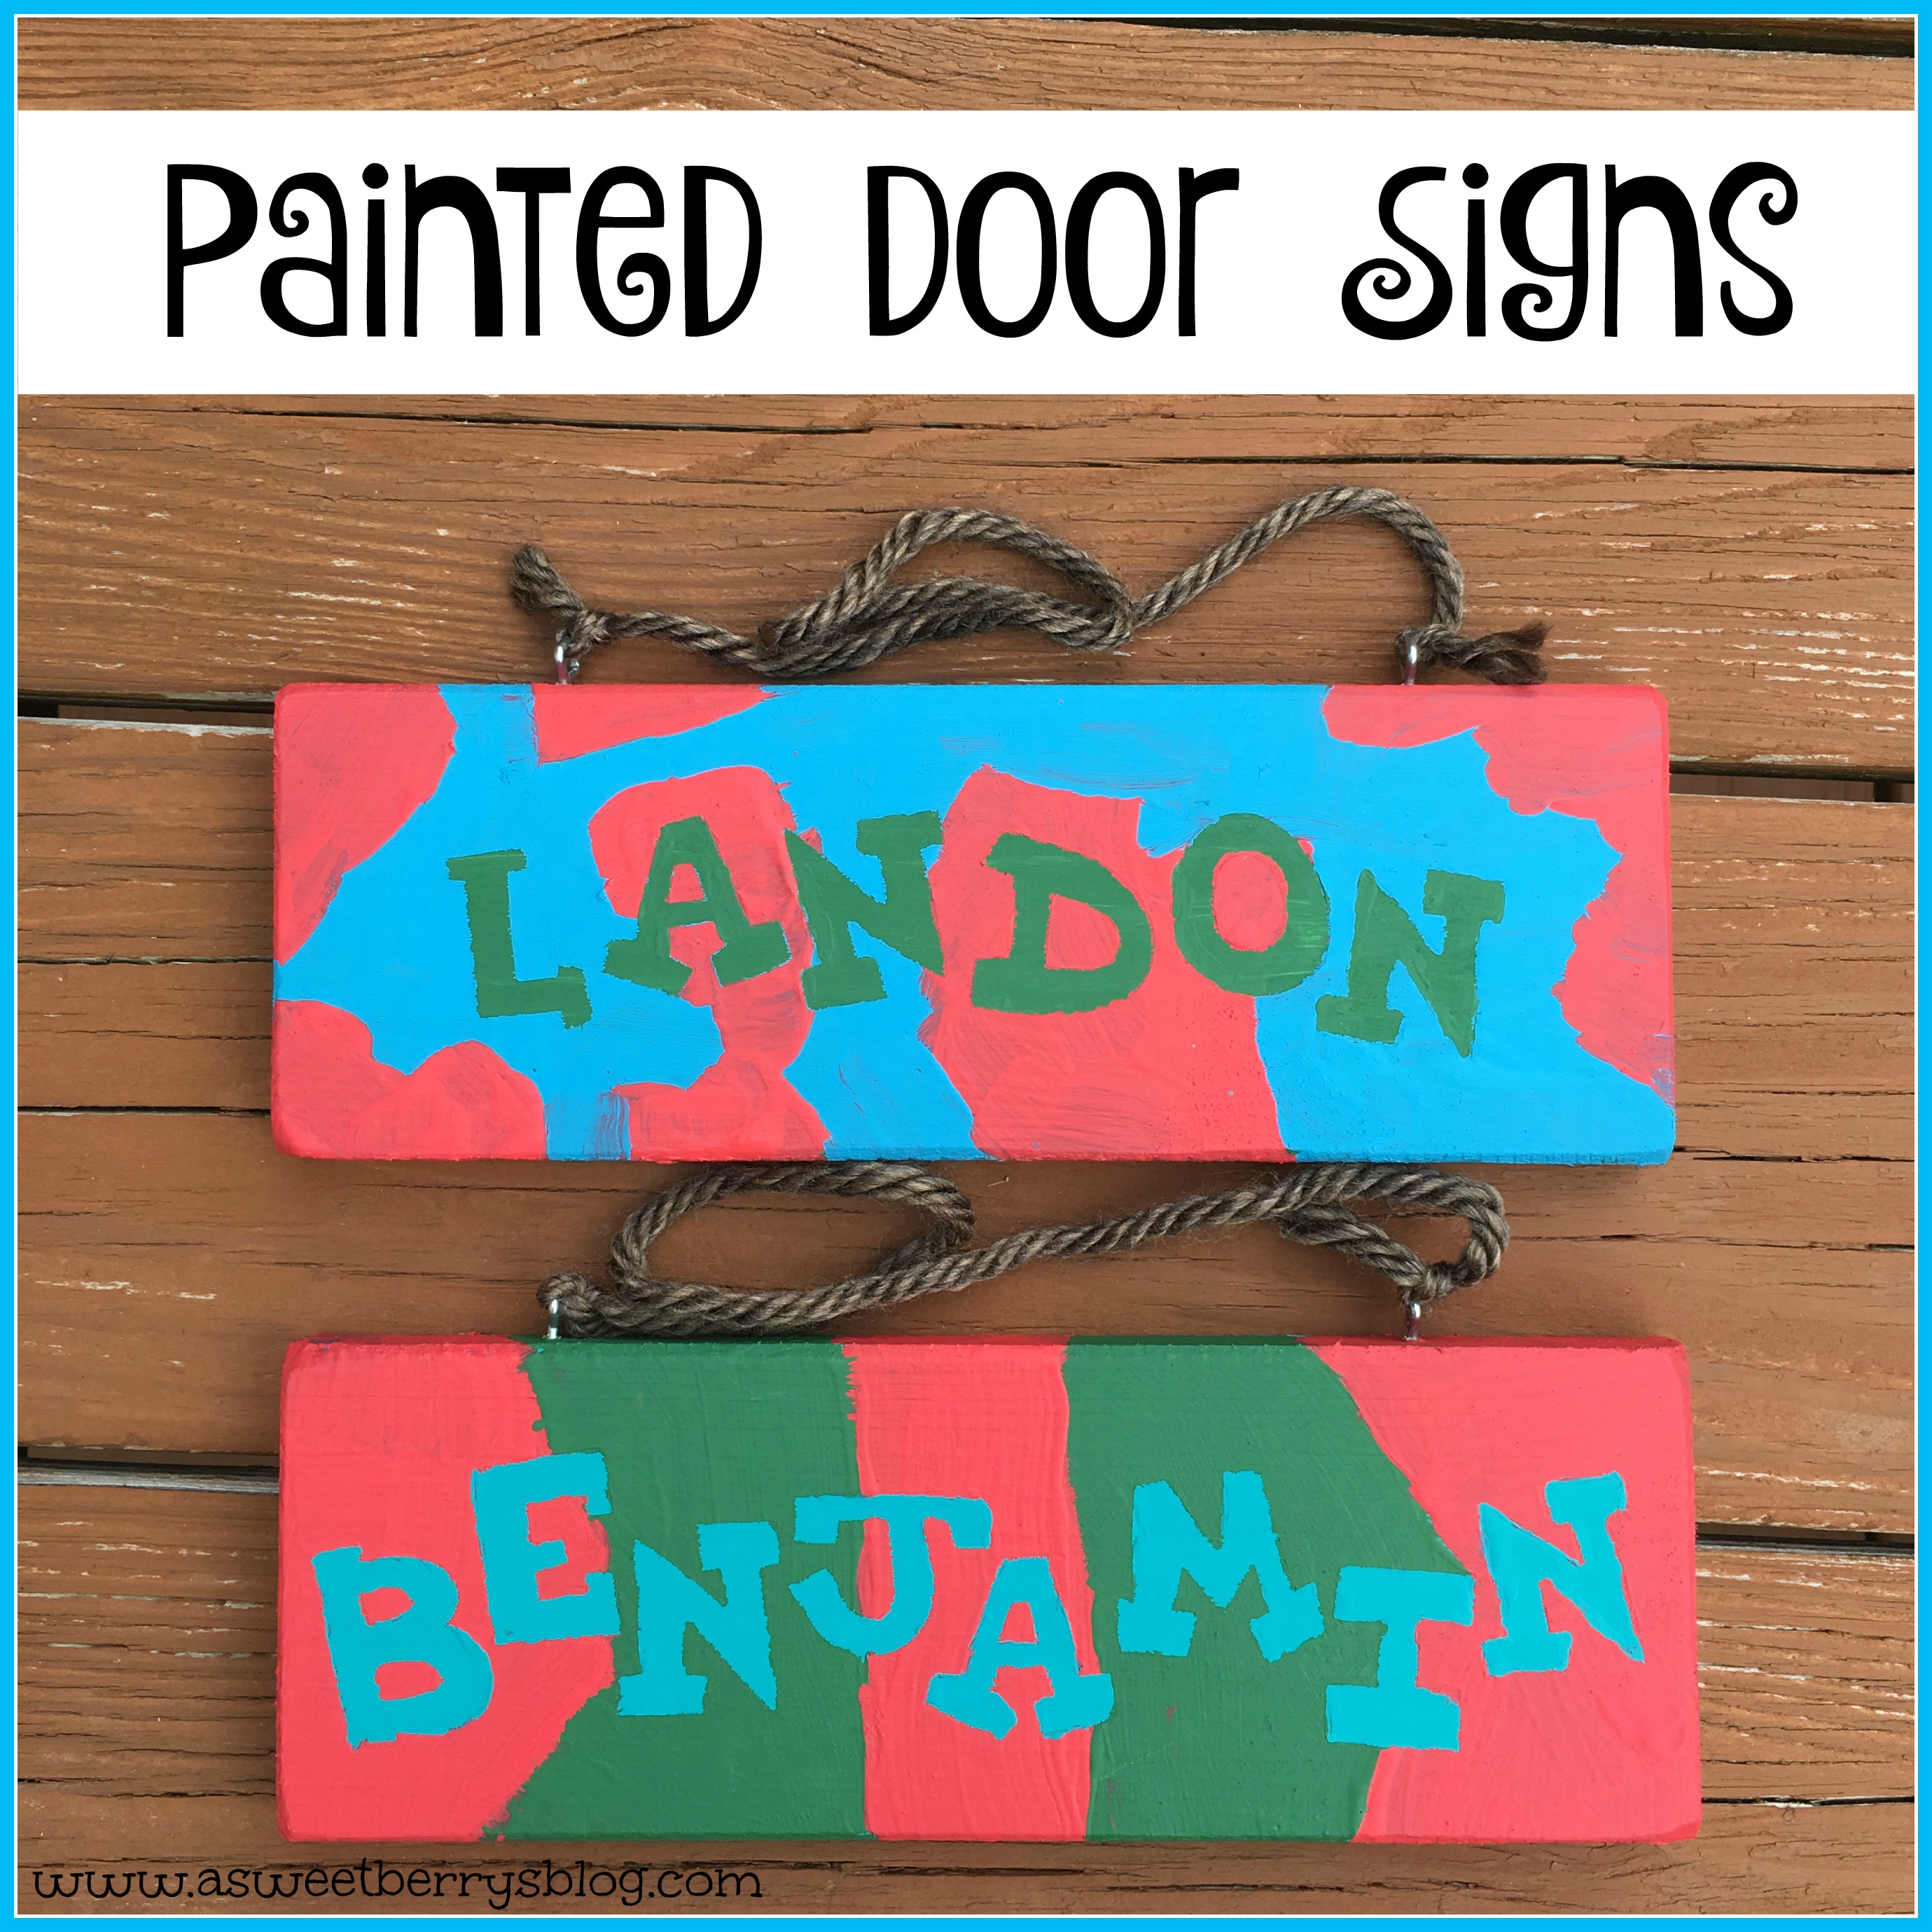
Need a quick DIY project to keep kids busy?  Well, these Painted Door Signs are perfect for a quick DIY project for kids.   They will love having their own personalized signs on their bedroom doors!  
final
Materials Used:
Pieces of wood
Acrylic Paint
Paint Brushes
Sticky Letters or other sticky designs
Screw eyes (two for each sign)
Yarn or other string
paint step 1
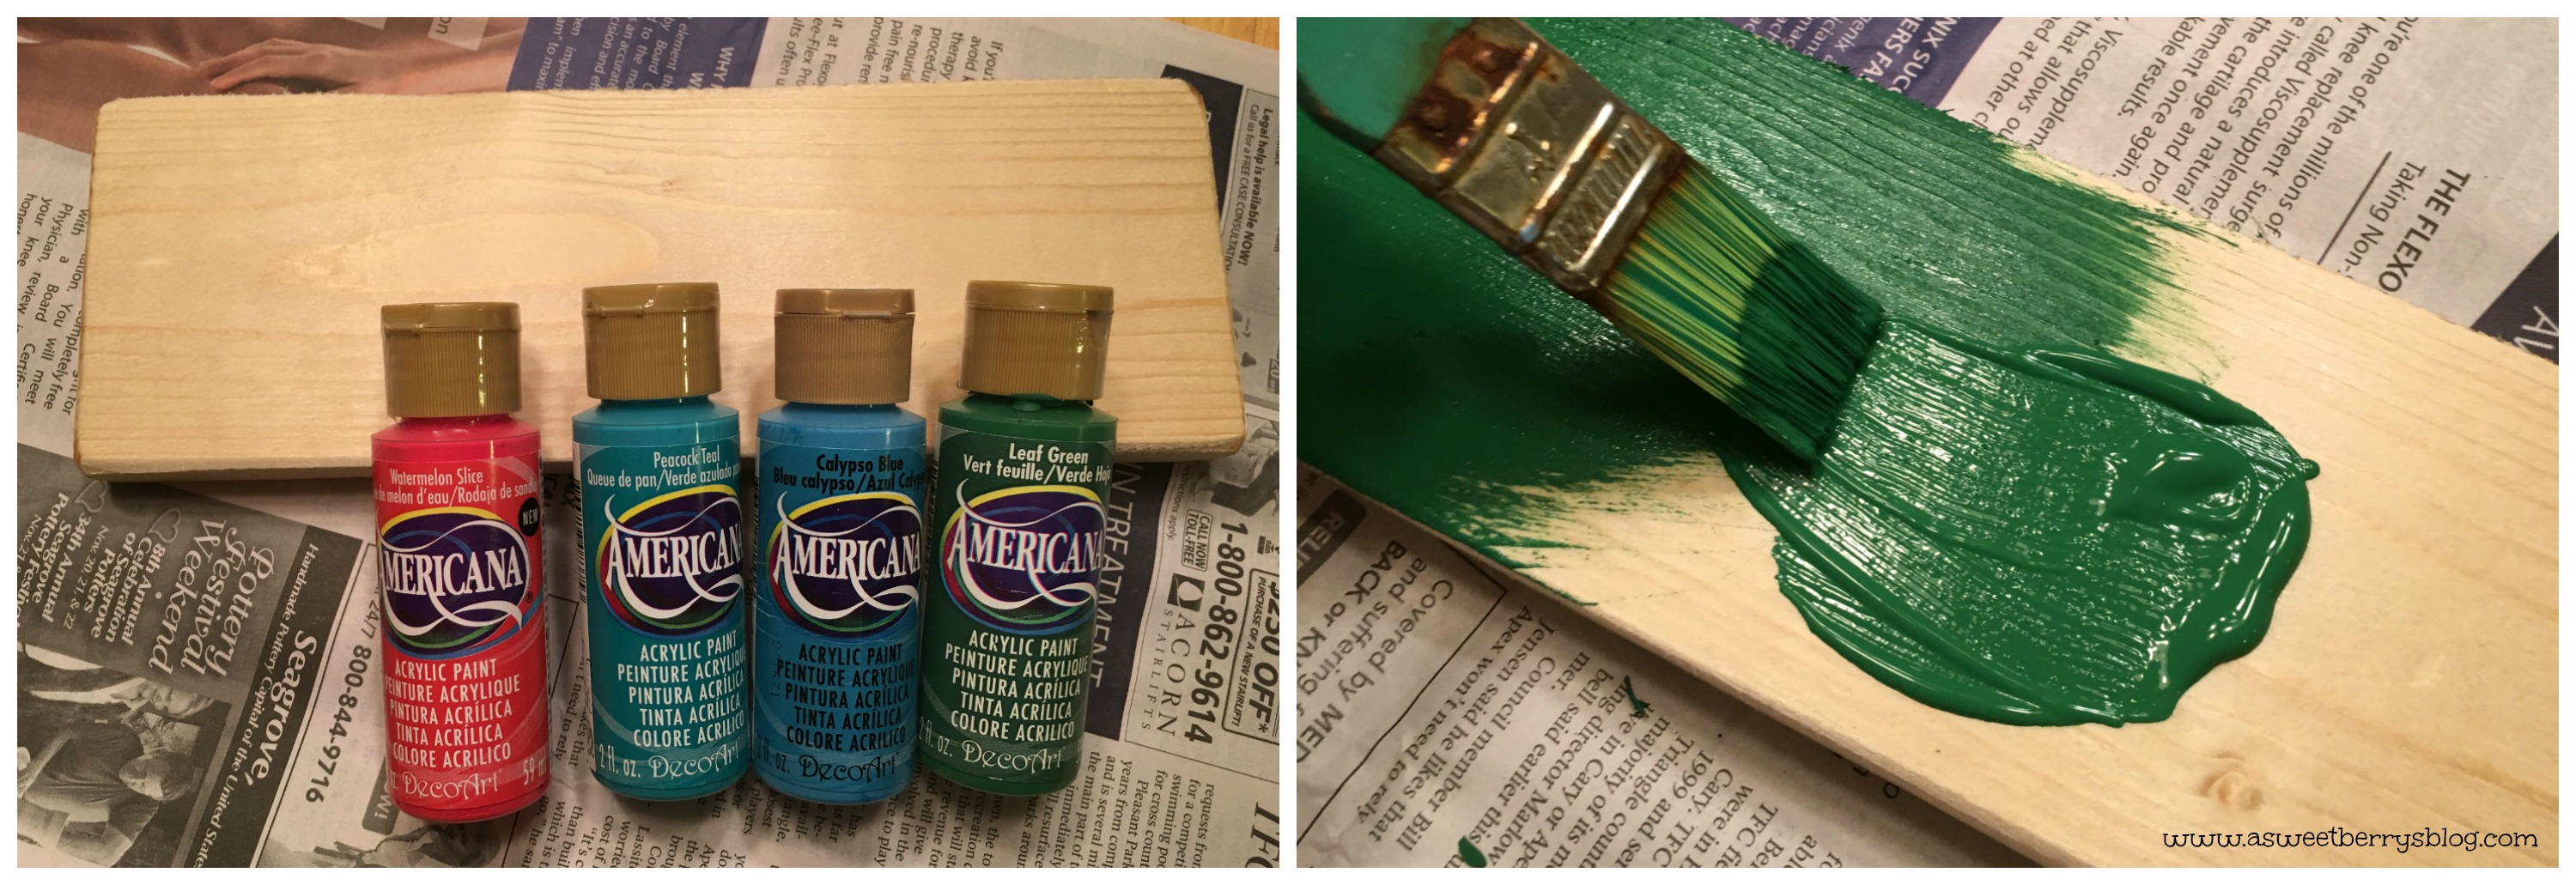
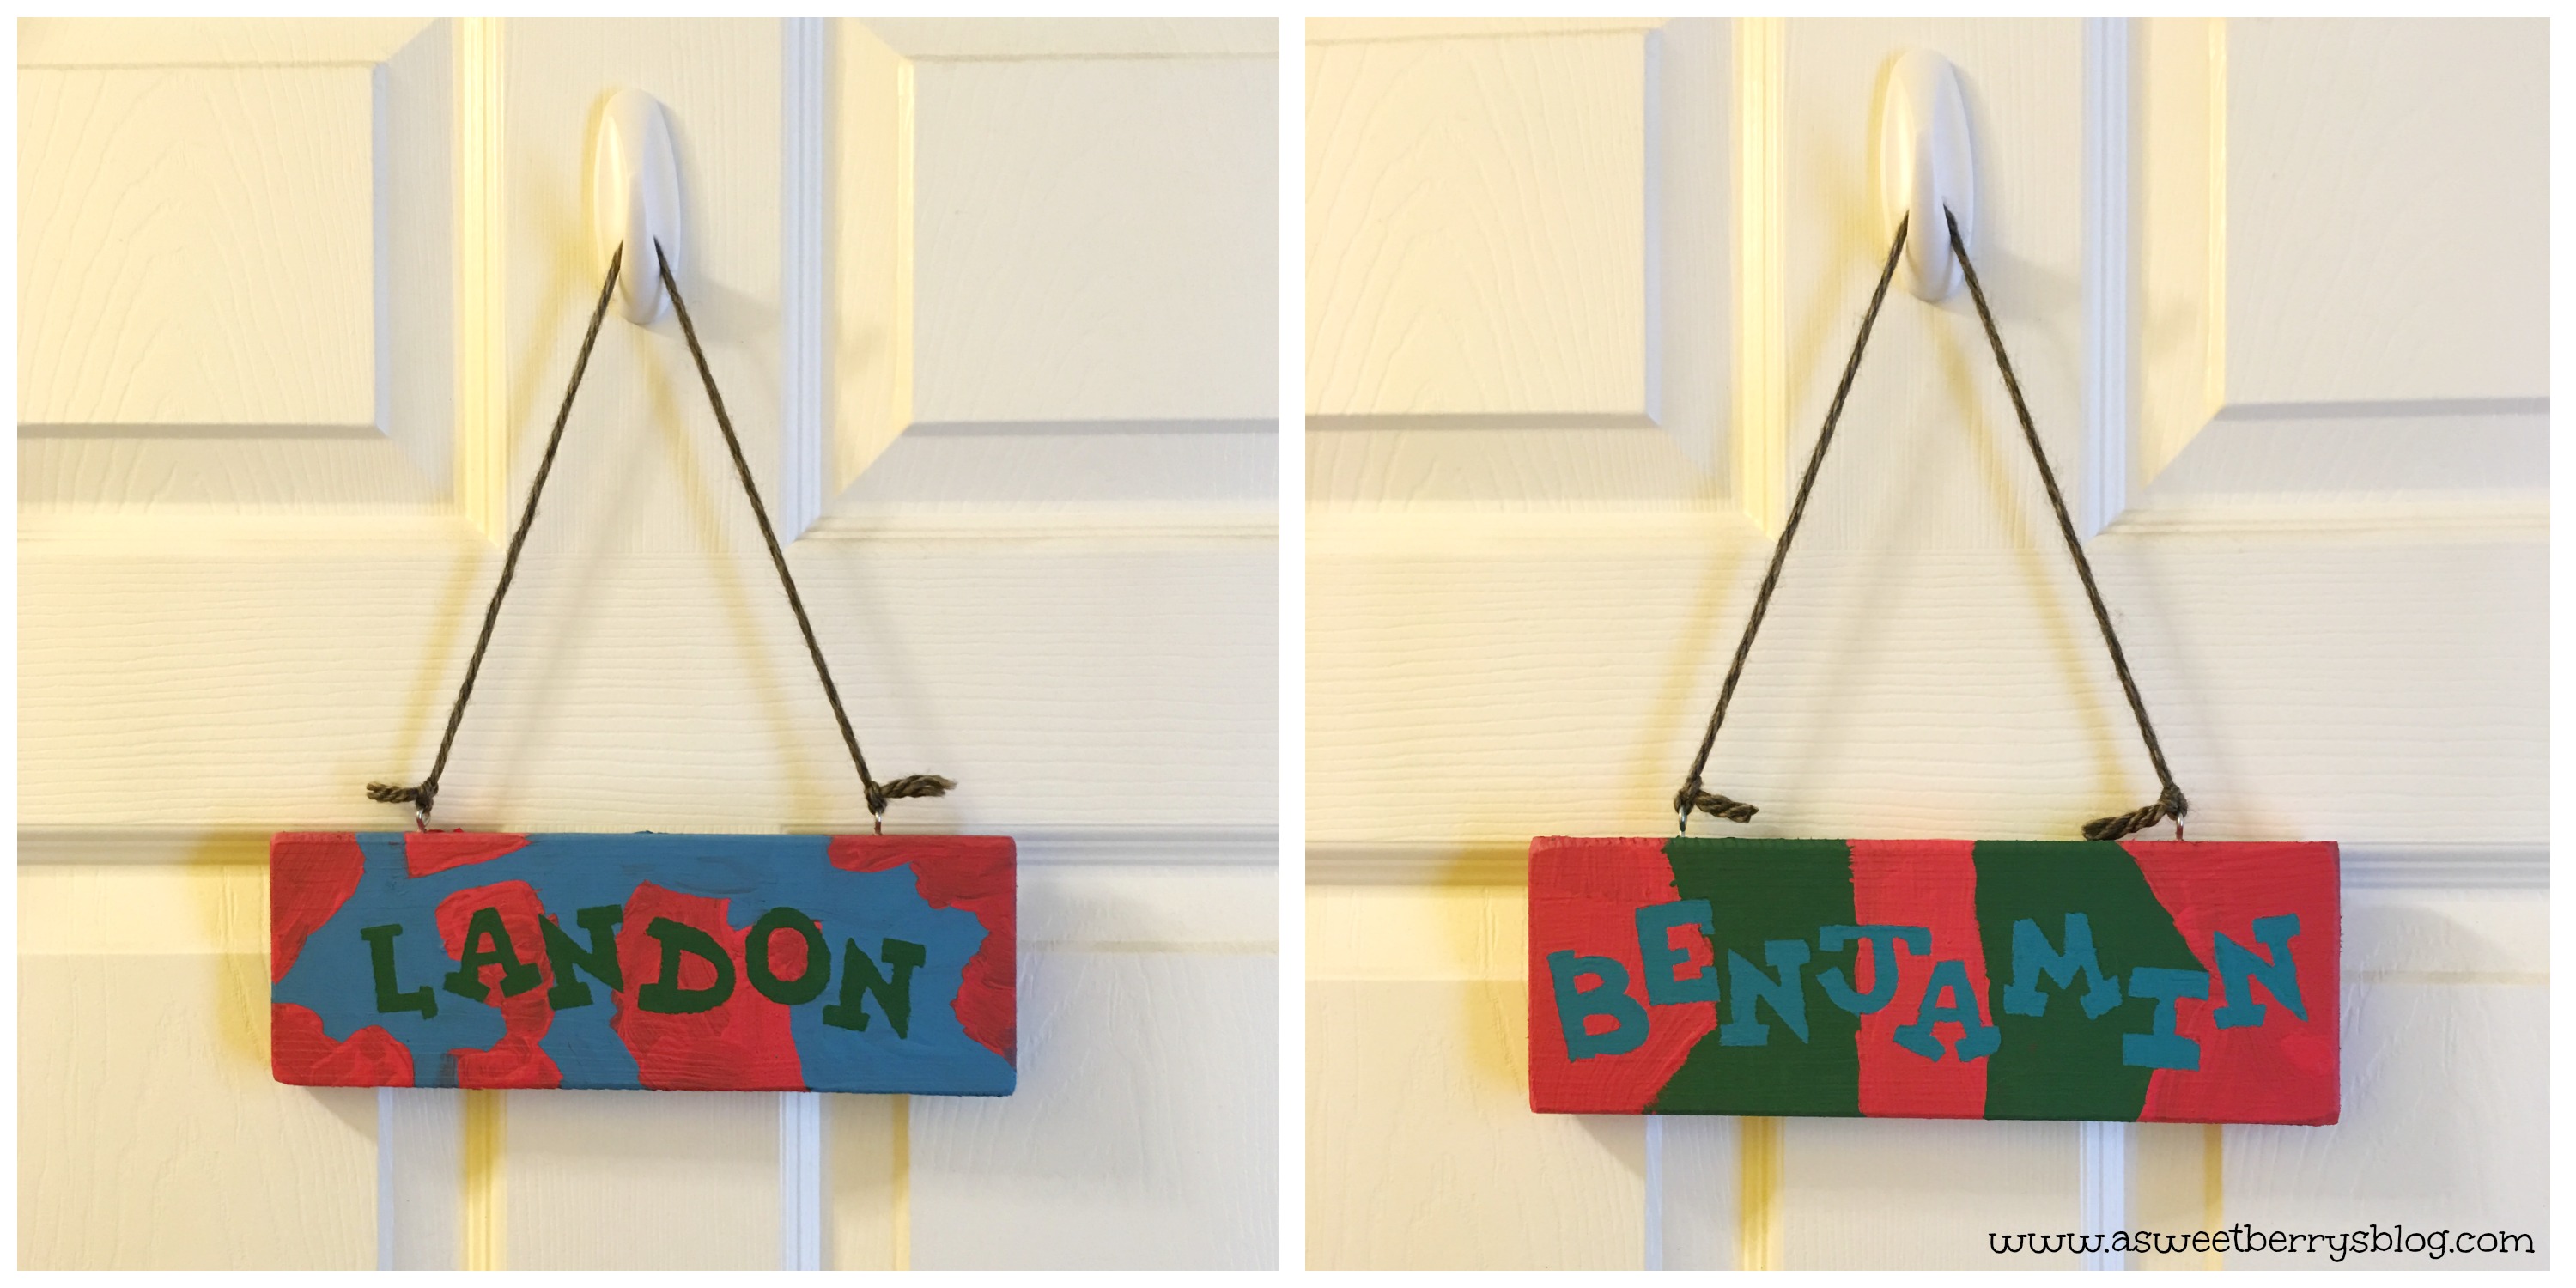
First, the wood pieces were painted with a base color.  Think about what color you want your letters to be!   That is the color that you want for the base.
Sizzix
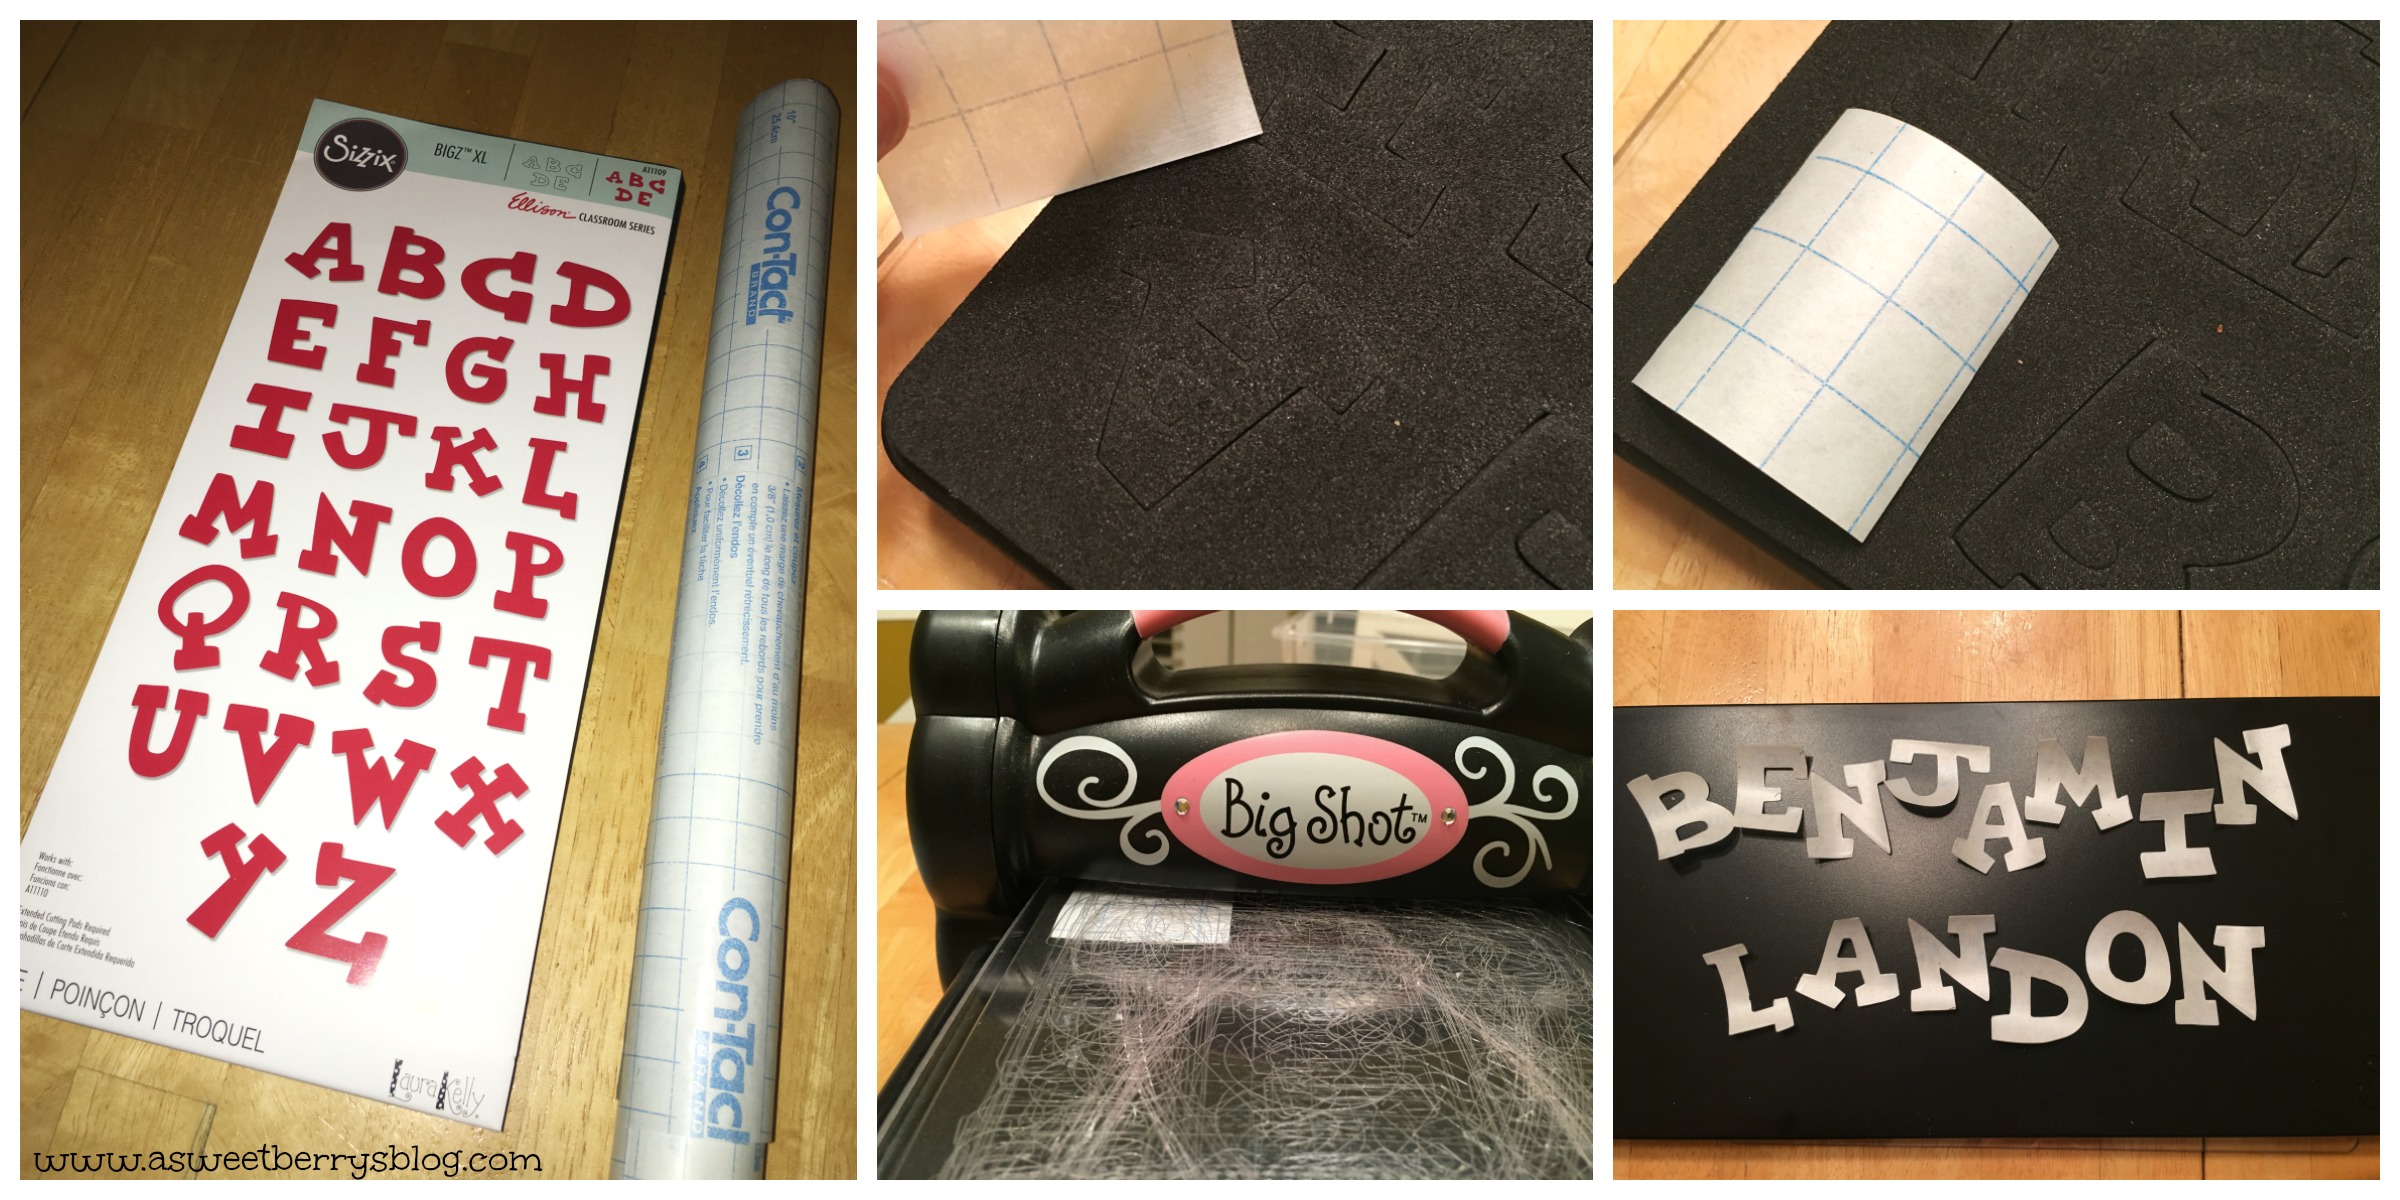
Using my Sizzix Big Shot and Laura Kelly’s Lemonade Capital Alphabet Sizzix Dies, I cut out each letter of my children’s names.
paint step 2
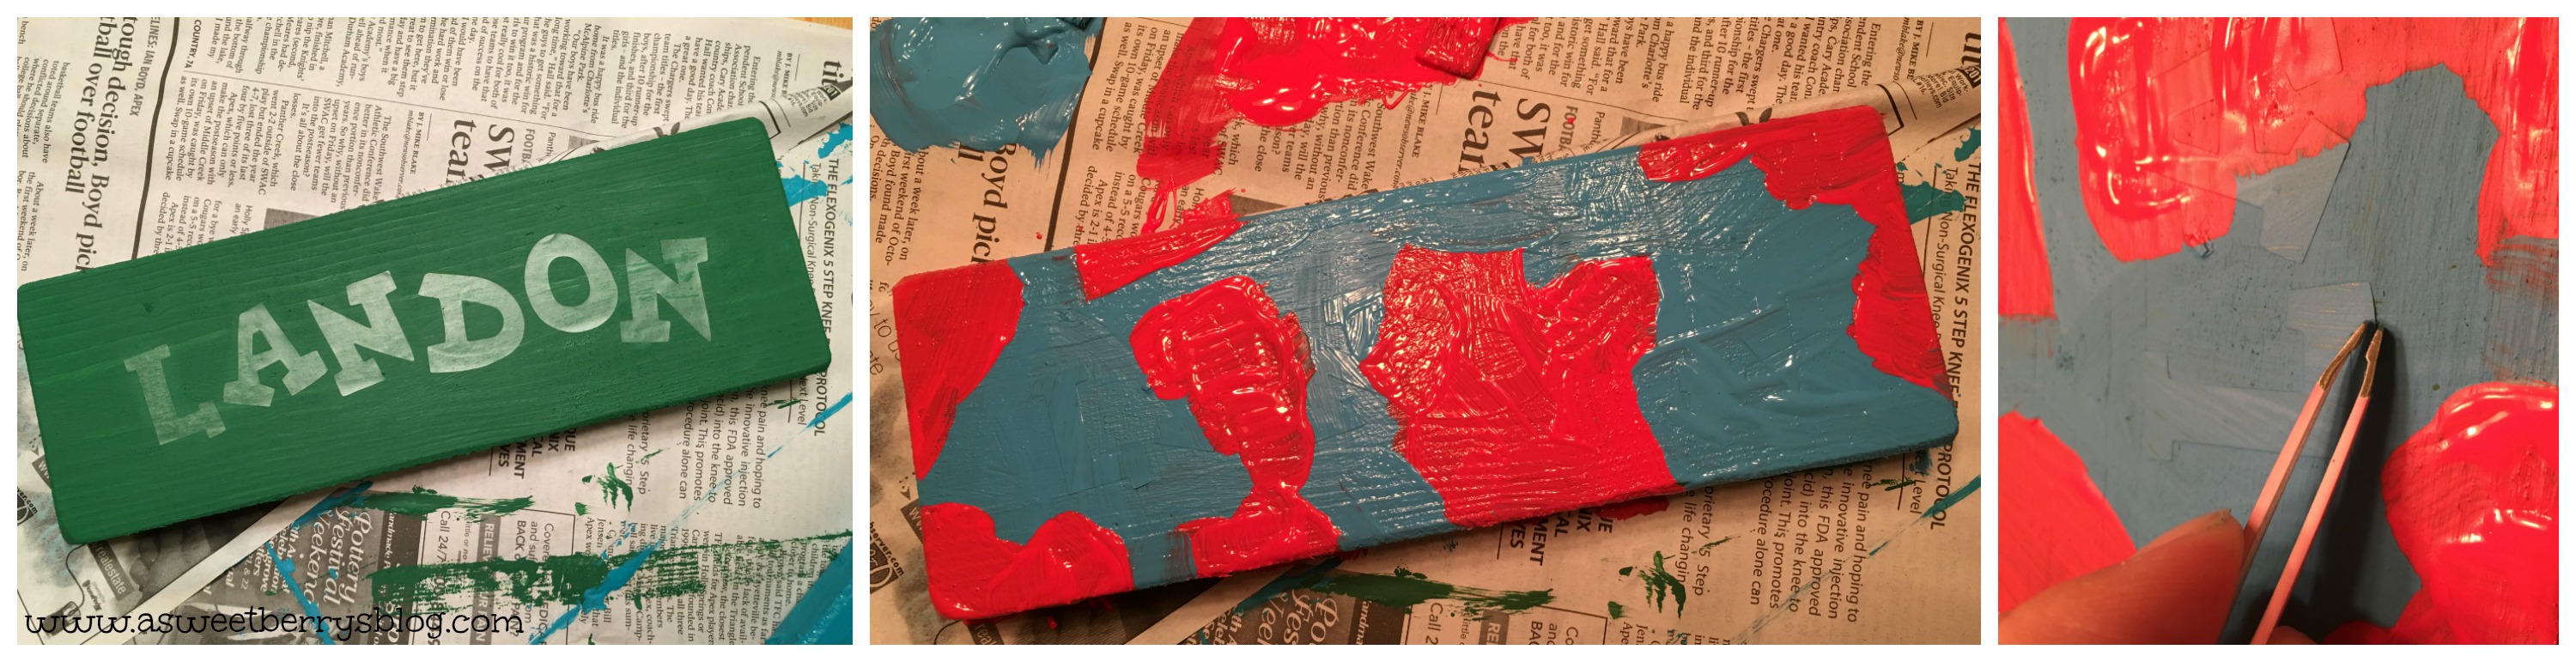
Once the base color was dry, I let them place the letters where they wanted after removing the backing.   Making sure the letters were pressed down nicely, it was time to paint over the letters!  When the paint was dry or at least close to being dry, I removed the letters with a pair of tweezers.
screw hanger
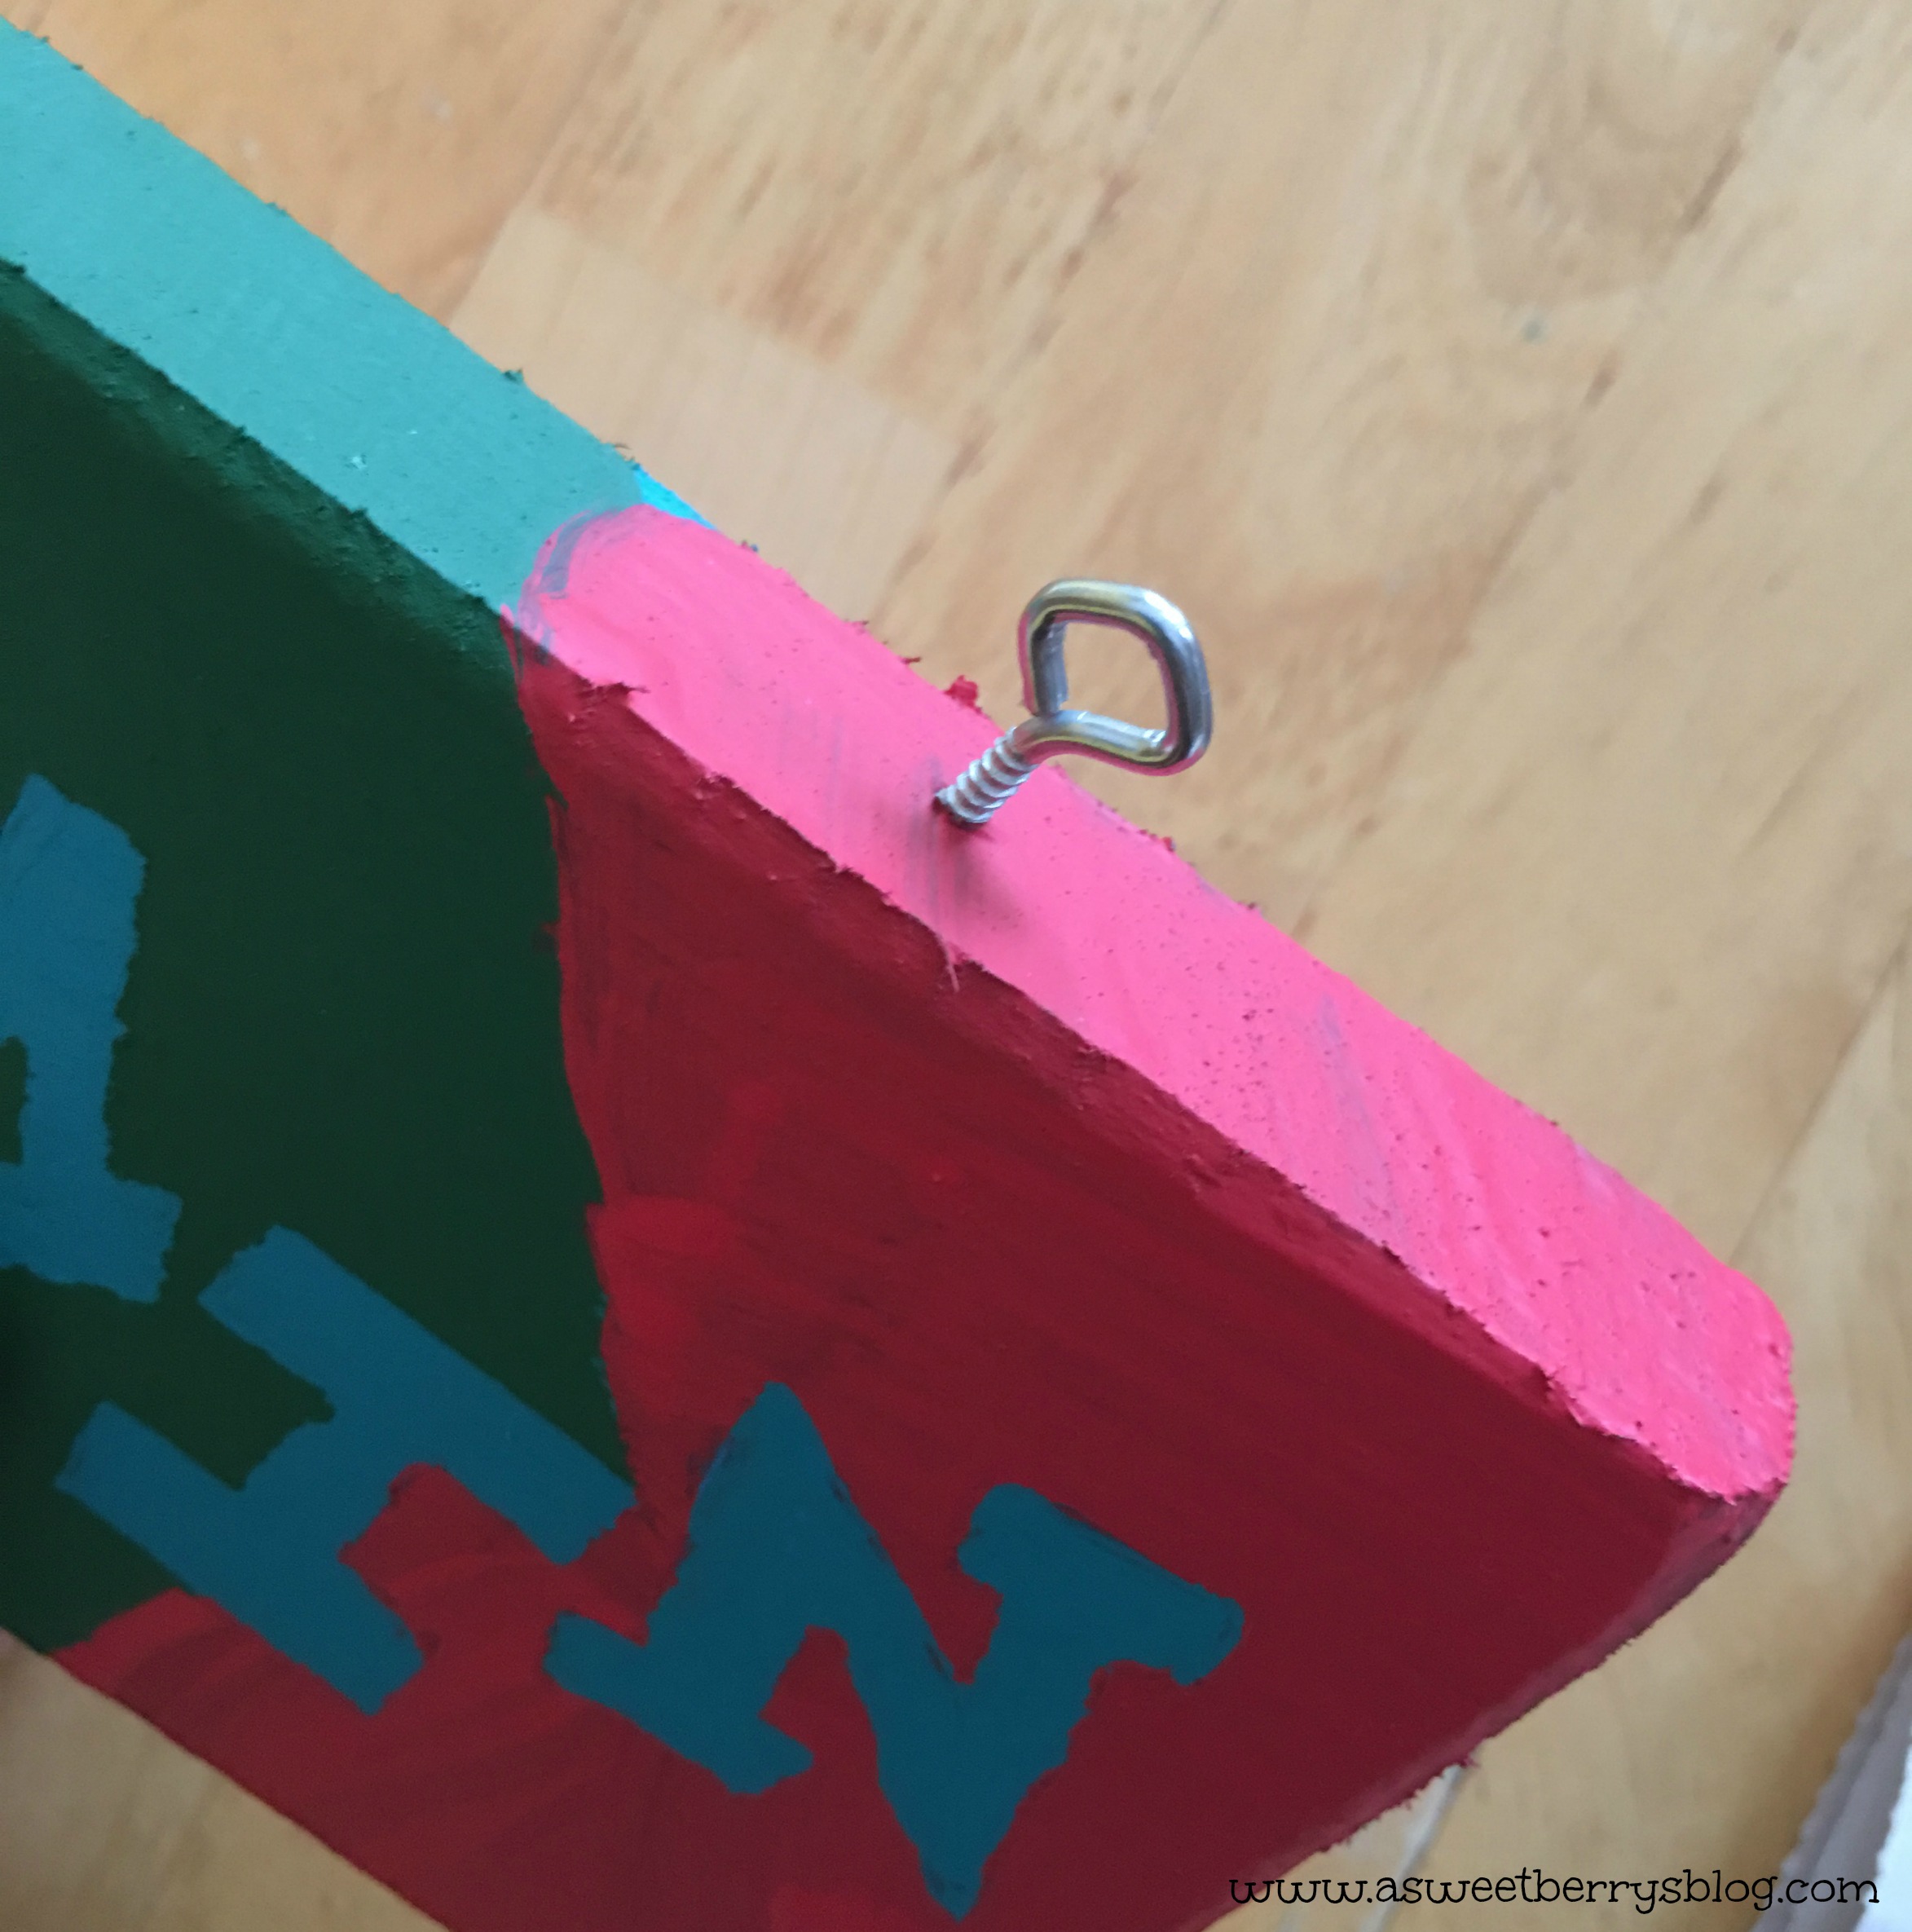
We let the signs dry completely.  Then I screwed in the screw eyes and attached a piece of yarn to them.   The boys were so excited to have their very own DIY Door Signs with their names on it!!!
doors
This project took about 15 minutes excluding the drying process!  It was super easy and fun and it kept the kids busy!

Be sure to check out other 15 minute Busy Kid Activities by clicking the Craft Lightning Button below!

Until next time……..

ShrinkFilm “Love” Earrings

Valentine’s Day is right around the corner!   These ShrinkFilm “Love” Earrings are perfect for the day of LOVE!   They were super easy and turned out super cute! earrings final
Using my Sizzix Eclips2 and ShrinkFilm that I purchased from A.C.Moore, I cut out a bunch of hearts.   The Eclips2 was so quick at cutting all of the hearts and they were all the same size!   
shrink film
Using just a regular hole punch, I went ahead and punched my holes, only one per heart.   Then I used a Sharpie permanent marker to draw an outline and the word Love.   Next it was time to put my hearts into the toaster oven and watch them shrink.  It amazes me every time that it only takes 2-3 minutes for it to shrink!
coloring
I keep a stash of earrings and jump rings in my supplies.   Using my round nose pliers, I added my jump rings (two to each heart) and placed them on my earrings.
putting together earrings
I love how they came out and I hope you like them too!    This cute pair of earrings took all of 15 minutes (maybe a little less) and they are perfect for Valentine’s Day!   Click here to check out a matching bracelet!

Click the box below to check out other great 15 minute or less Valentine’s Day crafts!

Felt Christmas Tree

It’s Craft Lightning time again!  And this time it’s a 15 minute Christmas craft!   This super easy and super quick Felt Christmas Tree is an awesome little decoration for the mantel or even the middle of your kitchen table! Main Photo
Supplies:
FloraCraft Styrofoam Cone
Kunin Felt
Hot Glue Gun
Pom Poms 
Rotary Cutter and Cutting Board
Pins
supplies
First, I did a quick cut of some felt, cutting it into strips.  Then I did a super quick cut of triangles.   Folding the triangles in thirds, I added a pin and then stuck it right into the styrofoam.  I started it at the bottom and worked my way up.
process
Using my Pom Poms and my hot glue gun, I added the green, red and white pom pons to cover the pins and added a couple of more to fill in the gaps!
Main Photo
Be sure to check out other creative Craft Lightning ideas by click the Button below!

Hope you like this quick Felt Christmas Tree! 

Until next time………..

Craft Lightning Paint Chip Pumpkin Card and Party Bag


I’m so excited to be joining 15 minute Craft Lightning again!   The theme for this Craft Lightning by The Country Chic Cottage, 30 Minute Crafts and 100 Directions is Halloween!   My 15 minute craft was inspired by my awesome friend Laura Kelly!
Paint Chip Pumpkins
If you are like me, you probably have paint chips lying around in your house!  These orange, black and brown ones were perfect for these quick and super easy Paint Chip Pumpkins! materials
All you have to do is create your little pumpkin with the paint chips, goggly eyes, ribbon and glue (I used Aleene’s!) and stick it right on to your blank card!   And then write you a spooky little note inside!
card
The same was done here using a cute little brown paper party bag!  Perfect for Halloween Party Goody Bags!   Inside this little party bag are a few little Halloween Lollipops from Lollipics! bag
Hope you liked these cute little Paint Chip Pumpkin Card and Bag decorations!    These are quick and easy and perfect for the little ones to do!

Until next time……..

Mr. and Mrs. Seat Back Wedding Wreaths

Need a quick wedding craft to brighten up the bride and grooms chair at the wedding reception?  These Mr. and Mrs. Seat Back Wedding Wreaths are quick, easy and adorable! final
Materials:
Two foam wreaths (I used FloraCraft Make It Fun Wreath Rings)
Wooden Letters (I picked these up at A.C. Moore)
Burlap Ribbon
Tulle
Krylon ColorMaster – Sea Glass
Hot Glue Gun and Glue
materials
So that it would be dry in time for adding them to my wreaths, I spray painted my letters first.   Krylon
Then, with the help of my craft loving five year old, Benjamin, I wrapped the foam wreath rings with the burlap ribbon and hot glued the end to keep it from unraveling. wrapping wreath
Once my letters were dry, I hot glued them together, slighting overlapping the letters. glued letters
Once the letters were glued together, I took a strip of tulle that was about 6-8 feet long and folded it in half to find the center.  Once I had the center, I hot glued my letters to the tulle.  I only attached the “Mrs” on the “R” and both the “M” and “R” of the “Mr” to the tulle.   I then laid the letters and tulle over the wreath and wrapped the tulle around the wreath near the top.  Once I was happy with the placement of the letters, I wrapped it around the chair and tied it to secure the wreaths to the chairs! individual wreath
I love how these turned out!  And they are actually on their way to a beach wedding this upcoming weekend!
final
Need other super quick and easy wedding ideas?  Be sure to check out this awesome Craft Lightning event for great ideas from some awesome bloggers!

Until next time……