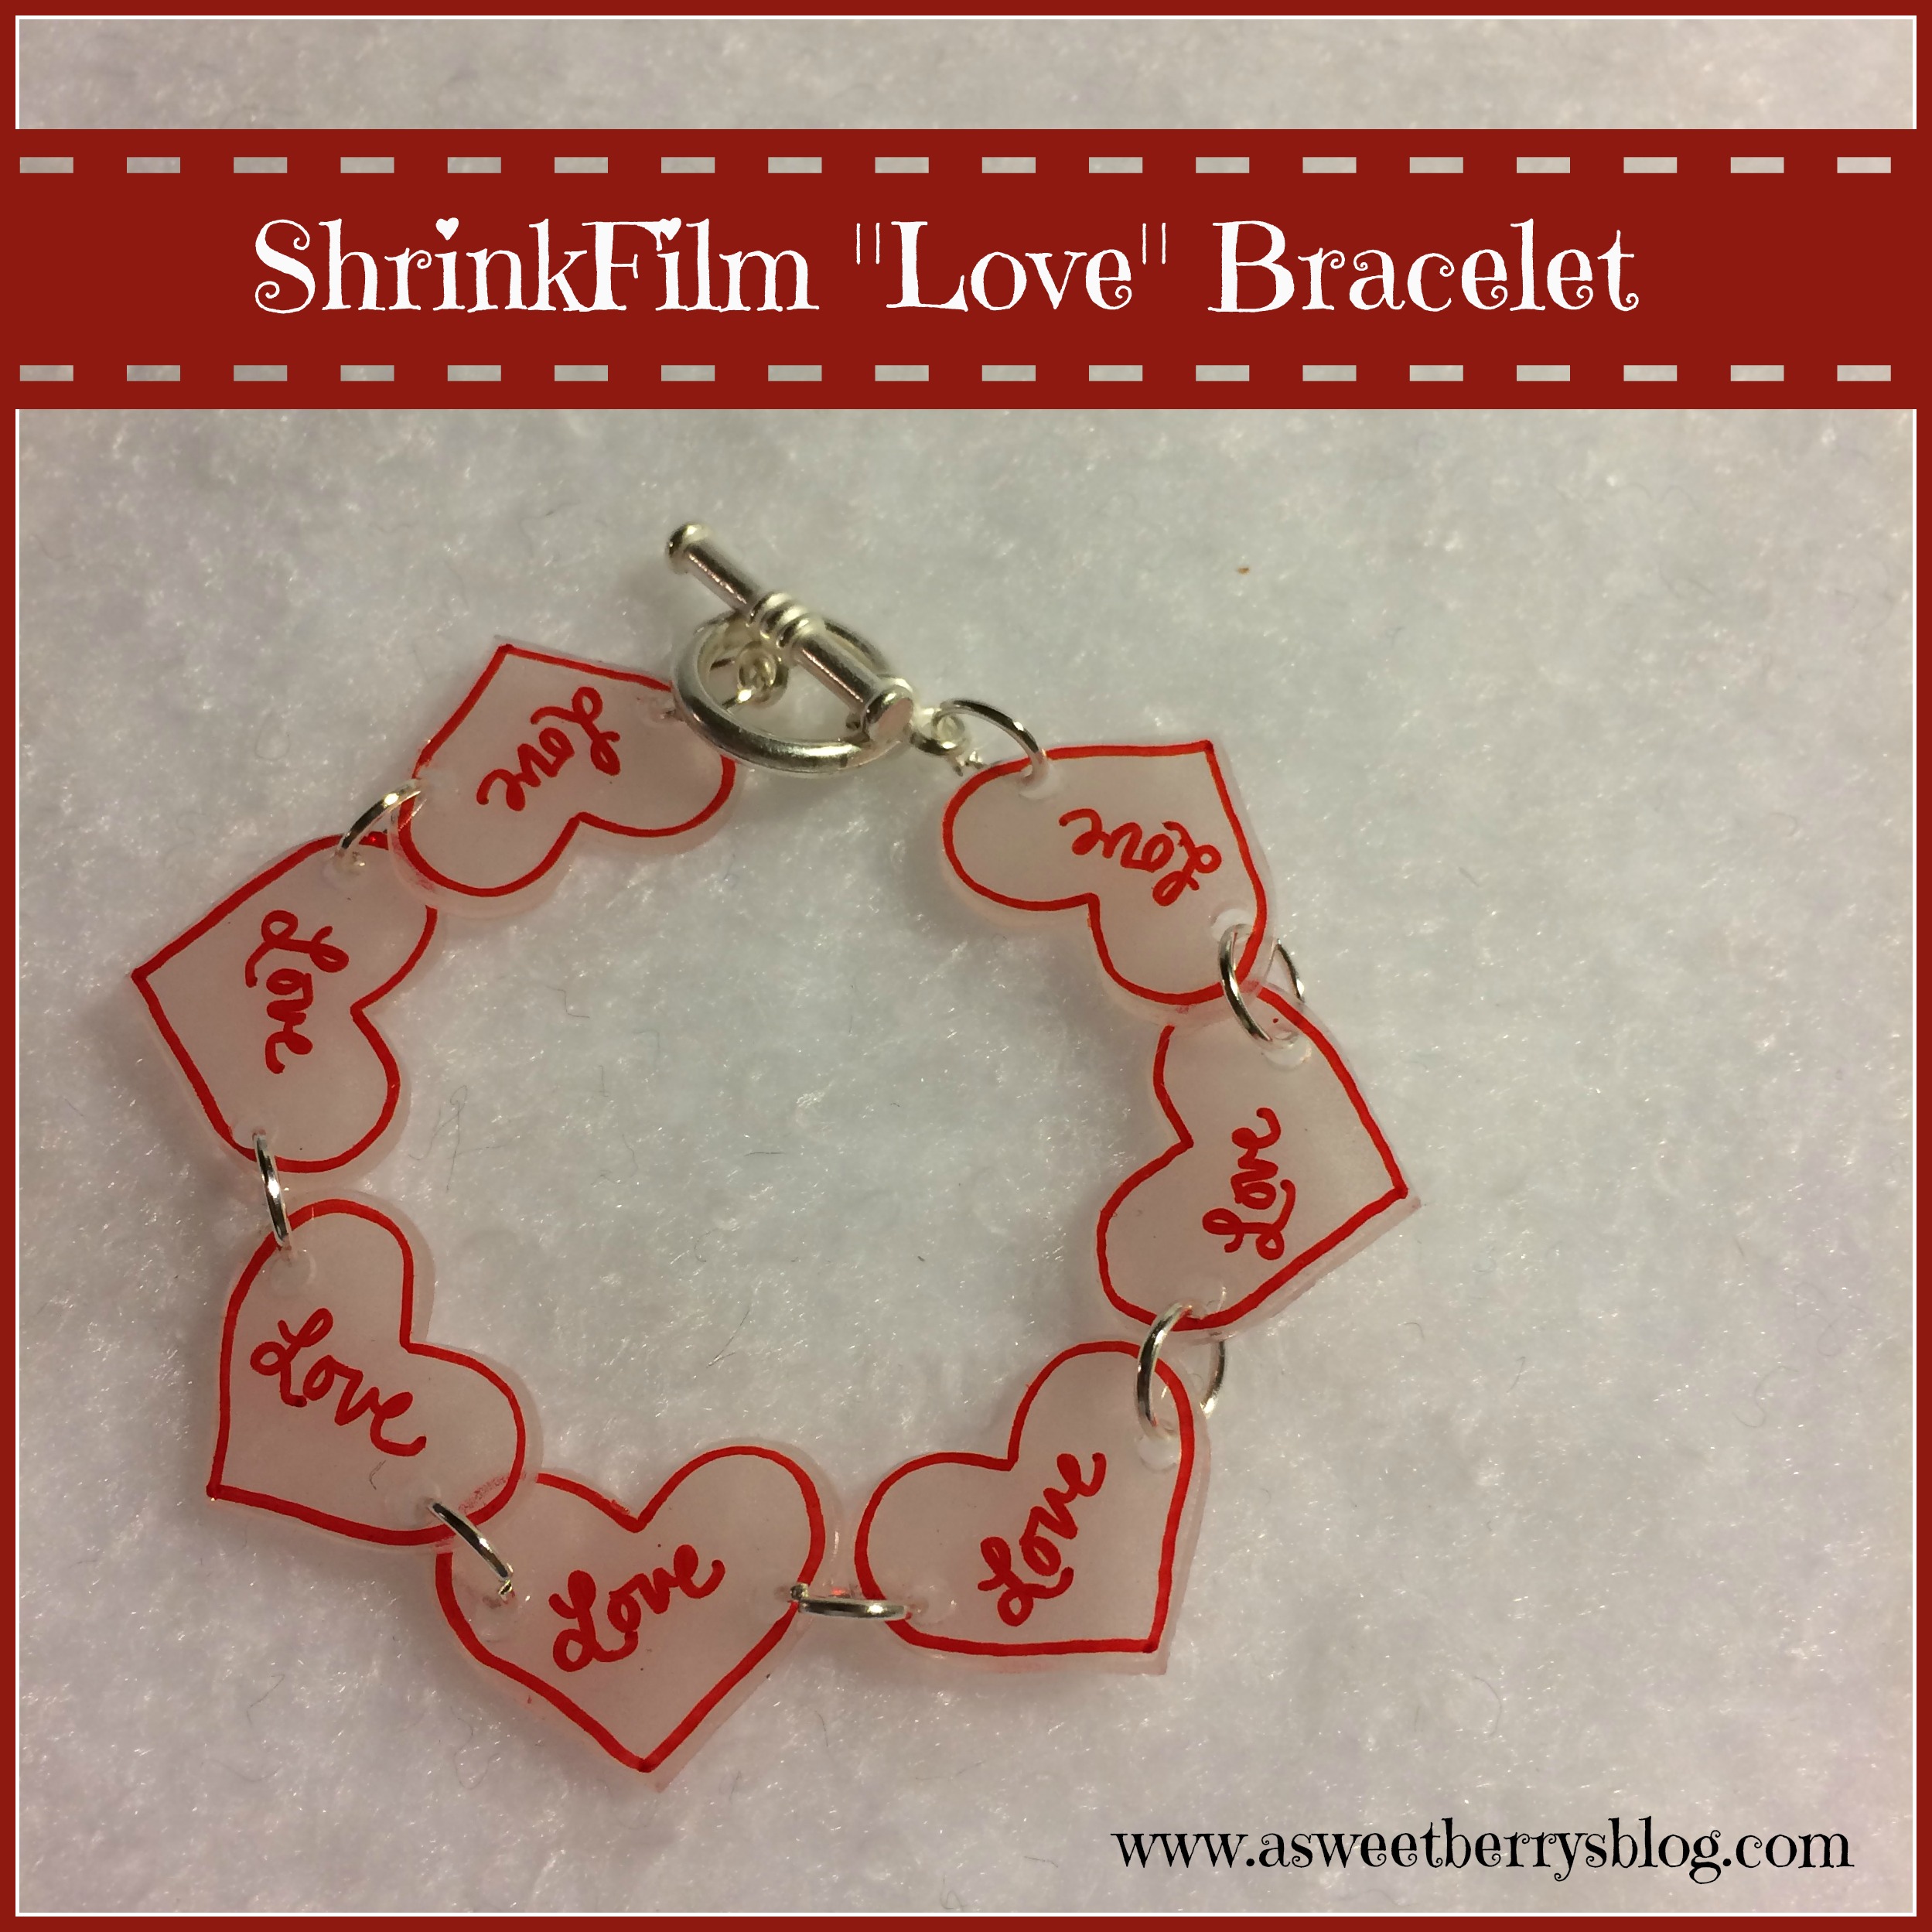
Clay is not just for kids! I have always loved to work with clay. And Sculpey is such an awesome clay to work with! It’s soft and really easy to use. And come in some really awesome colors!
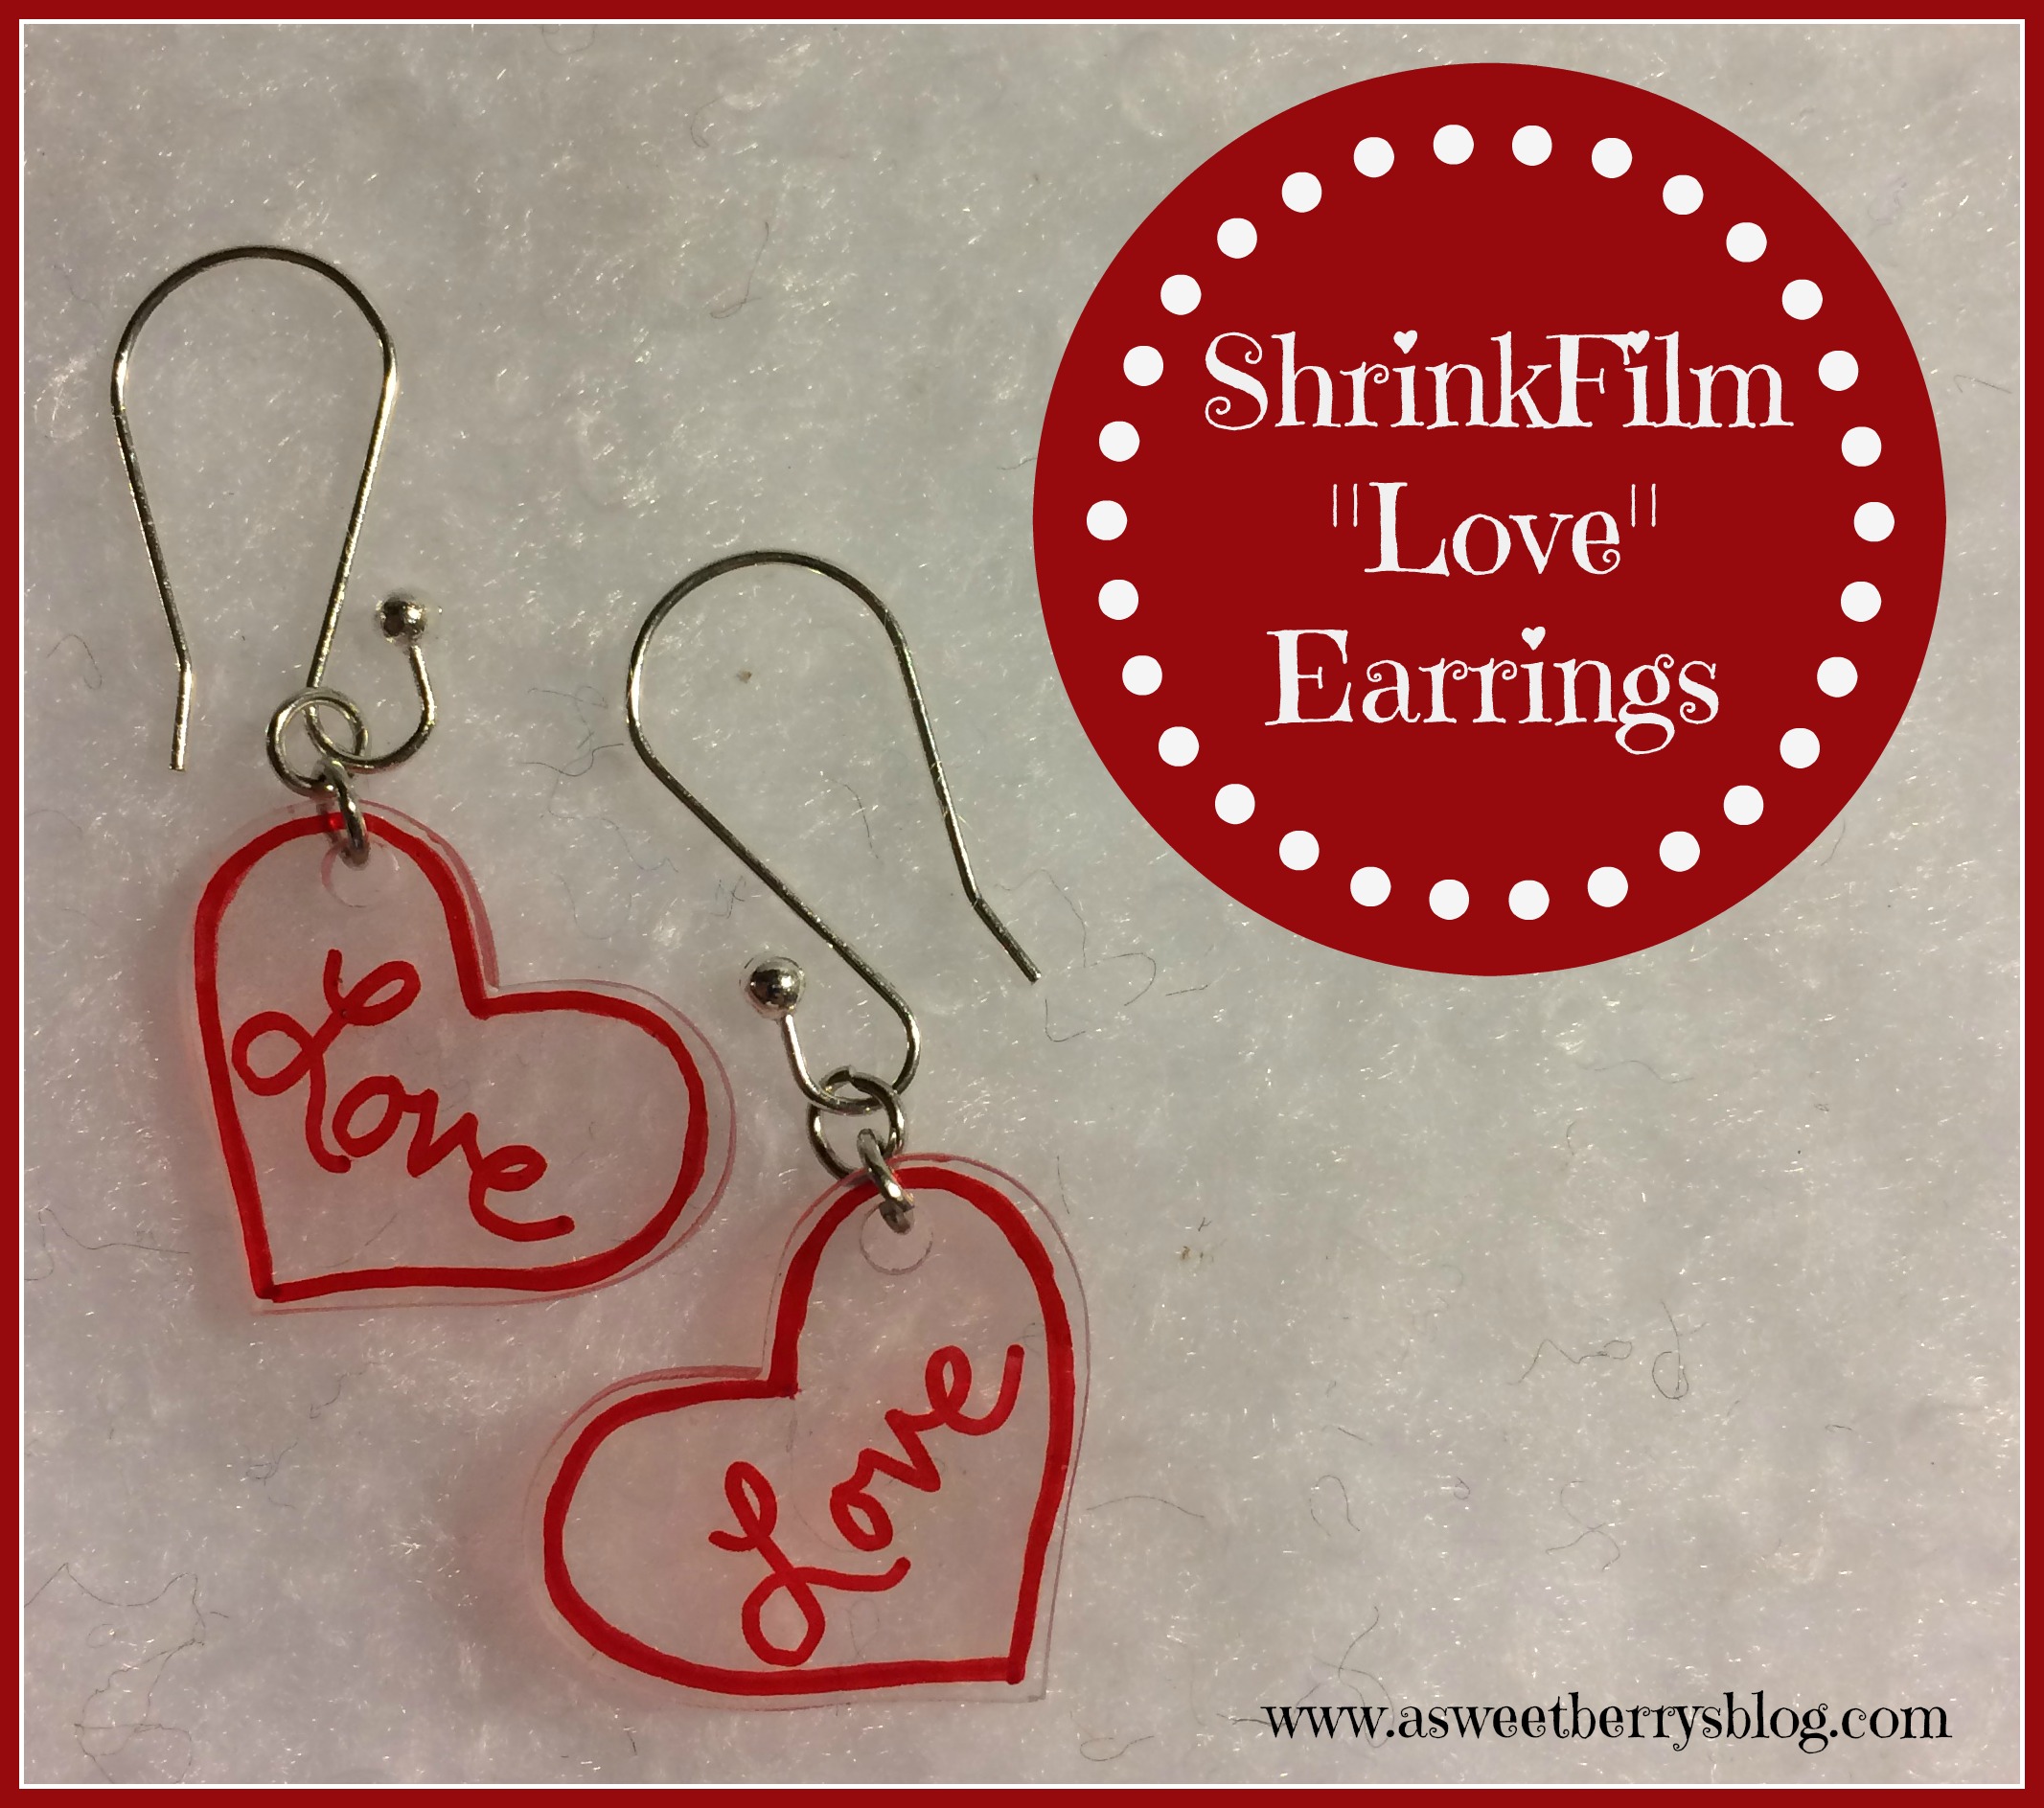
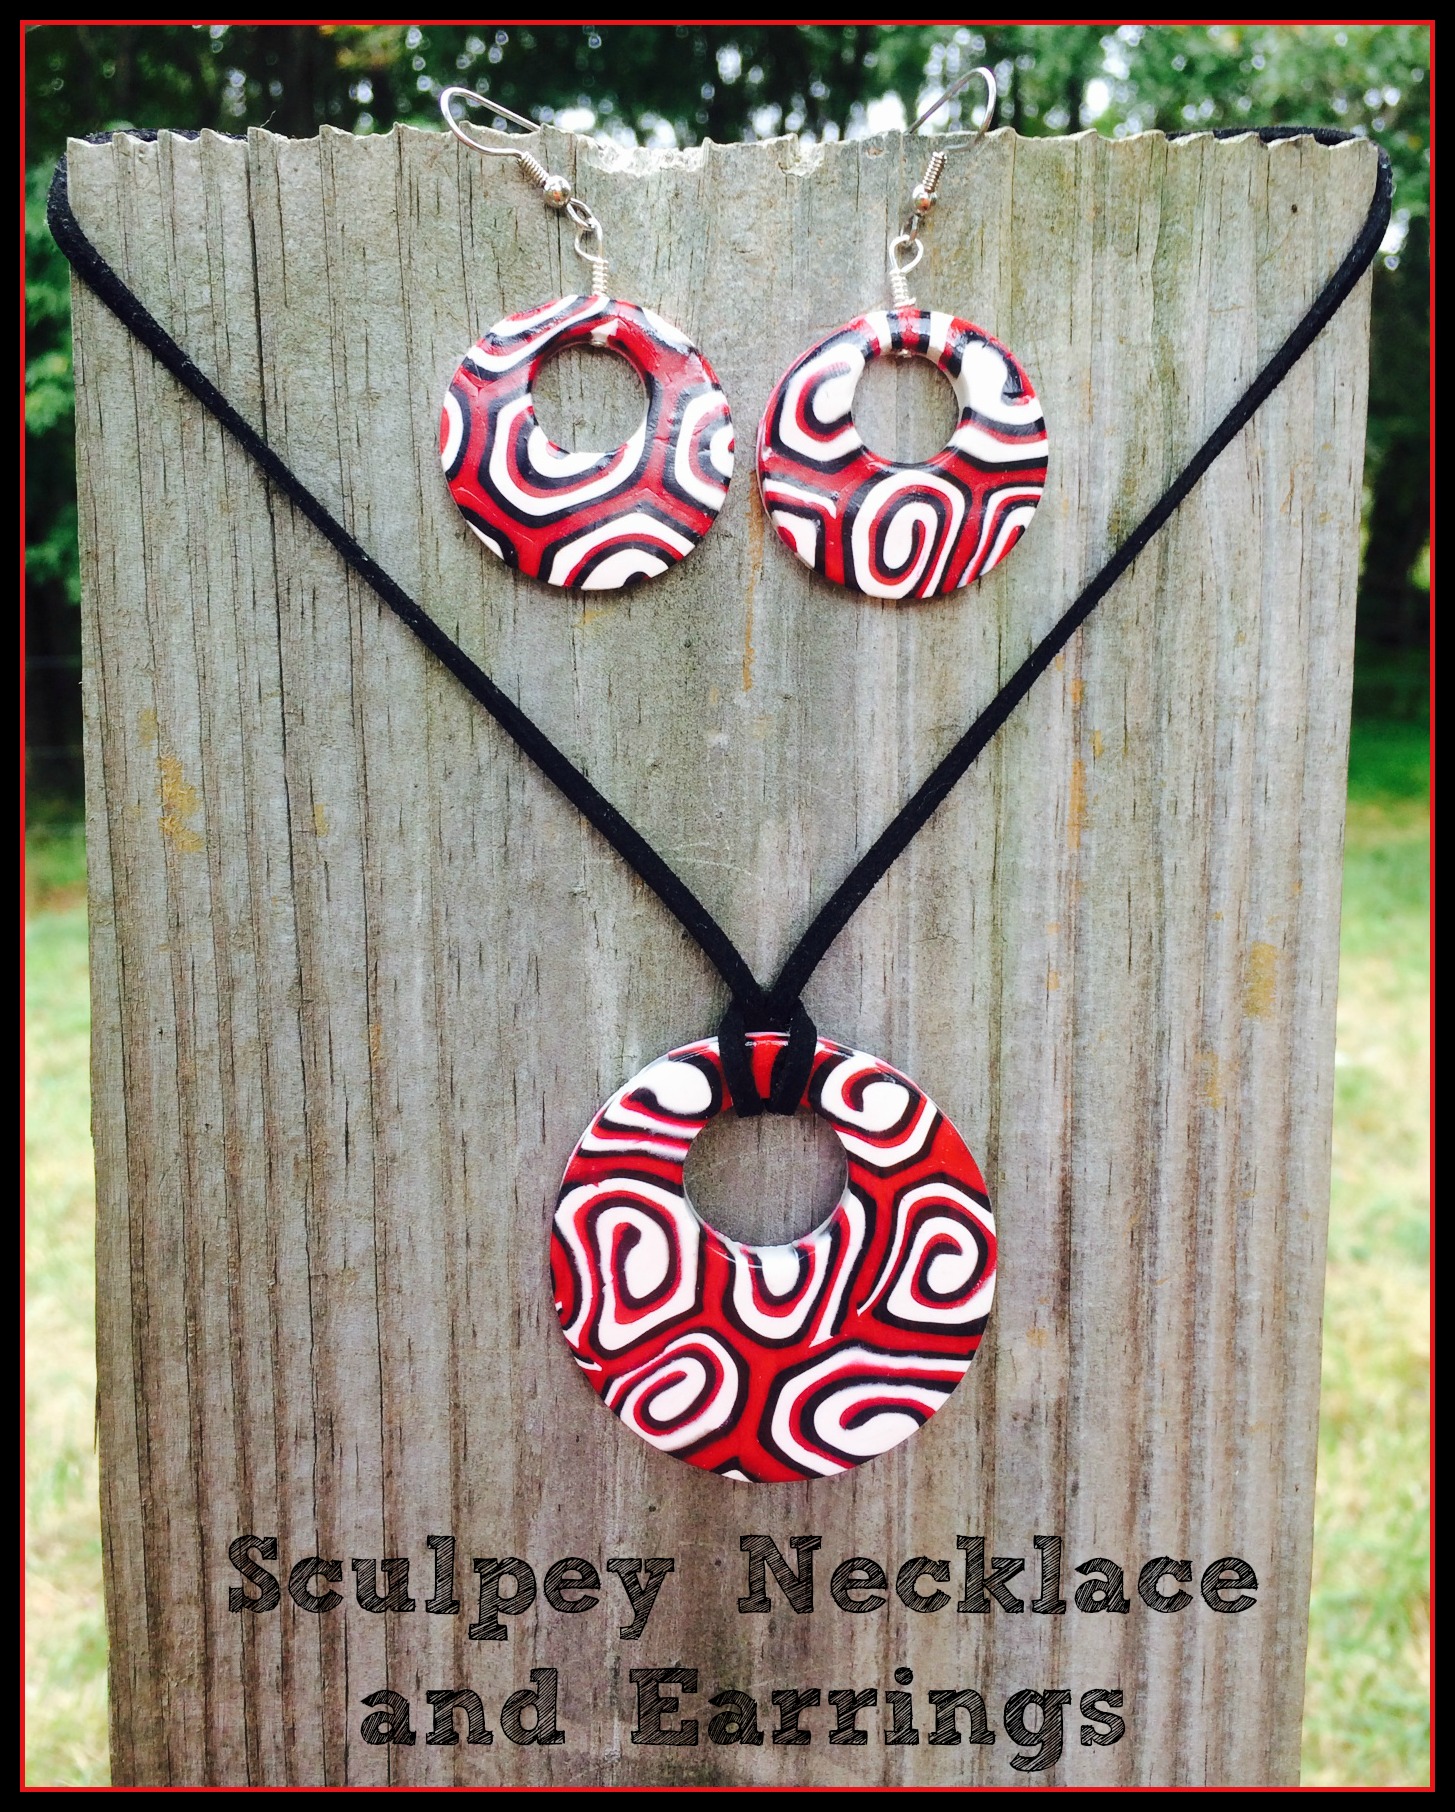
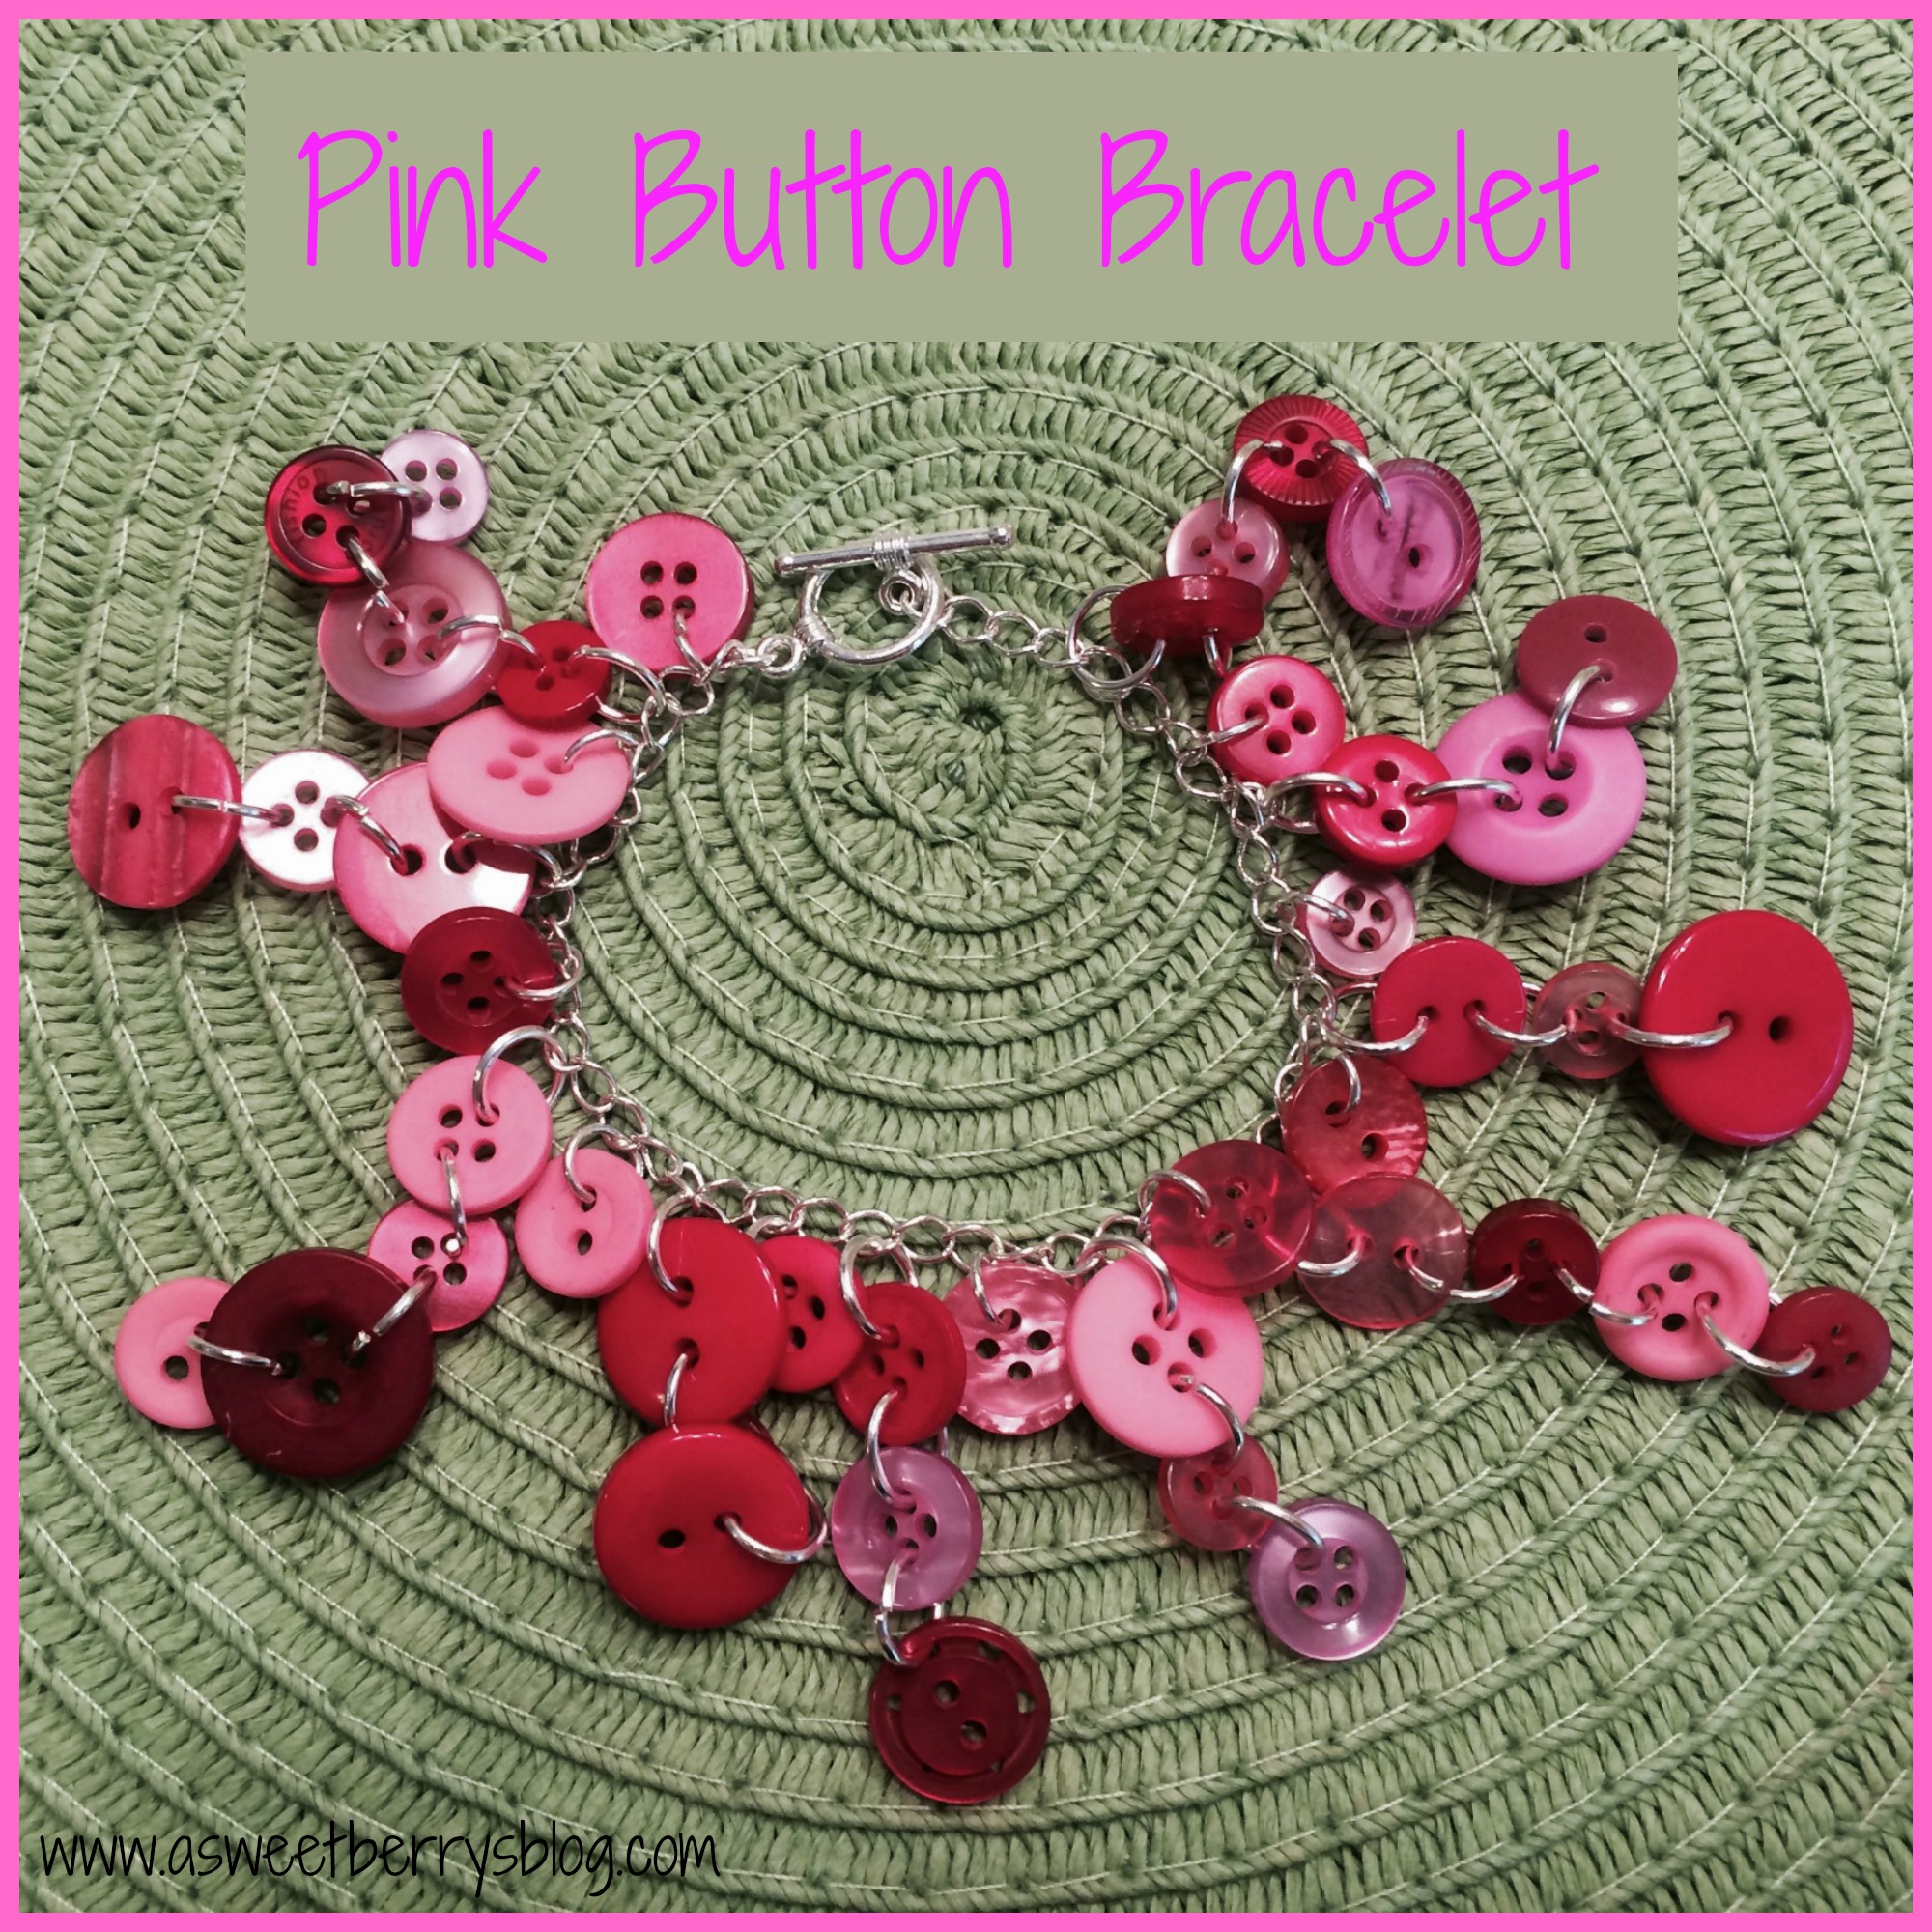
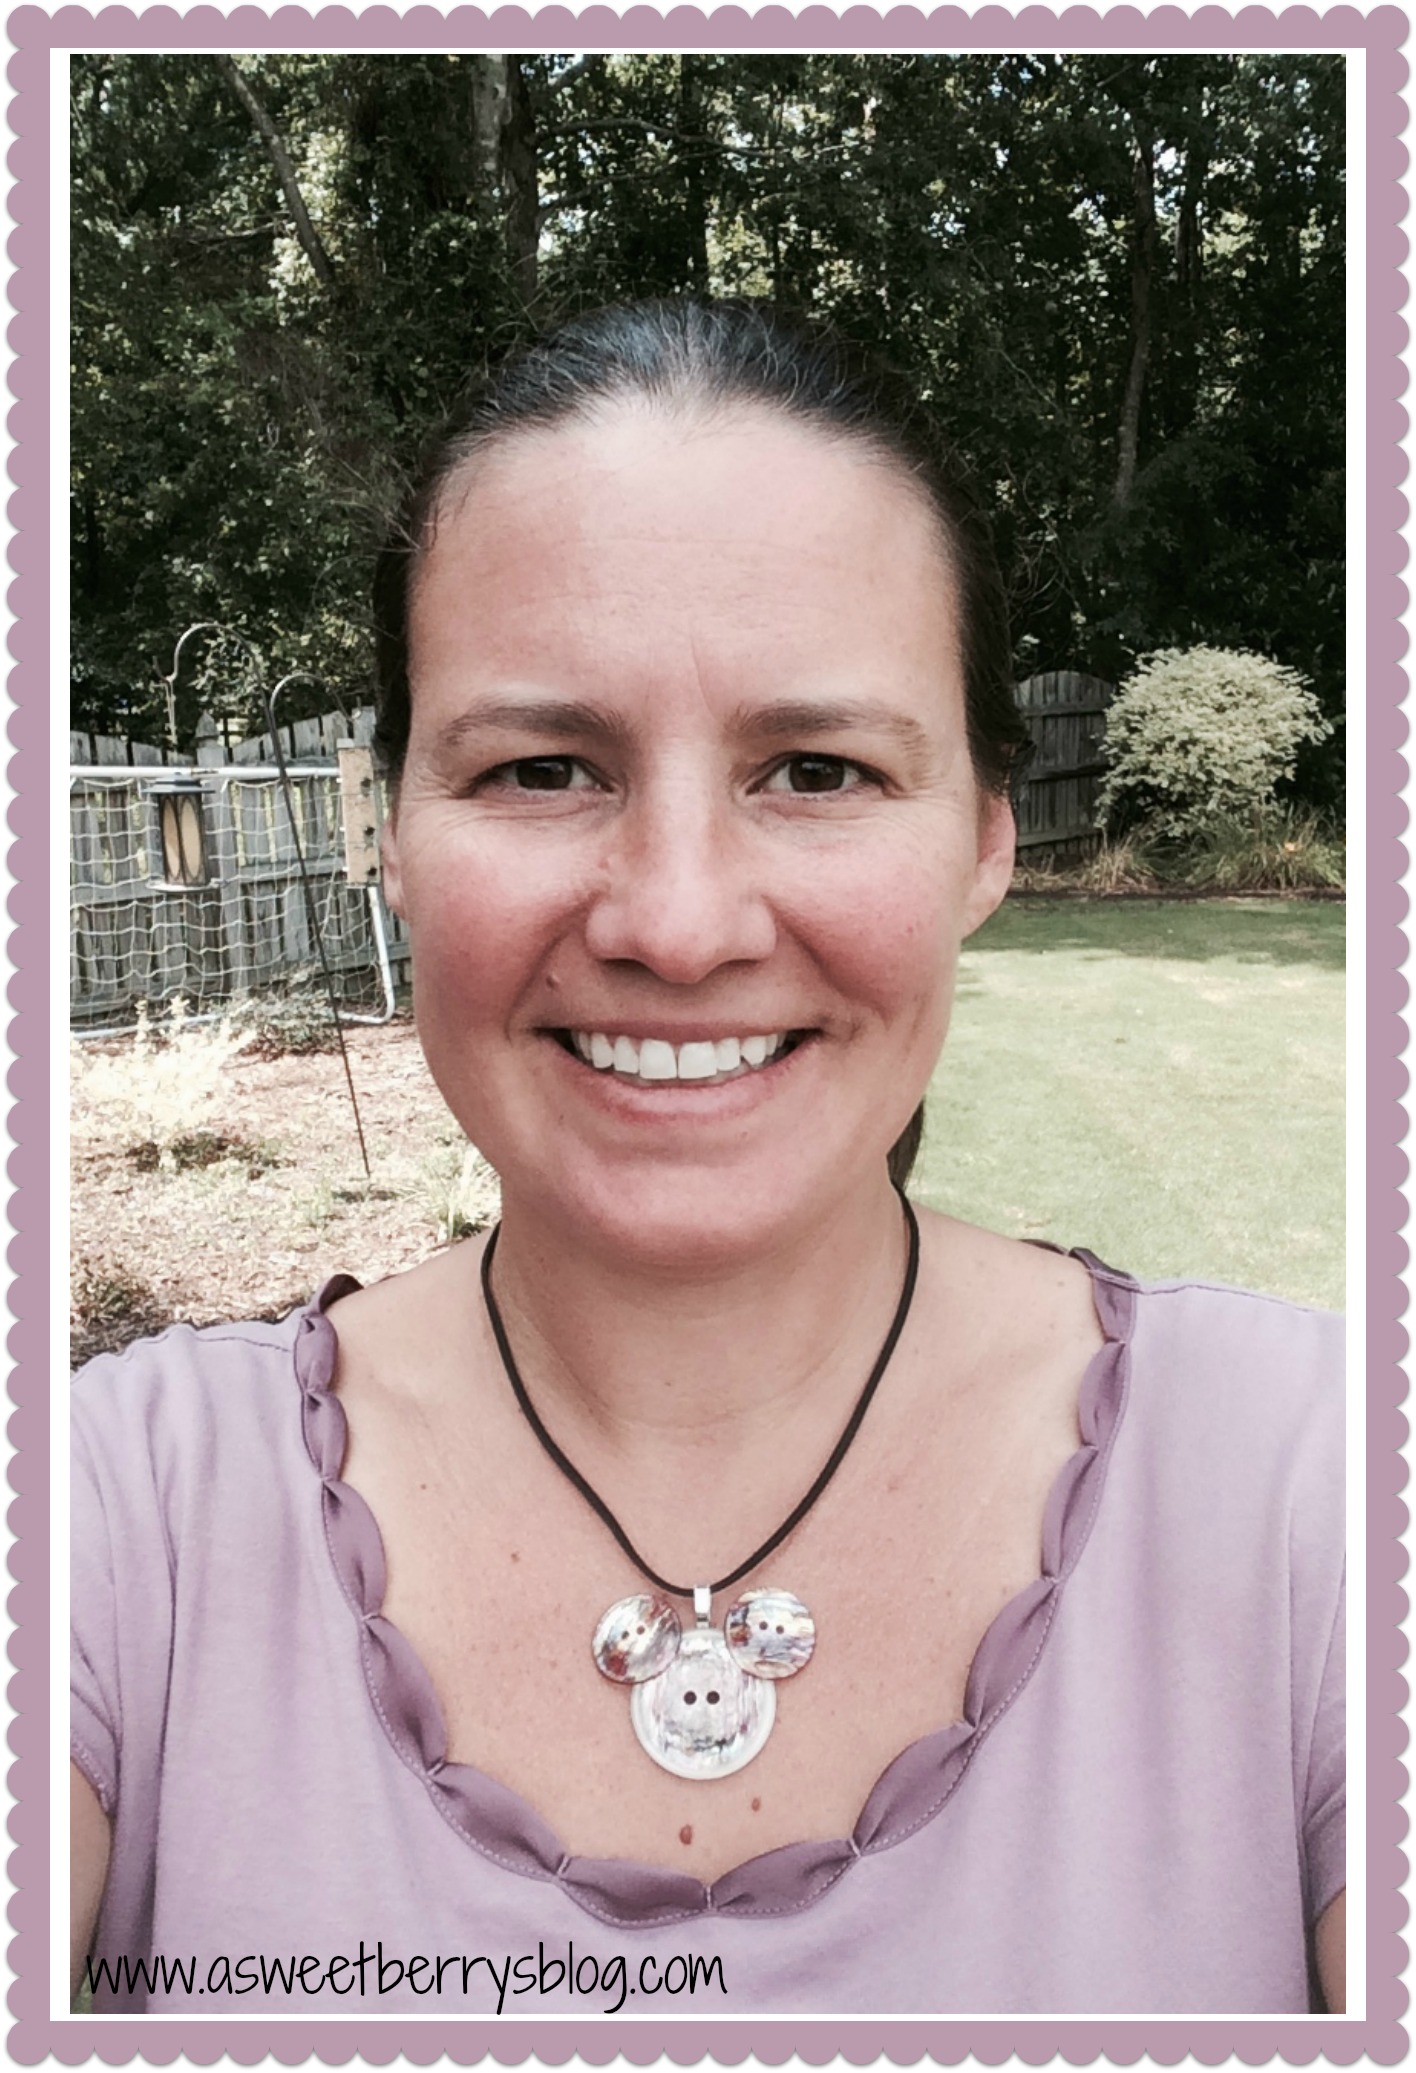
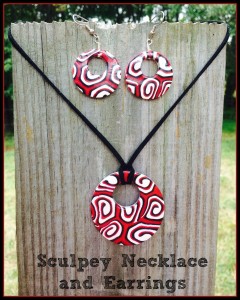
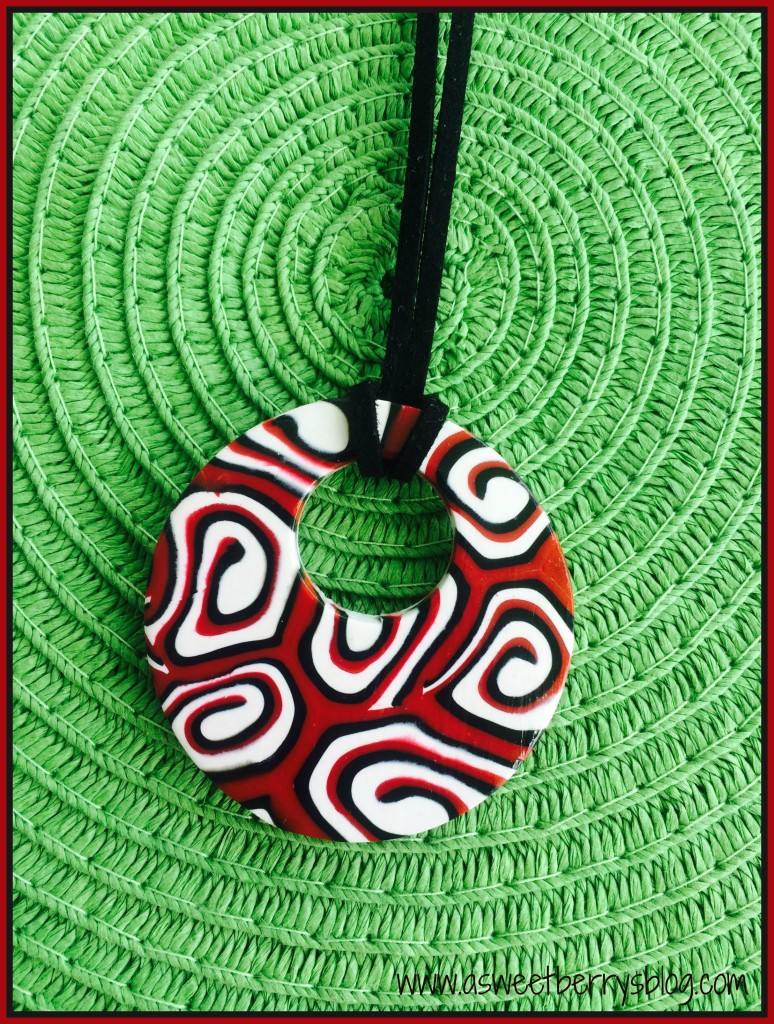
Below is a picture of the necklace and earrings that I made!
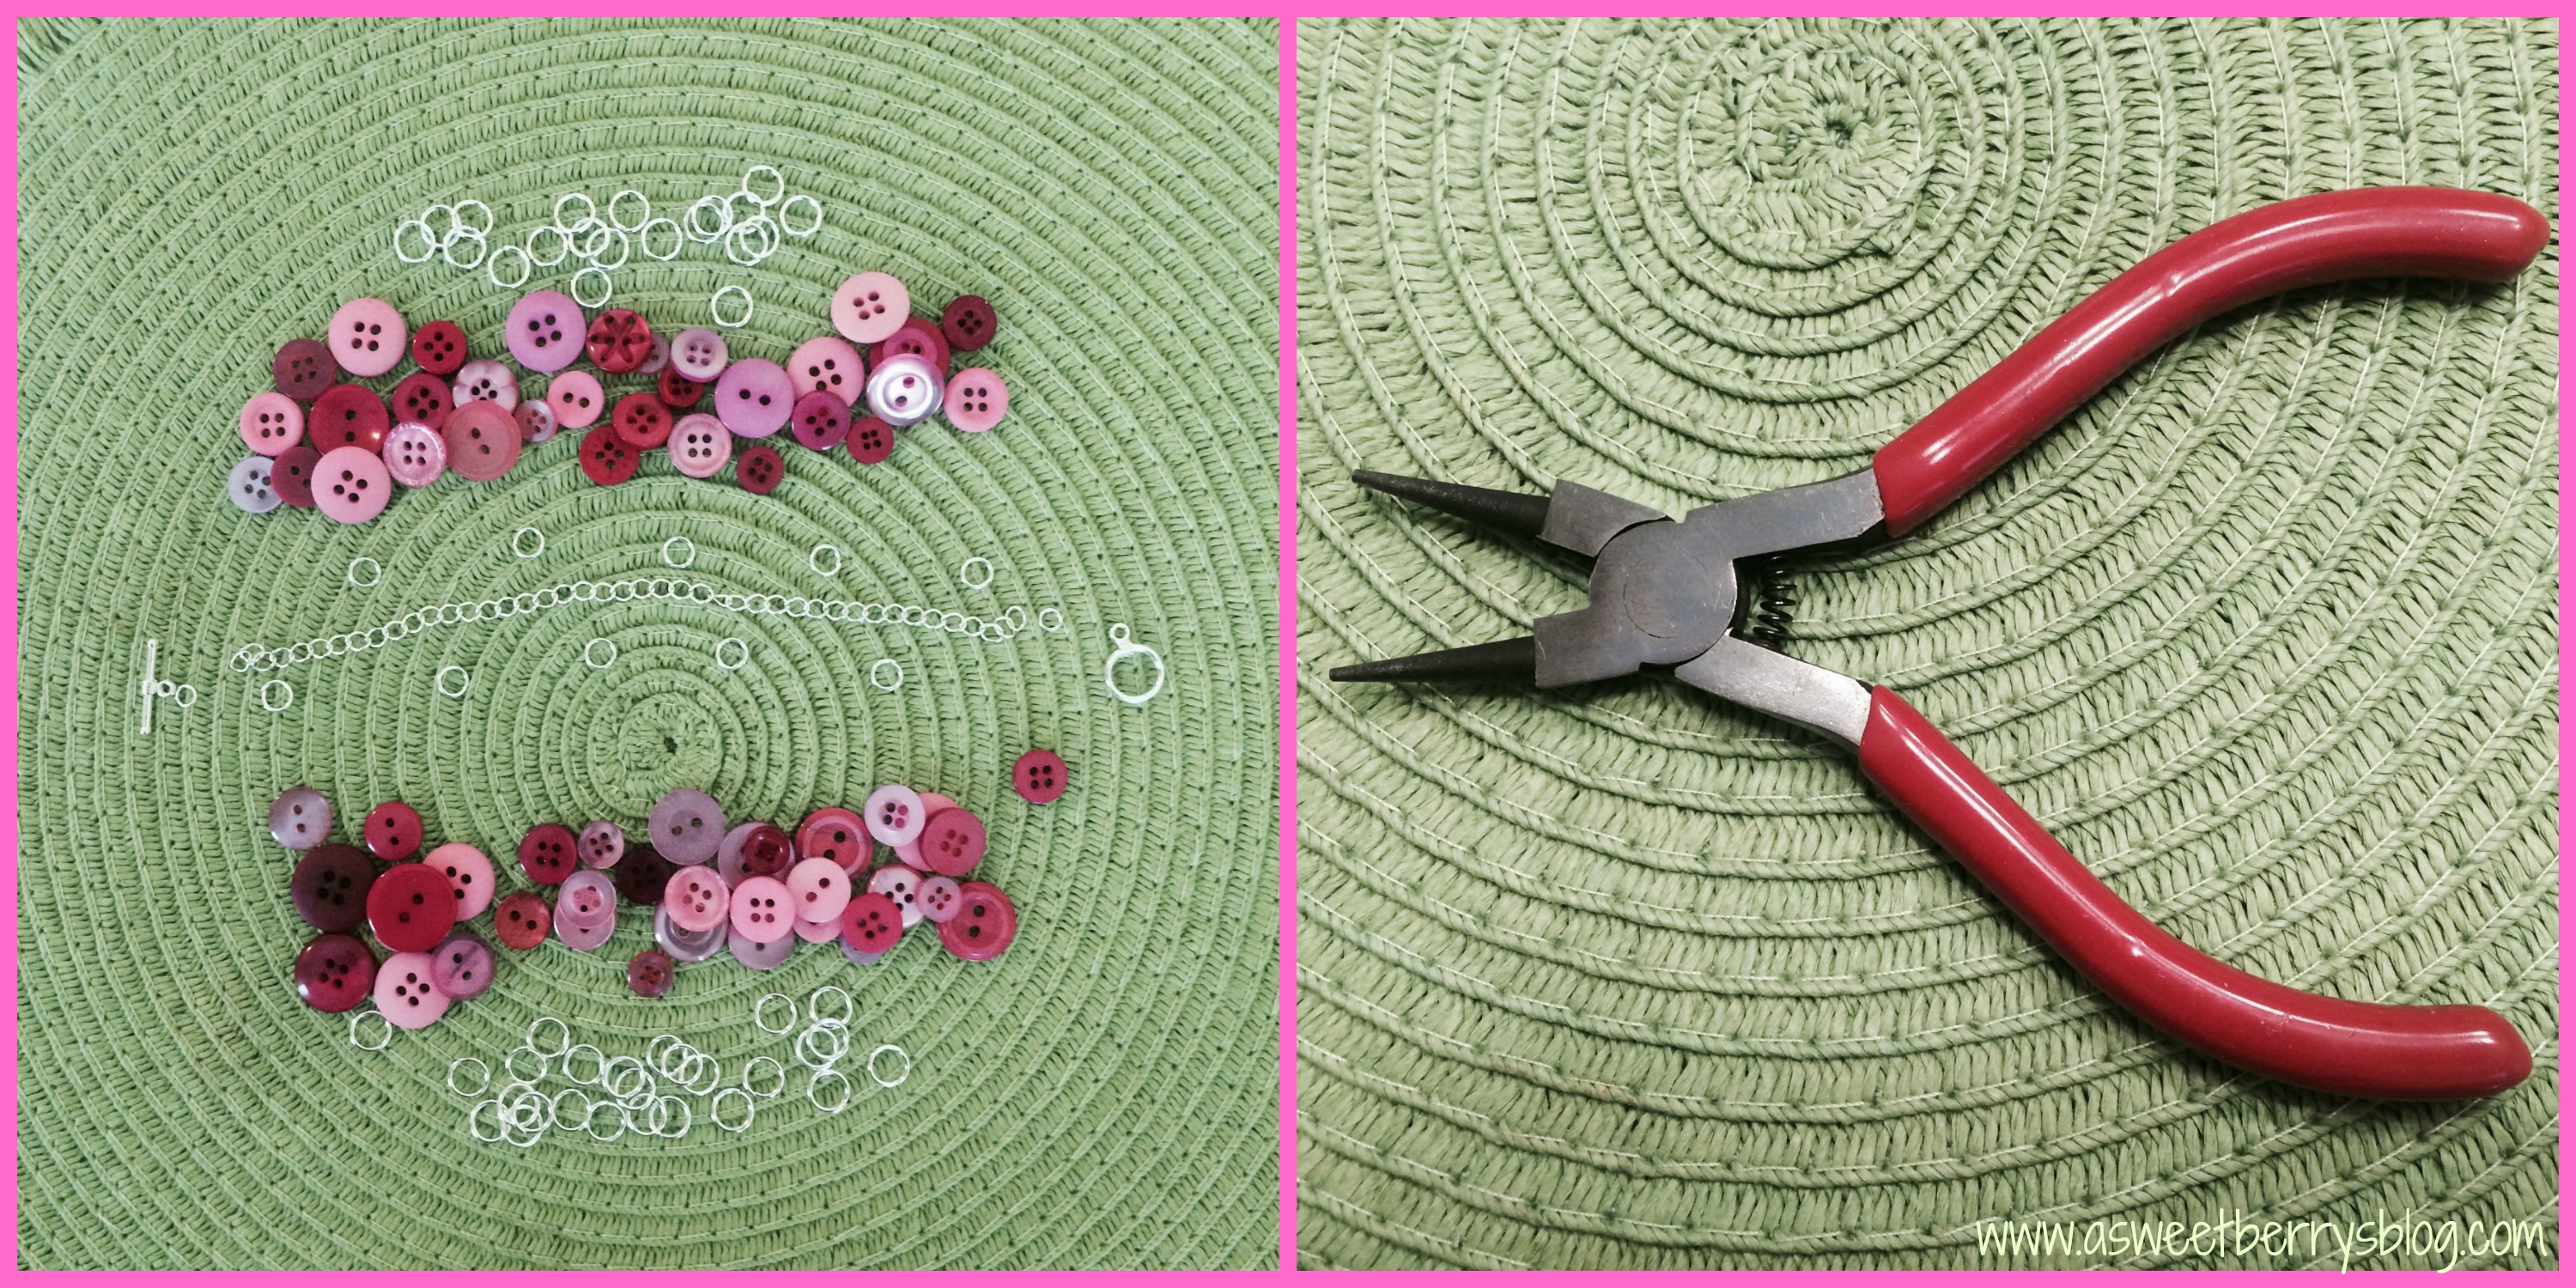
The materials used for this project are as follows:
SculpeyIII Oven Bake Clay
Sculpey Acrylic Roller
Sculpey Super Slicer
Premo! Circle Cutters
Sculpey Bead Baking Rack
Sculpey Bead Making Kit
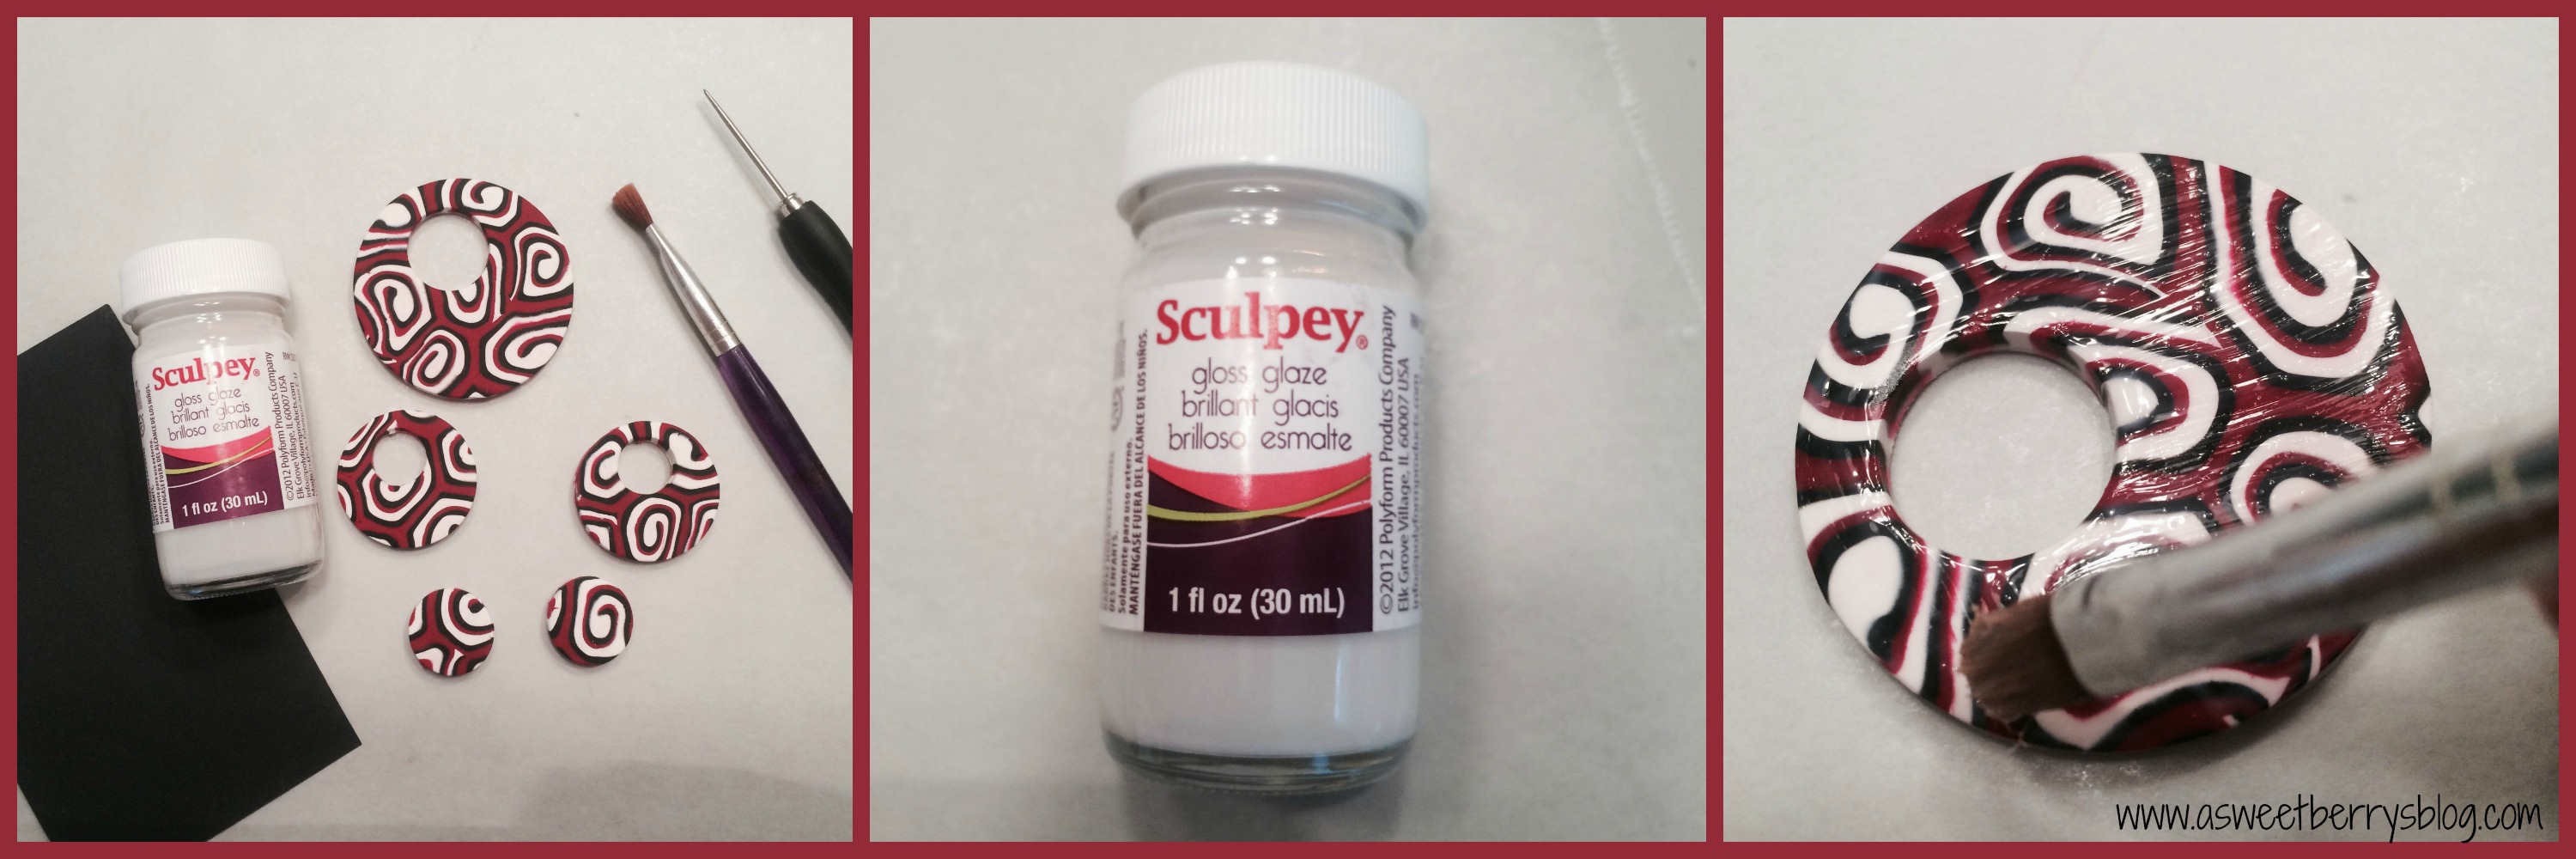
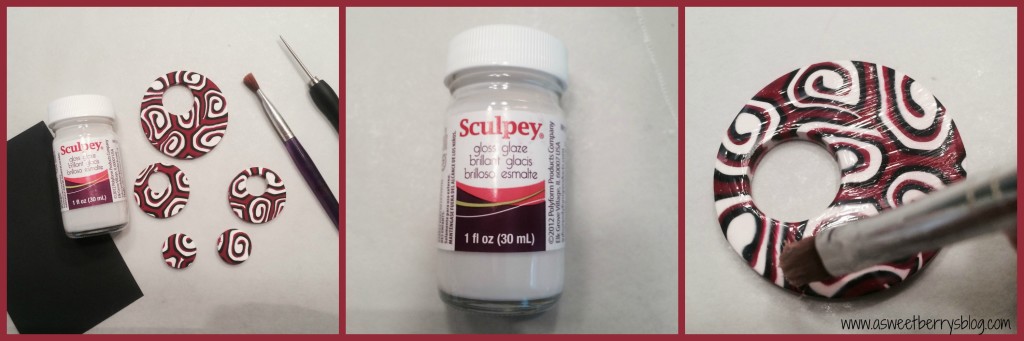
Sculpey Gloss Glaze
Paint Brush
Clay Conditioning Machine
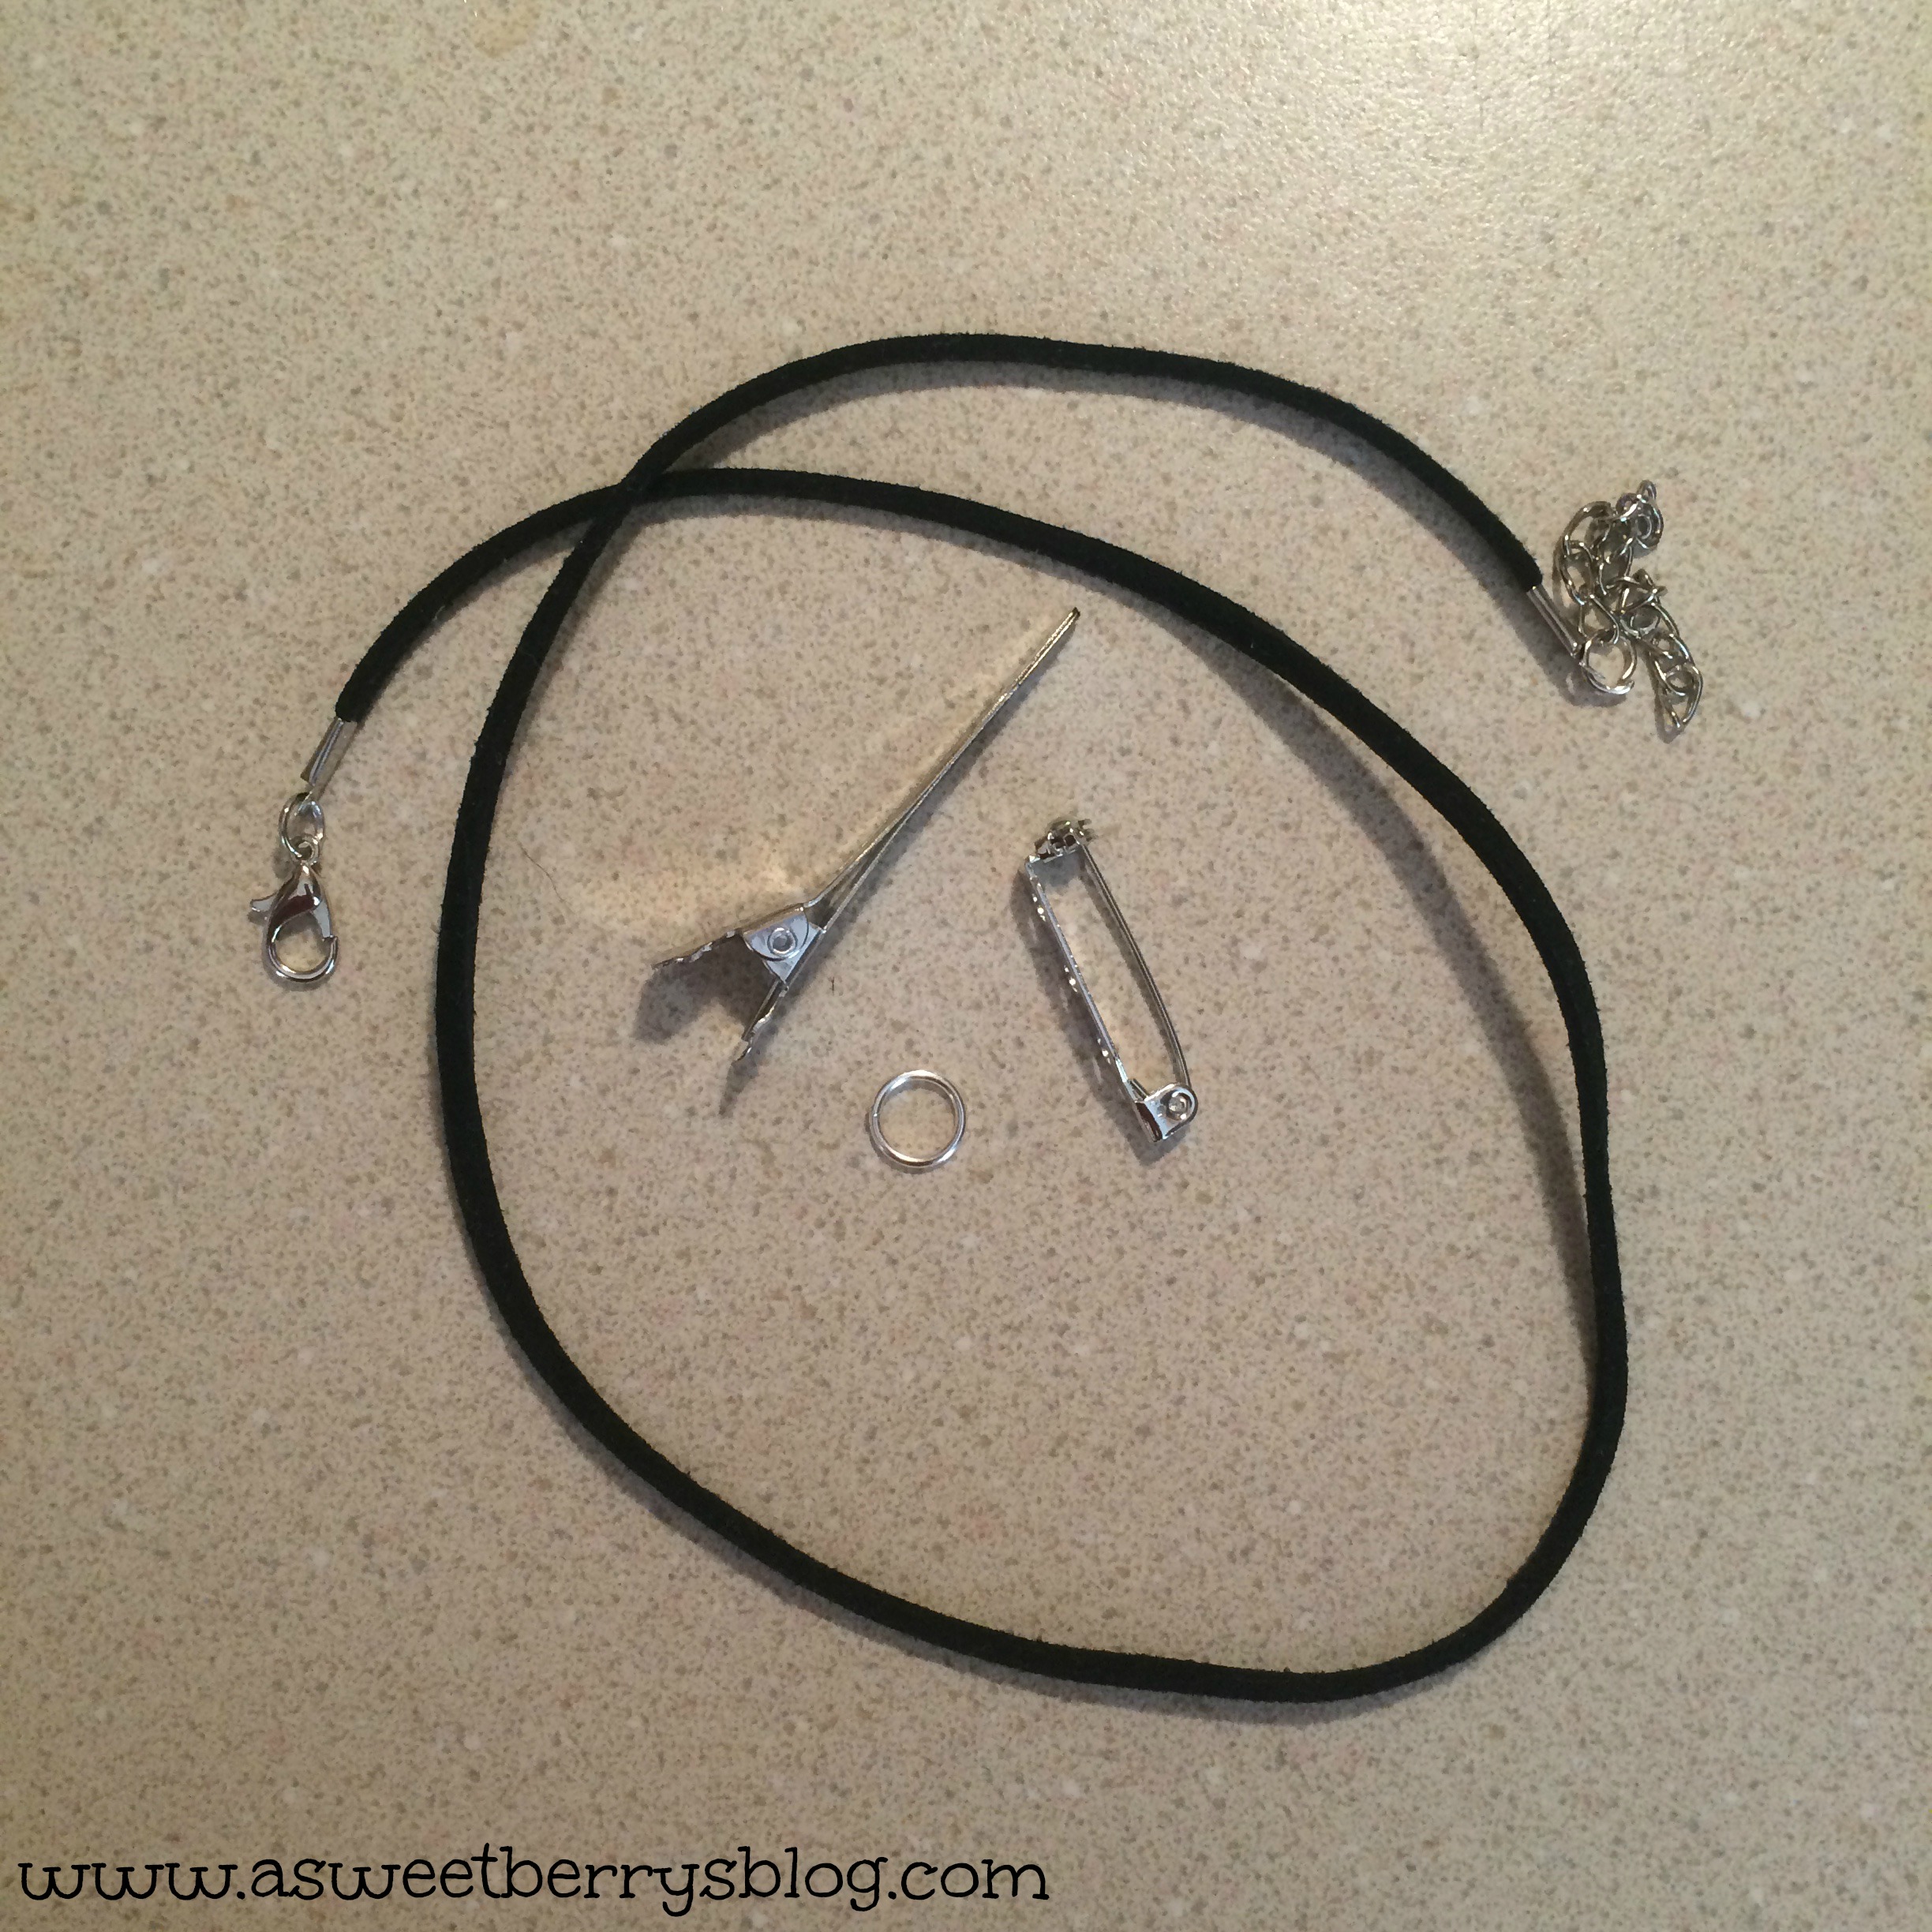
Hook Earrings
Thin Head Pins
Rope Necklace
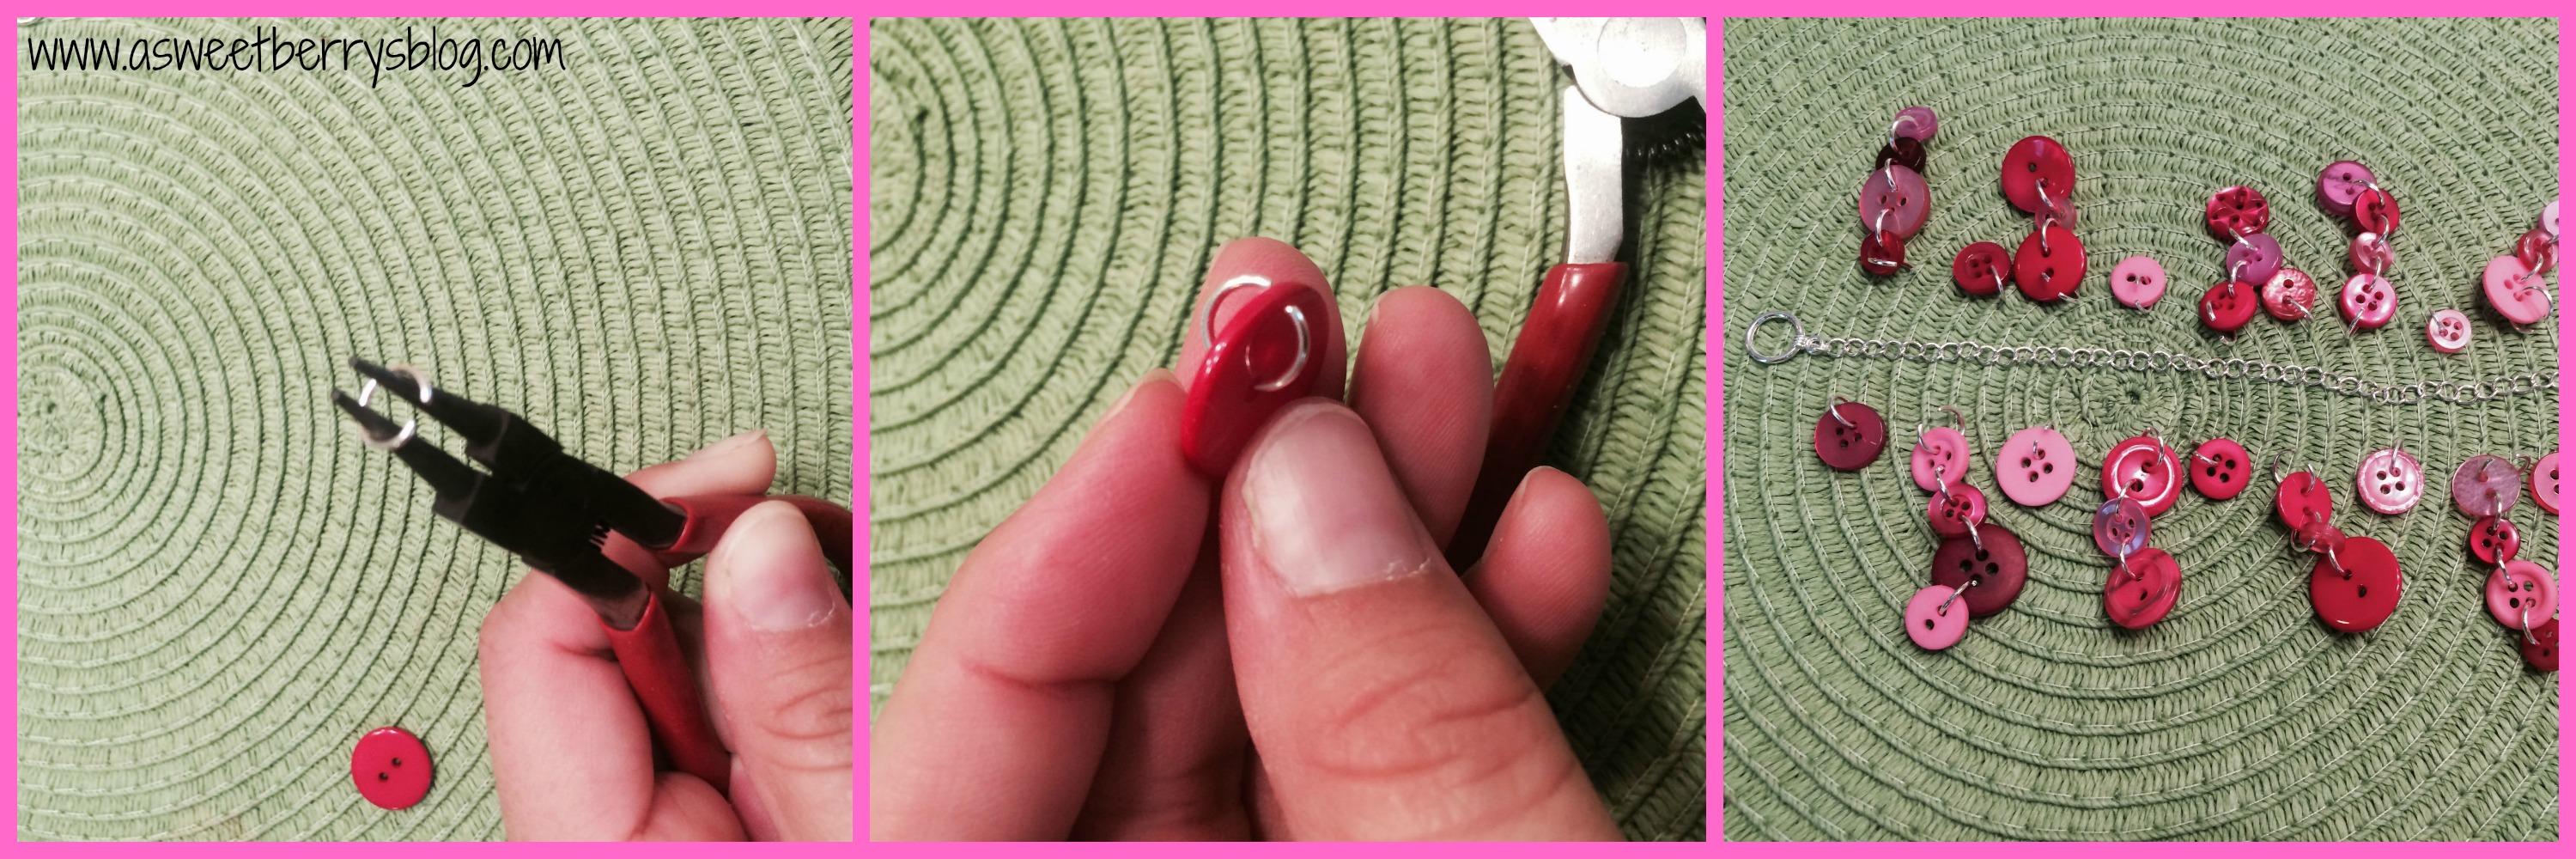
Round Nose Pliers
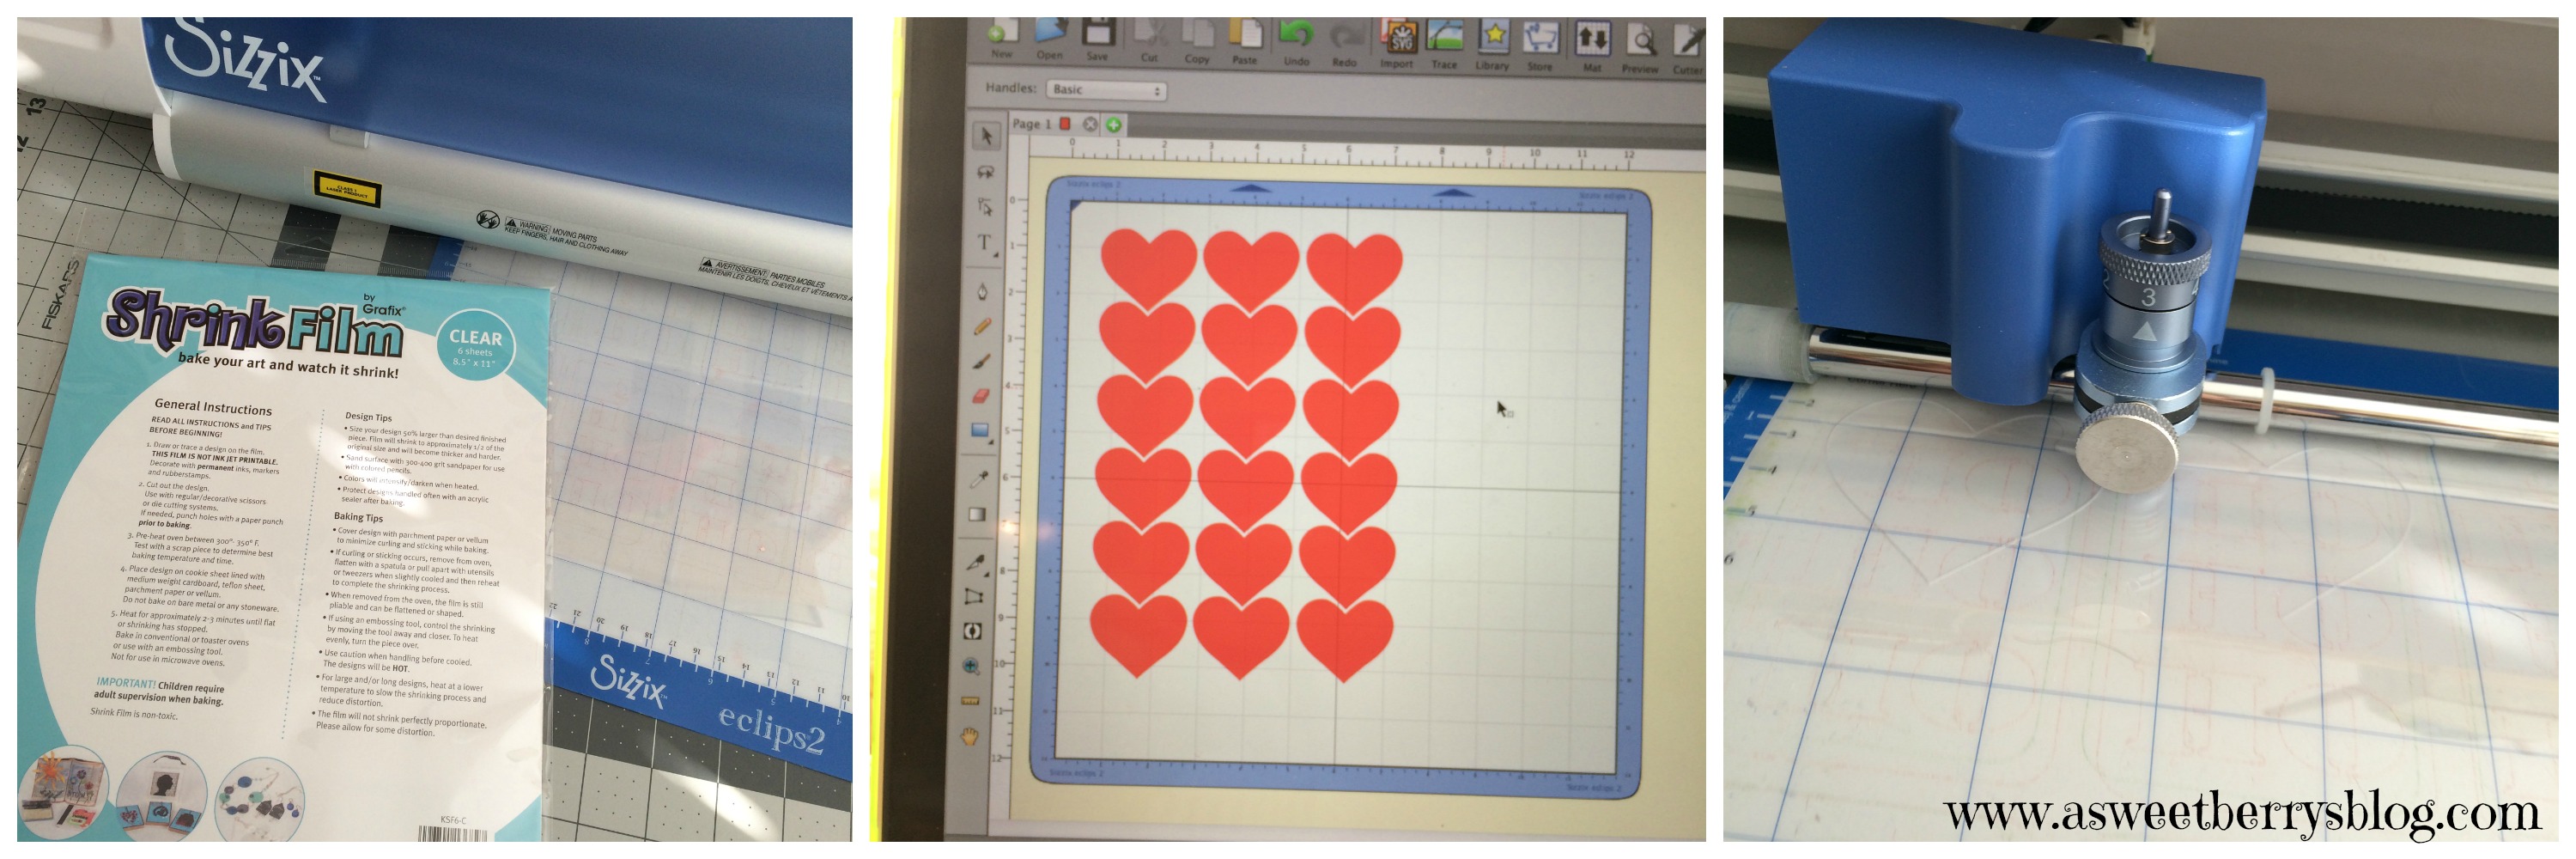
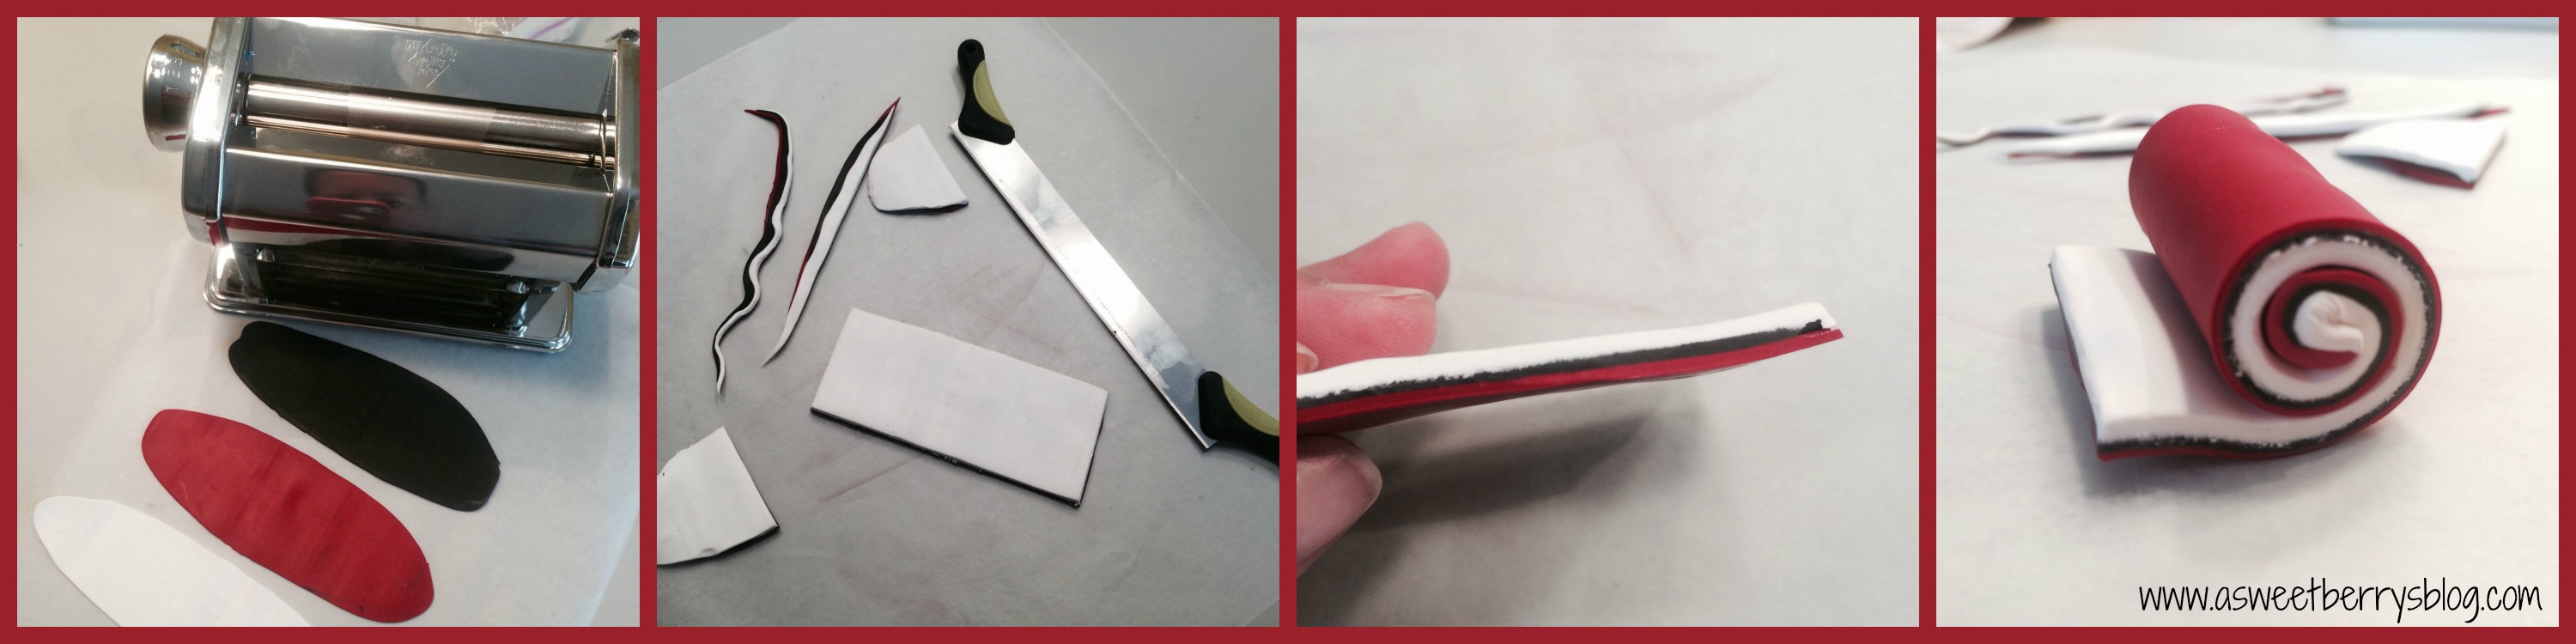
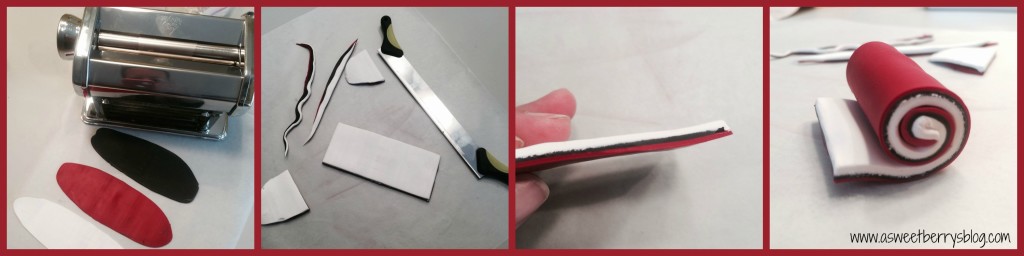
It’s always important to run your clay through a clay conditioning machine to make sure you get all of the air pockets out of the clay, so that it doesn’t break after it’s baked. I ran my three different colors through multiple times before I got started.
I rolled my three colors out at the largest opening that the conditioning machine would allow. Once they were rolled out, I piled them up and then cut to make a rectangle. I made sure to press them together really good so that the air pockets were released. Next, I began to roll the clay to make a cane.
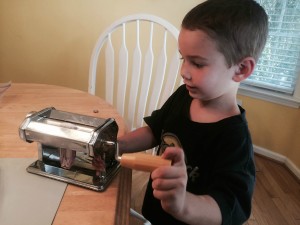
I had a little helper. He used my trimmings to play with the conditioning machine. It provided about an hour of fun with just the little bit of leftovers that there were! He just kept running it through the machine!
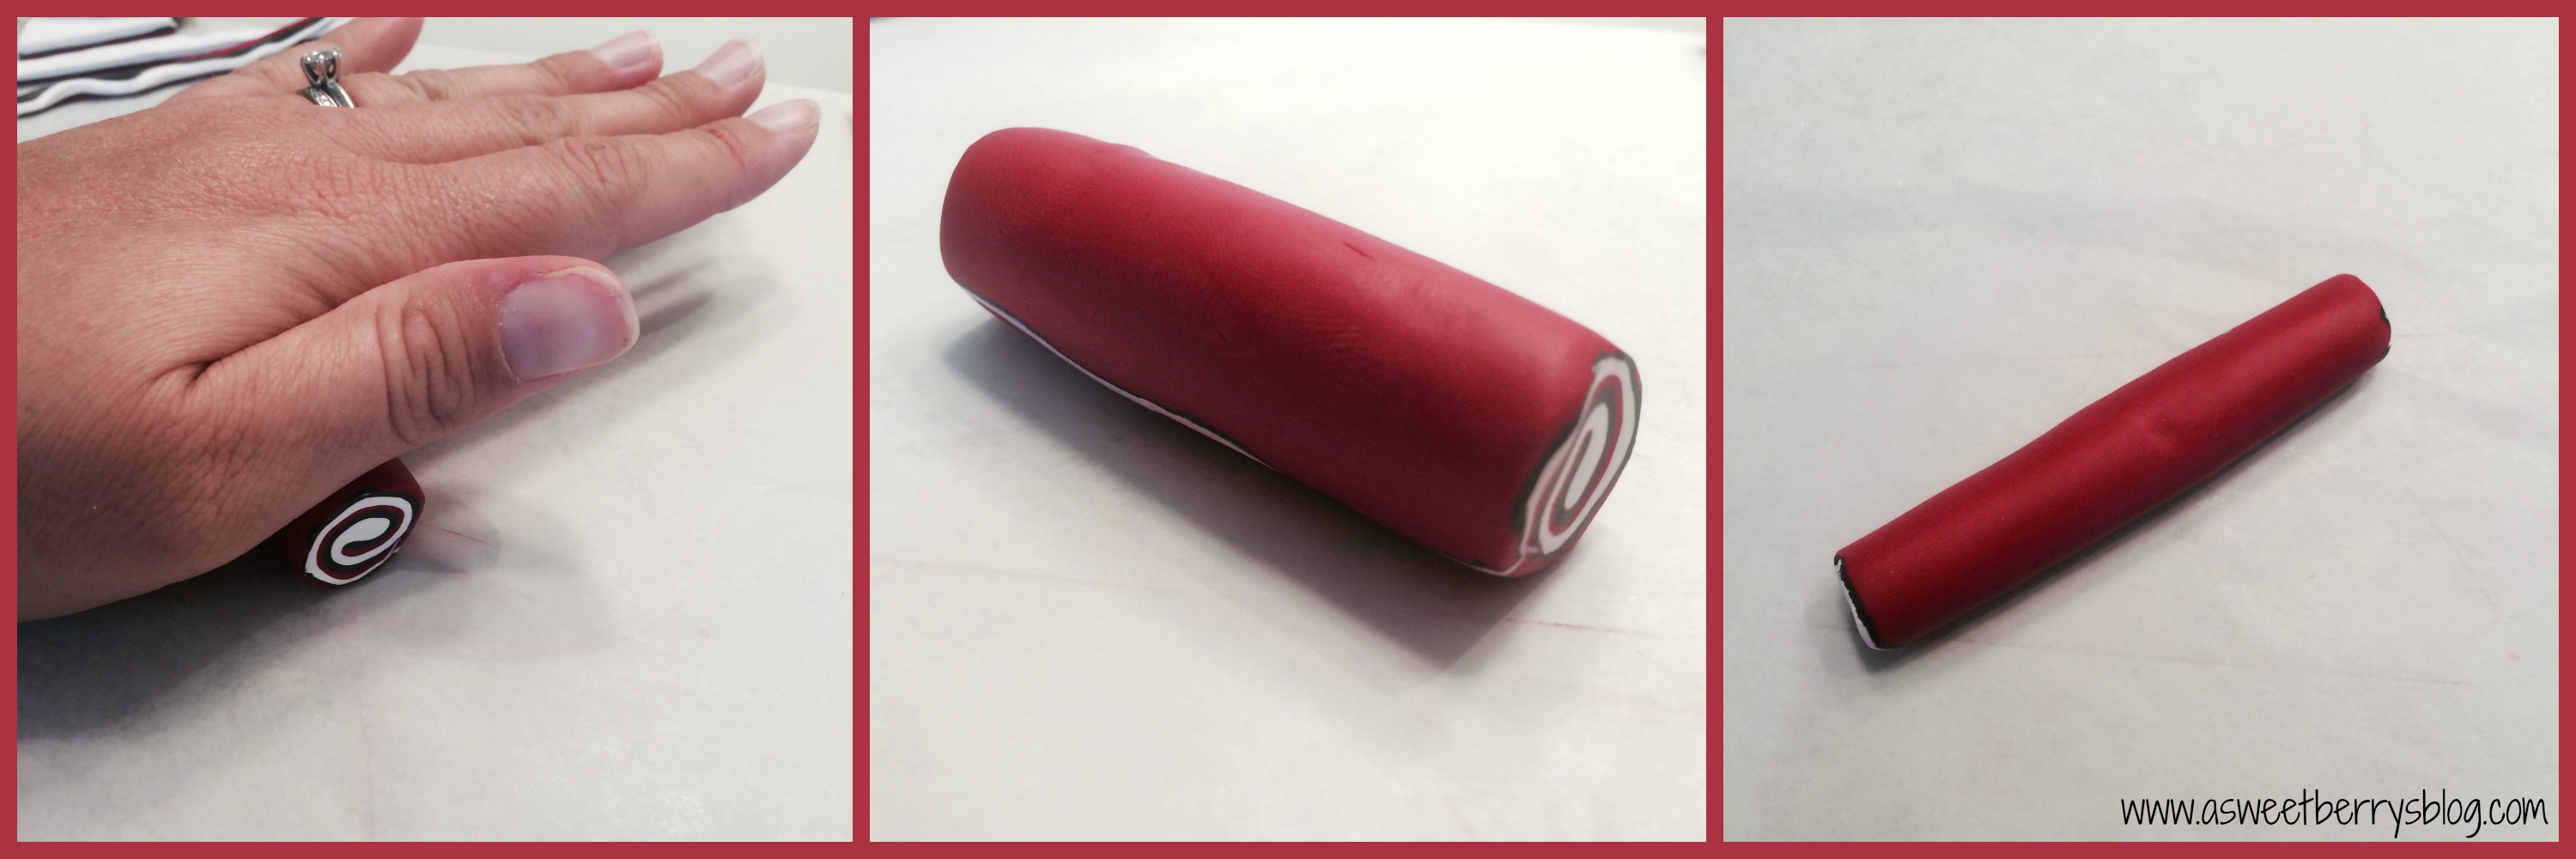
Once the cane was rolled, I gave the cane a squeeze to once again remove any air pockets. Using my hand, I continued to rolled slightly pushing outward to make the cane longer and thinner.

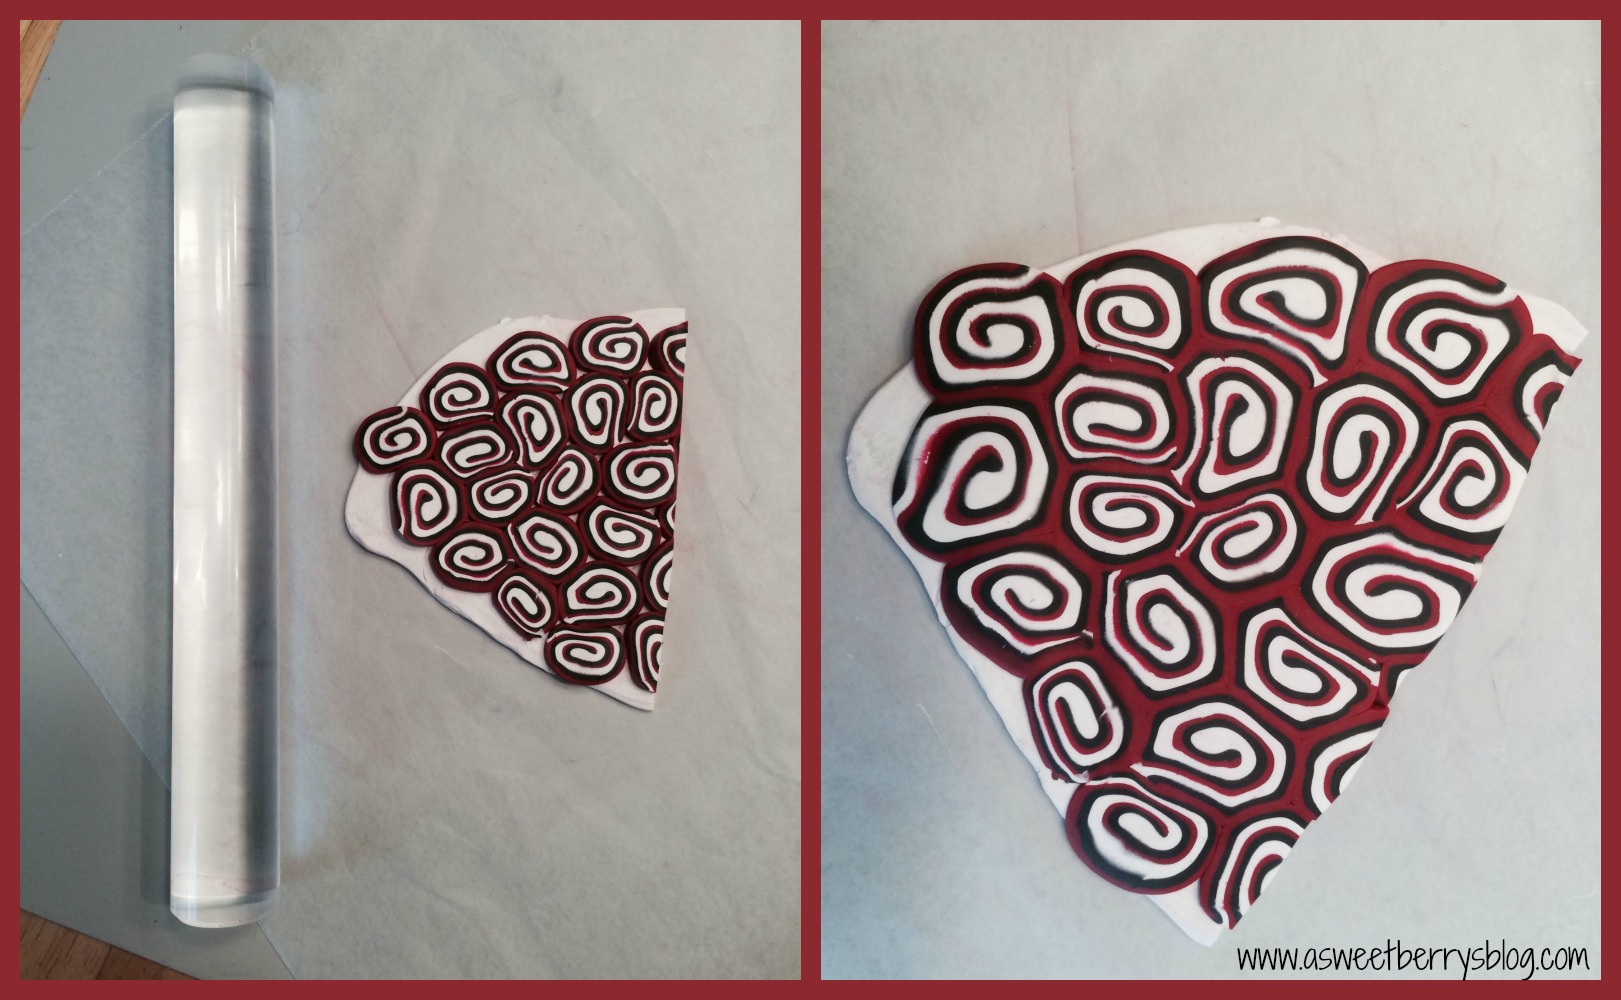
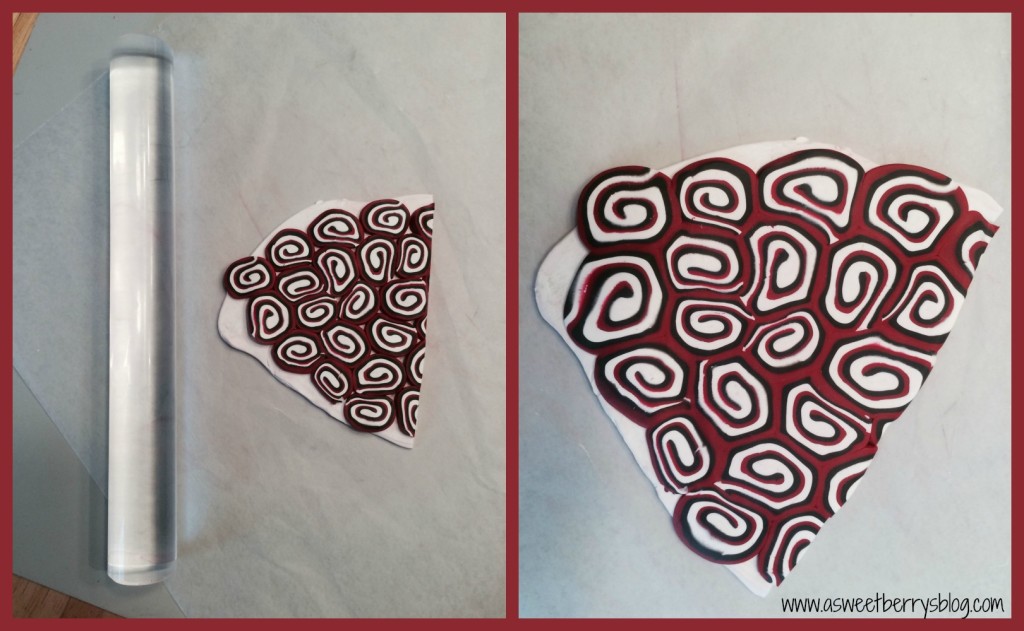
Using the Sculpey Super Slicer, I cut .25″ pieces off of the cane. I rolled out a piece of white clay and then placed the slices on the white piece. I didn’t make any specific design. I just organized them the all fit, with barely any white showing. The white was more for the back.
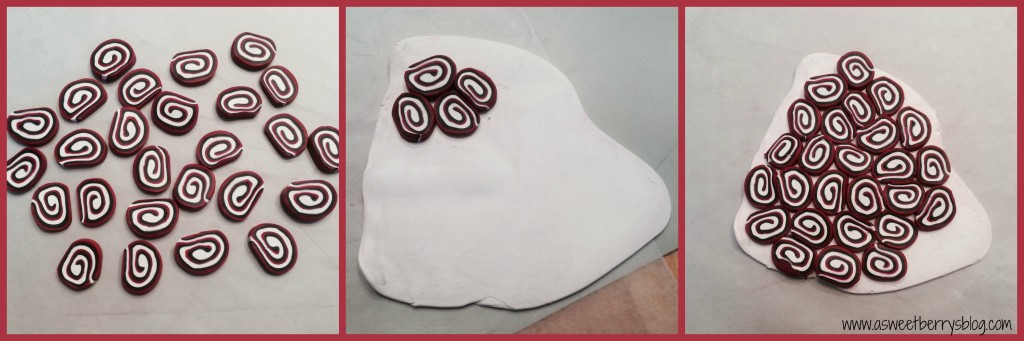
Using the Sculpey Acrylic Roller, I lightly began to roll over the slices, lightly applying pressure so that the slices began to mold together.
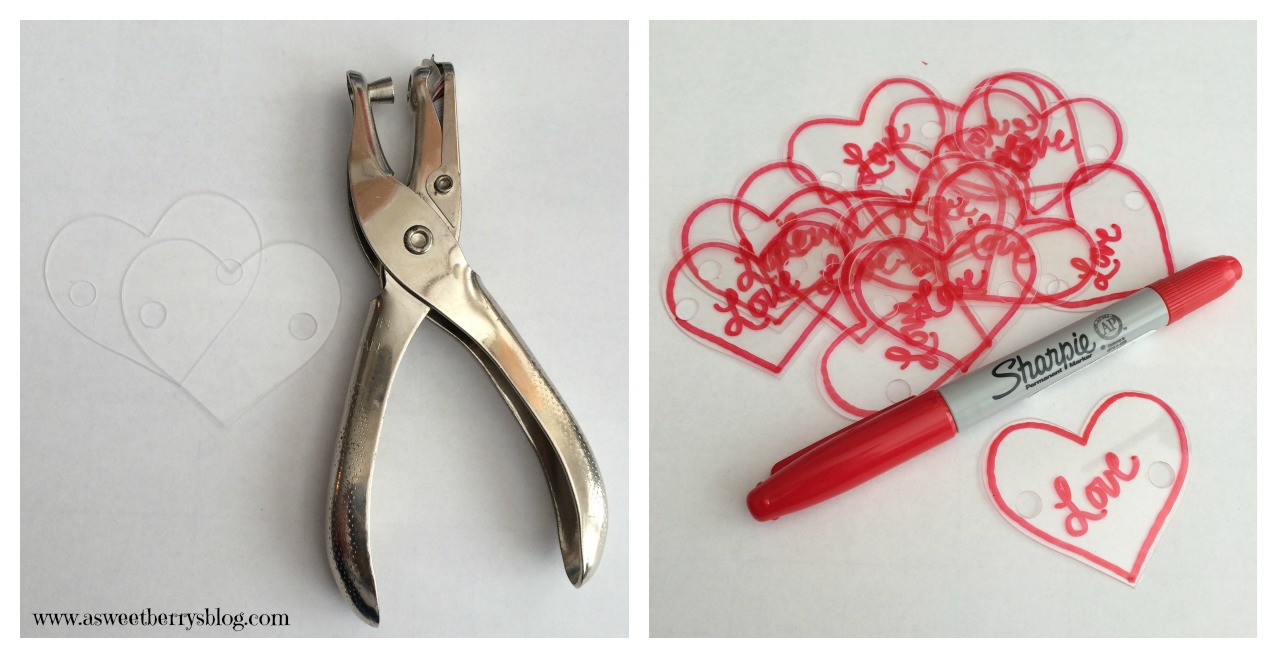
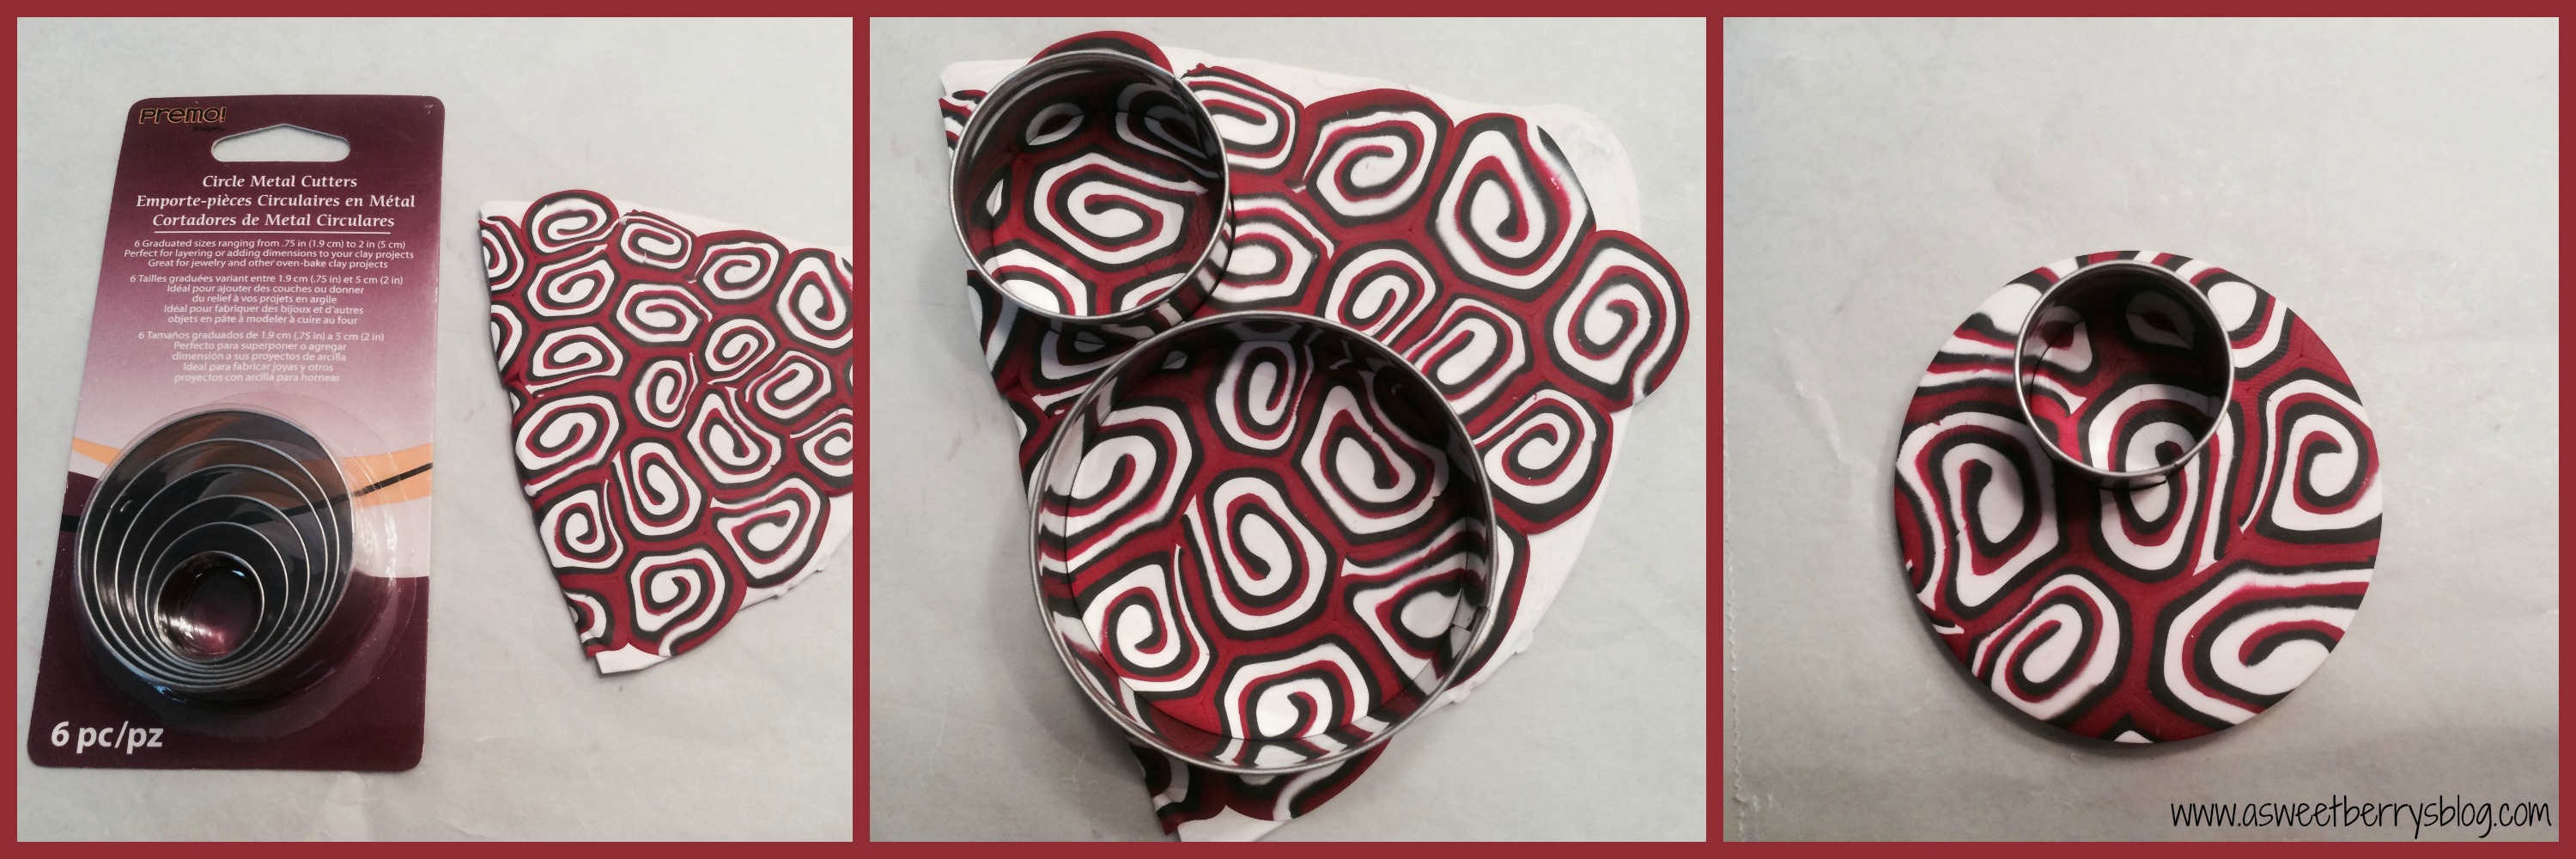
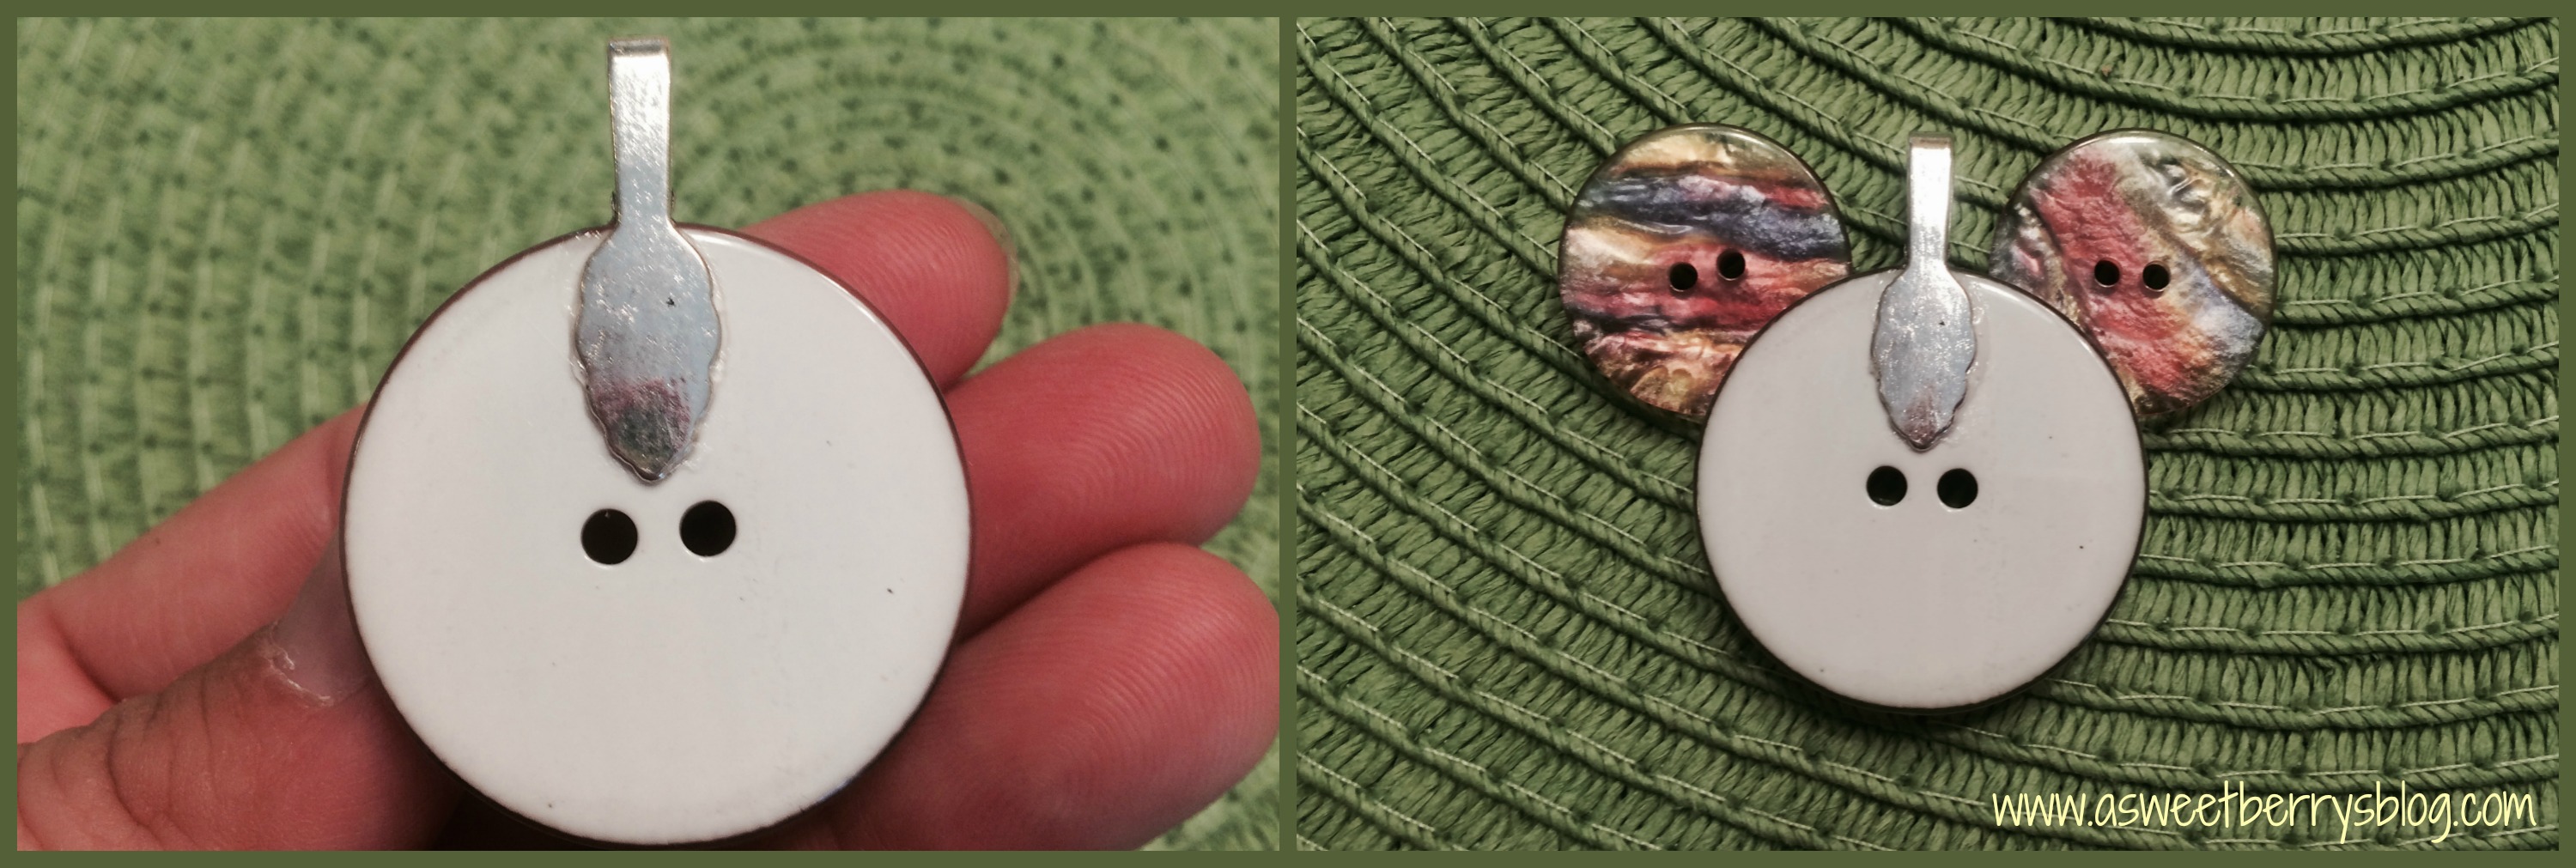
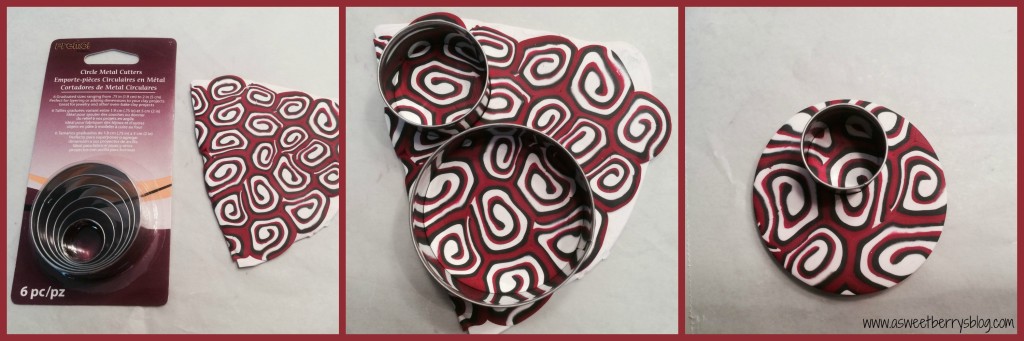
Once I had rolled it out to my liking, I used the Premo! Graduated Circle Cutters to cut two different size circles, one for the necklace and two for the earrings. I then used a smaller circle cutter to cut a hole near the tops of the my circles.
Once they were cut, I used the clay baking cushion from the Sculpey Bead Making kit to bake the pieces on. The two pieces on the baking rack are for another project!
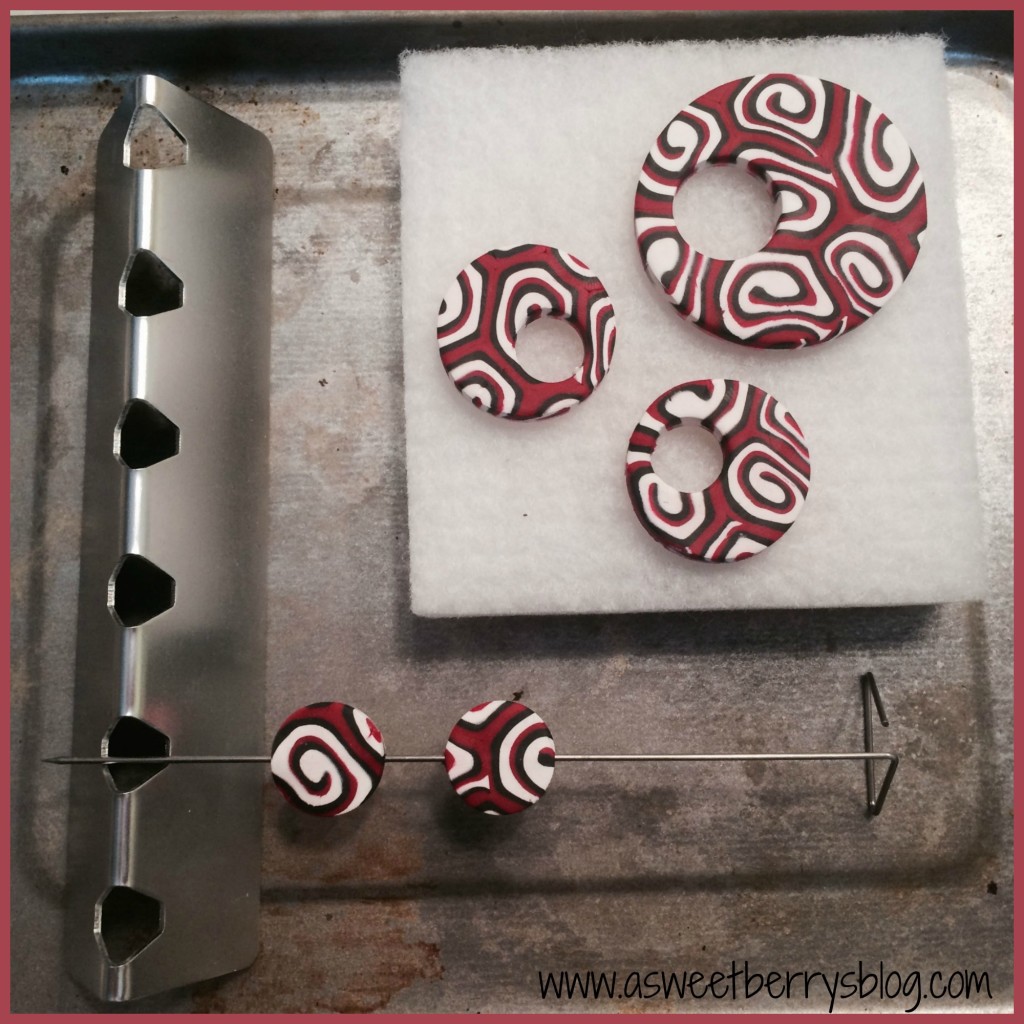
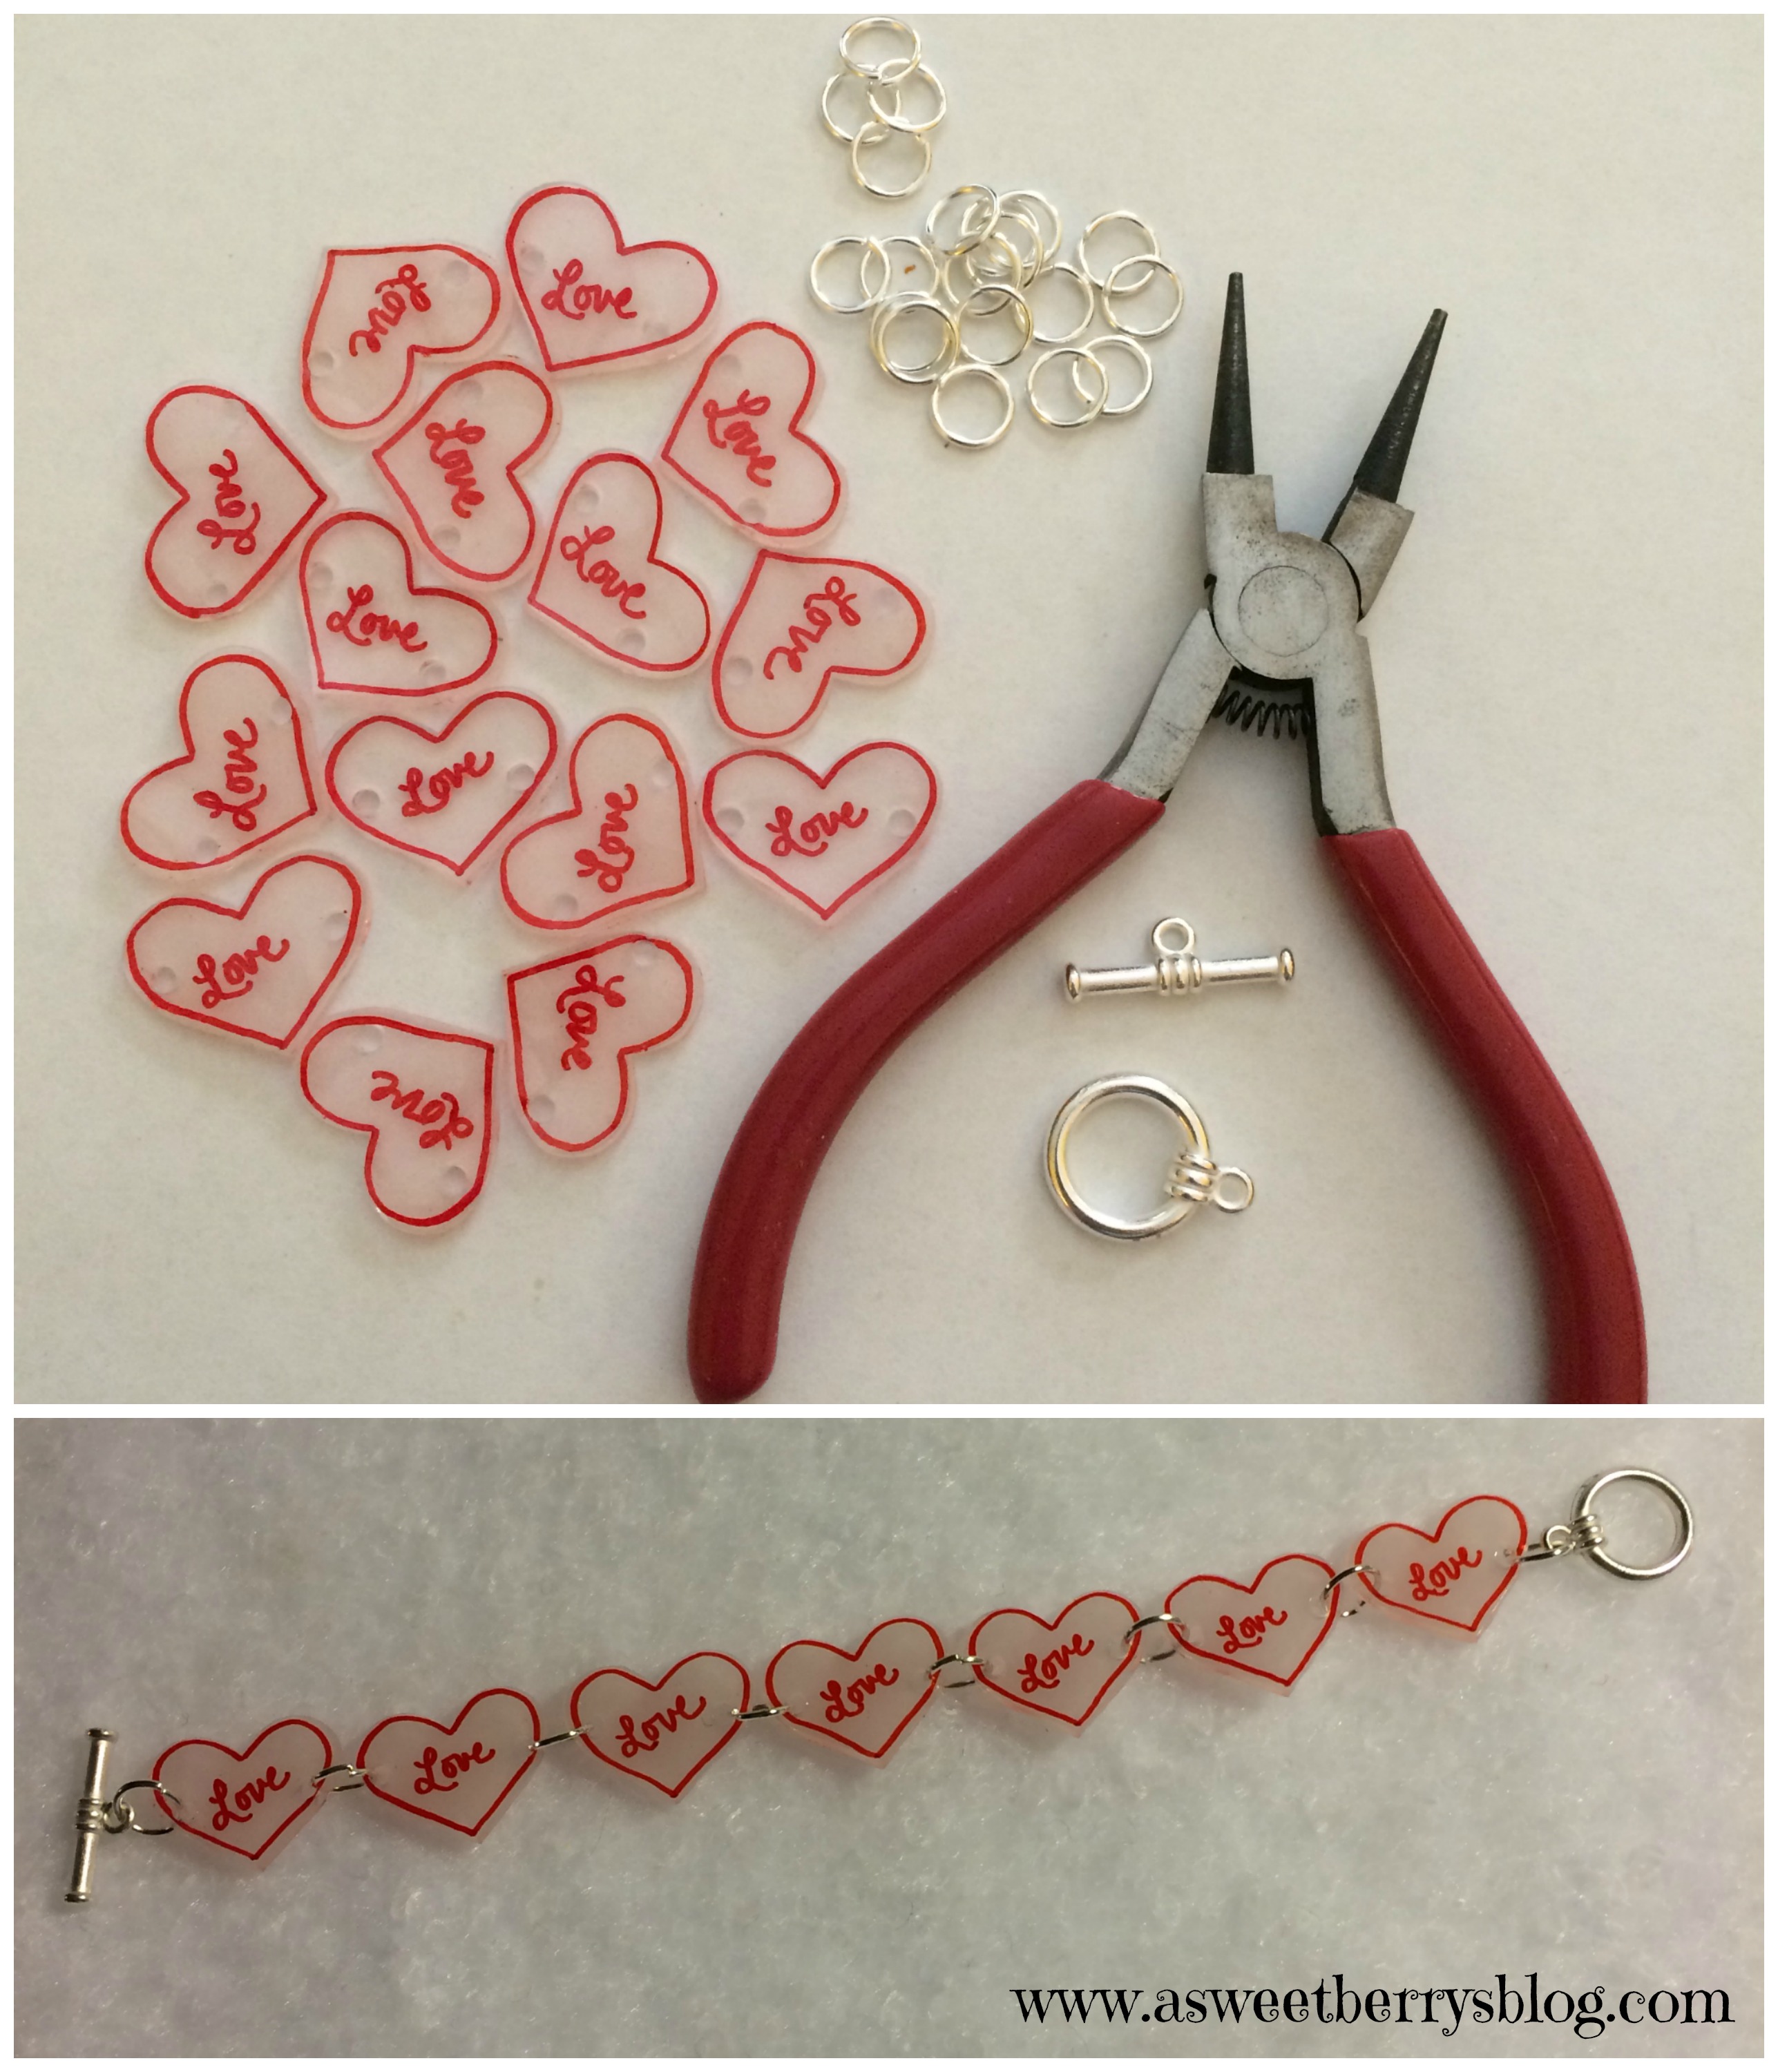
After the pieces were baked and cooled, I used the Sculpey Gloss Glaze and a paint brush to create a glossy look!
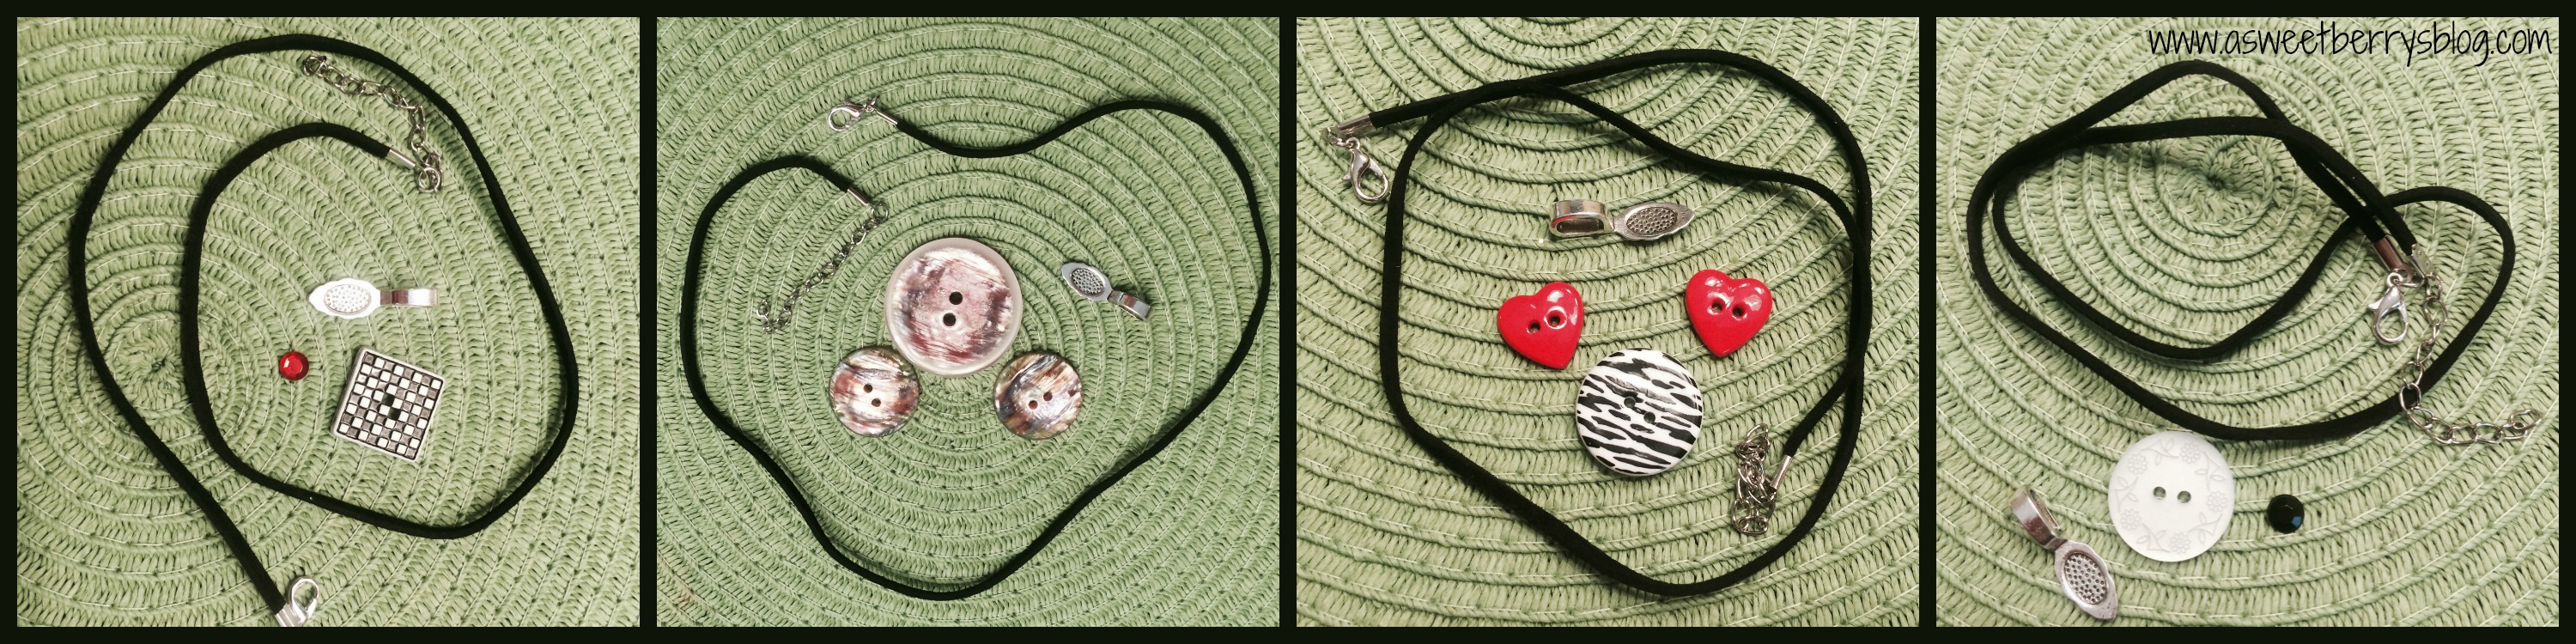
Once the glaze was dry, I used a cord necklace to loop through the larger piece to create a necklace.
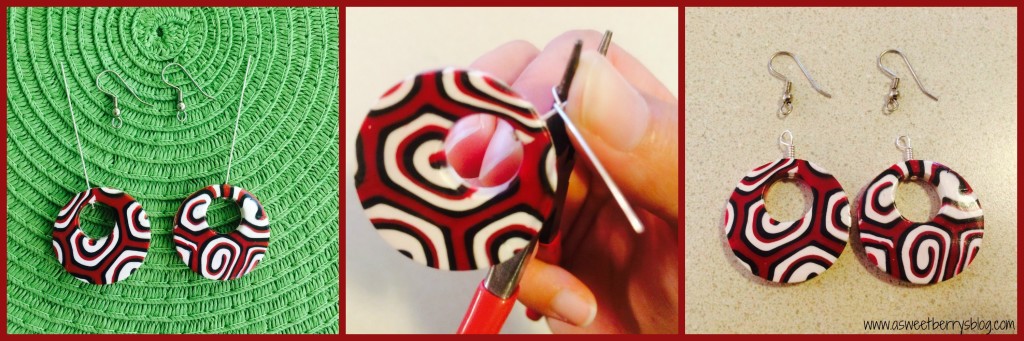
Then I used the thin head pins, the round nose pliers and the earring hooks to create my earrings!
And now they are ready to wear! And these just happen to be the perfect colors for my favorite football team! They are perfect for Game Day!!
 I hope that you like my Sculpey Necklace and Earrings!