Tag Archives: Sculpey Clay

Creative Christmas Crafting featuring Sculpey

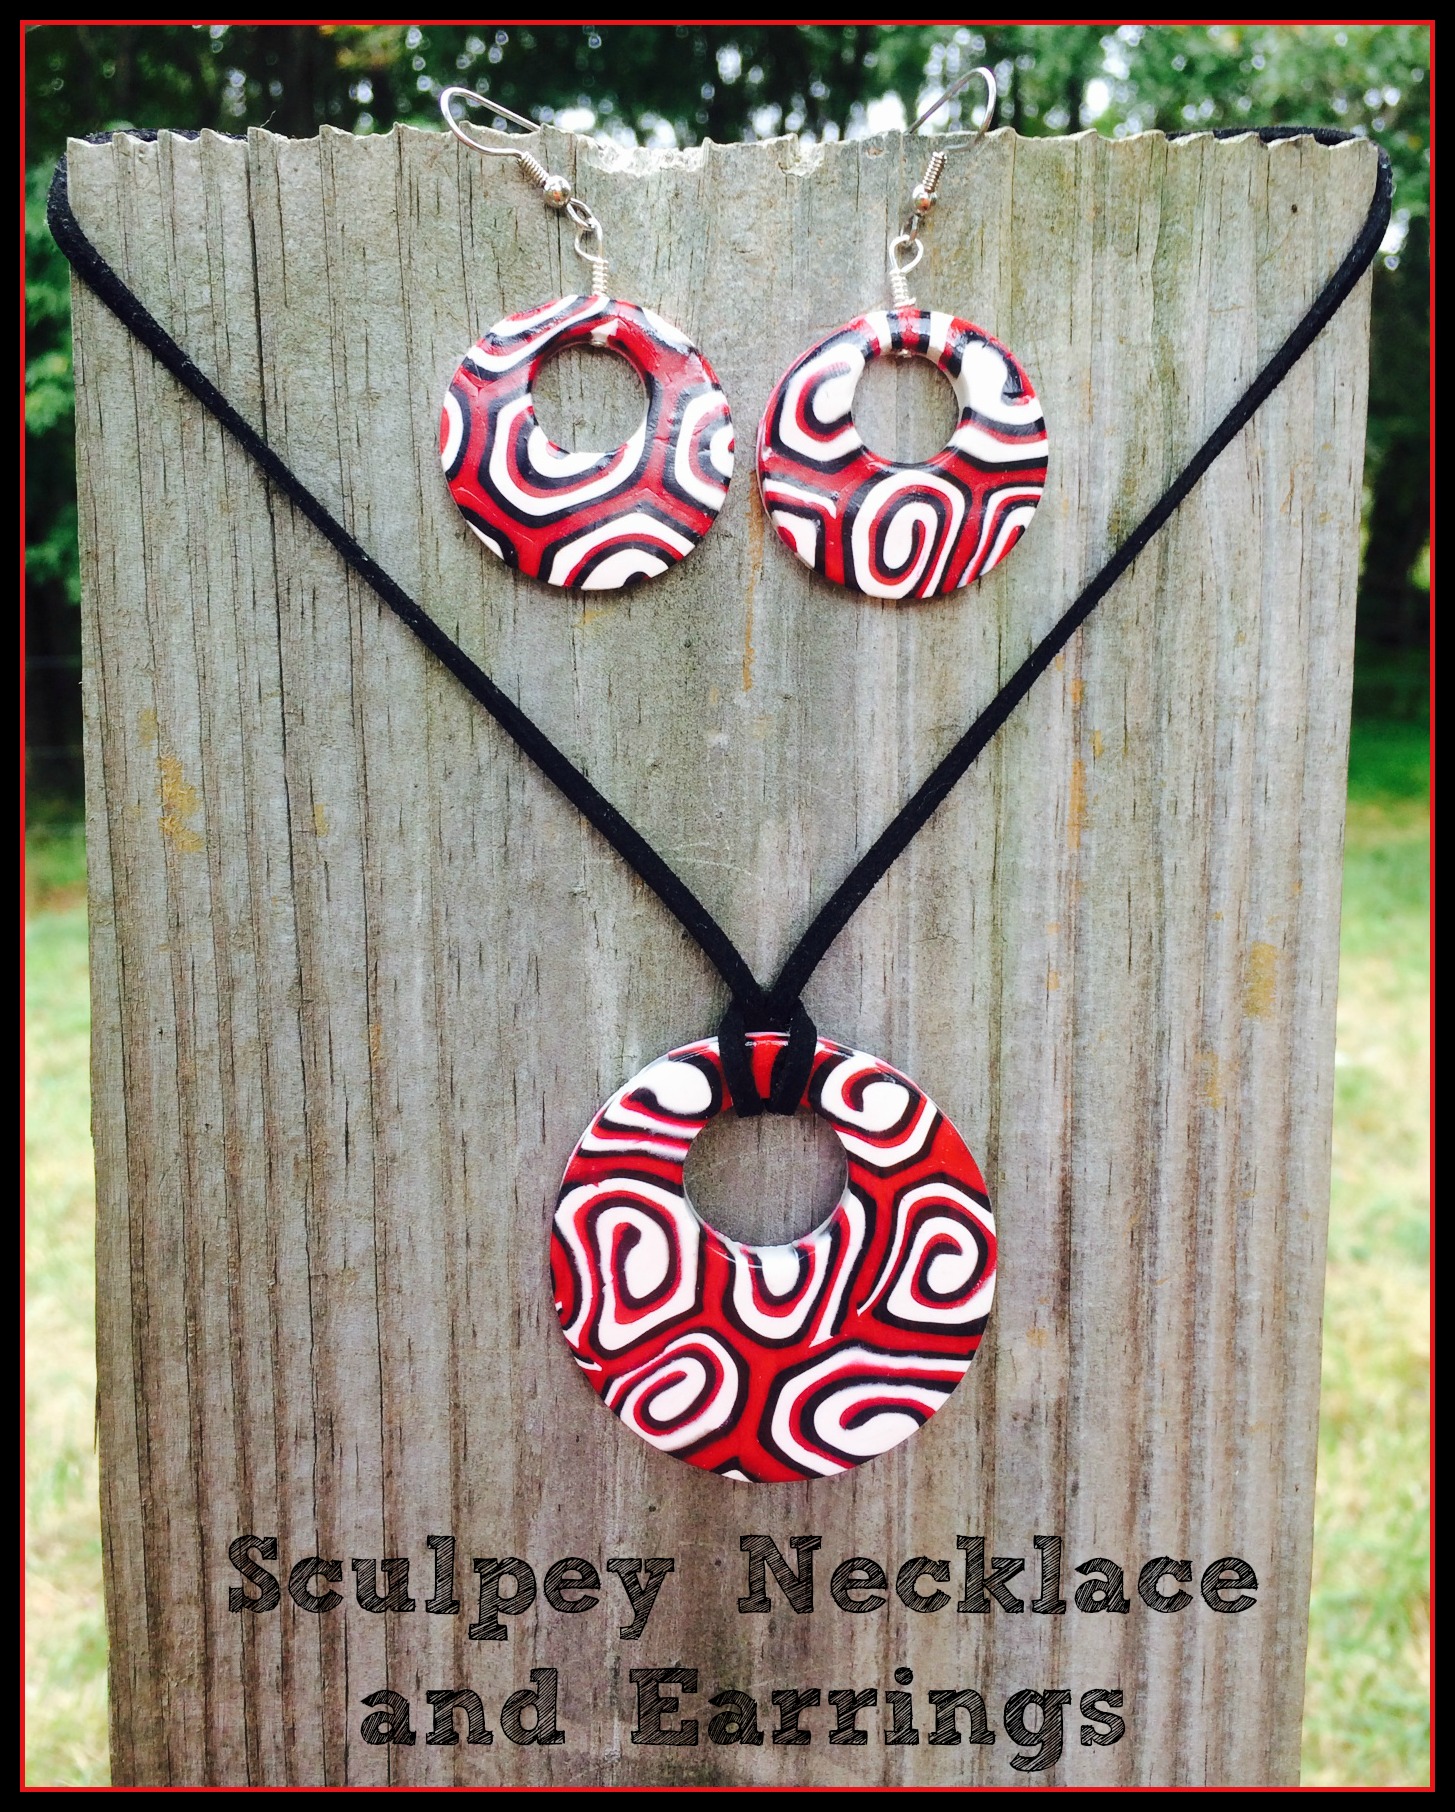
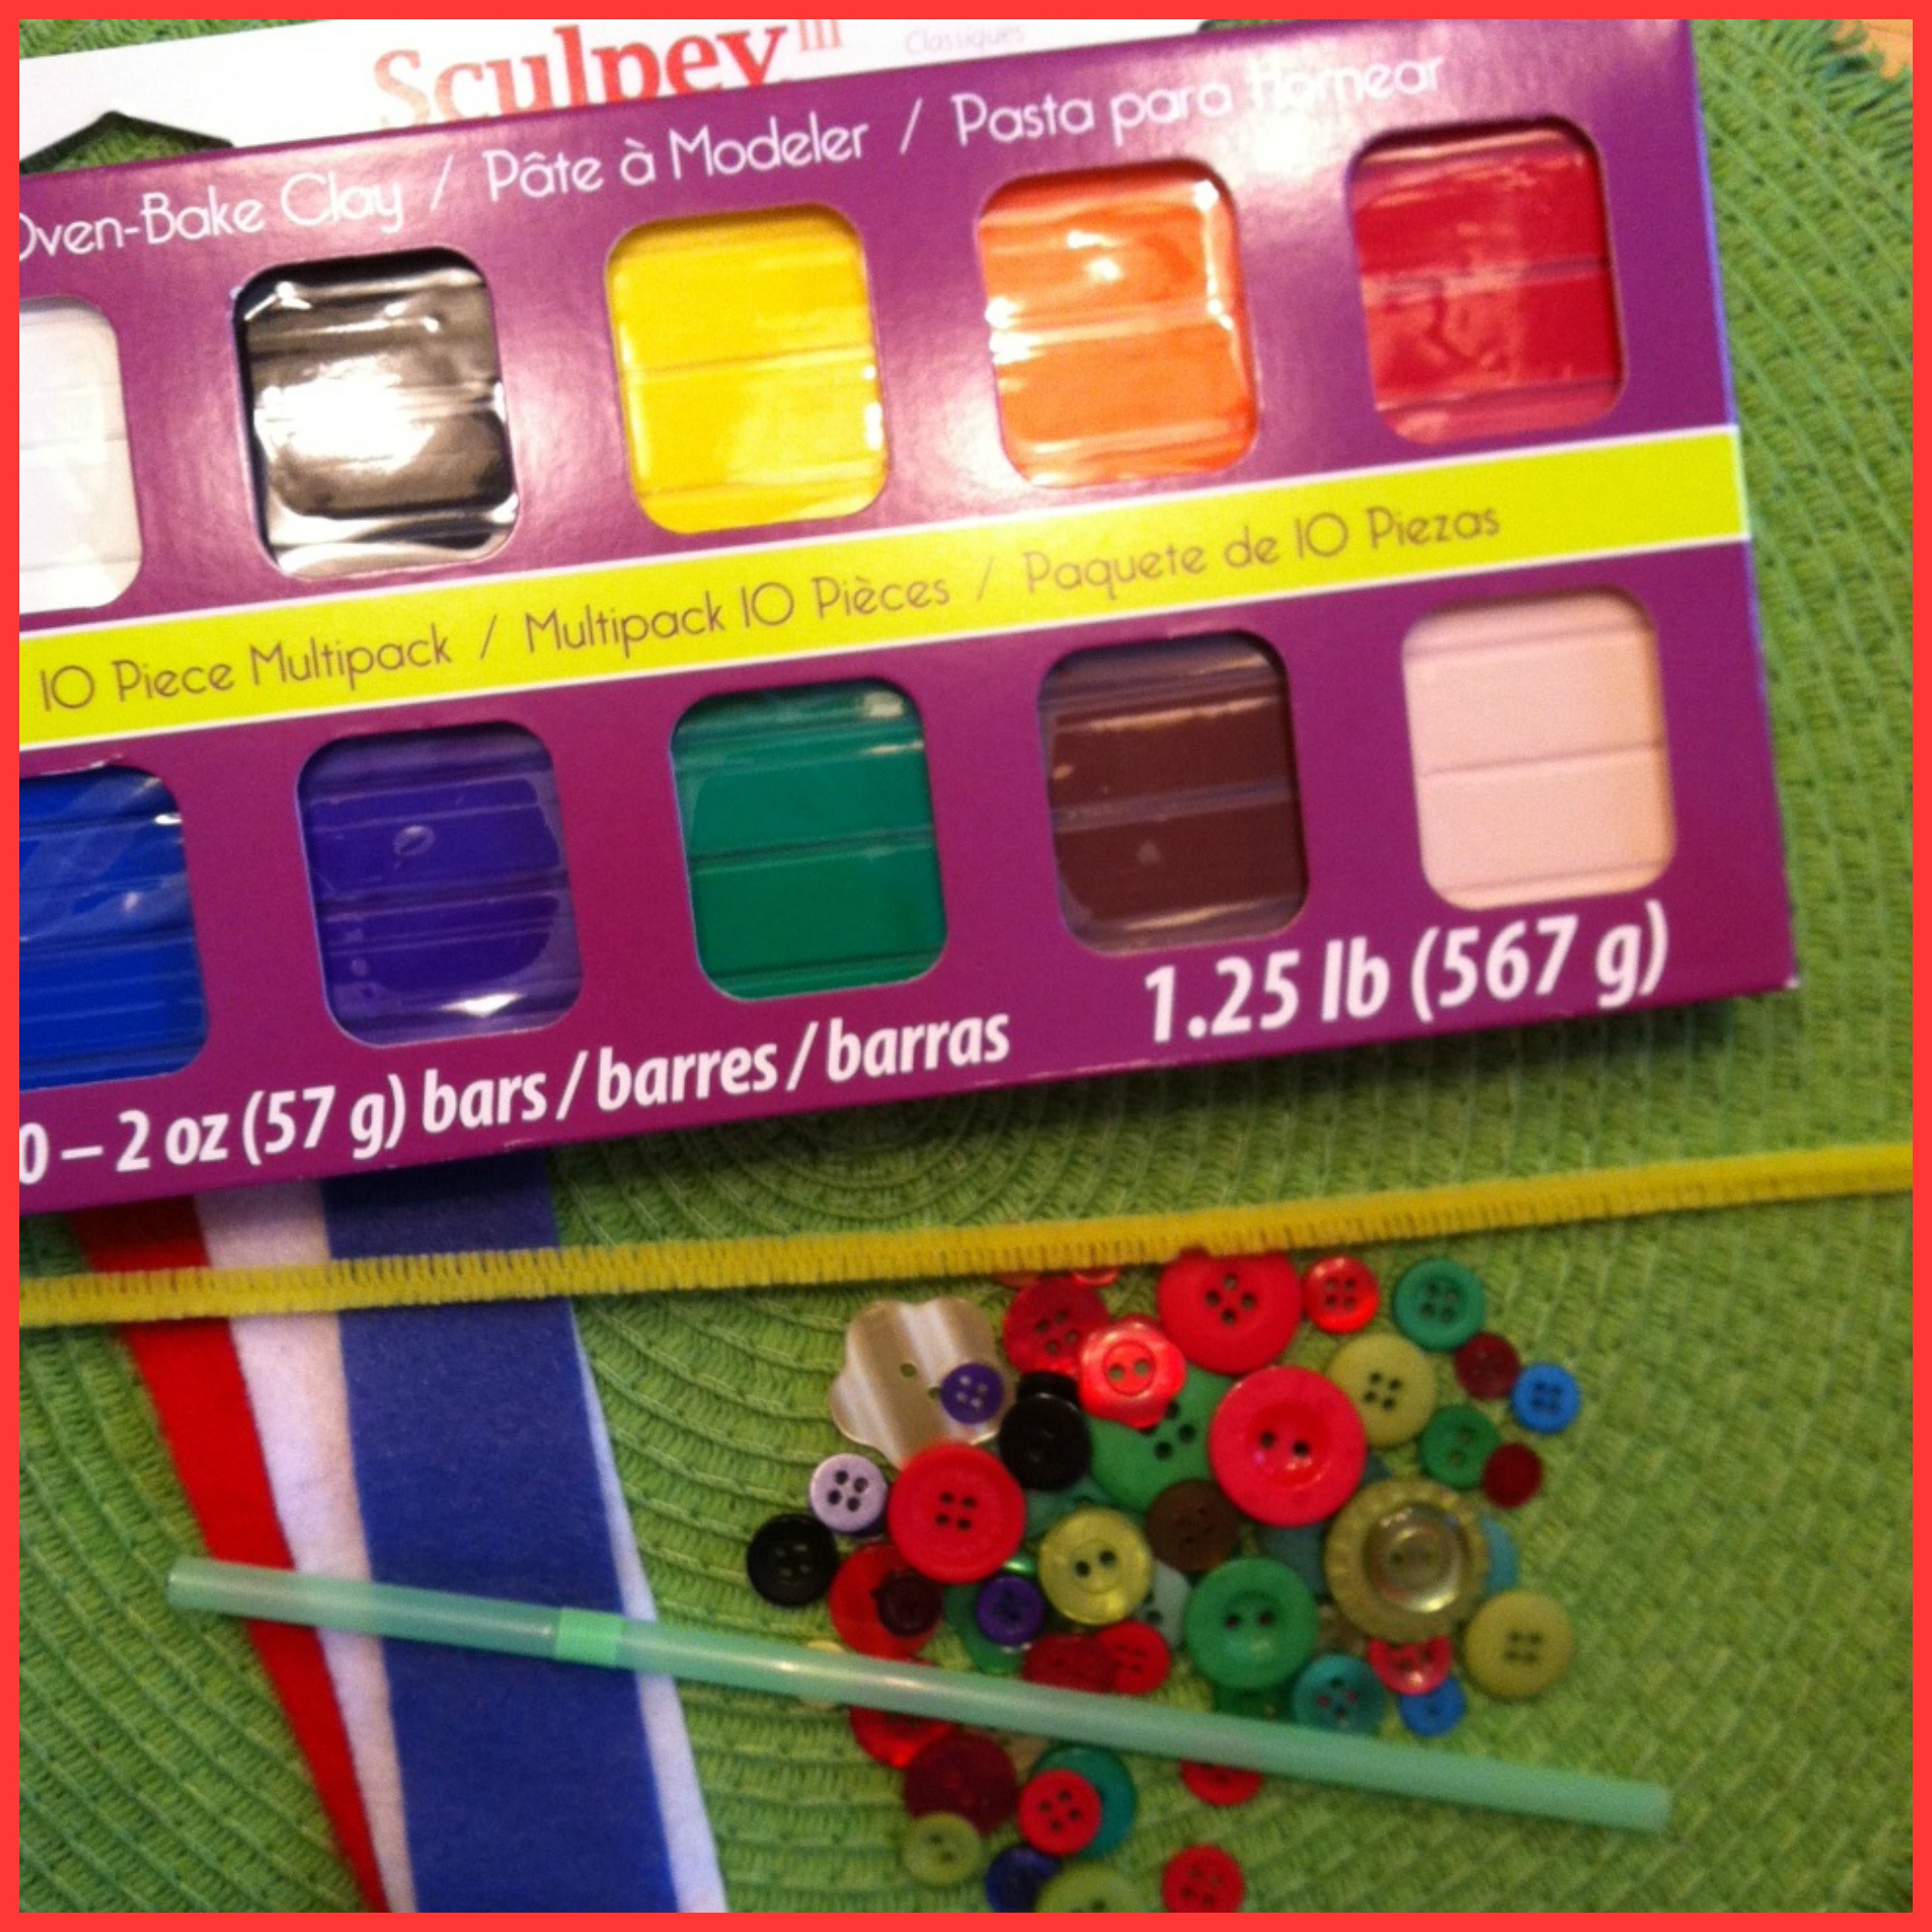
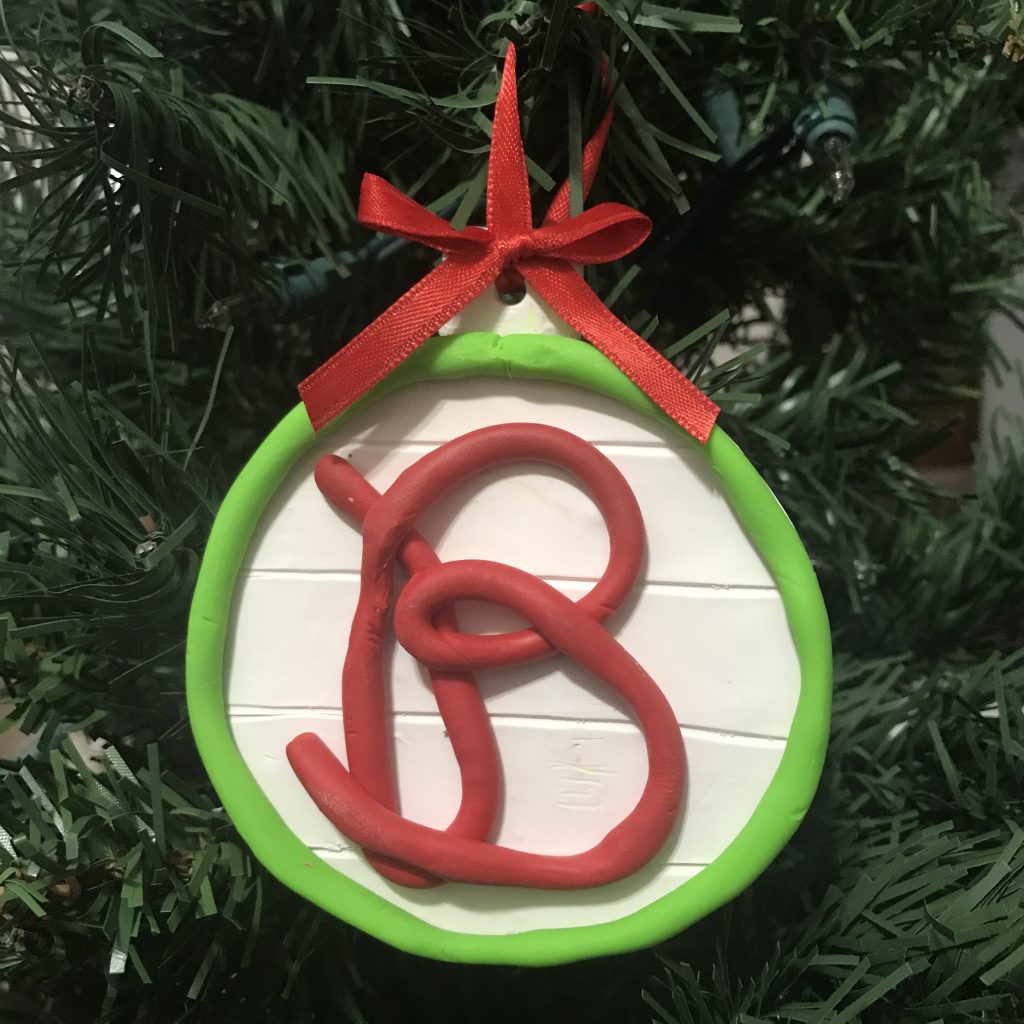
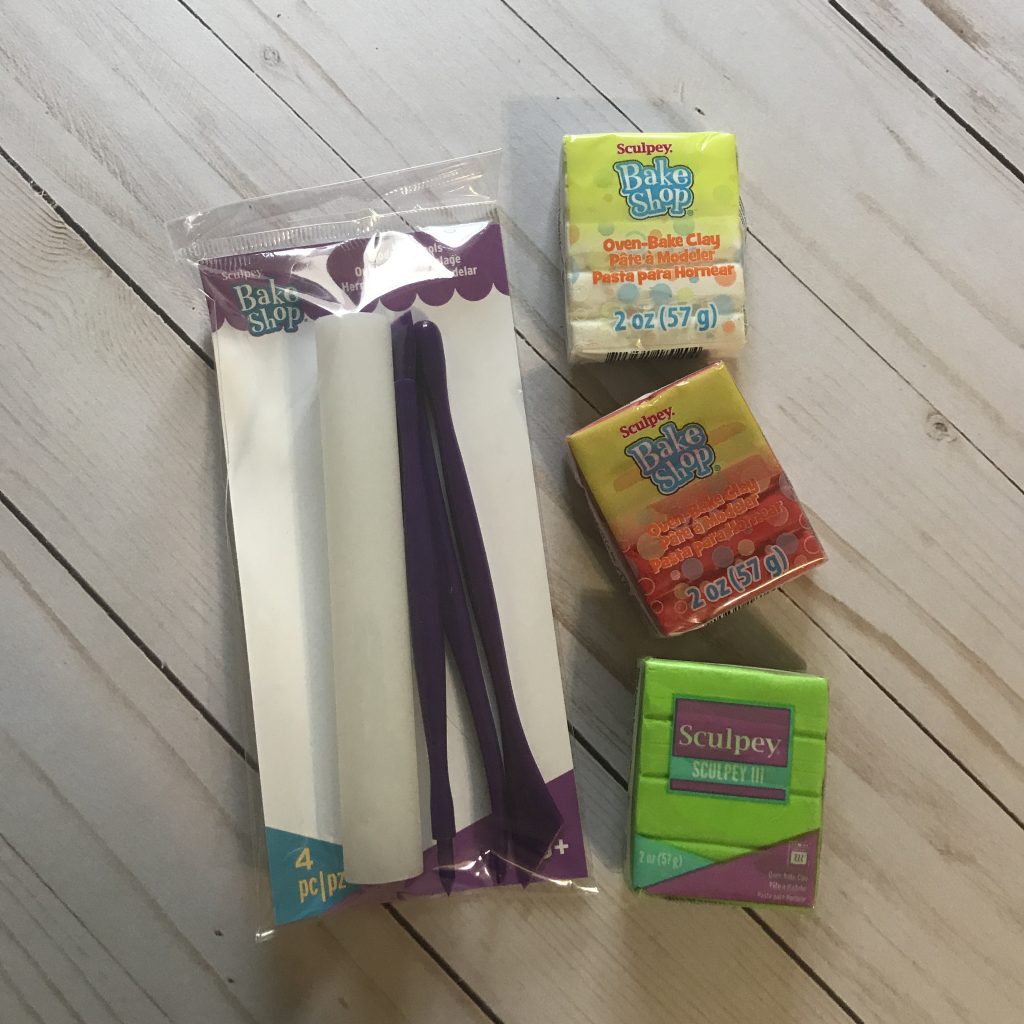
It’s time for the Creative Crafts Christmas Edition and together with Sculpey, we are creating for the holidays! Sculpey is the perfect medium to make Christmas ornaments with. Here in the south, monograms are all the rage and everyone loves a monogram. Sculpey® provided me with with Sculpey III and Sculpey Bake Shop clay and a modeling tool kit to create this adorable monogram ornament. This ornament could be attached to a gift and then placed on the tree afterwards!

Materials:

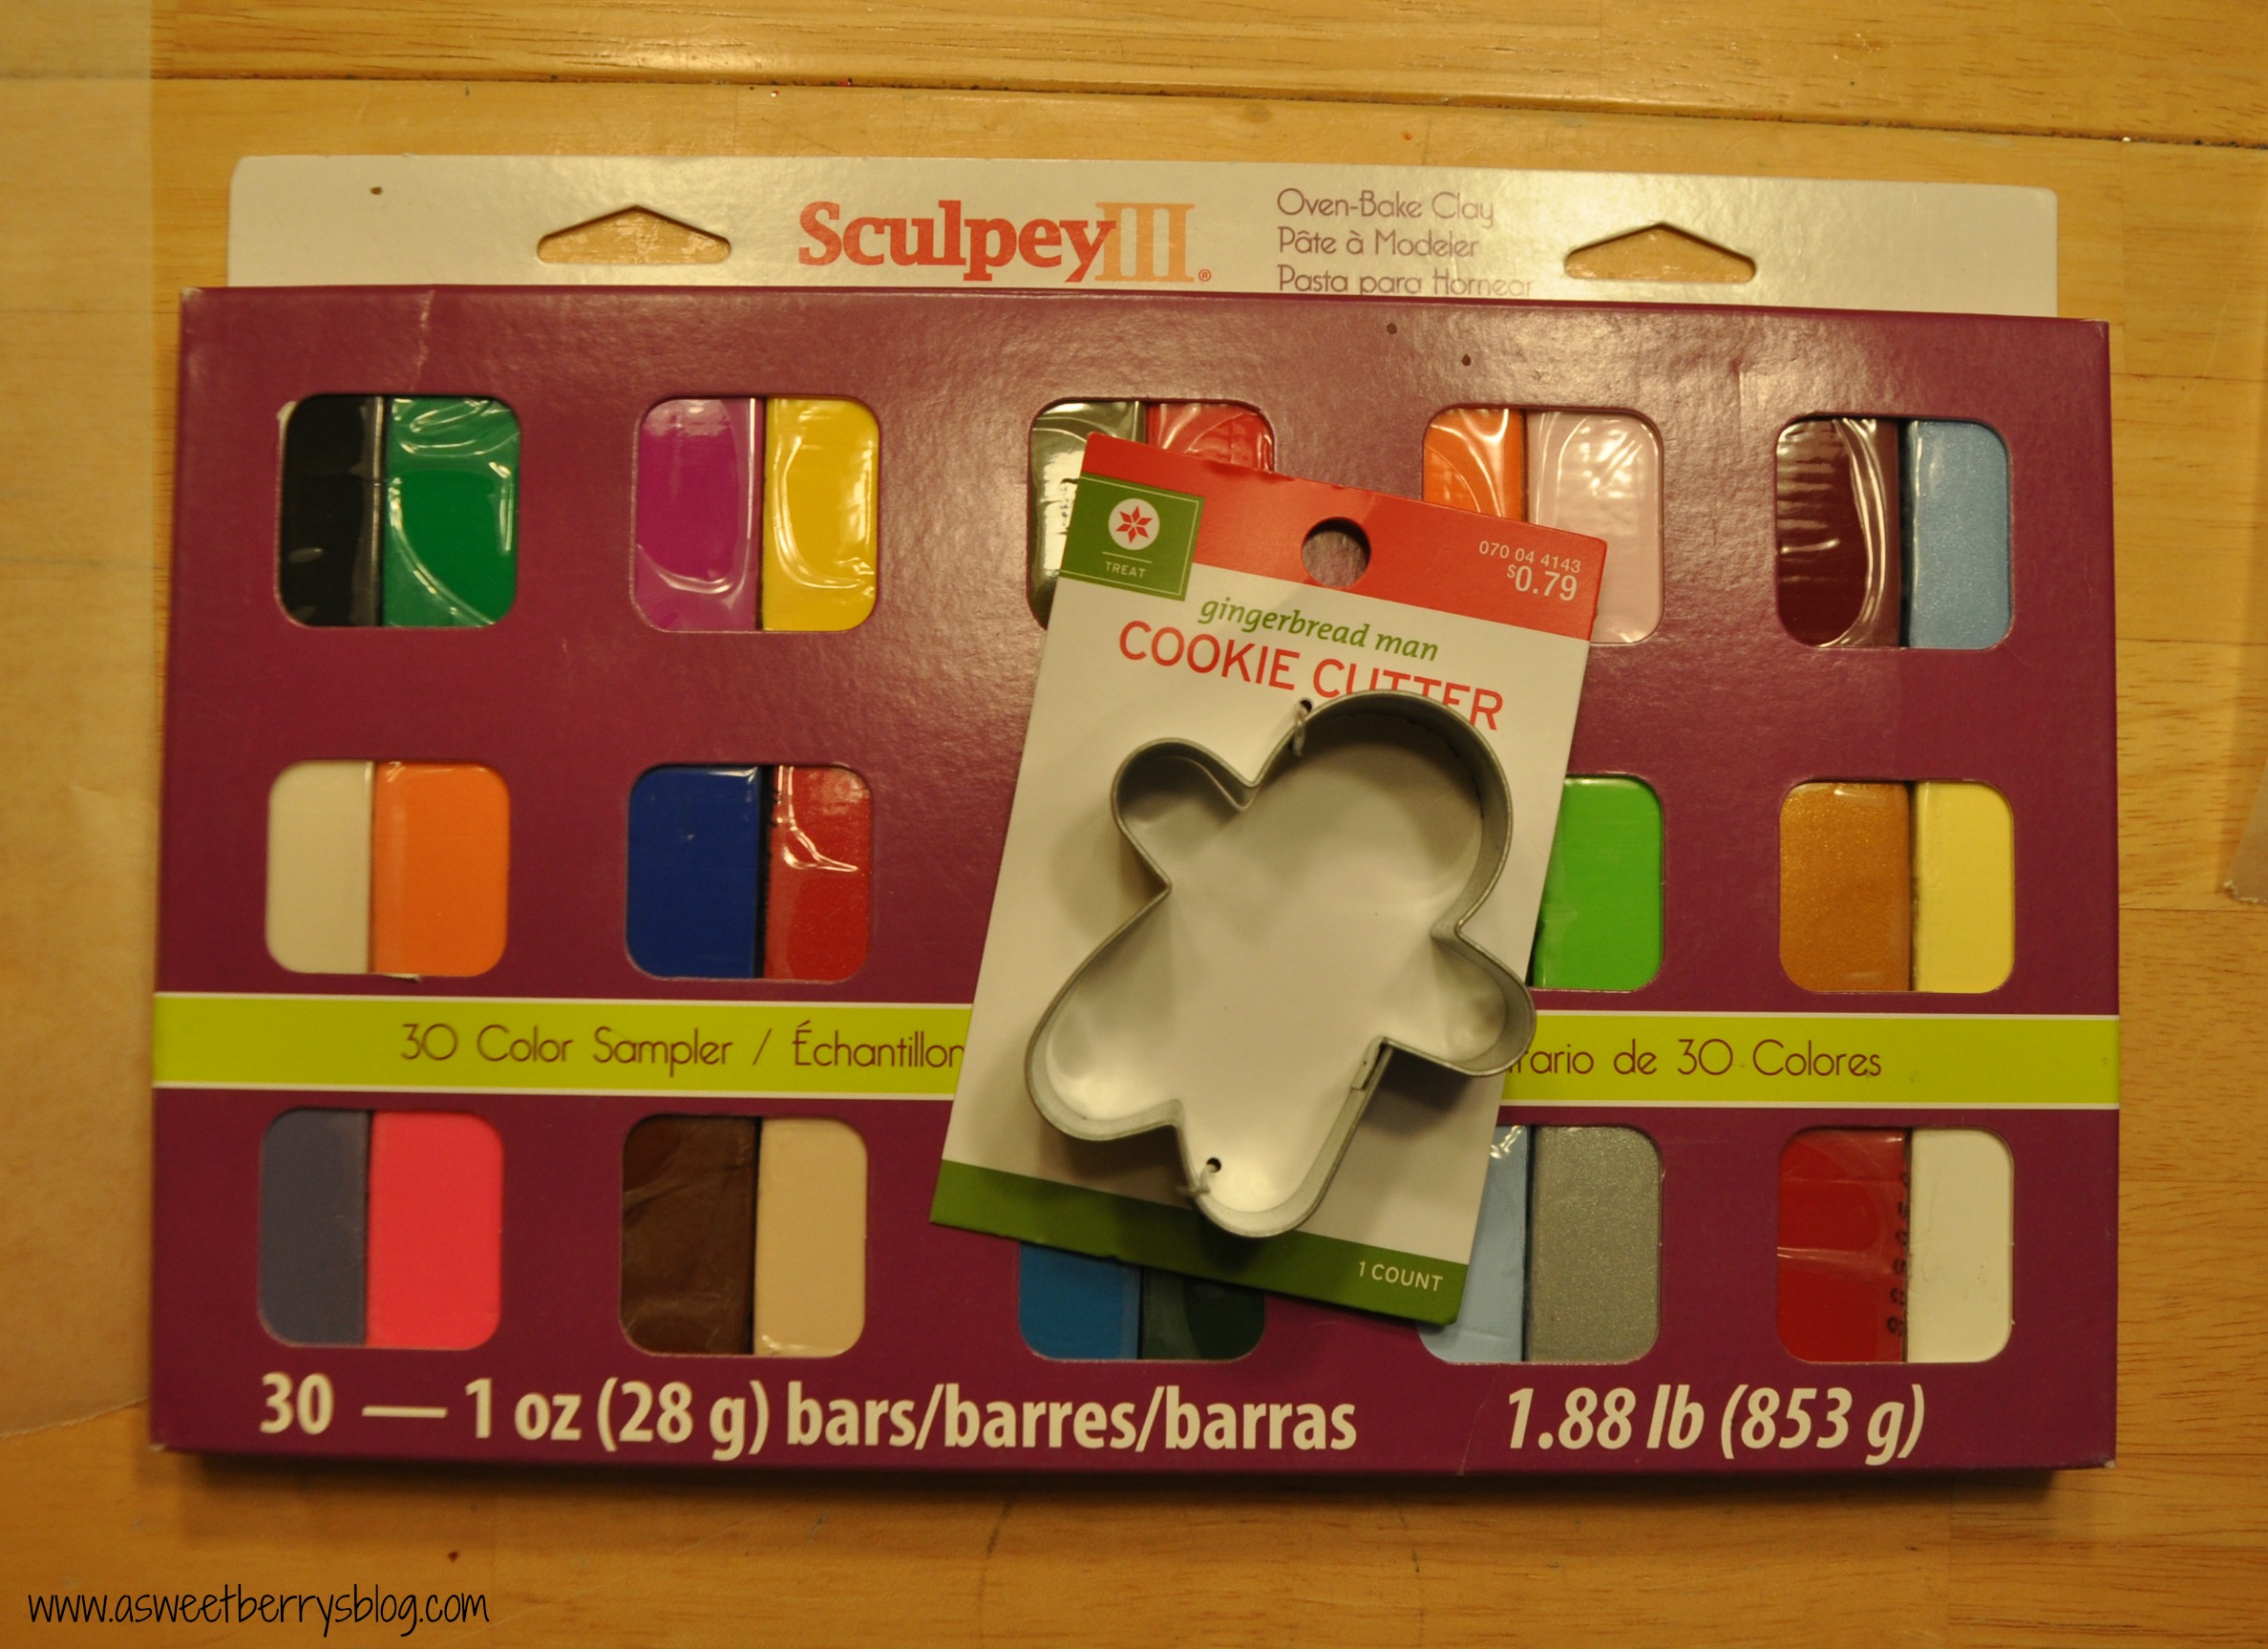
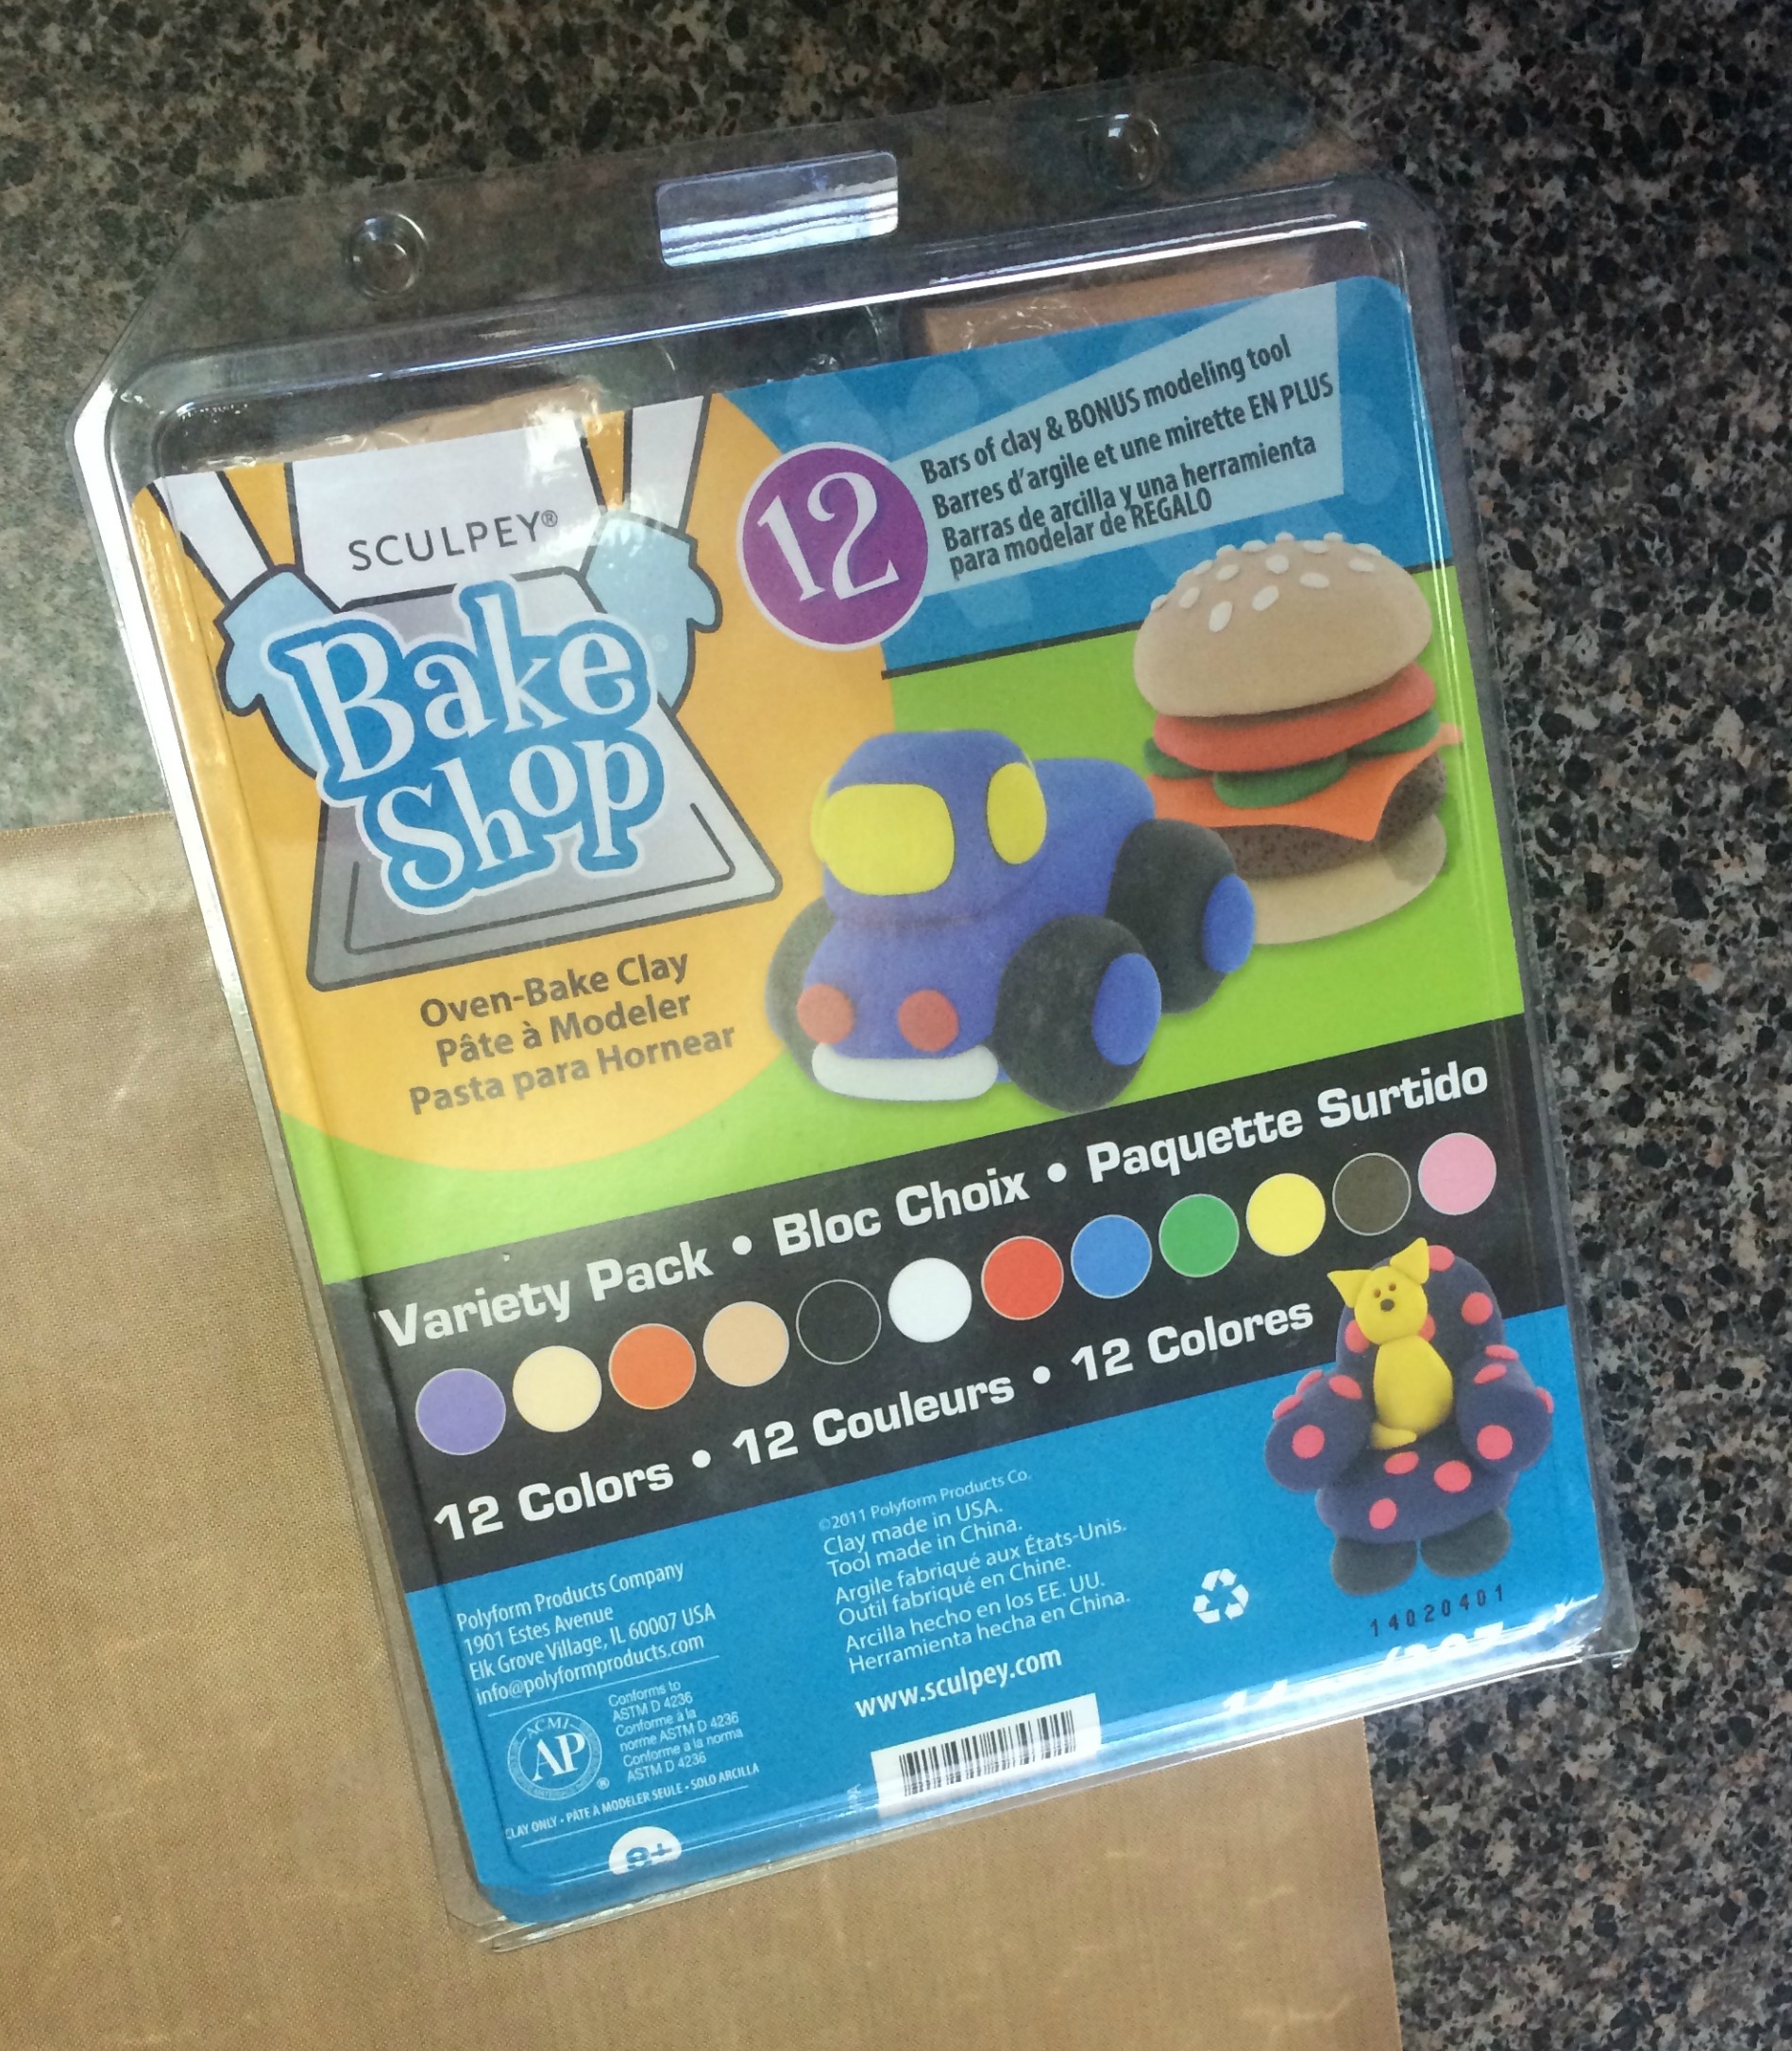
  • Sculpey® Clays: Sculpey III in Granny Smith, Sculpey Bake Shop® in White and Red
  • Sculpey Bake Shop® Modeling Tools
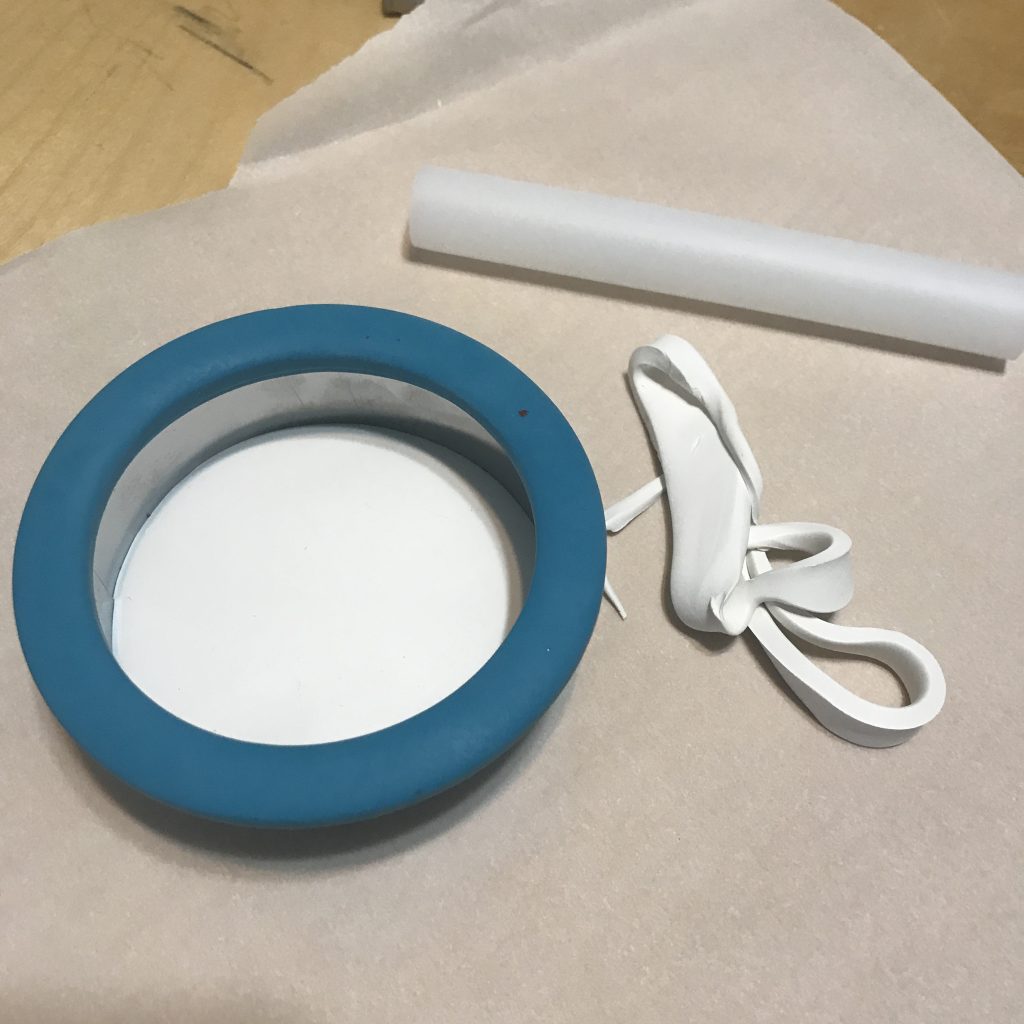
  • Round Cookie Cutter
  • Parchment Paper
  • String or Ribbon
  • Oven or Toaster Oven

How I made it:

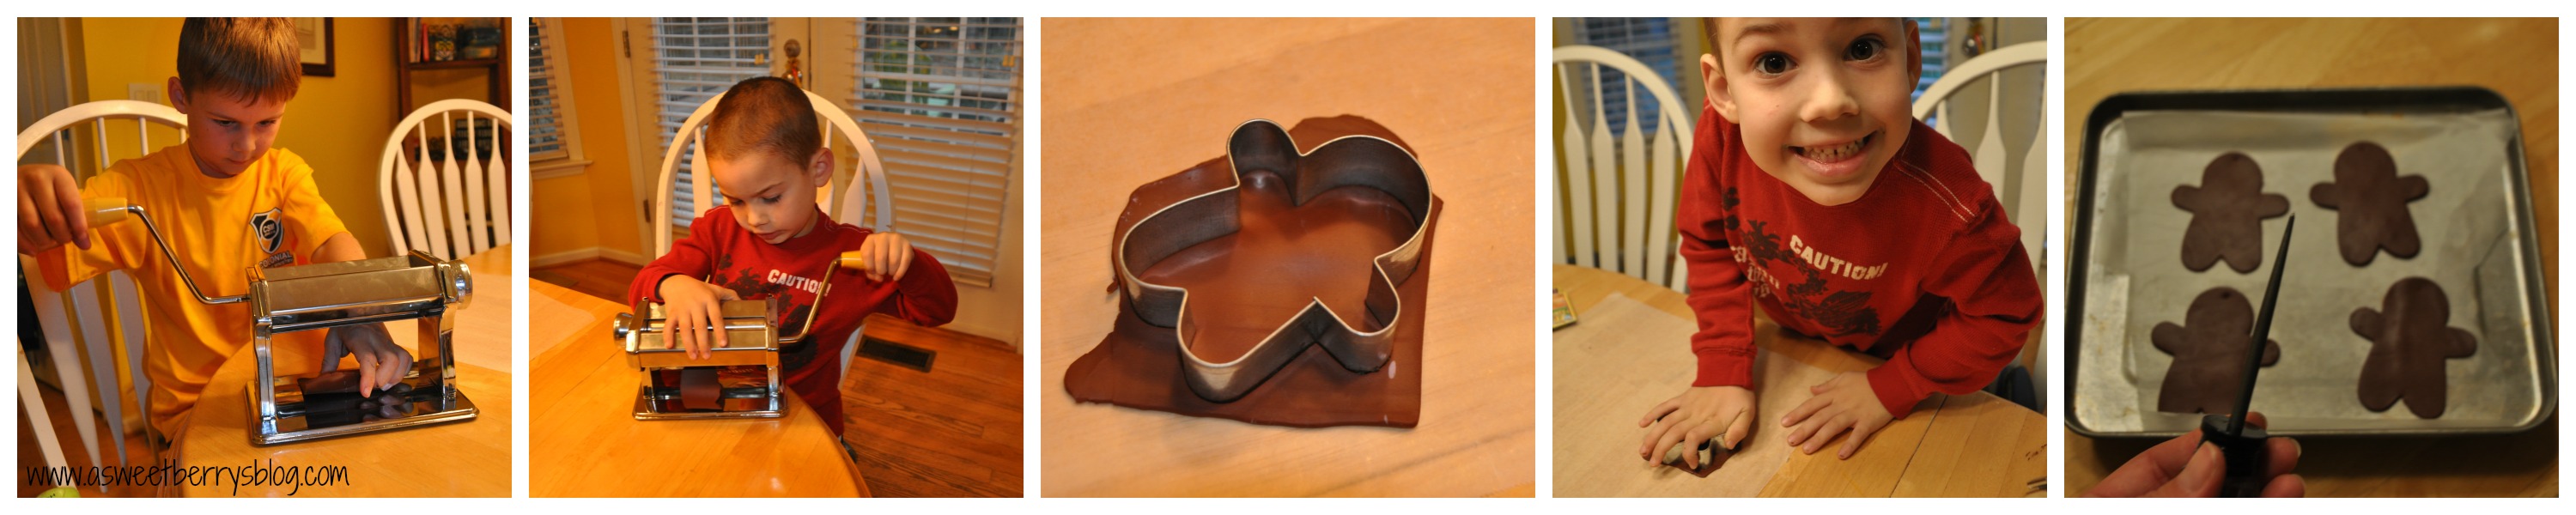
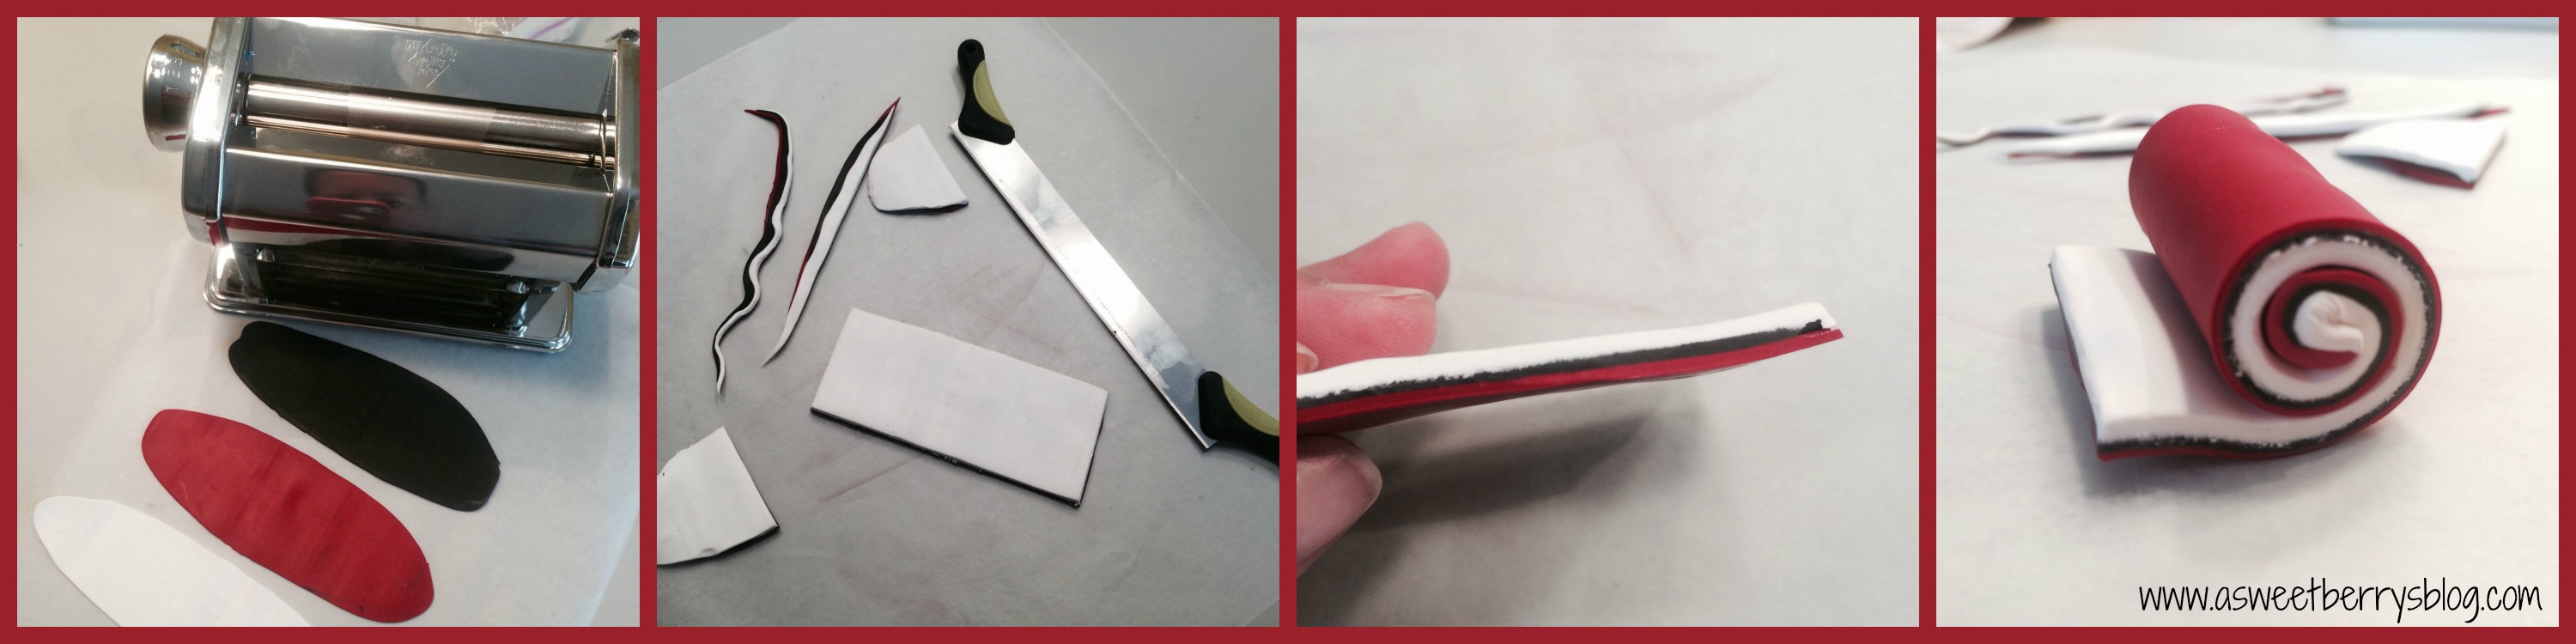
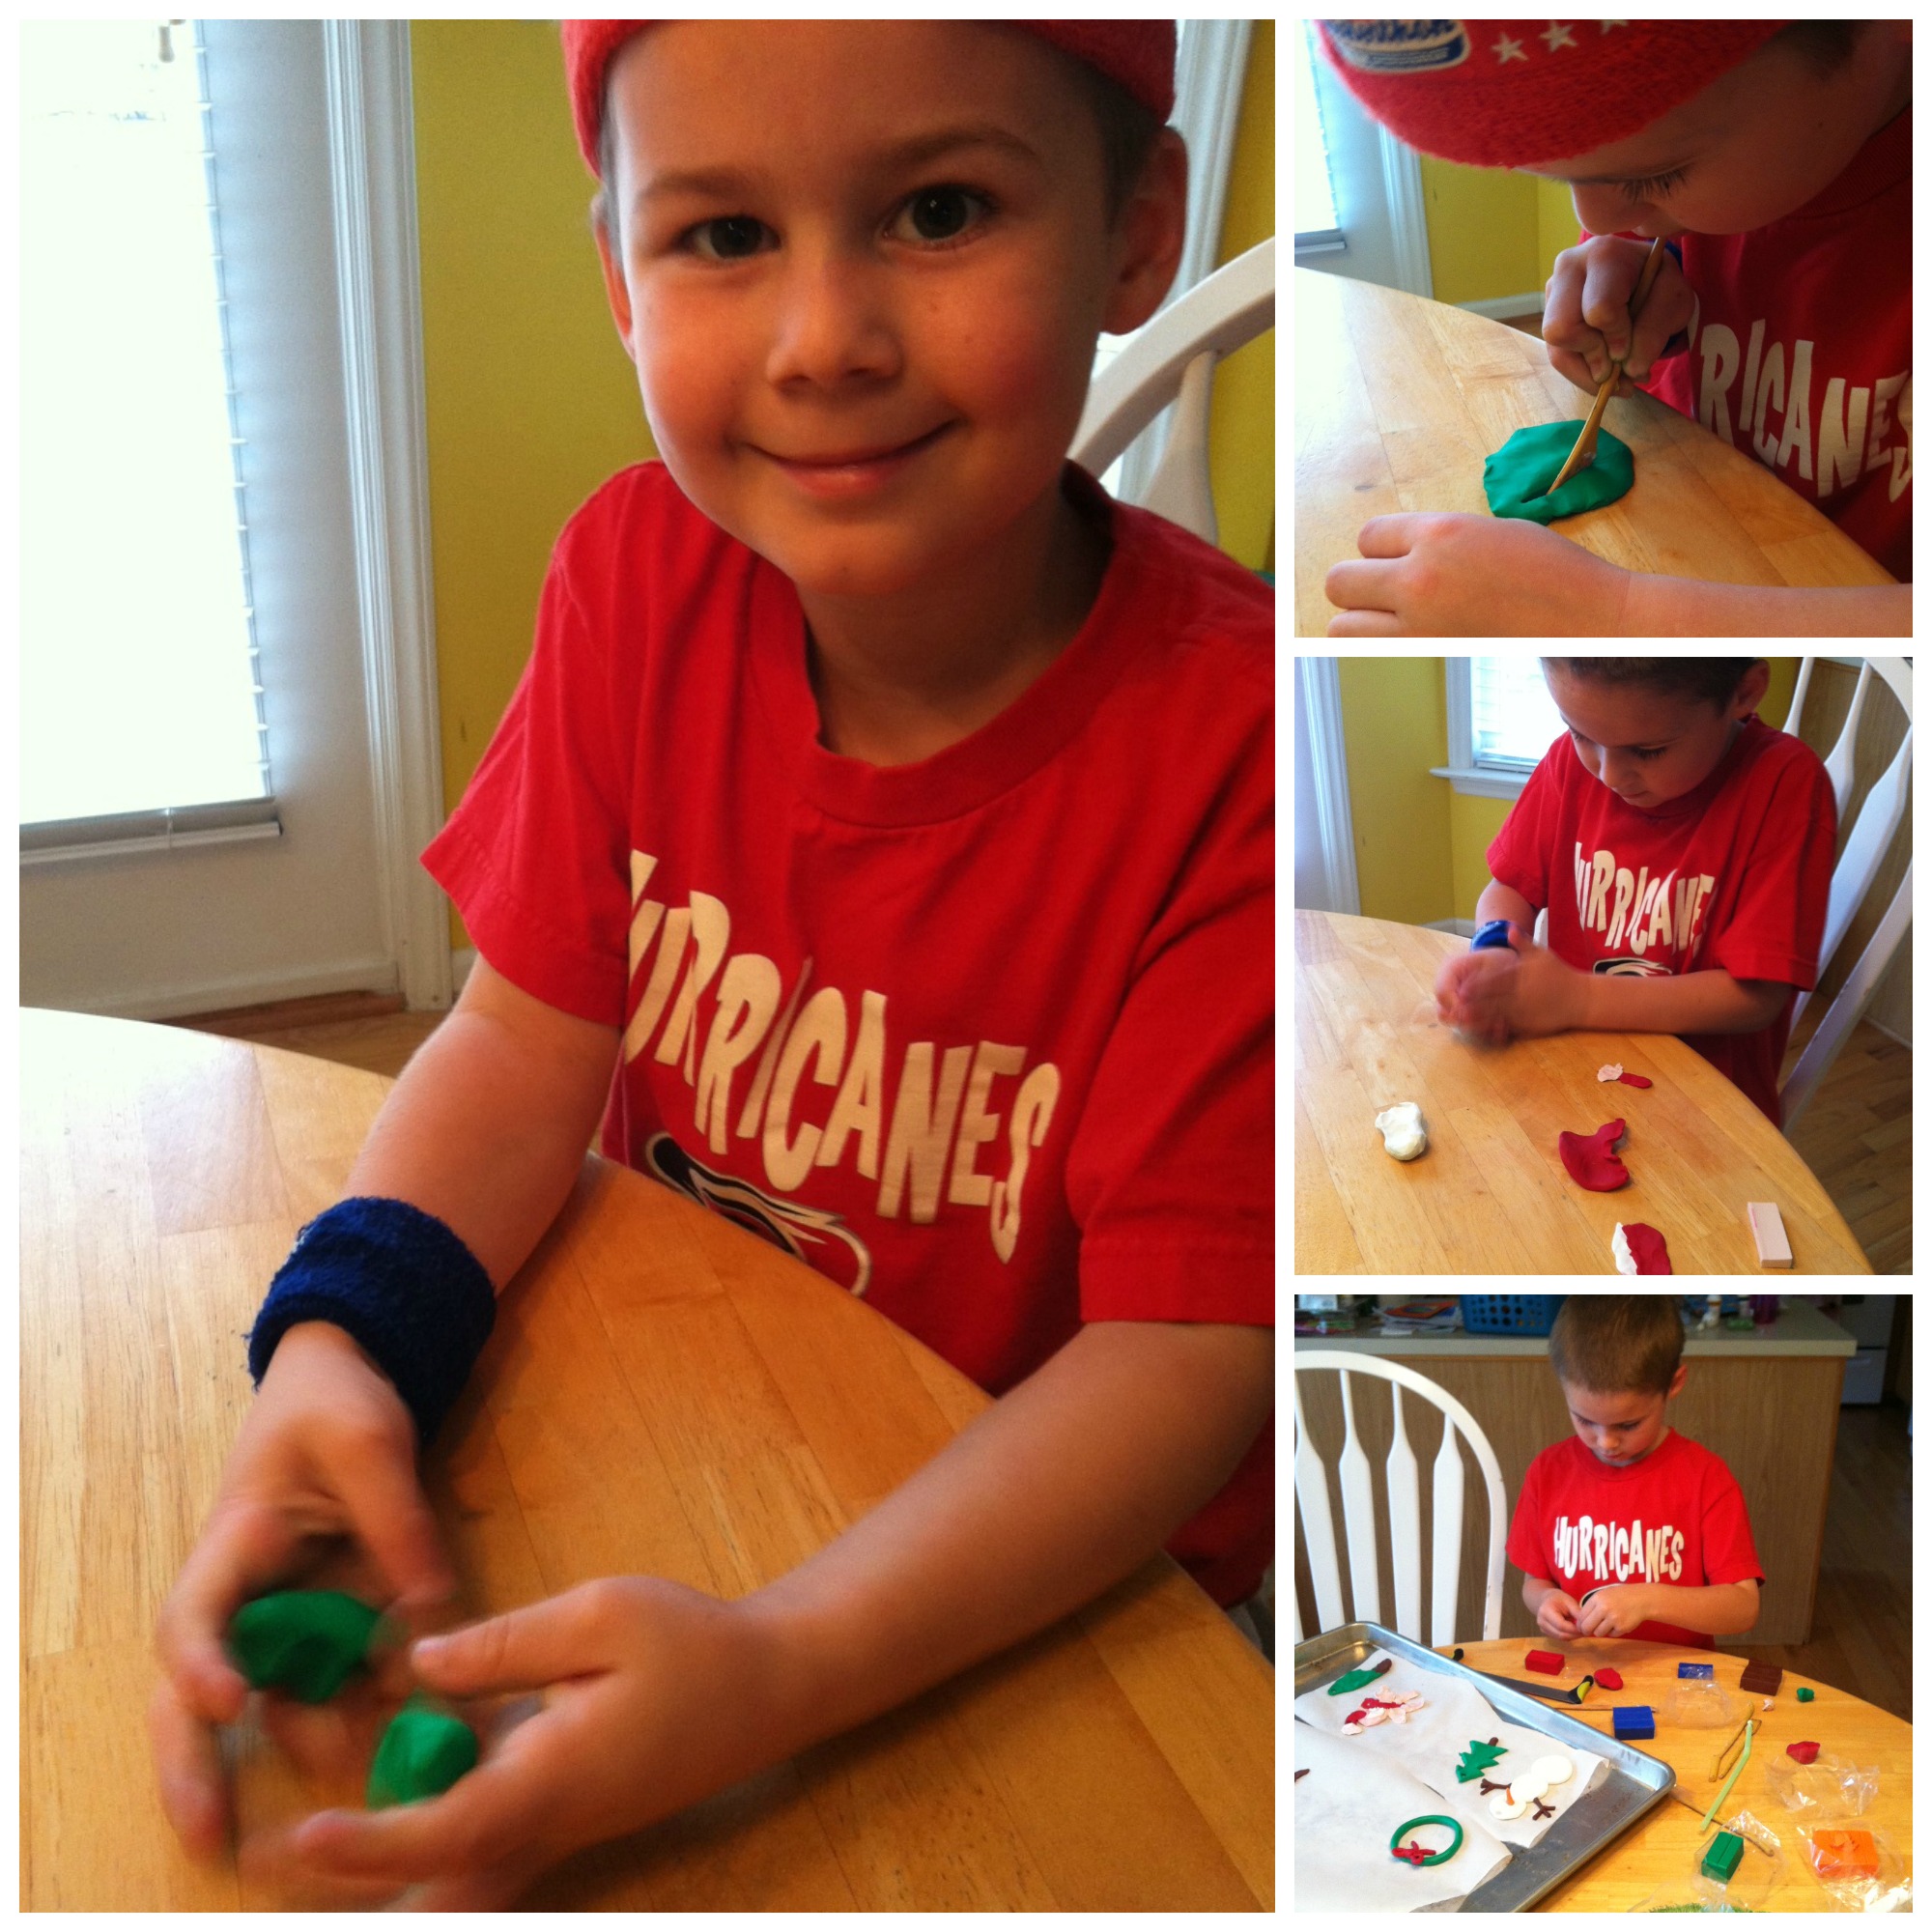
I started by cutting the amount of clay that I thought I would need from each block and kneading it to soften it.

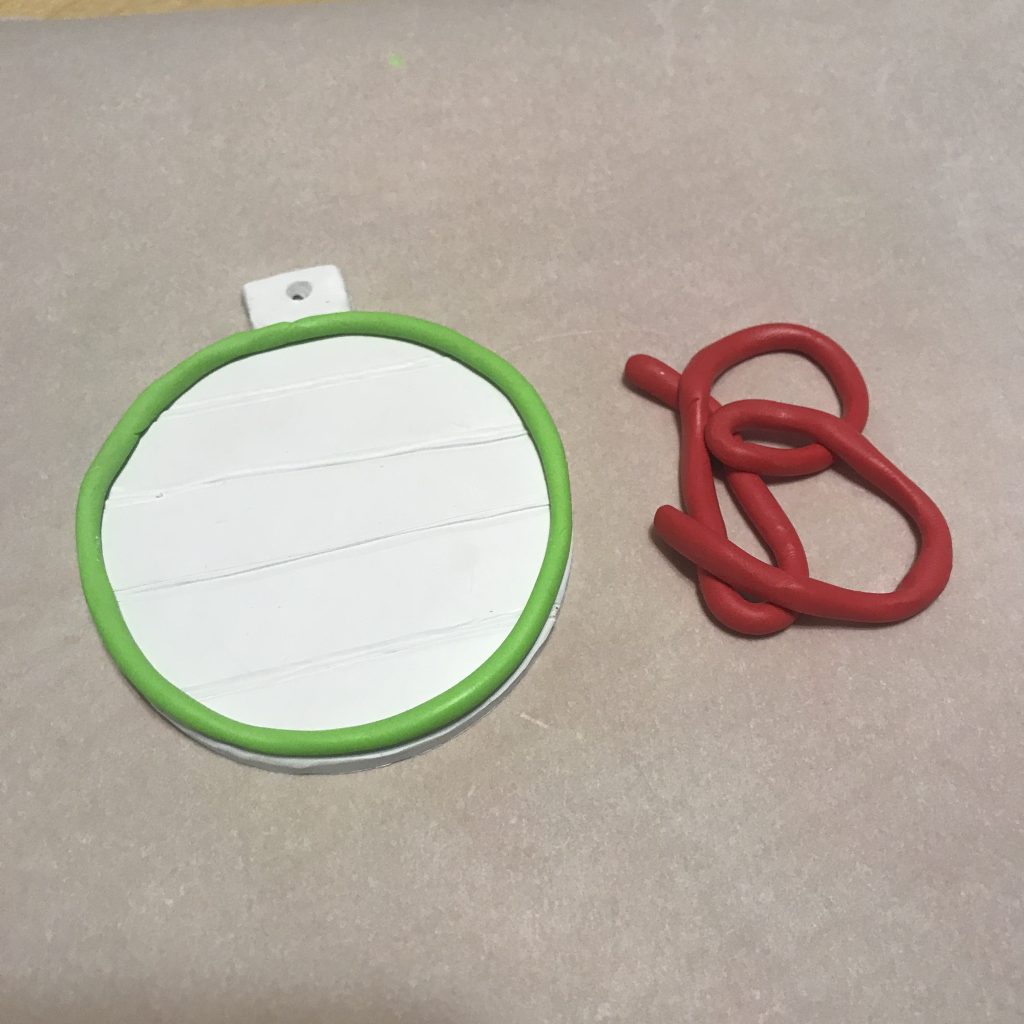
Once the clay was soft and easy to work with, I rolled out the white clay until it was about 1/4″ thick using the roller that came in the modeling tools pack. I also cut a small square piece to create the top of the ornament.

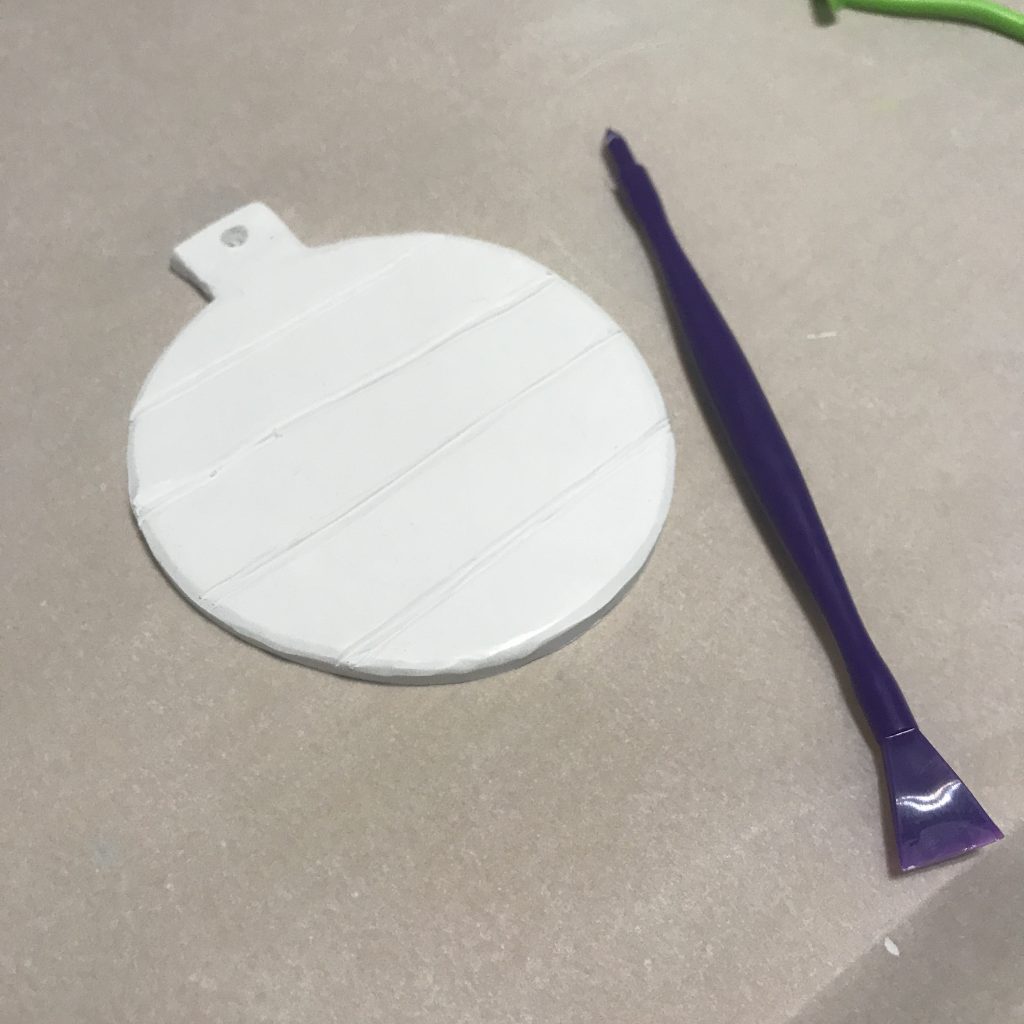
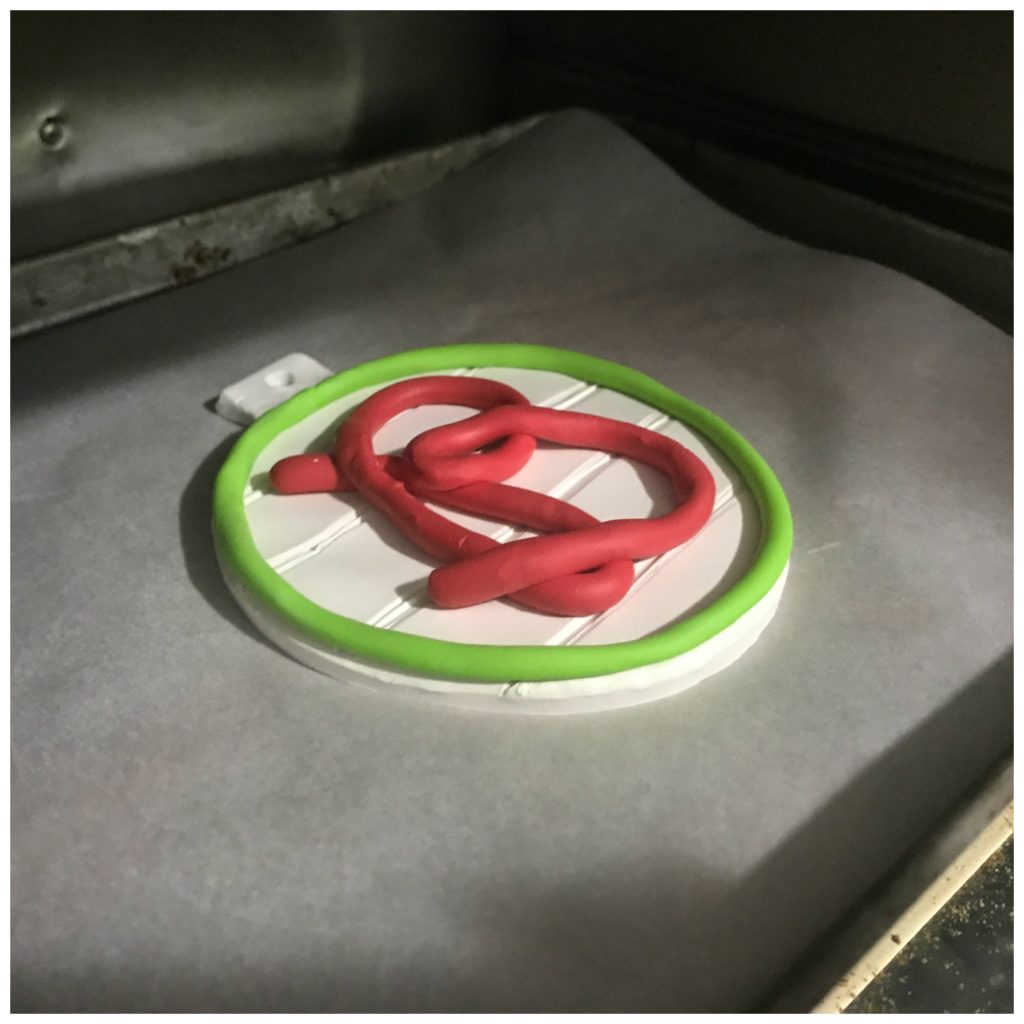
Using the pointed tool stick, I created a hole in the top part and then I scored the ornament to give it a shiplap look.

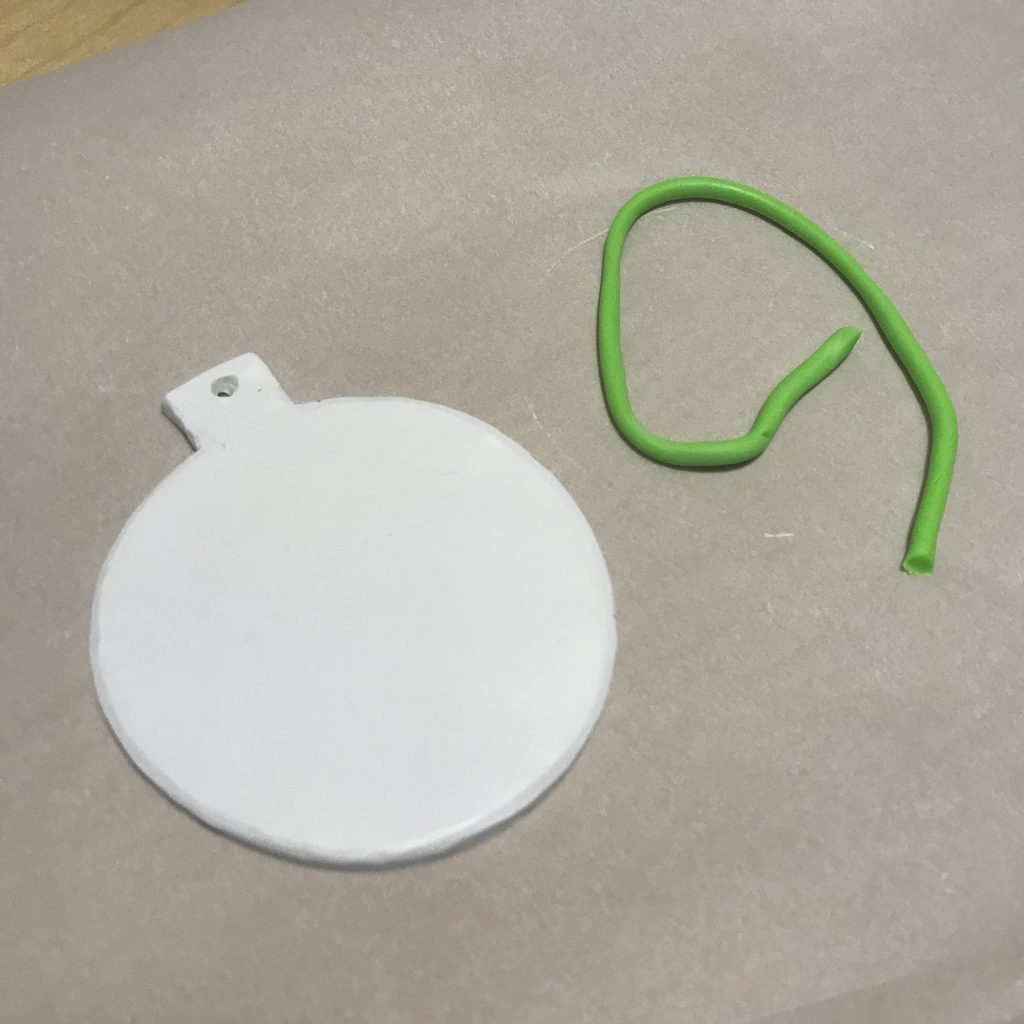
I then rolled out the green clay to create the border and then the red clay to create the monogram. I then added them to the white clay and pressed them down gently so that they stuck.

I preheated my toaster oven to 275 degrees and baked my clay for about 15 minutes per the instructions. Then I let it cool and added the ribbon.

Be sure to click the Creative Christmas Crafts button below to check out other Christmas crafts!

Happy Crafting! Until next time…..

Sculpey Valentine’s Day Heart Banner

Now that Christmas and New Years are out of the way, it’s time to get ready for Valentine’s Day!  And this is one of my favorite days of the year simply because it’s all about LOVE!!!   To pretty up my mantel, I made this adorable Sculpey Valentine’s Day Heart Banner to hang up!  It was super easy and even the little ones can help! banner
Using my sampler pack of Sculpey III, I picked out red, pink, white and purple.   I also gathered my heart cookie cutter and a coffee stirrer straw to make the holes for my string. materials
First, I needed to condition the clay using my clay conditioning machine.  I ran it through the machine several times to get the air pockets out.  It’s great for rolling out sheets of clay too!   I cut the hearts using the cookie cutter and then made two holes at the top of each heart using the straw.  Using my fingers, I rolled out thin strings of clay to decorate my hearts with!   steps
Then, it was time to bake these adorable hearts!   Intentionally I left six hearts without any decorations.   After they were baked and cooled, I used Scribbles 3D Fabric Paint to write BE MINE on the six hearts and let them dry.  Once my lettered hearts were dry, I used Sculpey Gloss Glaze to add a little shine to my hearts! decorating
Once they were completely dry, I used this Baker’s Twine that I got out of the Target $1 section to make the banner.   Using a large needle, I threaded each heart, spacing them out a little.

twine
Then, I hung it on my mantel!  

Who doesn’t love a cute banner to spruce up the fireplace mantel?!?!

Be Mine

It was just the right size to fit my mantel!  And it makes me think of love, hugs and kisses!  Hope you like this cute banner! banner

Until next time…

XOXO

The Gingerbread Bear Book and Sculpey and Scribbles Ornament

While walking through the Scholastics Book Fair at my oldest son’s school, I stumbled across The Gingerbread Bear book by Robert Dennis and Illustrated by Tammie Lyon.
book
In the story, a little girl and her mother are baking a gingerbread bear.  After daddy goes to work, mom goes into the garden to do some work and the little girl is left to watch after the oven.  Out of curiosity, the little girl opens the oven to have a look, and guess what happens?   Out jumps the Gingerbread Bear!   And away he runs……

Of course, no one can catch him, because after chanting “Run, Run, try if you dare.  You can’t catch me.  I’m the Gingerbread Bear!”, he runs away.  Throughout the book he runs into different people and animals that think they can catch him.  Gingerbread Bear is much to quick for them.
insidebook
You have to read the book to find out what happens at the end!   What a cute little change up to the Gingerbread Man.   My boys loved it!  The illustrations were awesome!

After we read the book, we decided to make our own Gingerbread Bears, using Sculpey clay and Scribbles paint.
sculpey
We picked out a brown Sculpey clay, ran it through the clay conditioning machine and then used our gingerbread man cookie cutter to cut them out.   After we had them cut out, I used a sharp pick to punch a whole in the top of their heads for ribbon.  Then it was time to bake them.  I stuck them in the oven for about 13 minutes. gingerbreadbear
Once they came out of the oven and cooled, We used Ilovetocreate’s Scribbles Fabric Paint (yes, I know it’s fabric paint, but it works on other things too!) to decorate our gingerbread bears! Scribbles
Once they were dry, they were ready for ribbon and then to be hung on the tree! 🙂 complete So, go out and pick up this adorable book.   The kids are sure to love it!   And then go get some Sculpey clay and a gingerbread man cookie cutter and create your own Gingerbread Bear!

Check out these other Christmas time books to read with kids:

  And the enter to win a great prize! a Rafflecopter giveaway
Until next time…….

Sculpey Necklace and Earrings

Clay is not just for kids!  I have always loved to work with clay.   And Sculpey is such an awesome clay to work with!   It’s soft and really easy to use.   And come in some really awesome colors!

Below is a picture of the necklace and earrings that I made!
Final
The materials used for this project are as follows:
SculpeyIII Oven Bake Clay
Sculpey Acrylic Roller
Sculpey Super Slicer
Premo! Circle Cutters
Sculpey Bead Baking Rack
Sculpey Bead Making Kit
Sculpey Gloss Glaze
Paint Brush
Clay Conditioning Machine
Hook Earrings
Thin Head Pins
Rope Necklace
Round Nose Pliers
It’s always important to run your clay through a clay conditioning machine to make sure you get all of the air pockets out of the clay, so that it doesn’t break after it’s baked.  I ran my three different colors through multiple times before I got started.
I rolled my three colors out at the largest opening that the conditioning machine would allow.  Once they were rolled out, I piled them up and then cut to make a rectangle.  I made sure to press them together really good so that the air pockets were released.  Next, I began to roll the clay to make a cane.
getting started
I had a little helper.  He used my trimmings to play with the conditioning machine.  It provided about an hour of fun with just the little bit of leftovers that there were!   He just kept running it through the machine!
Benjamin
Once the cane was rolled, I gave the cane a squeeze to once again remove any air pockets.  Using my hand, I continued to rolled slightly pushing outward to make the cane longer and thinner. rolling
Using the Sculpey Super Slicer, I cut .25″ pieces off of the cane.   I rolled out a piece of white clay and then placed the slices on the white piece.  I didn’t make any specific design.  I just organized them the all fit, with barely any white showing.  The white was more for the back. slices
Using the Sculpey Acrylic Roller, I lightly began to roll over the slices, lightly applying pressure so that the slices began to mold together. flattened
Once I had rolled it out to my liking, I used the Premo! Graduated Circle Cutters to cut two different size circles, one for the necklace and two for the earrings.  I then used a smaller circle cutter to cut a hole near the tops of the my circles. cuts
Once they were cut, I used the clay baking cushion from the Sculpey Bead Making kit to bake the pieces on.   The two pieces on the baking rack are for another project! bake
After the pieces were baked and cooled, I used the Sculpey Gloss Glaze and a paint brush to create a glossy look! glass glaze
Once the glaze was dry, I used a cord necklace to loop through the larger piece to create a necklace. final necklace
Then I used the thin head pins, the round nose pliers and the earring hooks to create my earrings! Earrings
And now they are ready to wear!  And these just happen to be the perfect colors for my favorite football team!   They are perfect for Game Day!! Final I hope that you like my Sculpey Necklace and Earrings!

Surfs Up Magnet – Sculpey Fun

As a kid, I used to love playing with clay.  Through the years, I have found several clay cups, jewelry holders, and Christmas ornaments that I made as a kid.  But I have to say, I still love working with clay as an adult.  And I love working with my kids with clay.  My favorite brand of clay is Sculpey!  Sculpey is so easy to work with, even for the kids!

One of my favorite Sculpey products is their Bake Shop collection.  It’s super soft and easy for little fingers, such as Landon and Benjamin’s to use!  And it has a great variety colors!!

Bake Shop

I used the Bake Shop Sculpey to create a Surfer Girl Magnet to put on my refrigerator to remind me of summer!!!!  She was super easy to create!

Steps

After I finished her, I baked her in the oven 275 degrees for 15 minutes, I let her cool.  Then, I drew on a face using Sharpie‘s and then using my Ad-tech glue gun, I added magnets. magnets

Then, I stuck my awesome yellow bikini clad surfer girl on the refrigerator with a  family beach picture.  Now I can think about the beach all year long!!!!

Final

Until next time…….

Adorable Little Ornaments Blog Hop!!!!

SculpeyButtonButton

I have to say that after making ornaments with Sculpey Clay, I am in love!!!!   So, what better way to have some fun than to add buttons from Laura Kelly’s collection from Buttons Galore & More?!?!   I had fun creating and so did my six year old son, Landon!!!    I created some traditional style ornaments with the clay and added buttons to embellish!!

Materials Needed:

Sculpey Clay

Laura Kelly Buttons

Felt (for the scarf)

A straw (to make a hole for the hook)

Pipe Cleaner

Materials

While I was making my ornaments with Sculpey clay, Landon wanted to make some too!   I love his creative ideas!

Landon

One of my favorite ornaments is a snowman.  Who doesn’t love a snowman?!?!  They are simple and just too cute!

snowman

After I was all done with my snowman and he was baked at the recommended baking time and temperature, I decided to give him some earmuffs!!

snowmanfinish

Here are two other cute ornaments I made:

treeandwreath

I always have fun participating in blog hops!  They are so much fun and it’s great to see how creative others are!  I hope you like my ornaments!

Hop over to Laura Kelly’s blog to check out other ornaments for the Adorable Little Ornament Blog Hop!!!

ENTER this RaffleCopter for a chance to win Scupley Clay and Buttons for Kids!!!