Category Archives: Ilovetocreate

Tulip Paint Decorated Gift Bags

Christmas is just days away and I know that everyone is busy doing some last minute wrapping!   Here is a super easy way to spiff up some plain gift bags!    Final
I got these adorable little gift bags from World Market.  They came in a pack of six and are perfect for small gifts.  I used Tulip Slick Dimensional Fabric Paint to decorate them with a monogram and snowflakes and holly!   Super easy! 
bags and paint
The decorated gift bags were perfect for these ornaments I made using my Sizzix Eclips2, a glass ornament and vinyl.   ornaments
Hope you enjoyed this quick and easy gift bag decorating idea!    Merry Christmas!

Until next time……..

Happy Spring Button Greeting Card

I love Spring and I love Buttons!   I created this adorable Happy Spring greeting card using Laura Kelly’s Buttons and Lady Bug Buttons from Buttons Galore & More!
Final
Materials used:
Laura Kelly Buttons from Buttons Galore & More
Lady Bug Buttons from Buttons Galore & More
Card stock from Core-dination from Darice
Card/Envelope from Core-dination from Darice
Fabric Tag
Tulip Fabric Markers from ILoveToCreate
Hot glue gun and hot glue
Aleene’s Fast Grab Tacky Glue
Aleene’s Paper Glaze
I started by making paper rosette flowers.   I cut 3/4″ and 1/2″ paper strips with cute card stock.  Bending the paper back and forth, I created a zigzag strip.   Once I had them all folded, I used a hot glut gun to glue the strips to each other, connecting two strips together on each end.  Once they were connected and formed a circle, I positioned the sides together to form the rosette and hot glued the center and let it dry. rosettes
I cut my stems and leaves from a green striped card stock and glued them to a card using my Aleene’s Fast Grab Tacky Glue.  I added buttons to the paper rosette flowers!  I used green buttons for the grass!
puttingtogether
Buttons Galore & More has adorable little lady bug buttons, so I attached them to my card using Aleene’s Fast Grab Tacky Glue.  I added them to the paper rosette flowers, the stem and the grass! ladybugs
Using a fabric tag and Tulip Fabric Markers, I wrote Happy Spring and added lines and dots!  I applied it to the card using Aleene’s Paper Glaze and added a little ladybug to cover the hole on the tag. tulip fabric markers
I love this adorable little Happy Spring card and someone special will be receiving it soon! Final

Buttons Galore & More is offering free shipping on orders over $30!    They also offer Coupons for their buttons!

Once I completed my card, I used my Laura Kelly personalized self-inking stamp from Expressionery.com to stamp the back showing that I created this card with love! Expressionery.com

Expressionery.com is currently running a special of 25% off Sitewide with the code:  SPRINGSALE.   They are also offering free shipping with a purchase of $50 or more!

Hope you like this adorable card as much as I do!  You can make one yourself!

Until next time……

Kunin Felt Easter Egg Bunting

Easter is right around the corner!   Why not brighten up your decor with this adorable KuninGroup Felt Easter Egg Bunting!   It was super easy and super fun! Final
I love using my Sizzix Eclips2 to cut out patterns for fabric or felt!   cutting
Once my patterns were cut out, I pinned them to my KuninGroup felt and then went to cutting!  I used pinking shears to give the eggs zigzag edges! cutting out felt
Then, it was time to sew them!  I decided to stuff them while they were still under the sewing foot.   I sewed all but about 2 inches, stuffed them, realigned my edges and finished sewing! sewing
Once they were all sewn, I used Tulip Fabric Paint to add decorations to them!   I think they turned out egg-tastic!  🙂 tulip fabric paint
Using bright pink baker’s twine and a big needle, I threaded the twine through the top part of the egg, making sure to go between the felt and stitches. twine
And then, it was complete!!!  It is absolutely adorable!   Final
Hope you like my Kunin Felt Easter Egg Bunting!

Until next time…..

Burlap Love Wreath

It’s February and the month of Love!  This Burlap Love Wreath makes me think of Love! wreath
Materials used:
A FloraCraft Foam Wreath
Burlap Ribbon
A 12×12 inch piece of burlap
Aleene’s Collage Pauge
Tulip Soft Fabric Paint
A Tulip Paint Roller
Red Coats & Clark Embroidery Floss and Needle
White Buttons from Buttons Galore
wreathandpaint
Using Aleene’s Collage Pauge and water, I added 3/4 Collage Pauge to 1/4 water to a plastic container.  It’s the formula usually used for Paper Mache.  I wanted to stiffen the burlap a little and to help it to keep from unraveling.  Once I soaked all of my pieces, I let them dry. burlap
Using a Tulip Foam Roller and Tulip Soft Fabric Paint, I painted the 12×12 inch piece of burlap.  I then let that dry. painting
Once my paint dried, I cut out two hearts.  I basically folded the fabric in half, cutting two hearts at once.  Using Embroidery floss and a needle, I sewed the two hearts together, paint sides out.  Before I sewed the heart all the way, I stuffed it with some felt scraps that I had left over from another project.  Then, I closed up the heart by sewing all the way around. heart
Using the burlap ribbon, I wrapped it around the foam wreath and used embroidery floss to sew the end of the ribbon to the the beginning to hold it in place. burlapwrap
From the scraps of painted burlap, I cut out red circles.  Using the embroidery floss, I added the white buttons to the center of the red pieces and attached them to the burlap on the wreath.  I tied them off on the front adding just a little color to the white buttons. dotsandbuttons
This lovely wreath is now hanging on my front door!  And I LOVE that it reminds me of LOVE!!! wreath
I hope that your February is filled with lots of love!  And I hope that you like my Burlap Love Wreath!

Until next time……

XOXO

The Gingerbread Bear Book and Sculpey and Scribbles Ornament

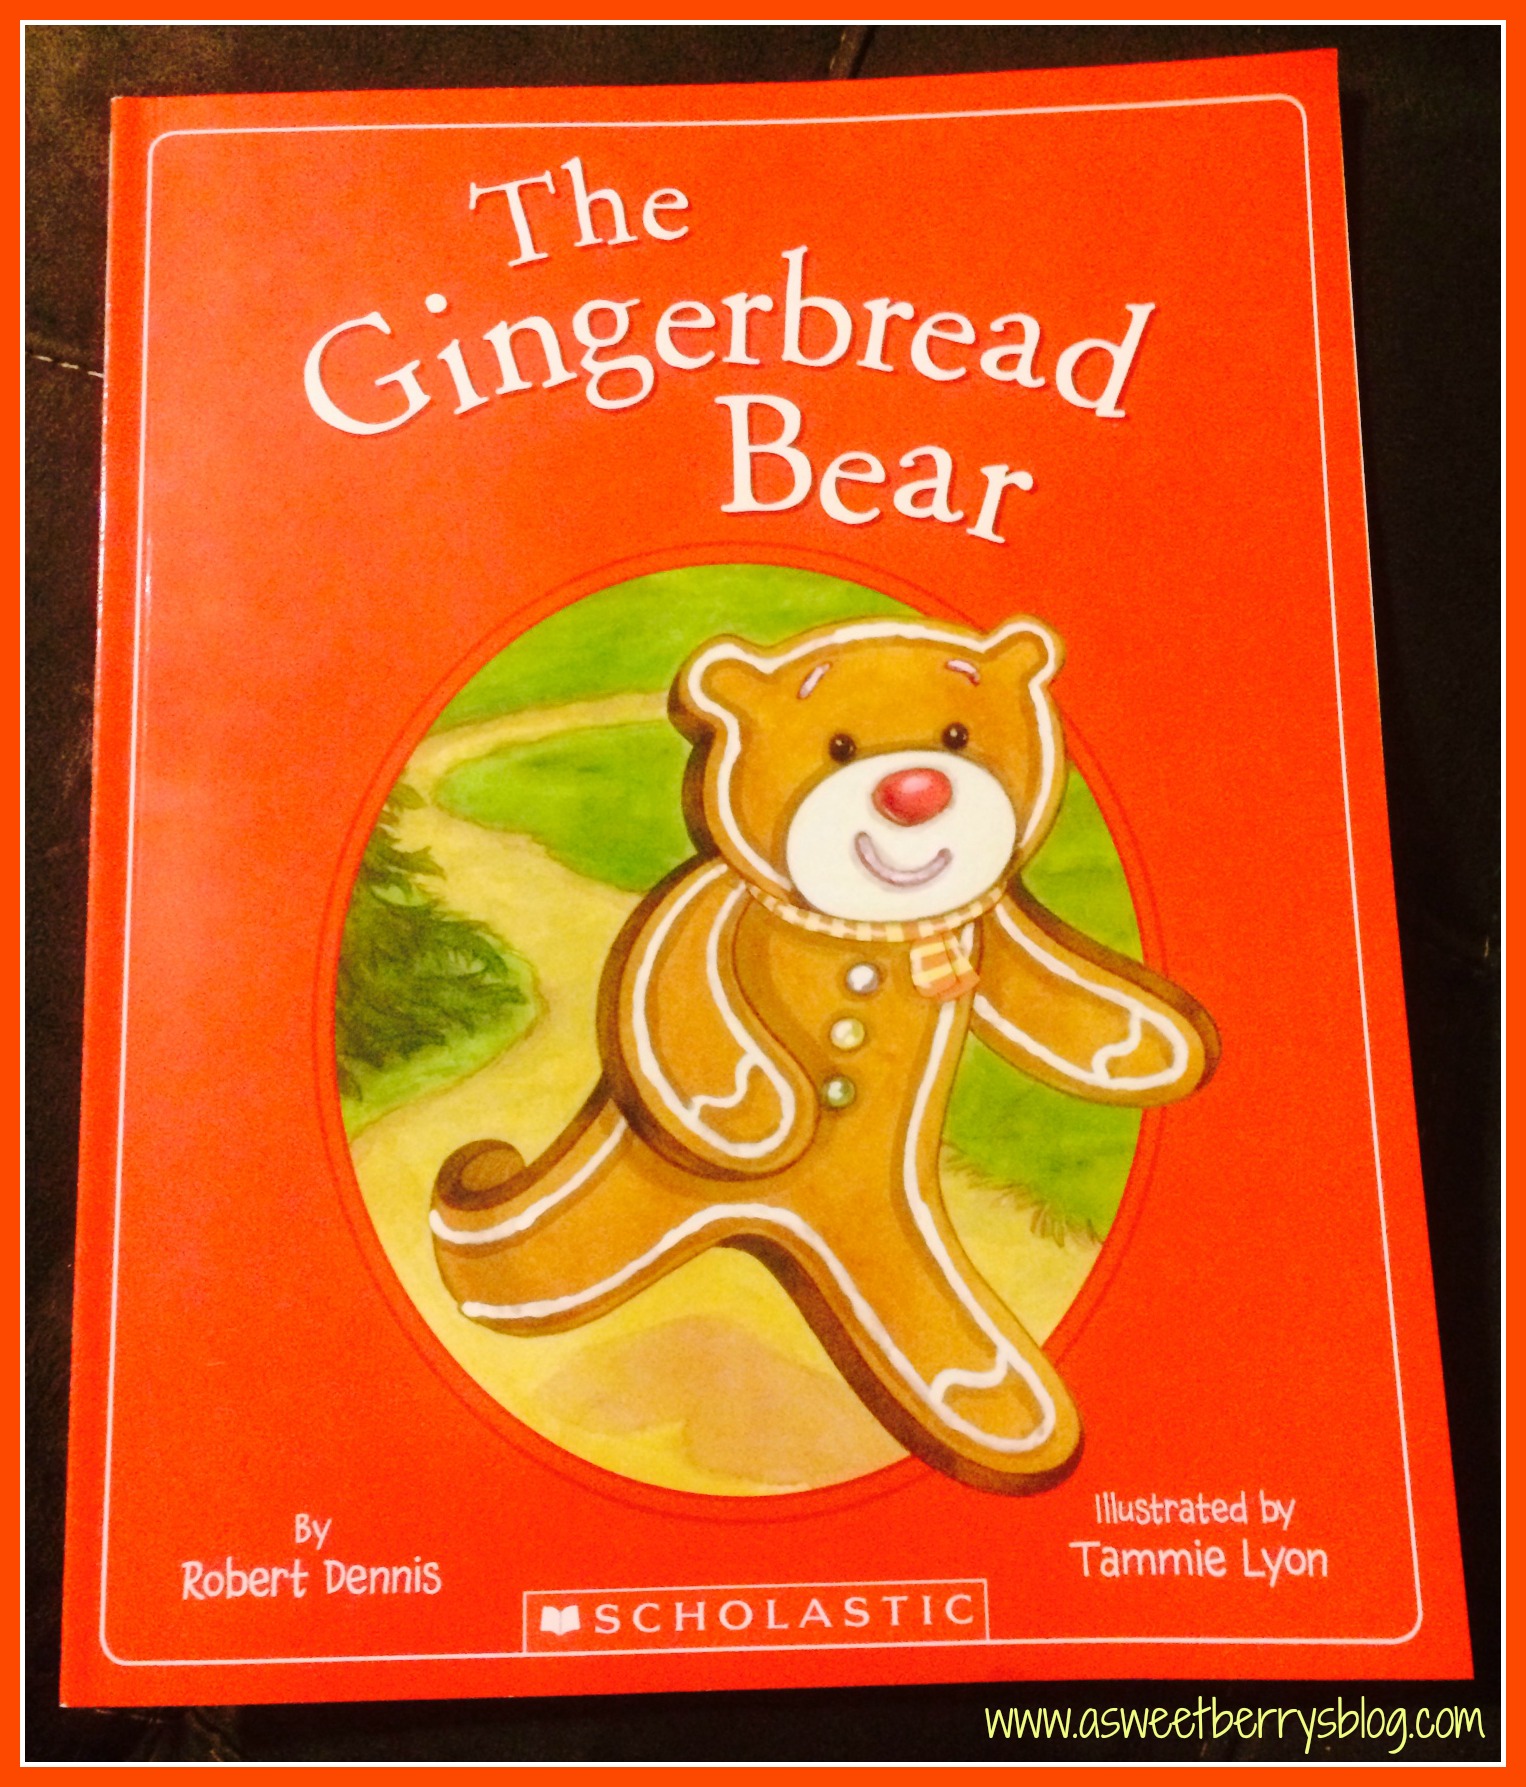
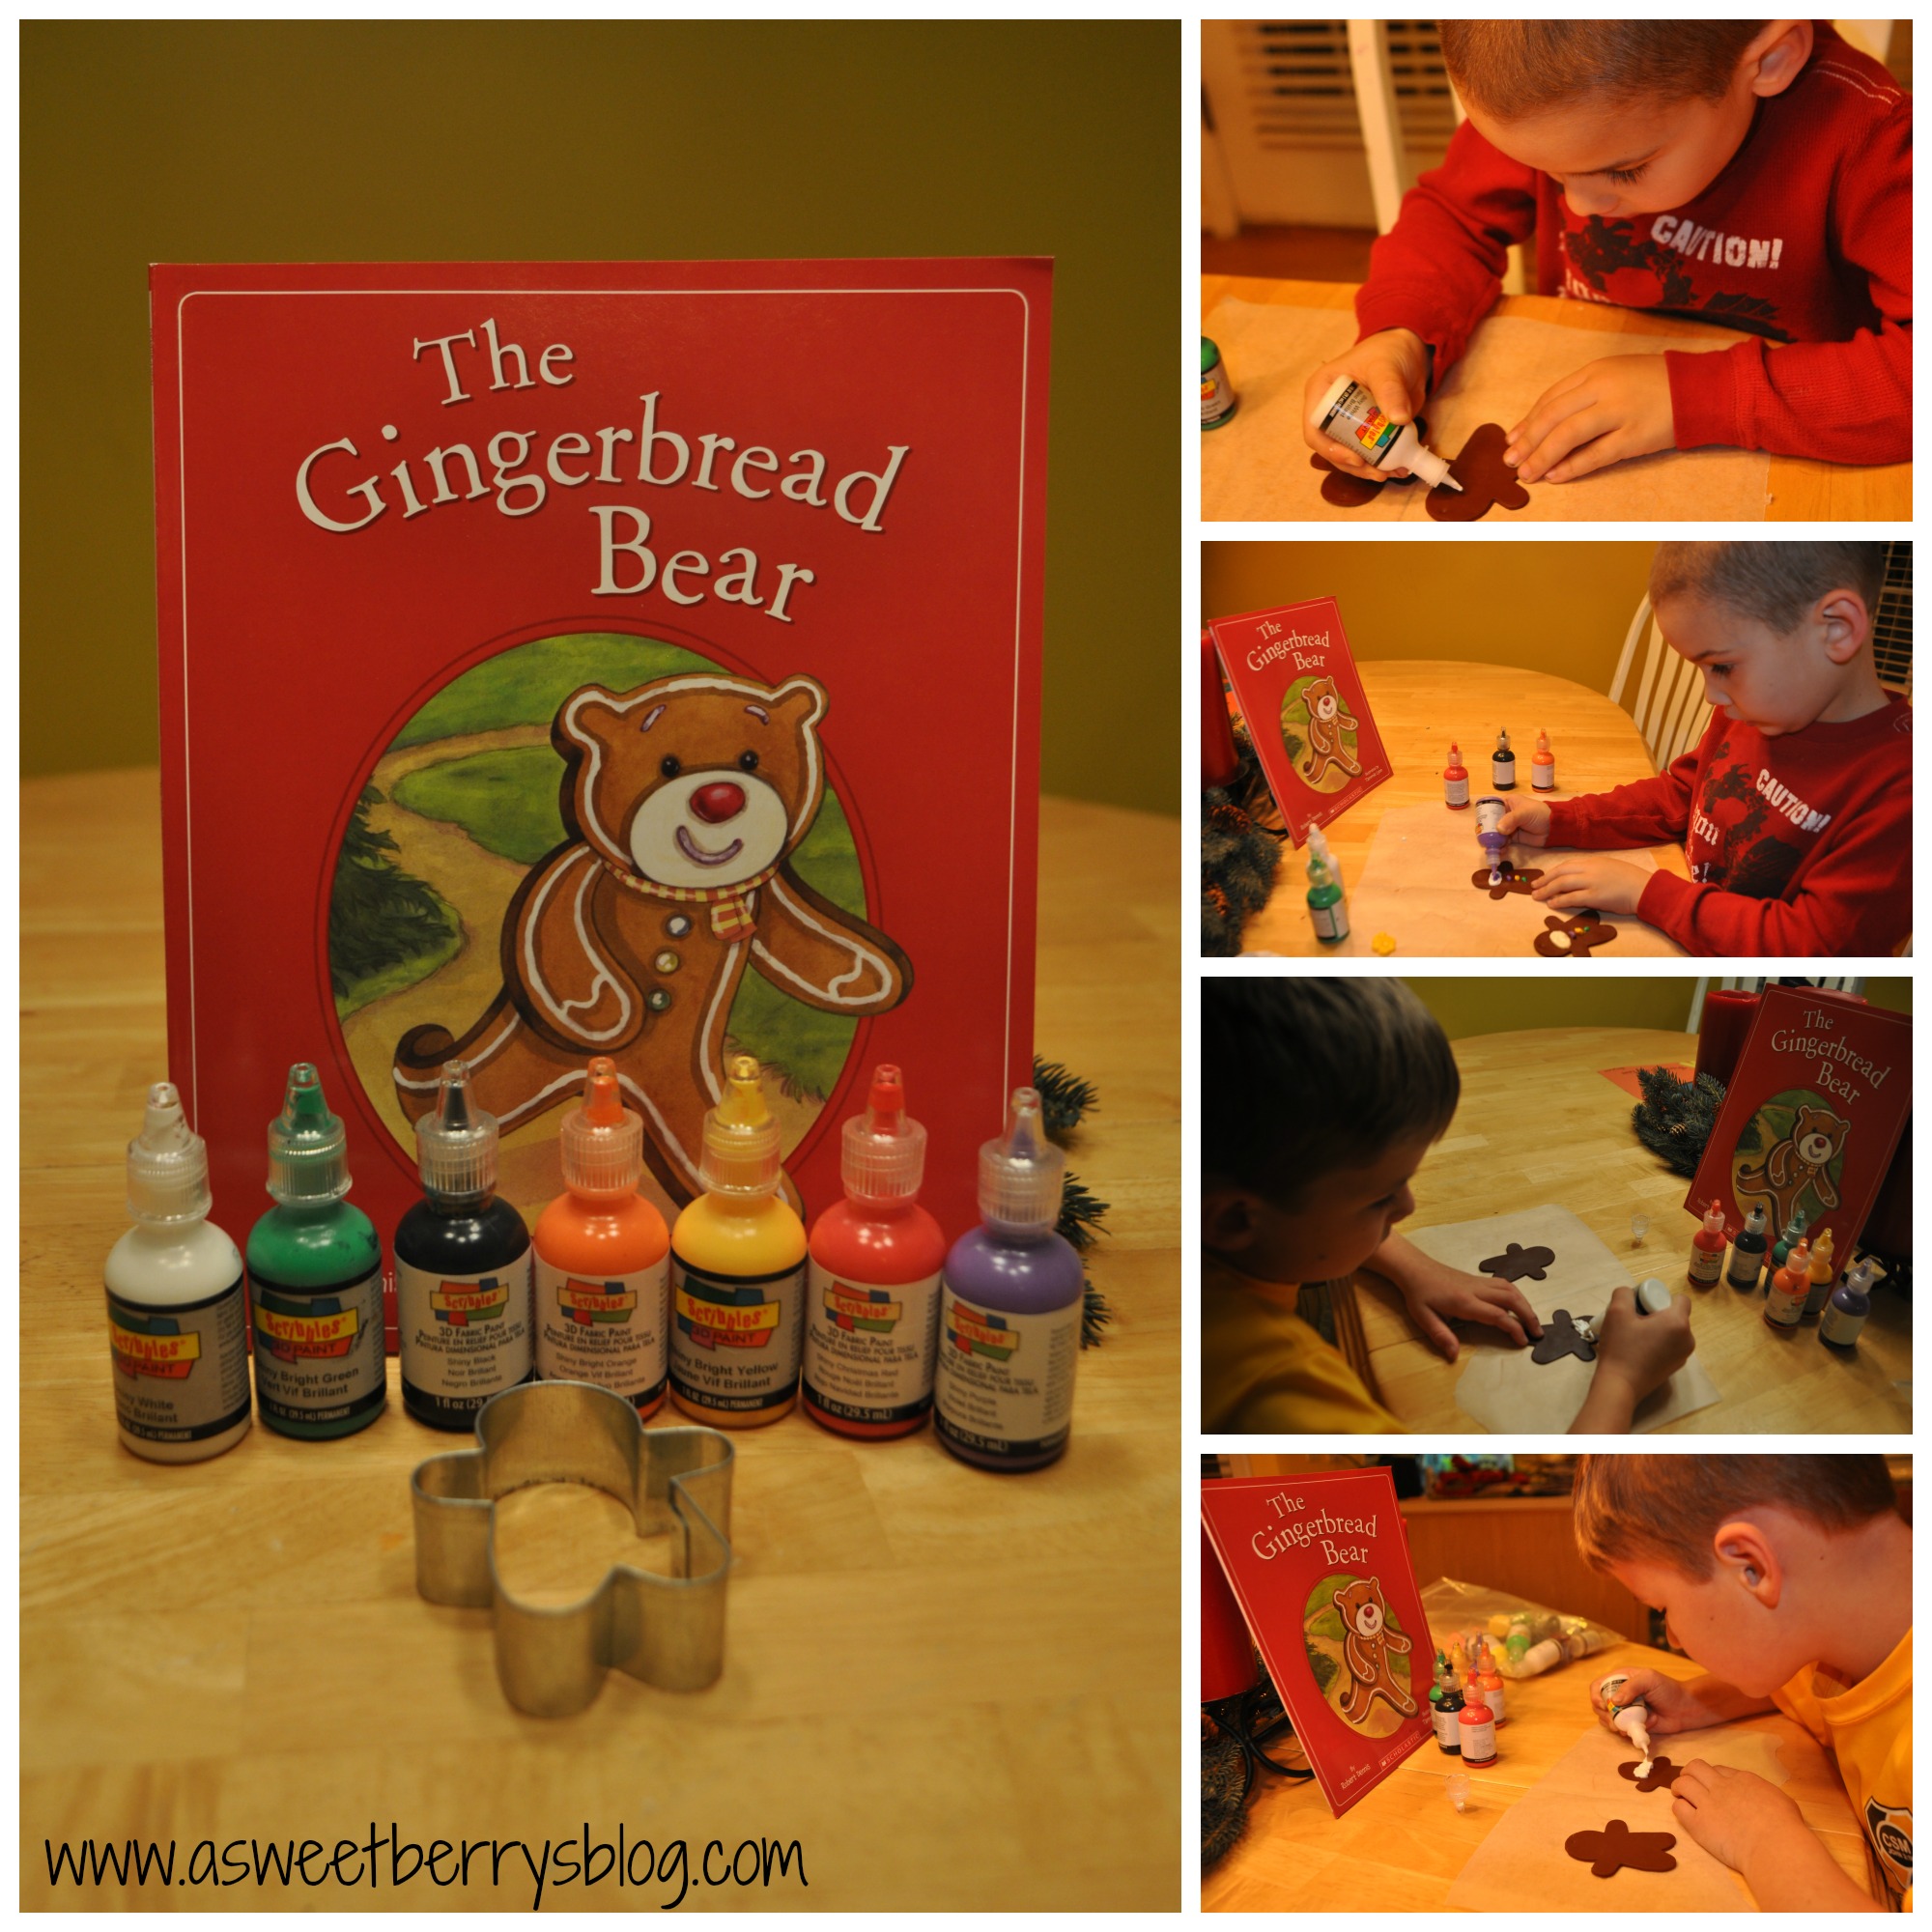
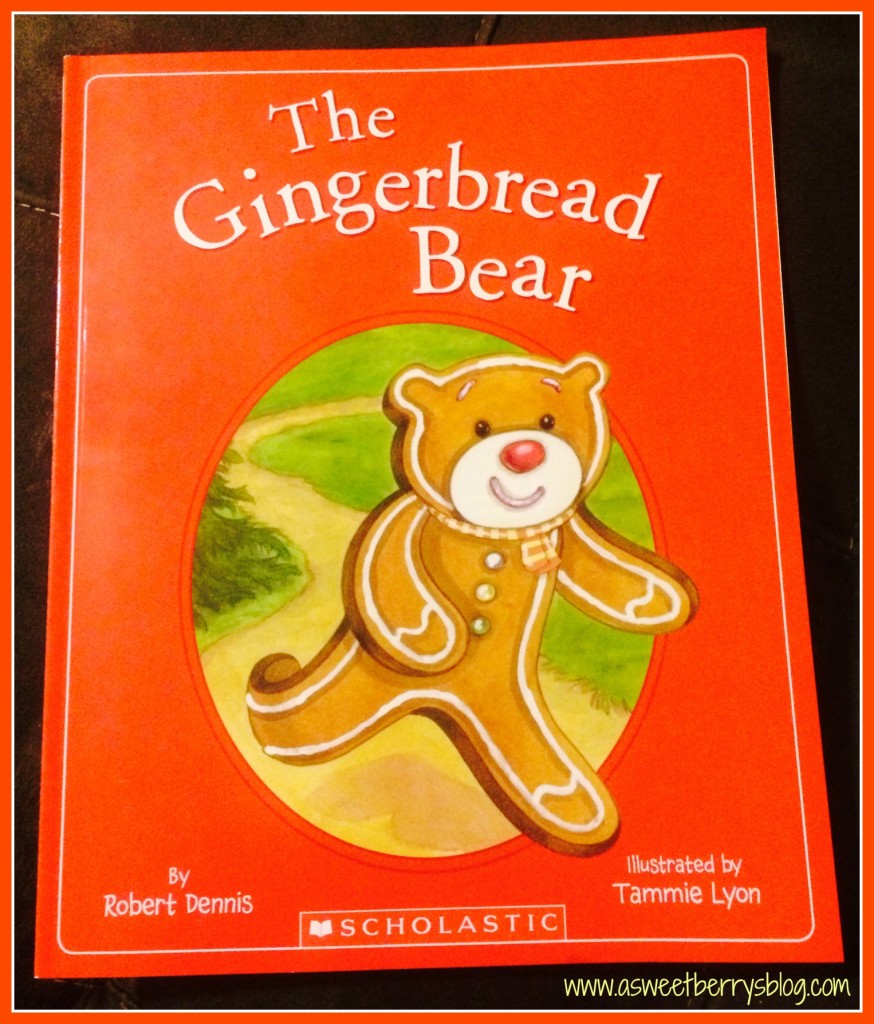
While walking through the Scholastics Book Fair at my oldest son’s school, I stumbled across The Gingerbread Bear book by Robert Dennis and Illustrated by Tammie Lyon.
book
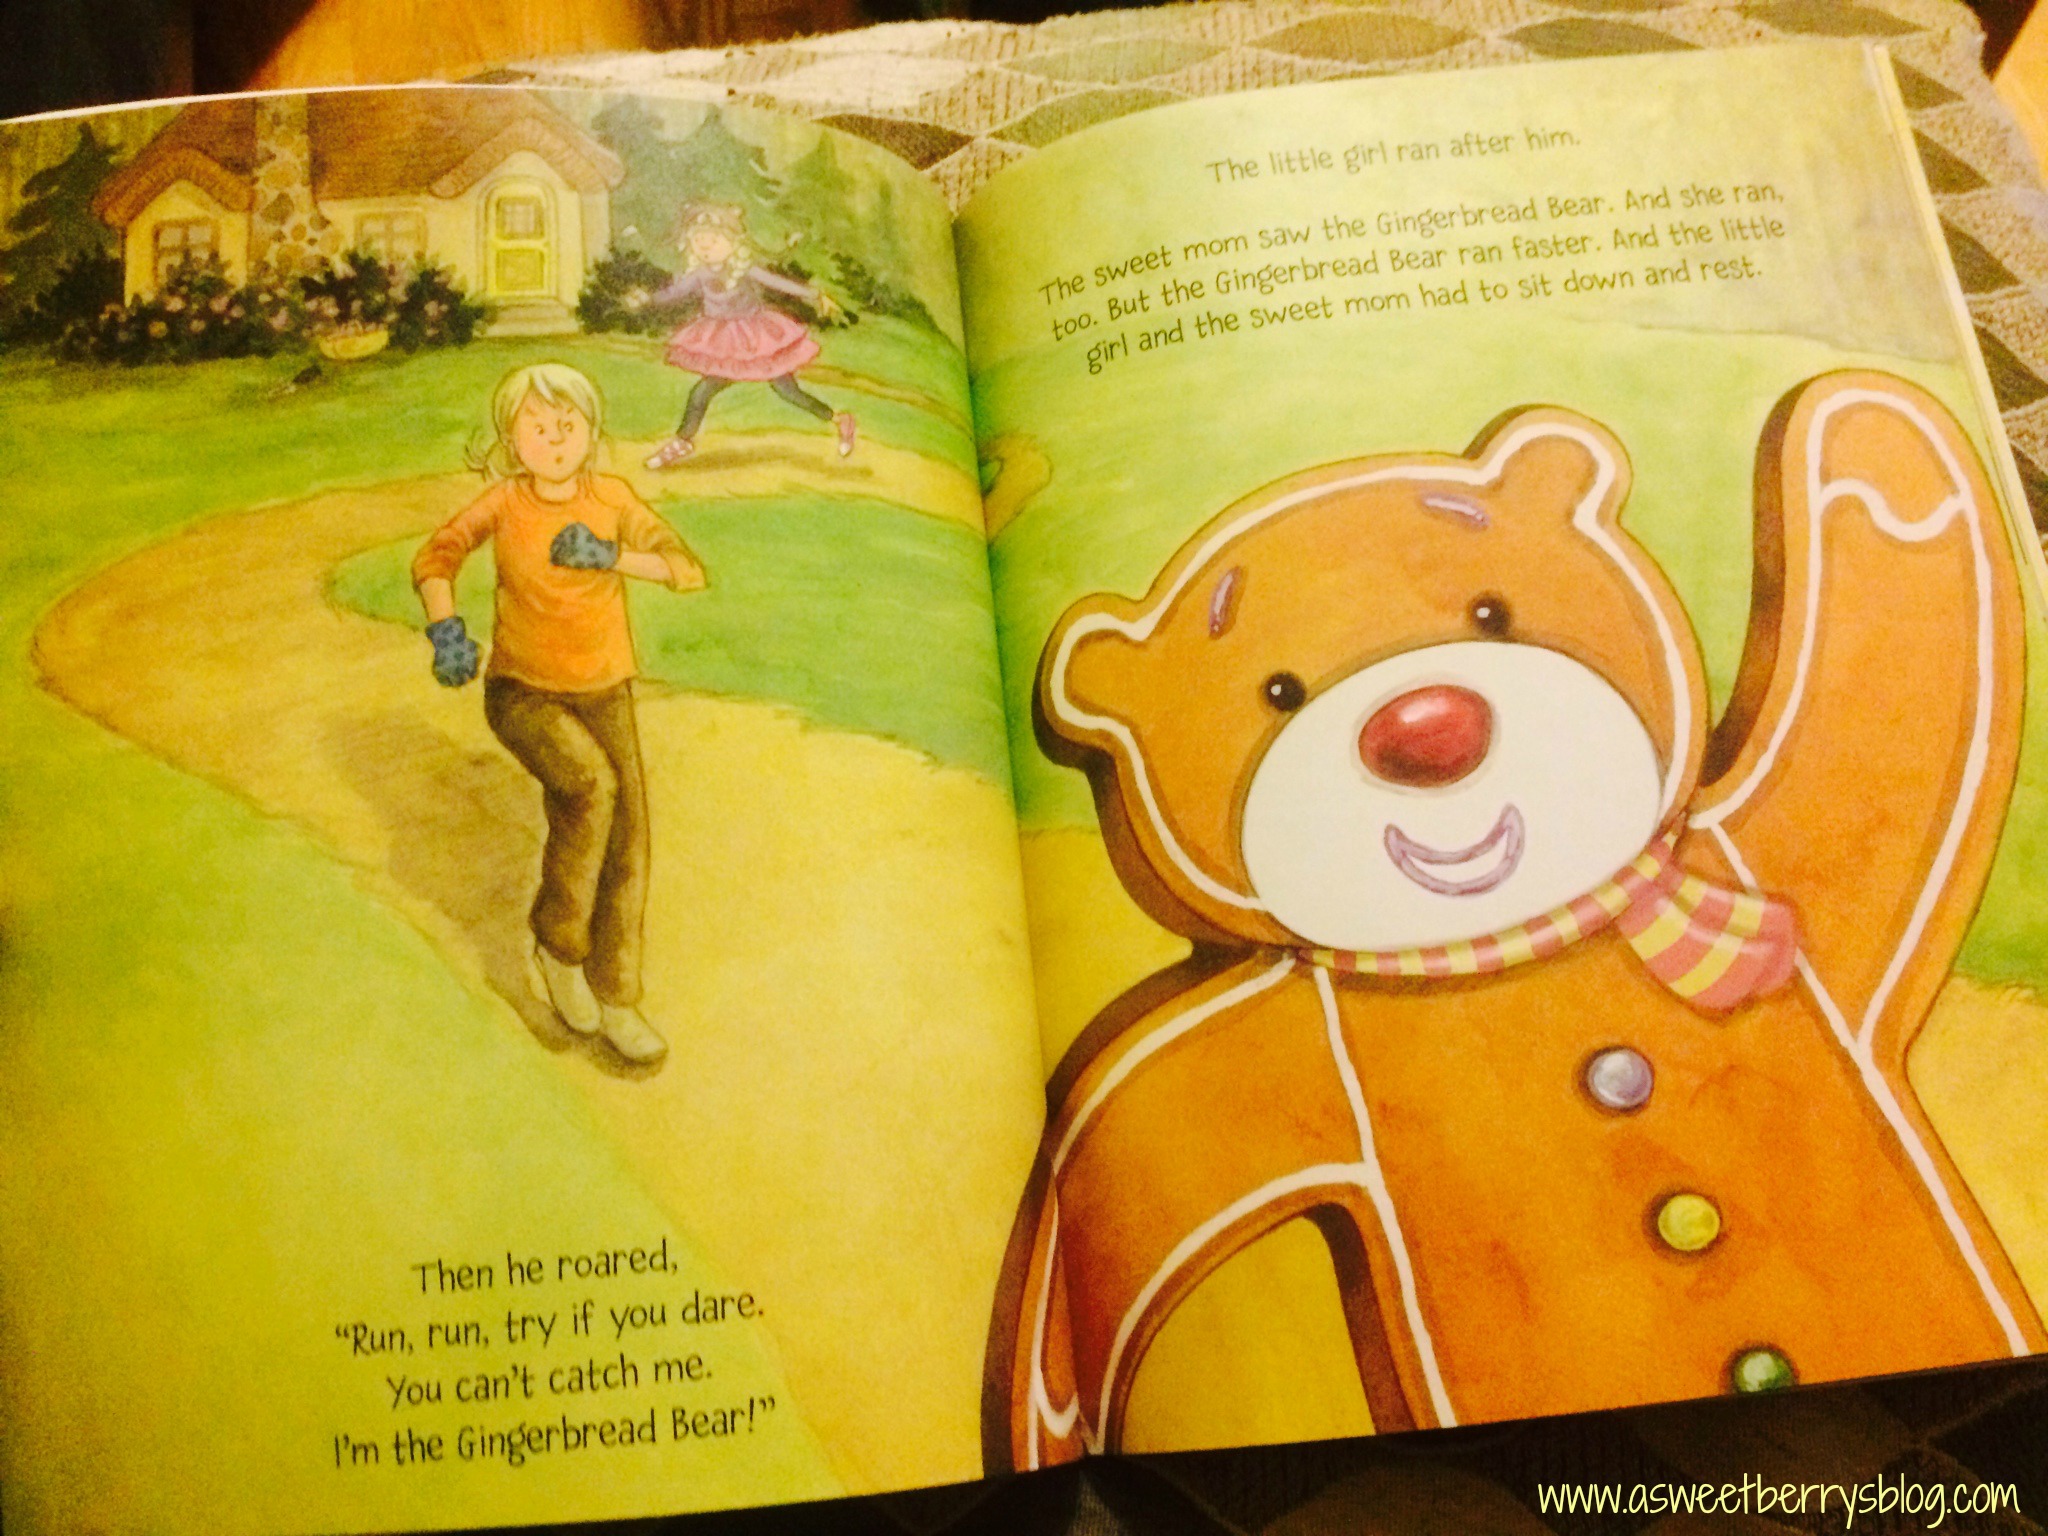
In the story, a little girl and her mother are baking a gingerbread bear.  After daddy goes to work, mom goes into the garden to do some work and the little girl is left to watch after the oven.  Out of curiosity, the little girl opens the oven to have a look, and guess what happens?   Out jumps the Gingerbread Bear!   And away he runs……

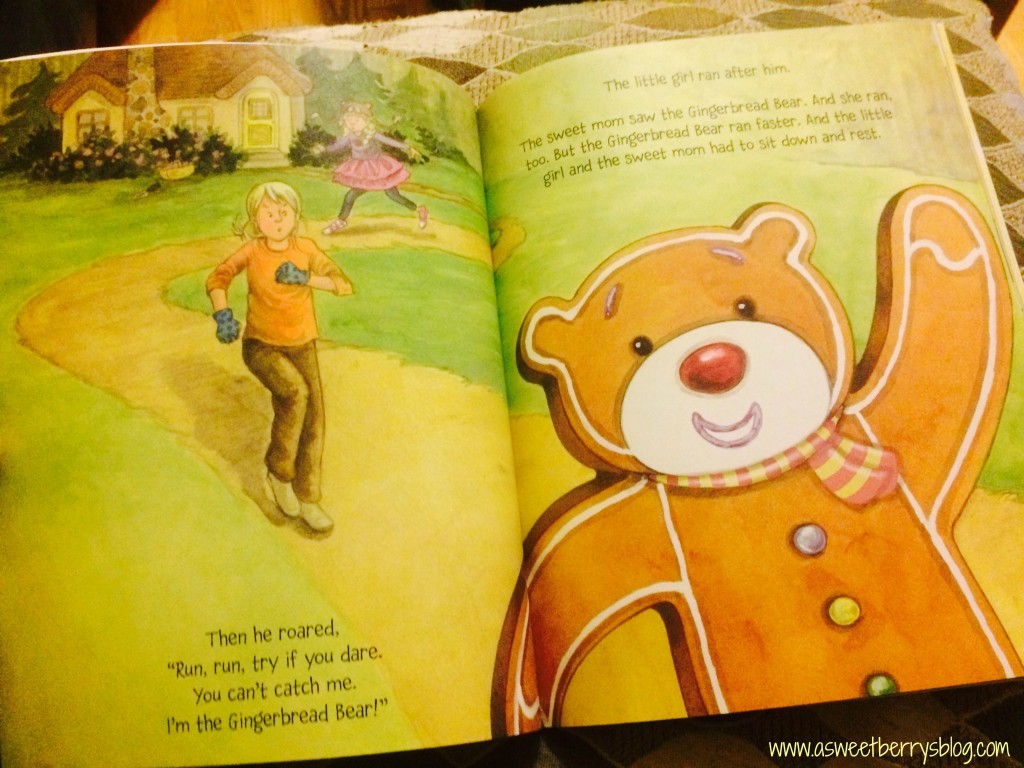
Of course, no one can catch him, because after chanting “Run, Run, try if you dare.  You can’t catch me.  I’m the Gingerbread Bear!”, he runs away.  Throughout the book he runs into different people and animals that think they can catch him.  Gingerbread Bear is much to quick for them.
insidebook
You have to read the book to find out what happens at the end!   What a cute little change up to the Gingerbread Man.   My boys loved it!  The illustrations were awesome!

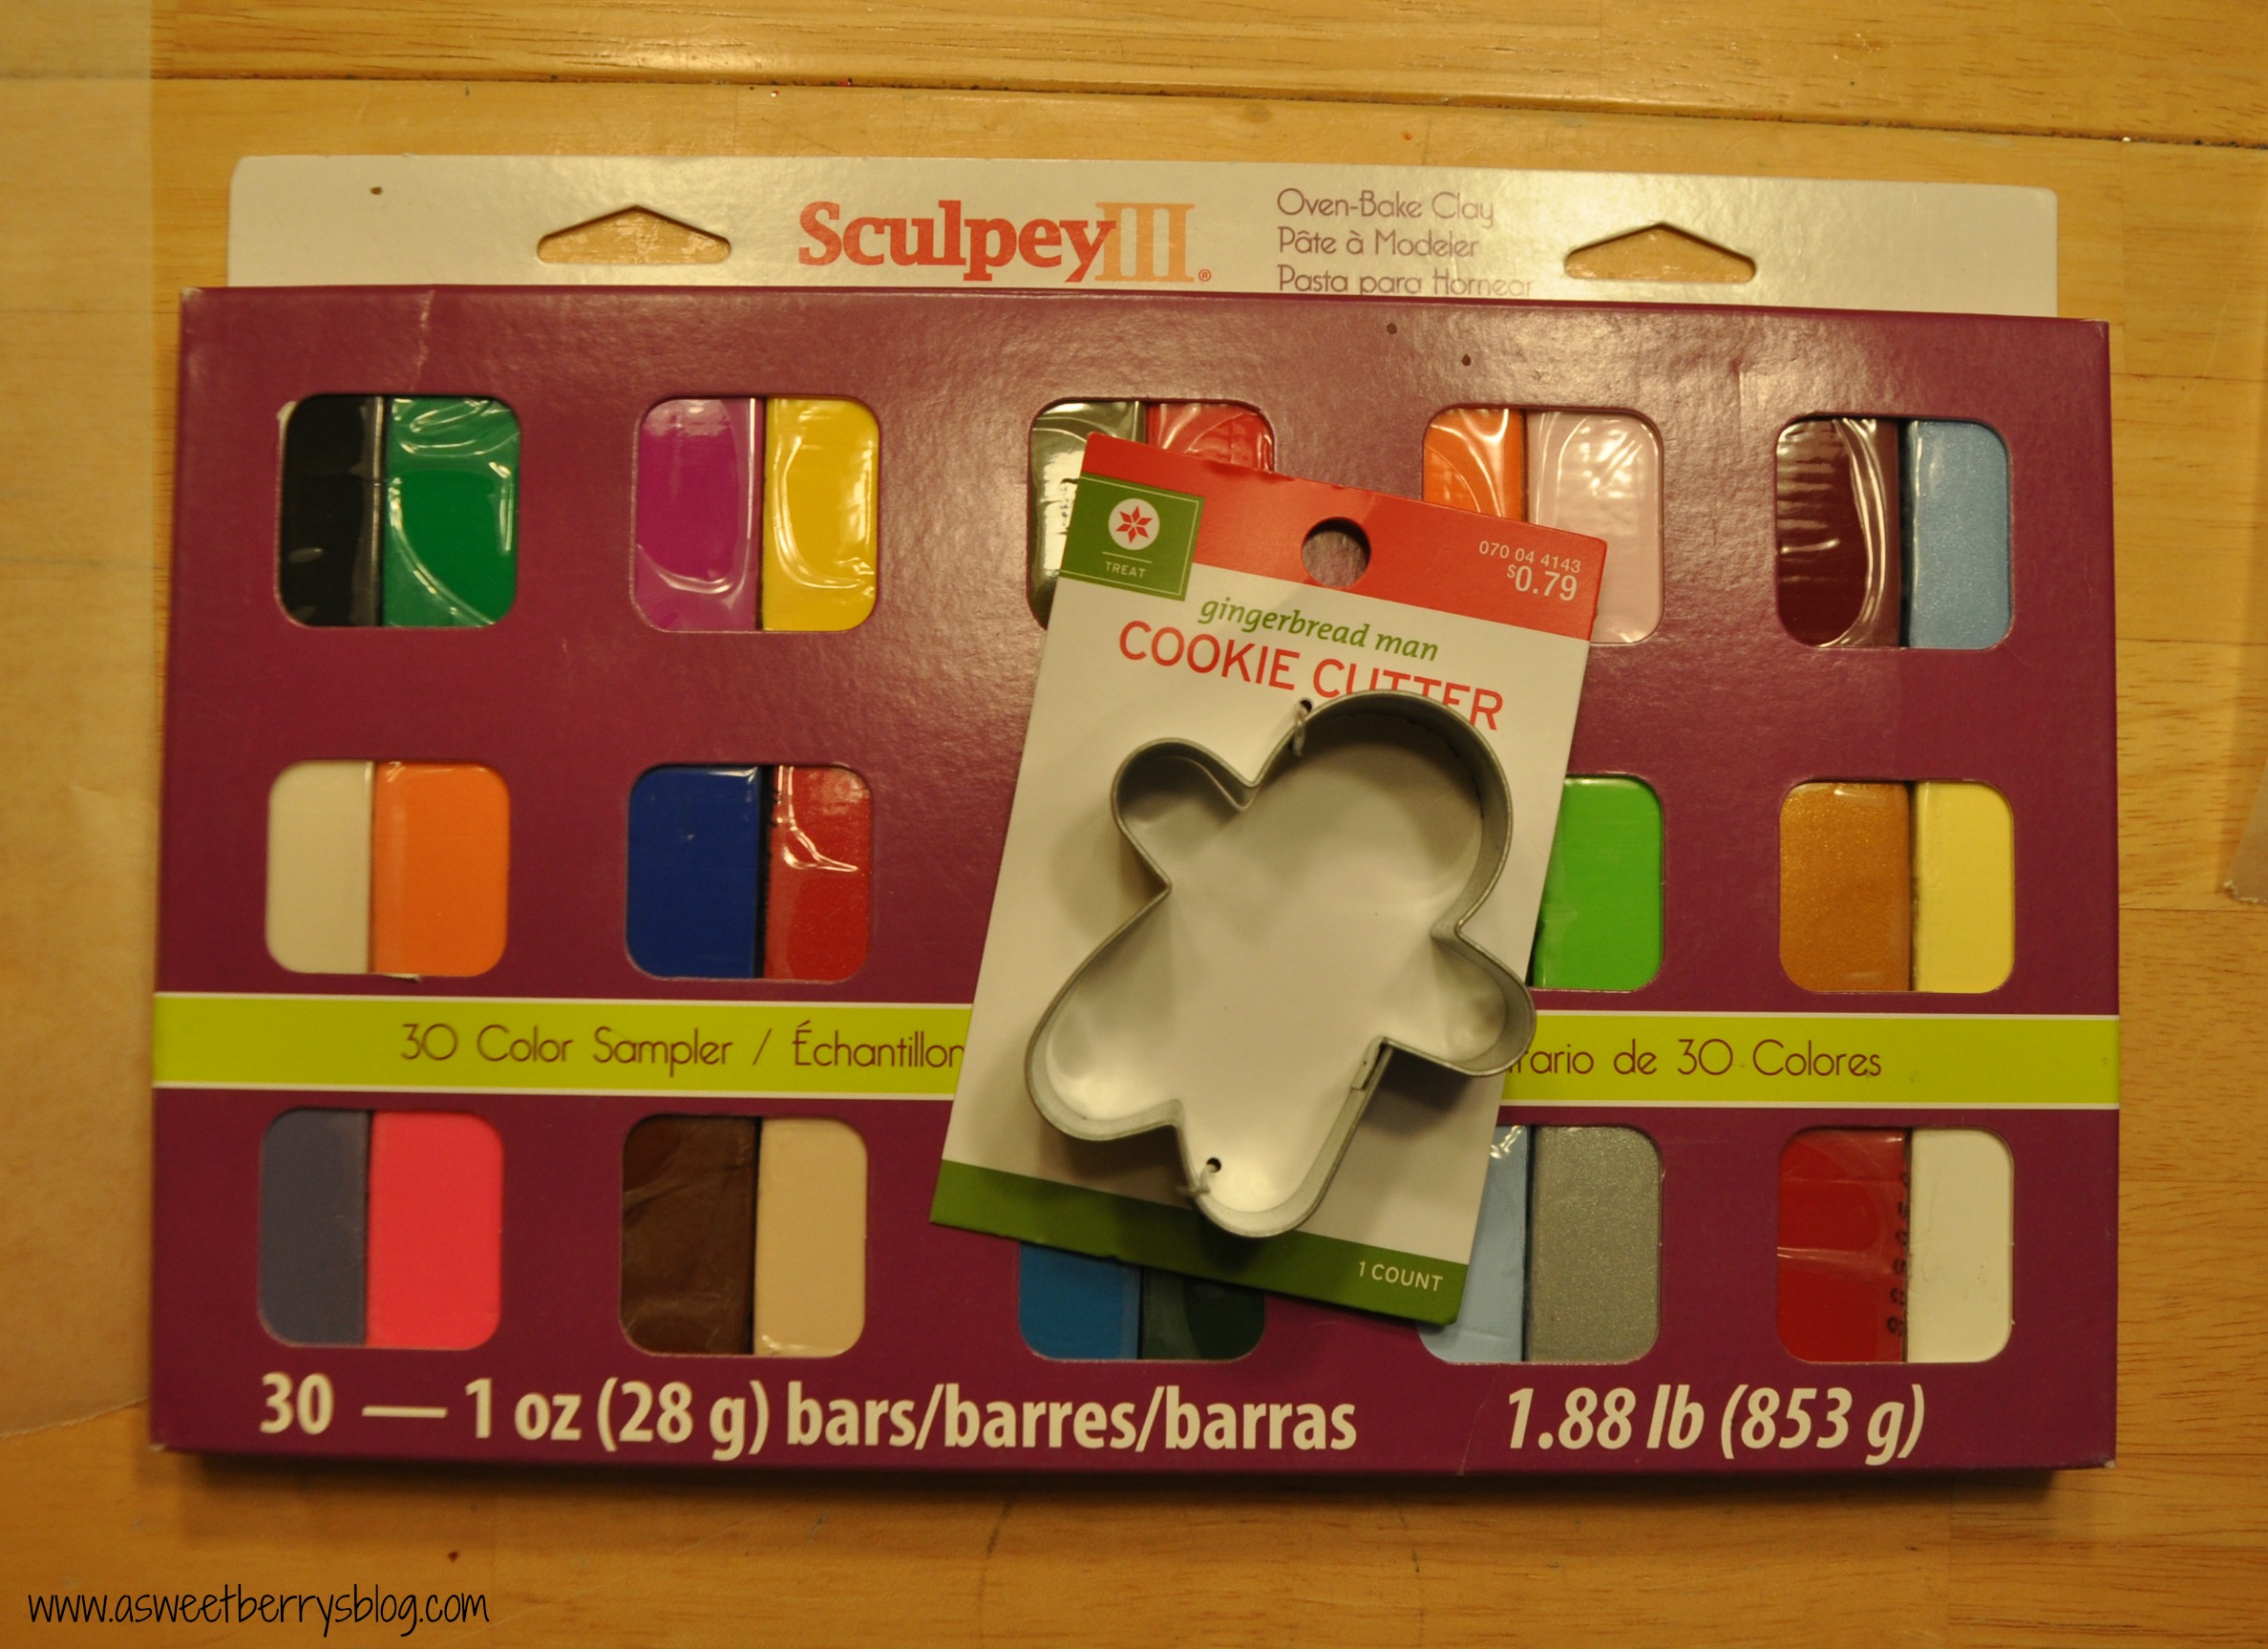
After we read the book, we decided to make our own Gingerbread Bears, using Sculpey clay and Scribbles paint.
sculpey
We picked out a brown Sculpey clay, ran it through the clay conditioning machine and then used our gingerbread man cookie cutter to cut them out.   After we had them cut out, I used a sharp pick to punch a whole in the top of their heads for ribbon.  Then it was time to bake them.  I stuck them in the oven for about 13 minutes. gingerbreadbear
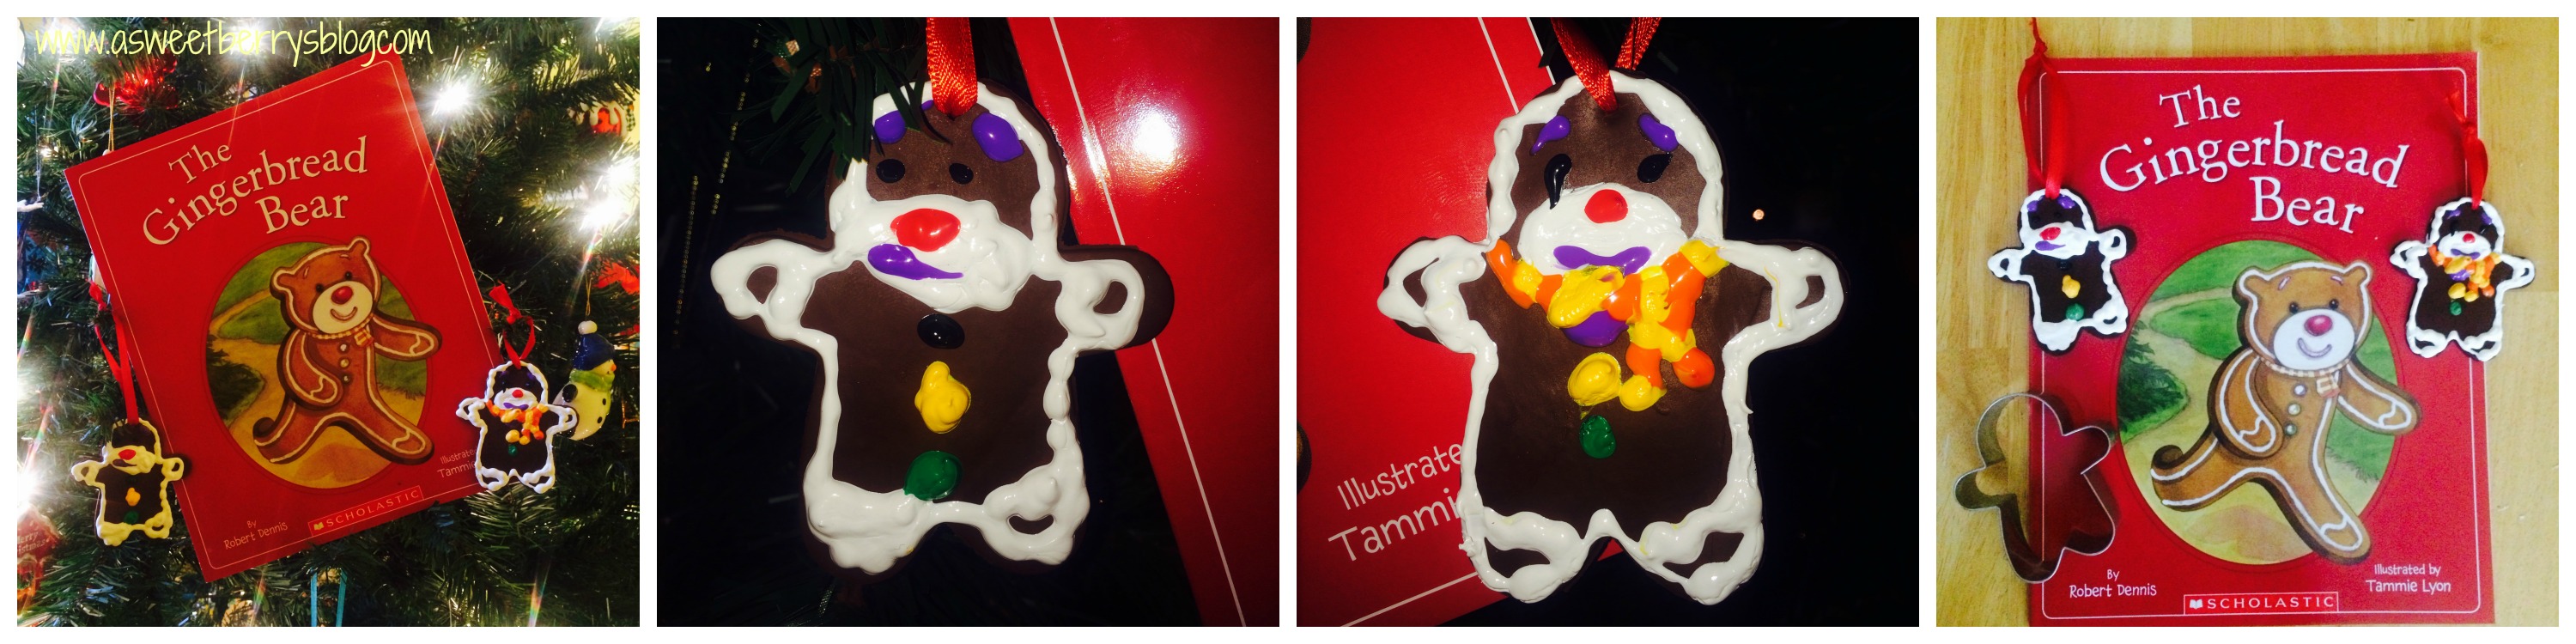
Once they came out of the oven and cooled, We used Ilovetocreate’s Scribbles Fabric Paint (yes, I know it’s fabric paint, but it works on other things too!) to decorate our gingerbread bears! Scribbles
Once they were dry, they were ready for ribbon and then to be hung on the tree! 🙂 complete So, go out and pick up this adorable book.   The kids are sure to love it!   And then go get some Sculpey clay and a gingerbread man cookie cutter and create your own Gingerbread Bear!

Check out these other Christmas time books to read with kids:

  And the enter to win a great prize! a Rafflecopter giveaway
Until next time…….

Tulip For Your Home

pillow
I love Tulip brand by ilovetocreate!  I have been using this brand forever!  This project is a Tulip For Your Home project. It is a pillow that I decorated with a Tulip stencil and Tulip Soft Fabric Paint.   Below is a photo of everything that I used for this project, with the addition of FrogTape to help create my Chevron background.
Materials:
Tulip Pillow Cover
Tulip Paint Roller
Tulip Textile Stencil
Tulip Stencil Spray Adhesive
Tulip Soft Matte Fabric Paint
FrogTape
materials
So, using the Chevron FrogTape, I created a Chevron pattern.  I did my placing with the backing still on before I actually removed the paper and stuck it to my pillow. FrogTape
Once I was done placing my chevron pattern, I laid the owl stencil onto and then marked where my owl overlapped the FrogTape.  I only marked the tape, not the pillow.  After I made my marks, I removed the stencil and cut a section of the tape out so that I’d not have the chevron pattern behind my owl. owl cutout
Using my roller, I applied the fabric paint around the cut out where my owl will be placed. painting chevron
After the paint dries, I removed the chevron FrogTape. readyforowl
Using my Tulip Stencil Spray Adhesive, I sprayed it on the back of the stencil and placed it in the open space on the pillow.   Don’t worry if you misplace it, the spray allows you to reposition the stencil.  Then it was time to paint the owl.   I did this using the roller after I cleaned it. painted owl
Instead of using a pillow to insert into the cover, I used some Poly-fil that I had at home! polyfil
I am totally obsessed with the results of my decorative Tulip pillow!  It was super easy and super fun!   So, why not create your own fun decorative pillows instead of buying them!!! IMG_4768
I hope you liked my Chevron Owl Pillow made using Tulip For Your Home!

Halloween Popcorn Box Blog Hop

A year ago, my friend Laura Kelly started this Halloween Popcorn Box Blog Hop and then decided to do it again this year. I was so excited to get my box of goodies to do this project! It’s so much fun and exciting to see what everyone comes up with! This year, I decided to make a Cat!

popcornbox2014

Items I used:
Popcorn Box
Black Felt from Kunin
Phoomph for Fabric from Coats & Clark
Tulip Soft Black Fabric Paint
Scribbles 3D Fabric Paint
Laura Kelly Buttons from Buttons Galore & More
Floral Wire
Paint Brush
Aleene’s Turbo Tacky Glue

First, I painted my box using the Tulip Soft Black Fabric Paint. Yes, I know it’s fabric paint, but it still worked great on my box! I let it dry and then painted on another coat.
painted box
Next, I made my cats tail. I thought about this for a little while! I took a piece of floral wire and folded it in half and manipulated it to look a little like how a real cats tail would look. I placed black Phoomph onto some felt, placed the wire onto the Phoomph and then folded my felt in half. Then, I cut around the wire making the felt the same shape as the wire. Then i manipulated the wire with the felt again to make the tail curved.
Tail
Next was my cats ears. Again, I used black felt and Phoomph. I placed the Phoomph onto a black piece of felt. When I folded the felt over, I made sure that it didn’t completely cover the Phoomph because I knew that I wanted to use the exposed part of the Phoomph to attach the ears to the popcorn box. I used the orange Scribbles Fabric Paint to make the inside of the cats ears.
ears
Using Laura Kelly’s buttons, I fold some orange, yellow and black beads to use for the eye and then an orange one to use for the nose. Using Aleene’s Turbo Tacky Glue, I attached them to the box.
eyes
Using the end of the wire from the tail, I inserted it into the back of the box and bent it upward helping it stay in place. I then used the Aleene’s tacky glue to glue the tail in place, to give it an extra hold.
Glue tail and dry
Once everything was dry, I used White Scribbles Fabric Paint to create the mouth and the whiskers of my cat!
whiskers
And then he was complete!
popcornbox2014
I hope you liked my Halloween Cat Popcorn Box!
Until next time…….
Print
Be sure to enter for a chance to win some great prizes!
a Rafflecopter giveaway
Also, check out the other great Halloween Popcorn Box Blog Hop entries!!!


Laura Kelly’s Pet Shop Sizzix Collection T-shirt

Laura Kelly’s Pet Shop Sizzix Collection T-shirt Benjamin final

Laura Kelly just launched a new line of die cuts with Sizzix/Ellison.  It’s really exciting and they are such cute die cuts.  Laura invited me to join in her quest to promote the line!   It’s called the Pet Shop collection.  Click on the link to check it out!!!   I decided to use the terrarium and lizard that Laura so kindly precut for me!

Things you will need:
-a t-shirt
-Laura Kelly’s Pet Shop Dies by Ellison
-Die Cut Machine
-Scribbles 3D Fabric Paint
-Tulip 3D Fabric Paint
-Fabric with an adhesive backing

materials

Before I removed the adhesive cover, I inserted my lizard into the precut slots.   back pieces

I then gently removed the backing of the lizard first and then the backing from the terrarium. putting it together

 I then placed the terrarium onto my shirt, making sure I put it exactly where I wanted it because it’s not easy to move!!!   Next, I added the cute little saying “Here Lizard Lizard!”, black fabric paint to the top of the terrarium to make it look like it has a lid and eyes on the lizard!

complete

Then I put it on this cute little guy and he loves it!!!  What little boy doesn’t like pets?!?!? Benjamin

Hope you like my cute little lizard and terrarium Pet Shop Collection by Laura Kelly t-shirt!!!

Until next time…..

  FINAL LOGO

  a Rafflecopter giveaway