Tag Archives: sewing

Easter Egg Place Mat

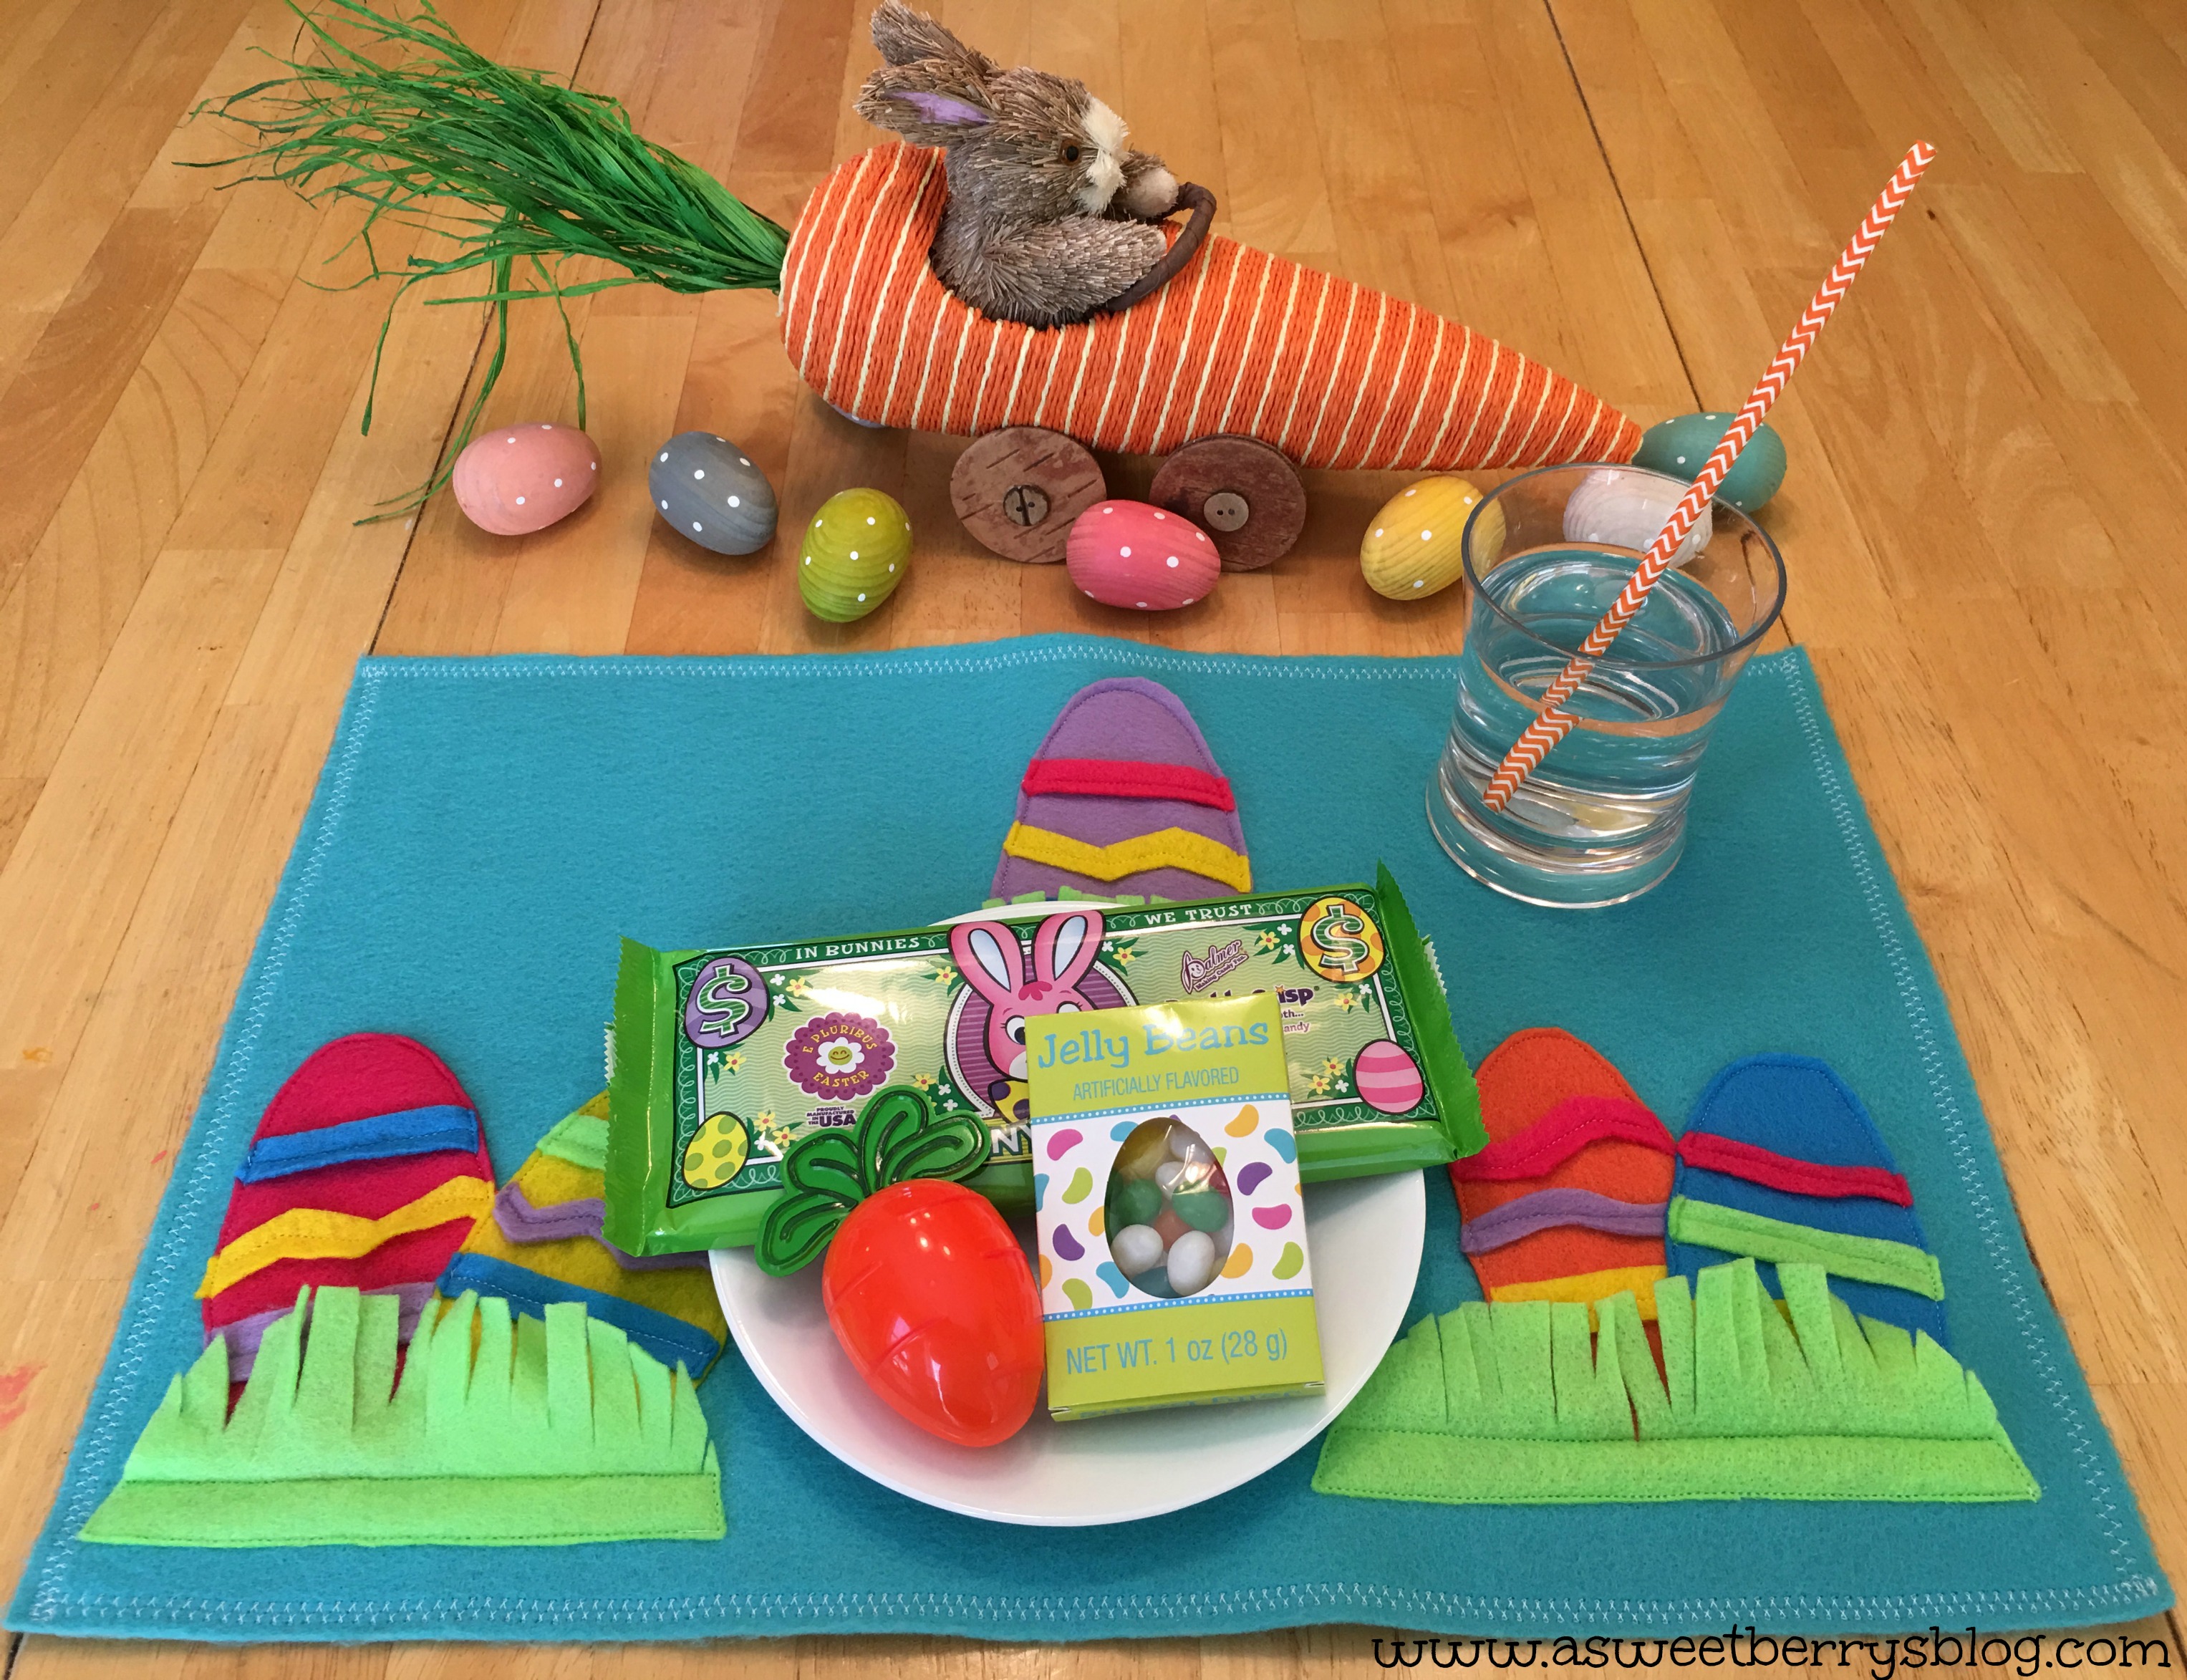
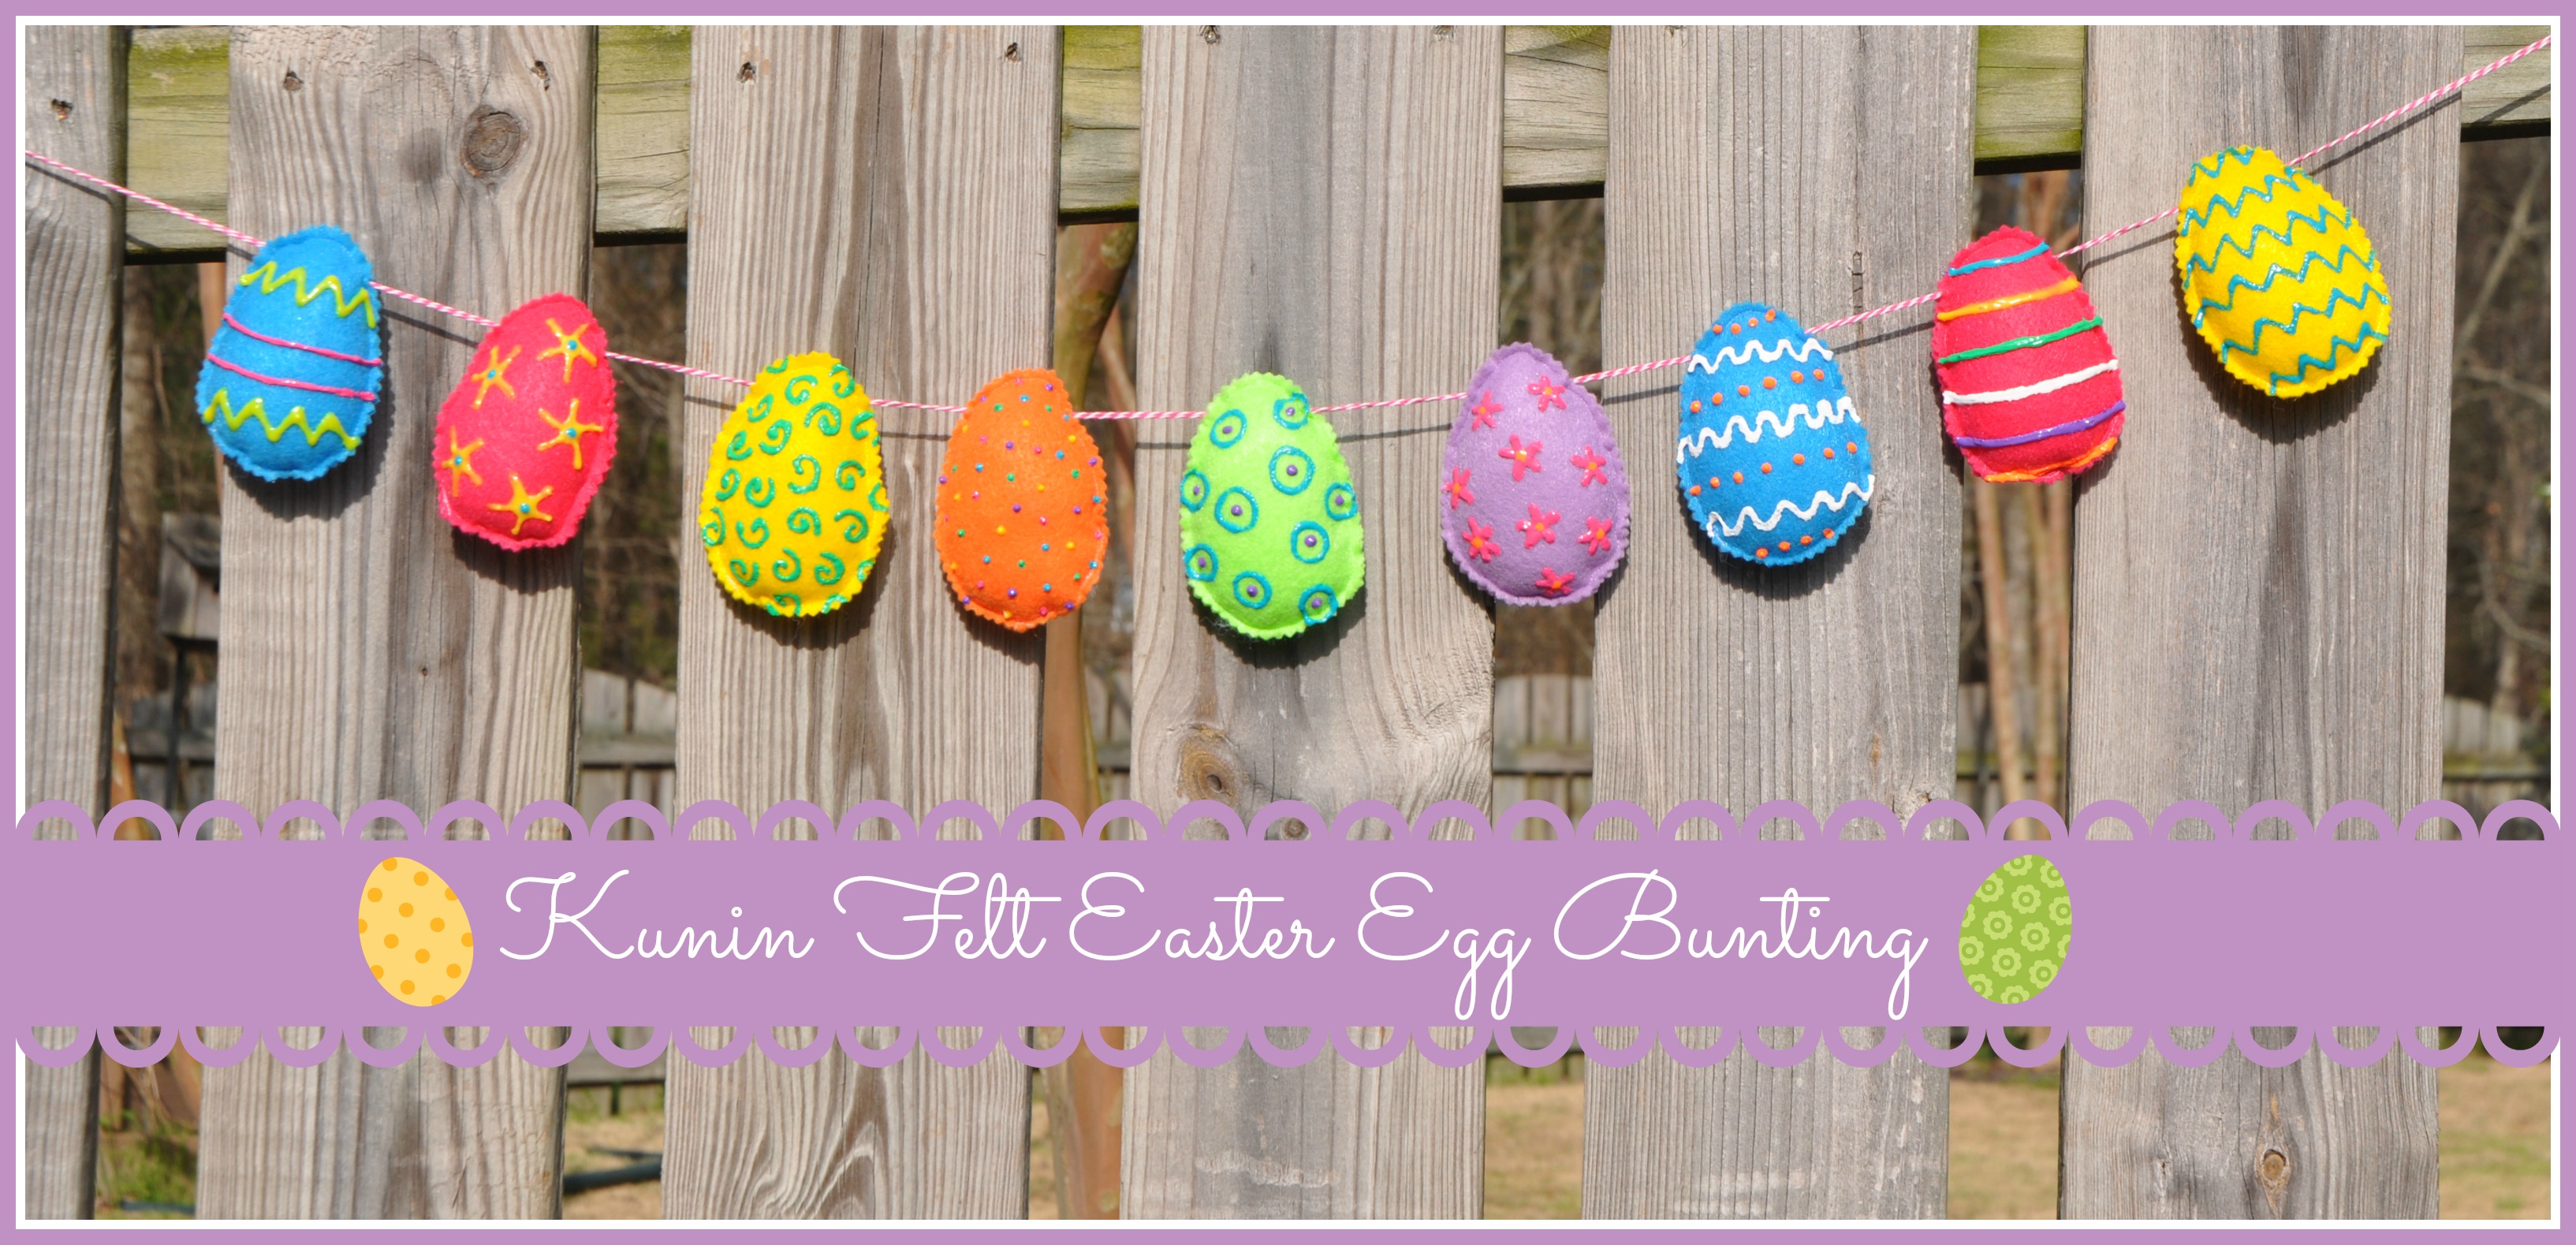
Easter is right around the corner, as in this upcoming weekend!  Everyone will be sitting down to have an Easter meal with the family!  Why not brighten up the table with an Easter Egg Place Mat!   This one is made with Kunin Felt!
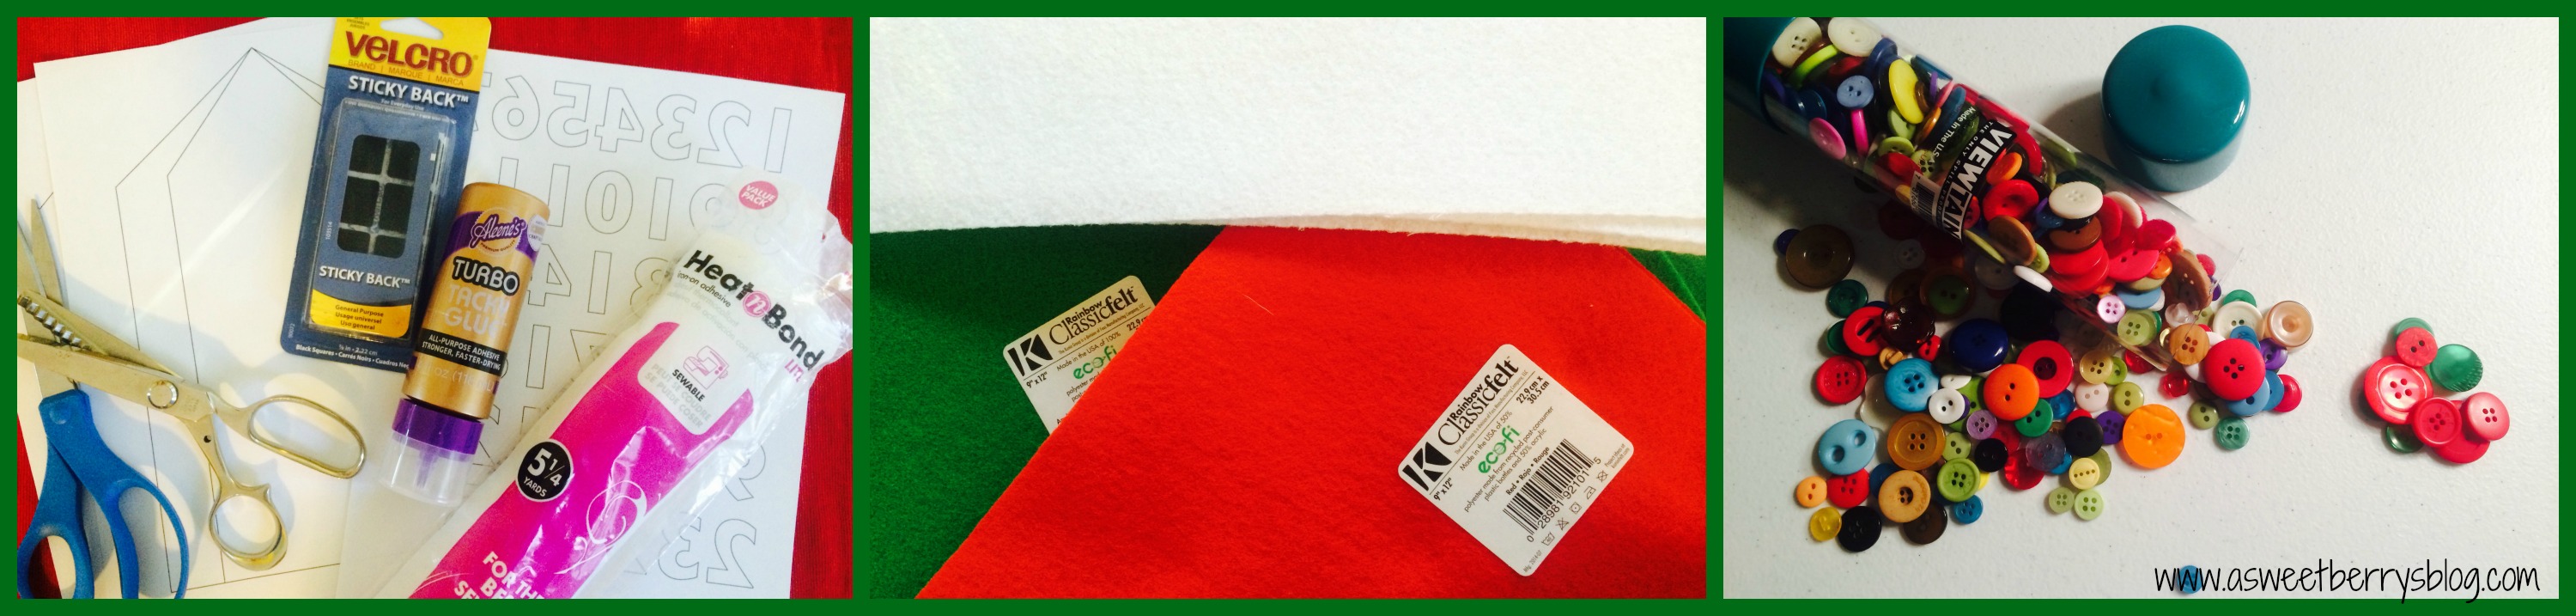
placemat
Materials needed:
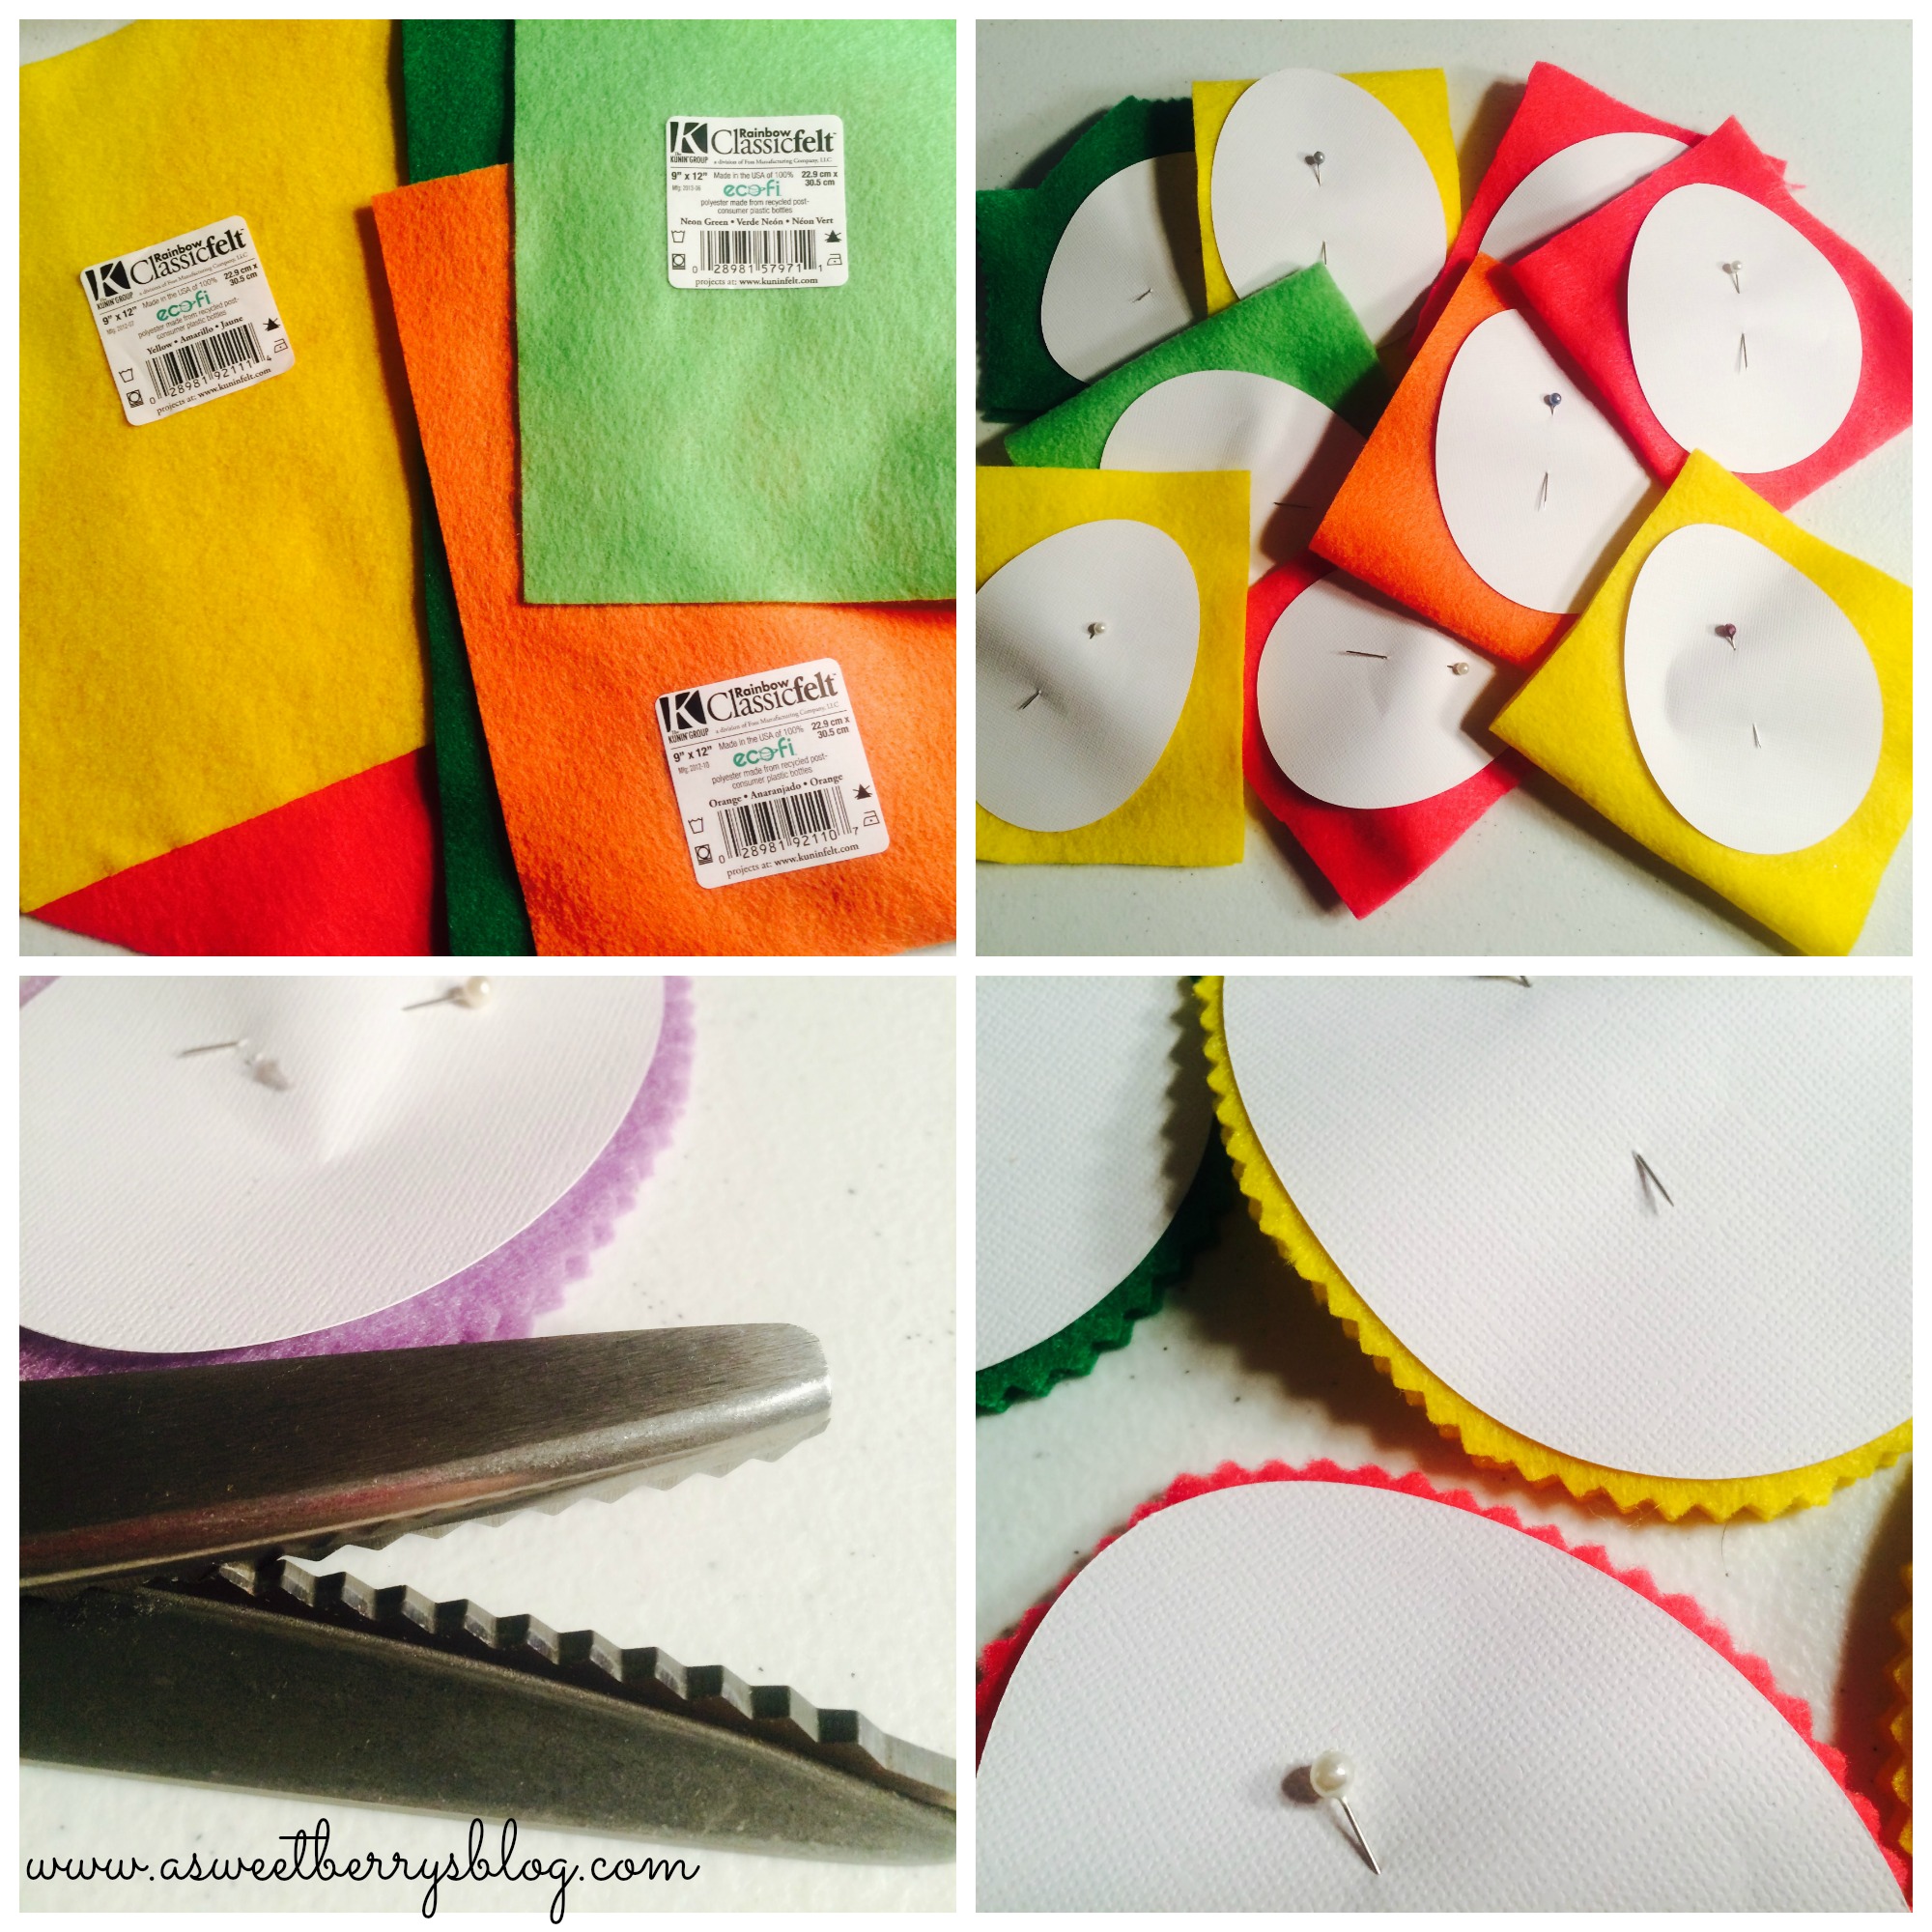
Bright colored Felt (Kunin is my brand of choice!  I used Eco-fi Plus for the mat and ClassicFelt for the eggs and grass)
Scissors
Sewing Machine
Thread
felt
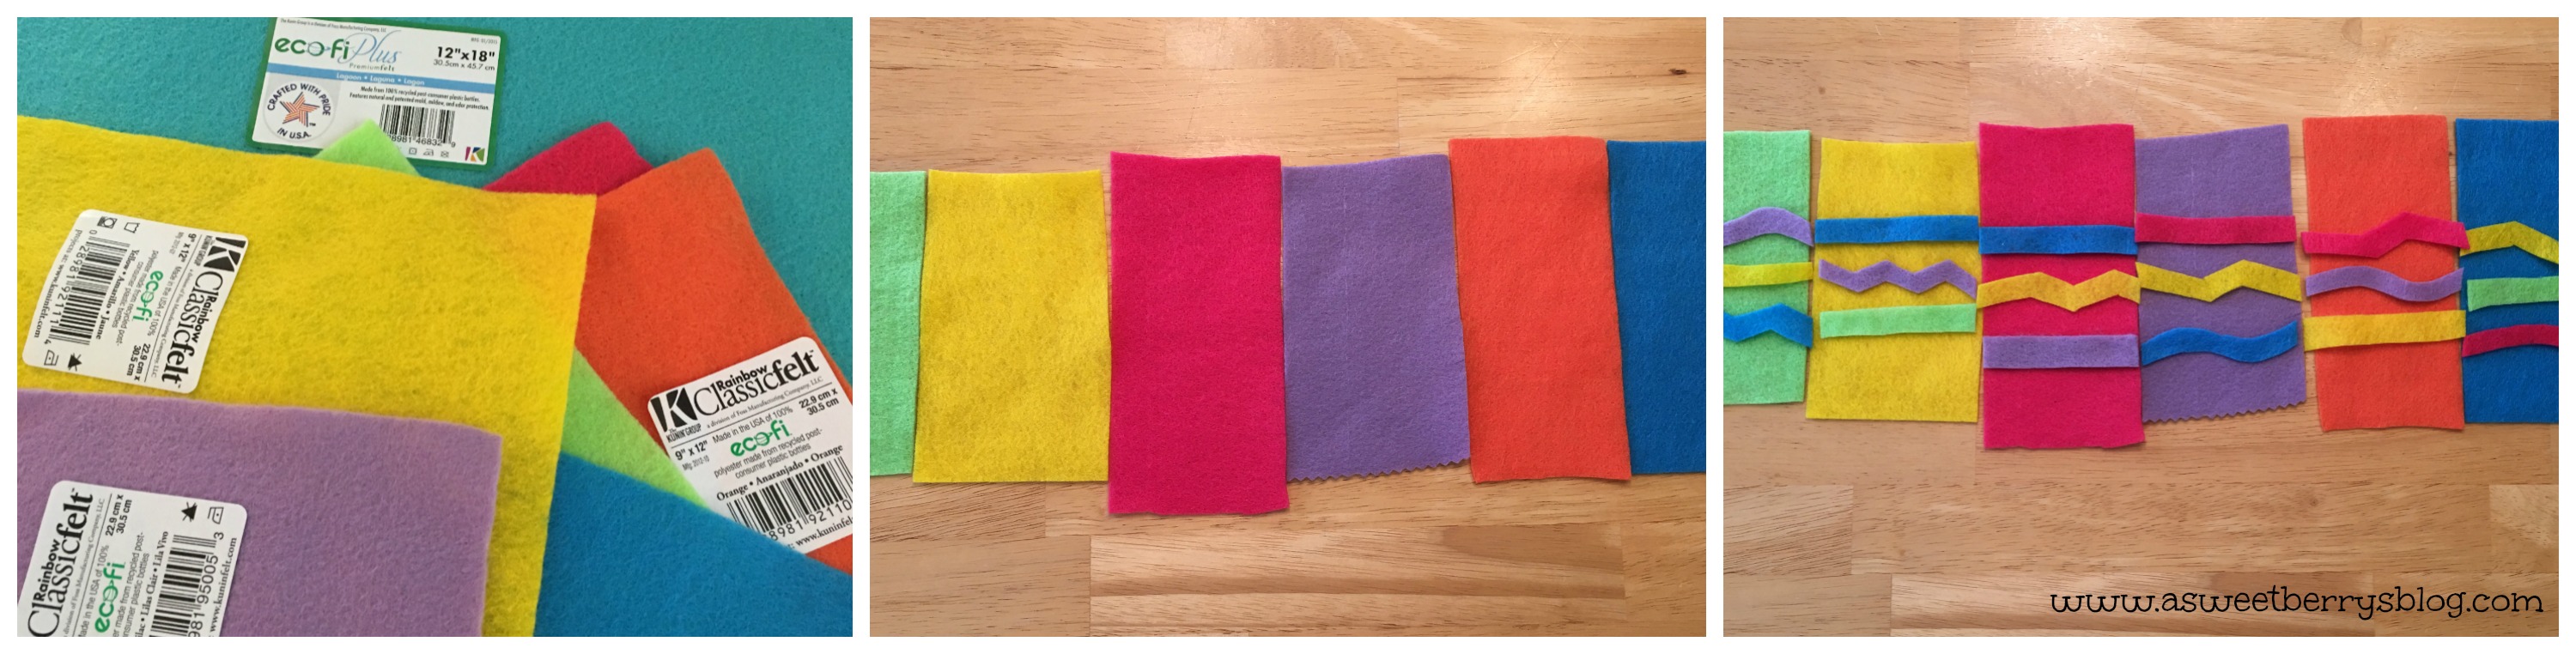
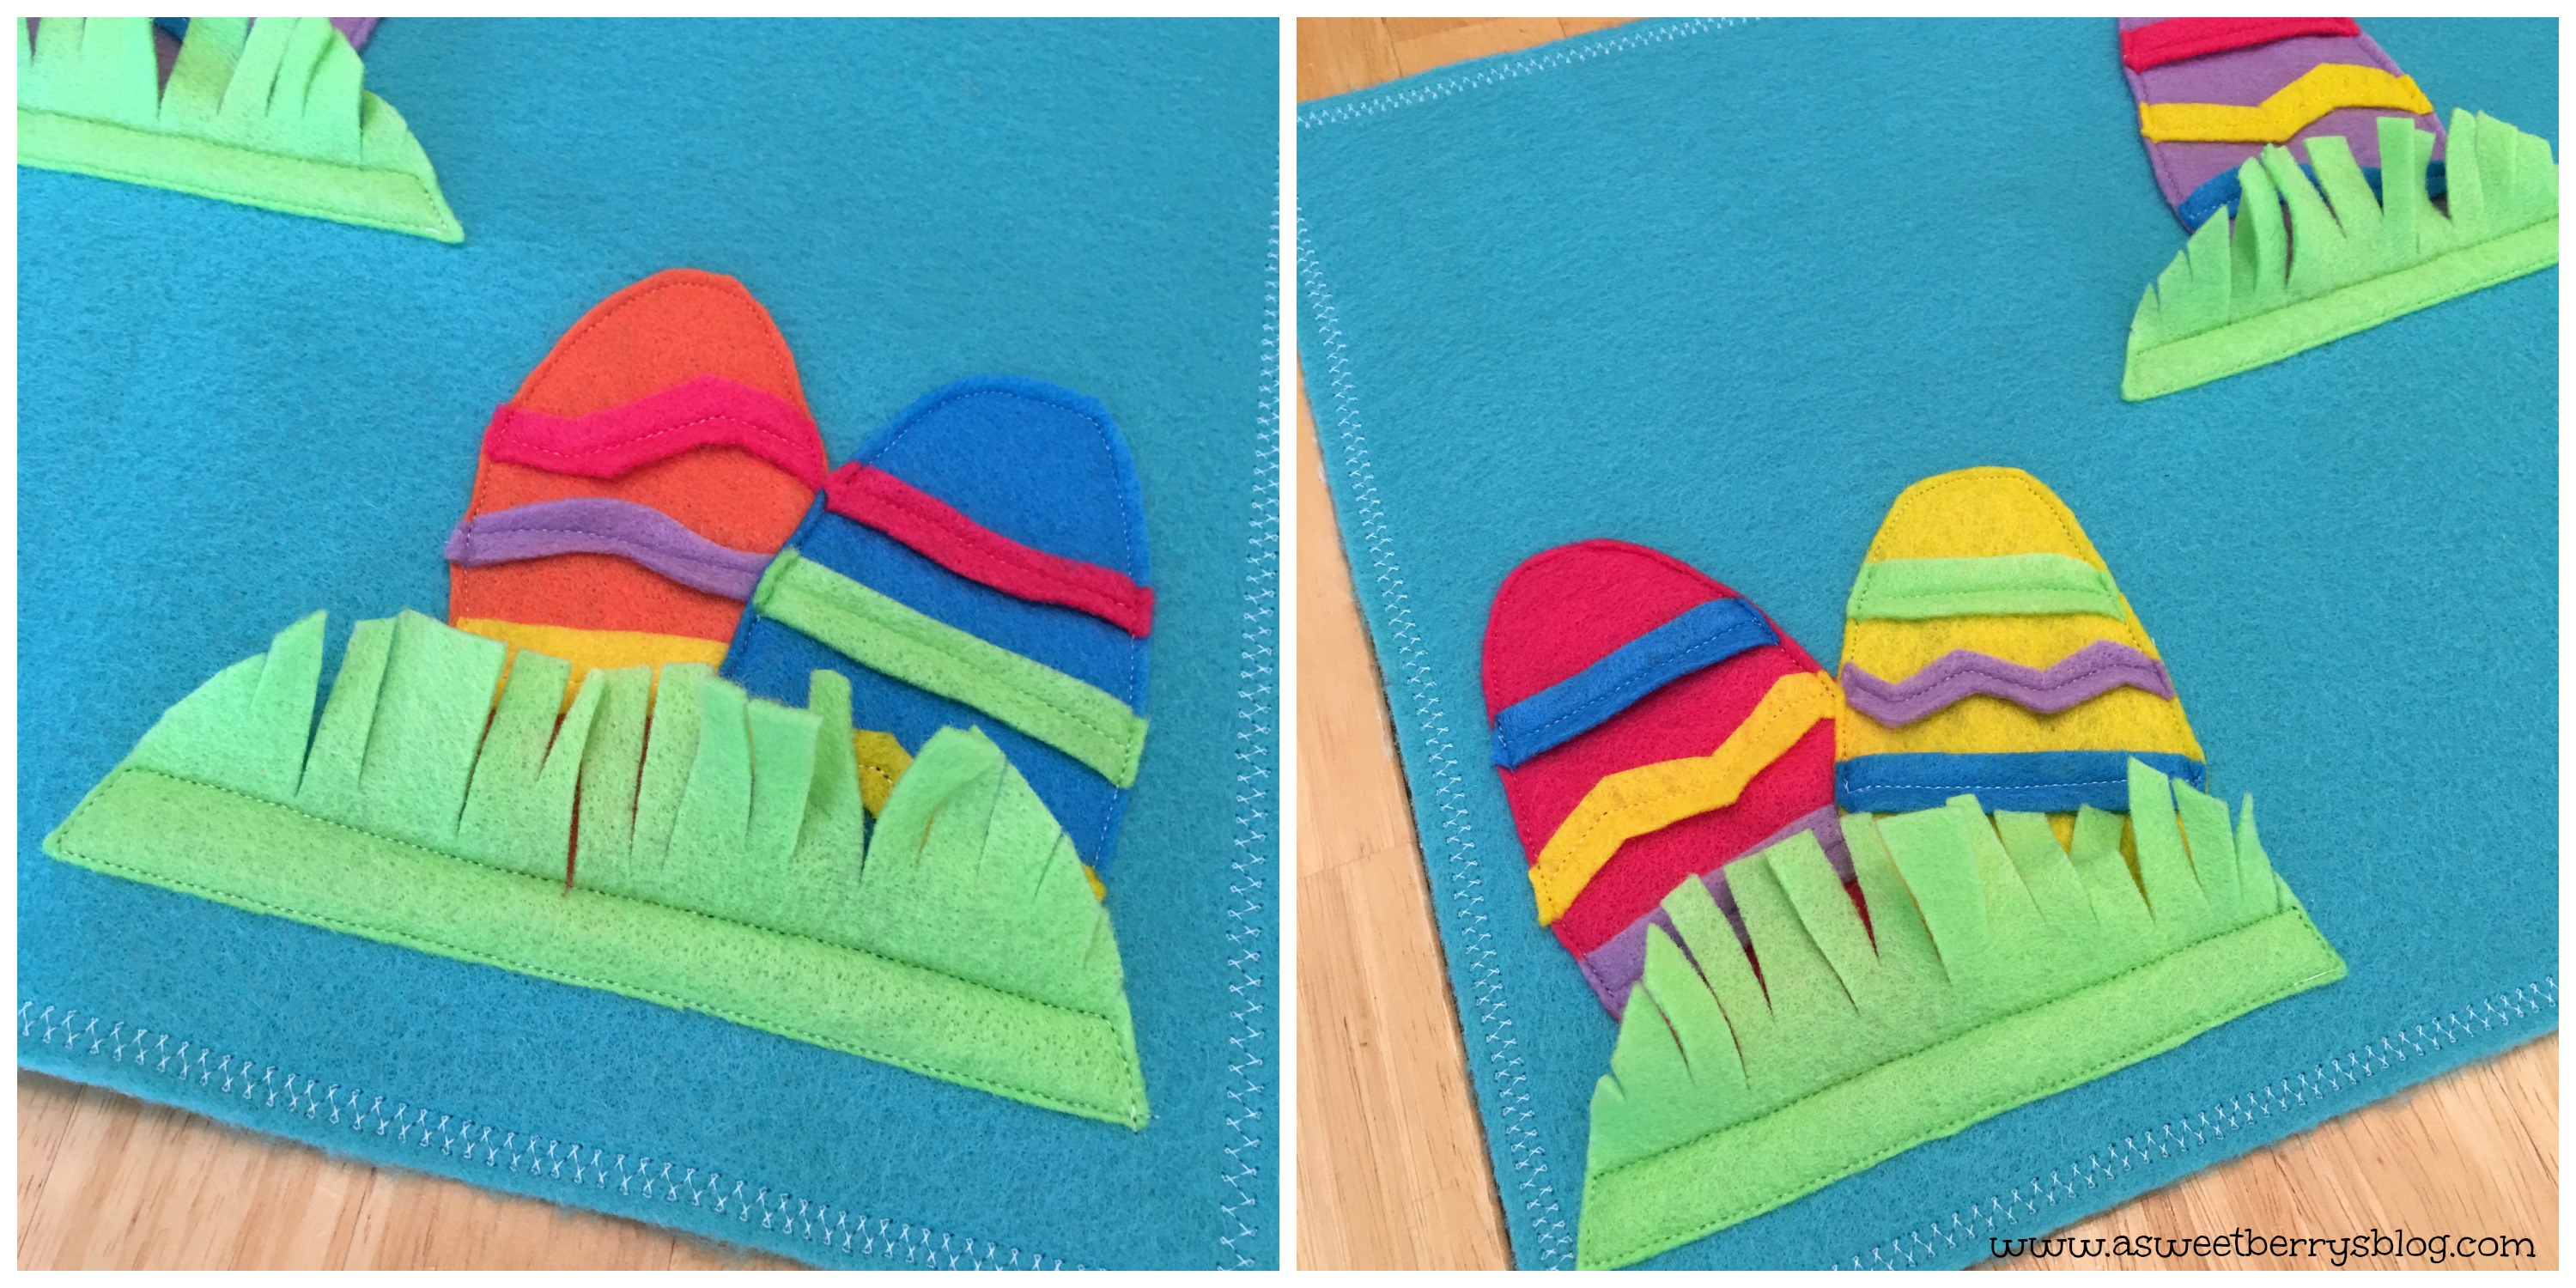
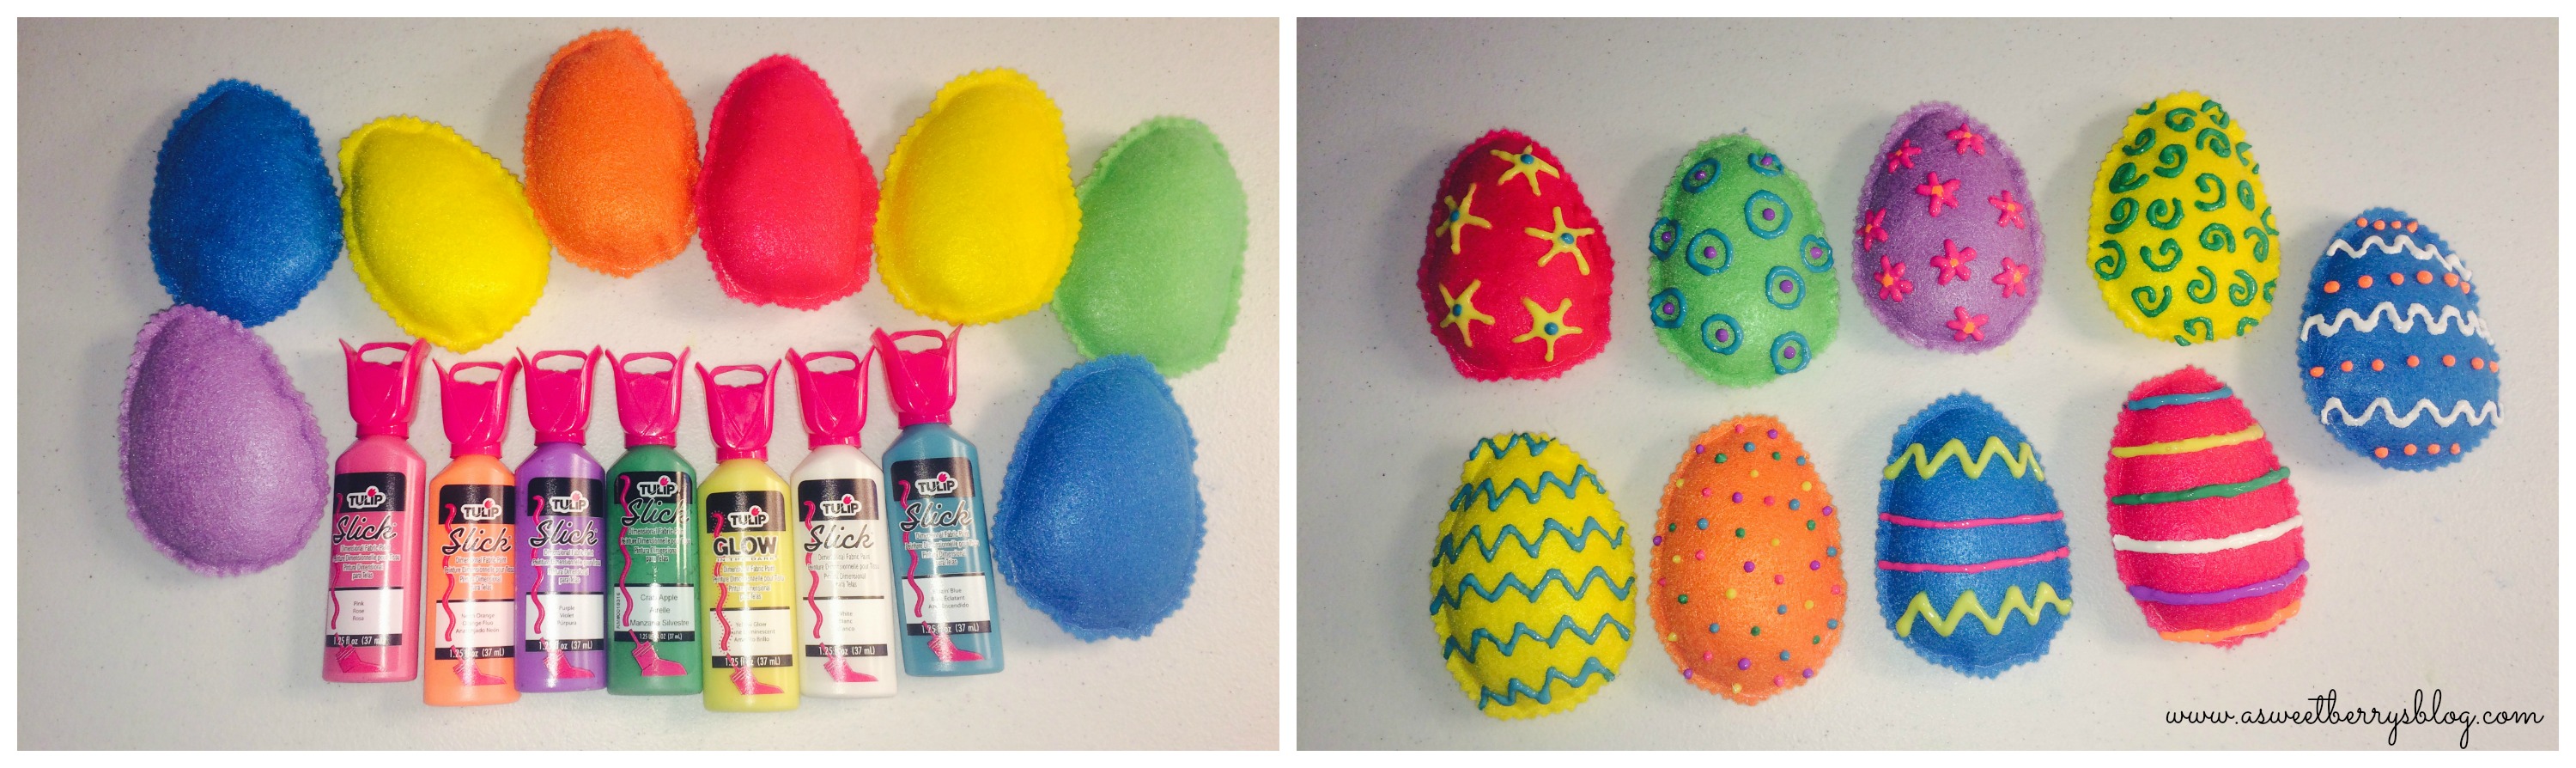
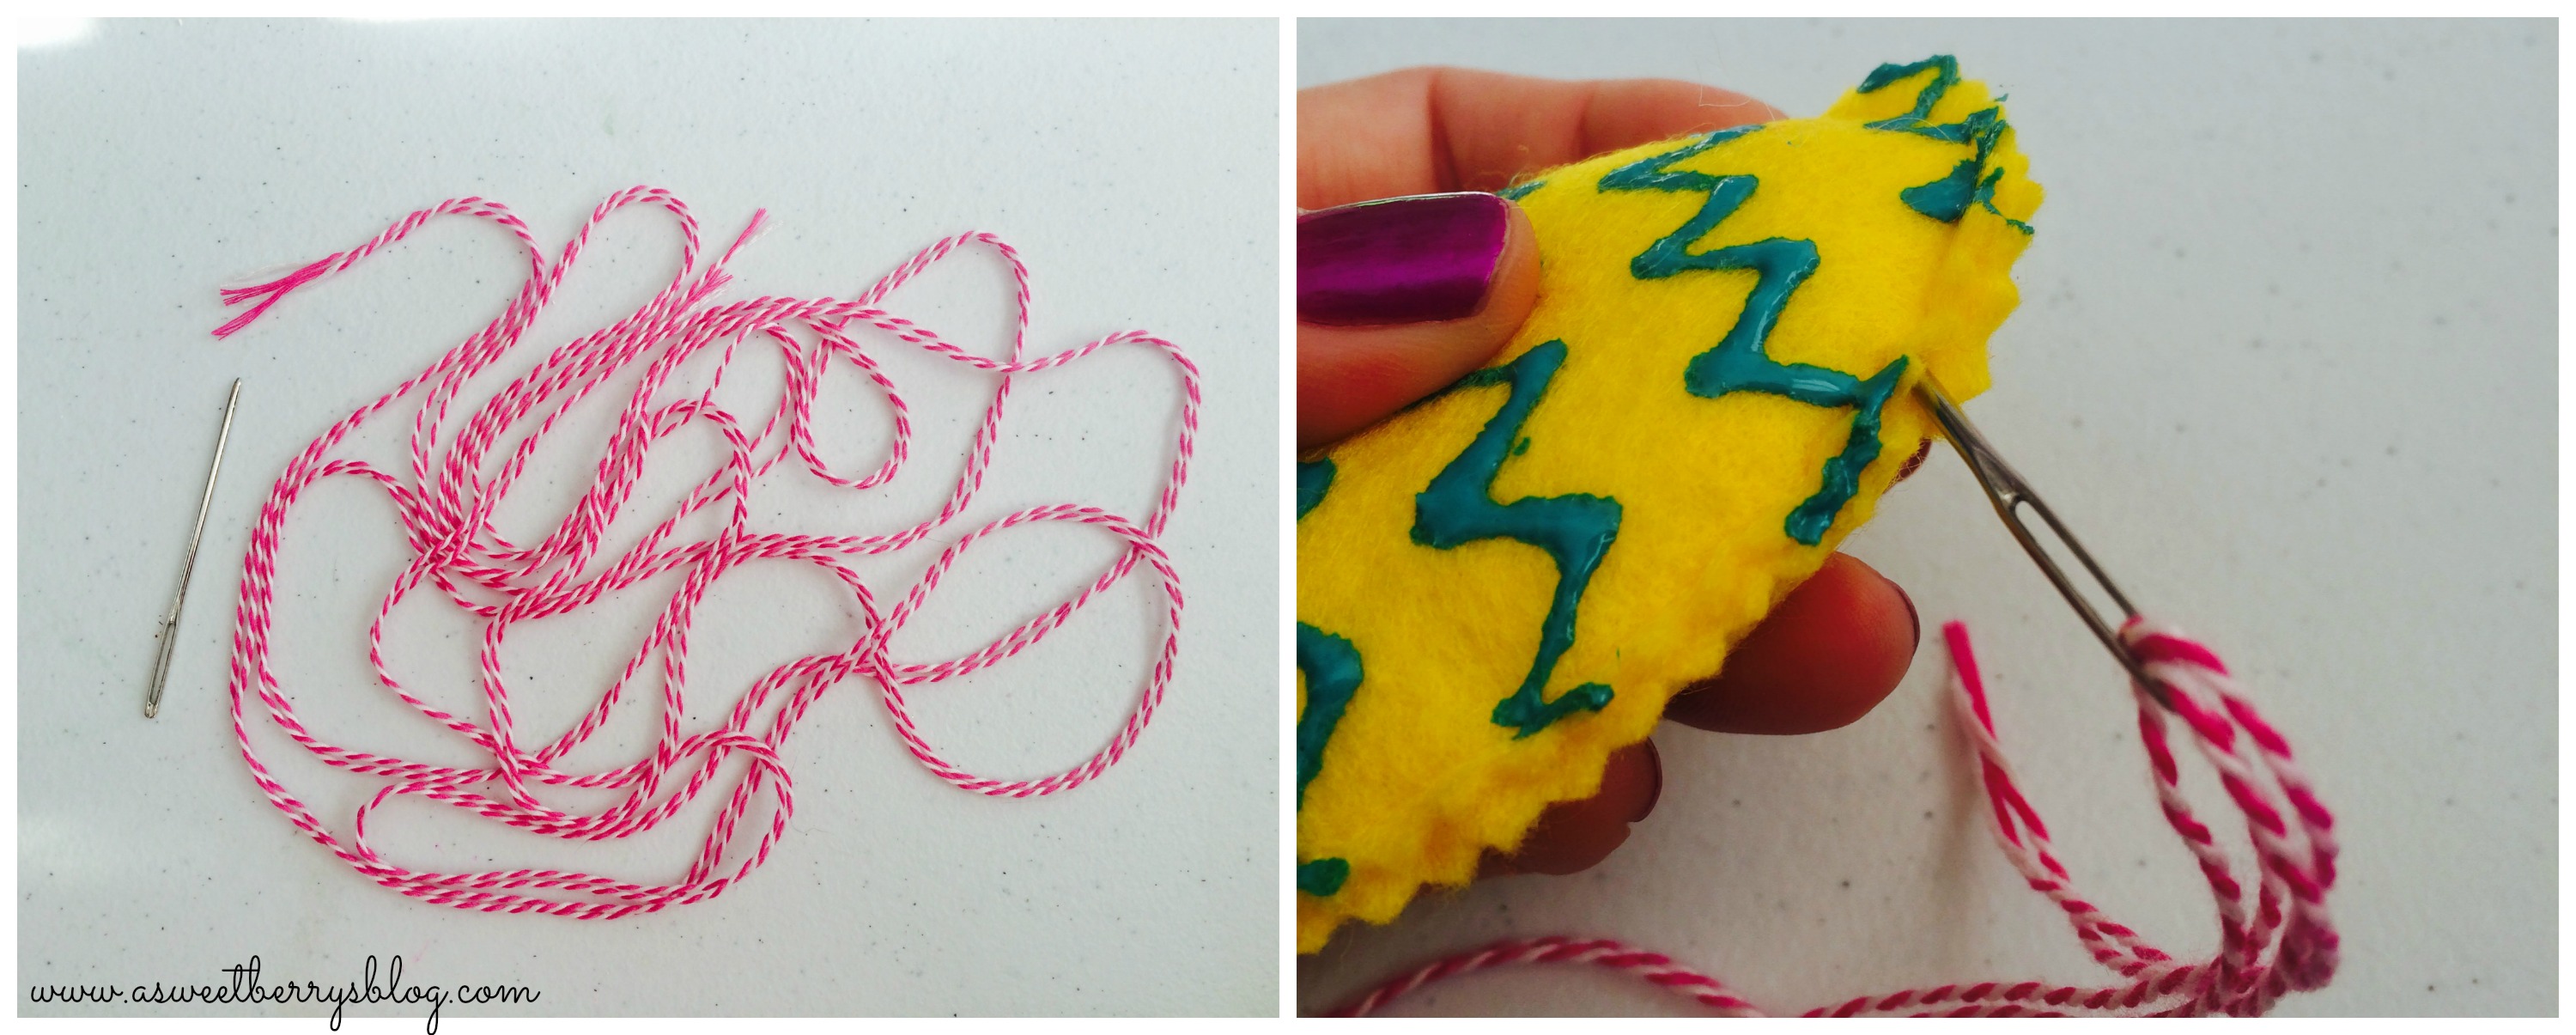
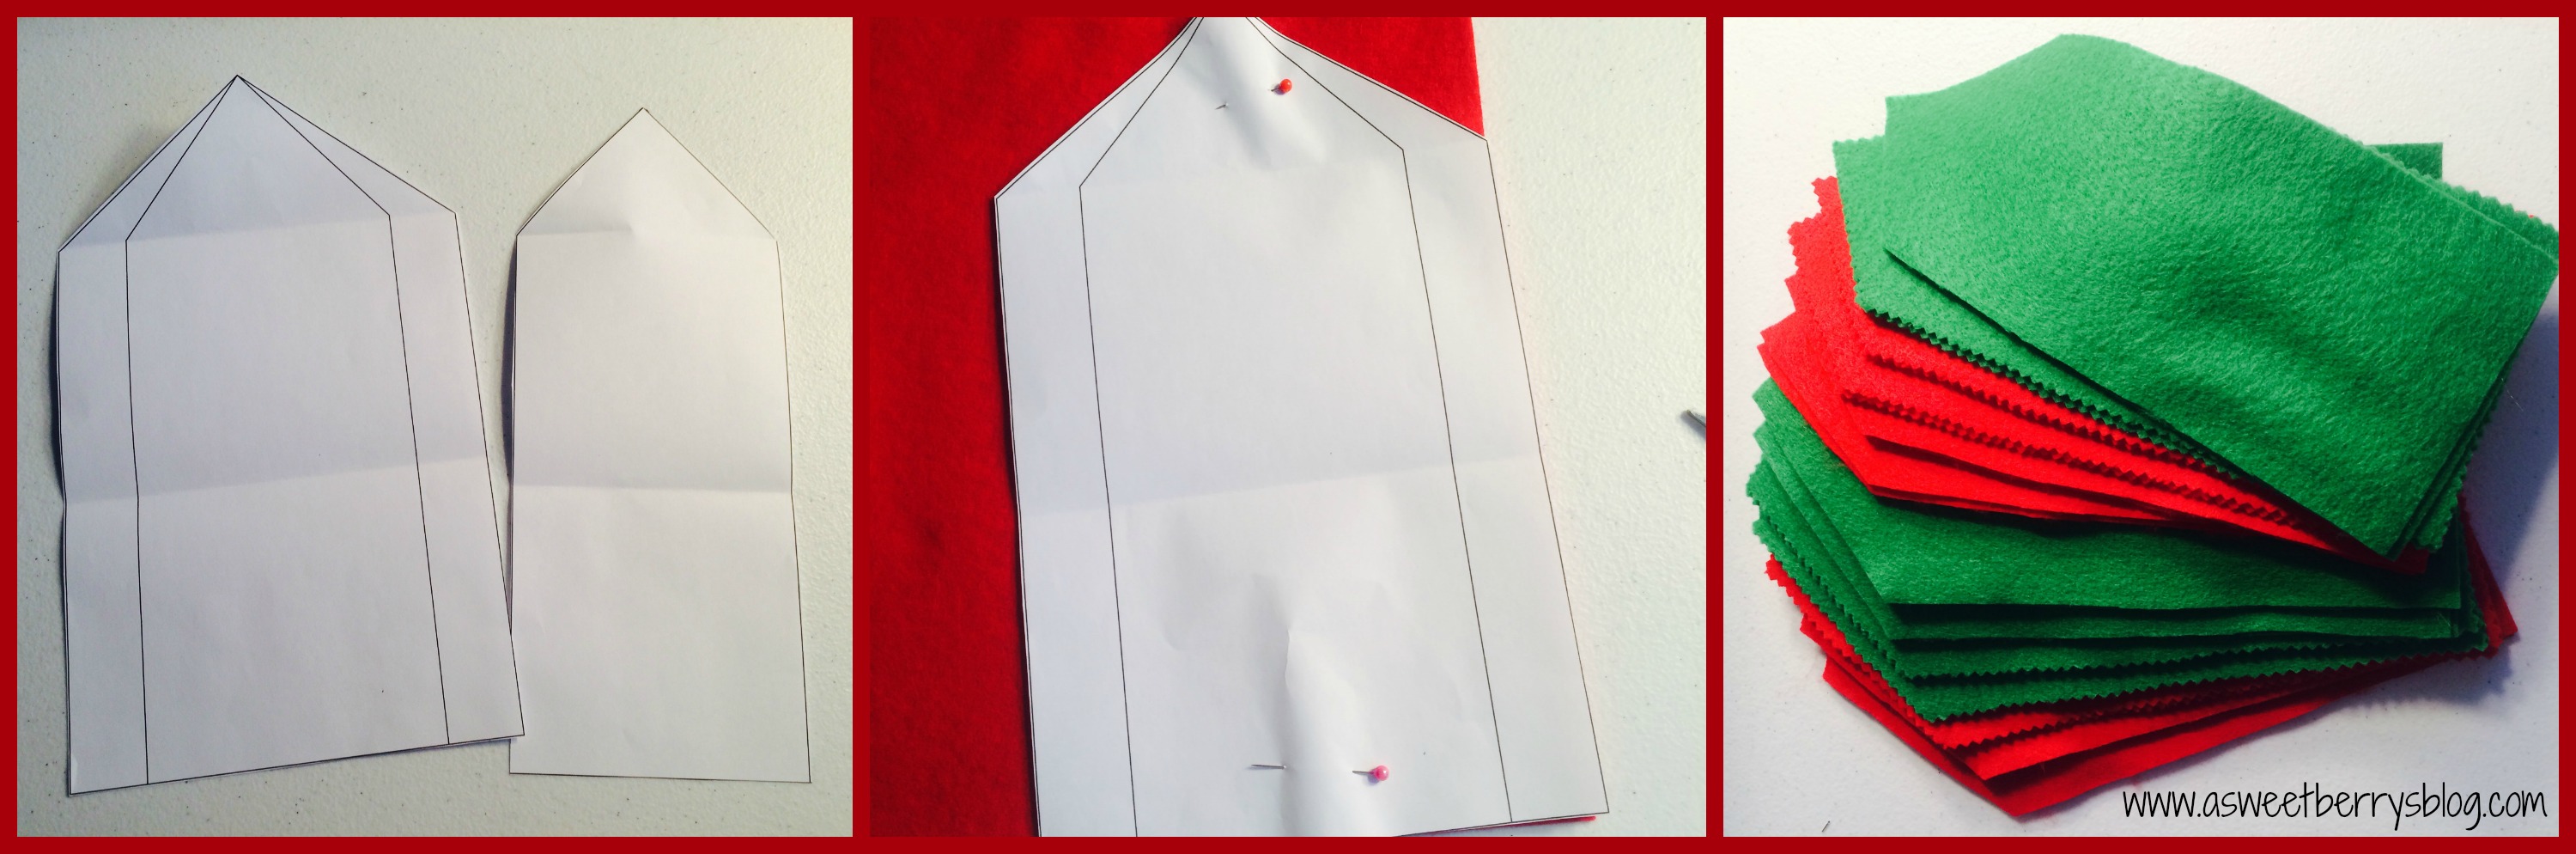
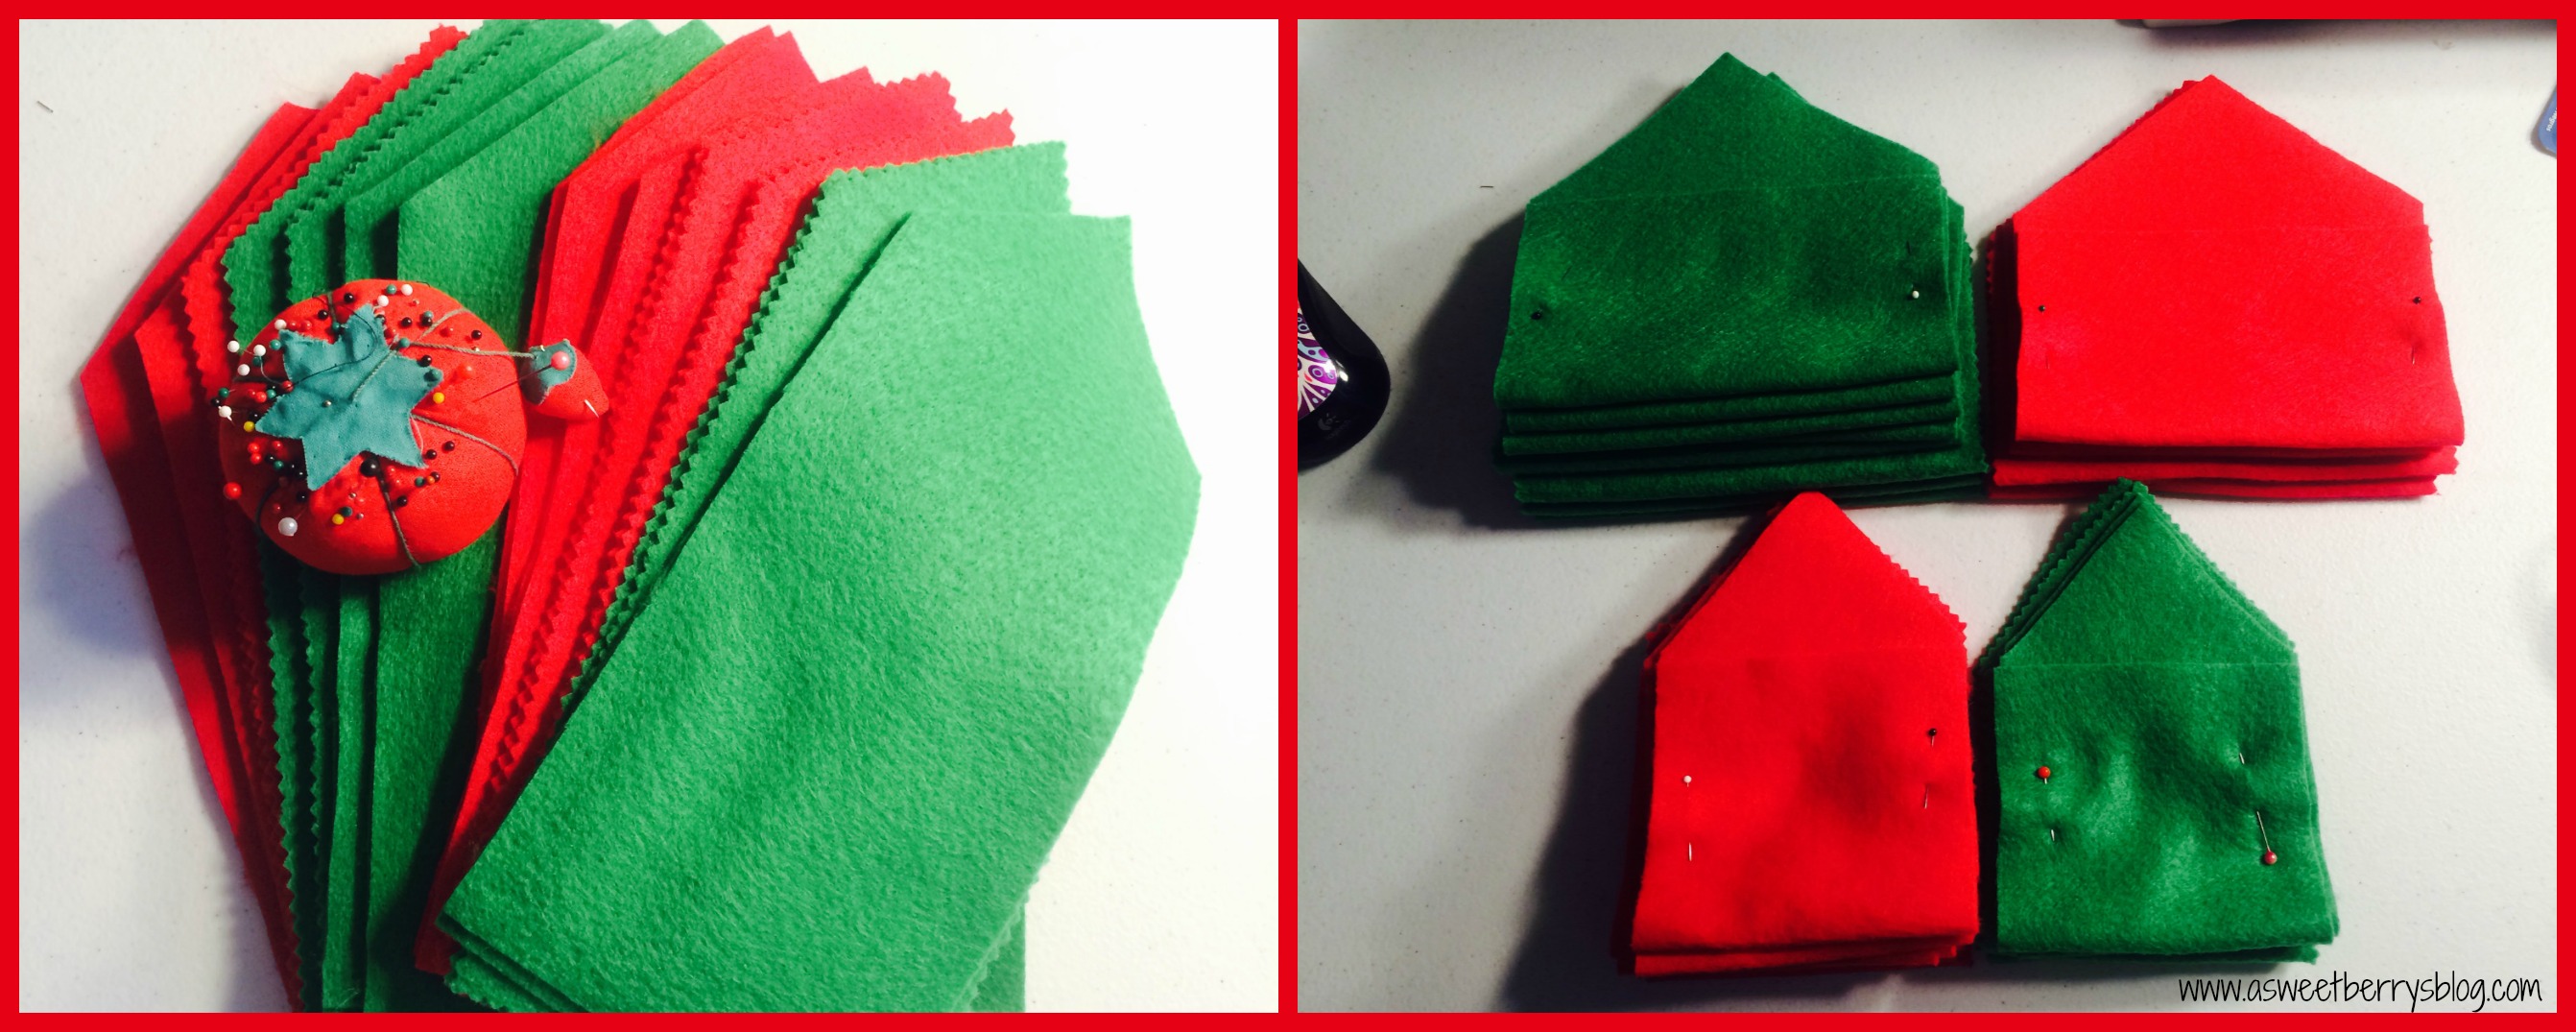
First, I cut several pieces of felt that were about 6in x 2in.  Then, I cut little strips to use as the decorations on the eggs.  I made some zigzag, some curvy and some straight.
eggs
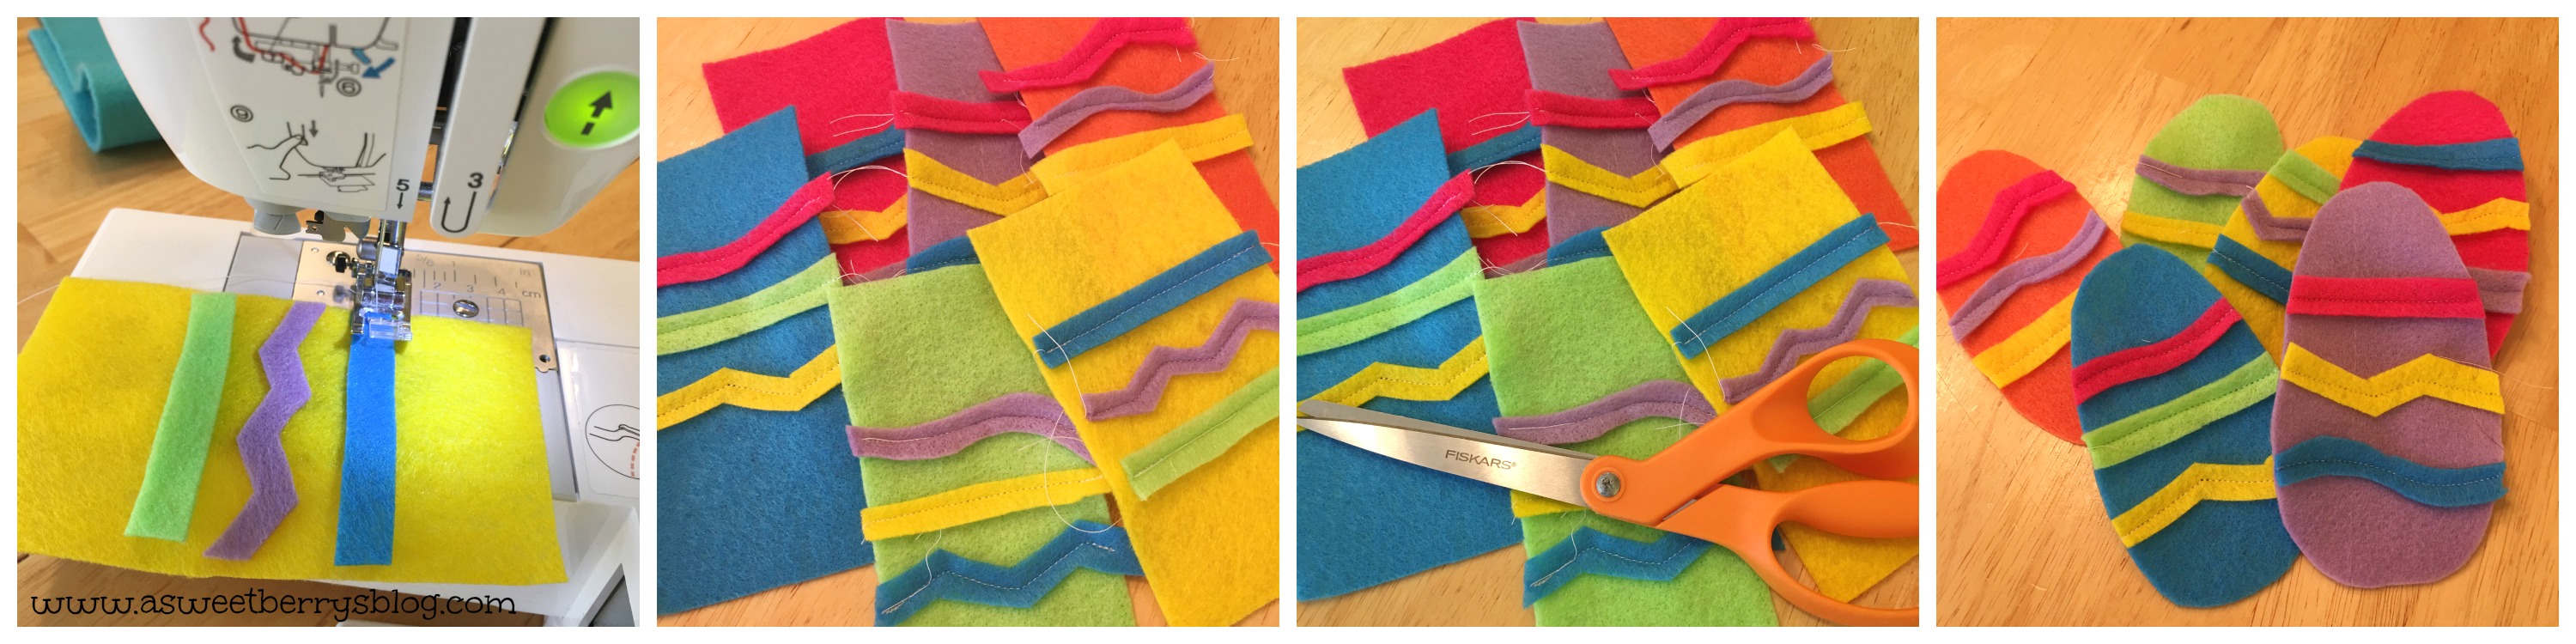
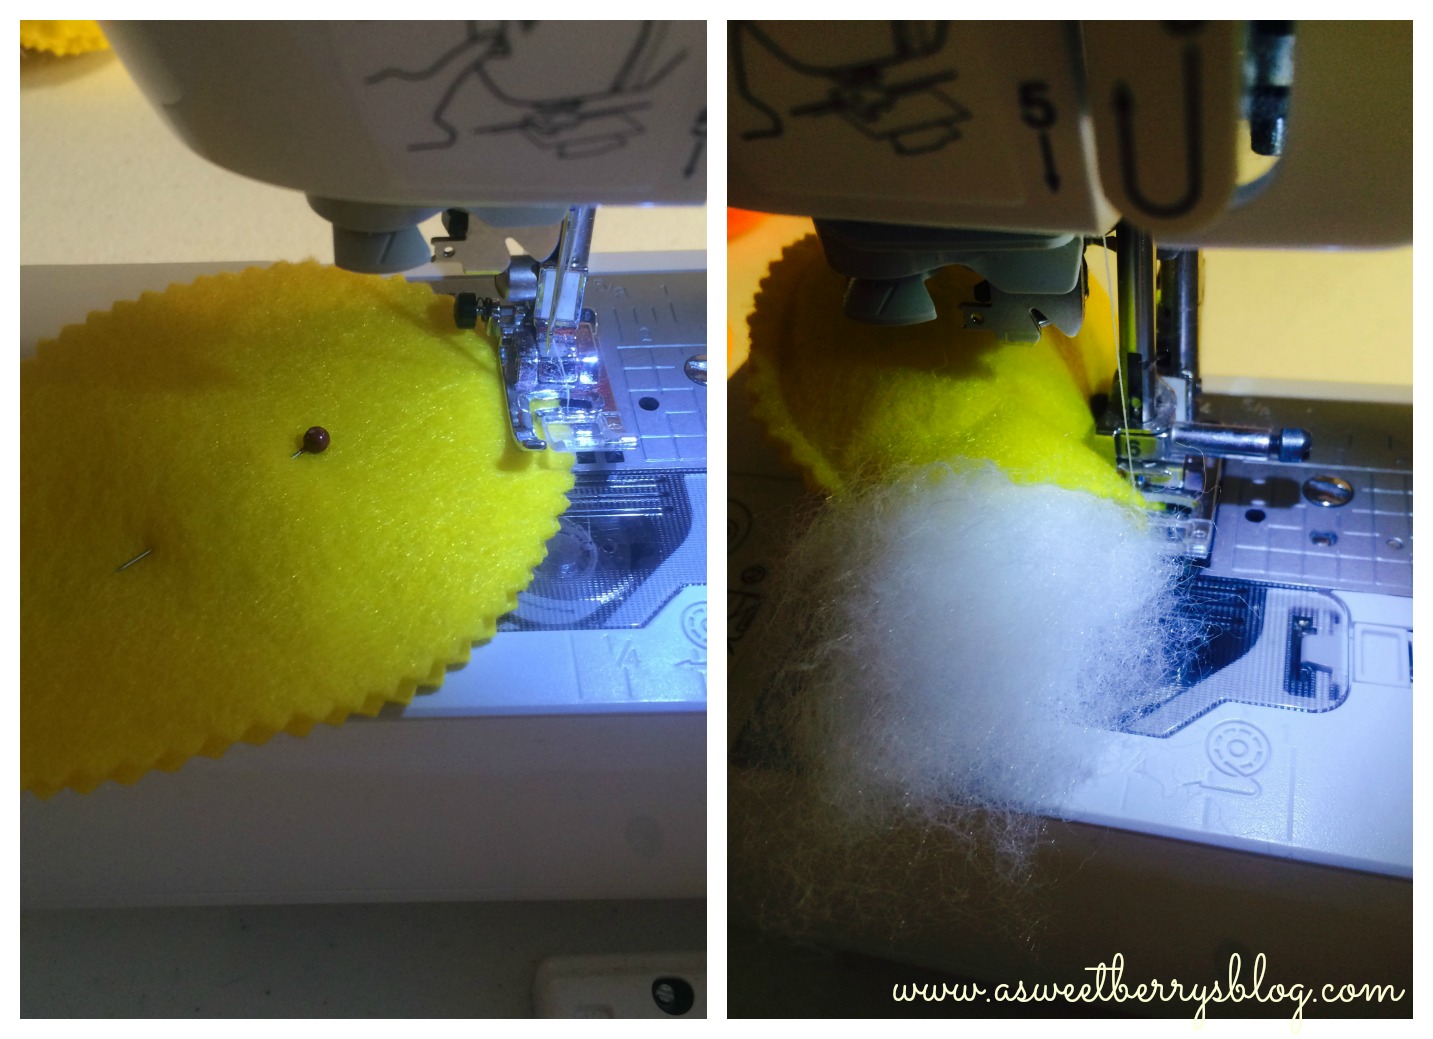
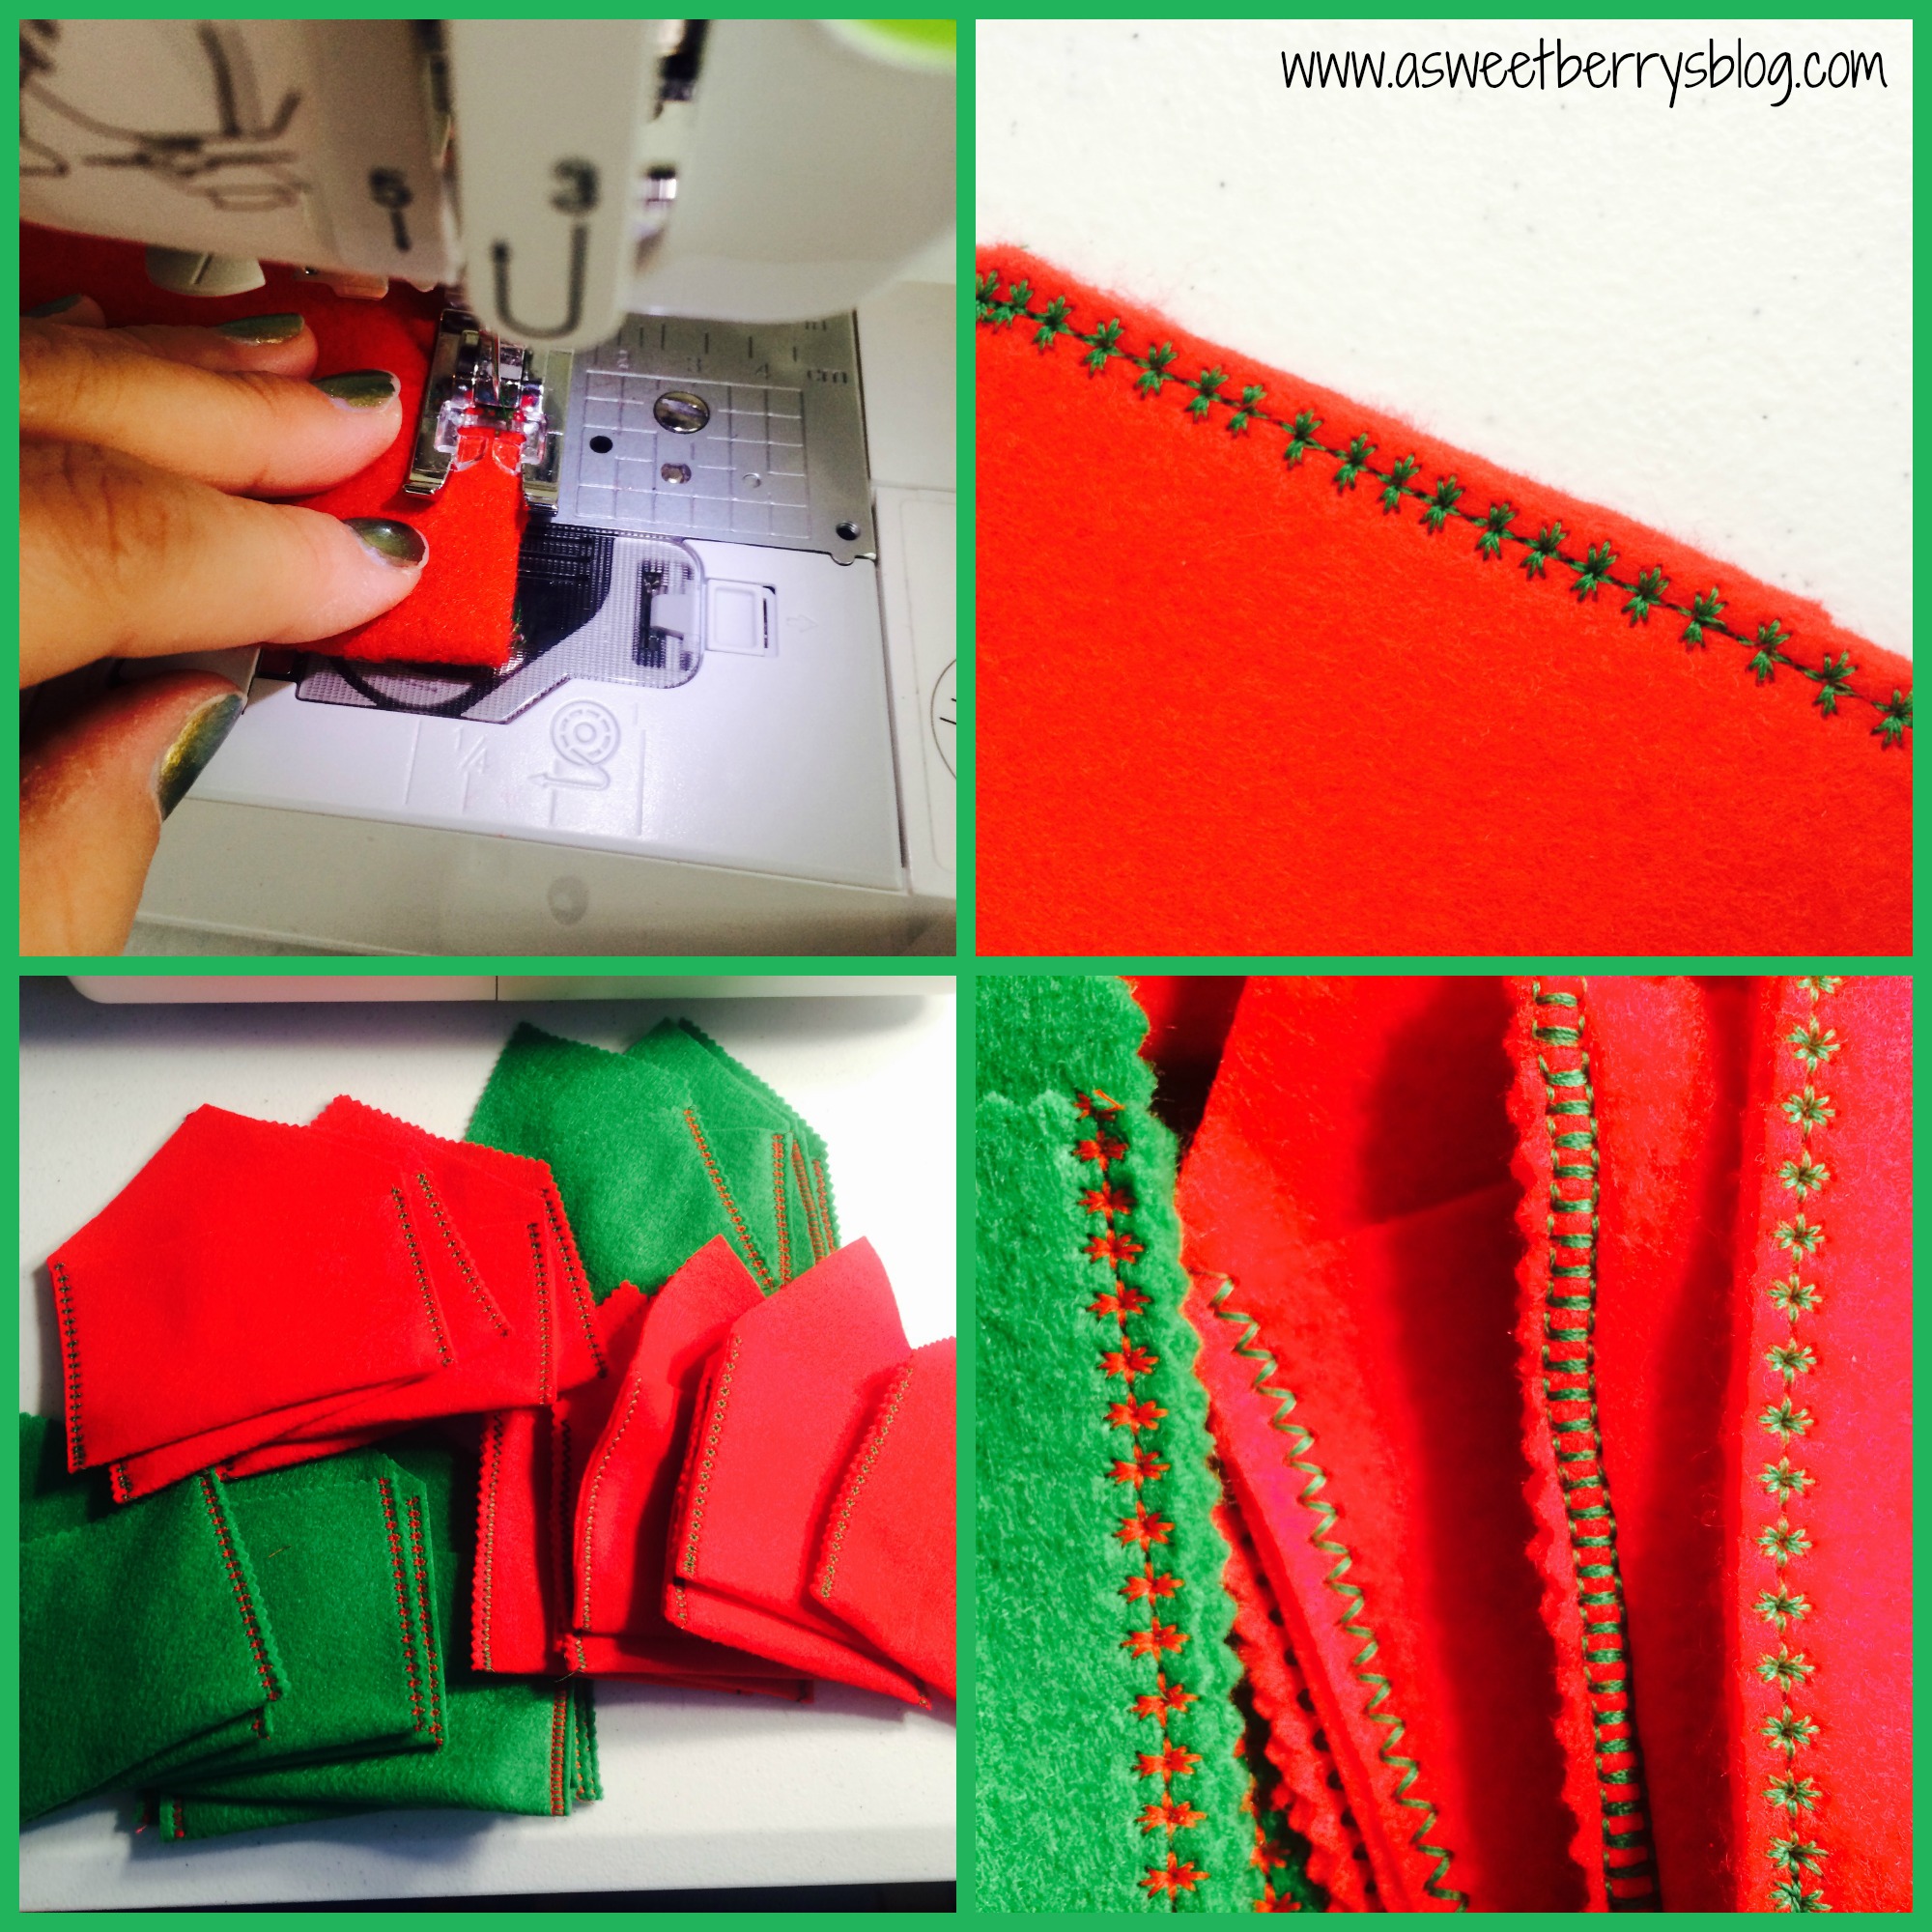
Once I had them all laid out, I sewed the strips onto the 6in x 2 in pieces using my sewing machine.   Then, I cut out the egg shapes.  Once they were cut, I placed them on my Eco-fi Plus piece of Felt and then sewed them down.
grass and finish
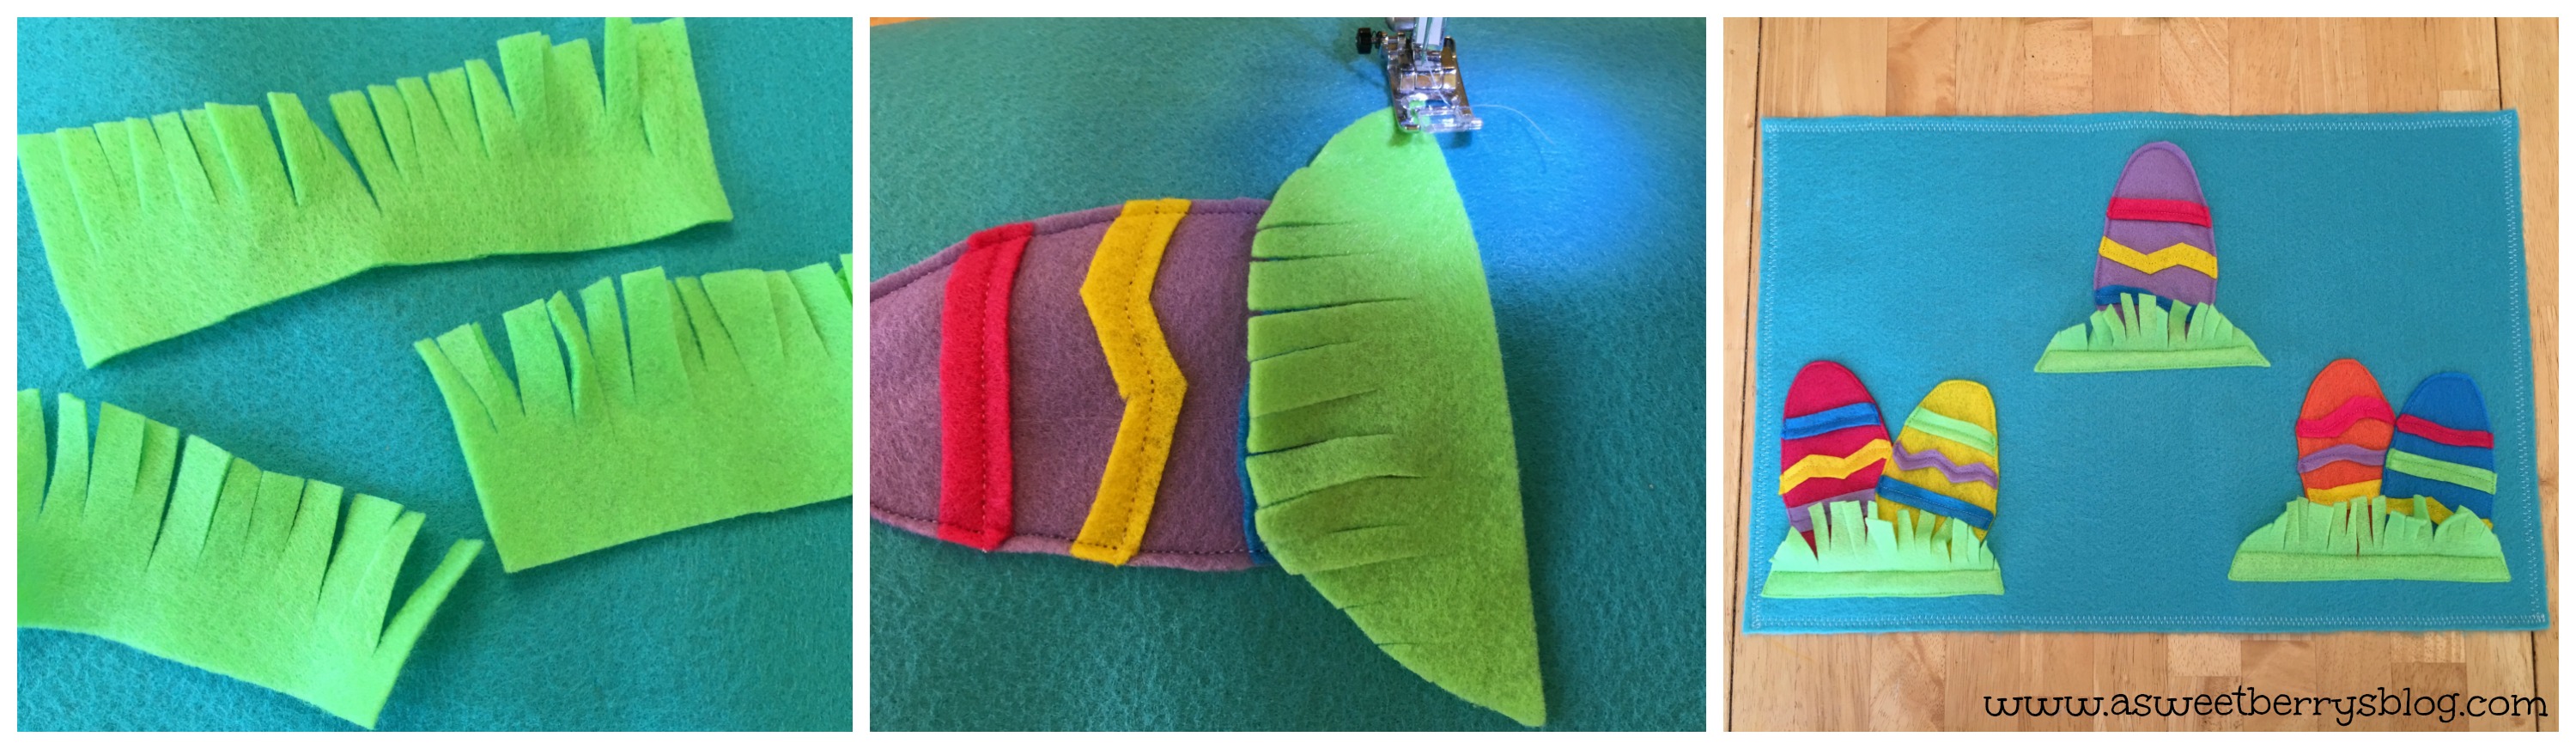
With my green felt, I cut strips to use as grass.  I snipped the sides different lengths and then rounded the edges.  Using the sewing machine, I sewed down the grass.  I sewed a rectangle along the bottom of the grass, so that the fringe would move.  Once my eggs and grass were all sewn on, I did a decorative stitch around the outside of the mat.
parts of finish
This was a really simple project.  Perfect for beginners!   The kids will love it!
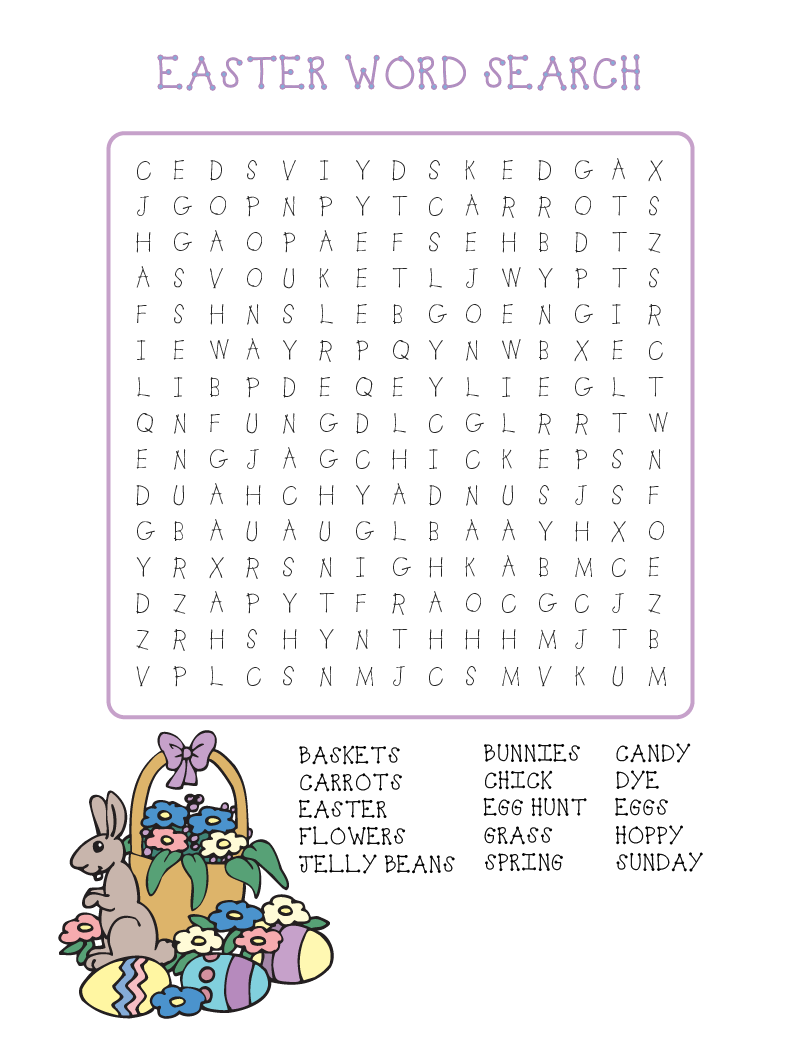
I have attached an Easter Word Search!  If you’d like to do it, Click HERE and print!
Screen Shot 2016-03-21 at 7.14.06 PM
Click the photo below to get lots of project ideas!
National Craft Month Series with 100Directions.com
Until next time…….

Personalized Felt Coasters with Kunin Felt

I love coasters, especially personalized ones.   And Kunin Felt is the perfect way to make your own personalized coasters!   Check out these Letter B coasters I made using KuninGroups gray and white chevron felt and a traditional white felt. Coasters
First, I cut eight 4 inch by 4 inch squares using my Fiskars rotary cutter, mat and ruler. cutting
Then, using the eCal2 software, I cut out the letter “B” using my Sizzix Eclips2 and cardstock.  Once my cardstock “B” was cut out, I pinned it to my white felt and then cut out four felt B’s. Letter B
I pinned the felt B’s to four of the felt squares and sewed them on. letters on
Once my letters were sewn on, I placed a second piece of felt the same size to the back and sewed it together to make it a little thicker! flip it over Hope you like my personalized felt coasters!

Until next time…..

Easy Fabric Key Fobs

Main Pic

Materials:
Fabric of your choice (colorful and white)
Printable Fabric Transfer
Color Printer
Iron
Key Fob Pieces
Rotary Cutter with Mat and Ruller
Scrap Felt
Sewing Machine with Thread
Pliers

Optional:
Sizzix Eclips 2 or other electronic cutting machine
Gift Tag SVG file
Ribbon

I started by printing my A Sweet Berry Designs berry logo on printable transfer paper and using the Sizzix Eclips2 to cut them out.  I was originally going to do circle keychains, so I cut our circles but ended up cutting them into more of a rectangle/square shape!  After they were printed and cut out, I laid them print side down onto my white fabric and ironed them with my iron set to the setting recommended on the transfer directions.
Cutting out berries
Then it was time to cut my fabric!  JoAnn Fabrics was having a Fat Quarter sale, so I purchased a variety of purples and greens.  I kept the fabric folded and cut a rectangle to my preferred size using my rotary cutter and ruler.  For the felt that I was going to place into the middle to give it a little fullness, I cut just a little smaller than the fabric cut out so that it was not visible once they were sewn in.  Once everything was cut, I placed the felt into the middle. materials
Then it was time to sew them up.  I used a zigzag stitch and sewed the three sides closed.  Once they were all sewn closed, I placed the berry logo where I wanted it and stitched it in place, also using the zigzag stitch.  Then it was time to place the key fob hardware clamp onto the sewn fabric.  I put them on the side that was folded.  I didn’t want flier marks on my hardware, so I used a scrap piece of fabric to place over the hardware while clamping it together, making sure that the spikes within the clamp went into the fabric.   I had just had my nails done, so my lovely husband was nice enough to add all of the split rings to my hardware clamps for me! sewing and metal
Voila! They were done!  I wanted to add cute little tags to mine, so I cut gift tags using my Sizzix Eclips 2.  Using my personalized stamp from Laura Kelly for Expressionery.com, I stamped my tag.  My stamp says “Created with Love From Katie Berry”. keyrings and labels
I hope you like my Fabric Key Fobs!  They were super easy to make!  I made them to go with my business cards for SNAP! Conference and they were a hit!  I still have a few left, so if you’d like one, just let me know!

Until next time……

Kunin Felt Easter Egg Bunting

Easter is right around the corner!   Why not brighten up your decor with this adorable KuninGroup Felt Easter Egg Bunting!   It was super easy and super fun! Final
I love using my Sizzix Eclips2 to cut out patterns for fabric or felt!   cutting
Once my patterns were cut out, I pinned them to my KuninGroup felt and then went to cutting!  I used pinking shears to give the eggs zigzag edges! cutting out felt
Then, it was time to sew them!  I decided to stuff them while they were still under the sewing foot.   I sewed all but about 2 inches, stuffed them, realigned my edges and finished sewing! sewing
Once they were all sewn, I used Tulip Fabric Paint to add decorations to them!   I think they turned out egg-tastic!  🙂 tulip fabric paint
Using bright pink baker’s twine and a big needle, I threaded the twine through the top part of the egg, making sure to go between the felt and stitches. twine
And then, it was complete!!!  It is absolutely adorable!   Final
Hope you like my Kunin Felt Easter Egg Bunting!

Until next time…..

To Talk or To Not Talk

Do you have little ones that love to talk and not eat when it comes to meal time?  Mine love to talk and not eat and we sometimes find ourselves still sitting at the table an hour later because the children aren’t done.

My oldest is in elementary school.  I’ve noticed that when I go there to have lunch with him, that they have a period of time at the beginning of lunch that they can not talk.  At the end of the table is a little stand that has a green side and a red side.  When the red side is facing them, they can’t talk and must eat.  When it gets turned to the green side facing them, they can talk quietly with their friends.   And it’s never quiet in the cafeteria when it’s time to talk!

So, since we have a hard time getting our food eaten within an hour, my husband suggested that we make a very similar stand for our table!  I decided to make mine with Kunin Felt!

Talking Side

Both Sides

Using my Sizzix Eclips2, I cut out a person and a talk bubble out of cardstock.  These two items were included in the Sure Cuts A Lot software that is used for the Eclips2.  Then, I used pins to attached the patterns to the felt and cut out two of each!  I ended up cutting out two small strips of red to put into one of my talk bubbles to symbolize “no talking”.  I then cut out a red and green rectangle, probably 6×10 inches.  Using my sewing machine, I sewed the people and bubbles onto the rectangle pieces. FeltCutSew

Using a strip of white felt (3×10 inches), I folded it into half and then in half again.  Using scissors, I cut a right triangle, so that when it was unfolded it was a triangle.  I pinned it to one of my rectangles with the right side up.  I sewed them to the rectangle and repeated with the other rectangle.  I then cut out a 3×6 inch rectangle from white for the base of my stand.  I pinned it and sewed it to the top part of my felt stand, leaving a 2 inch opening for turning it inside out and stuffing it.  Once it was stuffed, I sewed it up from the outside using my sewing machine.  You could also hand stitch. sewingandstuffing

One of my kids thought it was cool and one wasn’t so happy about it, well until it was turned to the talking side!   Usually we start our meal by saying a blessing and talking about what we are thankful for that day.  Now, we say our blessing, set the timer for our 10 minutes of no talking, and then we can talk about what we are thankful for that day. meal time

Benjamin actually ended up like the talking/no talking stand.  He wanted to snuggle and sleep with it!  He carried it around for a little while before it went back to the table. Benjamin Now, just so you know……we aren’t doing this to be mean.   We just have an every day issue with a little too much talking at the table and very little eating.  And after trying it, it has actually helped!  Benjamin will be going to Kindergarten in July, so this also helps get him ready for what lunch time will be like for him at the elementary school!

Hope you like my Talking/No Talking Felt Stand!

Until next time………..

Kunin Felt Advent Calendar

No December is complete without an Advent Calendar!   This year, I created my Advent Calendar using Felt from The Kunin Group!   My kids are super excited for December to arrive so that we can start opening them!

FINAL

materials
Materials used:
Felt from The Kunin Group (red, green, glitter white)
Sewing Machine with coordinating thread (green and red)
Envelope Patterns that I created using Adobe Illustrator
Letters that were reflected vertically that I created using Adobe Illustrator
Aleene’s Turbo Tacky Glue
Velcro
Laura Kelly Buttons from Buttons Galore & More
Heat & Bond
Pinking Shears
Scissors
Small clothes pins
Rope purchased from ACMoore

cutting
Using my envelope patterns, I cut out 24 envelopes.   I used both my regular scissors and my pinking shears just to change up the look.    Once I had them all cut out, I folded and pinned the sides to get them ready for sewing. pinning
My sewing machine does all kinds of cute little patterns, so I chose a couple of designs and sewed up the sides only to the top of the sides. sewing
Once they were all sewn up, I used my iron to help the flap on my envelopes to stay down. ironing
I didn’t think that a whole piece of velcro was needed, so I cut them into quarters and applied them to the inside of the flap.   Keeping the velcro pieces together, I closed my envelope so that they would line up.
velcro
Next, I was ready to cut out my numbers!   Using Heat & Bond, I ironed it to the back of my sheet of numbers, removed the backing and then ironed it to the back of the sheet of glitter white felt.  And then they were ready to cut out!  Once they were all cut out, I used an Excel knife to cut out the inside pieces of the numbers.
numbers
I really love Laura Kelly’s buttons from Buttons Galore & More and she has a great set of Christmas colors.   I chose a read and green for each envelope, glued them using Aleene’s Turbo Tacky Glue and then glued them to the flap of the envelope.  I also glued the numbers to the envelopes.
ButtonsAndGlue
After all of my envelopes were done, I decided to make a felt bow to attach to the string where I was going to clip my envelopes. BowAndRope

Once I was done, I attached the envelopes to the rope and hung it up! advent calendar

BrokenUp

   Ready for December!   And until next time…..

Repurposed Fabric Coasters

So, in trying to clean up my crafting area, I realized that I have a lot of scrap fabric laying around.  A lot of it is still good and enough fabric to do something with.  So, I decided to make fabric coasters with some of mine.

finals

 These coasters were super easy and even kids can help making them!

To make these awesome coasters, you will need:
-scrap fabric
-scissors
-a ruler
-thread (I used Coats & Clark) and needle
-bread ties

First, you are going to want to cut strips of fabric, roughly 3 inches by 24 inches.

needs

 Then, tie three strips together in a tight knot at one end.  Braid the strips until you get about three inches from the bottom.  Place the bread tie at the end of the braid to hold it into place.   Using a needle threaded so that you have double thread, sew another strip to each of the three braided strips.  This stitch can be loose, it’s just needed to make the strips longer and it will be braided in, so it won’t come apart.  After all three extra strips are sewn on, continue to braid until you are near the end.  Using another bread tie, secure it around the braid to hold it in place.

steps

After you have your braided strand, start with the end that has the knot.  Begin winding it. Run your needle and thread through the knot and then the part that is wound up, to hold it in place.  Continue winding your strand flat and place stitches through the strand as you keep winding it.  This will help hold everything in place and keep it from falling apart.  Once you get to the end, fold in and under the extra fabric and sew it to the wound up fabric to again hold it in place.

Then, place it on your table and put your glass on it!!!!!

CoastersFinal

I just love these and they look great on my front porch table for our evening rocks while the boys play!!!!

Hope you like these as much as I do!

Until next time……………

Ahoy there Matey! iPad Mini Travel Cases

So, in preparing for a trip to New York, I knew we’d be taking the boys iPad Minis with us.  Since they were going to be going into their backpacks to carry on the plane, I wanted to make sure that they weren’t going to get all scratched up.  So, I put together these super cute little iPad covers.   As some of you may know, my friend Laura Kelly Walters has an awesome array of different products, including a few different fabric designs and buttons.   I just happen to love her Tossed Pirate fabric!  It’s so fun and so boy!!!    She is such a creative person and I truly admire her!   But here is how I made these awesome iPad Mini travel cases!!!

image3

Materials used:

Laura Kelly’s Tossed Pirate on Blue Cotton Fabric, available online at Hancock Fabrics

Black Quilt Material

Guterman thread

A metal-less Hair rubberband

Laura Kelly Mix Buttons, from Buttons Galore & More

materials

First, I measured the iPad mini itself and the cut my fabrics (8.5×11 inches).  I then pinned the quilted fabric together.  And since these are the same on both sides, it doesn’t matter which way you pin them.

quilted insidesI then sewed them together using the sewing machine, leaving the top open.

quilt sewingI wanted to make sure the iPads themselves would fit and of course they did, just right!!

measuringThen it was on to sewing the fabric together.  For the pirate fabric, I put the sides together with the right sides facing together.

fabric right sides togetherAnd then I sewed those together, again leaving the top open.

sewing fabricThen, taking my metal-less hair rubberband, I pinned it in place and sewed it to the outside of the fabric.

rubberband With the pirate fabric the turned right side out, I placed it inside the quilted pocket, making sure that the rubberband was tucked down in between the pockets.

rightside to right sideThen, I pinned the pockets together and began to sew around the top, leaving about two inches open so that I could turn the pirate fabric right side out and then stuff the quilted fabric into the pirate fabric, creating a quilted pocket!

baginbagLastly, I sewed on a big button from Laura Kelly’s Mix Button collection and then hot glued a coordinating button on top so that the thread was hidden.

buttonAnd Voila!  After inserting the iPad Mini, you can fold over the top just enough to cover the iPad Mini and hook the rubberband onto the button!

closedAnd there you have it!!! And there you have it!!! finished

Hope you like my iPad Mini Travel Covers!  They were fun to make and were quite easy!  I love them and so do the boys!!

Until next time…….

4th of July Garden Flag

20130606-221033.jpg

In addition to my 4th of July Banner for the I Love The USA Blog Hop using Laura Kelly’s Patriotic Fabric, I made addition projects.   This project was a simple 4th of July Garden Flag!  I love it and it will proudly hang in my front lawn for the 4th!!!

IMG_6929

Materials used:

Laura Kelly’s Patriotic Fabric, available at JoAnns Stores

Burlap, also available at JoAnns Stores

Laura Kelly’s Patriotic Mix of Buttons from Buttons Galore & More

Coats & Clark Thread

Apple Barrel Acrylic Paints

Coats and Clark Embroidery Floss

For the sizing of the flag that I wanted, I basically just took the measurement from a garden flag that I have.

IMG_6821

Next, I folded over the edges and sewed them just to keep it from fraying.

IMG_6822

On the burlap, I used a pen to write out Happy 4th of July.

IMG_6827

Then, I painted the letters with Apple Barrel Acrylic Paints.

IMG_6832

Next, I used Coats & Clark Embroidery Floss and Laura Kelly’s Patriotic Mix buttons to attach the burlap to the flag.

IMG_6924

I made sure to tie them so close to the edge of the burlap so that if the burlap decided to lose a few strands, it wouldn’t fall off.

IMG_6925

I hope you like my little 4th of July Garden Flag!

Click here to go back to my original I Love the USA Blog Hop Page!