Tag Archives: Fiskars

Mason Jar Lid Fabric Wreath

Yay!  It’s Craft Lightning time again!   And this one is Christmas and Holiday crafts!  Christmas is one of my favorite times of the year!  Especially now that I have kids!  This Mason Jar Lid Fabric Wreath could even be done with the kids! final
Materials:
Green Fabric
Mason Jar Lid
Fiskars Scissors
Ad-tech Hot Glue Gun
Holly Berries (I got these from A.C. Moore)
Ribbon
materials
The steps for this Mason Jar Lid Fabric Wreath are pretty easy!  And it only took about 15 minutes to do!
putting-it-together
Step 1 – Cut your fabric into strips.  I just did a rough cut making the strips about 10 inches long and .75 – 1 inch wide.
Step 2 – Fold the pieces in half.
Step 3 – Place the folded strip under the lid.
Step 4 –  Feed the lose ends through the folded end and pull tight.
last-steps
Step 5 – Trim your wreath to your liking!  I trimmed my wreath so that it wasn’t so big.
Step 6 – Remove the berries from the stem.
Sept 7 – Hot glue the berries onto the wreath!  Parents, do this if you are doing this project with the kids.

I added a piece of ribbon to hang it on the tree!
wreath
I hope you enjoyed my Mason Jar Lid Fabric Wreath!

Be sure to click below and check out other Craft Lightning Crafts!

Until next time……

Easter Egg Place Mat

Easter is right around the corner, as in this upcoming weekend!  Everyone will be sitting down to have an Easter meal with the family!  Why not brighten up the table with an Easter Egg Place Mat!   This one is made with Kunin Felt!
placemat
Materials needed:
Bright colored Felt (Kunin is my brand of choice!  I used Eco-fi Plus for the mat and ClassicFelt for the eggs and grass)
Scissors
Sewing Machine
Thread
felt
First, I cut several pieces of felt that were about 6in x 2in.  Then, I cut little strips to use as the decorations on the eggs.  I made some zigzag, some curvy and some straight.
eggs
Once I had them all laid out, I sewed the strips onto the 6in x 2 in pieces using my sewing machine.   Then, I cut out the egg shapes.  Once they were cut, I placed them on my Eco-fi Plus piece of Felt and then sewed them down.
grass and finish
With my green felt, I cut strips to use as grass.  I snipped the sides different lengths and then rounded the edges.  Using the sewing machine, I sewed down the grass.  I sewed a rectangle along the bottom of the grass, so that the fringe would move.  Once my eggs and grass were all sewn on, I did a decorative stitch around the outside of the mat.
parts of finish
This was a really simple project.  Perfect for beginners!   The kids will love it!
I have attached an Easter Word Search!  If you’d like to do it, Click HERE and print!
Screen Shot 2016-03-21 at 7.14.06 PM
Click the photo below to get lots of project ideas!
National Craft Month Series with 100Directions.com
Until next time…….

Easy Fabric Key Fobs

Main Pic

Materials:
Fabric of your choice (colorful and white)
Printable Fabric Transfer
Color Printer
Iron
Key Fob Pieces
Rotary Cutter with Mat and Ruller
Scrap Felt
Sewing Machine with Thread
Pliers

Optional:
Sizzix Eclips 2 or other electronic cutting machine
Gift Tag SVG file
Ribbon

I started by printing my A Sweet Berry Designs berry logo on printable transfer paper and using the Sizzix Eclips2 to cut them out.  I was originally going to do circle keychains, so I cut our circles but ended up cutting them into more of a rectangle/square shape!  After they were printed and cut out, I laid them print side down onto my white fabric and ironed them with my iron set to the setting recommended on the transfer directions.
Cutting out berries
Then it was time to cut my fabric!  JoAnn Fabrics was having a Fat Quarter sale, so I purchased a variety of purples and greens.  I kept the fabric folded and cut a rectangle to my preferred size using my rotary cutter and ruler.  For the felt that I was going to place into the middle to give it a little fullness, I cut just a little smaller than the fabric cut out so that it was not visible once they were sewn in.  Once everything was cut, I placed the felt into the middle. materials
Then it was time to sew them up.  I used a zigzag stitch and sewed the three sides closed.  Once they were all sewn closed, I placed the berry logo where I wanted it and stitched it in place, also using the zigzag stitch.  Then it was time to place the key fob hardware clamp onto the sewn fabric.  I put them on the side that was folded.  I didn’t want flier marks on my hardware, so I used a scrap piece of fabric to place over the hardware while clamping it together, making sure that the spikes within the clamp went into the fabric.   I had just had my nails done, so my lovely husband was nice enough to add all of the split rings to my hardware clamps for me! sewing and metal
Voila! They were done!  I wanted to add cute little tags to mine, so I cut gift tags using my Sizzix Eclips 2.  Using my personalized stamp from Laura Kelly for Expressionery.com, I stamped my tag.  My stamp says “Created with Love From Katie Berry”. keyrings and labels
I hope you like my Fabric Key Fobs!  They were super easy to make!  I made them to go with my business cards for SNAP! Conference and they were a hit!  I still have a few left, so if you’d like one, just let me know!

Until next time……

Repurposed Fabric Coasters

So, in trying to clean up my crafting area, I realized that I have a lot of scrap fabric laying around.  A lot of it is still good and enough fabric to do something with.  So, I decided to make fabric coasters with some of mine.

finals

 These coasters were super easy and even kids can help making them!

To make these awesome coasters, you will need:
-scrap fabric
-scissors
-a ruler
-thread (I used Coats & Clark) and needle
-bread ties

First, you are going to want to cut strips of fabric, roughly 3 inches by 24 inches.

needs

 Then, tie three strips together in a tight knot at one end.  Braid the strips until you get about three inches from the bottom.  Place the bread tie at the end of the braid to hold it into place.   Using a needle threaded so that you have double thread, sew another strip to each of the three braided strips.  This stitch can be loose, it’s just needed to make the strips longer and it will be braided in, so it won’t come apart.  After all three extra strips are sewn on, continue to braid until you are near the end.  Using another bread tie, secure it around the braid to hold it in place.

steps

After you have your braided strand, start with the end that has the knot.  Begin winding it. Run your needle and thread through the knot and then the part that is wound up, to hold it in place.  Continue winding your strand flat and place stitches through the strand as you keep winding it.  This will help hold everything in place and keep it from falling apart.  Once you get to the end, fold in and under the extra fabric and sew it to the wound up fabric to again hold it in place.

Then, place it on your table and put your glass on it!!!!!

CoastersFinal

I just love these and they look great on my front porch table for our evening rocks while the boys play!!!!

Hope you like these as much as I do!

Until next time……………

Styrofoam Christmas Tree!

Christmas is my all time favorite time of the year!   And creating Christmas decorations is one of my favorite things to do, along with creating memories!!!

Check out this cute little tree I made using Styrofoam, Laura Kelly’s buttons from Buttons Galore and Sculpey Clay!!!!

tree

suppliesMaterials needed:

Styrofoam Cone

Sculpey Bake Shop Yellow Clay

Laura Kelly’s Radical Red and Candy Apple Green buttons from Buttons Galore & More

Wire

Folk Art Green Paint

Adtech Hot Glue gun and glue

Green Felt

Mini Pom Pom Ribbon from May Arts Ribbon

Fiskars Scissors

paintingI didn’t want the white cone to show, so I painted it green and let it dry before I started gluing the buttons on!

While it was drying, I made a star out of Sculpey Clay and added a curled wire.  I stuck it in the oven and baked it according to instructions.

clay starAfter the cone was dry, I used hot glue to attach the buttons in a single layer to cover the entire cone.  Then I added a few red ones as ornaments!  I also added a yellow button to the center of the star.

applying buttons

Using a scrap piece of green felt, Fiskars scissors and Mini Pom Pom Ribbon from May Arts Ribbon, I made a tree skirt.  I cut a circle out of the felt and then glued the ribbon around the edge of the circle.   It made a very cute little tree skirt to go with my styrofoam button tree!

skirt

tree

This lovely tree now sits on my dining room table as our center piece!  Hope you like it as much as my family and I do!!!!

I would like to thank my awesome friend Laura Kelly for the opportunity to work with her and to get the chance and the experience of working with so many amazing products!!!  Not only is she a great friend, but she has given me the opportunity to be her intern, as she has become the Resident Designer for Rit Dye!!!  Check her out on Rit Dye’s Blog!!!  Thank you Laura!  I love you!

Until next time……

ASWEETBERRYLOGO

Halloween Popcorn Blog Hop

Halloween is just around the corner and will be here before we know it!

My friend, Laura Kelly put together this cute and creative blog hop, sending out an envelope of goodies which included a popcorn box and some embellishments to go with it.  package
In our directions for this blog hop, it said:

“The objective is to create in whatever way you like best with whatever products you like to feature and simply be a part of something fun…something that connects your passion to those passions of others.”

So, with that being said, I decided to use some things I had lying around in my craft area.

picstitch3

I decided to make a Frankenstein Popcorn Box!

Materials used:

The Popcorn box, provided by Laura

Black Buttons from Laura Kelly’s mix buttons from Buttons Galore & More

Apple Barrel Spring Green Acrylic Paint by Plaid

Googly eyes

Black felt, purchased from JoAnn Stores

Beacon’s 527 Multi-use Glue

Mini Glue Dots

Fiskars Scissors

Black Sharpie Marker

a paint brush

Instructions:

1.  I painted the popcorn box green.  I did three coats (letting it dry between coats) to make sure everything on the box was covered up.

2.   I cut two strips from the black felt and then cut triangles out of one side of the strips to make it look like hair.  Then I glued it on to the top of the box using the Beacon’s 527 multi-use glue.

picstitch2

3.  Using glue dots, I glued the black buttons together to make them look like bolts.   I used about 6 small buttons and three larger ones for the bolt heads.  I then used glue dots to attach the bolts to the sides of the box.

picstitch4

4. Using a black Sharpie marker, I drew on the mouth and the stitches.

5.  Then I glued the googly eyes on.

Super easy and so much fun!   And he got filled with yummy goodness of popcorn, marshmallows and Pumpkin Spice flavored Hershey kisses!   🙂

photo

My children love Halloween just as much as I do!  And they love popcorn too!   So when I got to making my Halloween Popcorn Box for this blog hop, they were loving it!   And since I only made one, I now have to go buy the contents to make another one, unless Laura has any extra boxes lying around!!!!  🙂

This past week, Laura sent out a special little thanks for being a part of this blog hop!   She is super sweet!     Thanks my friend!  🙂

picstitch1

There were quite a few other blog hoppers that joined in on this blog hop, so hop over to Laura Kelly’s blog to check out the rest of the participants!!  A special thanks to Cre8time for supporting the Halloween Popcorn Box Blog Hop!  And to Laura Kelly for allowing me the chance to participate!

Be sure to click on the picture below for a chance to win a $100 gift card to Disney (park, store, or online)!!PopcornBlogHopPrize

I hope you like my Frankenstein Popcorn Box!  I’d love to hear what you think in my comments section!!

And until next time……

katie-asweetberry

Tooth Fairy Pillow

Waiting for the Tooth Fairy!

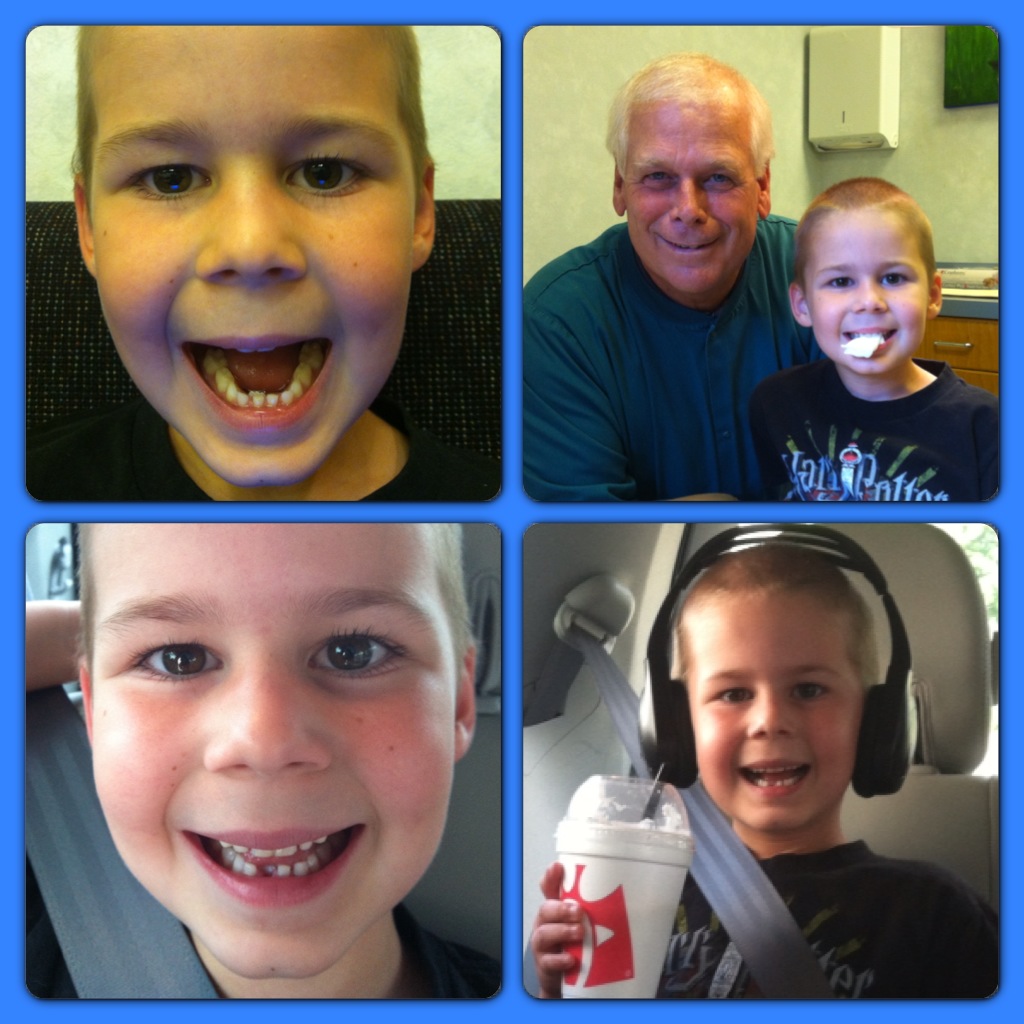
My six year old, Landon is to the age where it’s time for those good old baby teeth to start falling out.  Luckily for him, the dentist had to pull his very first baby tooth because his new adult teeth were coming in behind his baby teeth.  After some x-rays, the great Dr. Dan said that the baby tooth would not come loose, so it would have to be pulled.  Landon was actually excited because this meant that the tooth fairy was going to come!  IMG_8342

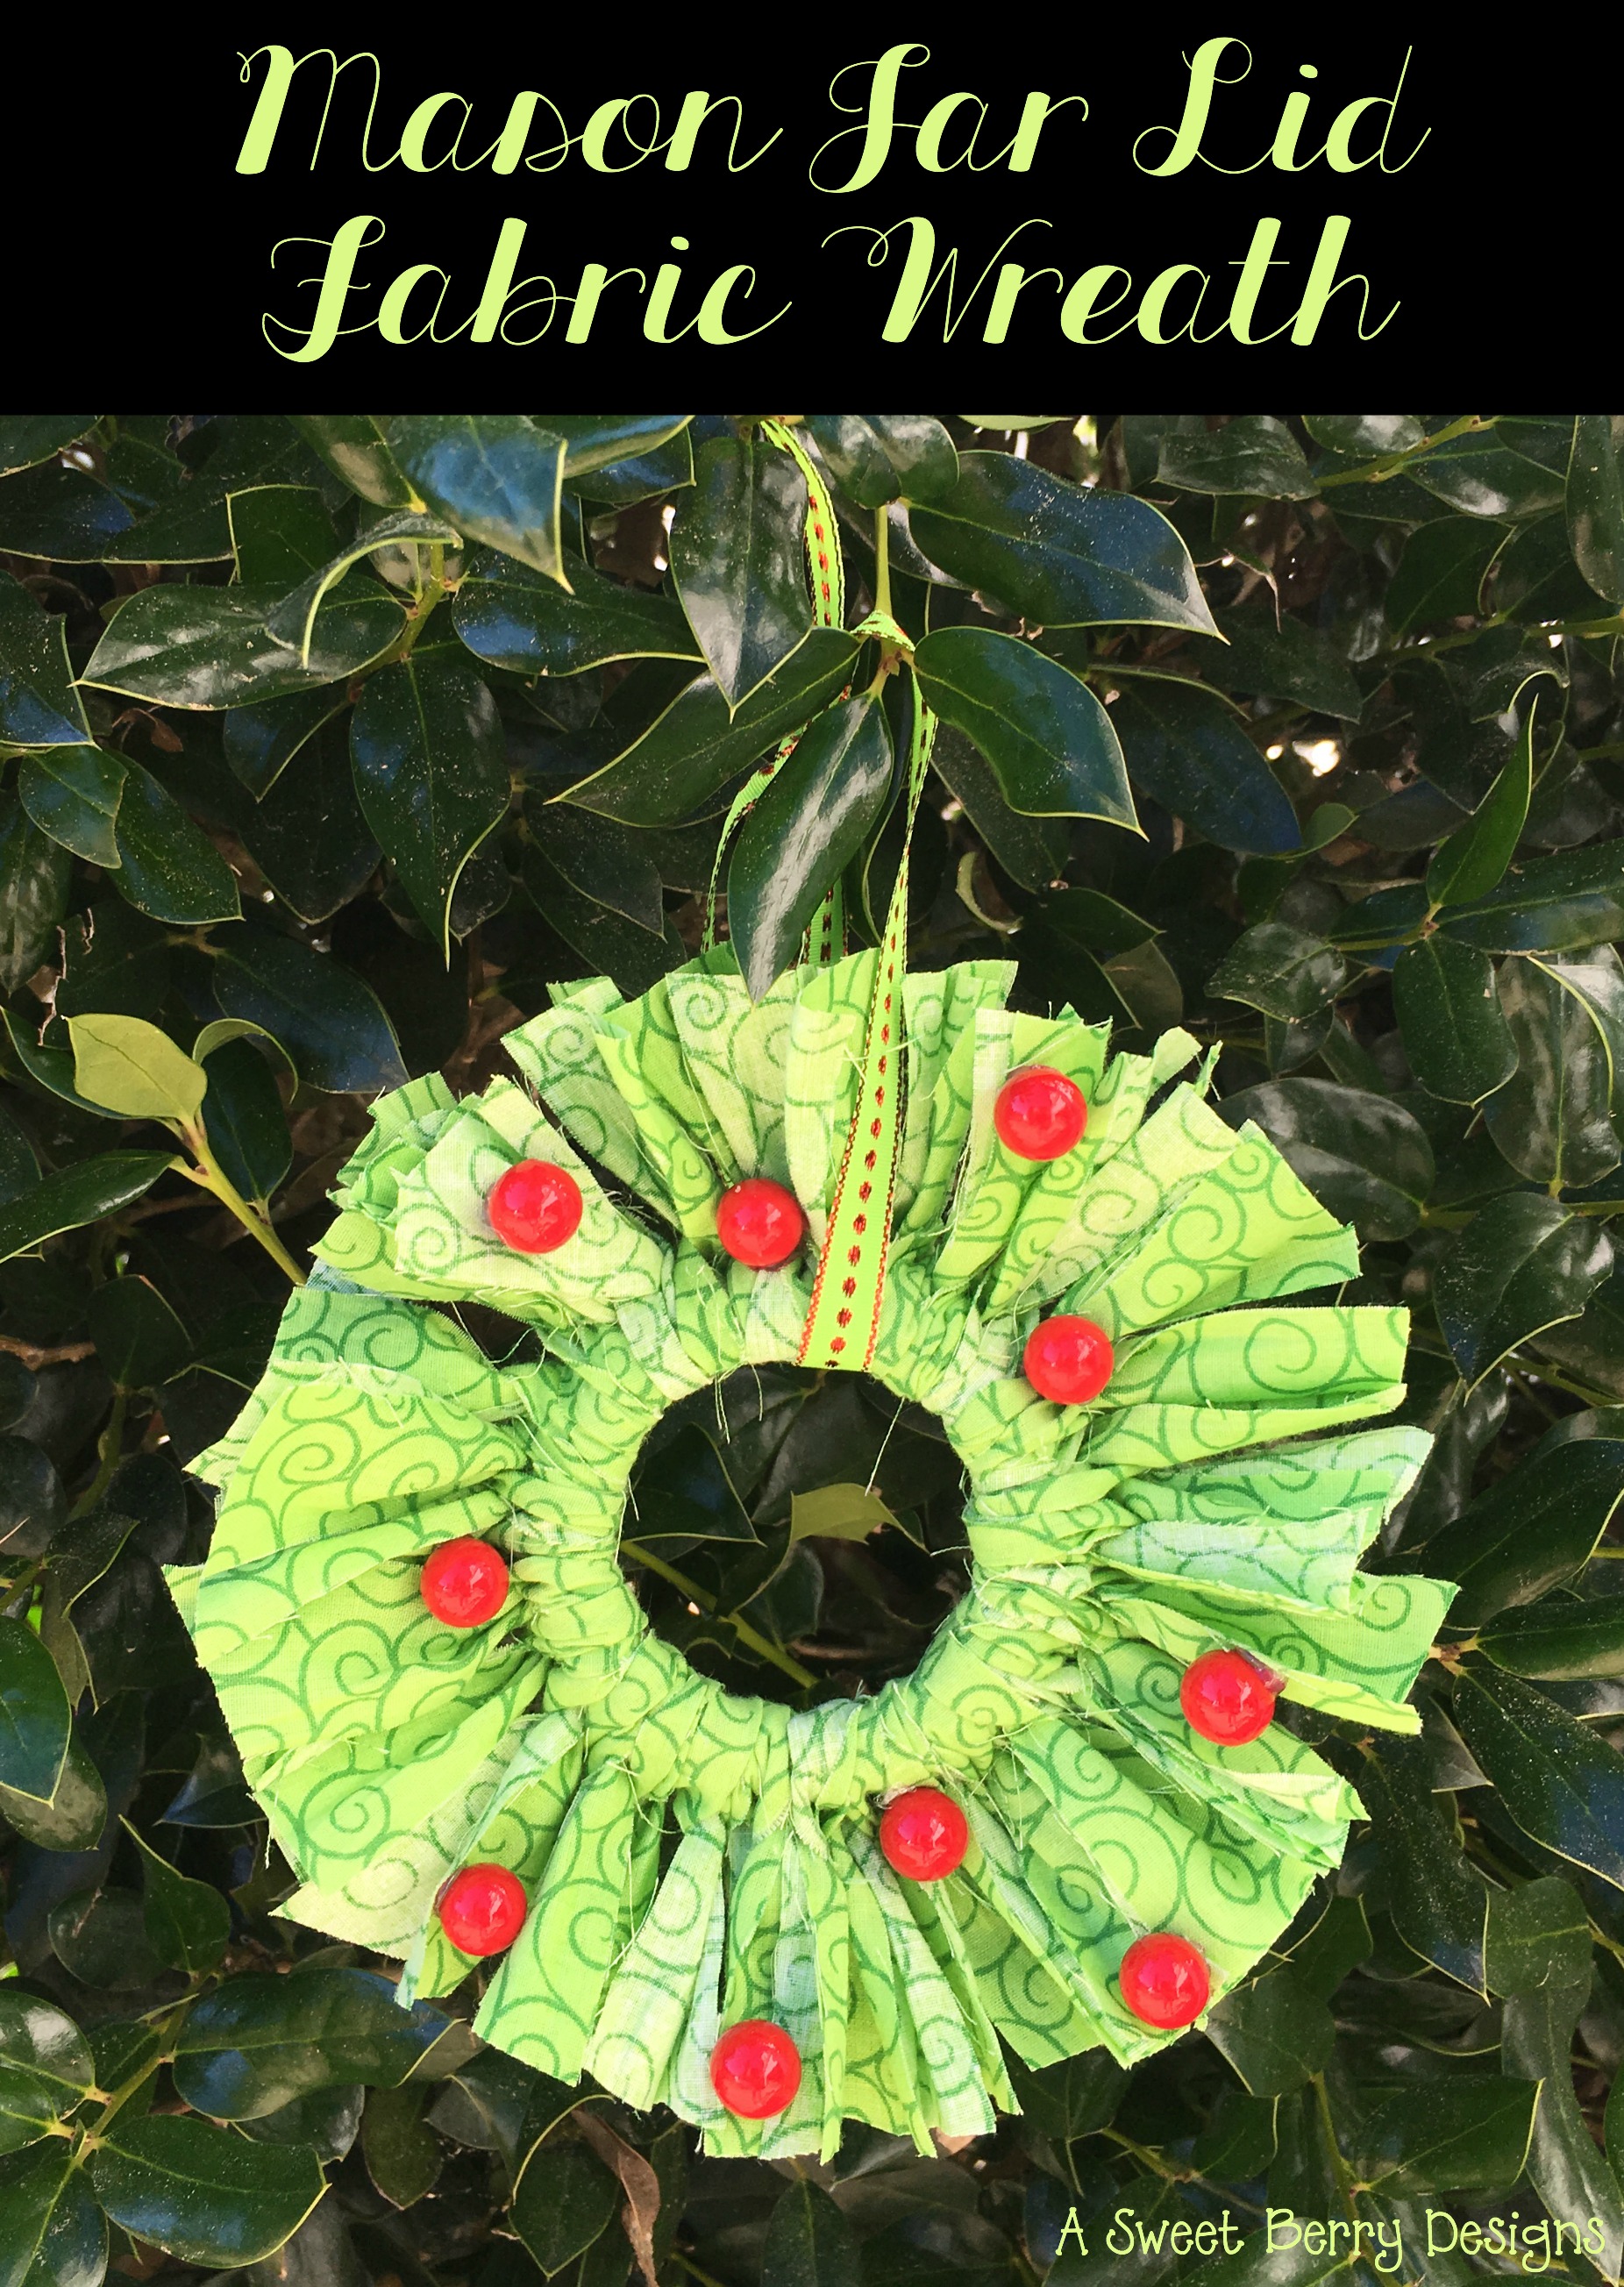
I have had the idea of making a Tooth Fairy Pillow on my mind for quite a while.  And now the time is here!!!

Materials I used:

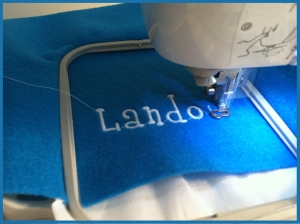
An embroidery machine

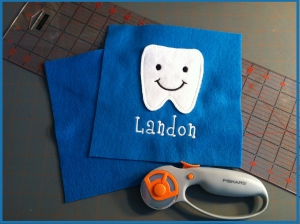
Felt, purchased from JoAnn Fabrics

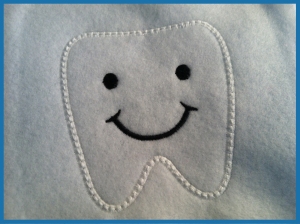
Planet Applique’s Tooth Applique

Coats & Clark Thread

Fiskars Rotary Cutter and Cutting Mat/Ruler
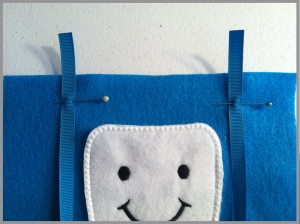
Blue Ribbon

Laura Kelly Mix Buttons from Buttons Galore & More

finished pillow

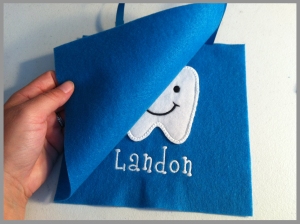
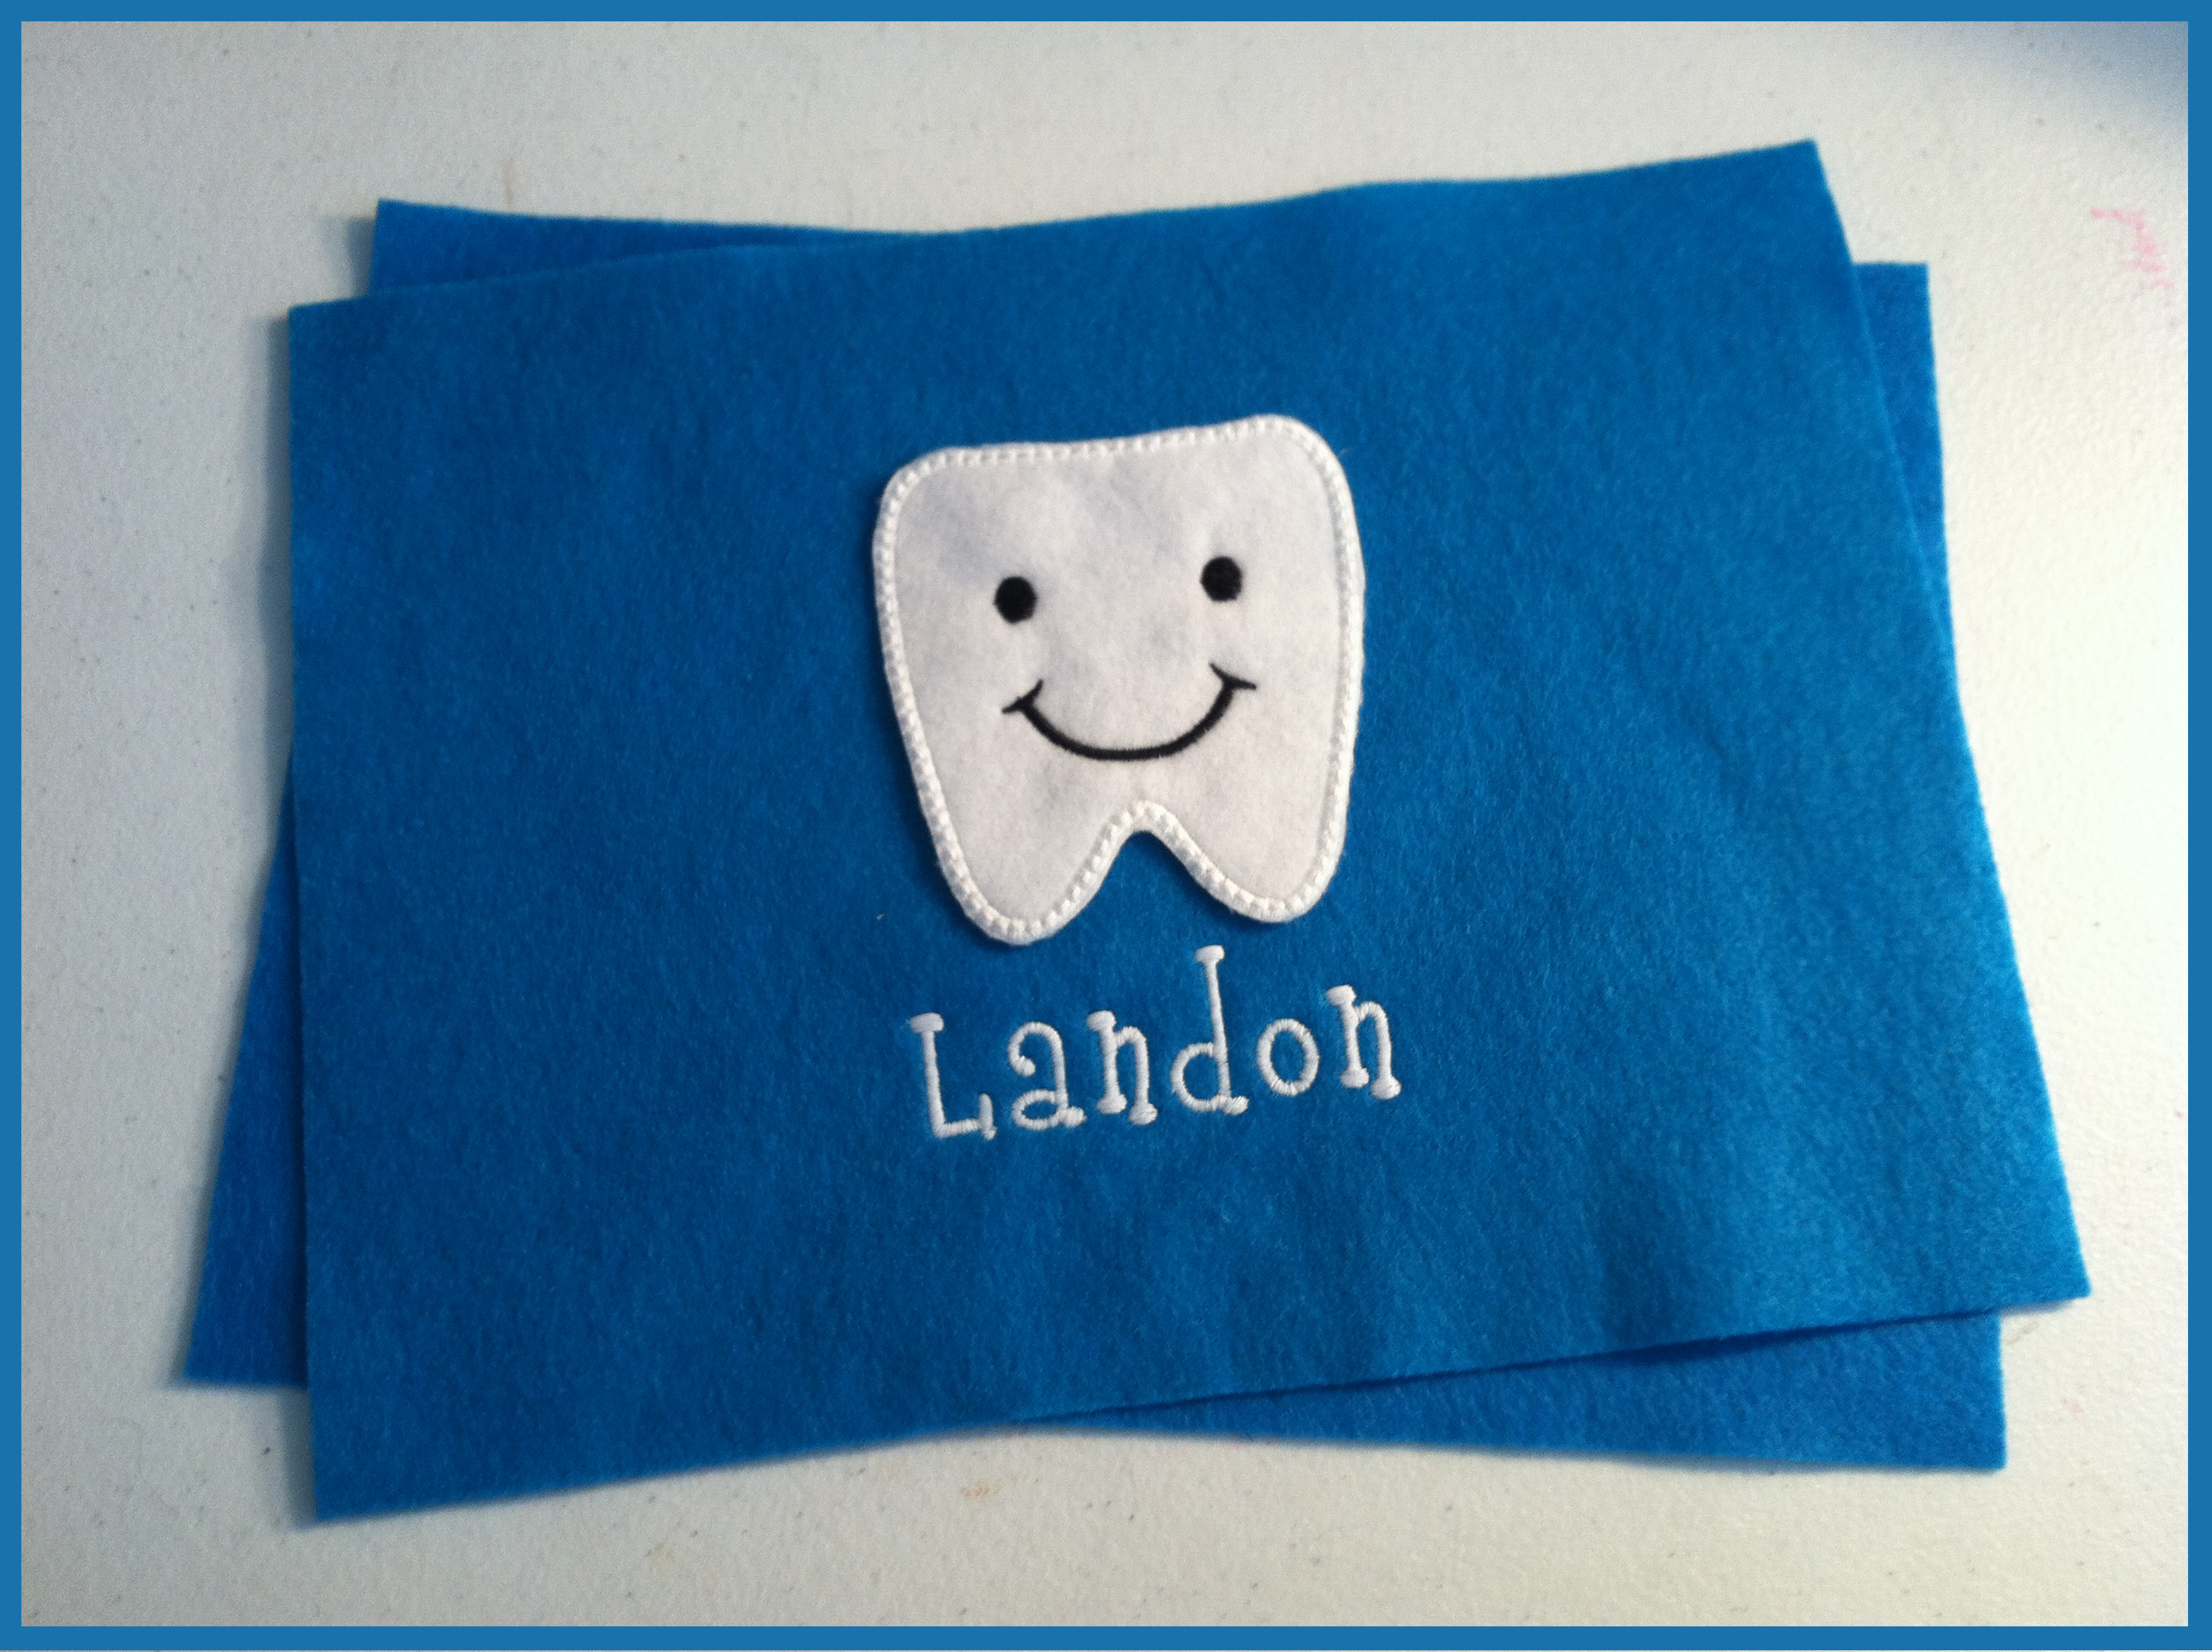
First, using white felt, I appliqued the tooth.  I then cut it out right at the edge of the applique.   Next, I embroidered Landon’s name onto the blue felt.

tooth applique namingAfter his name was done, I lined up the tooth cutout and then using my sewing machine, I sewed it on, leaving the top unsewn so that it would create a pocket!

time to assemble

The it was time to cut it to the exact size I wanted it.  I cut it at 8×6 inches.

fiskars and trimmed
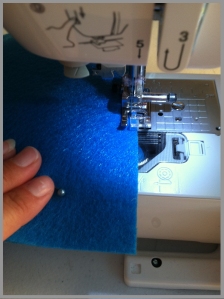
I used ribbon to hang it, so I pinned the ribbon to the right side of the pillow and stitched it back and forth a couple of times at the top of the pillow so that it would stay in place once I began to sew it.

ribbon pinned

Before sewing the actual pillow together, I put the right sides of the felt together.  I guess the back doesn’t really matter since it is plain, but both the tooth and the ribbon needed to be on the inside of the two pieces.

right sides togetherThen, I sewed the edges together leaving about a 2 inch opening on the side, so that I could flip it right side out and stuff it.

sew togetherOnce it was flipped right side out, it was ready for some stuffing!

ready to be stuffedI used Poly-fil, which you can get from any fabric store, even Wal-mart carries it. I used Poly-fil, which you can get from any fabric store, even Wal-mart carries it. stuffing

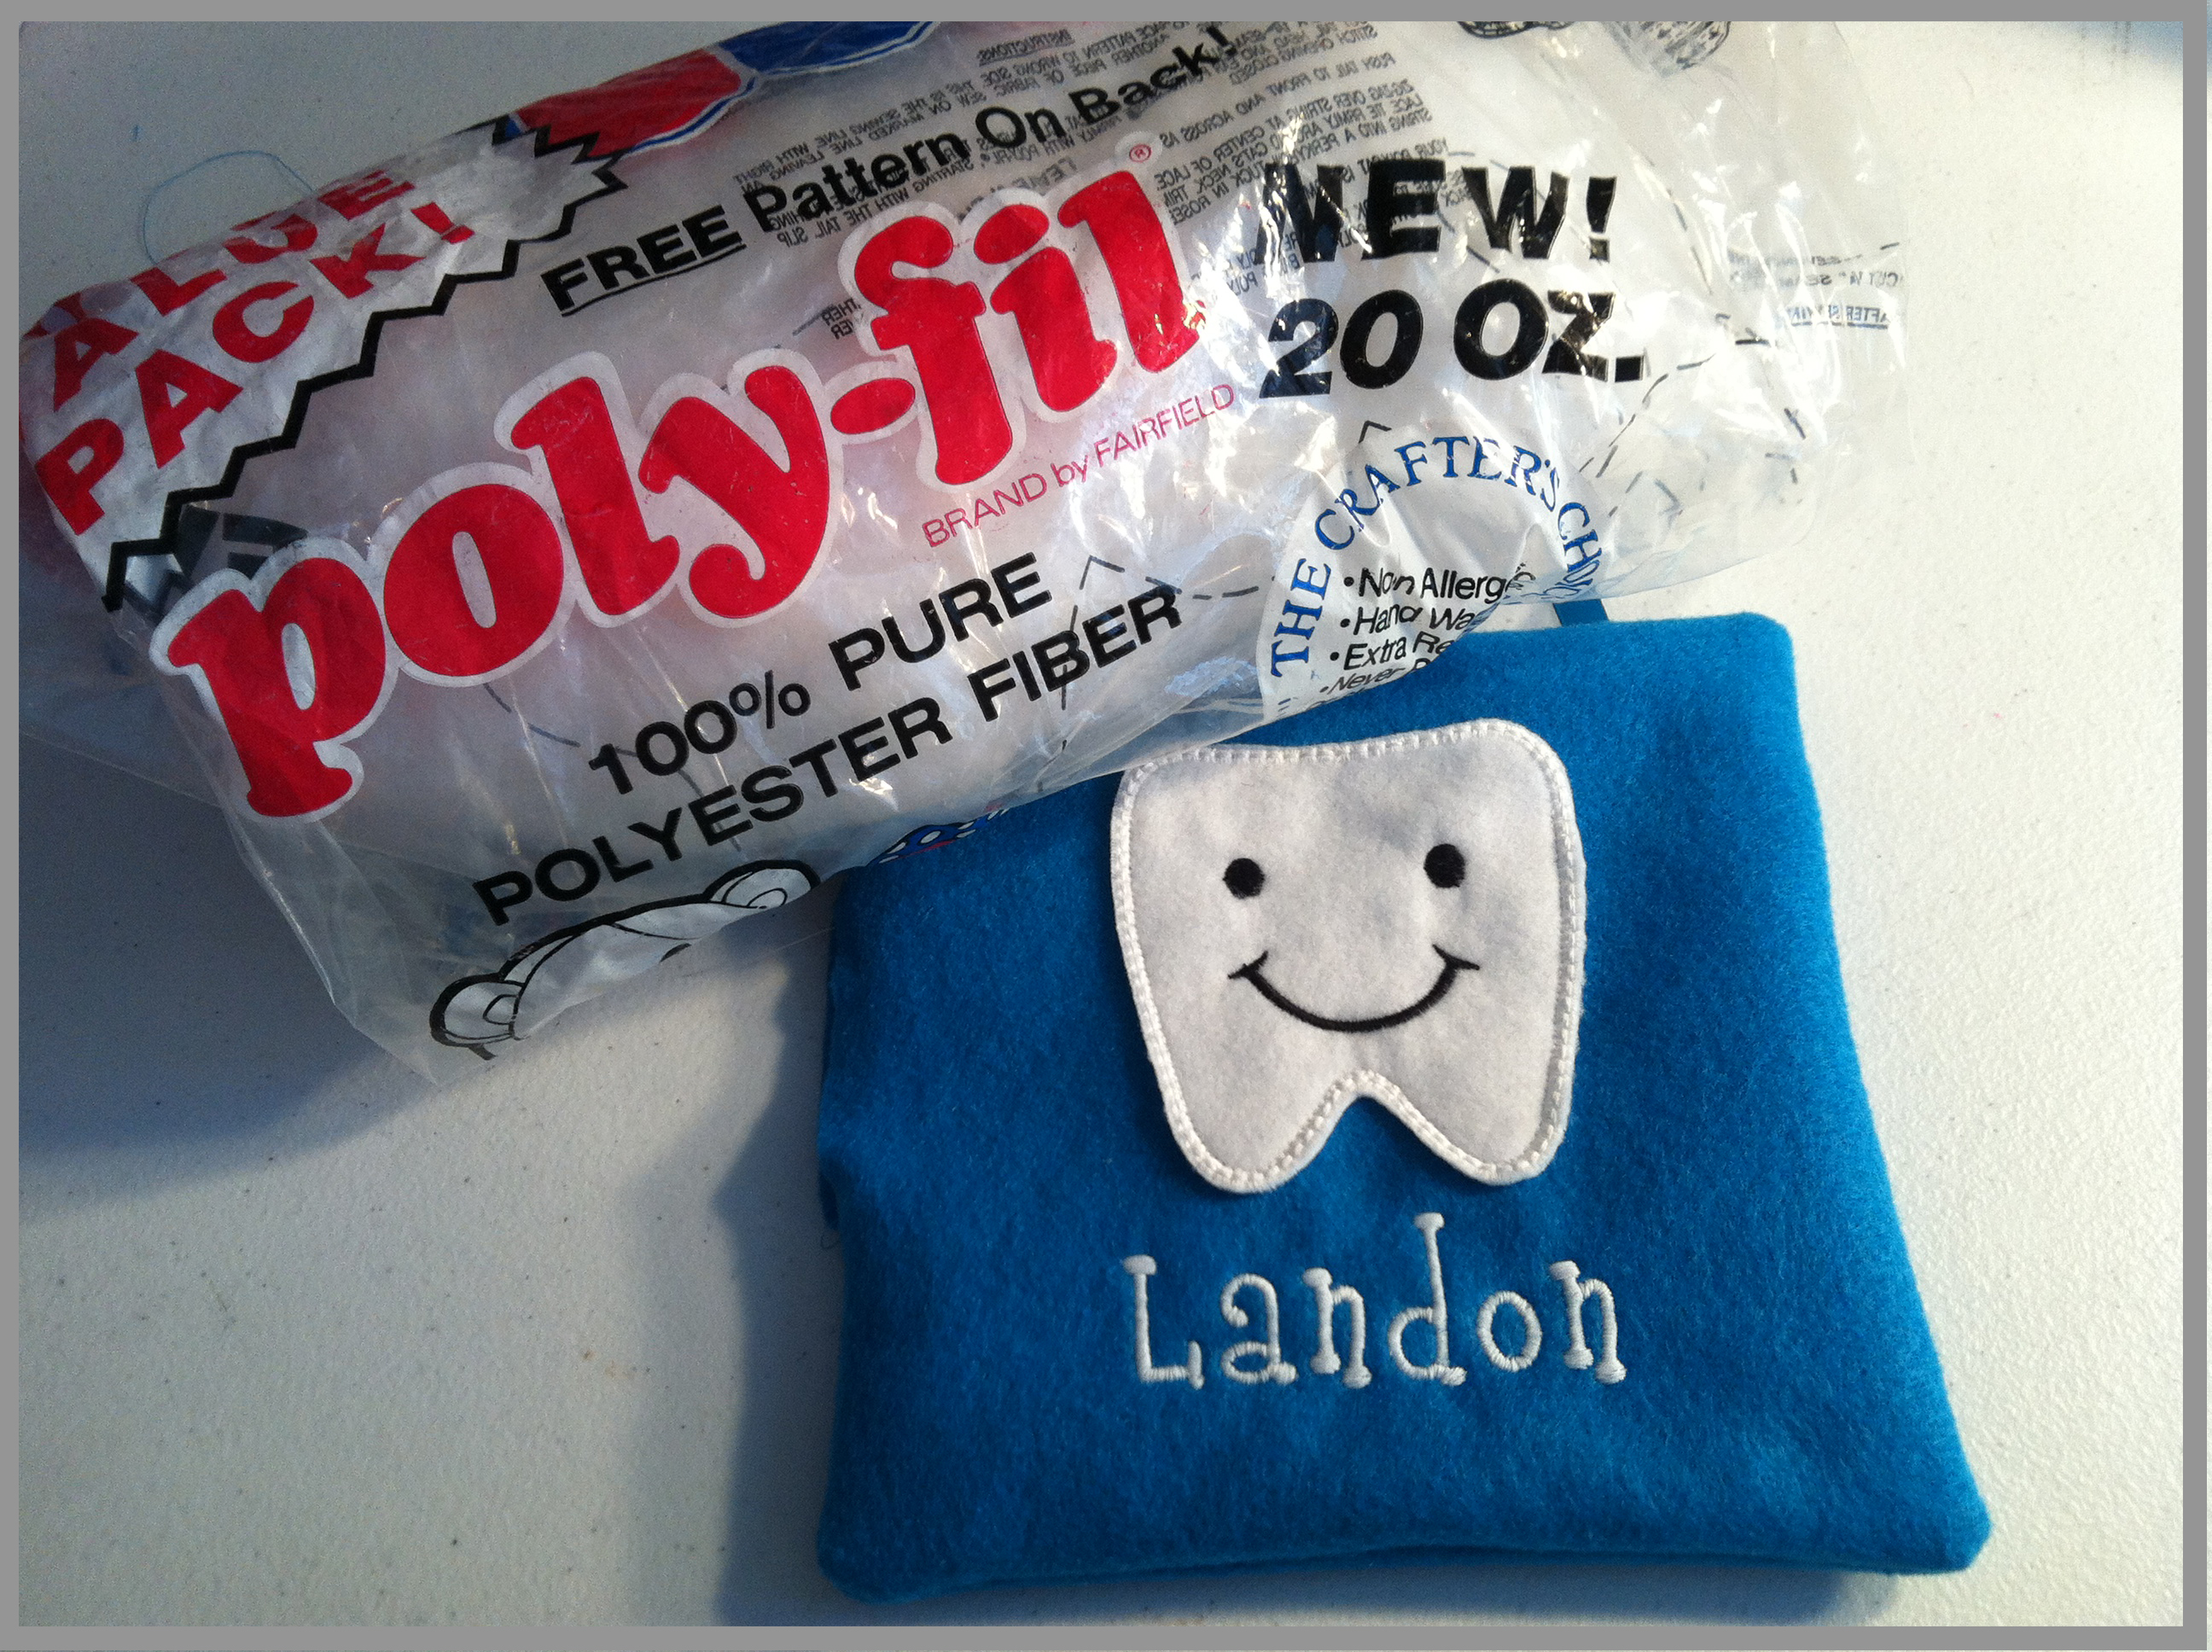
I stuffed the pillow to my liking.  I didn’t want it too thick, but I didn’t want it too thin.stuffed

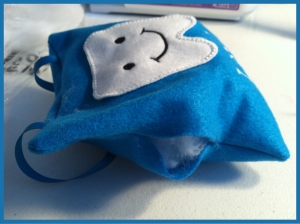
I wanted to add something to the ribbon so that it didn’t look so bare,….time to emblish

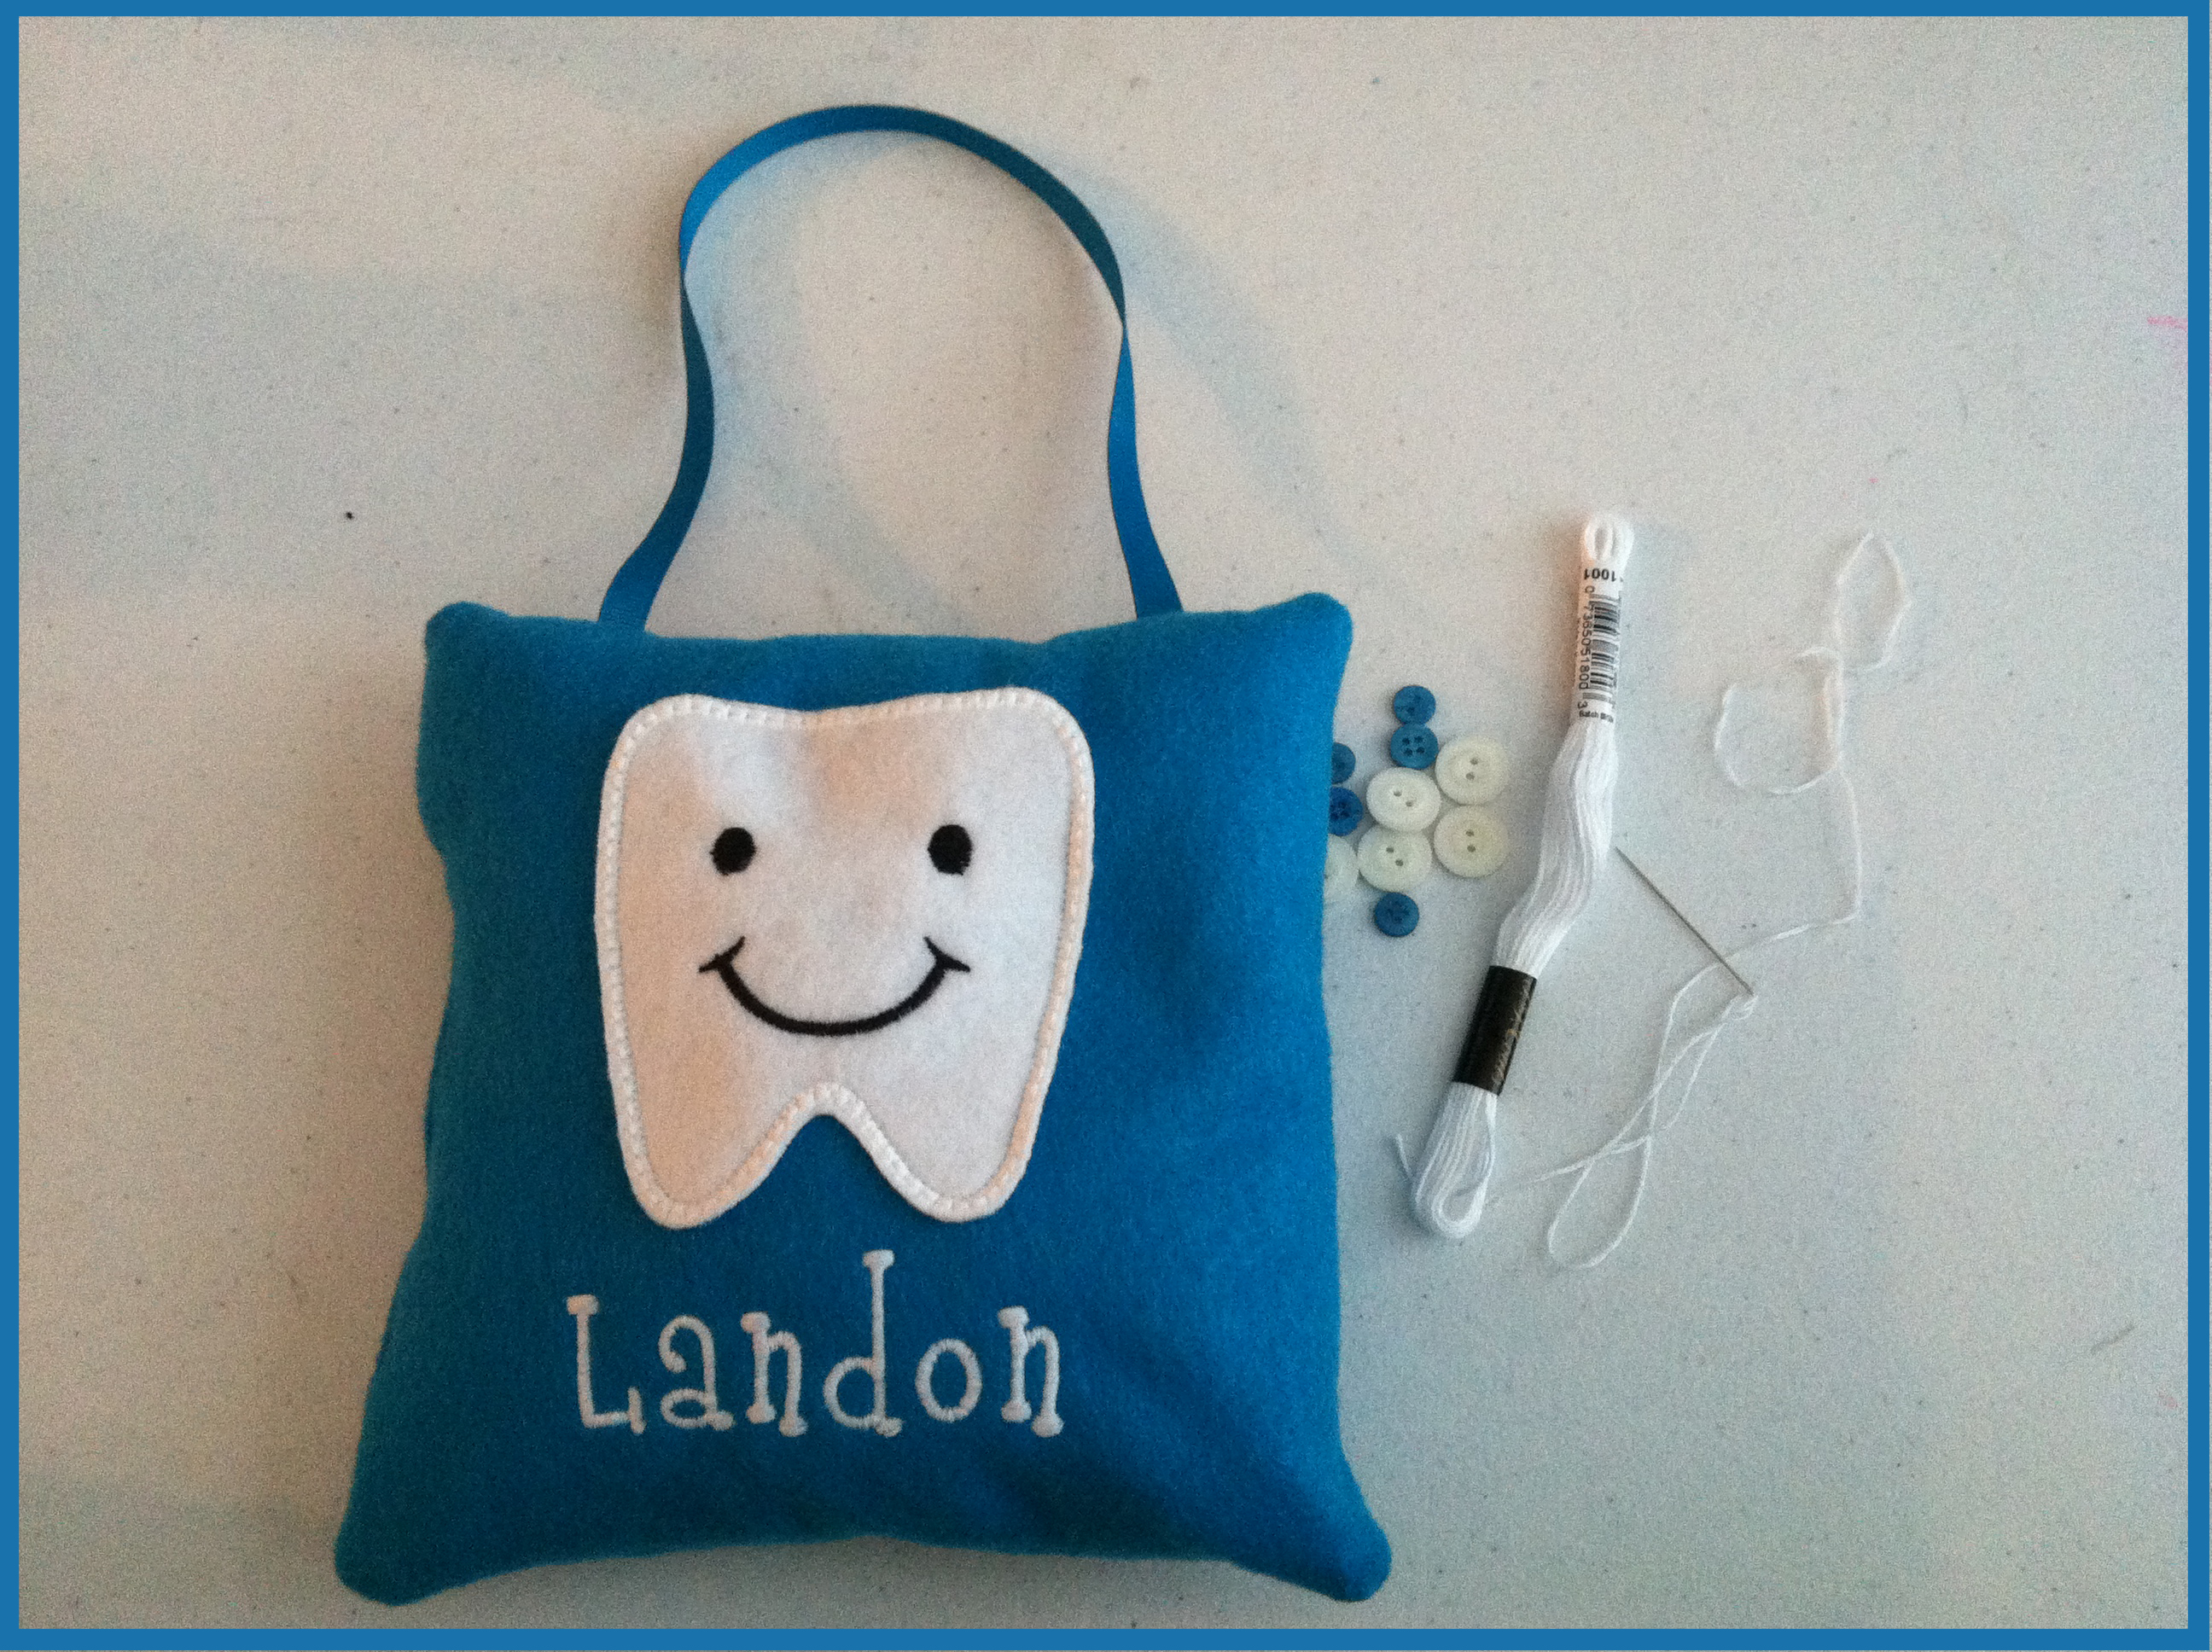
So, I added some of Laura Kelly’s Mix Buttons from Buttons Galore.emblish with buttons

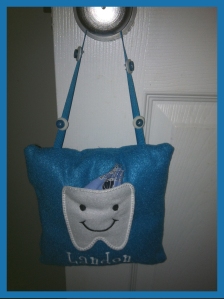
All Done, with a cute little tooth pocket!!!a tooth pocket
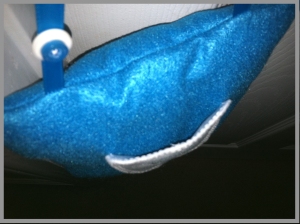
In went the tooth in a little baggie that the dentist put it in.

tooth stuffed with tooth

And guess what the tooth fairy left?!?!?!tooth stuffed with money

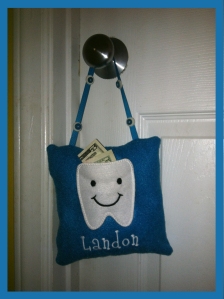
$5 for the Big Boy that did an awesome job at the dentist getting his shots to numb it up and then to have it pulled!!!!wahoo money

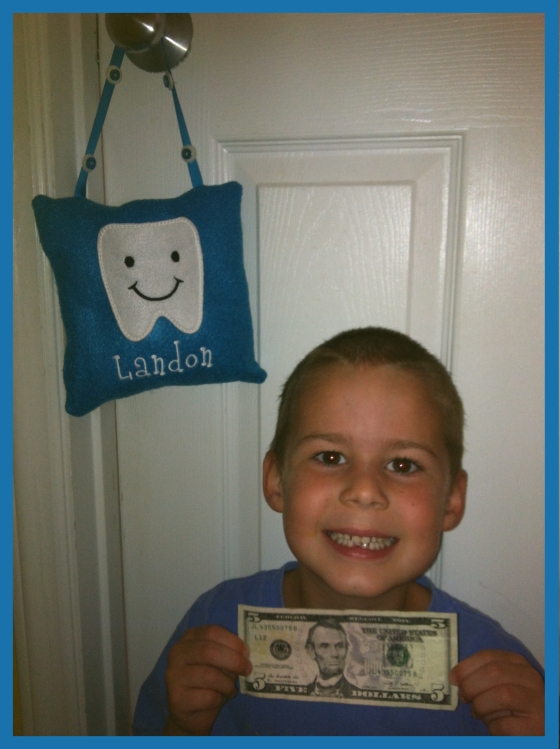
Hope you enjoyed my little Tooth Fairy Pillow.   It beats the tooth fairy having to go searching under those pillows for the tooth, in which she could accidently wake the child!!!

Until next time……

a Rafflecopter giveaway