Tag Archives: fabric

Mason Jar Lid Fabric Wreath

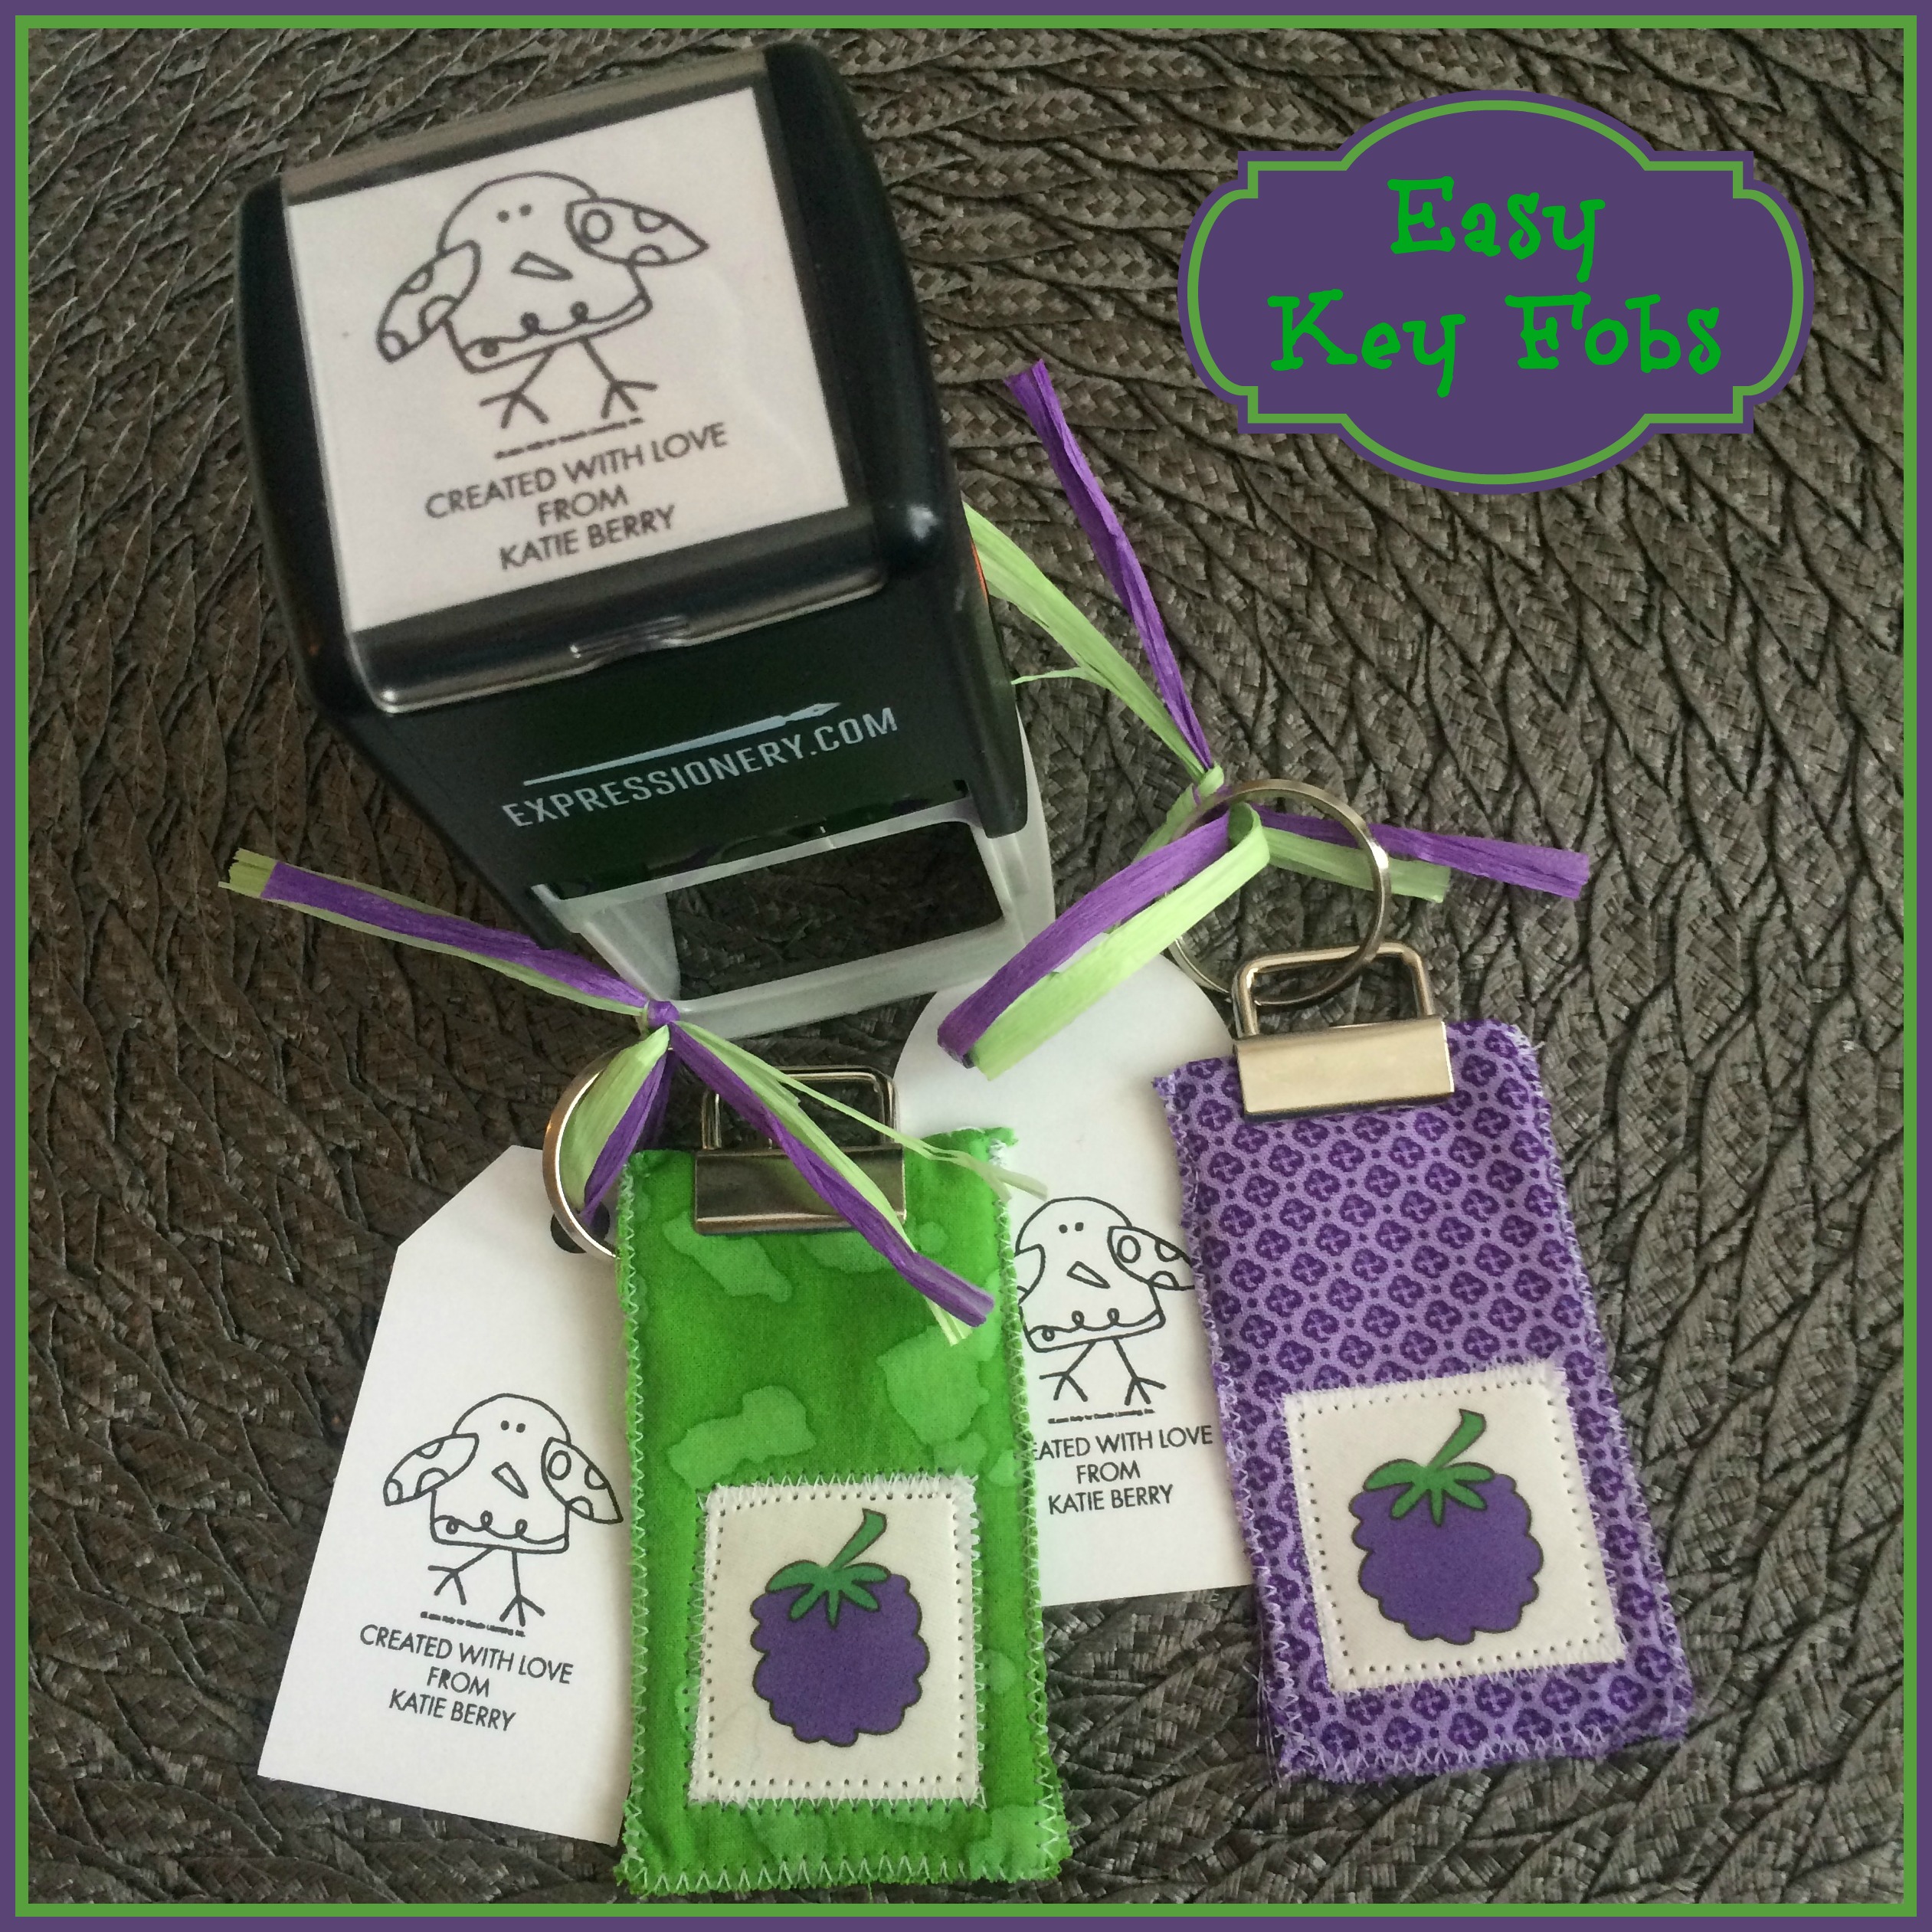
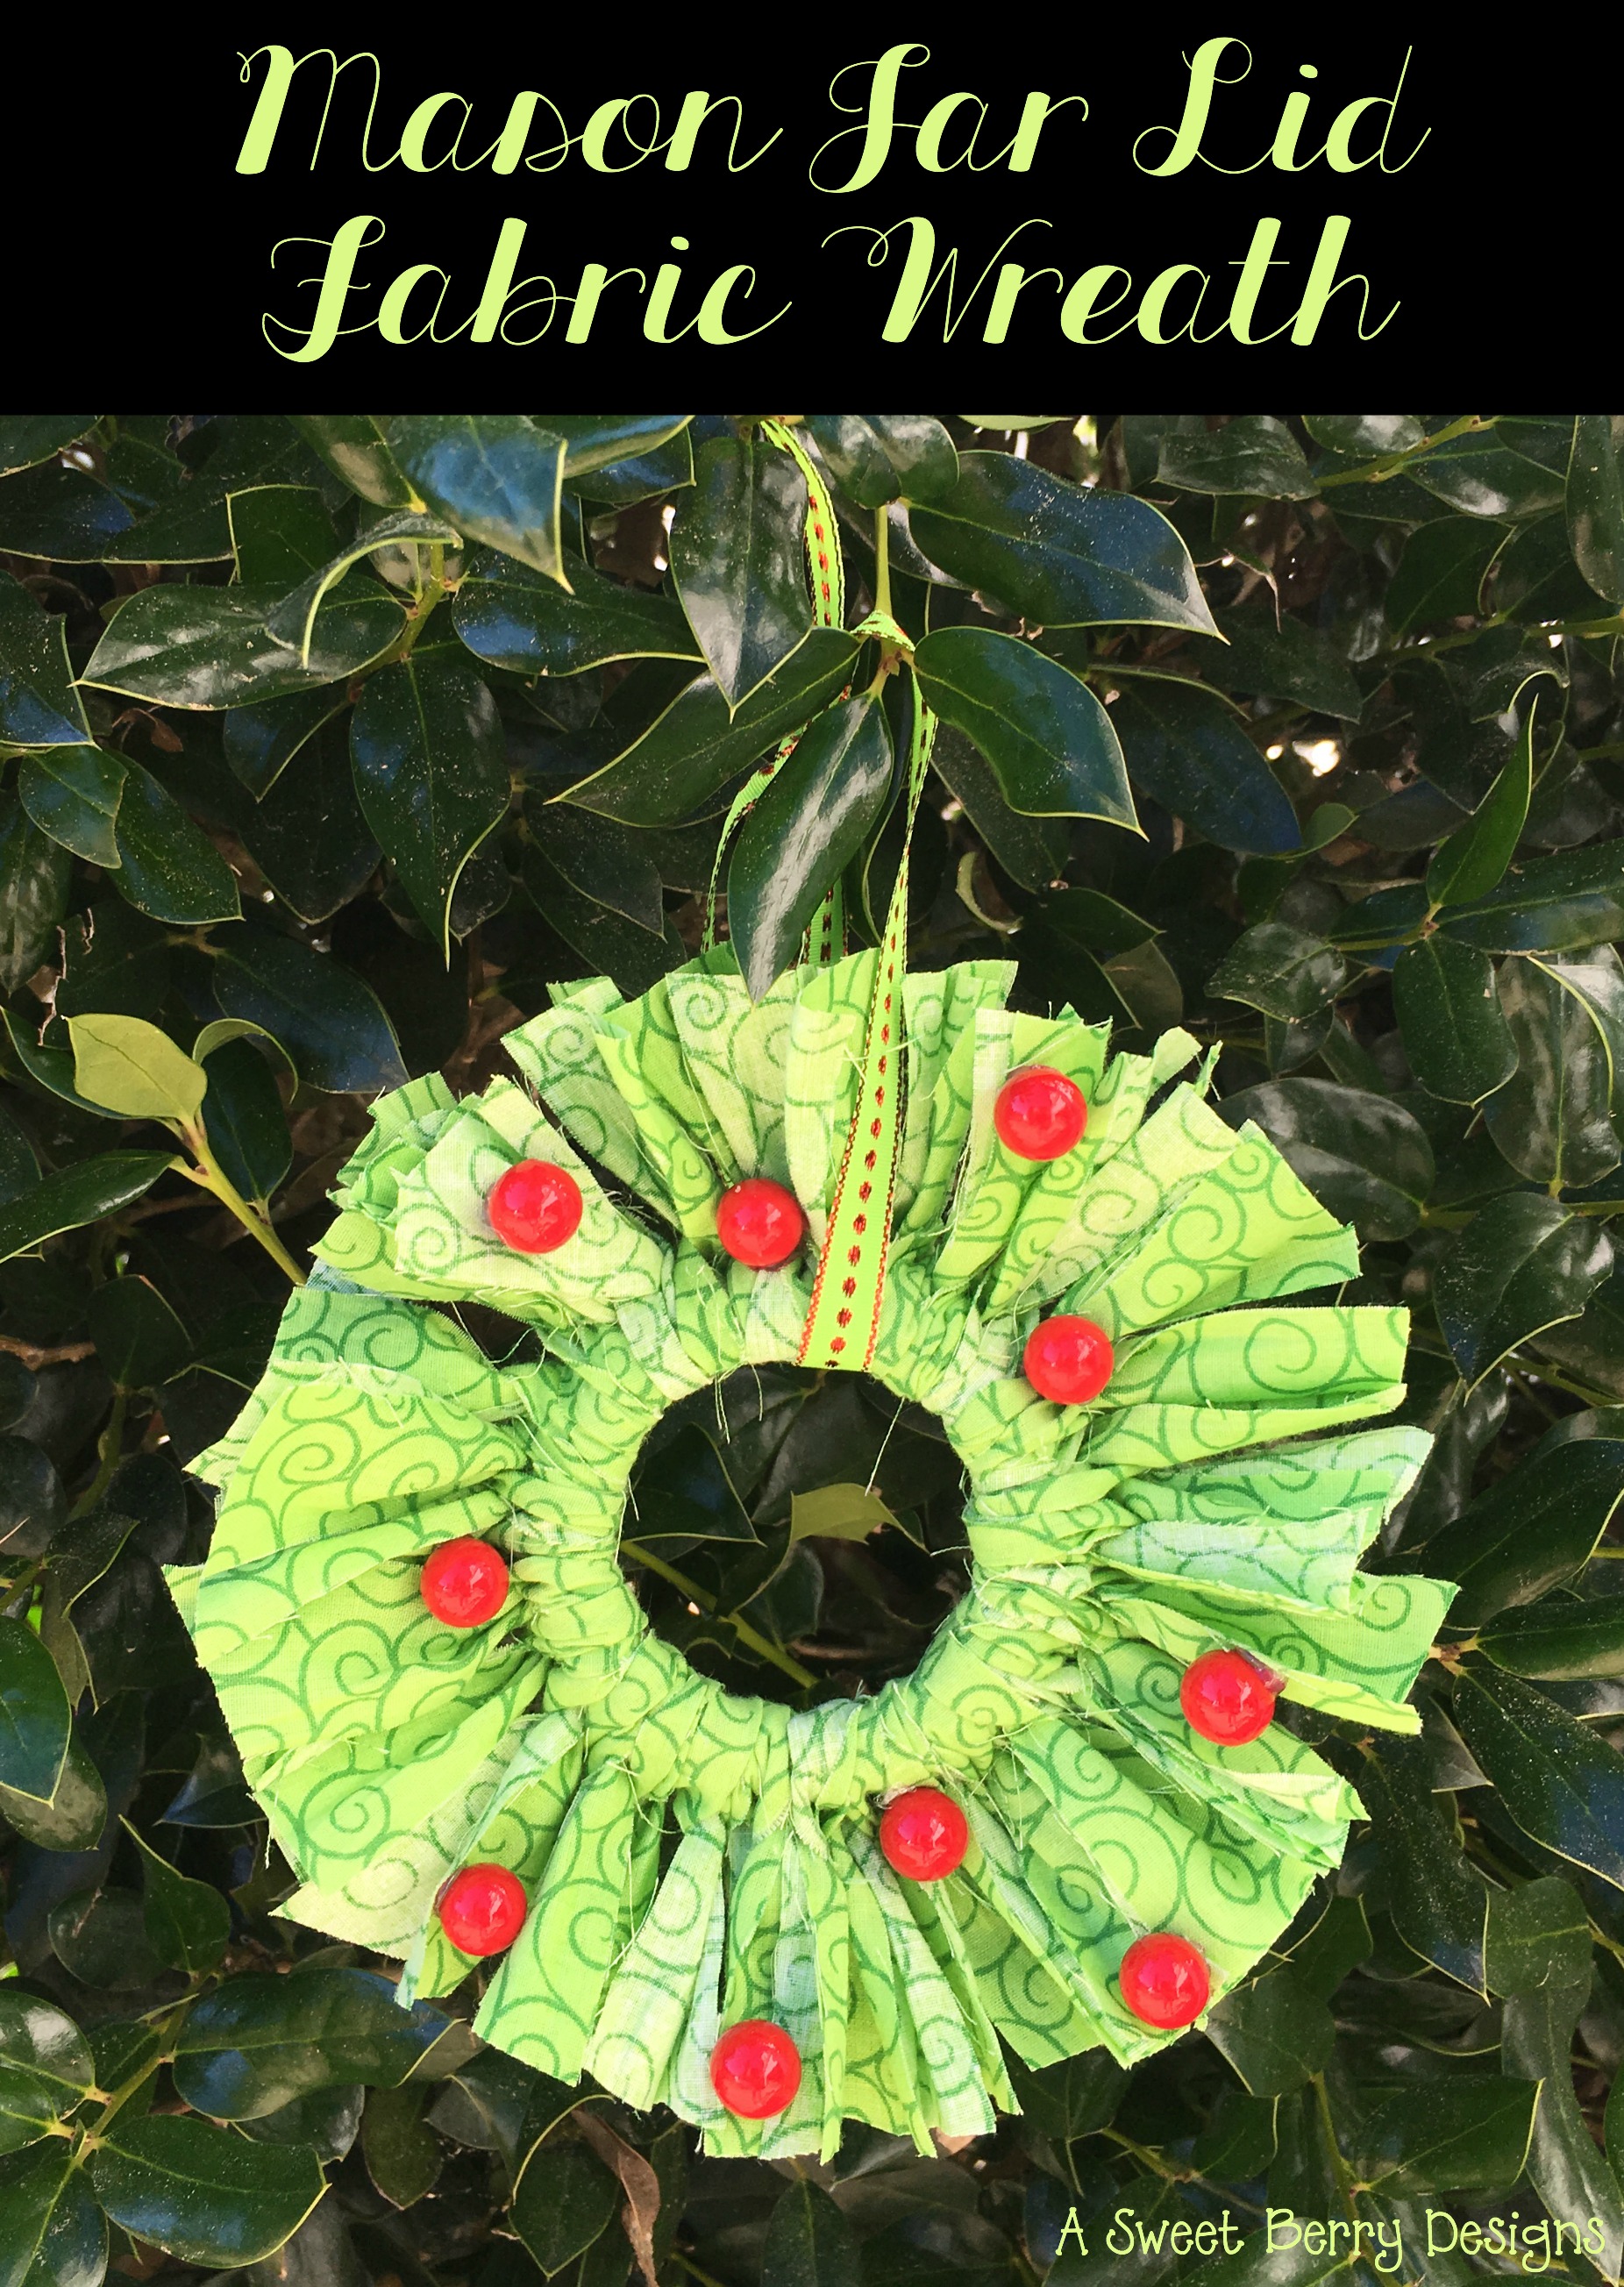
Yay!  It’s Craft Lightning time again!   And this one is Christmas and Holiday crafts!  Christmas is one of my favorite times of the year!  Especially now that I have kids!  This Mason Jar Lid Fabric Wreath could even be done with the kids!
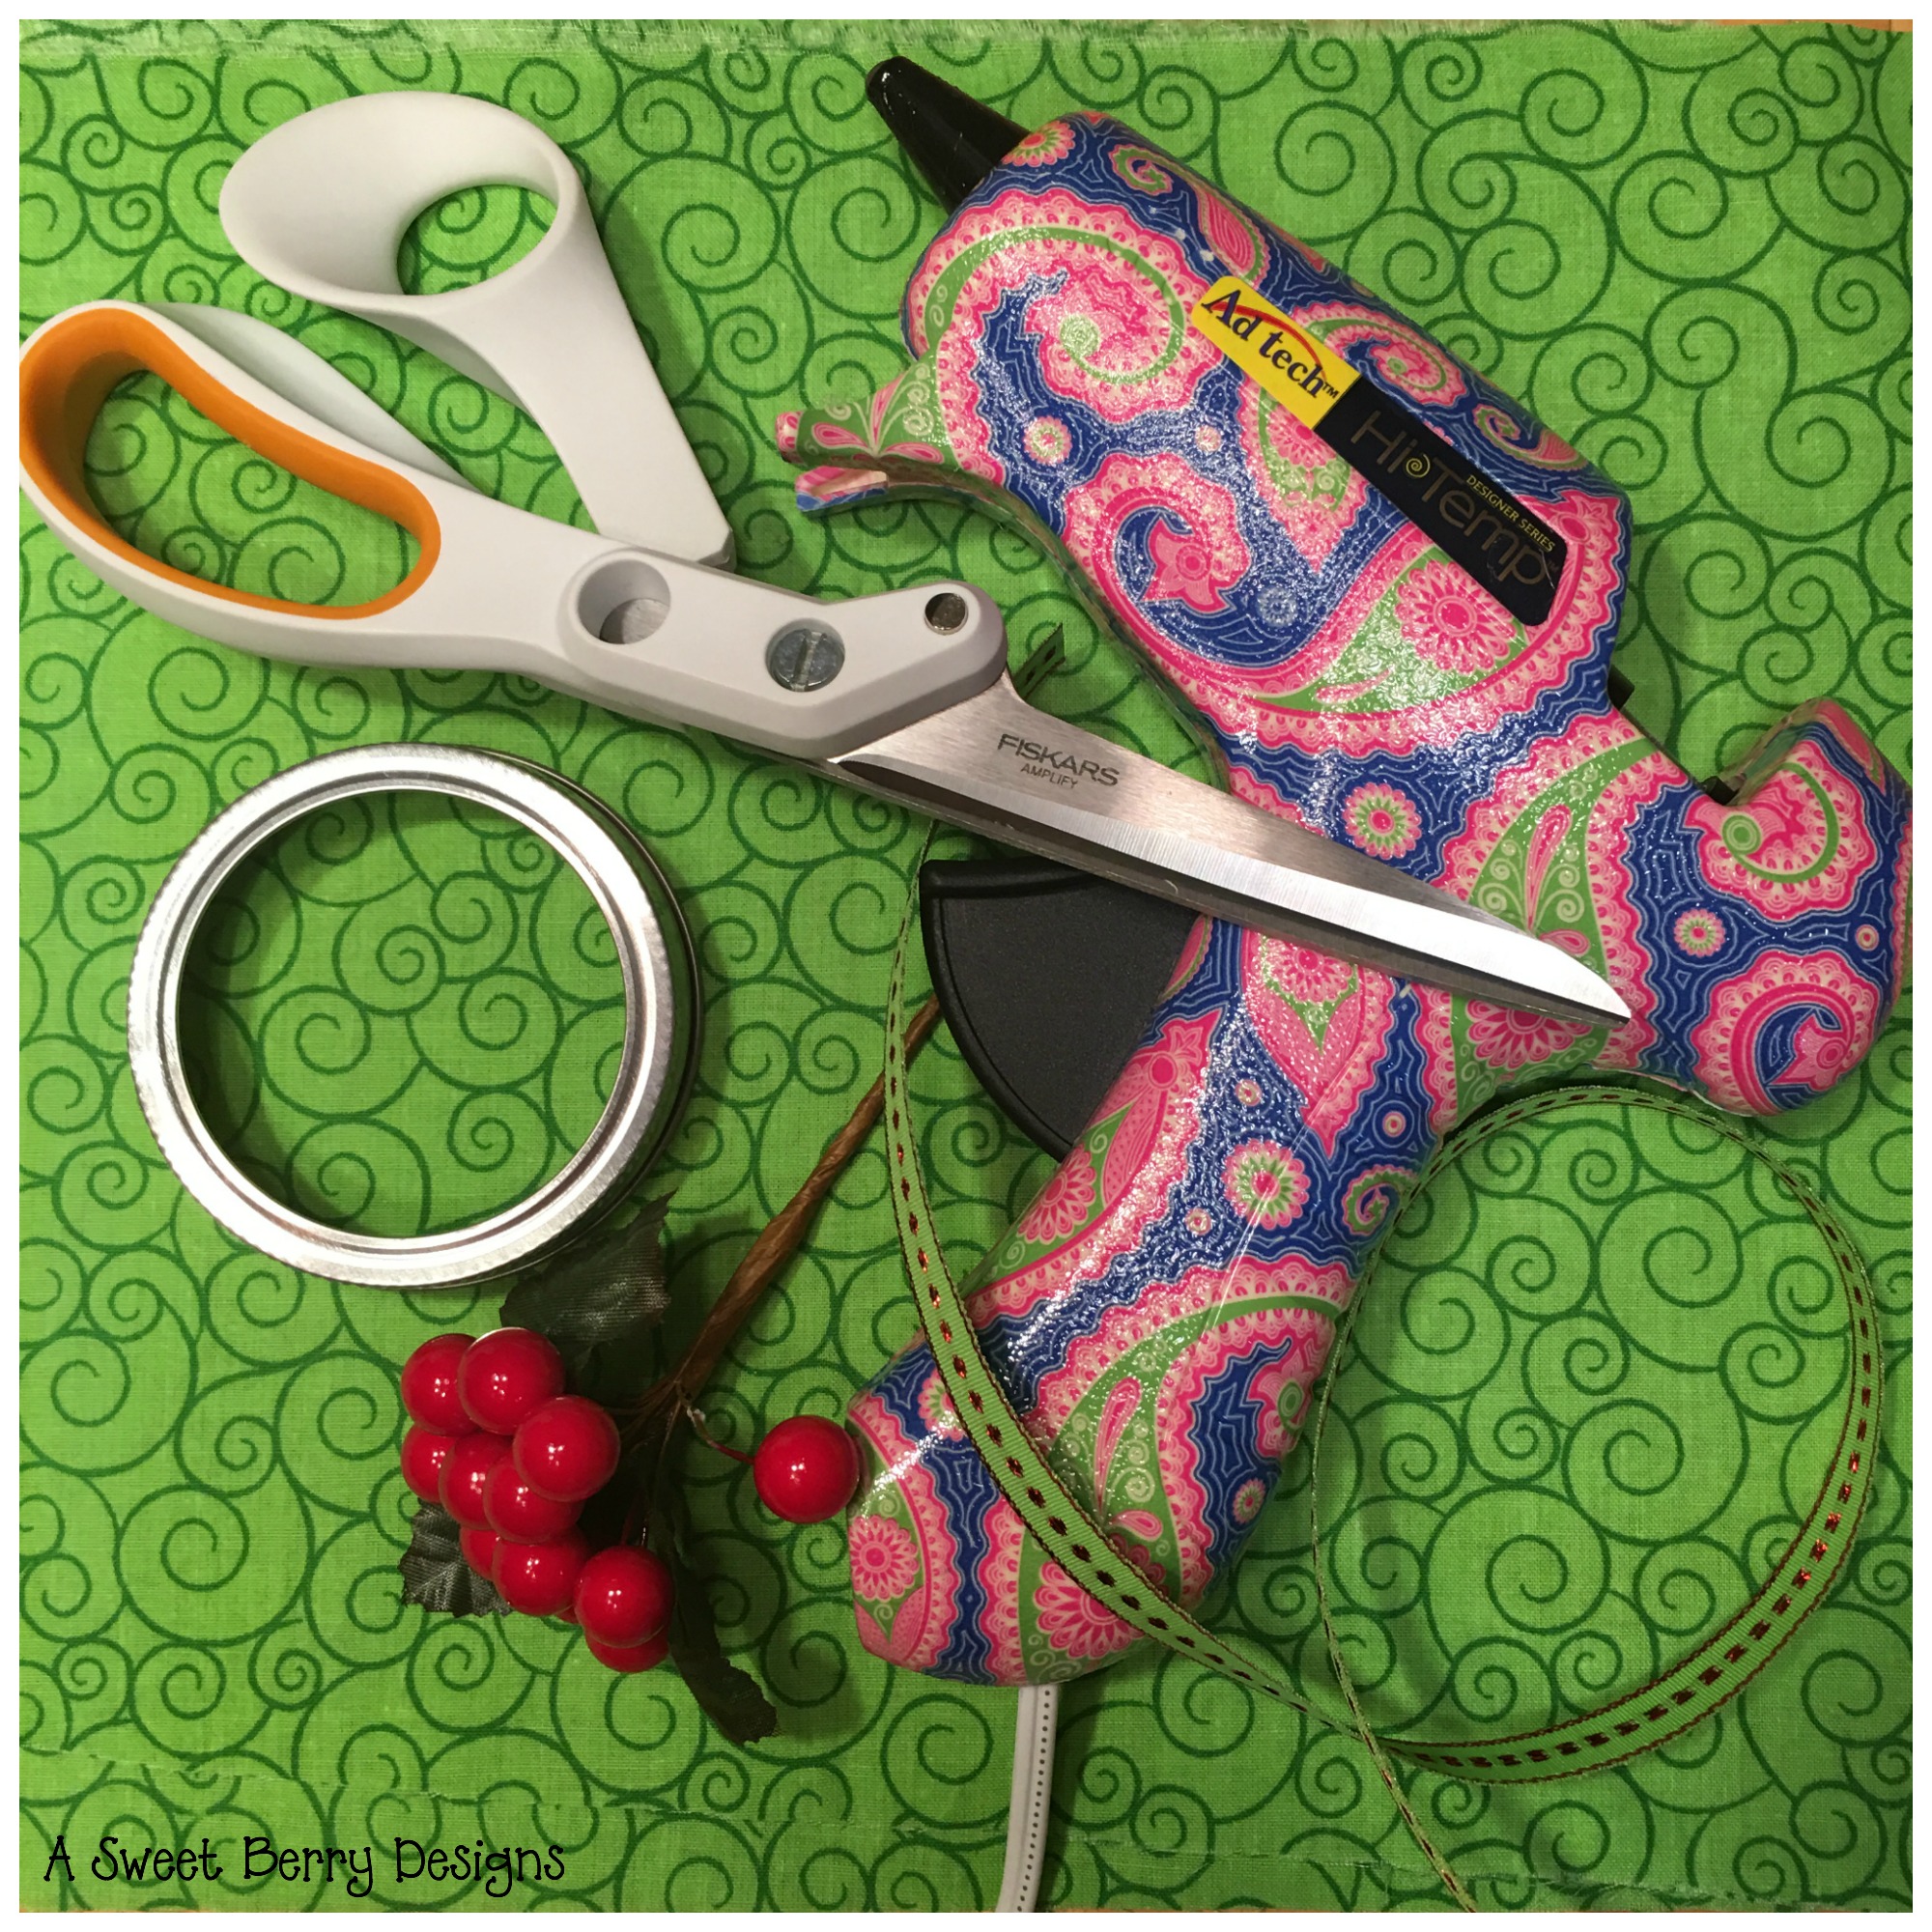
 final
Materials:
Green Fabric
Mason Jar Lid
Fiskars Scissors
Ad-tech Hot Glue Gun
Holly Berries (I got these from A.C. Moore)
Ribbon
materials
The steps for this Mason Jar Lid Fabric Wreath are pretty easy!  And it only took about 15 minutes to do!
putting-it-together
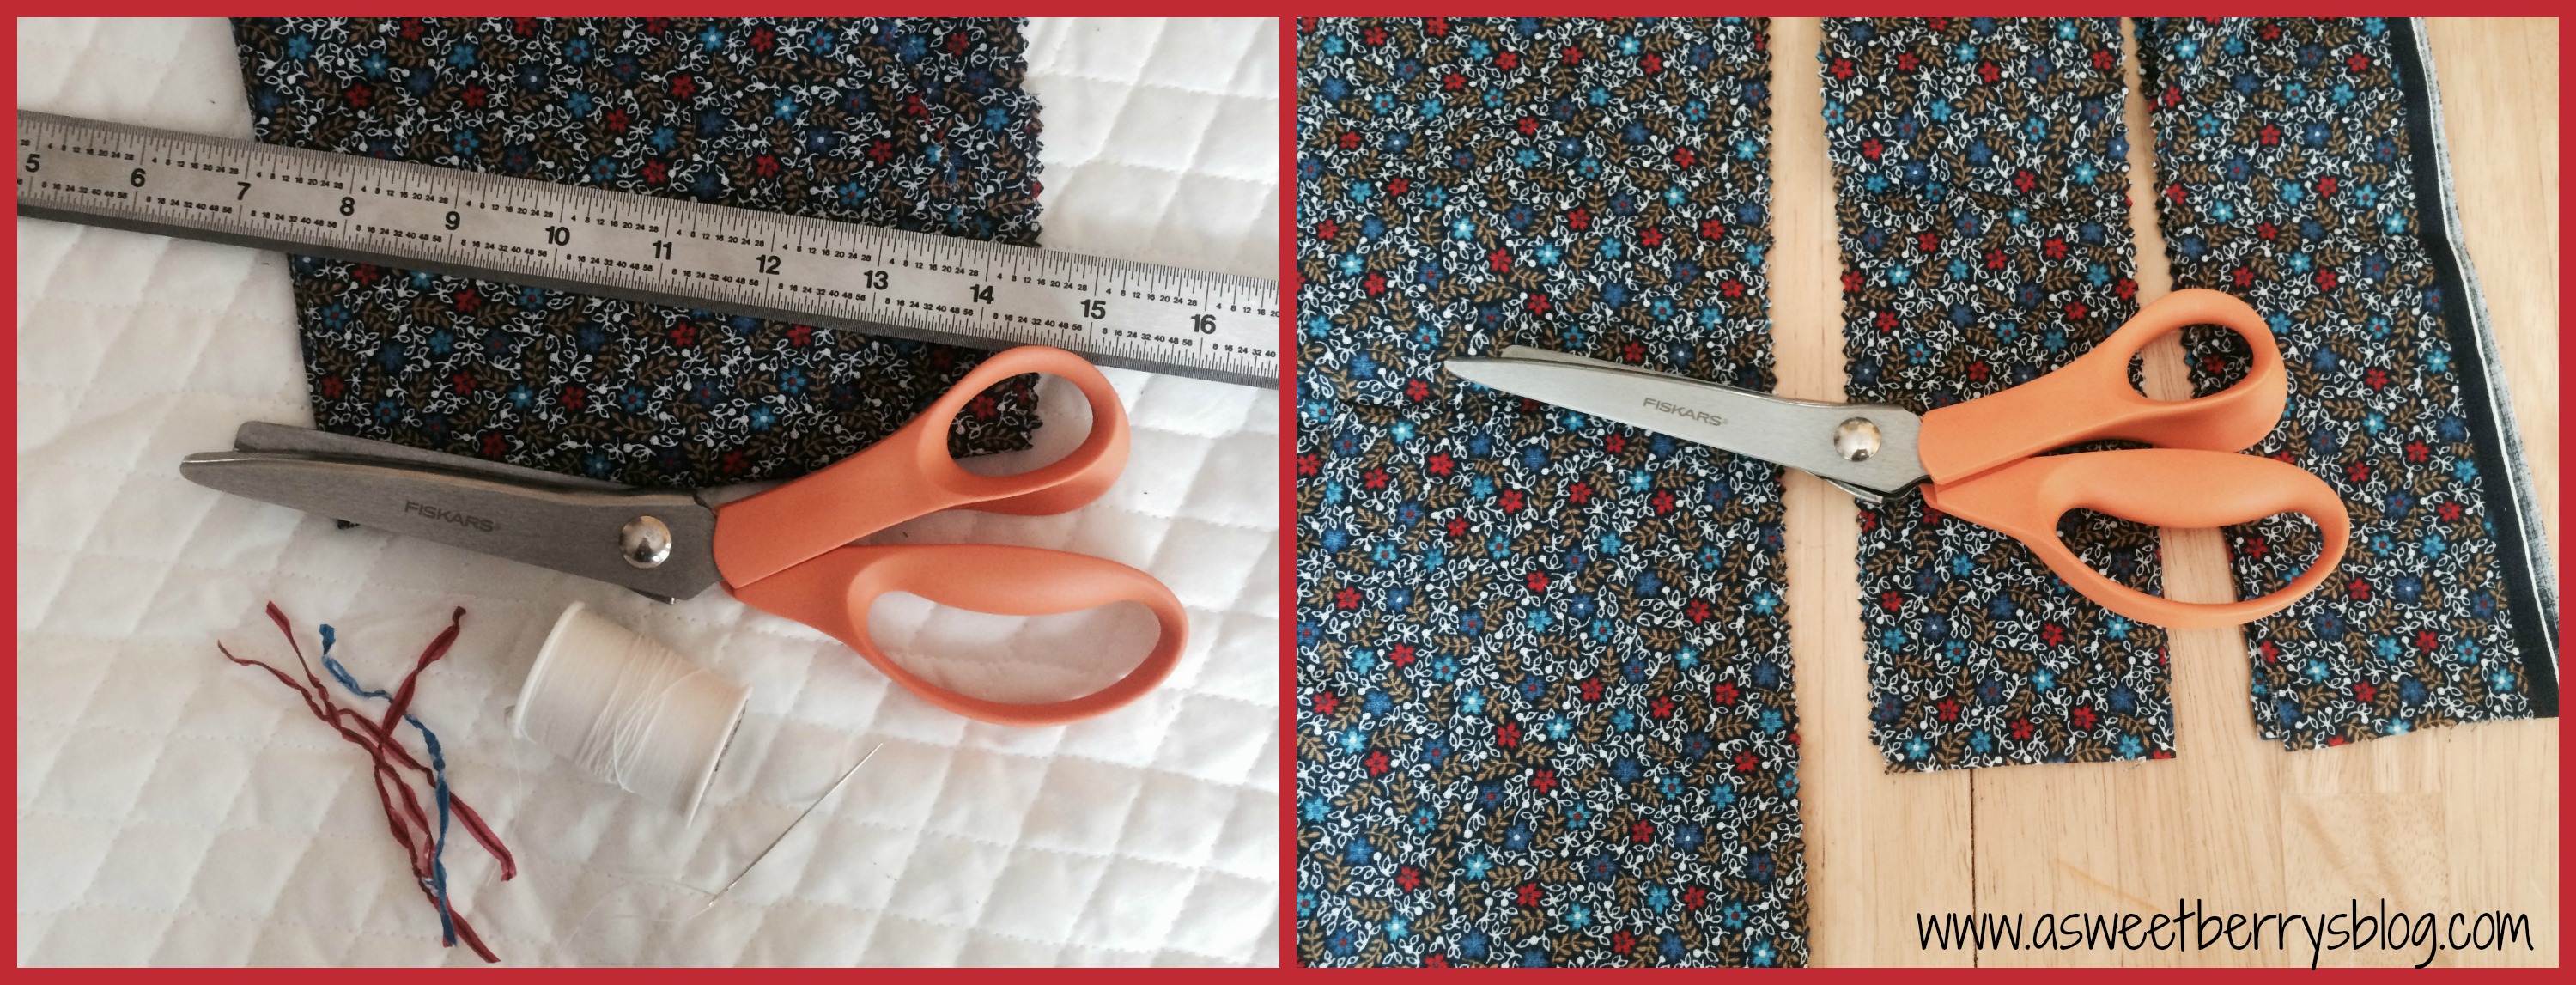
Step 1 – Cut your fabric into strips.  I just did a rough cut making the strips about 10 inches long and .75 – 1 inch wide.
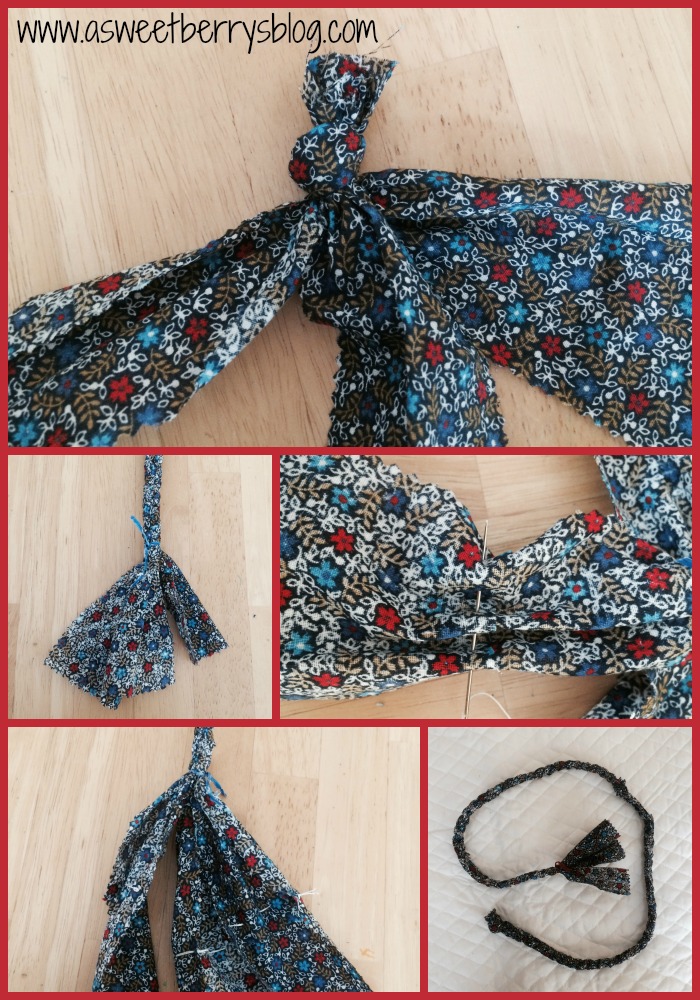
Step 2 – Fold the pieces in half.
Step 3 – Place the folded strip under the lid.
Step 4 –  Feed the lose ends through the folded end and pull tight.
last-steps
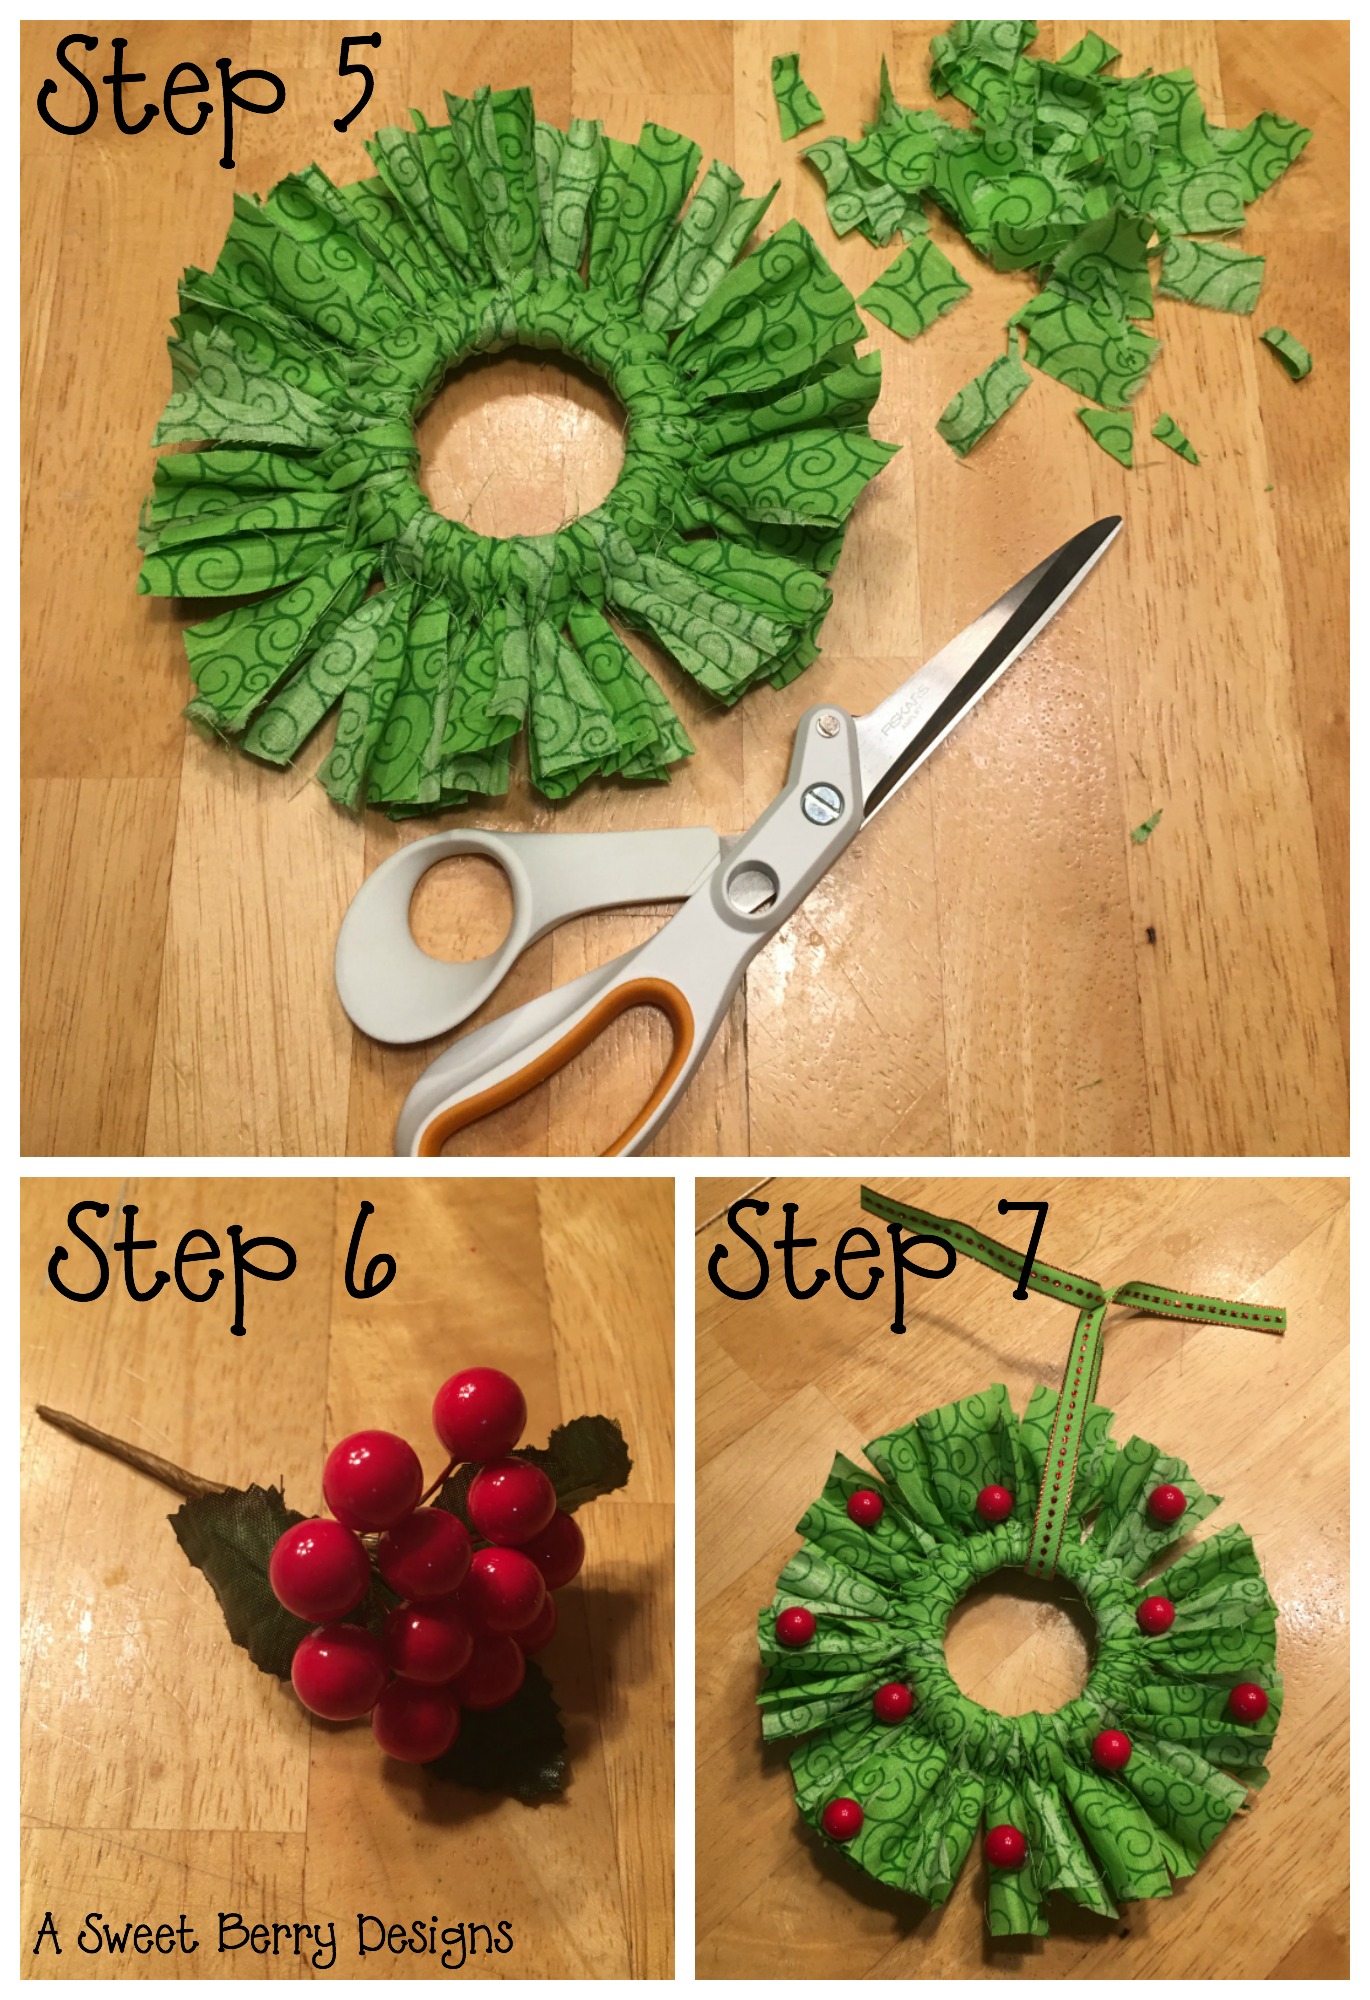
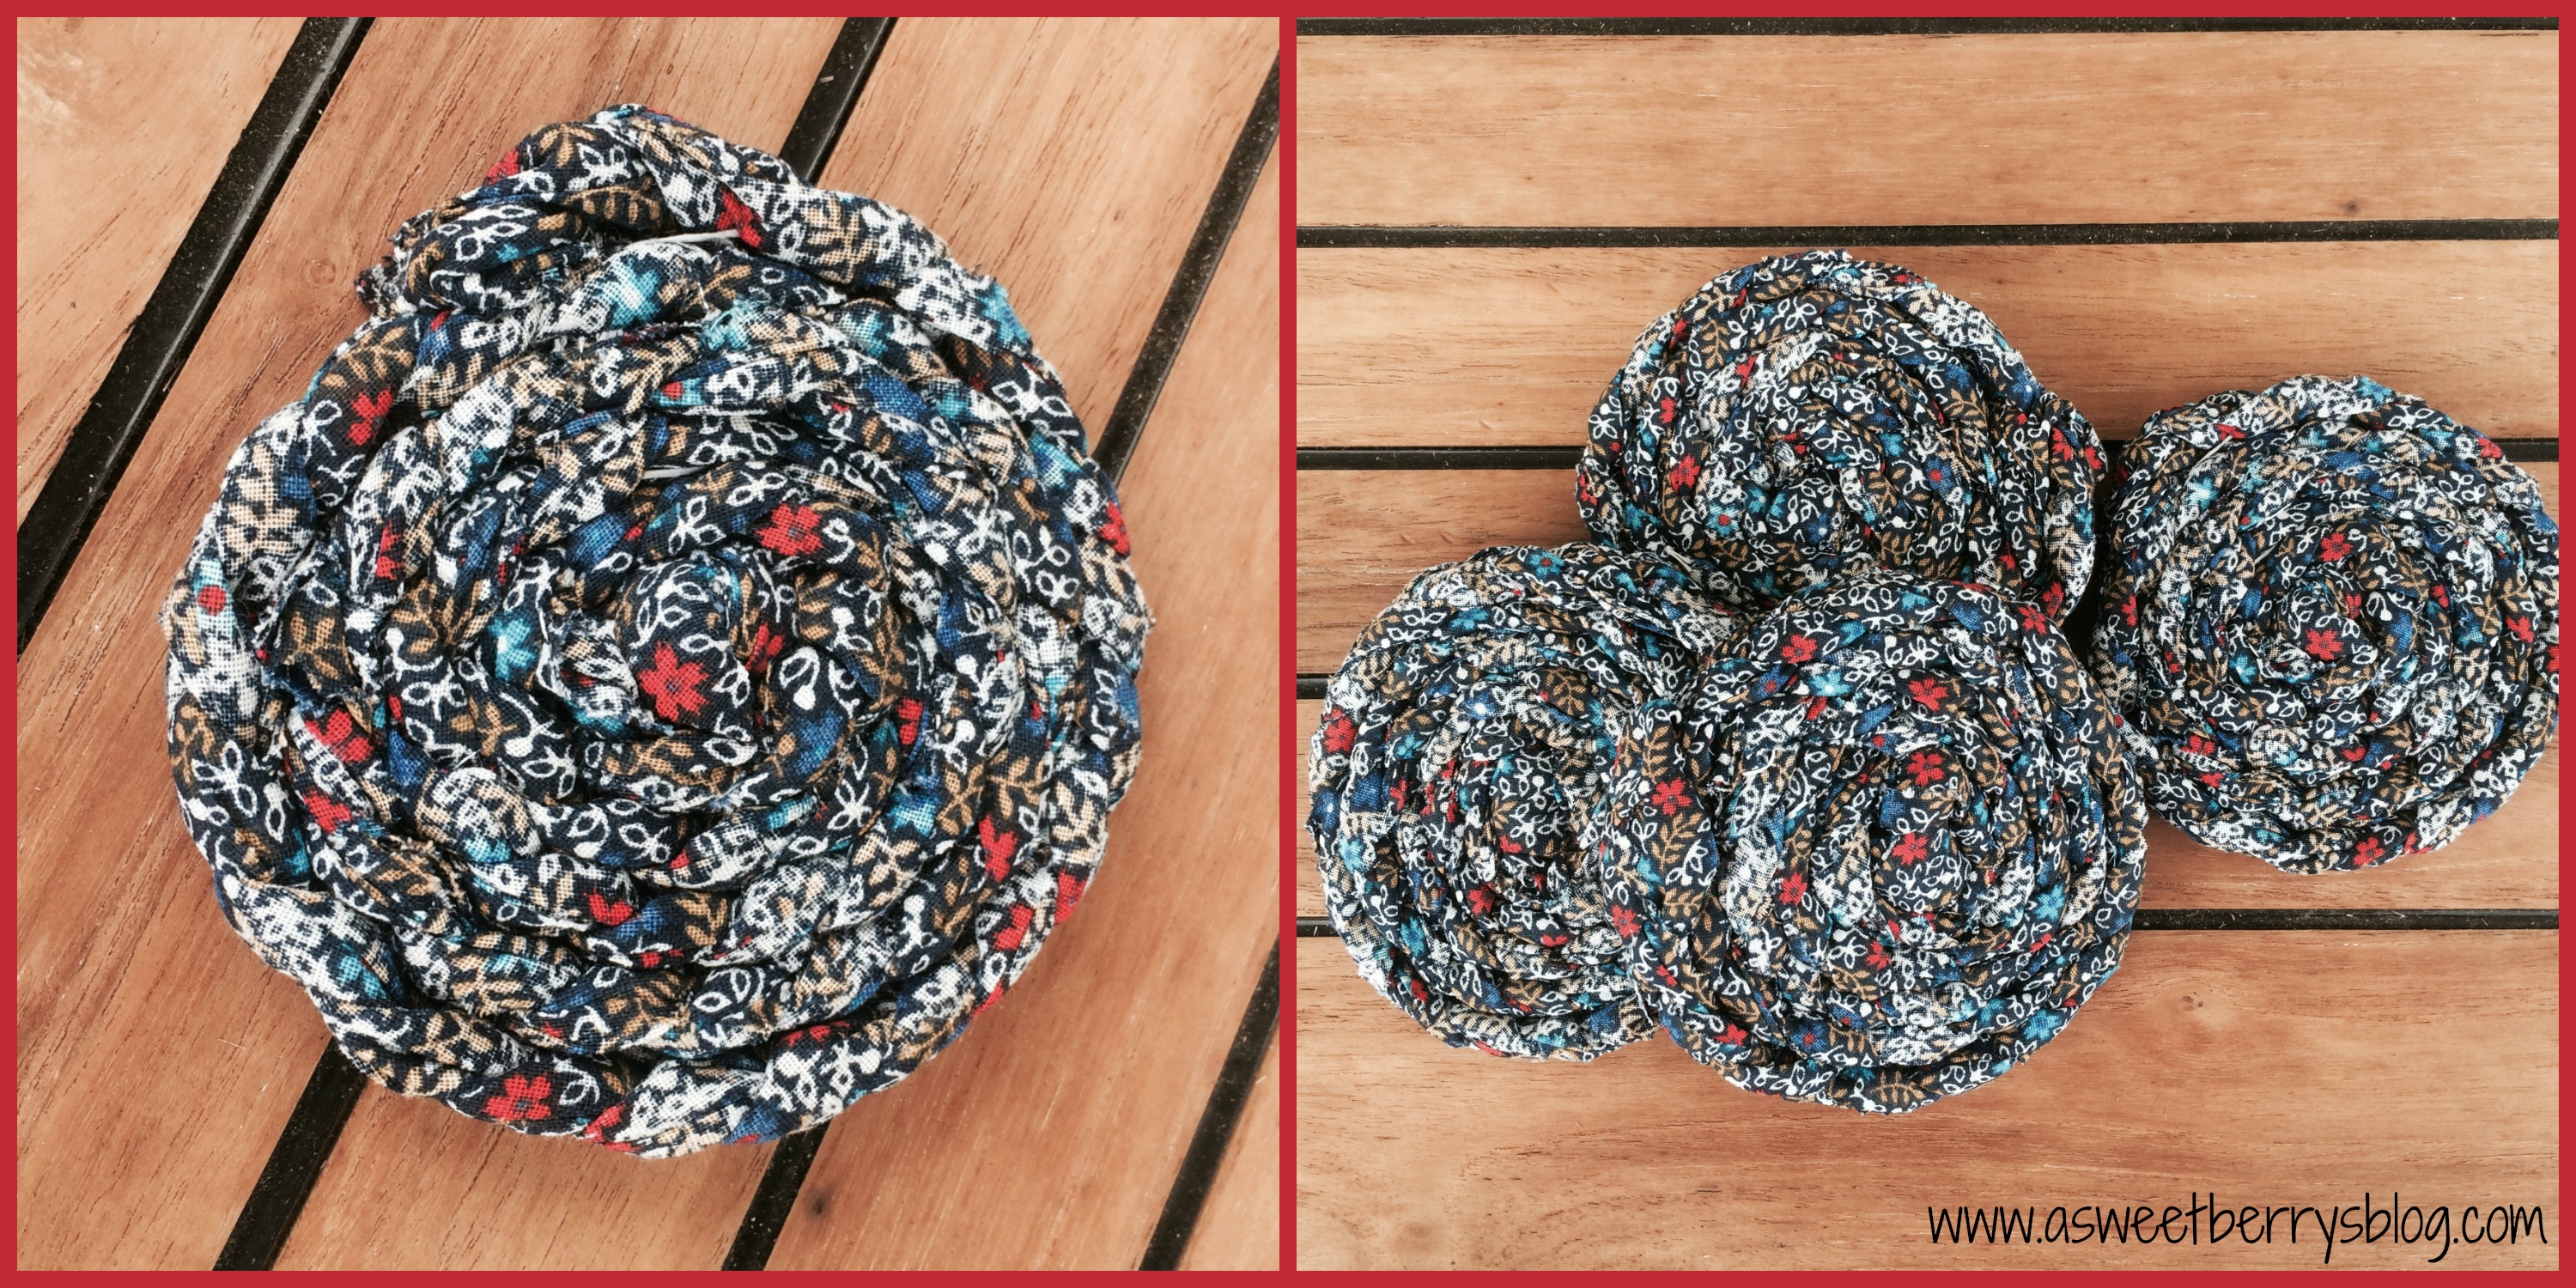
Step 5 – Trim your wreath to your liking!  I trimmed my wreath so that it wasn’t so big.
Step 6 – Remove the berries from the stem.
Sept 7 – Hot glue the berries onto the wreath!  Parents, do this if you are doing this project with the kids.

I added a piece of ribbon to hang it on the tree!
wreath
I hope you enjoyed my Mason Jar Lid Fabric Wreath!

Be sure to click below and check out other Craft Lightning Crafts!

Until next time……

Easy Fabric Key Fobs

Main Pic

Materials:
Fabric of your choice (colorful and white)
Printable Fabric Transfer
Color Printer
Iron
Key Fob Pieces
Rotary Cutter with Mat and Ruller
Scrap Felt
Sewing Machine with Thread
Pliers

Optional:
Sizzix Eclips 2 or other electronic cutting machine
Gift Tag SVG file
Ribbon

I started by printing my A Sweet Berry Designs berry logo on printable transfer paper and using the Sizzix Eclips2 to cut them out.  I was originally going to do circle keychains, so I cut our circles but ended up cutting them into more of a rectangle/square shape!  After they were printed and cut out, I laid them print side down onto my white fabric and ironed them with my iron set to the setting recommended on the transfer directions.
Cutting out berries
Then it was time to cut my fabric!  JoAnn Fabrics was having a Fat Quarter sale, so I purchased a variety of purples and greens.  I kept the fabric folded and cut a rectangle to my preferred size using my rotary cutter and ruler.  For the felt that I was going to place into the middle to give it a little fullness, I cut just a little smaller than the fabric cut out so that it was not visible once they were sewn in.  Once everything was cut, I placed the felt into the middle. materials
Then it was time to sew them up.  I used a zigzag stitch and sewed the three sides closed.  Once they were all sewn closed, I placed the berry logo where I wanted it and stitched it in place, also using the zigzag stitch.  Then it was time to place the key fob hardware clamp onto the sewn fabric.  I put them on the side that was folded.  I didn’t want flier marks on my hardware, so I used a scrap piece of fabric to place over the hardware while clamping it together, making sure that the spikes within the clamp went into the fabric.   I had just had my nails done, so my lovely husband was nice enough to add all of the split rings to my hardware clamps for me! sewing and metal
Voila! They were done!  I wanted to add cute little tags to mine, so I cut gift tags using my Sizzix Eclips 2.  Using my personalized stamp from Laura Kelly for Expressionery.com, I stamped my tag.  My stamp says “Created with Love From Katie Berry”. keyrings and labels
I hope you like my Fabric Key Fobs!  They were super easy to make!  I made them to go with my business cards for SNAP! Conference and they were a hit!  I still have a few left, so if you’d like one, just let me know!

Until next time……

Repurposed Fabric Coasters

So, in trying to clean up my crafting area, I realized that I have a lot of scrap fabric laying around.  A lot of it is still good and enough fabric to do something with.  So, I decided to make fabric coasters with some of mine.

finals

 These coasters were super easy and even kids can help making them!

To make these awesome coasters, you will need:
-scrap fabric
-scissors
-a ruler
-thread (I used Coats & Clark) and needle
-bread ties

First, you are going to want to cut strips of fabric, roughly 3 inches by 24 inches.

needs

 Then, tie three strips together in a tight knot at one end.  Braid the strips until you get about three inches from the bottom.  Place the bread tie at the end of the braid to hold it into place.   Using a needle threaded so that you have double thread, sew another strip to each of the three braided strips.  This stitch can be loose, it’s just needed to make the strips longer and it will be braided in, so it won’t come apart.  After all three extra strips are sewn on, continue to braid until you are near the end.  Using another bread tie, secure it around the braid to hold it in place.

steps

After you have your braided strand, start with the end that has the knot.  Begin winding it. Run your needle and thread through the knot and then the part that is wound up, to hold it in place.  Continue winding your strand flat and place stitches through the strand as you keep winding it.  This will help hold everything in place and keep it from falling apart.  Once you get to the end, fold in and under the extra fabric and sew it to the wound up fabric to again hold it in place.

Then, place it on your table and put your glass on it!!!!!

CoastersFinal

I just love these and they look great on my front porch table for our evening rocks while the boys play!!!!

Hope you like these as much as I do!

Until next time……………