Tag Archives: Sizzix Eclips2

Disney World Savings Bank

Disney Bank Final

Kids just do not realize how much Disney World costs, especially when you don’t live there and you have to get a place to stay.   And if you are like us, we like to stay on the Disney property.   We have worked really hard to help our children learn about saving and spending money.   They’ve learned that if they want something, they have to save their money for it.  

Well, in preparation for an upcoming trip to Disney, I decided to make my boys a Disney World Savings Bank!  Aside from their allowance money, we’ve decided that every cent or dollar that we have will go into our Savings Bank.   We will use this money for fun things like souvenirs and extra treats!   So, the more they save, the more money they have to spend!  We are fortunate that we are going at a time that they offer the free dining plan.  That is helping to save A LOT of money!

Now, I will tell you the steps I took to making this fun and easy Disney World Savings Bank!

Materials needed:

-A Shadow Box Frame

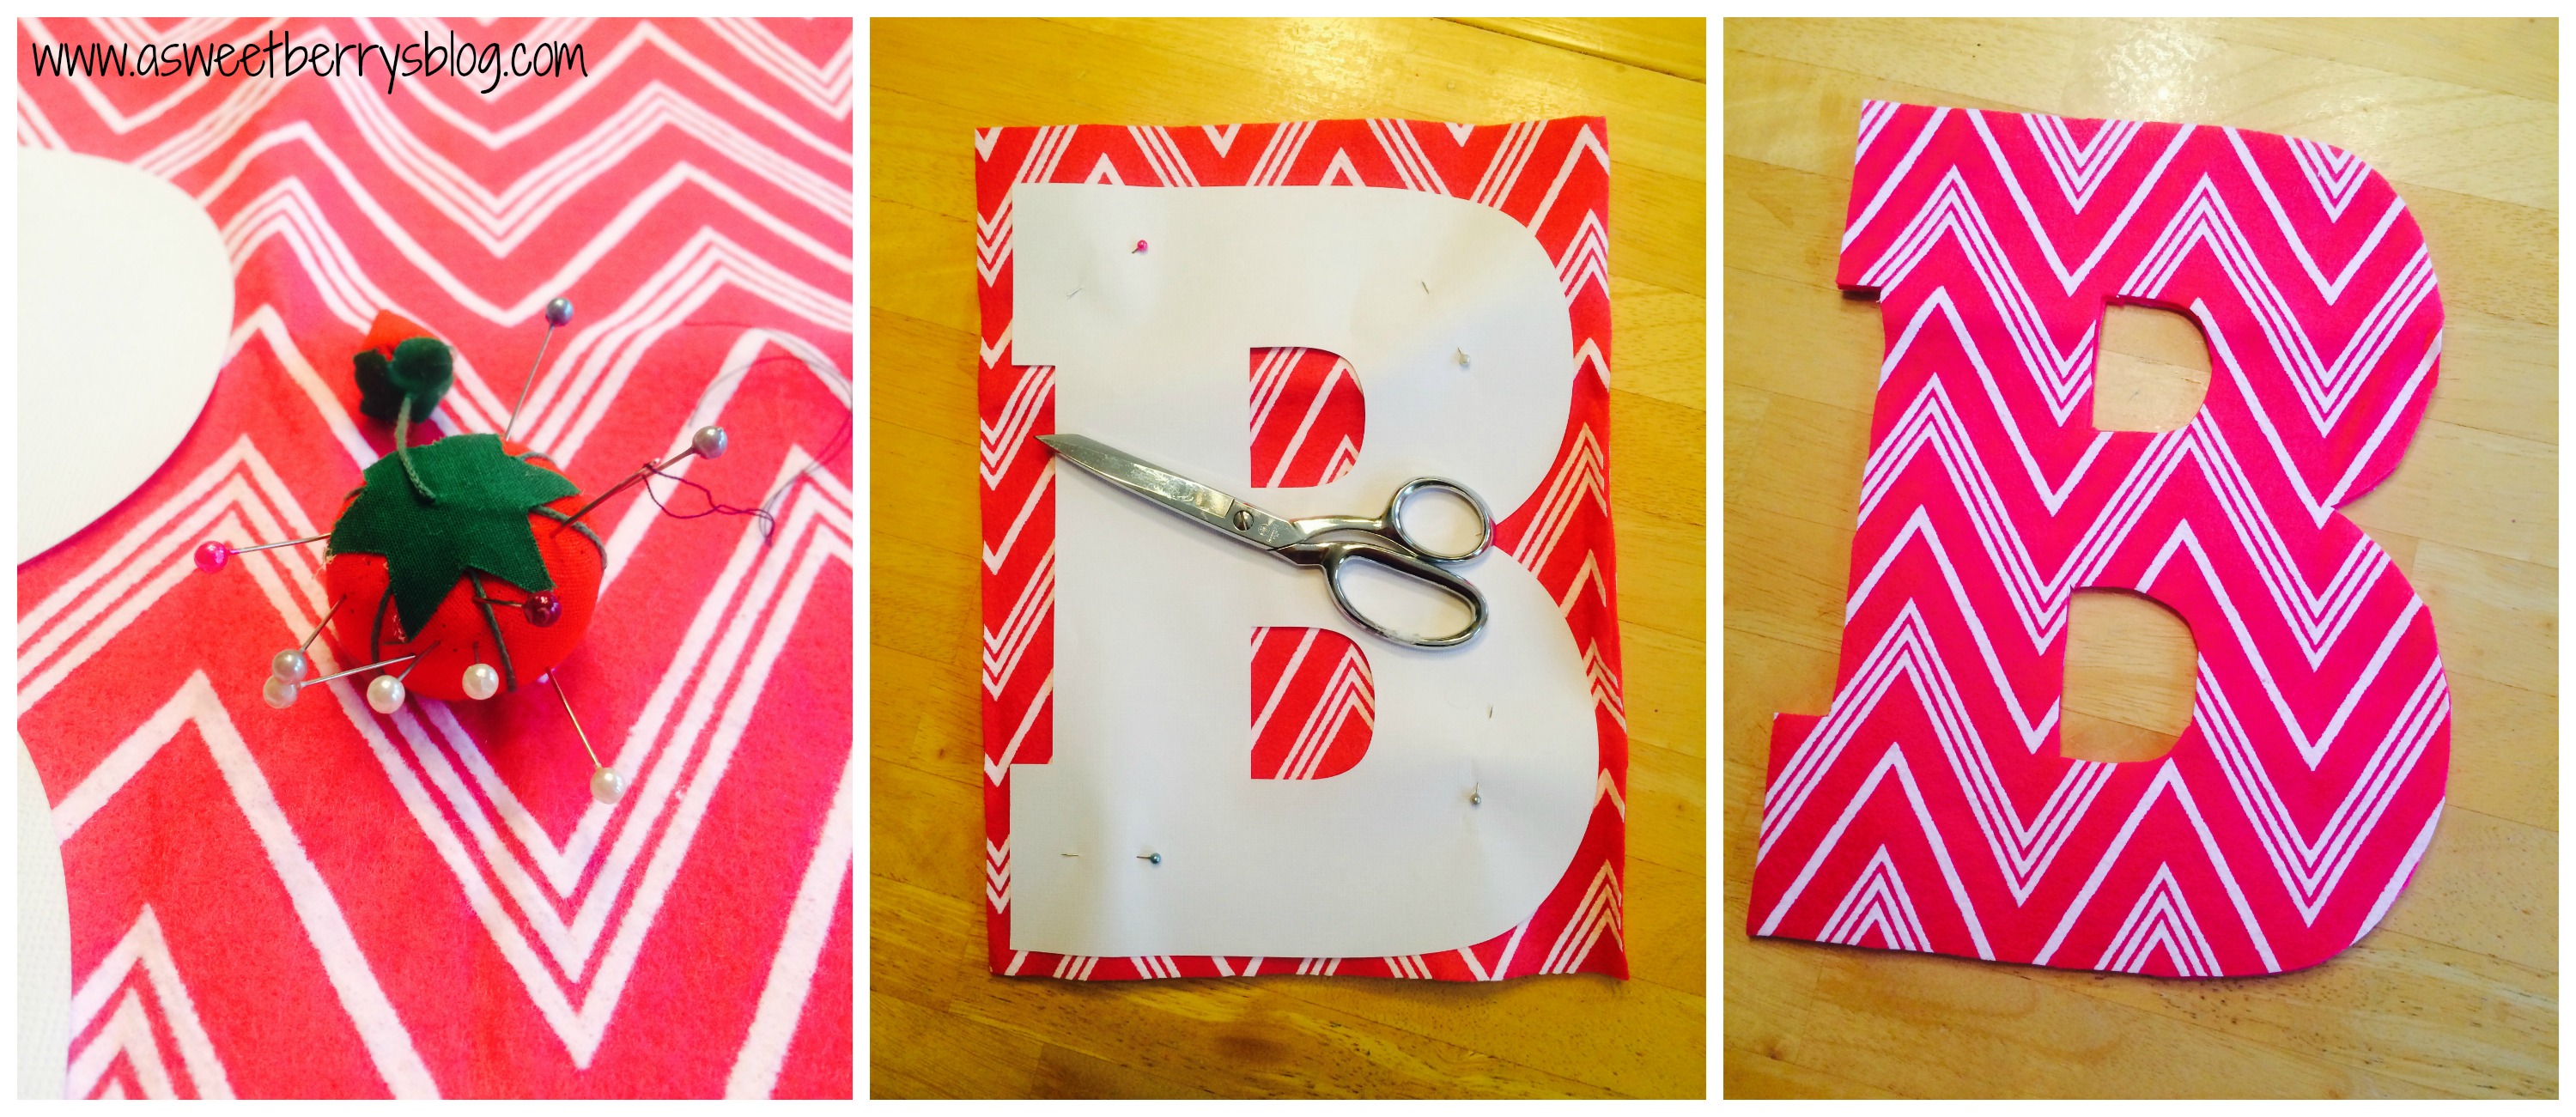
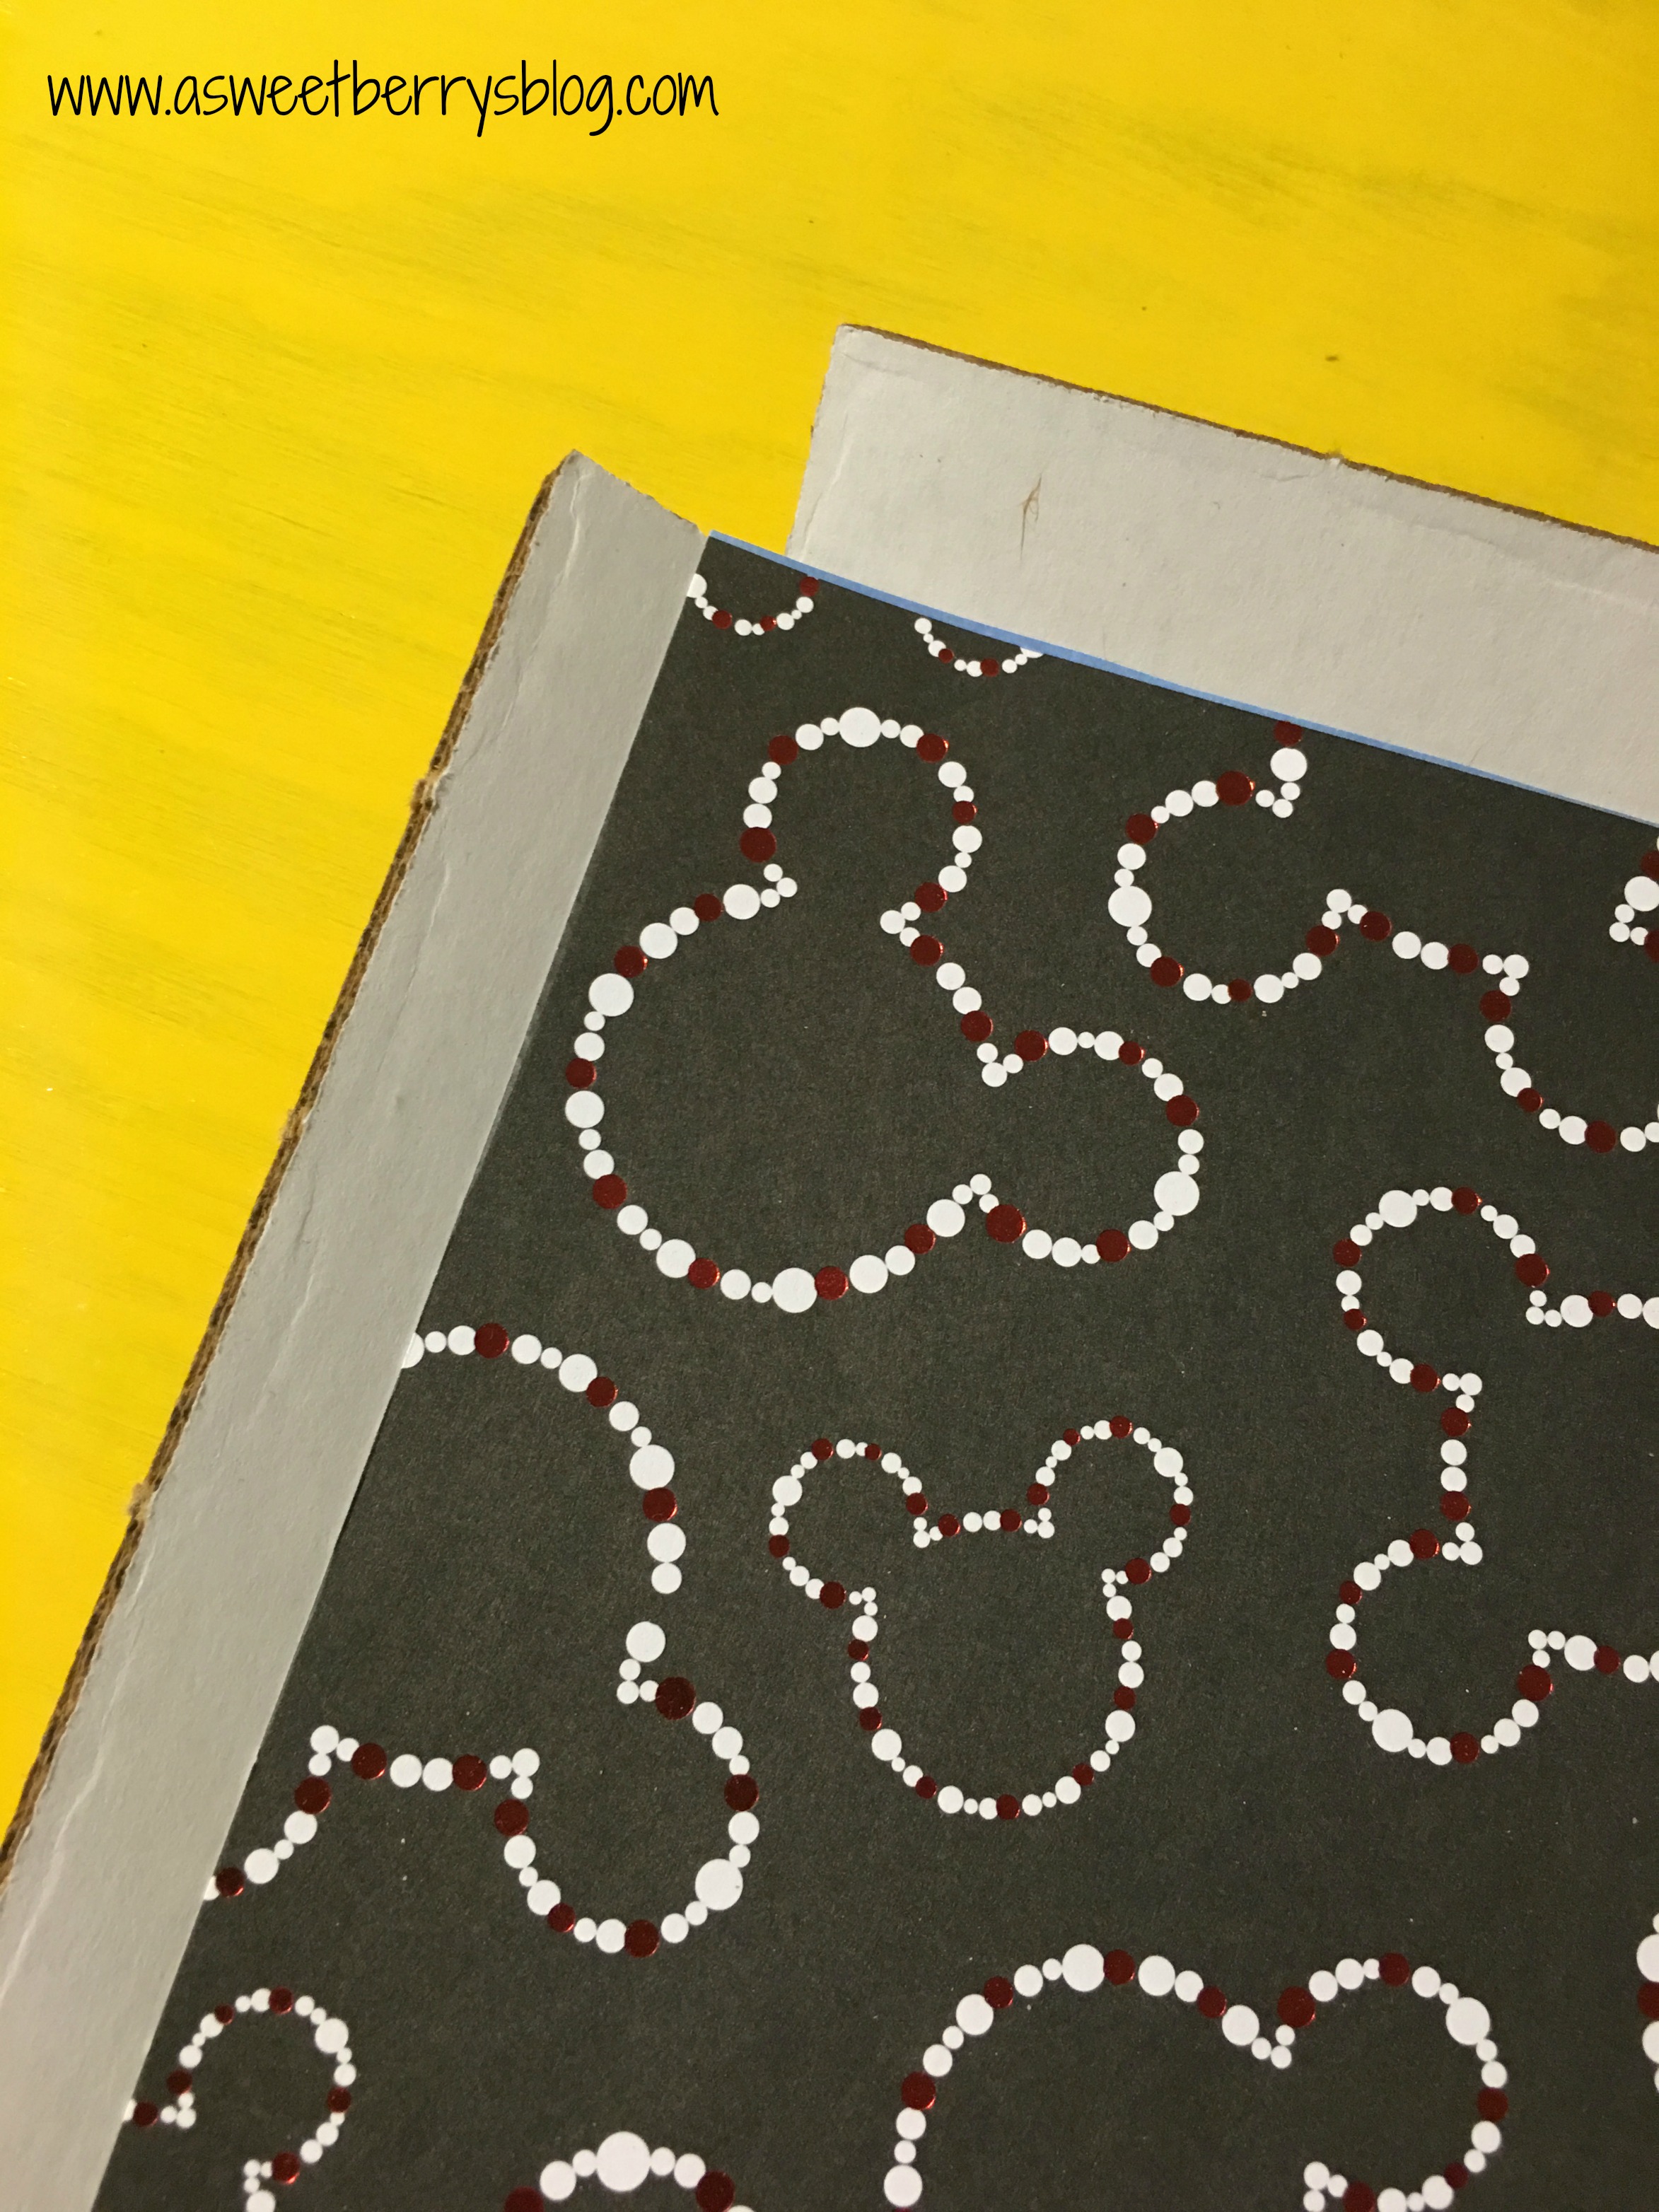
-A fun piece of scrapbook paper (I used this cute Mickey paper, but you could use any kind that you want if you are making it for something other than Disney!)

-A drill

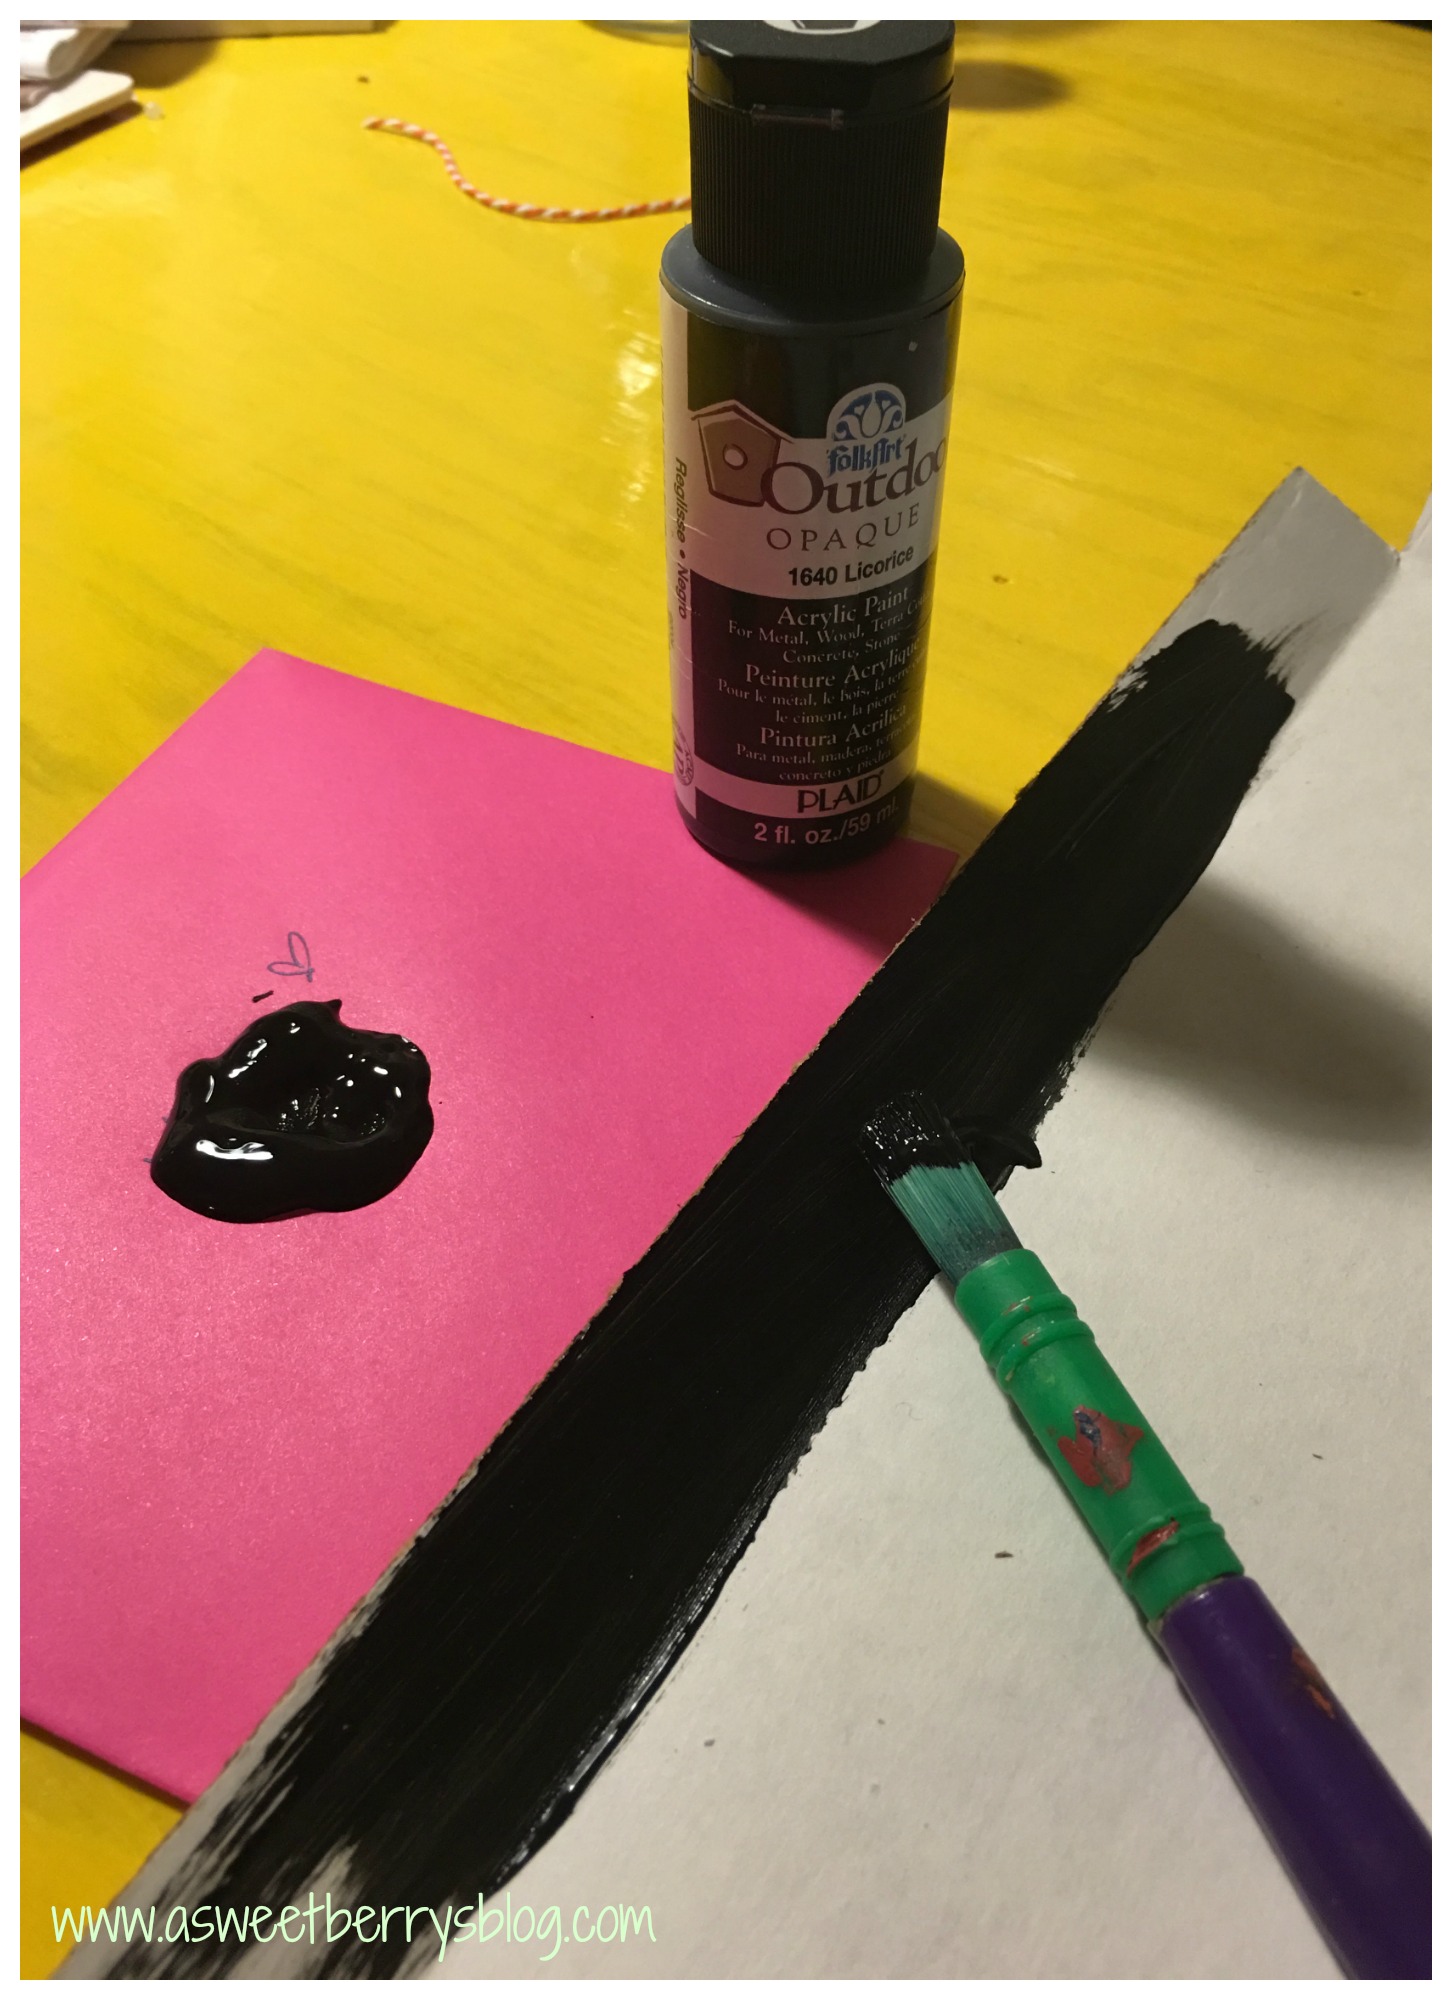
-Black Paint and a paint brush

-Glue Runner

Vinyl (affilate link)

-Electronic Cutting Machine (I used the Sizzix Eclips2 (affiliate link)

-Design/Cutting Software

-Money!!!!!!

Steps:

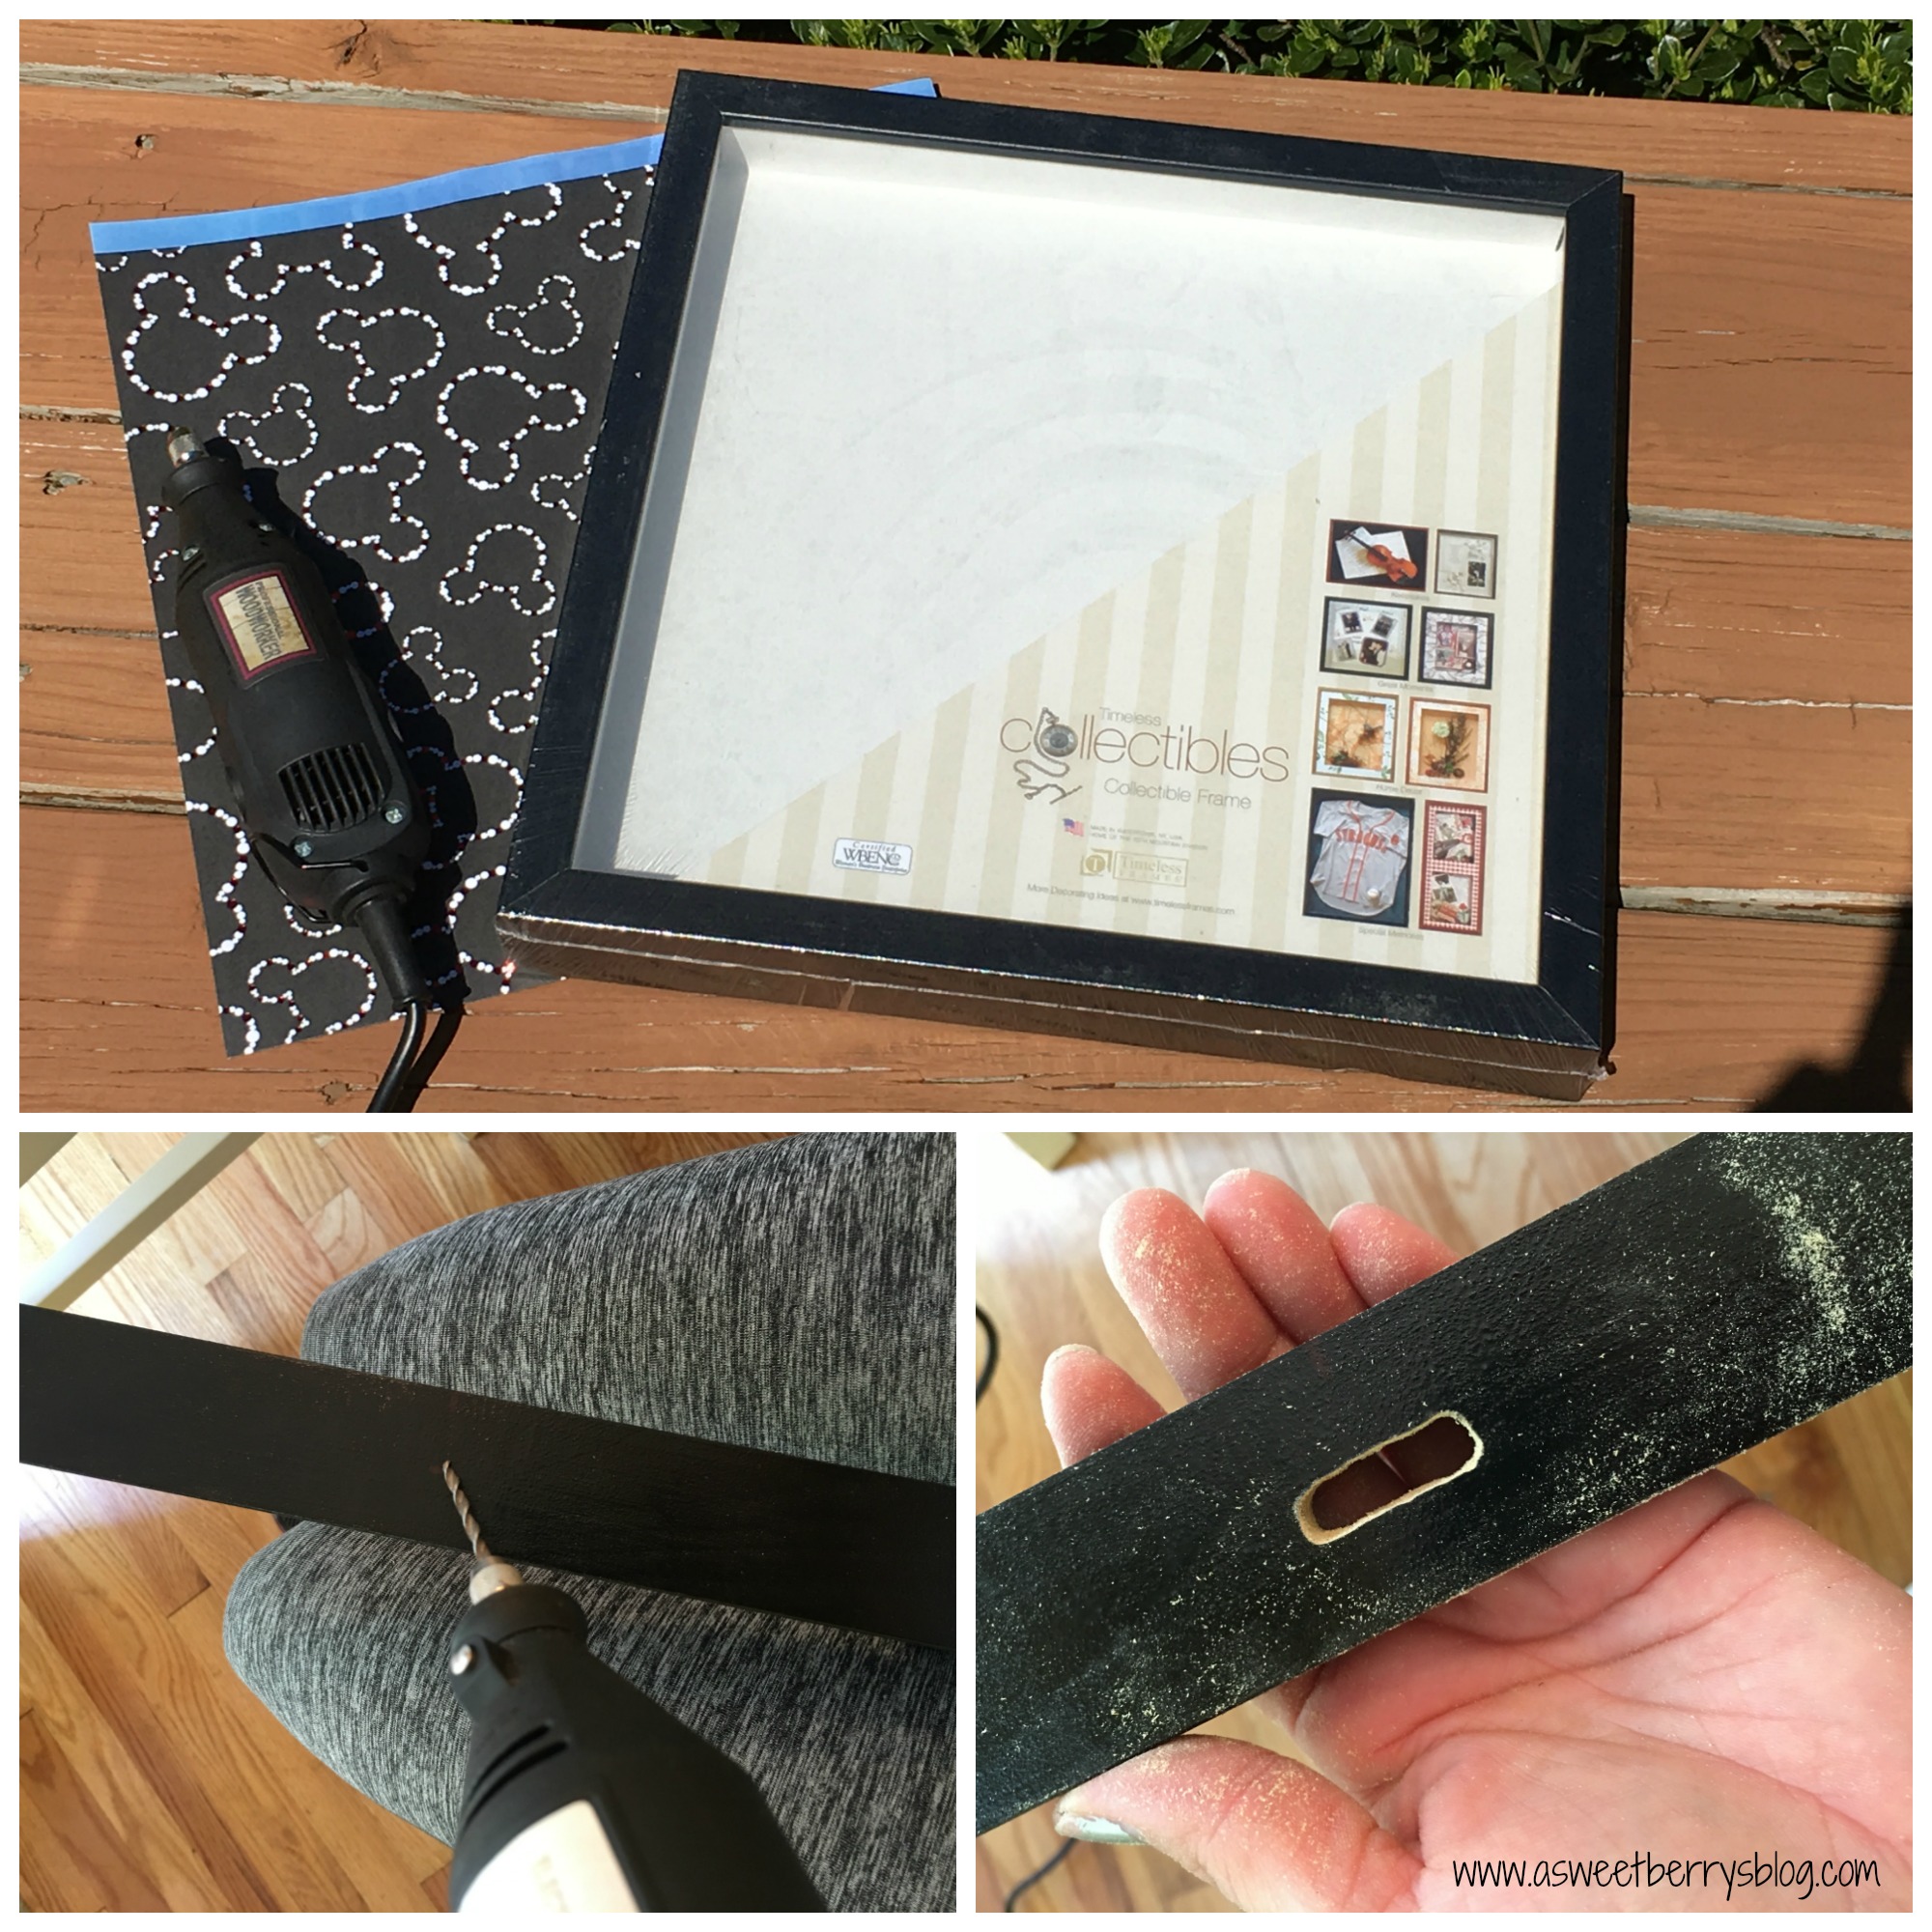
  1.  I removed the glass and cardboard backing from the frame and then drilled a hole in the top big enough for money to fit through.

Frame and Drill

2.  I measured my scrapbook paper to fit to the cardboard backing.  Then I painted the edges of the cardboard backing with the black paint.   Once the paint was dry, I put the cardboard backing into the frame and used a pencil to trace the hole that I cut from the frame.  I removed the cardboard backing and drilled a hole making it a little bigger than the lines.   

adding paper         painting cardboard

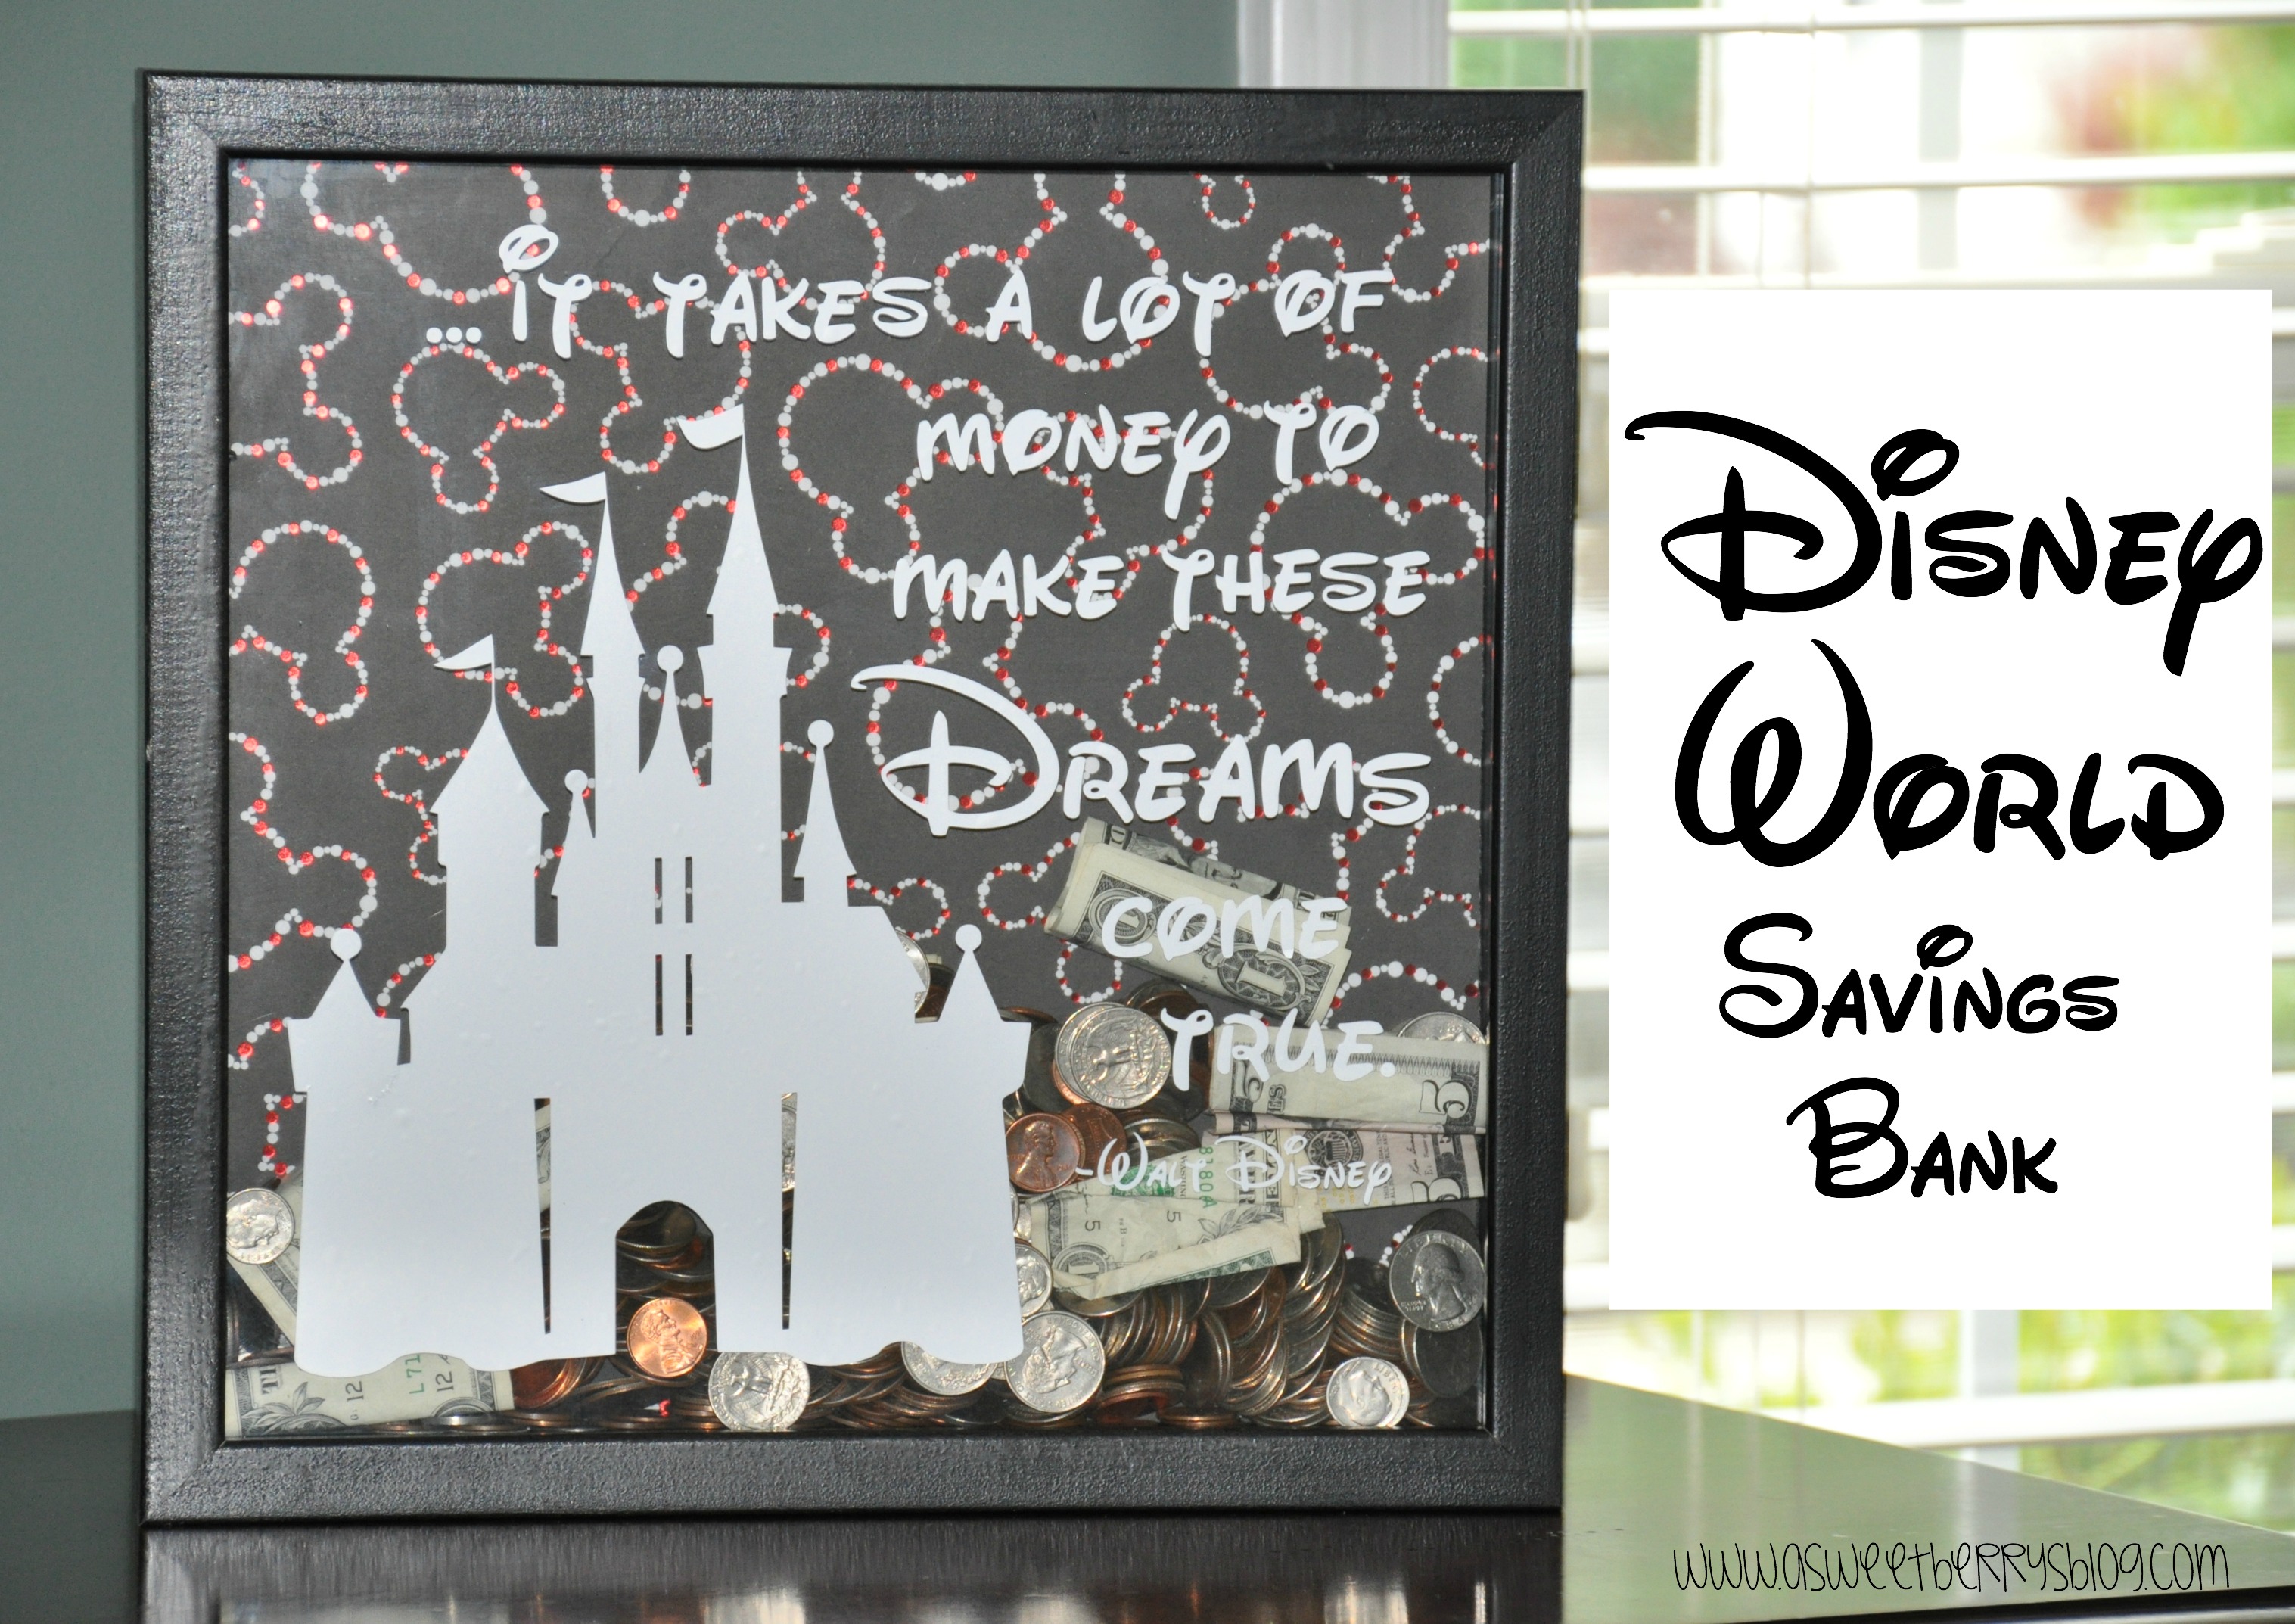
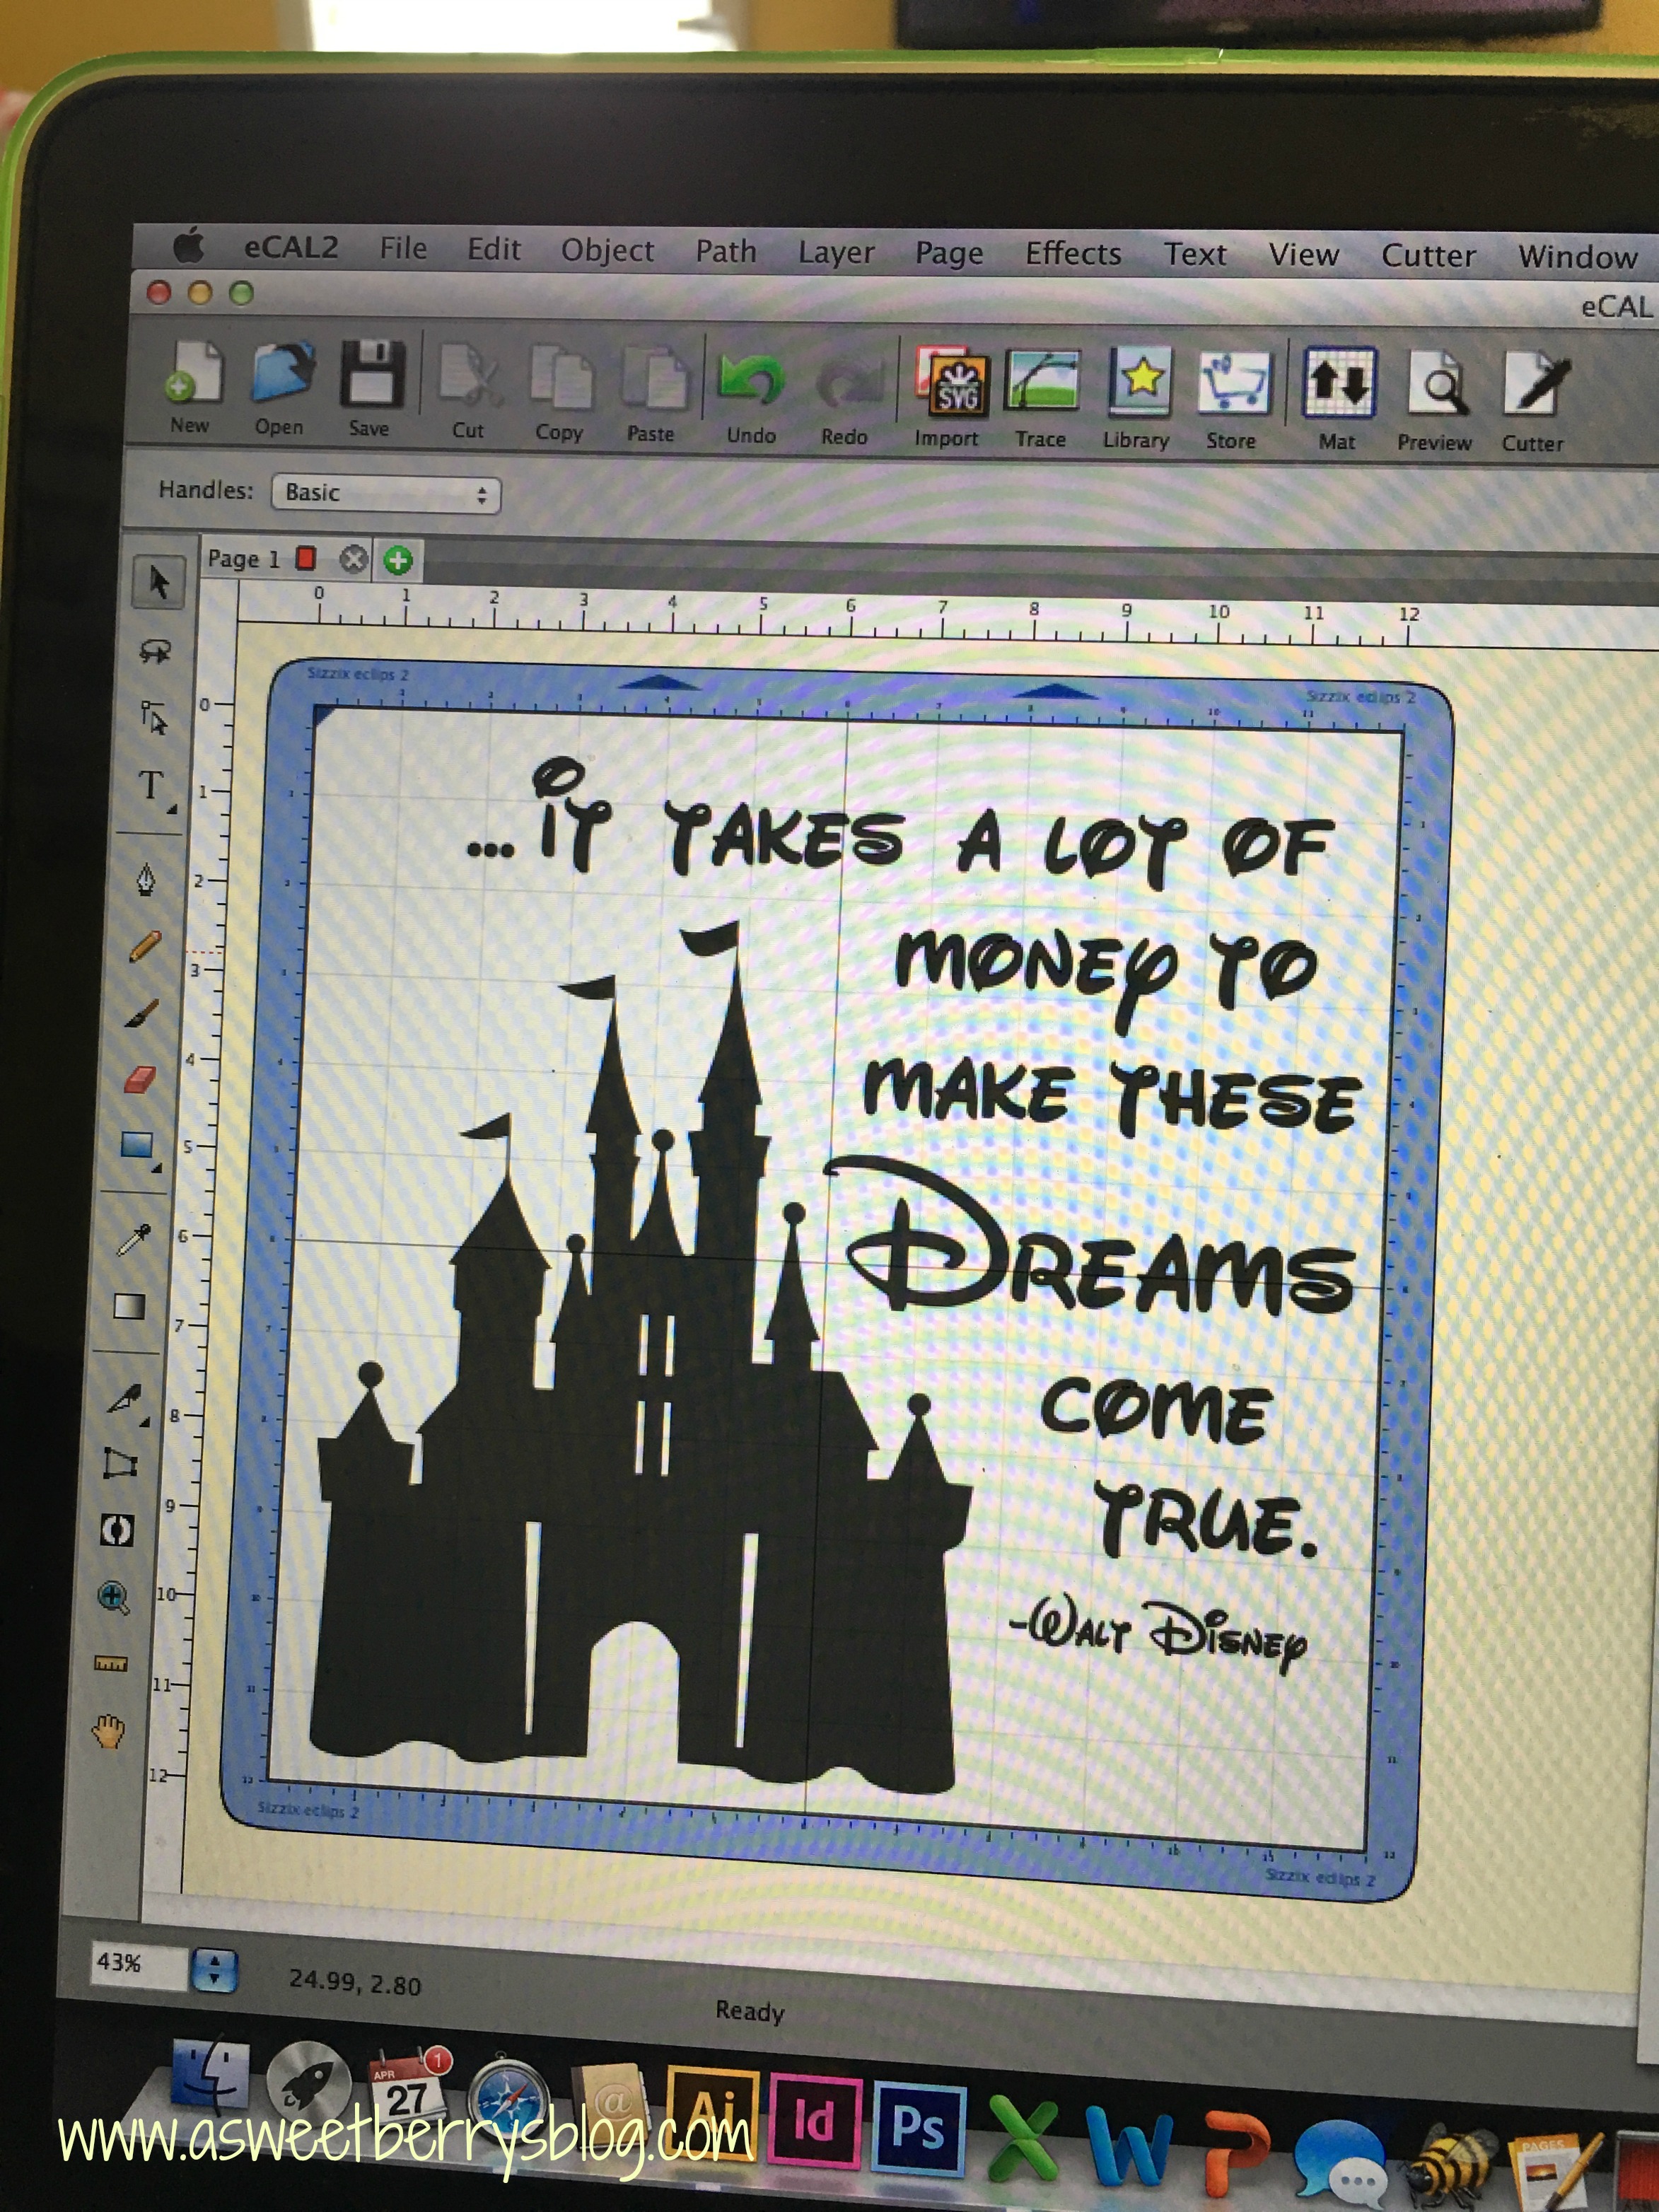
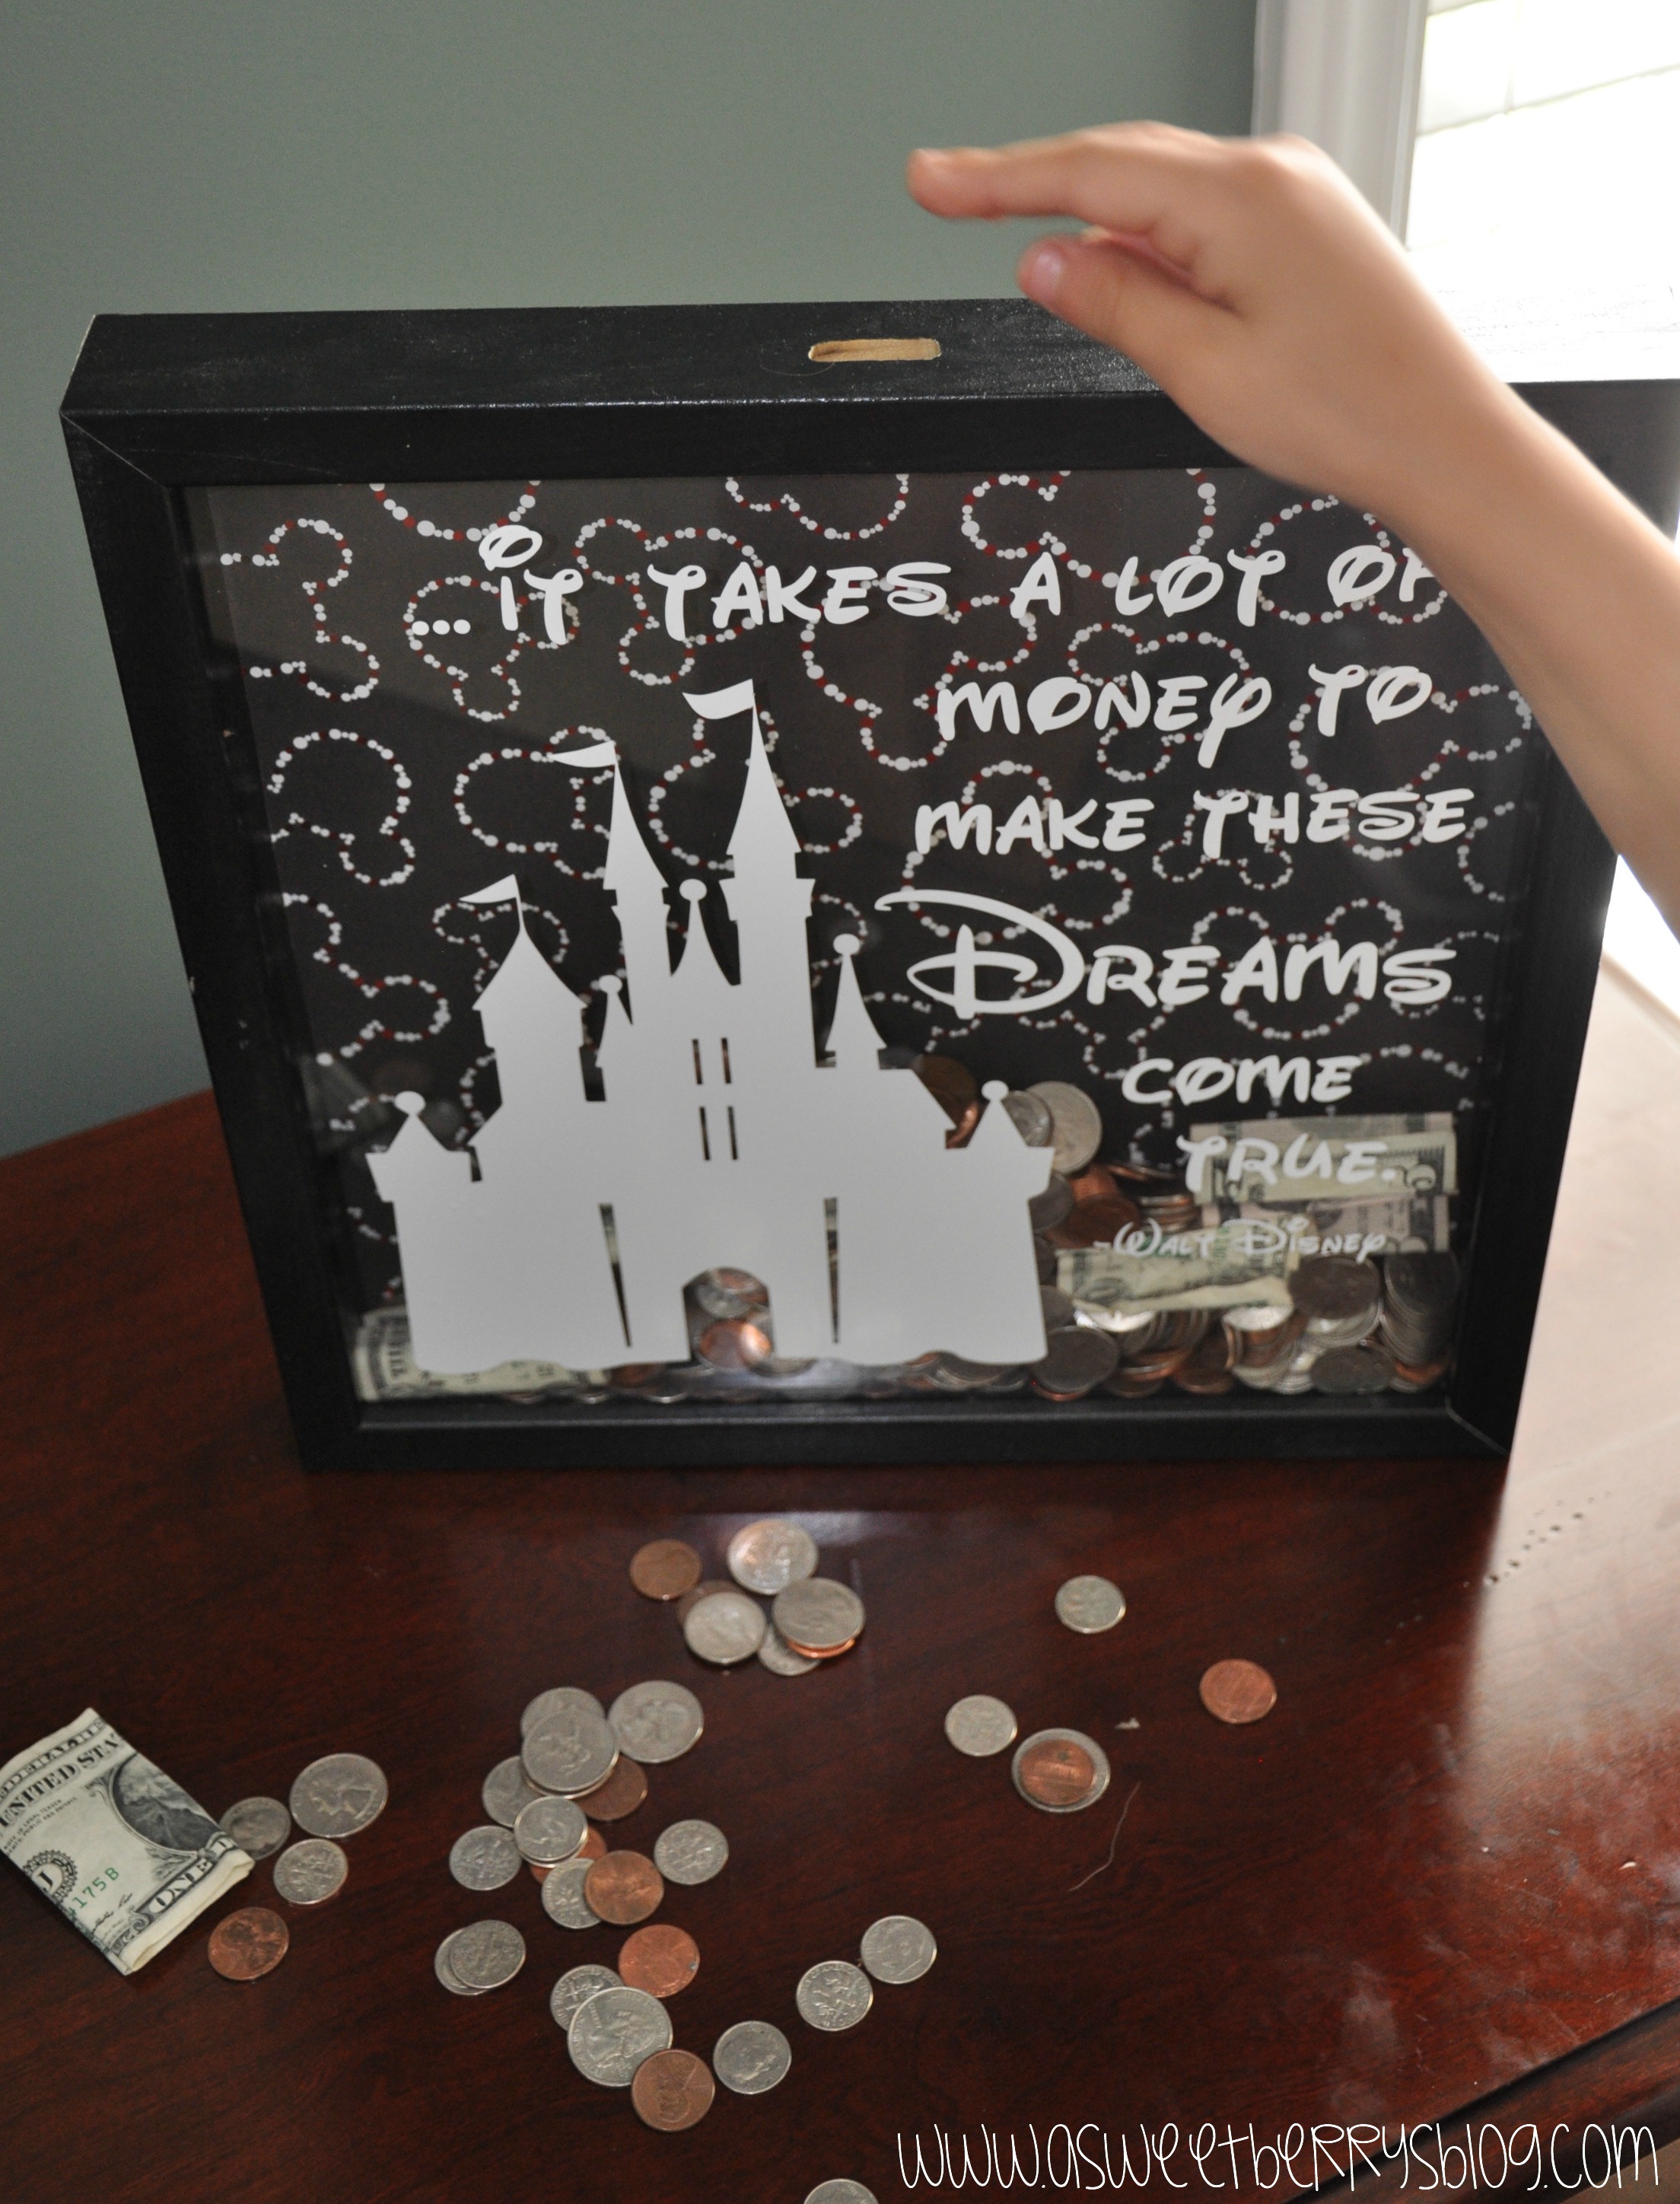
3.  Using eCAL2, I used a castle .svg file and a quote about money from Walt Disney.  I know that the quote had a different meaning than the saving of money for a trip to Disney, but I still like the quote and well……”It takes a lot of money to make these Dreams come true.”  That quote helps put into perspective for the kids that it does indeed take a lot of money to go to Disney!   I then cut it out with white vinyl.

eCal2

4. After the vinyl was cut, I weeded the excess vinyl.  I have to say that there is something very relaxing about weeding vinyl!   Using the hinge method, I placed the vinyl on the glass.

5.   I put everything together, making sure that I lined the holes up.  Then, I gave Benjamin all of the money that was in our change jar.   He went to town on putting all of the money in the Disney World Savings Bank!  

     Benjamin filling frame          filling high

Benjamin

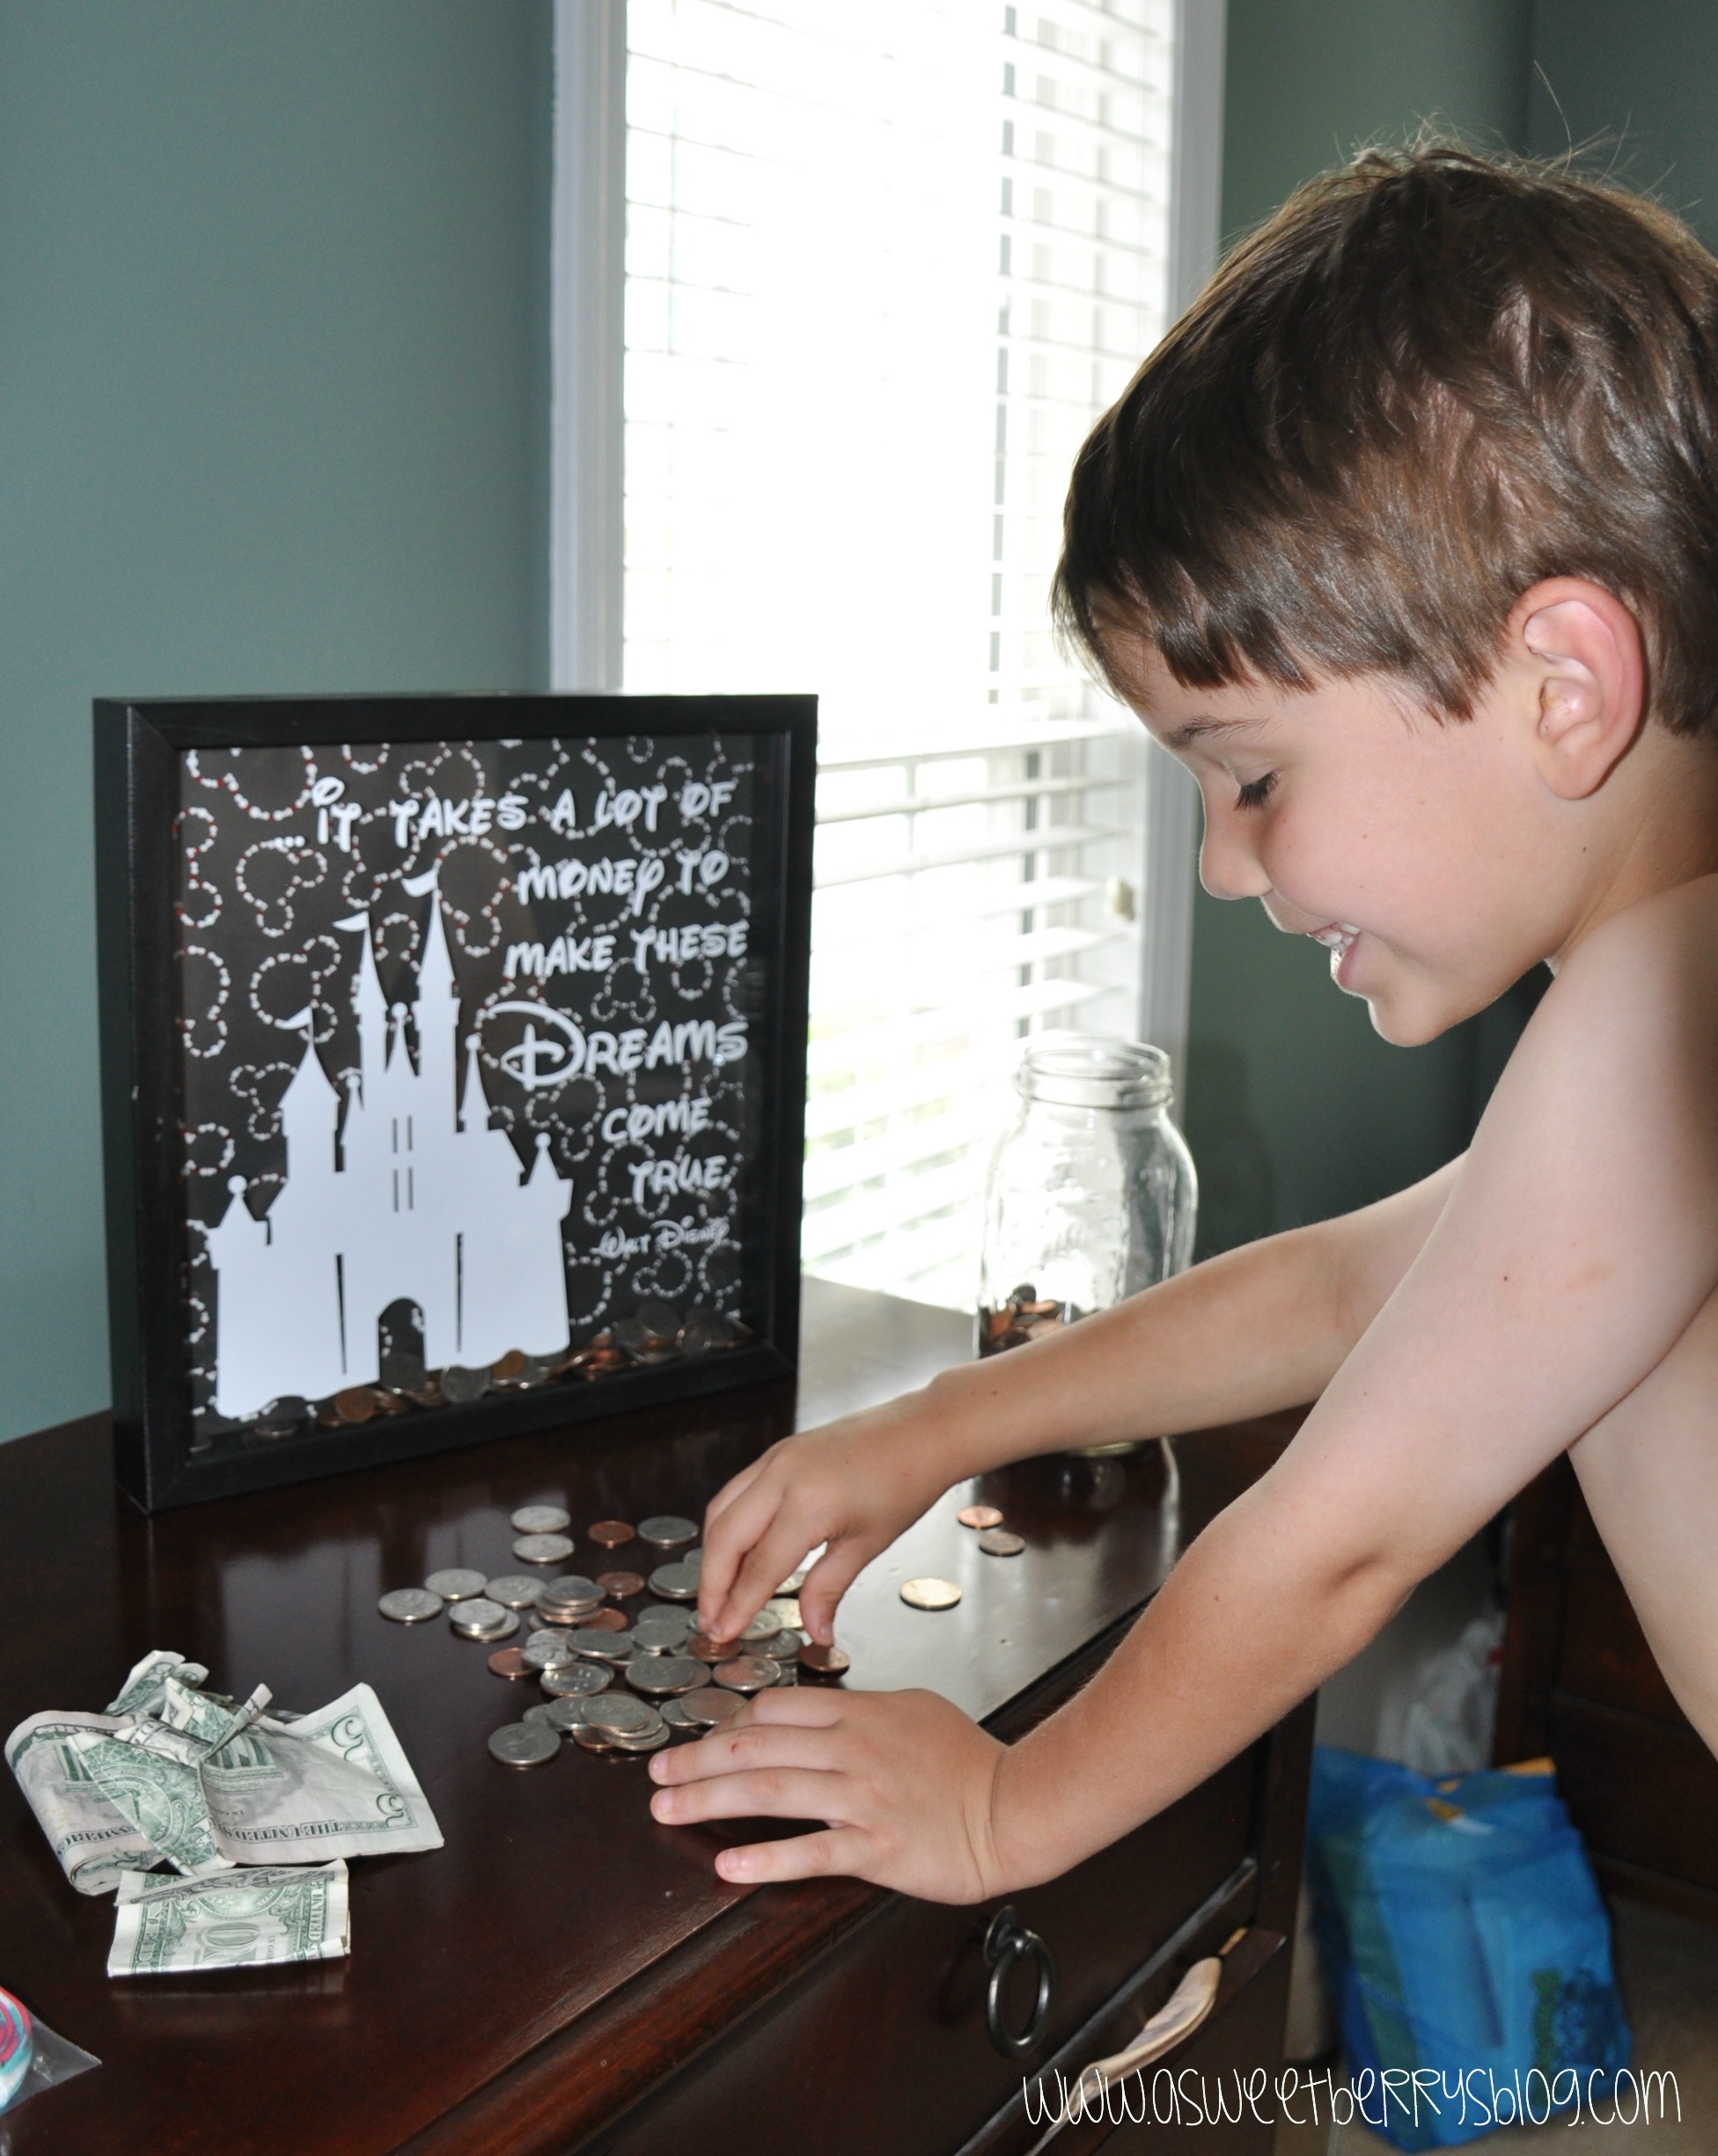
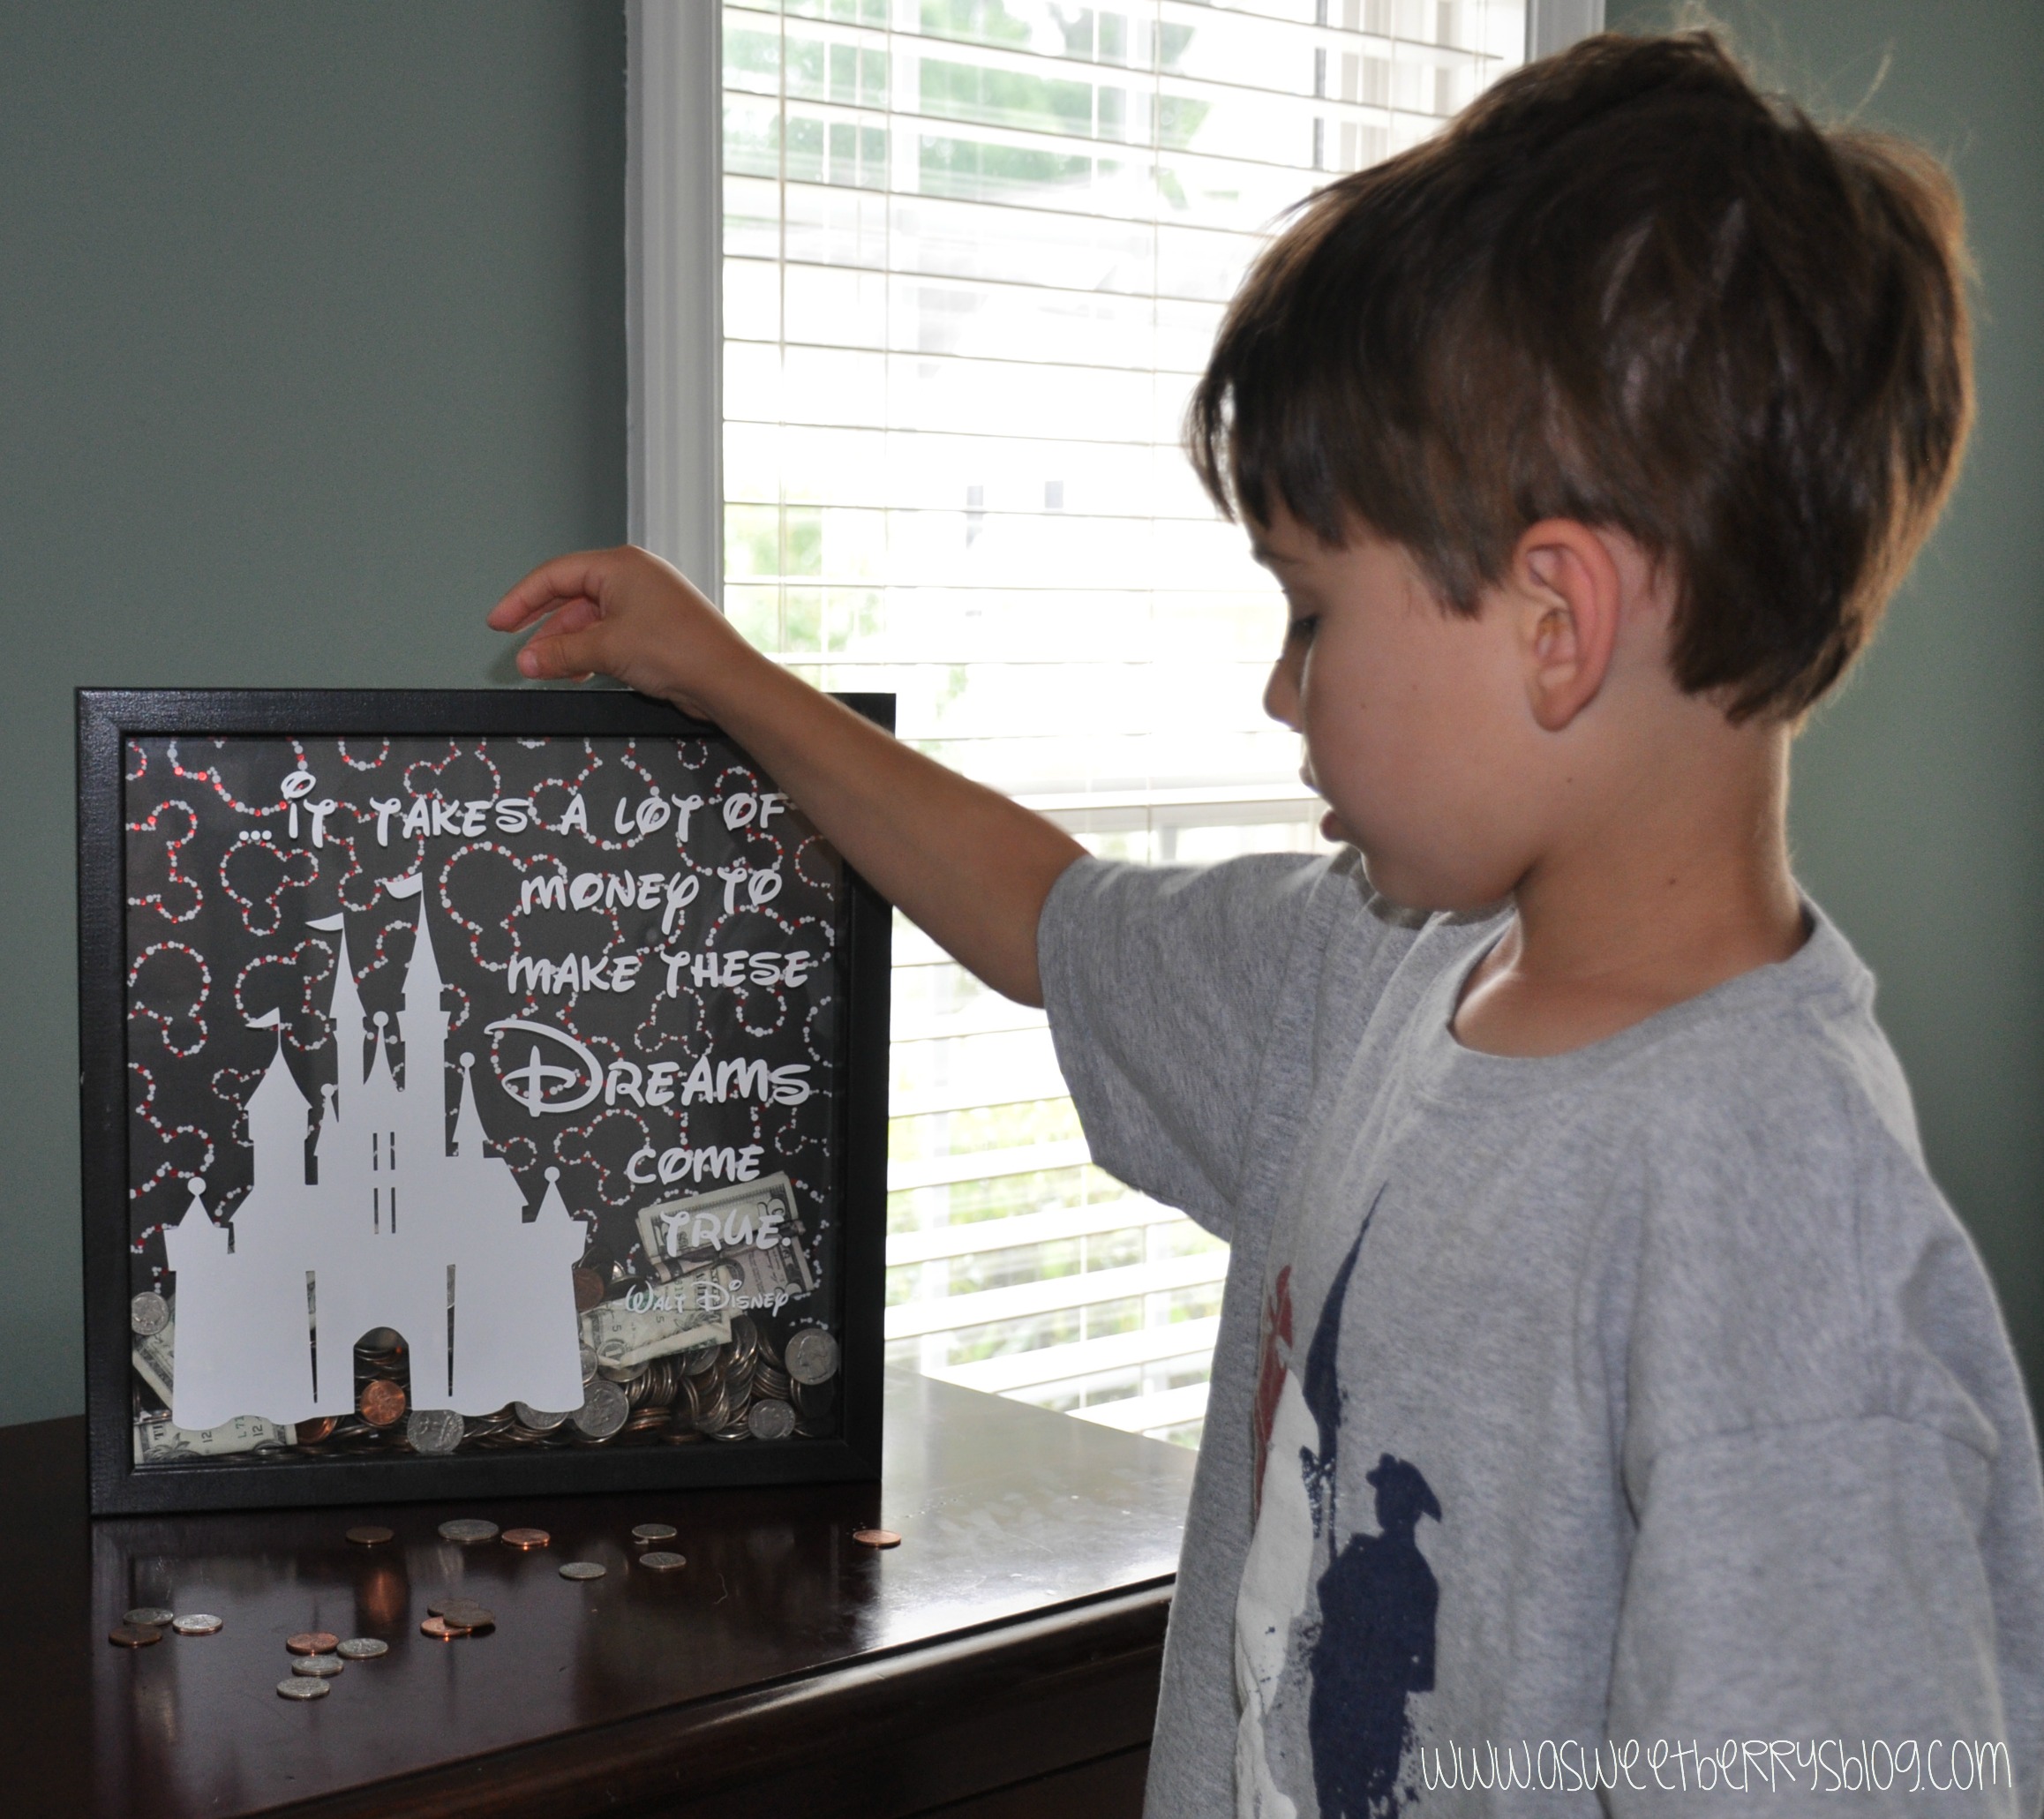
Hope you like my Disney World Savings Bank idea!!!   It was fun to make and the boys love putting their extra money in there.   Every so often, they want to count the money to see how much is in it and then they have fun putting the money in it again!   

Until next time…….


Meet eClips2

Easy Christmas Gift Tags

Christmas Tags

Christmas is upon us and the shopping has begun! These adorable and super easy gift tags are going to look awesome on the gifts below my Christmas tree!   If you have a Sizzix Eclips2, then you most likely use Sure Cuts A Lot eCAL2 for your software.  Well, if you do then all of these cut outs are included in the software.

collage

The process was pretty easy……

The snowflake:  I just cut the tag and snow flakes out separately.  I used a foam dot to get the snowflake a little dimension.  Then, I added a white ribbon.

The Christmas tree cutout:  I cut the tags with the Christmas Tree Cut out together and then cut the same tag, minus the tree.  I put them together using an Aleene’s tape runner.  Then, I added a piece of twine.

The Gingerbread Man:  I cut out a tag.  Then I cut out the gingerbread man on brown card stock.  Then, in the software, I removed the face and buttons from the gingerbread man and just cut out the outline on white card stock.   Using the tape runner, I attached the white gingerbread man cut out to the back of the brown one.  Then using a foam dot, I added it to the tag.  To finish it up, I added a piece of twine.

The Raised Christmas Tree:  I cut out some tags.  Using the Christmas Tree scraps from the Christmas Tree cutout tag, I just added a foam dot to the back of the tree and added it to the tag. Then, I added a piece of twine.

The Holly Tag:   I cut out some tags.  Cut the Holly leaves and berries out and used a foam dot on each piece and then attached it to the tag.   Then I added a piece of twine.

Christmas Tags

I hope you like these adorable little Christmas Tree Tags!   I made some last week and sold them at an Artisan Fair that my Church was hosting and everyone loved them!

Until next time………..

Happy Halloween Pumpkin Cut Out Art

Halloween will be here before we know it!   And I am super excited.  I love to pull out the Halloween decorations!

While I was at Target one day, I saw a popup heart piece in the framed art section and I thought it was so cute.  I had not seen anything like it with Halloween designs and I don’t think the heart one had any words.   I thought I’d make a Halloween one with cute little pumpkins and a font that was a little ghoulish! final
Materials needed:
A shadowbox frame
cardstock (I used four pieces….black, white, green, orange)
Aleene’s glue and a adhesive runner,
Electronic Cutting Machine (I used the Sizzix Eclips2)
Halloween .svg file that I created.   (comment if you’d like the file) cutting
Once my file was cut and removed from the cutting mat, I lightly folded the cut parts upwards.  I also saved the inside pieces of the letters. bending
Once all of my pieces were folded up, I cut strips of orange and green just big enough to fit across the back of my 12×12 piece.  I used green for the stems and orange for the pumpkins.  Using an Aleene’s adhesive runner, I attached the strips to the back, being careful not the squash my folded up pieces flat. aleenes
Because the insides of the letters were small, I used Aleene’s Tacky Glue to glue those to the green.
letters
After all of my pieces were put together, I placed them into 12×12 shadowbox frames.   black and white
This photo is just to show them from each side, so that you can see that the orange and green can be seen from under the folded upward pieces of pumpkin. both at different angles
I love them both, but truth be told, the black one is my favorite.  It looks more Halloween-ish!
final
I hope you liked my Happy Halloween Pumpkin Cut Art.  If you’d like the .svg file, just let me know in a comment and I will be sure to get that to you!

Until next time……

Easy Fabric Key Fobs

Main Pic

Materials:
Fabric of your choice (colorful and white)
Printable Fabric Transfer
Color Printer
Iron
Key Fob Pieces
Rotary Cutter with Mat and Ruller
Scrap Felt
Sewing Machine with Thread
Pliers

Optional:
Sizzix Eclips 2 or other electronic cutting machine
Gift Tag SVG file
Ribbon

I started by printing my A Sweet Berry Designs berry logo on printable transfer paper and using the Sizzix Eclips2 to cut them out.  I was originally going to do circle keychains, so I cut our circles but ended up cutting them into more of a rectangle/square shape!  After they were printed and cut out, I laid them print side down onto my white fabric and ironed them with my iron set to the setting recommended on the transfer directions.
Cutting out berries
Then it was time to cut my fabric!  JoAnn Fabrics was having a Fat Quarter sale, so I purchased a variety of purples and greens.  I kept the fabric folded and cut a rectangle to my preferred size using my rotary cutter and ruler.  For the felt that I was going to place into the middle to give it a little fullness, I cut just a little smaller than the fabric cut out so that it was not visible once they were sewn in.  Once everything was cut, I placed the felt into the middle. materials
Then it was time to sew them up.  I used a zigzag stitch and sewed the three sides closed.  Once they were all sewn closed, I placed the berry logo where I wanted it and stitched it in place, also using the zigzag stitch.  Then it was time to place the key fob hardware clamp onto the sewn fabric.  I put them on the side that was folded.  I didn’t want flier marks on my hardware, so I used a scrap piece of fabric to place over the hardware while clamping it together, making sure that the spikes within the clamp went into the fabric.   I had just had my nails done, so my lovely husband was nice enough to add all of the split rings to my hardware clamps for me! sewing and metal
Voila! They were done!  I wanted to add cute little tags to mine, so I cut gift tags using my Sizzix Eclips 2.  Using my personalized stamp from Laura Kelly for Expressionery.com, I stamped my tag.  My stamp says “Created with Love From Katie Berry”. keyrings and labels
I hope you like my Fabric Key Fobs!  They were super easy to make!  I made them to go with my business cards for SNAP! Conference and they were a hit!  I still have a few left, so if you’d like one, just let me know!

Until next time……

Teacher Appreciation Gift – Stenciled Monogram Burlap Basket

Teacher Appreciation Week is right around the corner.  We all appreciate the hard work, love and dedication that our teachers put into our children’s education.  Do you need a quick, easy and cute teacher appreciation gift?  This stenciled monogram burlap basket was super simple and quick.
Final

Materials:
Burlap basket (I found mine in the Target $3 section and it’s nice and sturdy)
basket
Tulip Fabric Paint
Sizzix Eclips2
Contact Paper

Directions:

1.  Measure your basket, so that you know how big your letter (and name) can be.

2.  Using the electronic cutting machine software, I chose a font for the letter and name.  In this case, I used the Sure Cuts A Lot software.  And I chose the Bell Font.

3.  Using the Sizzix Eclips2, mat and my contact paper (placed on the mat face up), I cut out the letter and name.

4.  I didn’t want to use the actual letter cutouts, so I pulled up the outlined piece of contact paper and placed it on my burlap basket making sure it was centered.
stencil

5.  Using the Tulip Fabric Paint, I colored in the letters like a stencil.
tulip

6.  Once I was done with the fabric paint, I pulled up the contact paper stencil and then let it dry!

I think it turned out great!  And I know that my son’s teacher will love it!  Plus, I filled it with goodies for her!

Now, click below to check out the three host of Craft Lighning and others that have amazing 15 minute or less Teacher Appreciation Gifts!

Kunin Chevron Felt Hanging Letter

I love Kunin Group’s Chevron Felt!  The pattern is already on the felt, so all you have to do is create something Felt-tastic.   I love having something decorative hanging on my front door.  Driving by one of my neighbors houses the other day, I noticed that they had a wooden initial on their front door, so I thought……why not do something similar with felt!   While at the Craft and Hobby Associations Mega Show in January, the lovely ladies at the Kunin Group Felt booth gave me this lovely Pink Chevron Felt.   And I love how it turned out!

Hung up _ Inside_Final

So, I am totally obsessed with the Sizzix eclips2!  It does amazing things.  I use it all of the time to cut out patterns for sewing.  Using the eCal2 software, I decided upon this big B.  I used the eclips2 to cut it out and tada….a big B pattern!

Cutting of Letter

Once my B was cut out of card stock, I pinned it to the felt and then cut it out, making sure that the top and bottoms were both facing with the pattern outward.

Pinning and Cutting

Using my sewing machine, I began sewing at about 1/4 of an inch from the edge.  I started with the insides.   For the outside of the letter, I started on the serifs, leaving an opening on the left of the “B” so that I could stuff it.  I used Poly-fil to stuff it.  Once it was stuffed, I pinned my open edge and sewed it shut!

sewing and stuffing

Using a thicker type wire, I inserted it in two places into the back side of my “B” at the top.  I meant to leave about 3 inches that I wound around a marker so give it curls.

Wiring

Then it was ready to hang!  

  Hung up _ Inside_Final

I love it and it is just perfect for the Spring time hanging on my front door!

Fun Fact:  Kunin Fabrics are made from Eco-fi, 100% Post Consumer recycled plastic bottles and made in the USA!

Until next time……