Tag Archives: ilovetocreate

Tulip Paint Decorated Gift Bags

Christmas is just days away and I know that everyone is busy doing some last minute wrapping!   Here is a super easy way to spiff up some plain gift bags!    Final
I got these adorable little gift bags from World Market.  They came in a pack of six and are perfect for small gifts.  I used Tulip Slick Dimensional Fabric Paint to decorate them with a monogram and snowflakes and holly!   Super easy! 
bags and paint
The decorated gift bags were perfect for these ornaments I made using my Sizzix Eclips2, a glass ornament and vinyl.   ornaments
Hope you enjoyed this quick and easy gift bag decorating idea!    Merry Christmas!

Until next time……..

Happy Spring Button Greeting Card

I love Spring and I love Buttons!   I created this adorable Happy Spring greeting card using Laura Kelly’s Buttons and Lady Bug Buttons from Buttons Galore & More!
Final
Materials used:
Laura Kelly Buttons from Buttons Galore & More
Lady Bug Buttons from Buttons Galore & More
Card stock from Core-dination from Darice
Card/Envelope from Core-dination from Darice
Fabric Tag
Tulip Fabric Markers from ILoveToCreate
Hot glue gun and hot glue
Aleene’s Fast Grab Tacky Glue
Aleene’s Paper Glaze
I started by making paper rosette flowers.   I cut 3/4″ and 1/2″ paper strips with cute card stock.  Bending the paper back and forth, I created a zigzag strip.   Once I had them all folded, I used a hot glut gun to glue the strips to each other, connecting two strips together on each end.  Once they were connected and formed a circle, I positioned the sides together to form the rosette and hot glued the center and let it dry. rosettes
I cut my stems and leaves from a green striped card stock and glued them to a card using my Aleene’s Fast Grab Tacky Glue.  I added buttons to the paper rosette flowers!  I used green buttons for the grass!
puttingtogether
Buttons Galore & More has adorable little lady bug buttons, so I attached them to my card using Aleene’s Fast Grab Tacky Glue.  I added them to the paper rosette flowers, the stem and the grass! ladybugs
Using a fabric tag and Tulip Fabric Markers, I wrote Happy Spring and added lines and dots!  I applied it to the card using Aleene’s Paper Glaze and added a little ladybug to cover the hole on the tag. tulip fabric markers
I love this adorable little Happy Spring card and someone special will be receiving it soon! Final

Buttons Galore & More is offering free shipping on orders over $30!    They also offer Coupons for their buttons!

Once I completed my card, I used my Laura Kelly personalized self-inking stamp from Expressionery.com to stamp the back showing that I created this card with love! Expressionery.com

Expressionery.com is currently running a special of 25% off Sitewide with the code:  SPRINGSALE.   They are also offering free shipping with a purchase of $50 or more!

Hope you like this adorable card as much as I do!  You can make one yourself!

Until next time……

Teacher Appreciation Gift – Stenciled Monogram Burlap Basket

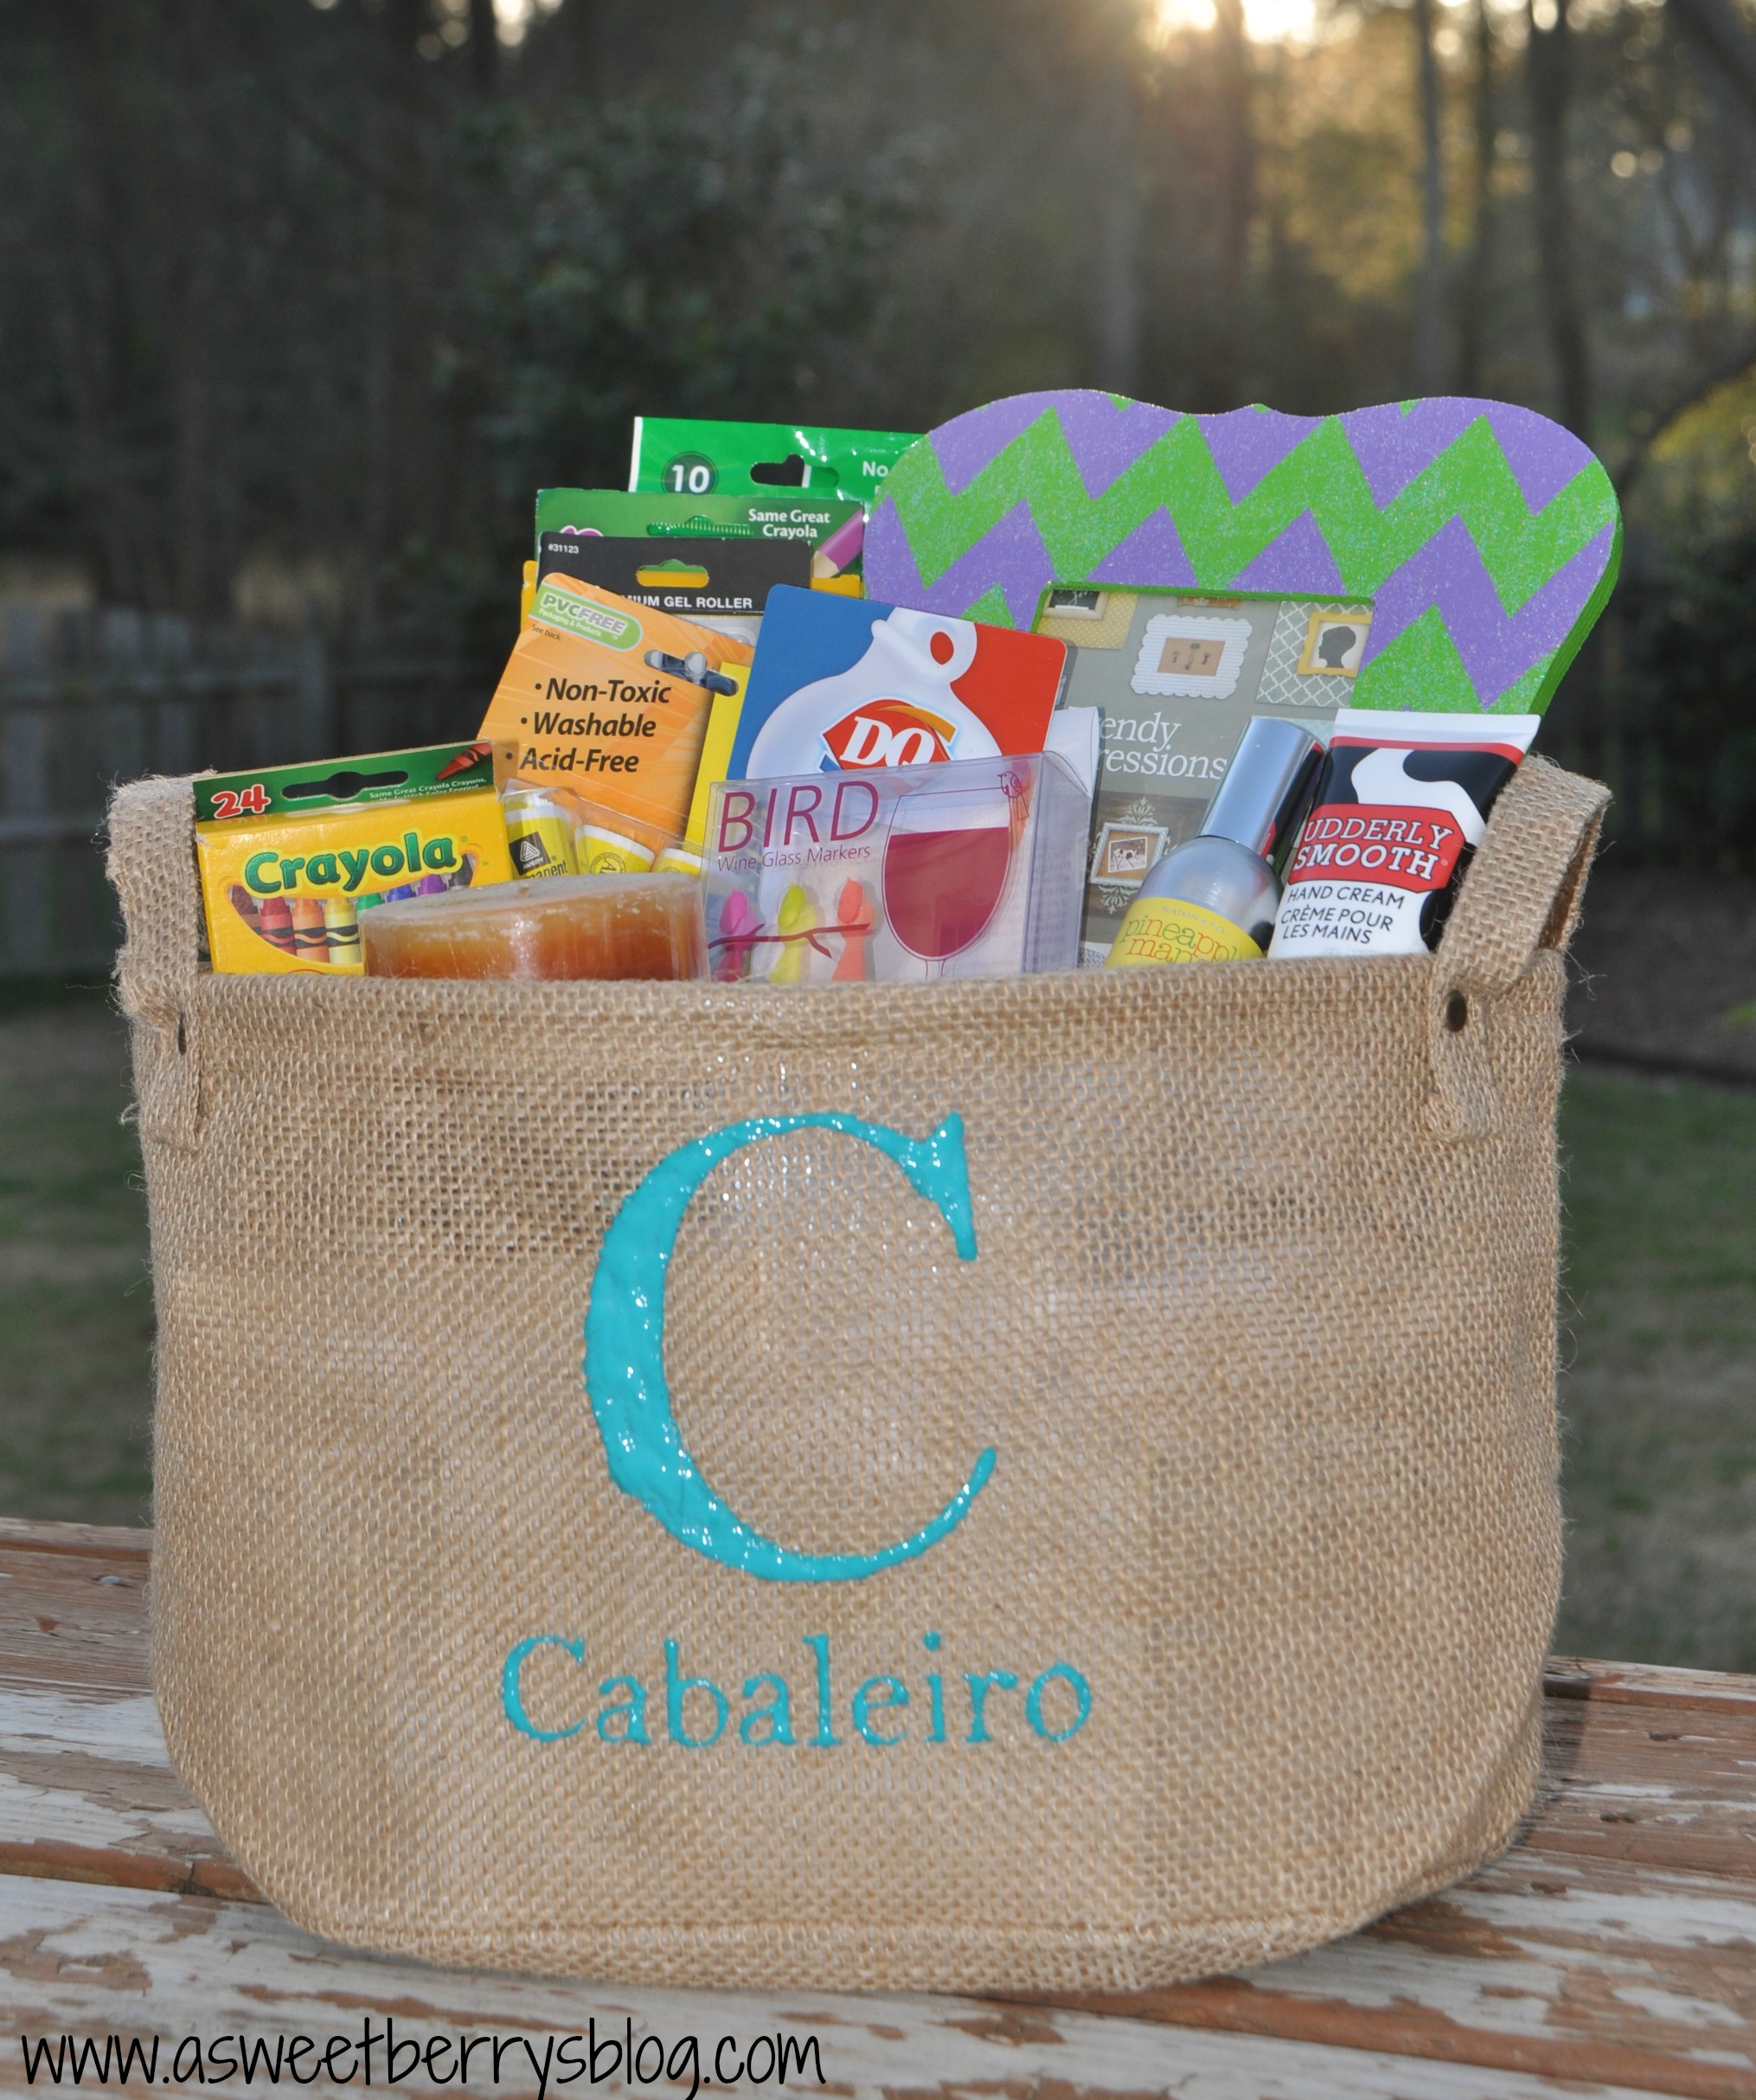
Teacher Appreciation Week is right around the corner.  We all appreciate the hard work, love and dedication that our teachers put into our children’s education.  Do you need a quick, easy and cute teacher appreciation gift?  This stenciled monogram burlap basket was super simple and quick.
Final

Materials:
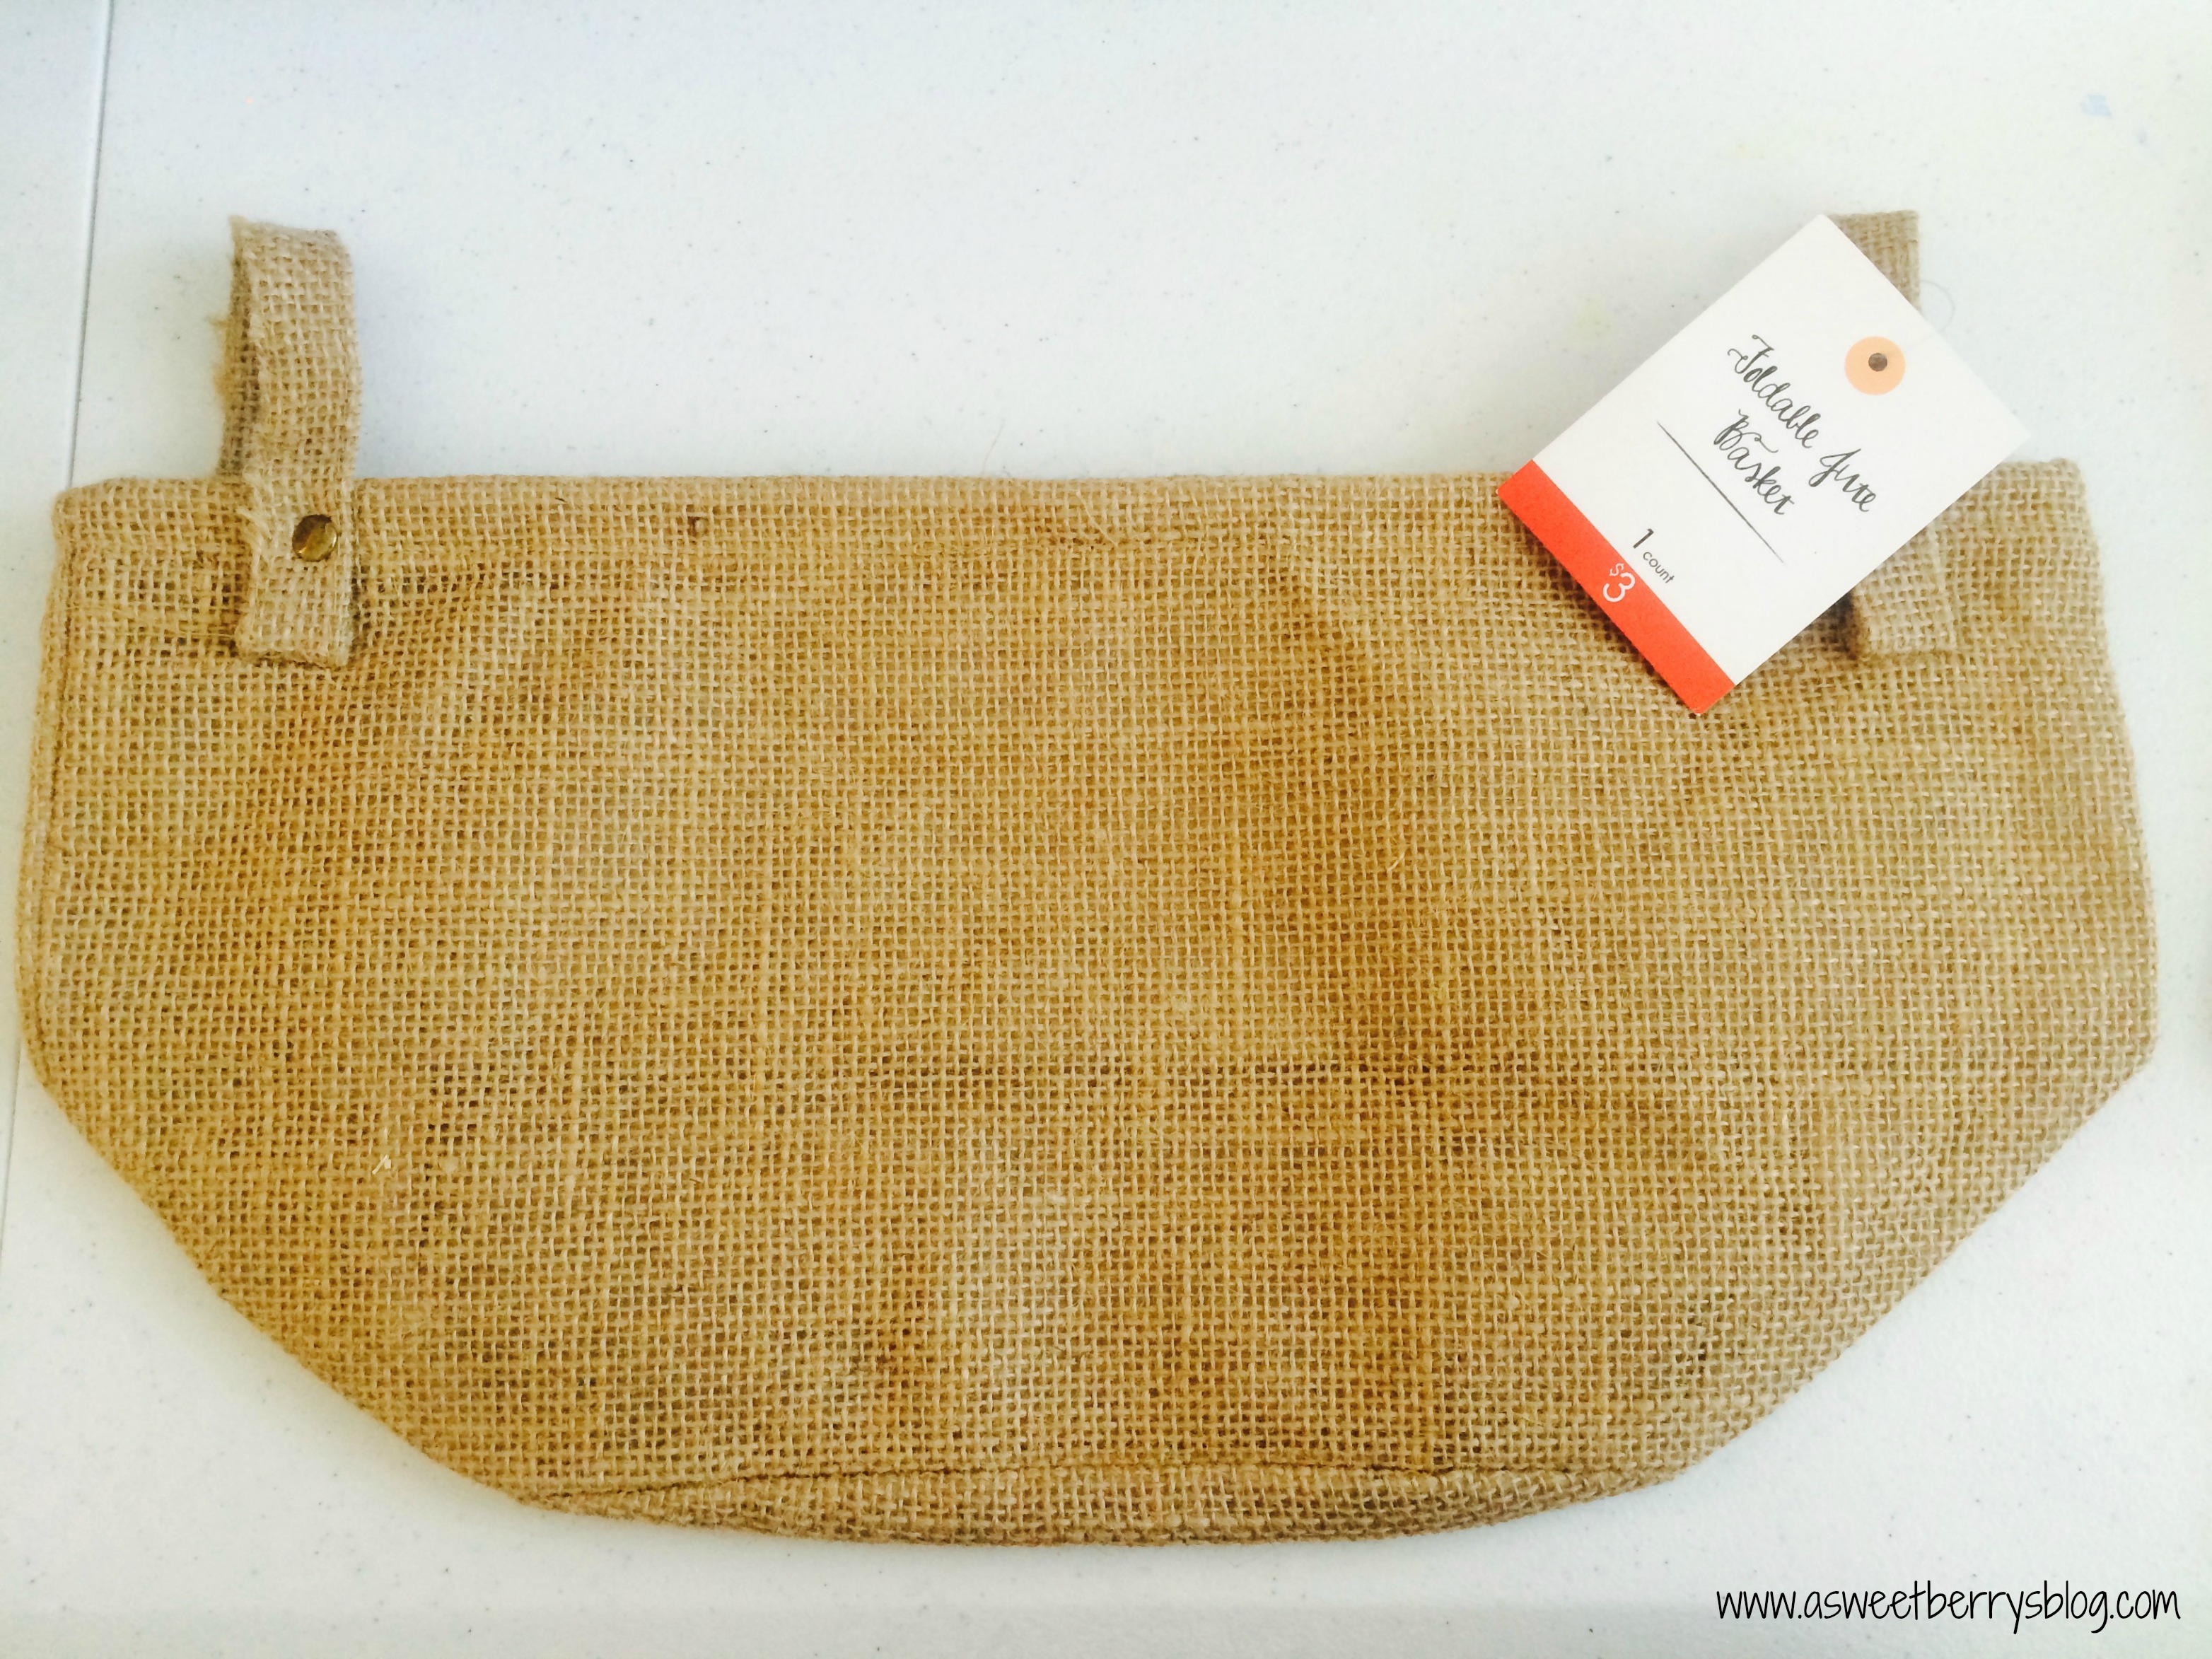
Burlap basket (I found mine in the Target $3 section and it’s nice and sturdy)
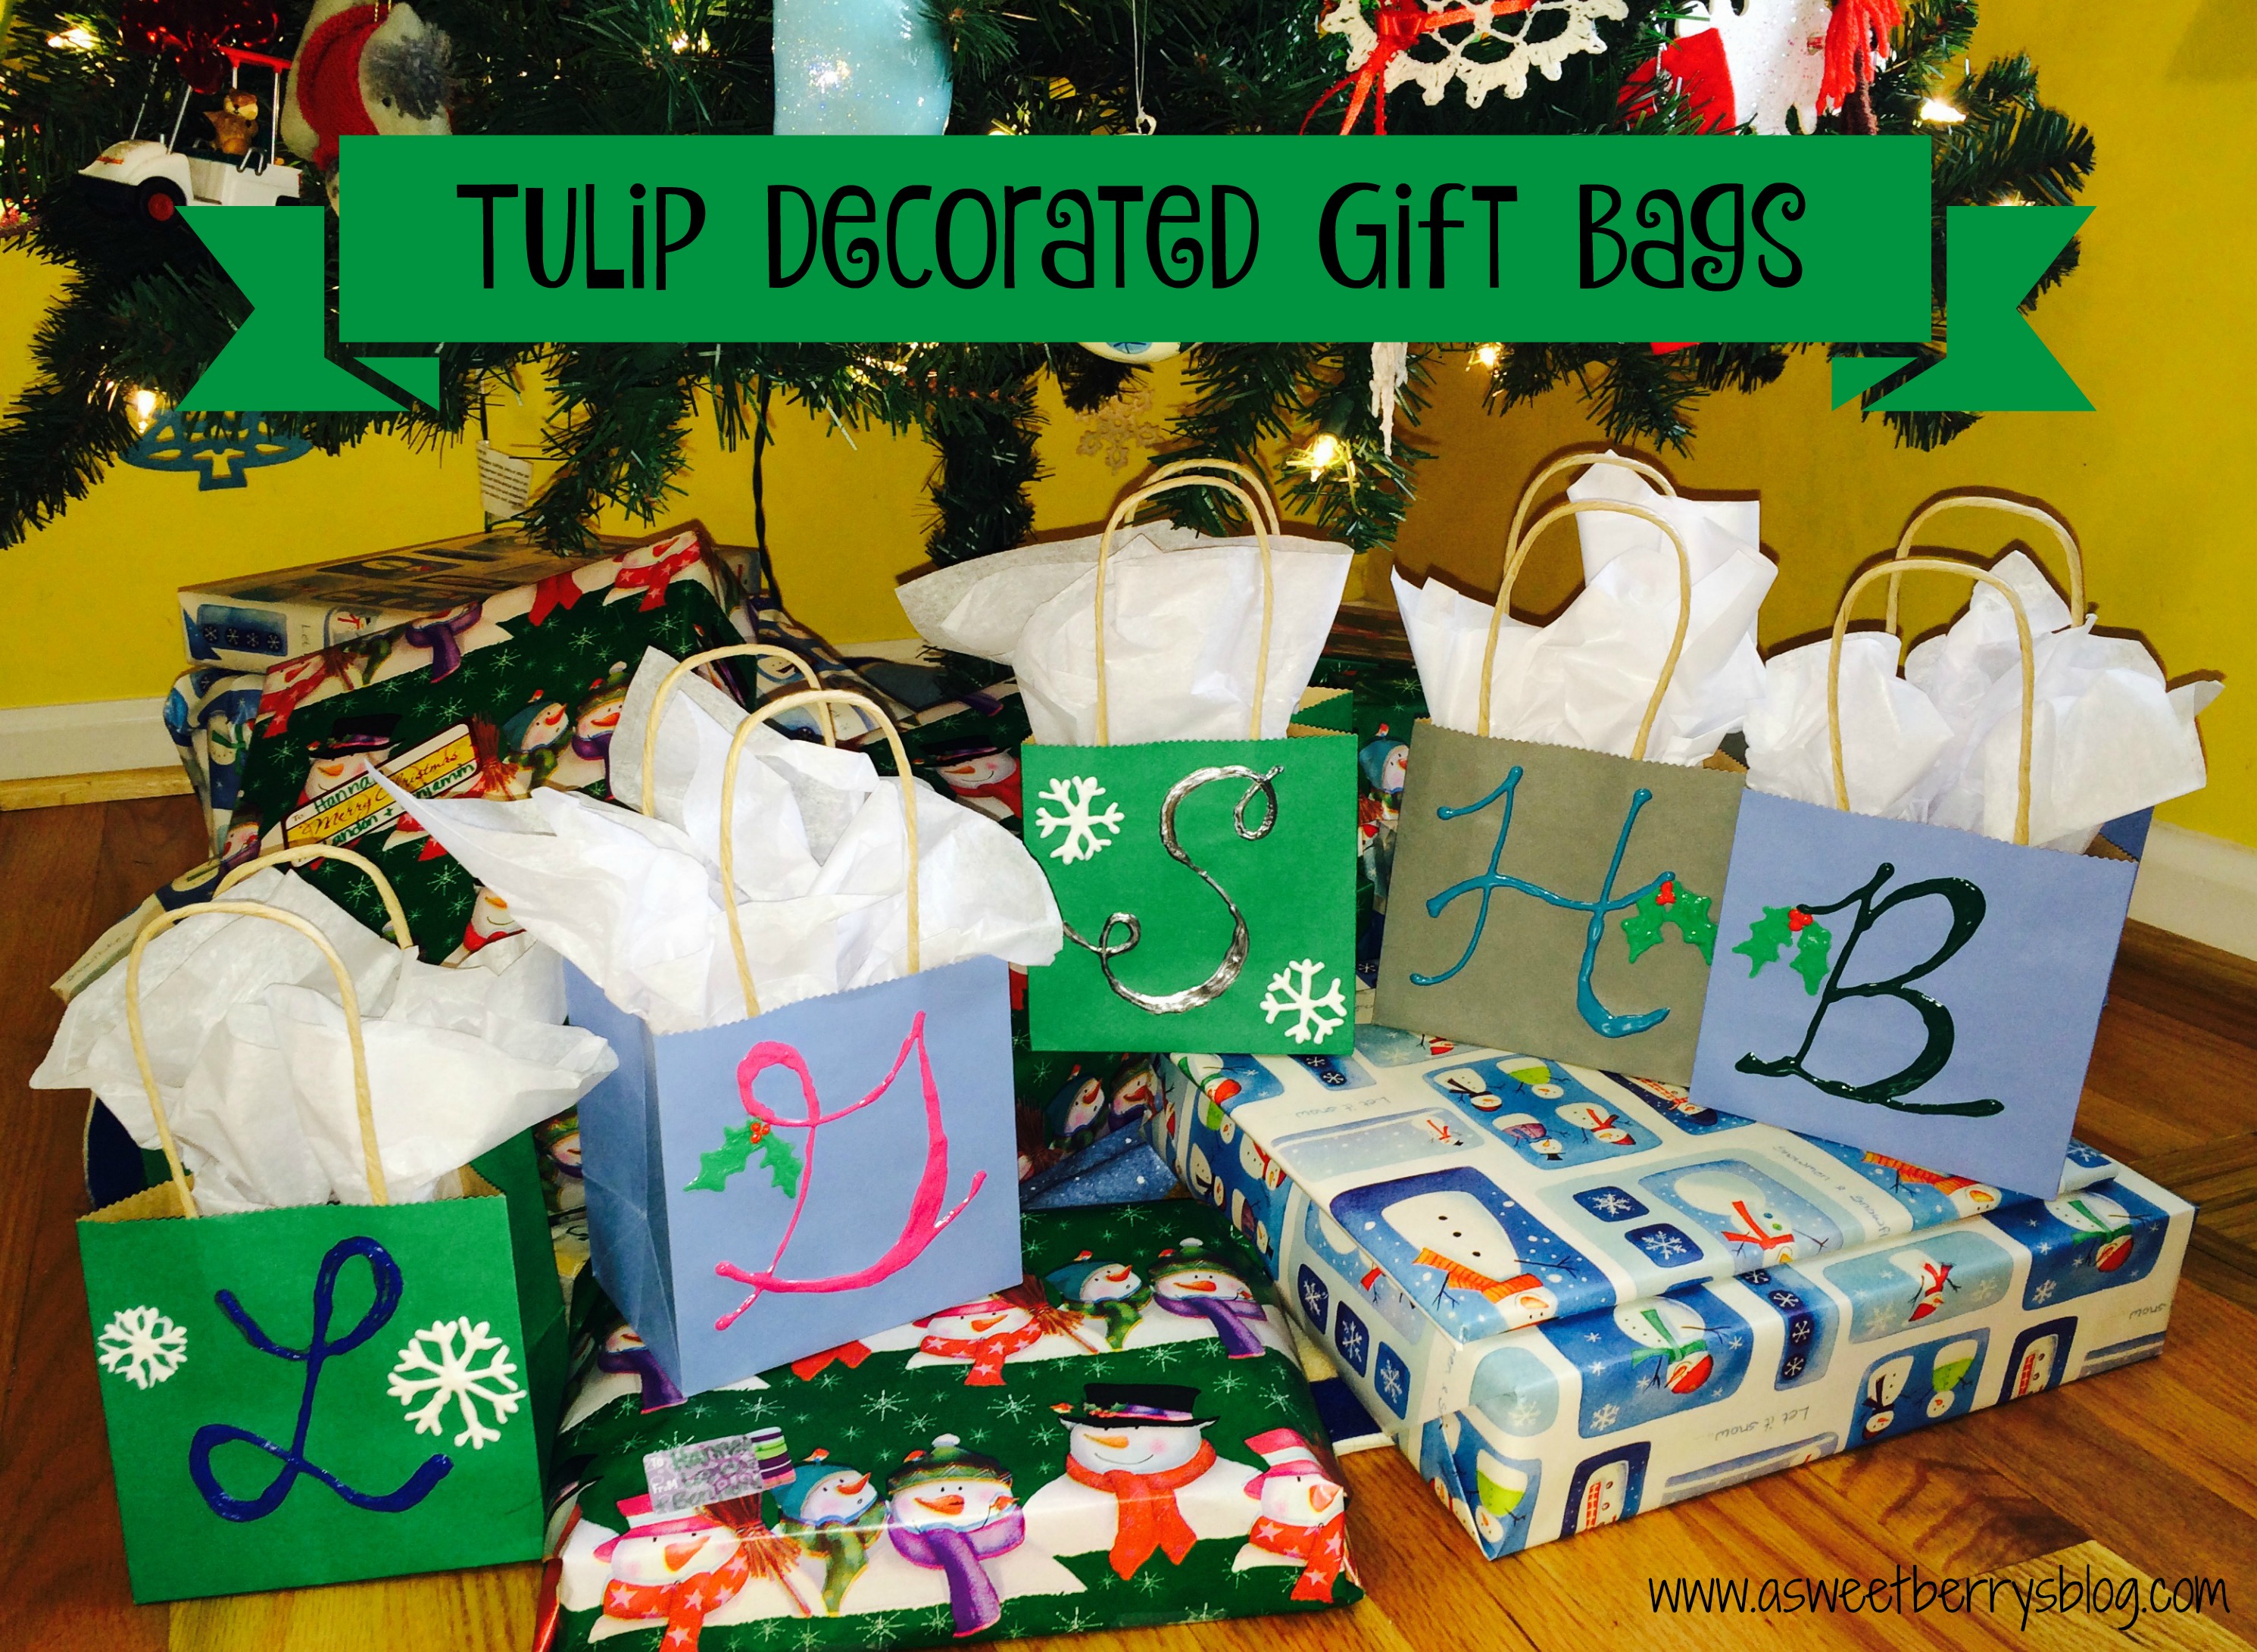
basket
Tulip Fabric Paint
Sizzix Eclips2
Contact Paper

Directions:

1.  Measure your basket, so that you know how big your letter (and name) can be.

2.  Using the electronic cutting machine software, I chose a font for the letter and name.  In this case, I used the Sure Cuts A Lot software.  And I chose the Bell Font.

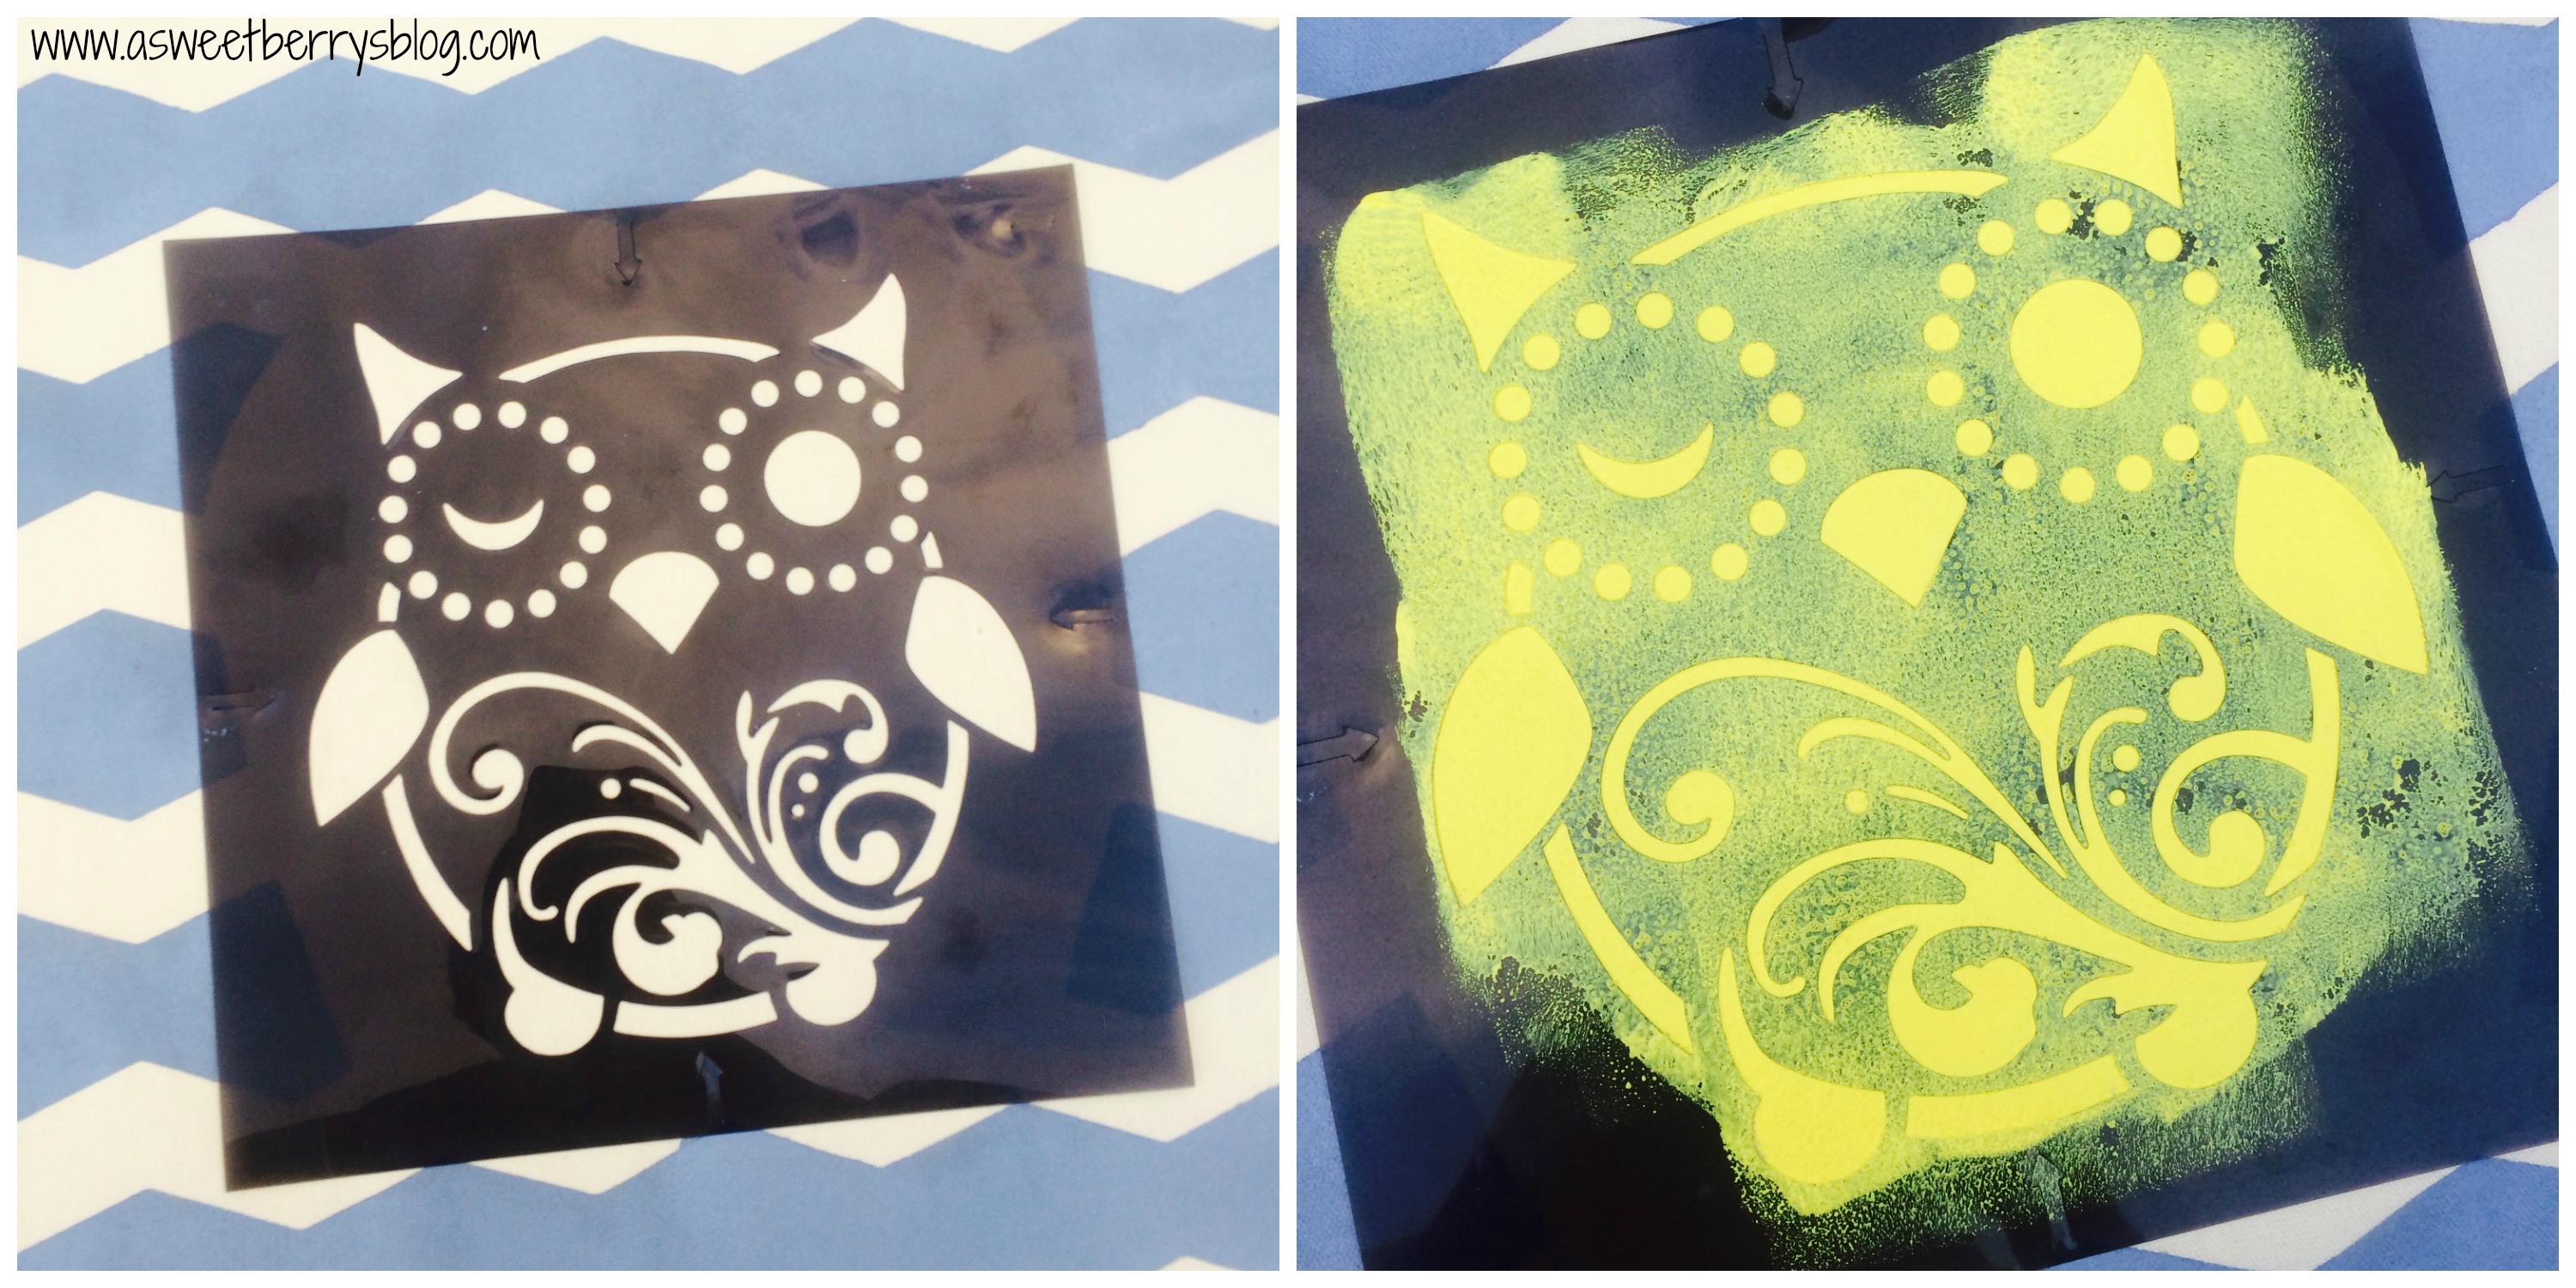
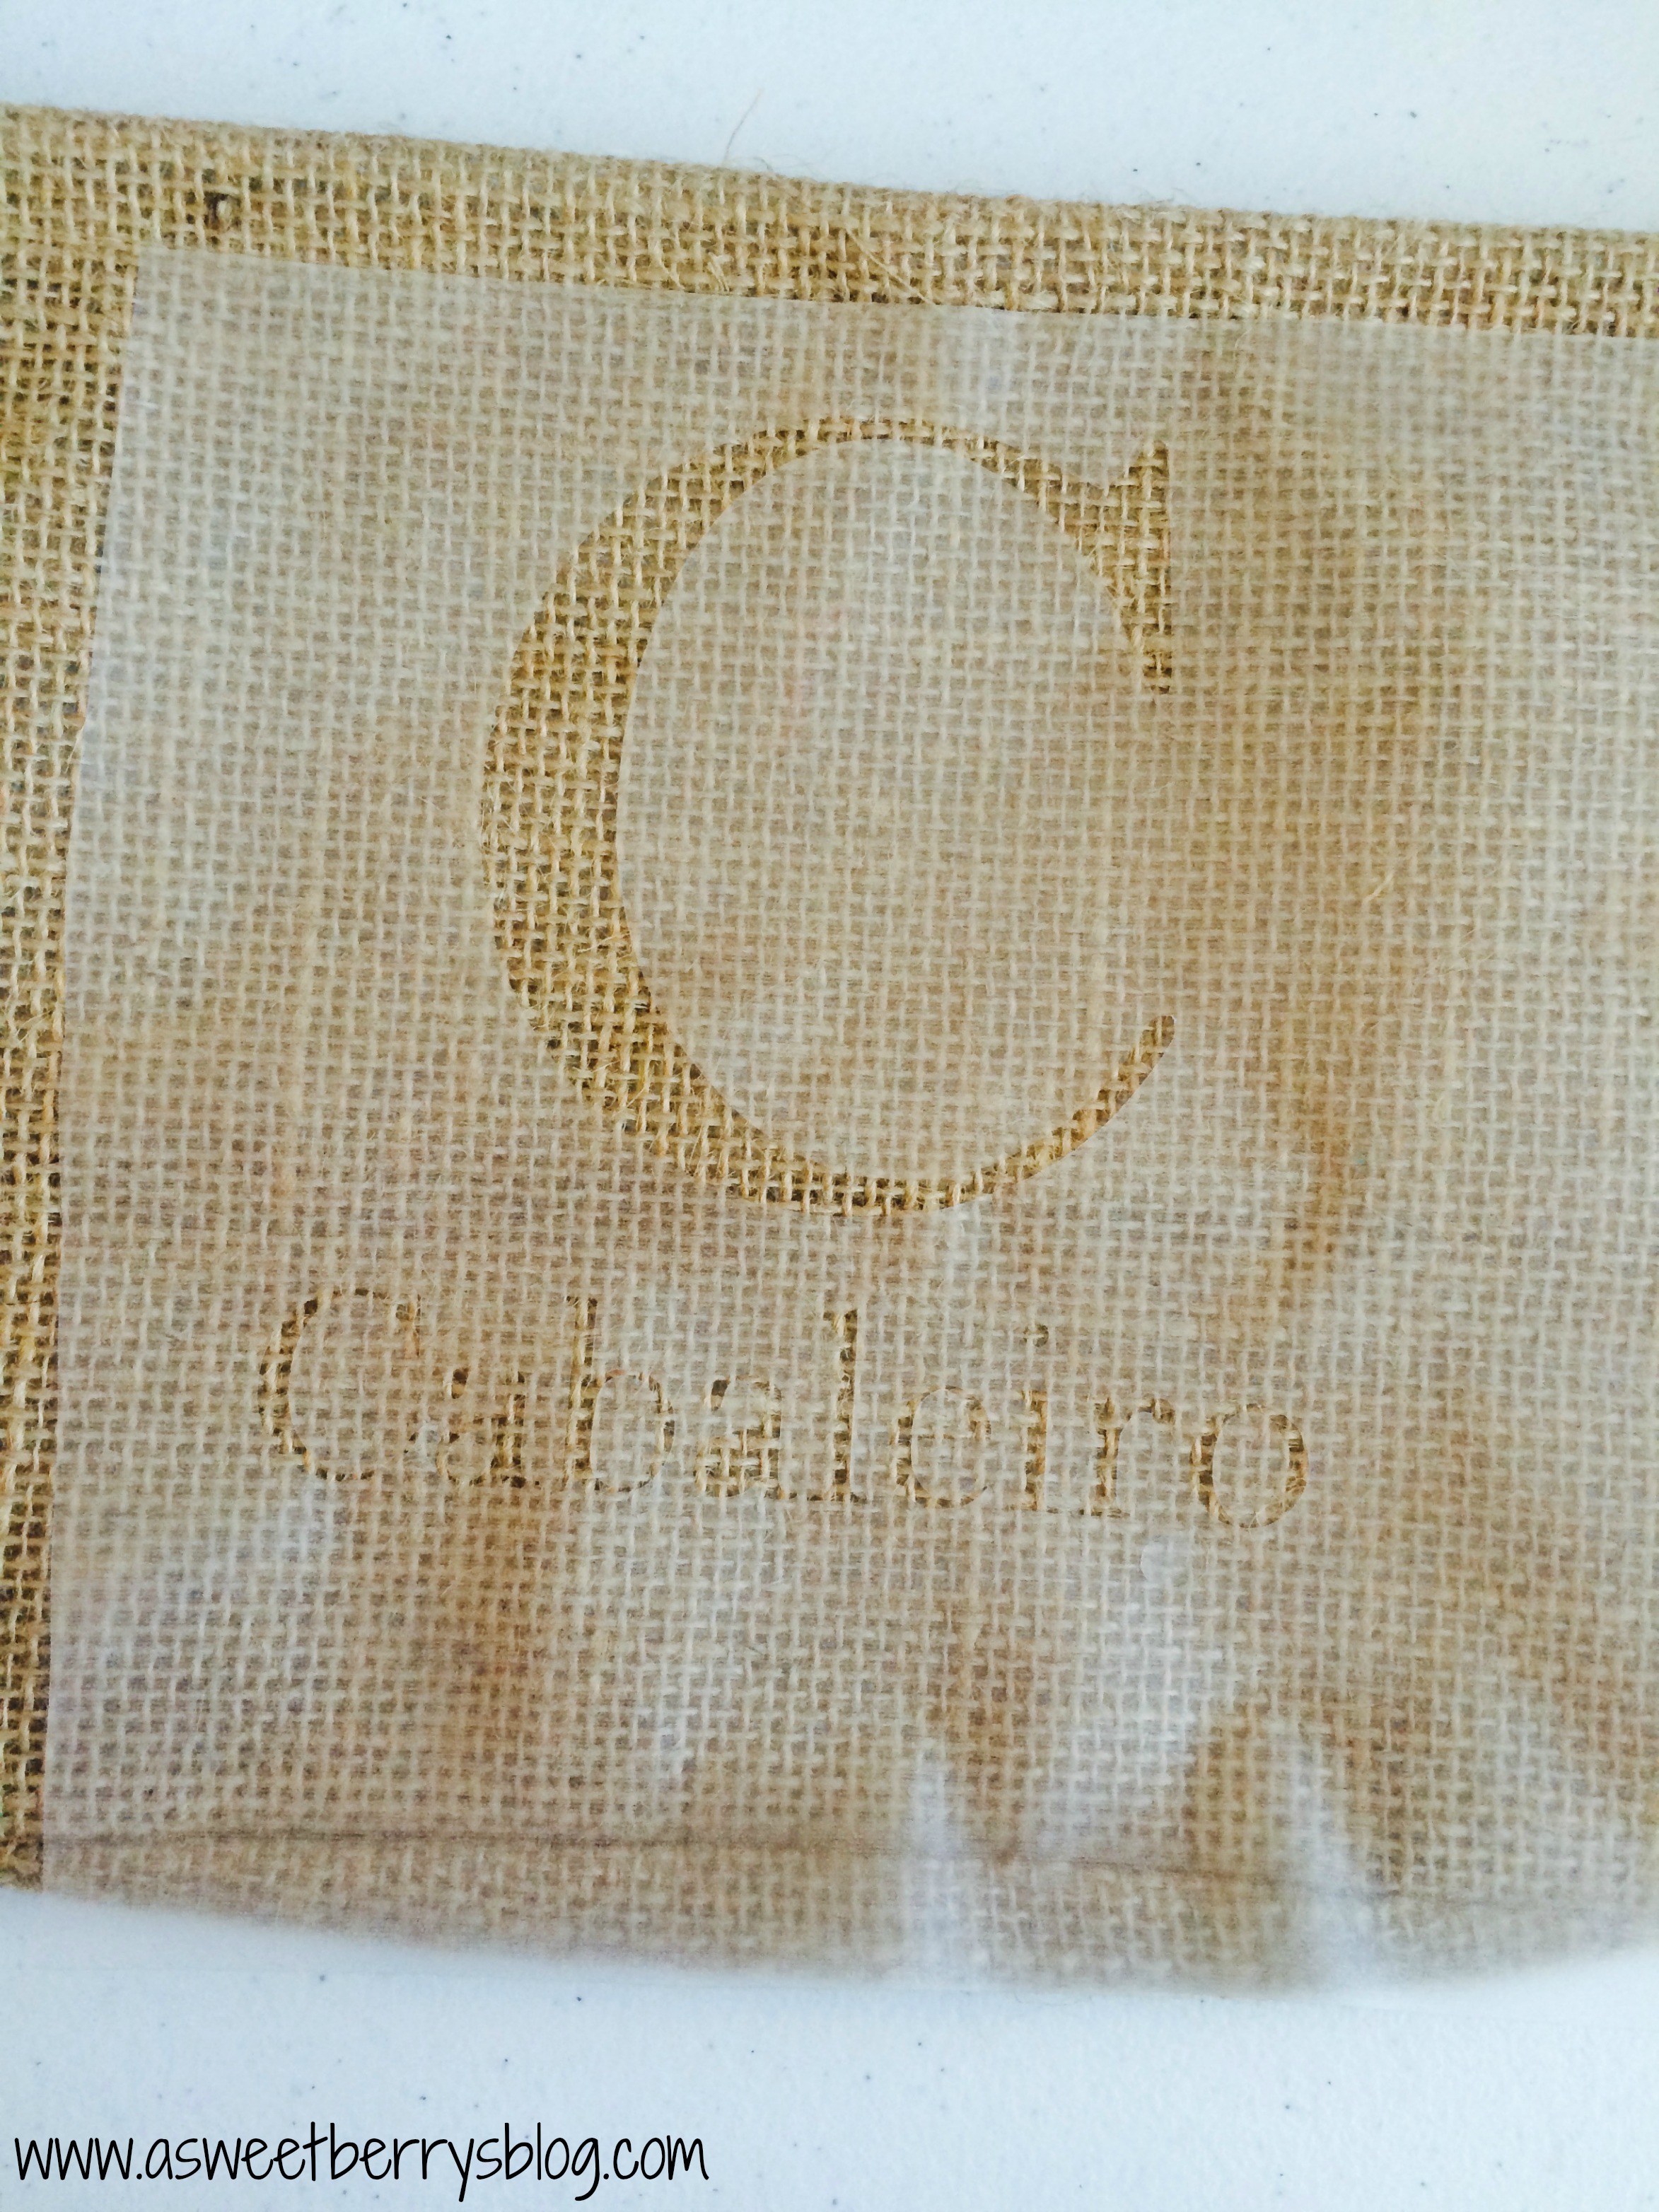
3.  Using the Sizzix Eclips2, mat and my contact paper (placed on the mat face up), I cut out the letter and name.

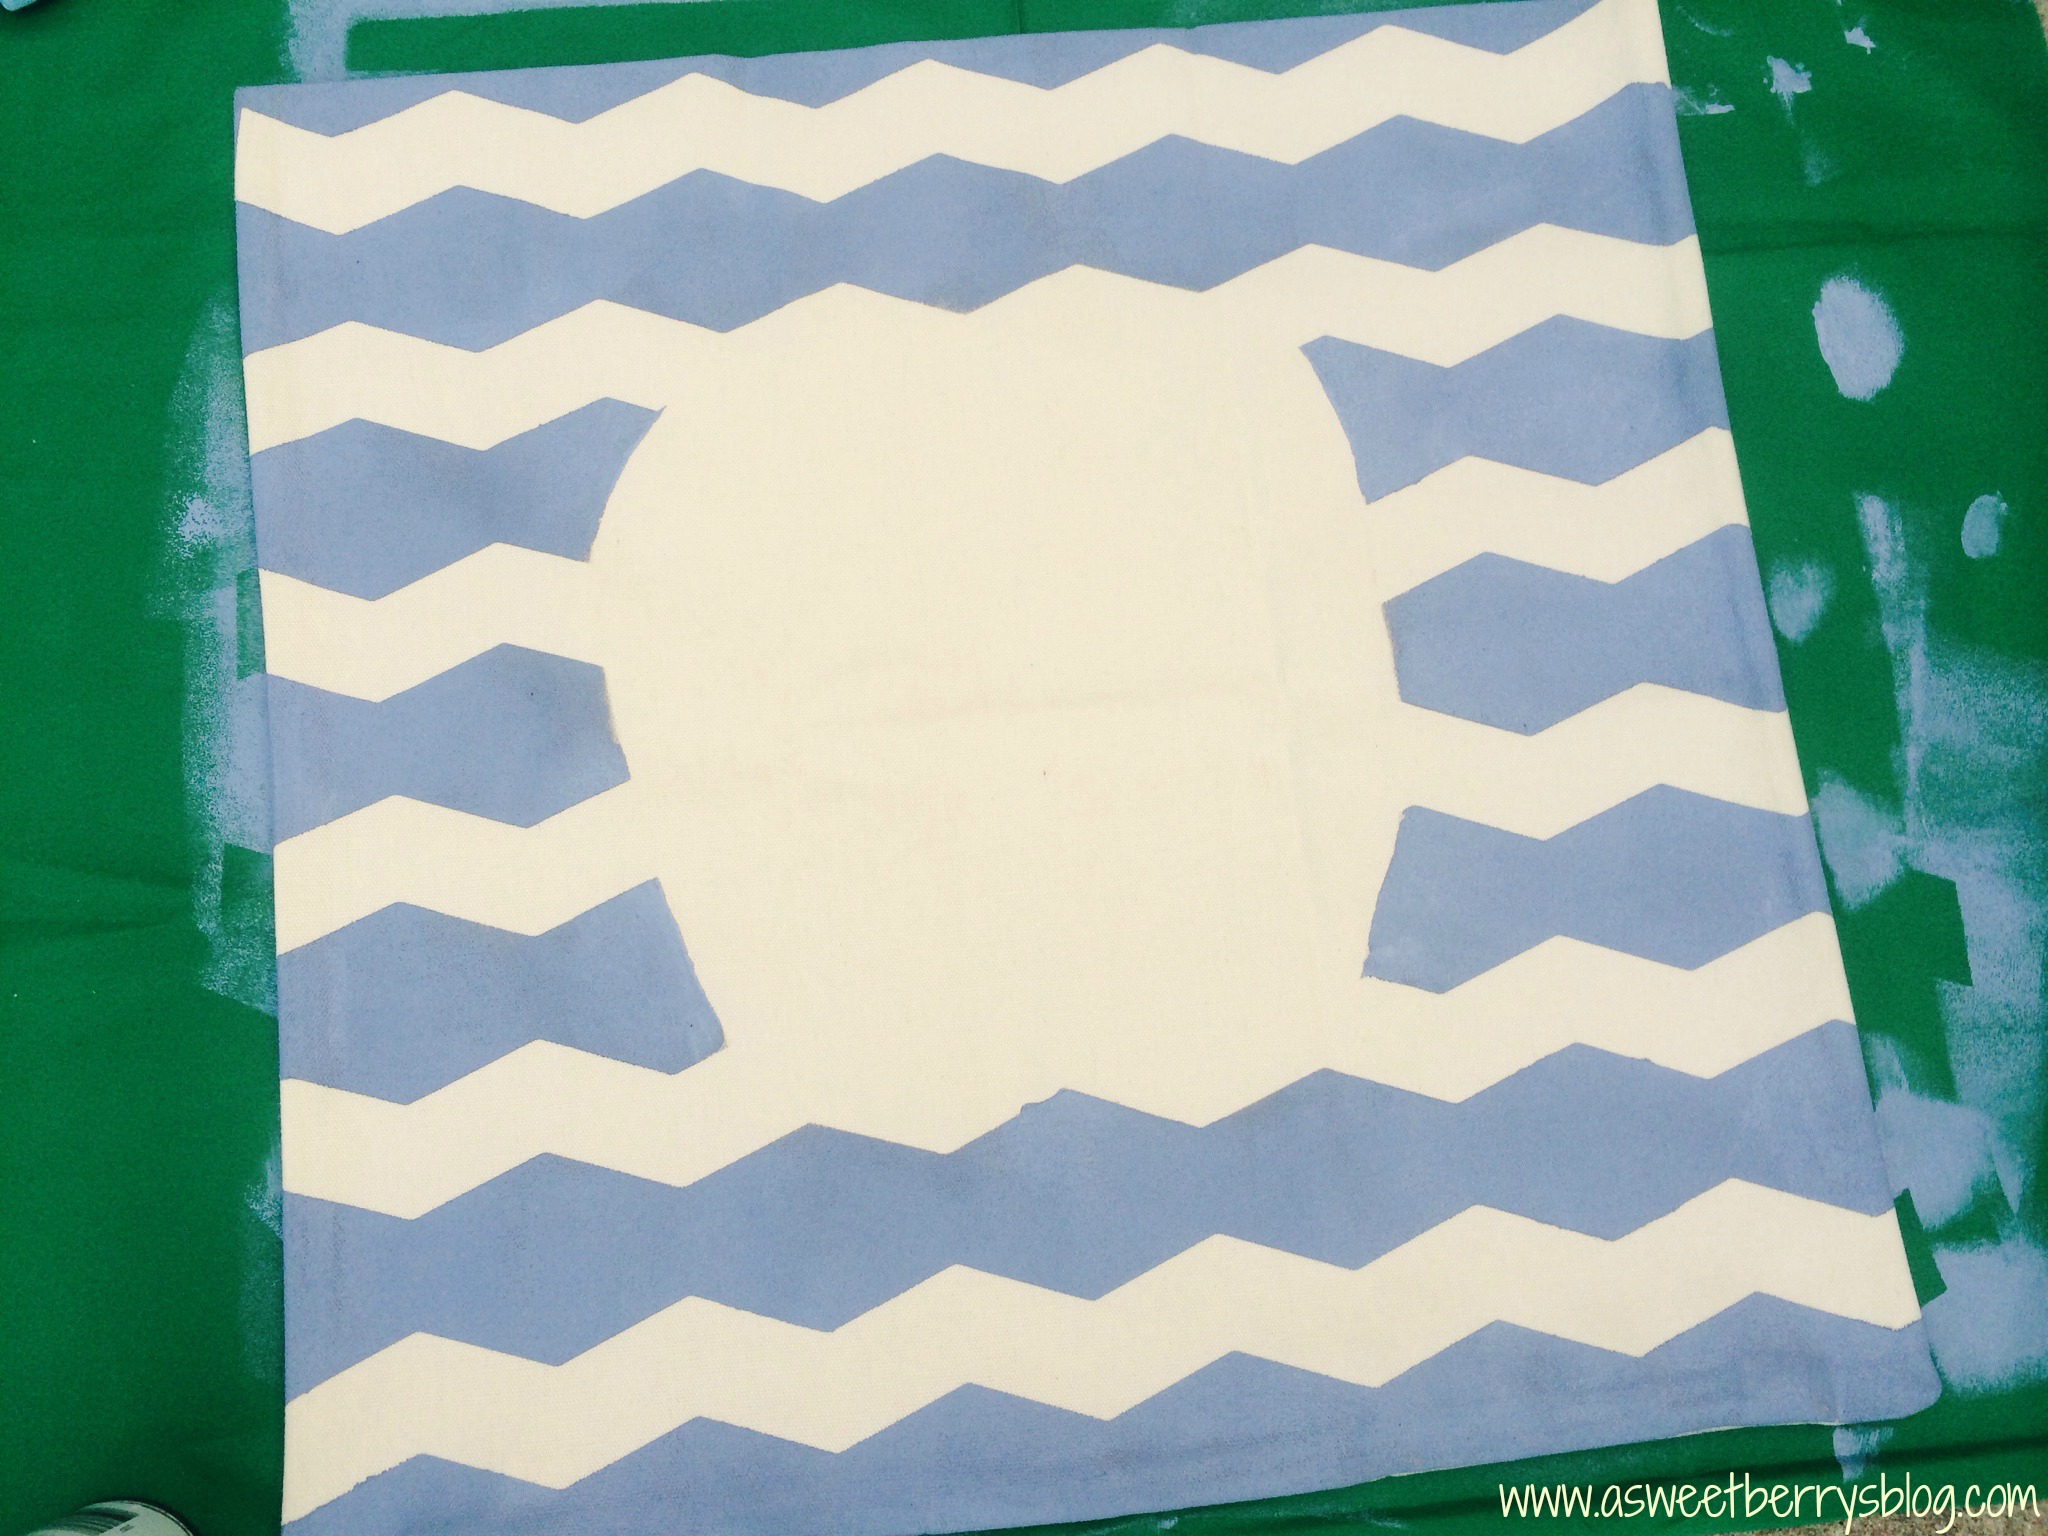
4.  I didn’t want to use the actual letter cutouts, so I pulled up the outlined piece of contact paper and placed it on my burlap basket making sure it was centered.
stencil

5.  Using the Tulip Fabric Paint, I colored in the letters like a stencil.
tulip

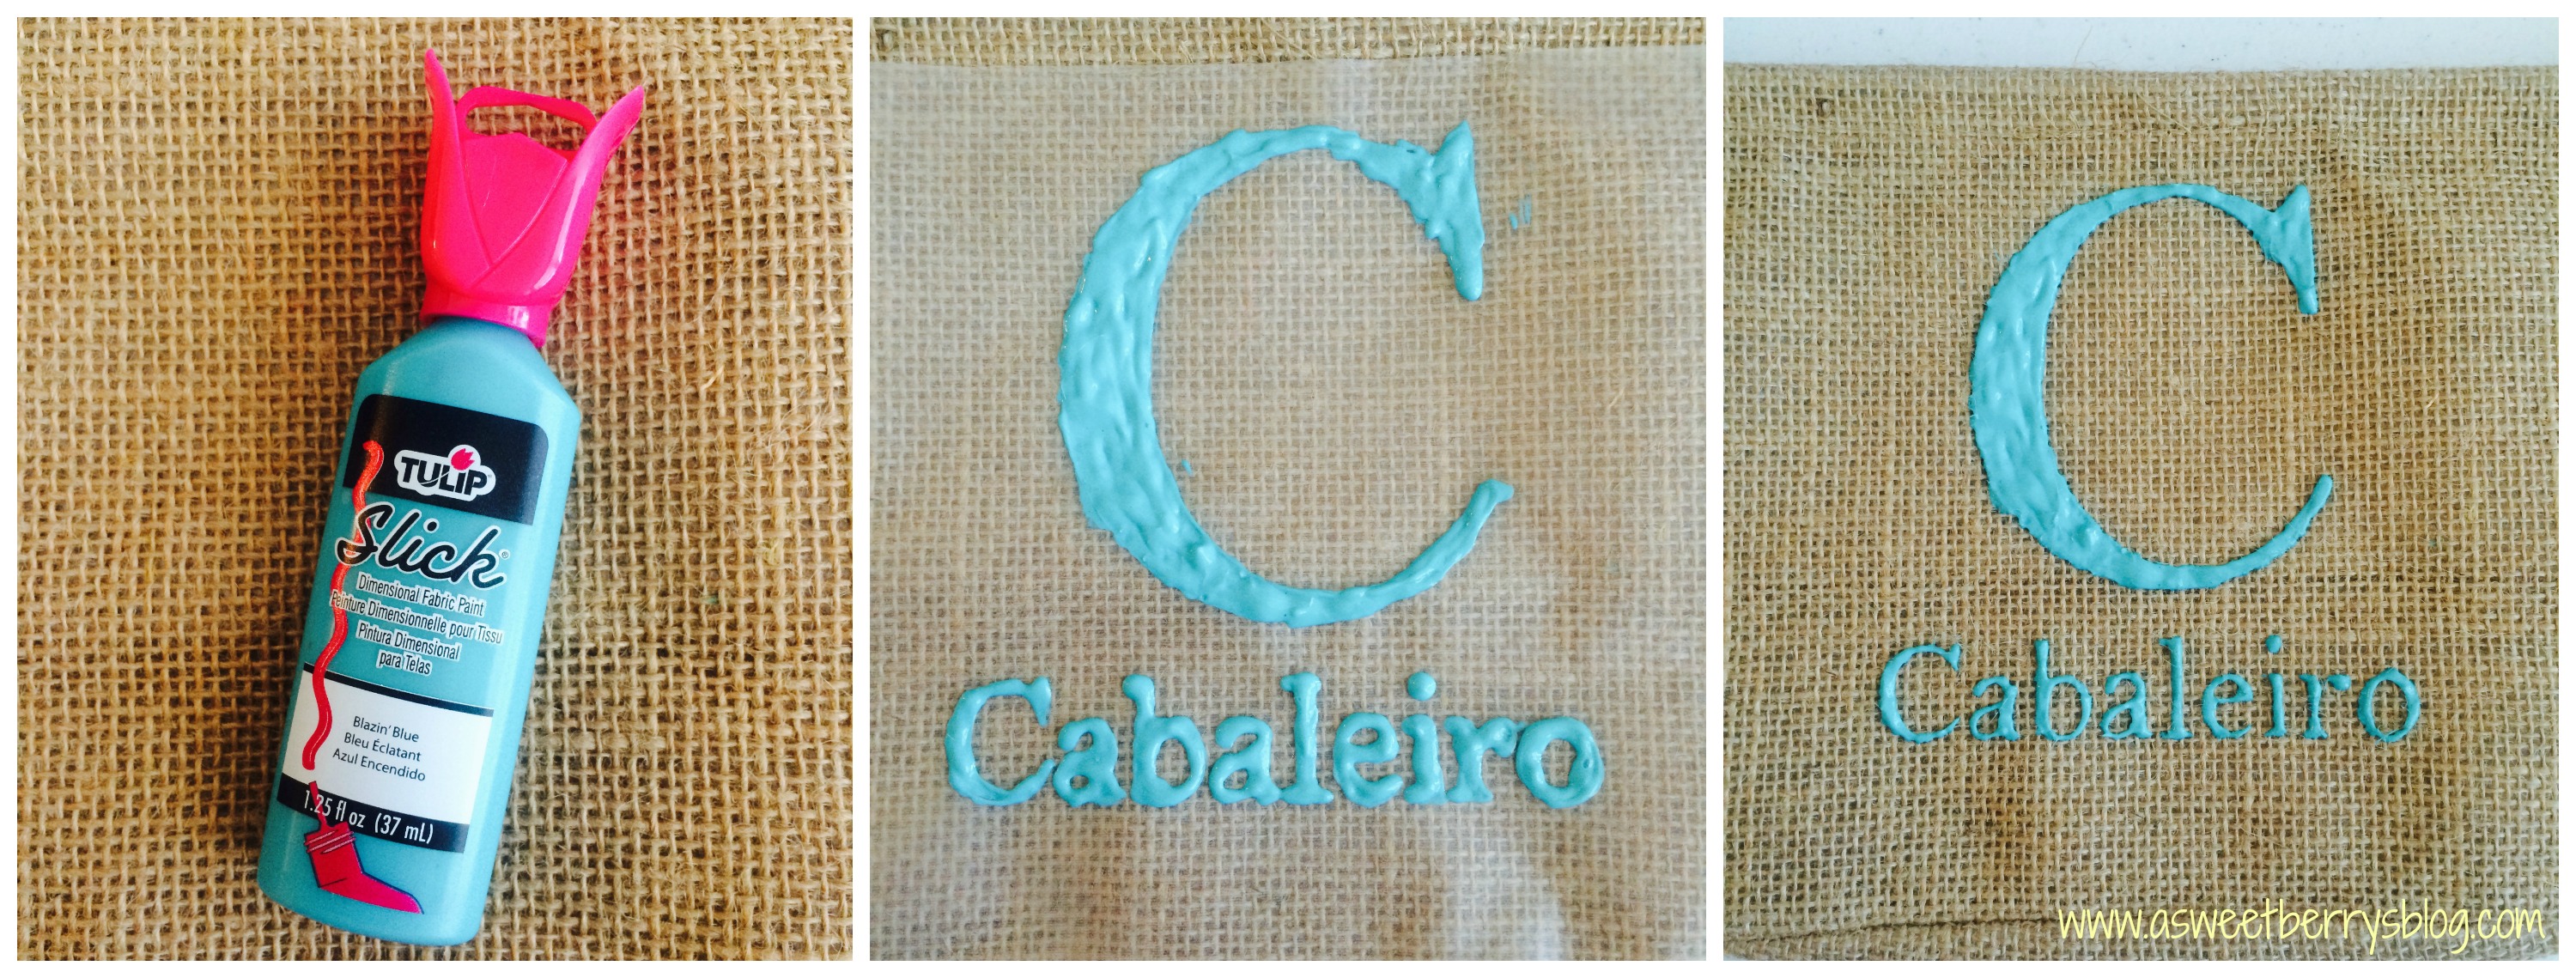
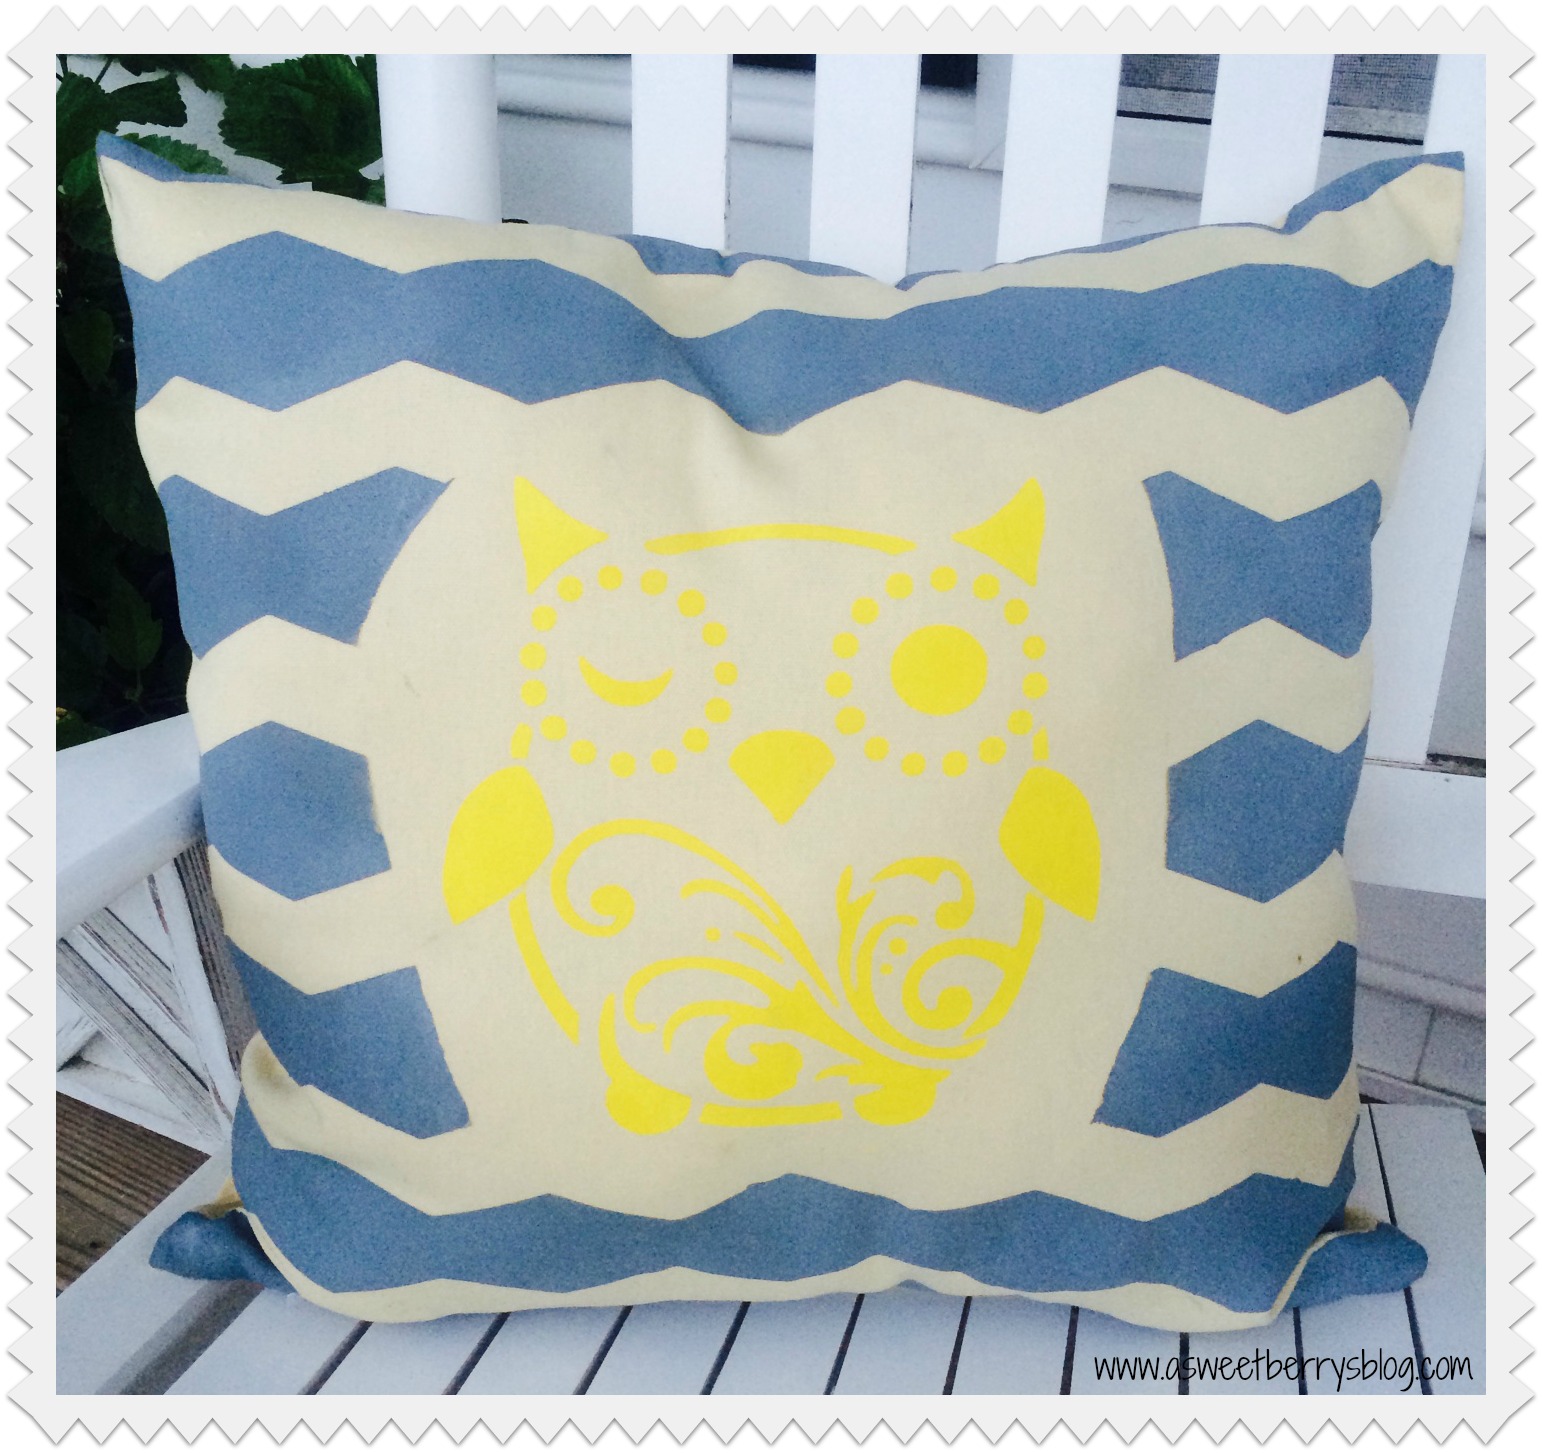
6.  Once I was done with the fabric paint, I pulled up the contact paper stencil and then let it dry!

I think it turned out great!  And I know that my son’s teacher will love it!  Plus, I filled it with goodies for her!

Now, click below to check out the three host of Craft Lighning and others that have amazing 15 minute or less Teacher Appreciation Gifts!

Kunin Felt Easter Egg Bunting

Easter is right around the corner!   Why not brighten up your decor with this adorable KuninGroup Felt Easter Egg Bunting!   It was super easy and super fun! Final
I love using my Sizzix Eclips2 to cut out patterns for fabric or felt!   cutting
Once my patterns were cut out, I pinned them to my KuninGroup felt and then went to cutting!  I used pinking shears to give the eggs zigzag edges! cutting out felt
Then, it was time to sew them!  I decided to stuff them while they were still under the sewing foot.   I sewed all but about 2 inches, stuffed them, realigned my edges and finished sewing! sewing
Once they were all sewn, I used Tulip Fabric Paint to add decorations to them!   I think they turned out egg-tastic!  🙂 tulip fabric paint
Using bright pink baker’s twine and a big needle, I threaded the twine through the top part of the egg, making sure to go between the felt and stitches. twine
And then, it was complete!!!  It is absolutely adorable!   Final
Hope you like my Kunin Felt Easter Egg Bunting!

Until next time…..

Be Mine Crafty – MineCraft Valentine’s

It’s finally the week of Valentine’s Day!  And my boys are super obsessed with Minecraft, so this year they wanted Minecraft Valentine’s!  Well, after looking, homemade Minecarft Valentine’s were the only ones that could be found.  No stores sold them!  So, I decided to make them!   Final
Recently, I was sent a Sizzix Eclips2!  And let me tell you…..I AM IN LOVE!!!!!   It makes cutting super easy!  So, I created my little Minecraft creeper faces in Adobe Illustrator, which I have as a graphic designer.  I converted the file to an .SVG file, imported it into the ECal2 software that works with the Sizzix and got right to cutting!  I also cut black rectangles for the cards, green squares for the creepers face and white light card stock (not DCWV) squares for the inside of my cards, since the cards were black.  I used DCWV card stock, in which ACMoore sells and they sell it in a pack of 12×12 inches pieces.   creeper faces
Using Inkadinkado stamps and ink, I stamped the inside of the cards.  I knew that my treats were going to be a craft, so I used a crafty saying:  “Be Mine Crafty!”  Inkadinkado
After getting everything cut out for my cards, I used Aleene’s Tacky 2-sided adhesive sheets to put the cards together.  I just cut the sheets up into smaller pieces and it worked great! creeper card
So, the treats to go along with the cards are Make It Yourself Cards.  I included a green square, a creeper face, some hearts and some scrap pieces of the DCWV card stock from what had already been cut. paperandhearts
On the left over white scraps that I had from the squares inside my cards, I used my adorable Laura Kelly Self-Inking Stamp from Expressionery.com!  How cute is that stamp?!?!
Stamp
Then it was time to stuff my bags.  I just picked up some clear bags from the party section at Target.  I also got plain white cards with envelopes from ACMoore.  I also included an mini bottle of Aleene’s School Tacky Glue for their card making, a pencil, a small thing of bubbles and a pencil topper eraser!    I decided that I wanted this years Valentine’s to be Candy Free because we also end up having way too much candy anyway and it ends up going to waste.  I folded the bags and stapled a folded piece of DCWV card stock rectangle to close the bag and added the card and the piece white cardstock with my stamp on it to the front and back to cover the staples puttingtogetherbags
How cute did these turn out?   I hope the kids like them!   all shots My idea for a Make It Yourself Card idea came from my super crafty friend Mothership Scrapbook Gal, Rina Gonzales!  Check out her Facebook page and her Etsy Shop!!!!!

Until next time…..

XOXO

Burlap Love Wreath

It’s February and the month of Love!  This Burlap Love Wreath makes me think of Love! wreath
Materials used:
A FloraCraft Foam Wreath
Burlap Ribbon
A 12×12 inch piece of burlap
Aleene’s Collage Pauge
Tulip Soft Fabric Paint
A Tulip Paint Roller
Red Coats & Clark Embroidery Floss and Needle
White Buttons from Buttons Galore
wreathandpaint
Using Aleene’s Collage Pauge and water, I added 3/4 Collage Pauge to 1/4 water to a plastic container.  It’s the formula usually used for Paper Mache.  I wanted to stiffen the burlap a little and to help it to keep from unraveling.  Once I soaked all of my pieces, I let them dry. burlap
Using a Tulip Foam Roller and Tulip Soft Fabric Paint, I painted the 12×12 inch piece of burlap.  I then let that dry. painting
Once my paint dried, I cut out two hearts.  I basically folded the fabric in half, cutting two hearts at once.  Using Embroidery floss and a needle, I sewed the two hearts together, paint sides out.  Before I sewed the heart all the way, I stuffed it with some felt scraps that I had left over from another project.  Then, I closed up the heart by sewing all the way around. heart
Using the burlap ribbon, I wrapped it around the foam wreath and used embroidery floss to sew the end of the ribbon to the the beginning to hold it in place. burlapwrap
From the scraps of painted burlap, I cut out red circles.  Using the embroidery floss, I added the white buttons to the center of the red pieces and attached them to the burlap on the wreath.  I tied them off on the front adding just a little color to the white buttons. dotsandbuttons
This lovely wreath is now hanging on my front door!  And I LOVE that it reminds me of LOVE!!! wreath
I hope that your February is filled with lots of love!  And I hope that you like my Burlap Love Wreath!

Until next time……

XOXO

Kunin Felt Love Banner

I love a cute felt banner, and I love making them using Kunin Felt!   Isn’t this Love Banner super adorable!   And it was super simple! Final Banner
The materials that I used to make this banner were:
Kunin Red Felt
Kunin Glitter Felt
Aleene’s Fabric Fusion Permanent Fabric Adhesive Sheets
A Sizzix Frame Die (I used a wavy frame)
Sizzix Big Shot
Offray red with white polka dot ribbon
Eyelet Pliers and red eyelets
Rotary Cutter, Cutting Ruler and Cutting Mat materials
First, I applied the Aleene’s fabric fusion sheets to the back of my Kunin Glitter Felt and then cut it into smaller pieces.  I got 5 pieces out of one sheet.  I made sure that they were big enough to fit onto the die. fabric fusion
Using the Sizzix Wavy Frame Die, I placed it on my cutting pads.  Then, I placed my felt on the die making sure that I completely covered the frame cutout.  Next, I placed the top cutting pad over it and then ran it through the big shot die cutting machine.    frames
Using the middle pieces of the frame, I cut out two hearts and the letters L, O, V, E by hand. Love Letters

Using my rotary cutter, cutting mat and ruler, I cut out 5″ x 6″ rectangles. blocks
Once I had everything cut out, I peeled the paper off the back of the frames and stuck them on my red rectangle pieces, placing it closer to the bottom so that I had space to add my eyelets at the top. putting it together
Using my eyelet pliers, I placed two eyelets at the top of my red felt rectangles.  Once I had two eyelets on each piece, I ran my red and white polkadot ribbon through front the backs. eyelet punch

And it made this super cute and super easy banner!   Final Banner If you don’t have die cuts or die cut machines, you can still create this banner, making your own frames by hand.  The Aleene’s Fabric Fusion Permanent Sheets make it a sewing free project!  And, you don’t necessarily have to put eyelets on the pieces.  You could just cut small holes to thread your ribbon through!

I hope you like my Love banner as much as I do!

Until next time……

XOXO


The Gingerbread Bear Book and Sculpey and Scribbles Ornament

While walking through the Scholastics Book Fair at my oldest son’s school, I stumbled across The Gingerbread Bear book by Robert Dennis and Illustrated by Tammie Lyon.
book
In the story, a little girl and her mother are baking a gingerbread bear.  After daddy goes to work, mom goes into the garden to do some work and the little girl is left to watch after the oven.  Out of curiosity, the little girl opens the oven to have a look, and guess what happens?   Out jumps the Gingerbread Bear!   And away he runs……

Of course, no one can catch him, because after chanting “Run, Run, try if you dare.  You can’t catch me.  I’m the Gingerbread Bear!”, he runs away.  Throughout the book he runs into different people and animals that think they can catch him.  Gingerbread Bear is much to quick for them.
insidebook
You have to read the book to find out what happens at the end!   What a cute little change up to the Gingerbread Man.   My boys loved it!  The illustrations were awesome!

After we read the book, we decided to make our own Gingerbread Bears, using Sculpey clay and Scribbles paint.
sculpey
We picked out a brown Sculpey clay, ran it through the clay conditioning machine and then used our gingerbread man cookie cutter to cut them out.   After we had them cut out, I used a sharp pick to punch a whole in the top of their heads for ribbon.  Then it was time to bake them.  I stuck them in the oven for about 13 minutes. gingerbreadbear
Once they came out of the oven and cooled, We used Ilovetocreate’s Scribbles Fabric Paint (yes, I know it’s fabric paint, but it works on other things too!) to decorate our gingerbread bears! Scribbles
Once they were dry, they were ready for ribbon and then to be hung on the tree! 🙂 complete So, go out and pick up this adorable book.   The kids are sure to love it!   And then go get some Sculpey clay and a gingerbread man cookie cutter and create your own Gingerbread Bear!

Check out these other Christmas time books to read with kids:

  And the enter to win a great prize! a Rafflecopter giveaway
Until next time…….

Kunin Felt Advent Calendar

No December is complete without an Advent Calendar!   This year, I created my Advent Calendar using Felt from The Kunin Group!   My kids are super excited for December to arrive so that we can start opening them!

FINAL

materials
Materials used:
Felt from The Kunin Group (red, green, glitter white)
Sewing Machine with coordinating thread (green and red)
Envelope Patterns that I created using Adobe Illustrator
Letters that were reflected vertically that I created using Adobe Illustrator
Aleene’s Turbo Tacky Glue
Velcro
Laura Kelly Buttons from Buttons Galore & More
Heat & Bond
Pinking Shears
Scissors
Small clothes pins
Rope purchased from ACMoore

cutting
Using my envelope patterns, I cut out 24 envelopes.   I used both my regular scissors and my pinking shears just to change up the look.    Once I had them all cut out, I folded and pinned the sides to get them ready for sewing. pinning
My sewing machine does all kinds of cute little patterns, so I chose a couple of designs and sewed up the sides only to the top of the sides. sewing
Once they were all sewn up, I used my iron to help the flap on my envelopes to stay down. ironing
I didn’t think that a whole piece of velcro was needed, so I cut them into quarters and applied them to the inside of the flap.   Keeping the velcro pieces together, I closed my envelope so that they would line up.
velcro
Next, I was ready to cut out my numbers!   Using Heat & Bond, I ironed it to the back of my sheet of numbers, removed the backing and then ironed it to the back of the sheet of glitter white felt.  And then they were ready to cut out!  Once they were all cut out, I used an Excel knife to cut out the inside pieces of the numbers.
numbers
I really love Laura Kelly’s buttons from Buttons Galore & More and she has a great set of Christmas colors.   I chose a read and green for each envelope, glued them using Aleene’s Turbo Tacky Glue and then glued them to the flap of the envelope.  I also glued the numbers to the envelopes.
ButtonsAndGlue
After all of my envelopes were done, I decided to make a felt bow to attach to the string where I was going to clip my envelopes. BowAndRope

Once I was done, I attached the envelopes to the rope and hung it up! advent calendar

BrokenUp

   Ready for December!   And until next time…..

Tulip For Your Home

pillow
I love Tulip brand by ilovetocreate!  I have been using this brand forever!  This project is a Tulip For Your Home project. It is a pillow that I decorated with a Tulip stencil and Tulip Soft Fabric Paint.   Below is a photo of everything that I used for this project, with the addition of FrogTape to help create my Chevron background.
Materials:
Tulip Pillow Cover
Tulip Paint Roller
Tulip Textile Stencil
Tulip Stencil Spray Adhesive
Tulip Soft Matte Fabric Paint
FrogTape
materials
So, using the Chevron FrogTape, I created a Chevron pattern.  I did my placing with the backing still on before I actually removed the paper and stuck it to my pillow. FrogTape
Once I was done placing my chevron pattern, I laid the owl stencil onto and then marked where my owl overlapped the FrogTape.  I only marked the tape, not the pillow.  After I made my marks, I removed the stencil and cut a section of the tape out so that I’d not have the chevron pattern behind my owl. owl cutout
Using my roller, I applied the fabric paint around the cut out where my owl will be placed. painting chevron
After the paint dries, I removed the chevron FrogTape. readyforowl
Using my Tulip Stencil Spray Adhesive, I sprayed it on the back of the stencil and placed it in the open space on the pillow.   Don’t worry if you misplace it, the spray allows you to reposition the stencil.  Then it was time to paint the owl.   I did this using the roller after I cleaned it. painted owl
Instead of using a pillow to insert into the cover, I used some Poly-fil that I had at home! polyfil
I am totally obsessed with the results of my decorative Tulip pillow!  It was super easy and super fun!   So, why not create your own fun decorative pillows instead of buying them!!! IMG_4768
I hope you liked my Chevron Owl Pillow made using Tulip For Your Home!