Category Archives: Laura Kelly

Shop Laura Kelly – Button and Felt Heart Garland

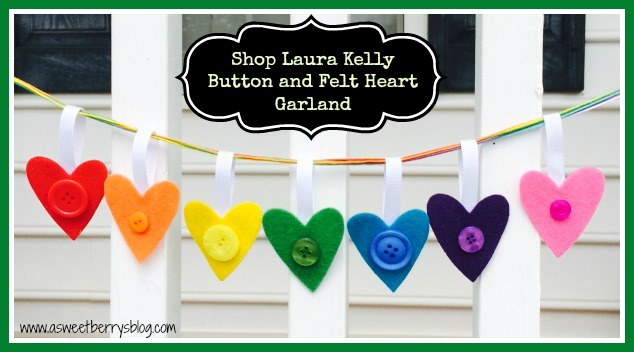
ShopLauraKelly.com has some of the cutest craft kits put together by one of my best friends, Laura Kelly!  One of my favorite kits in the collection is the Button and Felt Heart Garland! banner
Laura is very creative and has licenses with several companies!  The kits that she has put together come with everything you need to put your projects together! kit
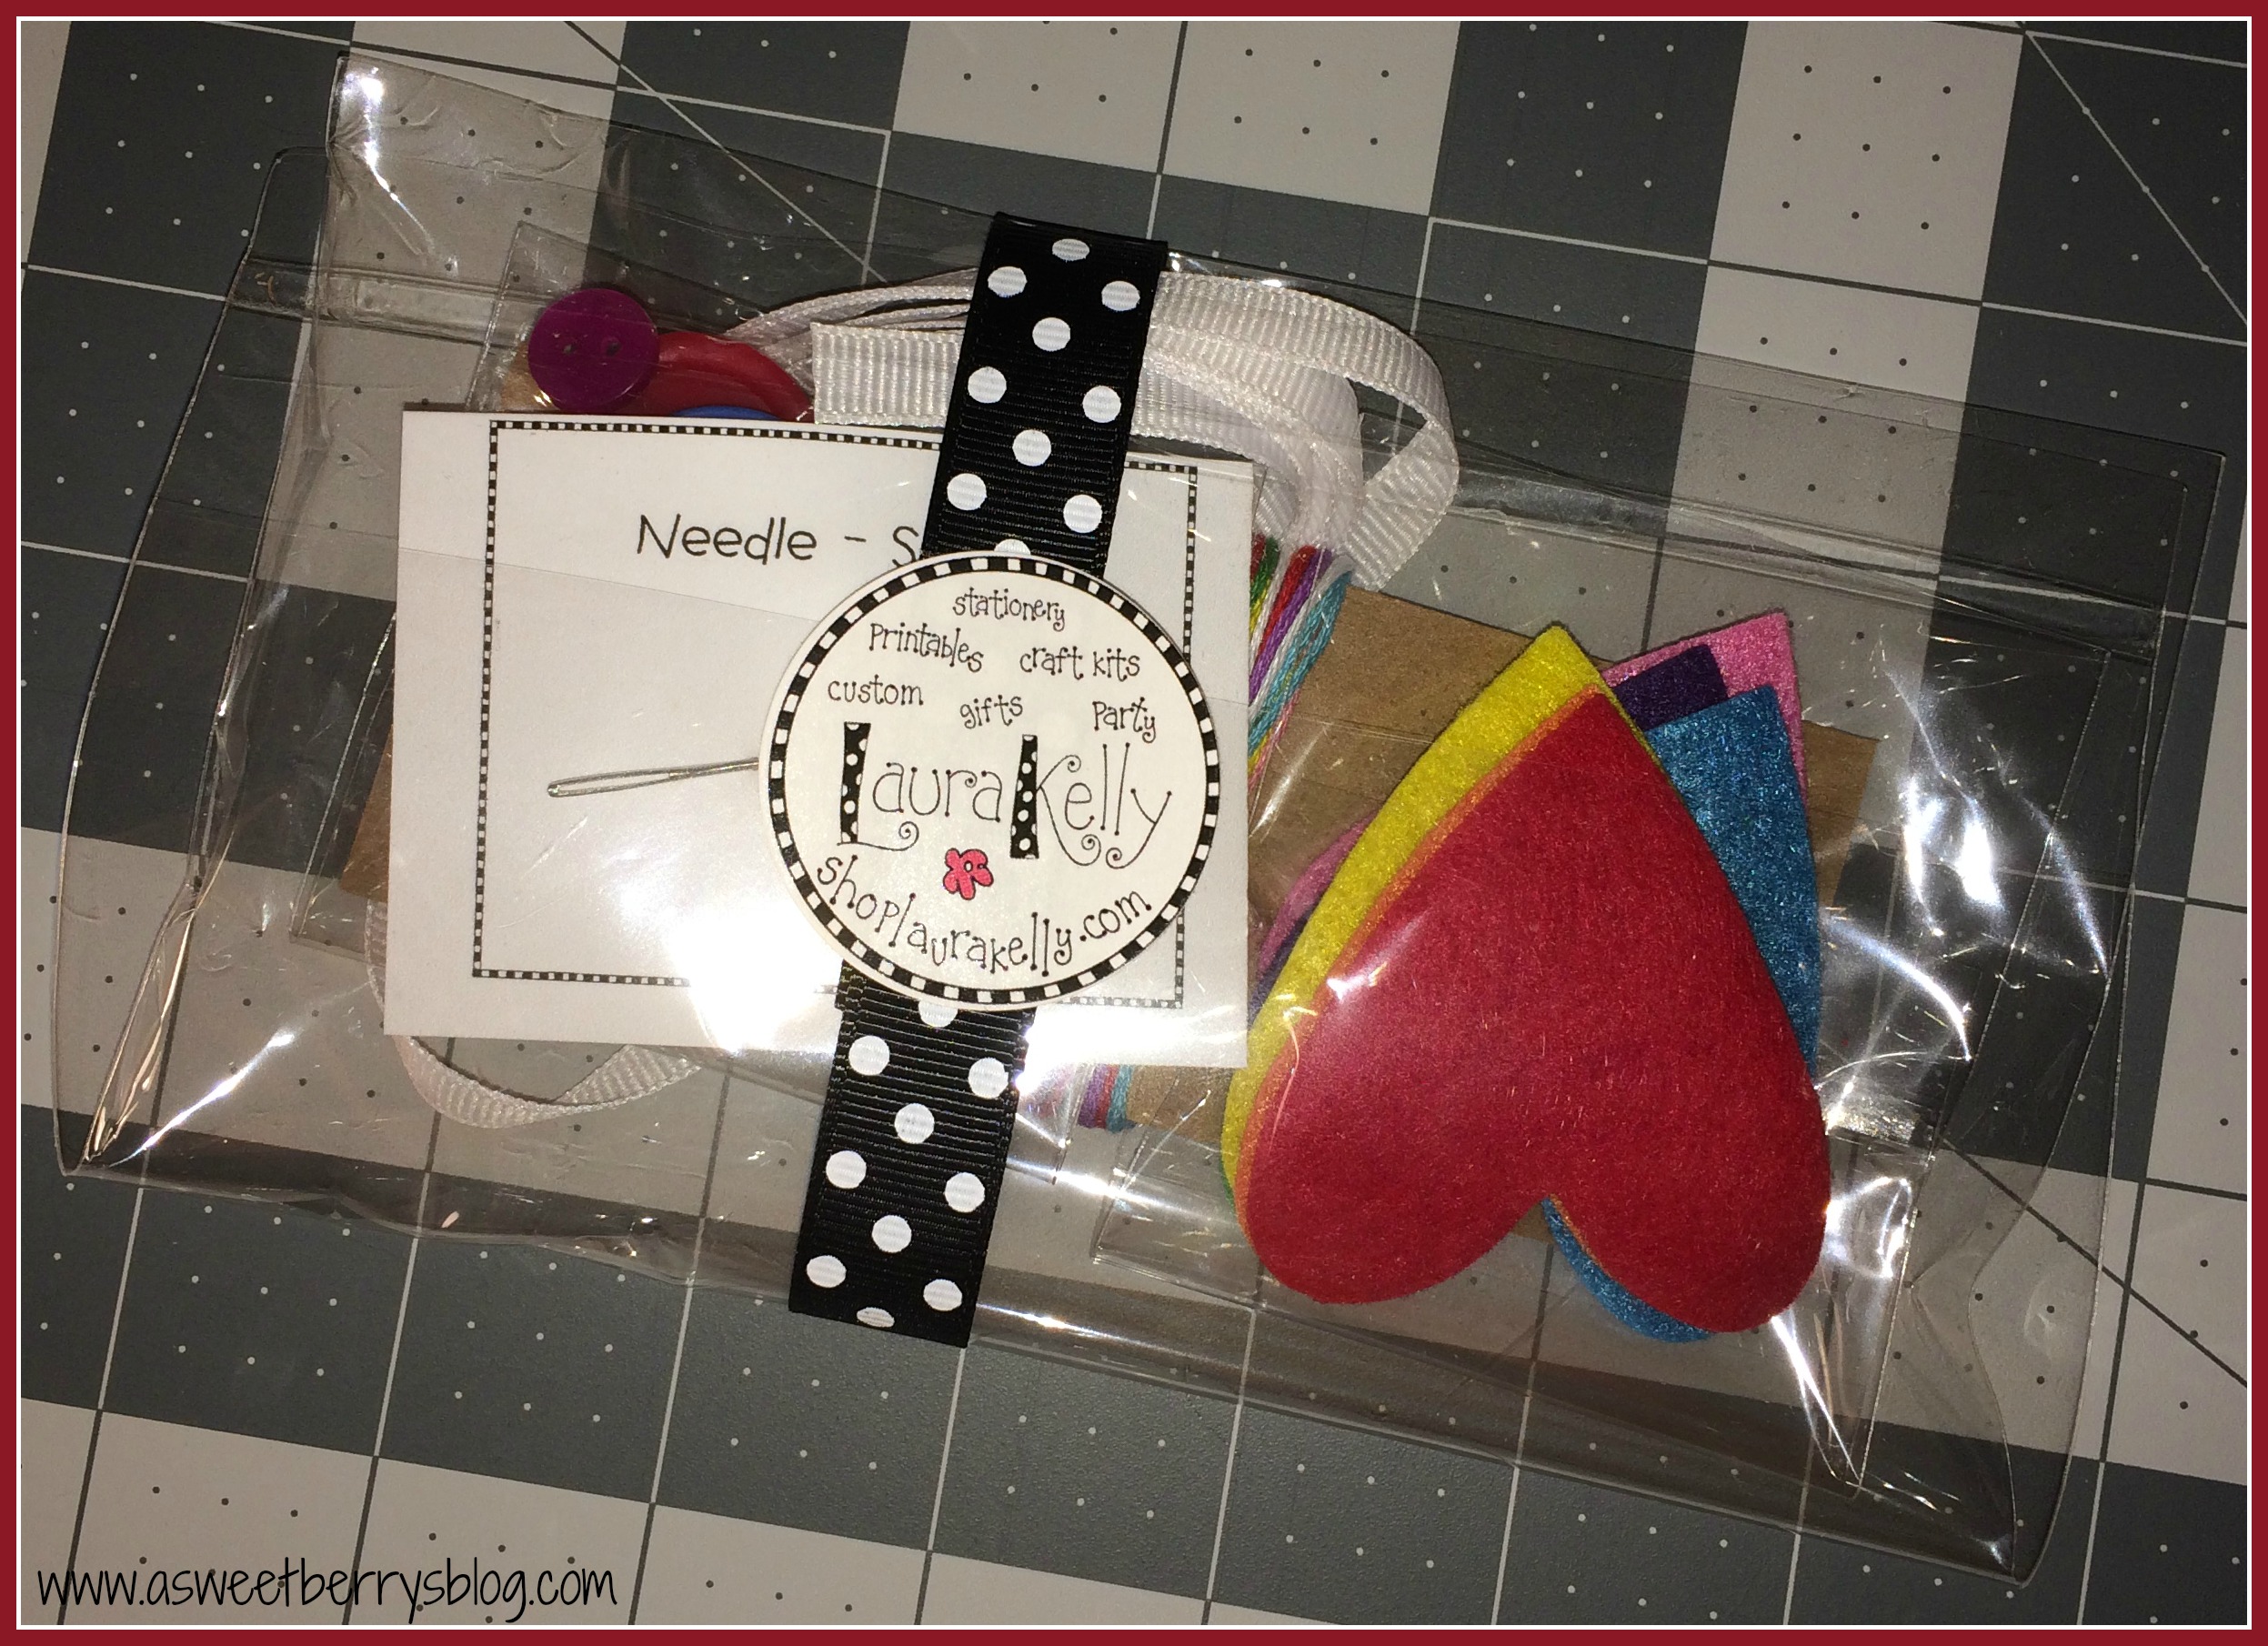
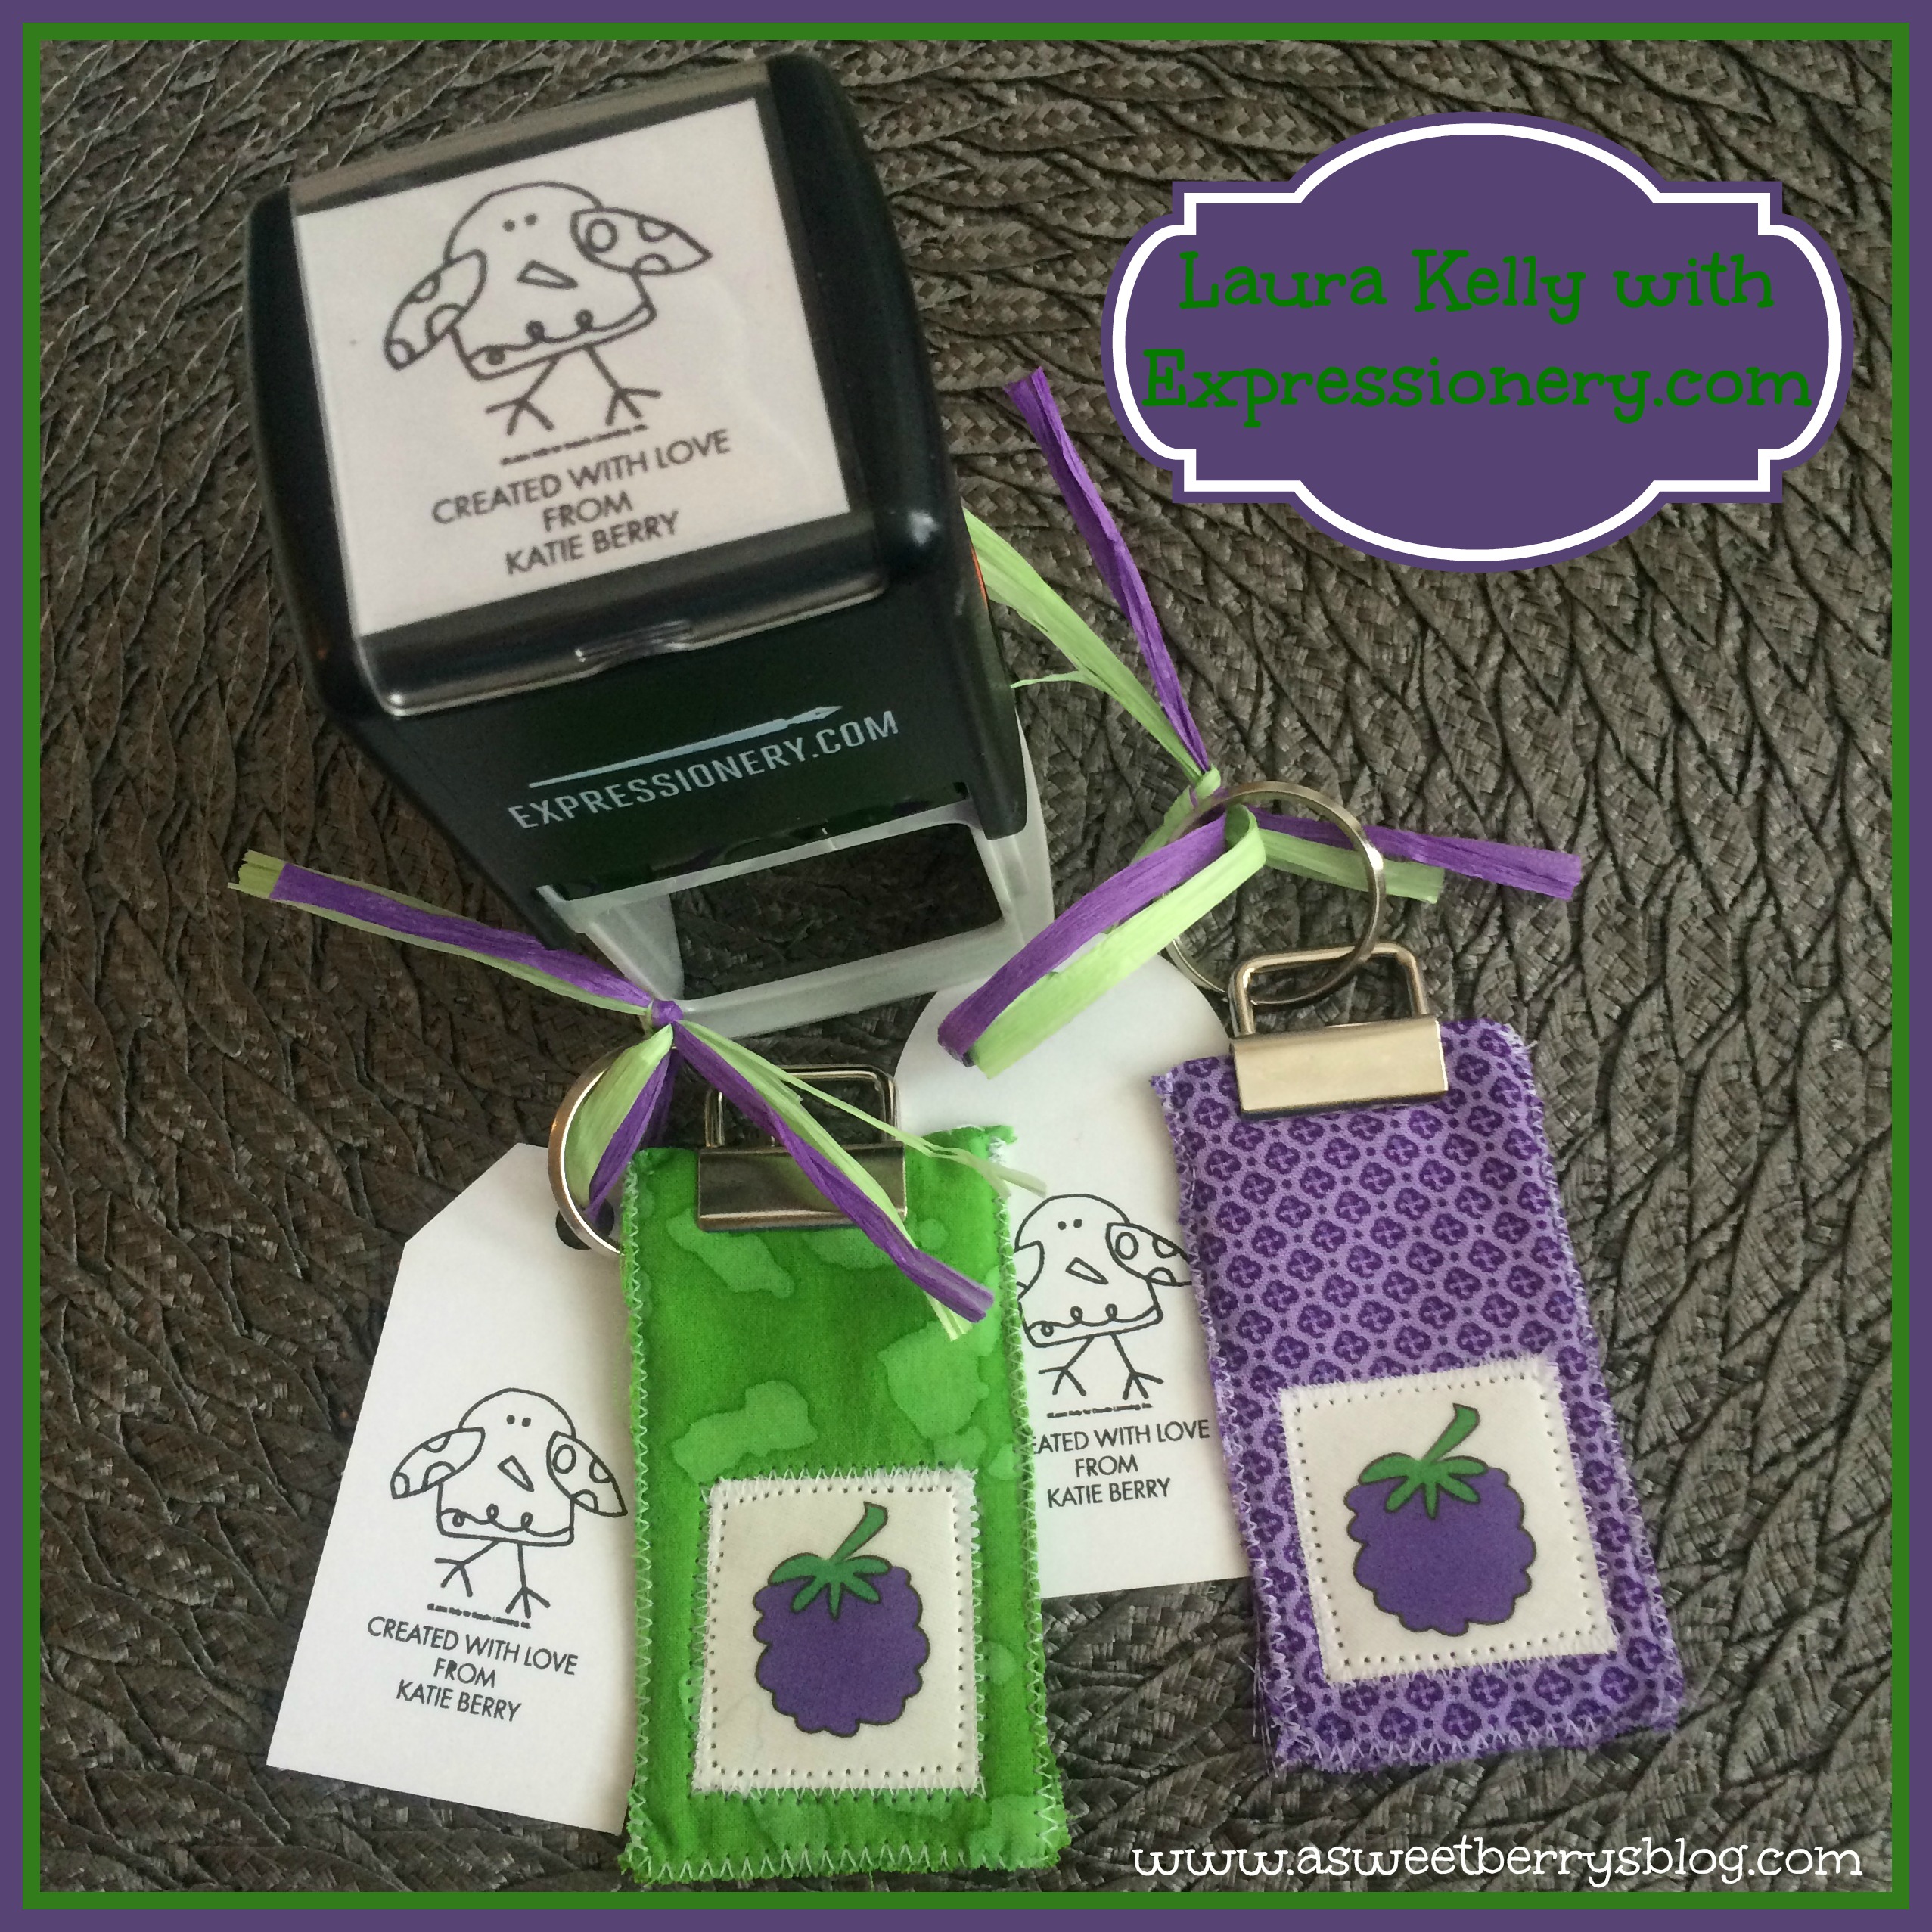
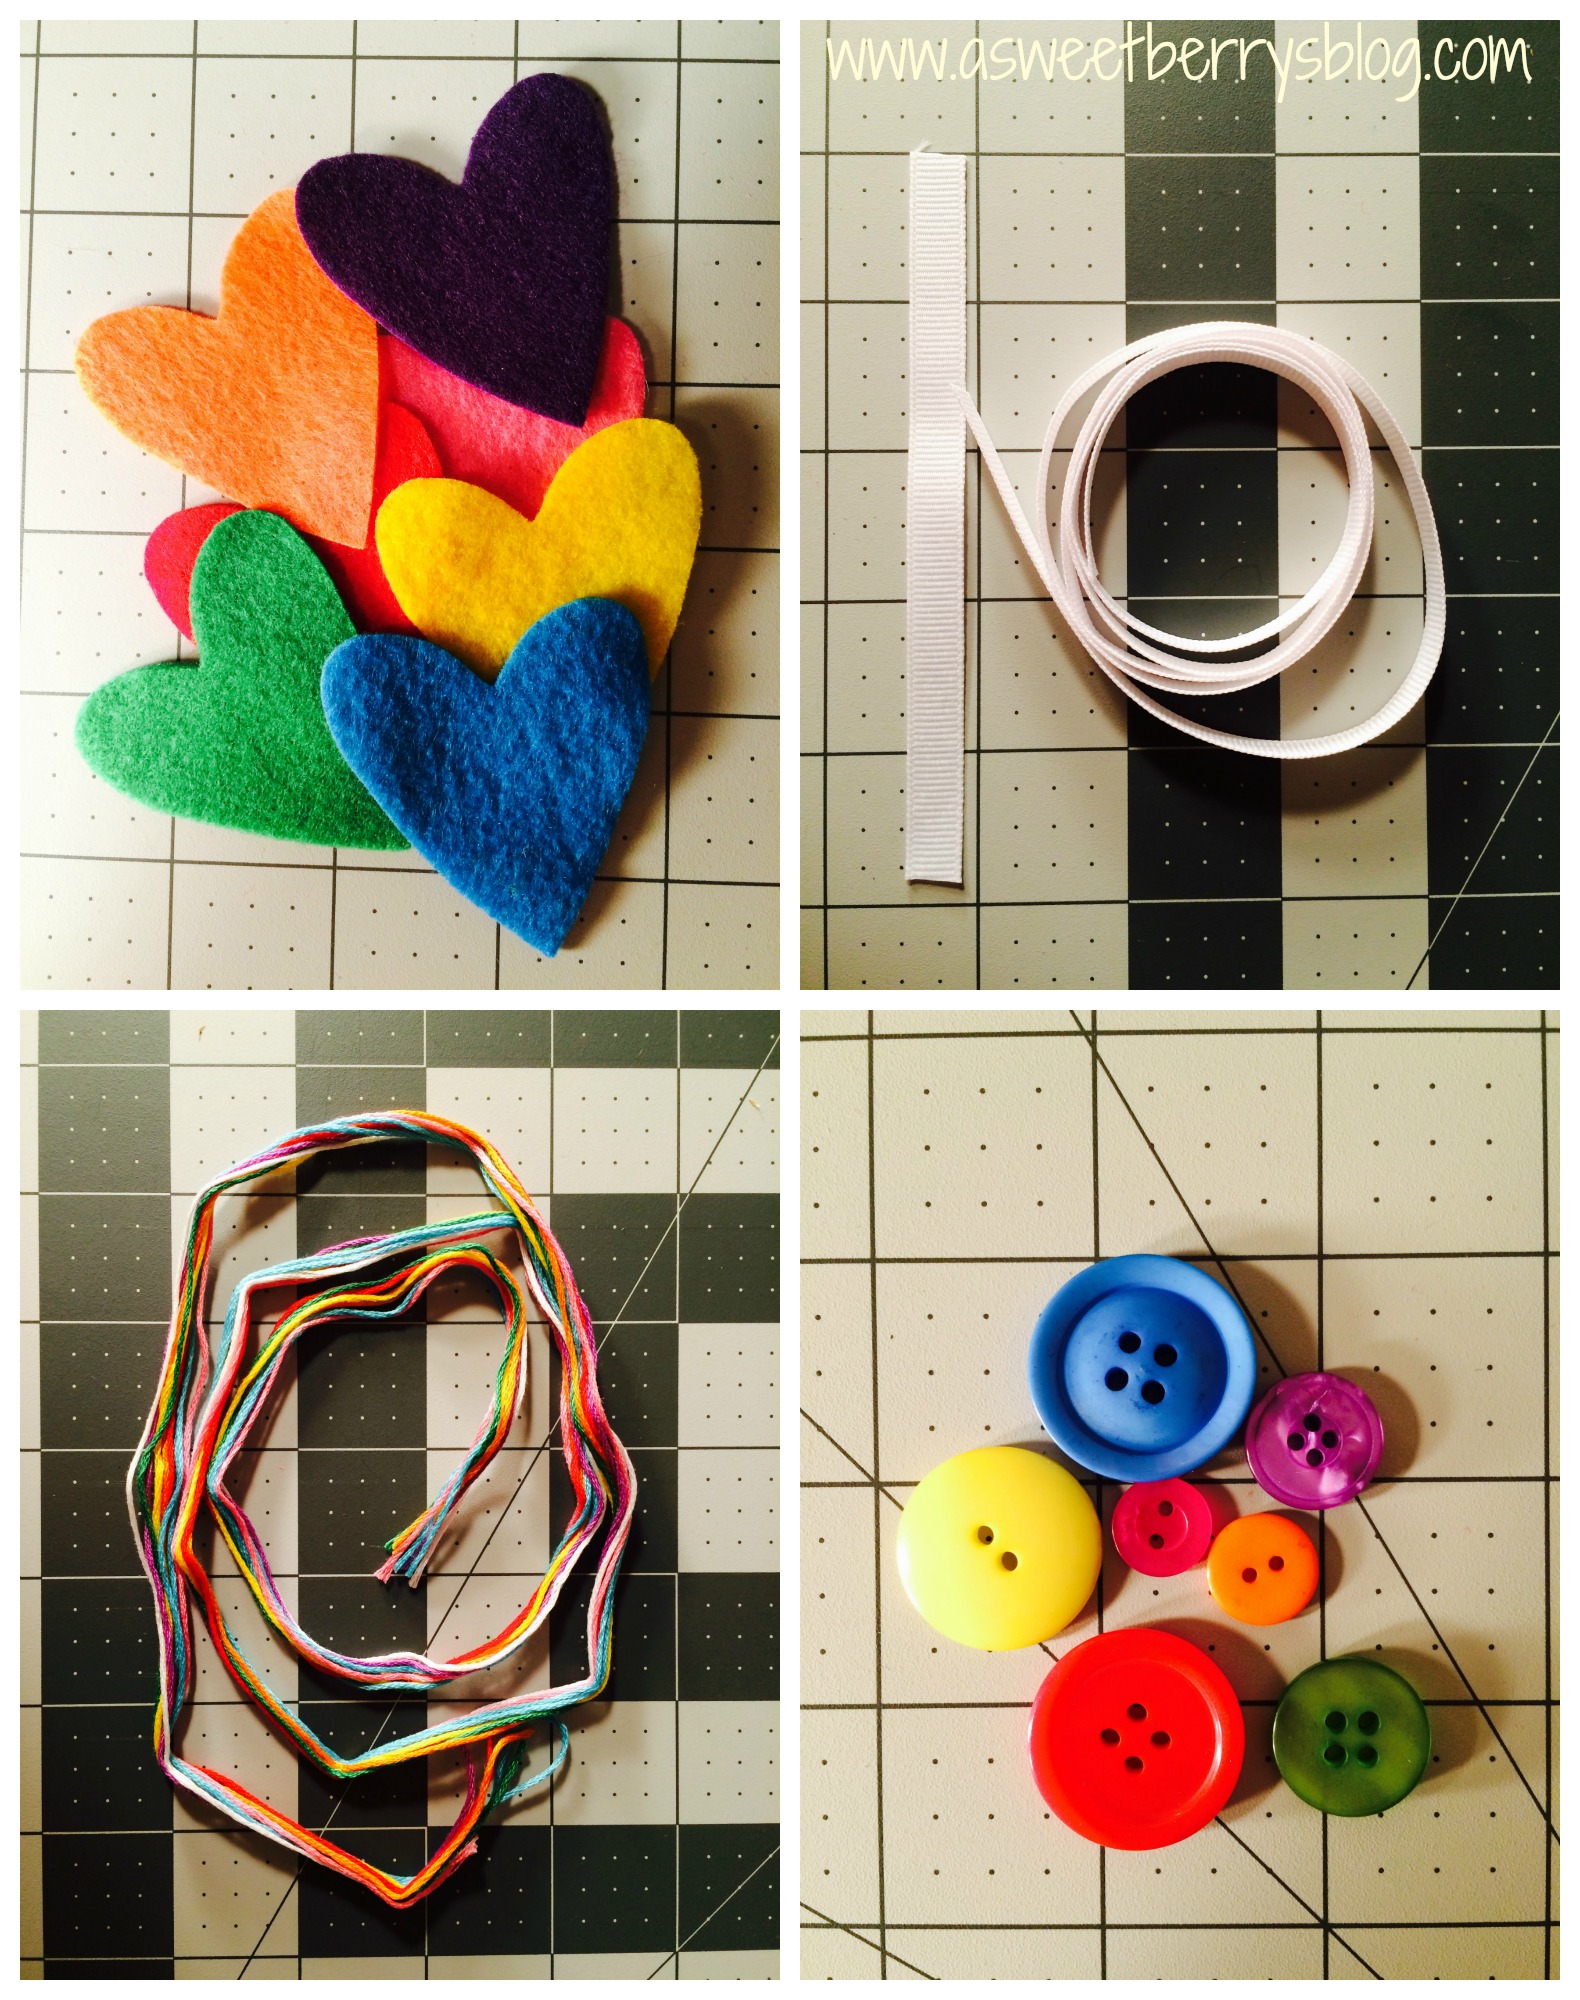
This particular kit includes felt hearts, ribbon, colorful embroidery floss, buttons and a needle. supplies
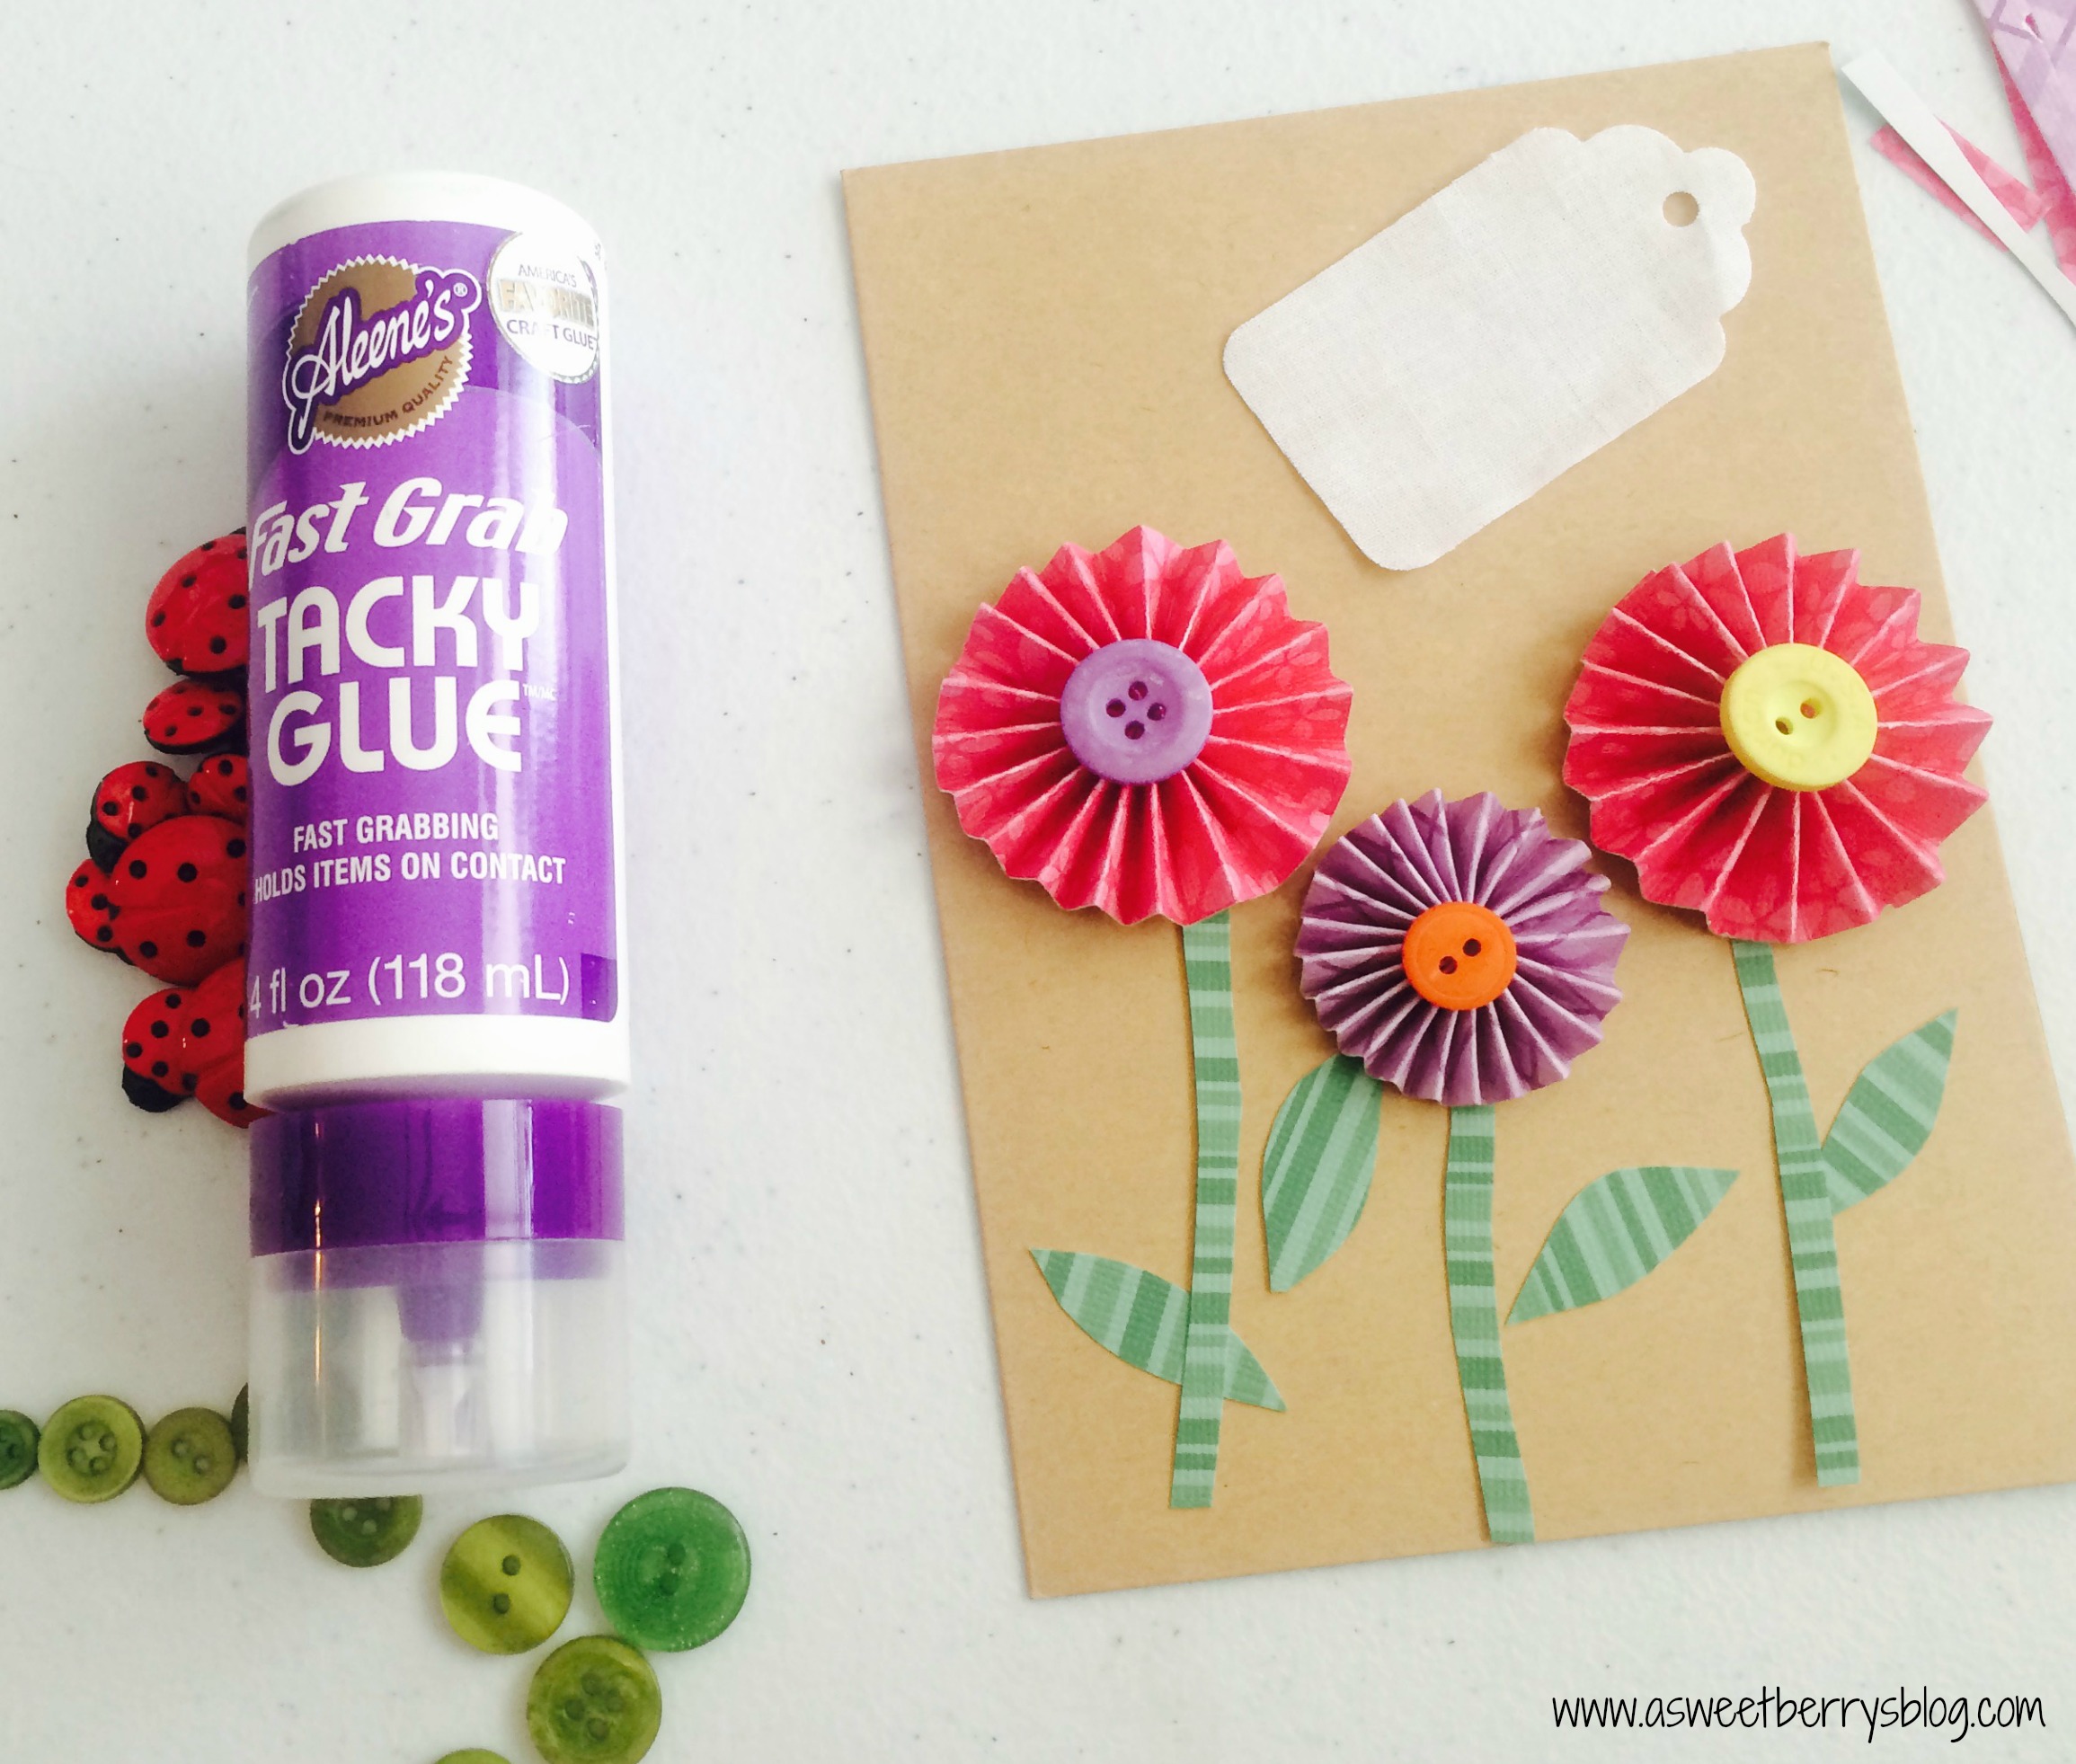
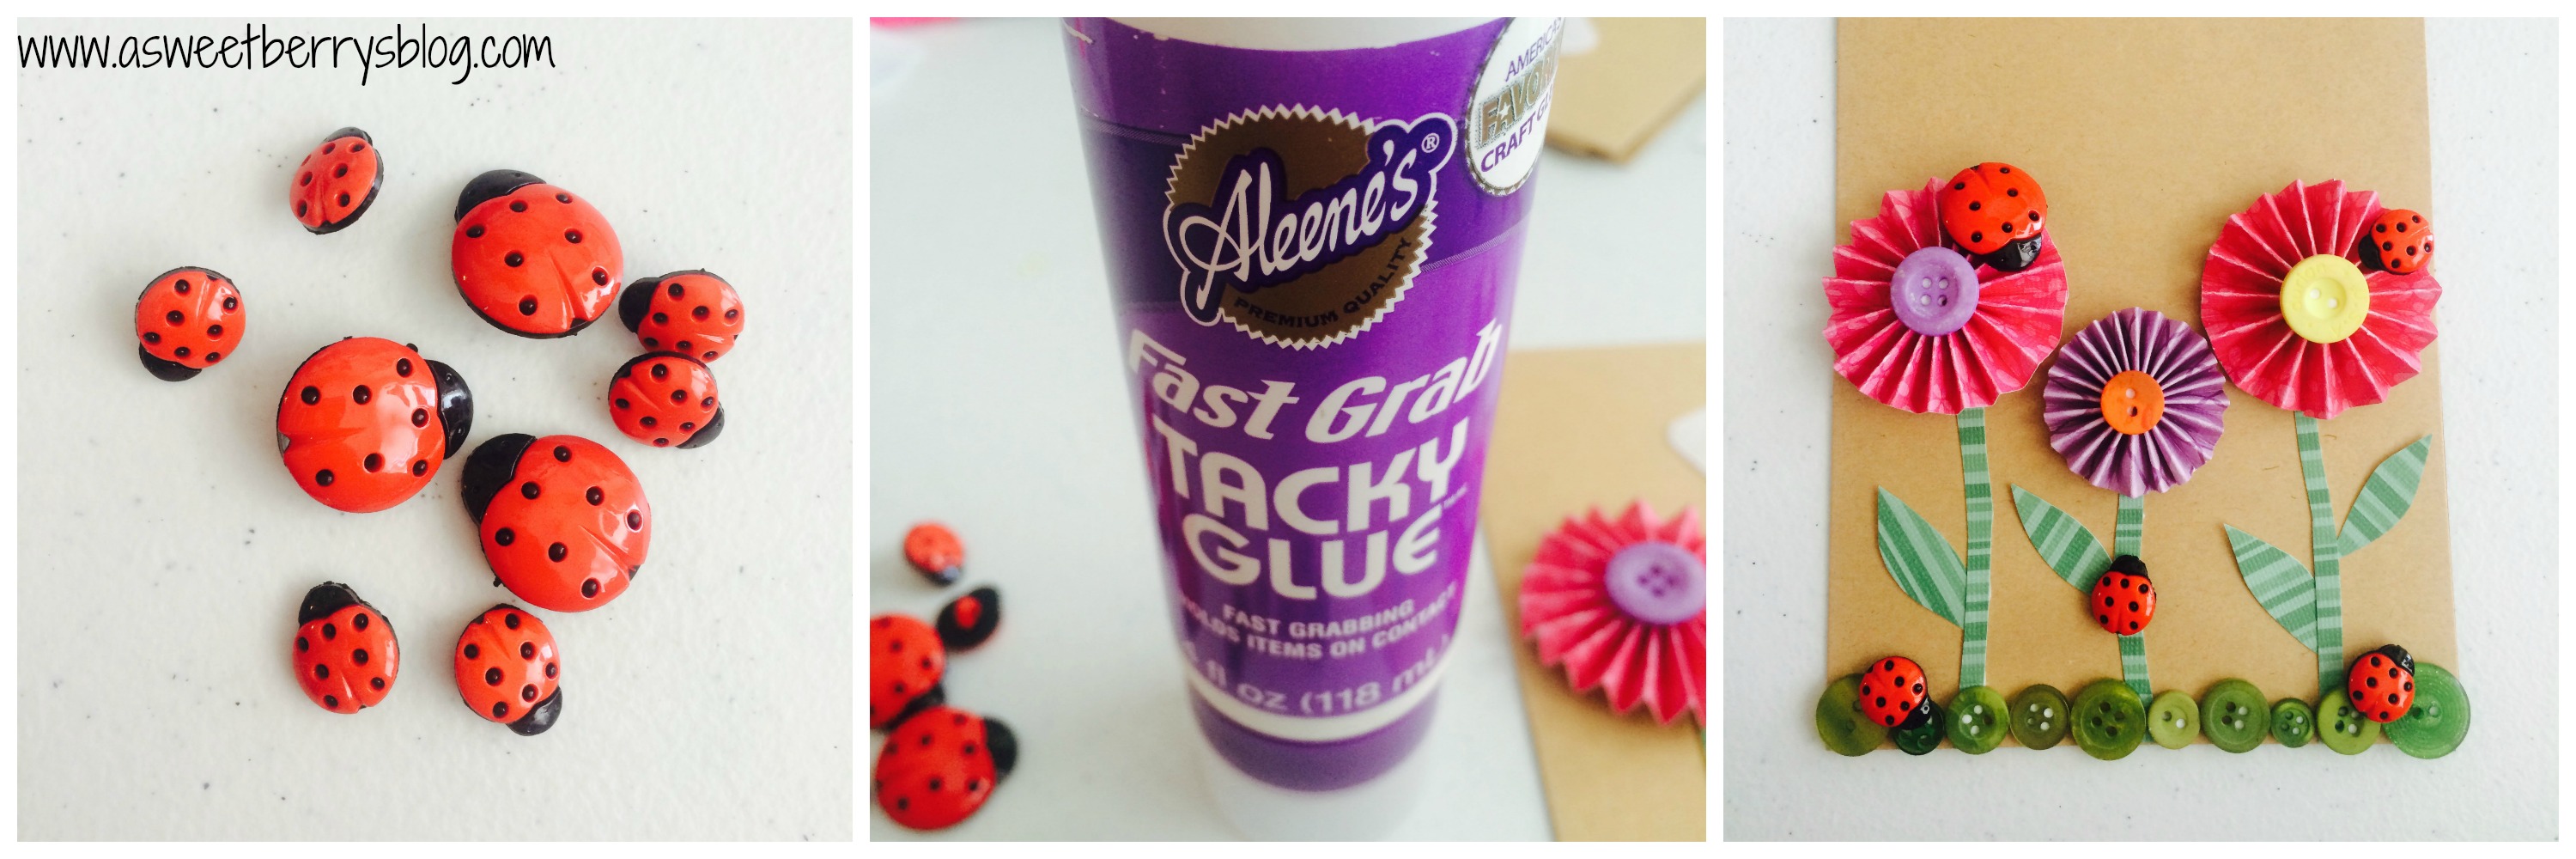
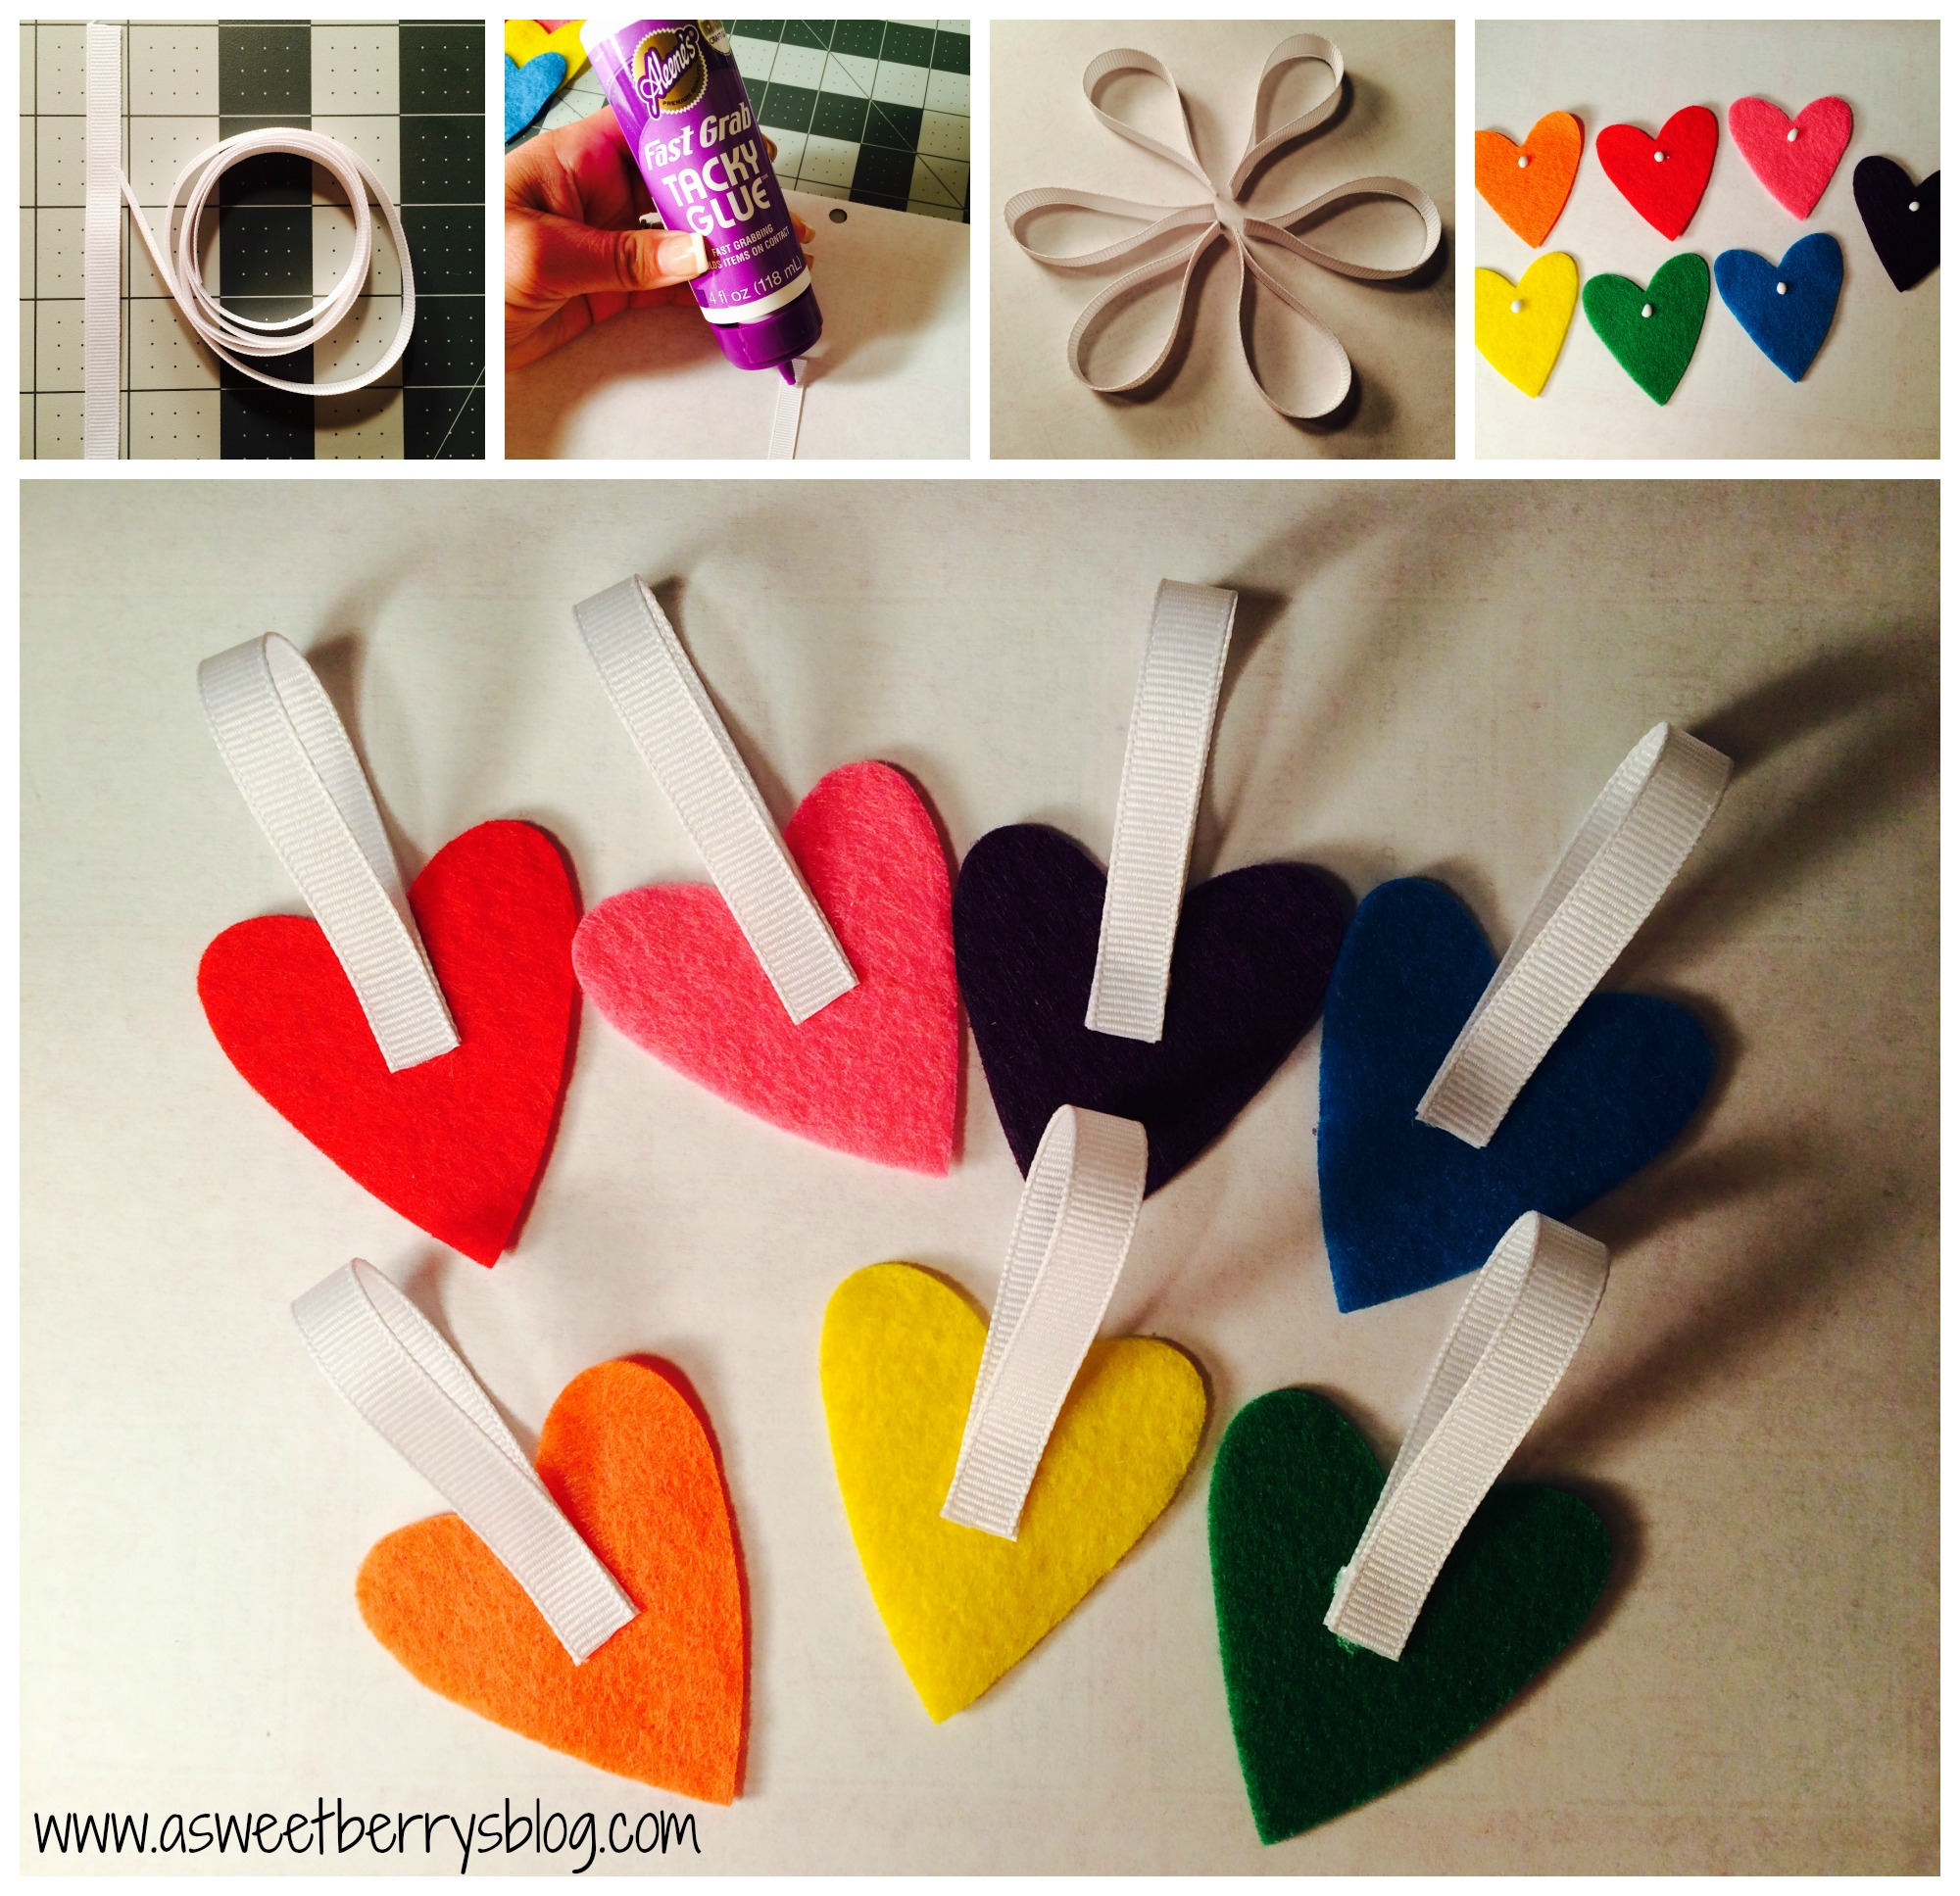
Instead of using my ribbon to hold the hearts for the banner, I decided to cut the ribbon into 4 inch strips and glued them together to make a little loop using Aleene’s Fast Grab Tacky Glue.  I then glued them to the backs of my hearts.  ribbon hooks
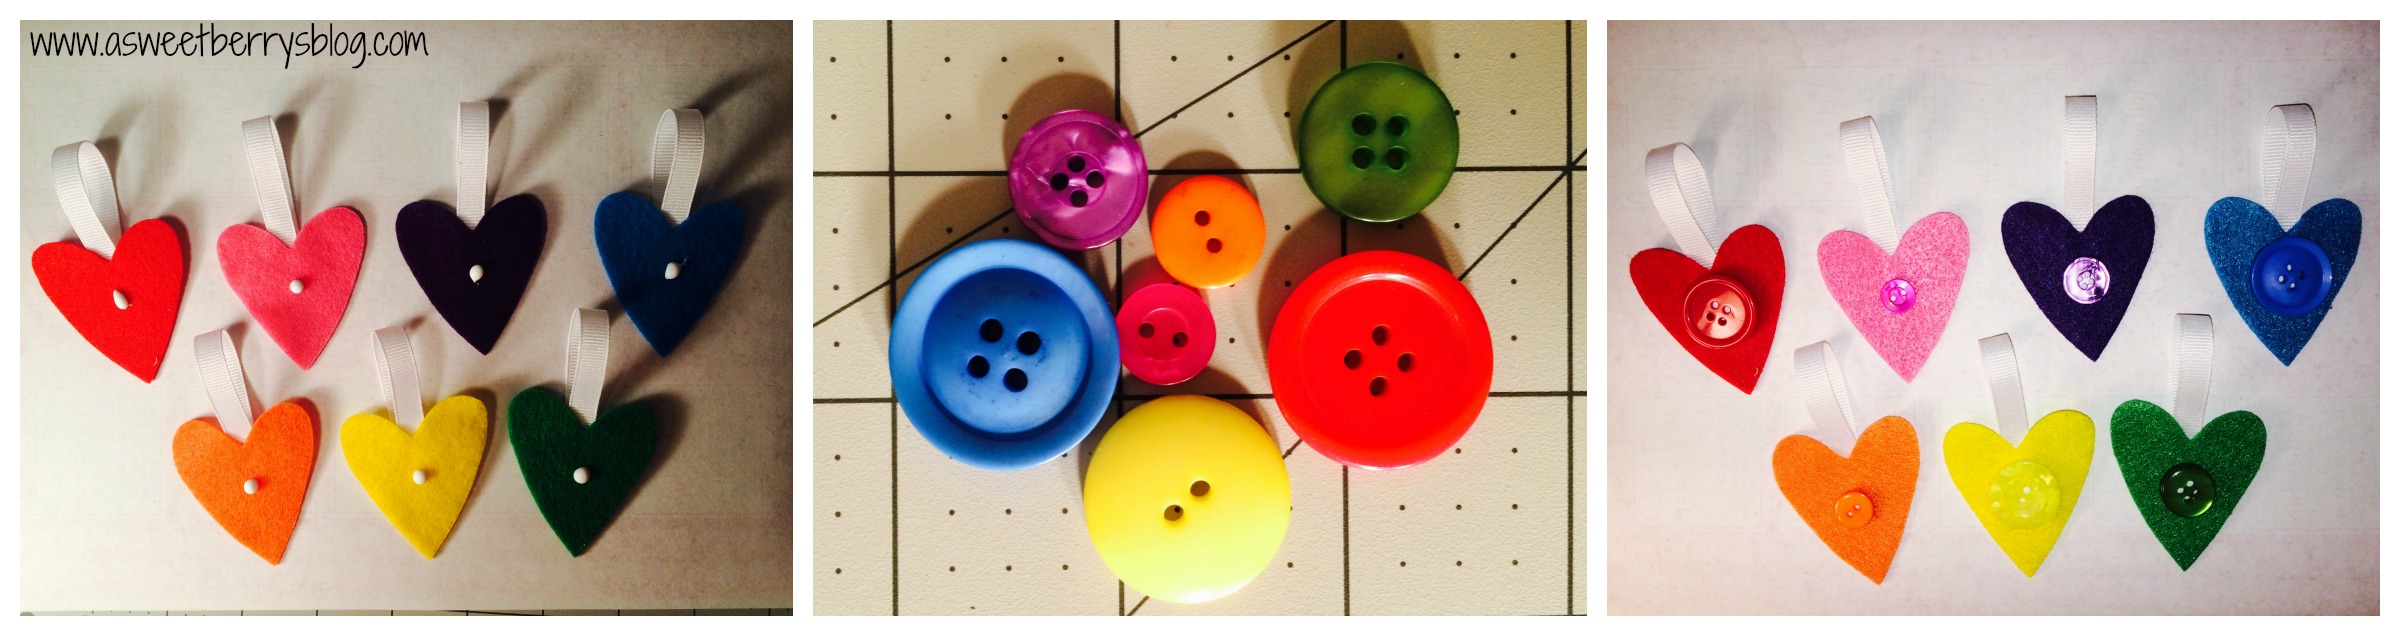
Once they were dried, I turned the hearts over and glued a coordinating color button to the front.
adding buttons
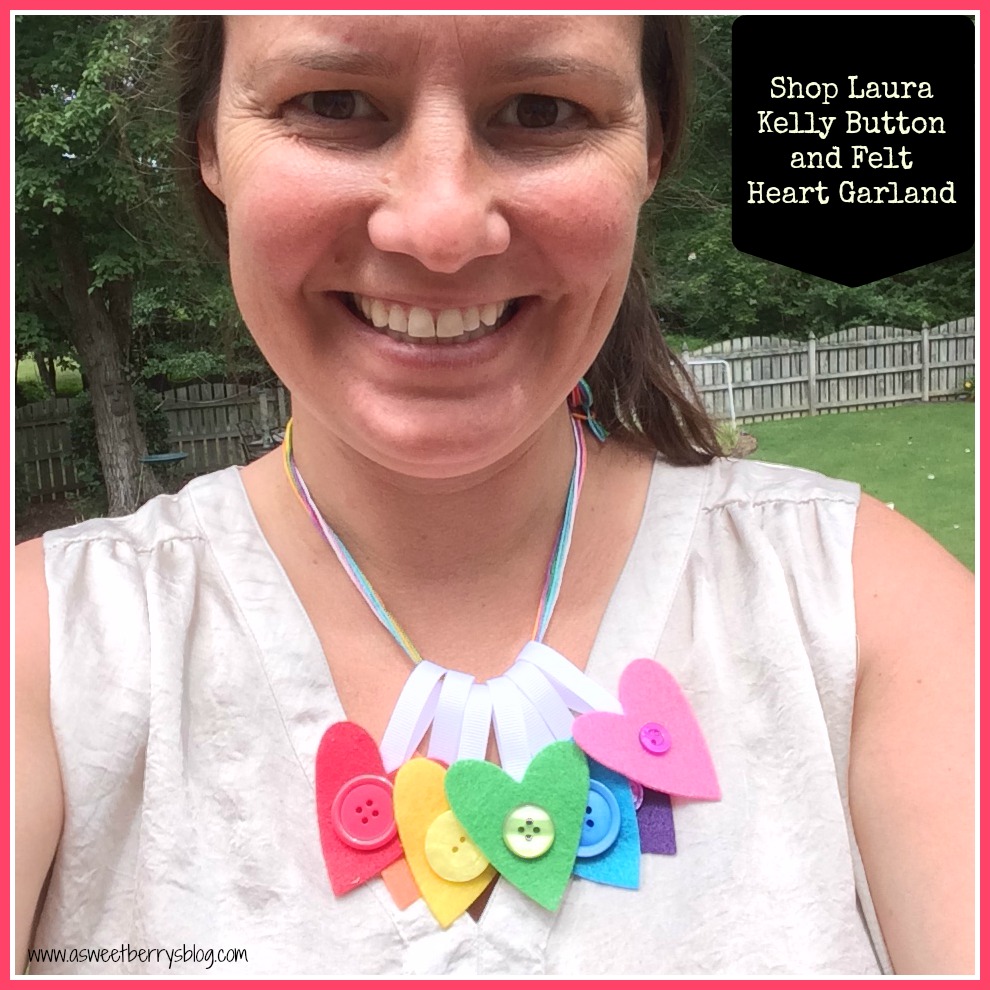
Then, I slid them onto my embroidery floss that I left together to look like a rainbow!
banner
It also makes a great necklace!  I love it!  So, go on over to ShopLauraKelly.com and check out Laura’s cute little craft kits!
necklace

Be sure to click through other great ShopLauraKelly project ideas below:


And enter to win!
a Rafflecopter giveaway

Until next time…….

Expressionery.com Self-Inking Stamps

Self-Inking stamps are so easy to use and Laura Kelly’s collection with Expressionery.com are super cute!   Expressionery.com has tons of different self-inking stamps to choose from!  I love my “Created with Love From” personalized stamp!  I use it on anything that I create that I am giving as a gift!   Here, I used it on a label for these awesome Scrappy Keychains that I made to go with my business cards for people that I meet at SNAP!   stamp
Click the photo below for Fifteen other fun ways to use Laura Kelly Stamps from Expressionery.com! Stamps
Right now, Expressionery.com is offering 30% off Sitewide with the code:  HAPPYSALE.  They are also offering free standard shipping on orders over $50!

Until next time…..


Happy Spring Button Greeting Card

I love Spring and I love Buttons!   I created this adorable Happy Spring greeting card using Laura Kelly’s Buttons and Lady Bug Buttons from Buttons Galore & More!
Final
Materials used:
Laura Kelly Buttons from Buttons Galore & More
Lady Bug Buttons from Buttons Galore & More
Card stock from Core-dination from Darice
Card/Envelope from Core-dination from Darice
Fabric Tag
Tulip Fabric Markers from ILoveToCreate
Hot glue gun and hot glue
Aleene’s Fast Grab Tacky Glue
Aleene’s Paper Glaze
I started by making paper rosette flowers.   I cut 3/4″ and 1/2″ paper strips with cute card stock.  Bending the paper back and forth, I created a zigzag strip.   Once I had them all folded, I used a hot glut gun to glue the strips to each other, connecting two strips together on each end.  Once they were connected and formed a circle, I positioned the sides together to form the rosette and hot glued the center and let it dry. rosettes
I cut my stems and leaves from a green striped card stock and glued them to a card using my Aleene’s Fast Grab Tacky Glue.  I added buttons to the paper rosette flowers!  I used green buttons for the grass!
puttingtogether
Buttons Galore & More has adorable little lady bug buttons, so I attached them to my card using Aleene’s Fast Grab Tacky Glue.  I added them to the paper rosette flowers, the stem and the grass! ladybugs
Using a fabric tag and Tulip Fabric Markers, I wrote Happy Spring and added lines and dots!  I applied it to the card using Aleene’s Paper Glaze and added a little ladybug to cover the hole on the tag. tulip fabric markers
I love this adorable little Happy Spring card and someone special will be receiving it soon! Final

Buttons Galore & More is offering free shipping on orders over $30!    They also offer Coupons for their buttons!

Once I completed my card, I used my Laura Kelly personalized self-inking stamp from Expressionery.com to stamp the back showing that I created this card with love! Expressionery.com

Expressionery.com is currently running a special of 25% off Sitewide with the code:  SPRINGSALE.   They are also offering free shipping with a purchase of $50 or more!

Hope you like this adorable card as much as I do!  You can make one yourself!

Until next time……

Personalized Christmas Stationery from Expressionery

This post is sponsored by Expressionery.com and Laura Kelly Designs.  Although I received product and financial compensation, all opinions are entirely my own. Written Words
Personalized Stationery from Expressionery.com is my favorite, especially when it has Laura Kelly’s Me and My Peeps on it!   There is a Peep for everyone, even your pets!   There are even Christmas time Peeps.   When the package from Expressionery.com came and my boys (Landon, age 7 and Benjamin, age 5) saw that they had their own Me and My Peeps Christmas stationery, they were so excited!   Landon is to the age that he loves writing notes, especially to his teachers and friends!

Expressionery.com has a gift for everyone.  Personalized stationery is the perfect gift for the holidays, Mother’s Day, Birthdays or even Teacher Appreciation.  Or, you can just order it for yourself!  Laura Kelly’s collection of stationary is super cute and fun!   Her designs are appropriate for children and adults!

A Little Christmas Ornament using our Me and My Peeps Stationery!

We decided to make a cute craft with one of our notecards.   They each made a Christmas ornament to send with the note that Landon wrote to his Mimi and Paw!  Each boy cut out their own Peep, leaving their name attached.
Cutting
Using Aleene’s Turbo Tacky Glue, they glued their Peep to a piece of Kunin’s red felt! Aleene's
After the glue dried, they cut the felt just a little bigger than their Peep! felt
Next, we used Eyelet Pliers and an eyelet to create a hole so that we could add a piece of string!   We used the elastic silver string that came wrapped around our stationery gift from Expressionery.com!! ornaments
These lovely homemade ornaments will be sent to Mimi and Paw’s house with the sweet little note that Landon wrote for them! Final Ornaments So, go to www.expressionery.com/laurakelly and order some personalized stationery for a gift or for yourself!  The deadline to order for Christmas is December 19th.  For 30% off site wide, used Promo Code:  PEEPS    Code expires on 12/30/14 and excludes embossed stationary and paperweights.  *Limited time offer valid through December 30, 2014 at 11:55 PM CST. Receive 30% off sitewide plus free standard non-trackable shipping and handling on orders over $50 with offer code “PEEPS” at checkout. Offer excludes embossed stationery and paperweights. This offer may not be combined with any other offer or discount, and shipping fees and sales tax are separate. To prevent abuse, prices, specifications, and availability subject to change without notice from Expressionery.com.
Enter for a chance to win a fantastic giveaway!
250VisaGiftCard_PRIZE_Pic
a Rafflecopter giveaway

Button Christmas Tree Earrings

Check out these adorable Button Christmas Tree Earrings that I made using Laura Kelly’s collection of buttons from Buttons Galore and More!   I have a great love for buttons and Laura’s are awesome!
Final
Materials used:
Laura Kelly Buttons from Buttons Galore & More
Head Pins
Earring Hooks
Round Nose Pliers
materials
First, I started out by picking out my buttons.  I made sure that the green ones were somewhat graduated, so that they made a tree shape.  Then, I chose some brown ones for the trunk and then yellow to represent the star.  Once I laid them out the way I wanted them, I placed them on the head pin. makingthetree
When all of my buttons were on the head pin, I used my round nose pliers to create a loop.  I then opened up the end of the earring hook and placed it on the head pin loop and then closed it using the pliers.  Then I did the other one the same way! earring
Easy Peasy Lemon Squeezy!   And they turned out super cute!   I plan to wear them a lot during the month of December! earrings Hope you liked my Button Christmas Tree Earrings!   Now you can make your own!

Until next time……….

Pink Button Bracelet

Pink Button Bracelet

I love dangly bracelets and this pink button bracelet is super cute and super easy!  And it can be worn in October to show your support for Breast Cancer Awareness.   Finished Bracelet

What you need:
Pink Button Bracelet Supplies
Laura Kelly’s Sweet Blush Collection Buttons from Buttons Galore & More
Jump Rings (two different sizes)
Chain (sized to fit your wrist)
2 piece toggle clasp set
Wire Looping pliers (round nose pliers)

Using my wire looping pliers, I opened all of my jump rings slightly, most of them big enough to get a button on them and then connect them to another button and the rest of them only big enough to connect to the chain.  As you can see in the picture below, I connected a few buttons to make a strand or just left them as singles.  I did try to make it even, so that it would not be too heavy on one end. I also used two jump rings to connect each piece of the toggle clasp to the ends of the chains.
Putting it together
After I had all of my buttons together with jump rings, I attached them to the chain.  And then it was complete!
Finished Bracelet
Hope you like my Pink Button Bracelet. Thanks for reading, and

Until next time…………
ASWEETBERRYLOGO

Laura Kelly’s Pet Shop Sizzix Collection T-shirt

Laura Kelly’s Pet Shop Sizzix Collection T-shirt Benjamin final

Laura Kelly just launched a new line of die cuts with Sizzix/Ellison.  It’s really exciting and they are such cute die cuts.  Laura invited me to join in her quest to promote the line!   It’s called the Pet Shop collection.  Click on the link to check it out!!!   I decided to use the terrarium and lizard that Laura so kindly precut for me!

Things you will need:
-a t-shirt
-Laura Kelly’s Pet Shop Dies by Ellison
-Die Cut Machine
-Scribbles 3D Fabric Paint
-Tulip 3D Fabric Paint
-Fabric with an adhesive backing

materials

Before I removed the adhesive cover, I inserted my lizard into the precut slots.   back pieces

I then gently removed the backing of the lizard first and then the backing from the terrarium. putting it together

 I then placed the terrarium onto my shirt, making sure I put it exactly where I wanted it because it’s not easy to move!!!   Next, I added the cute little saying “Here Lizard Lizard!”, black fabric paint to the top of the terrarium to make it look like it has a lid and eyes on the lizard!

complete

Then I put it on this cute little guy and he loves it!!!  What little boy doesn’t like pets?!?!? Benjamin

Hope you like my cute little lizard and terrarium Pet Shop Collection by Laura Kelly t-shirt!!!

Until next time…..

  FINAL LOGO

  a Rafflecopter giveaway