Tag Archives: Aleene’s

Kunin Felt Love Banner

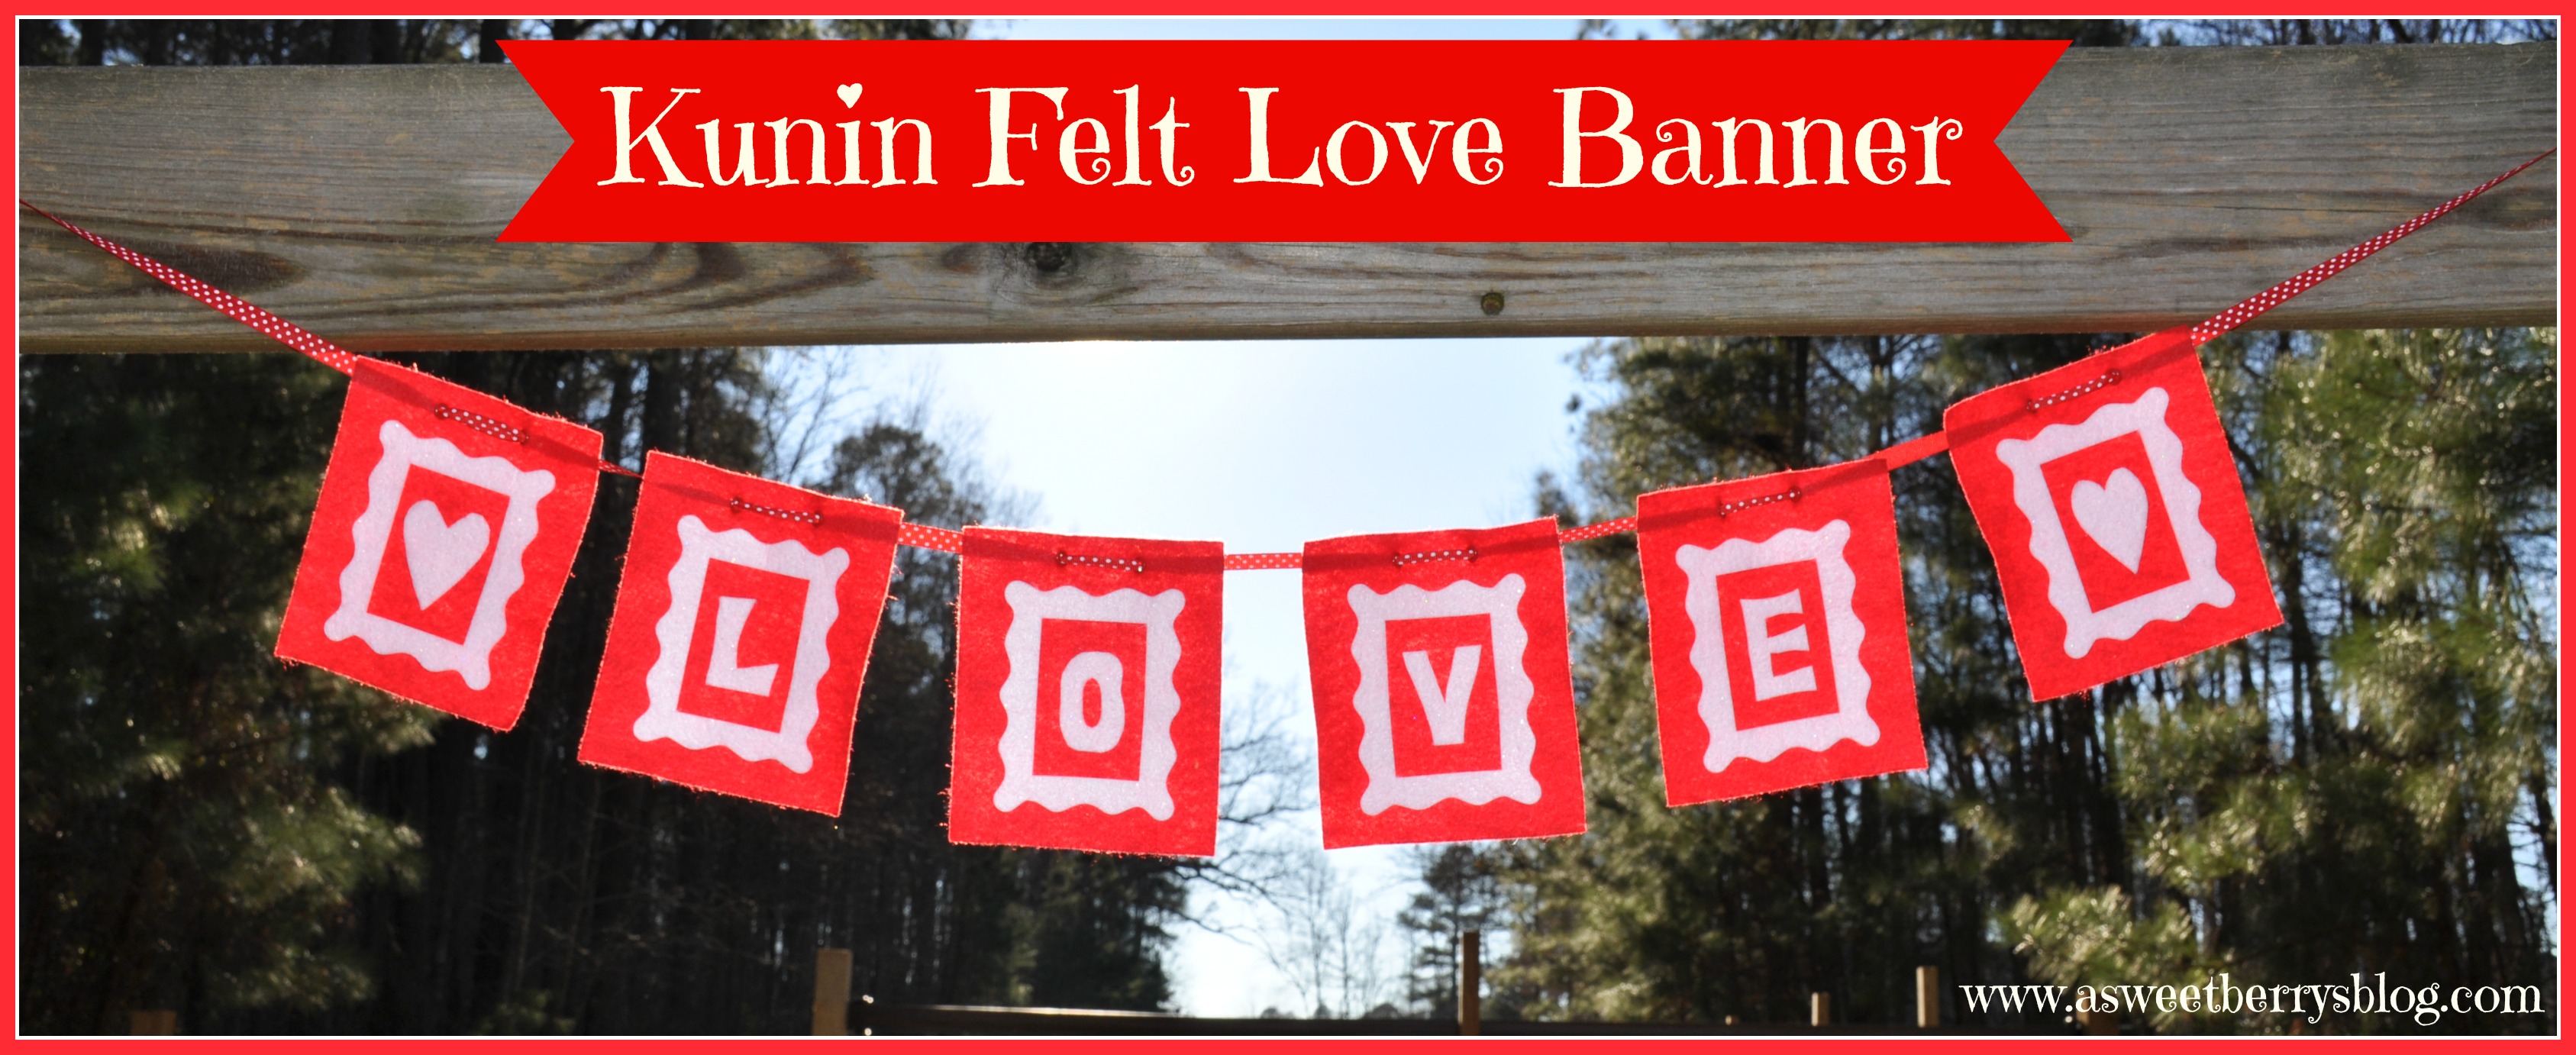
I love a cute felt banner, and I love making them using Kunin Felt!   Isn’t this Love Banner super adorable!   And it was super simple! Final Banner
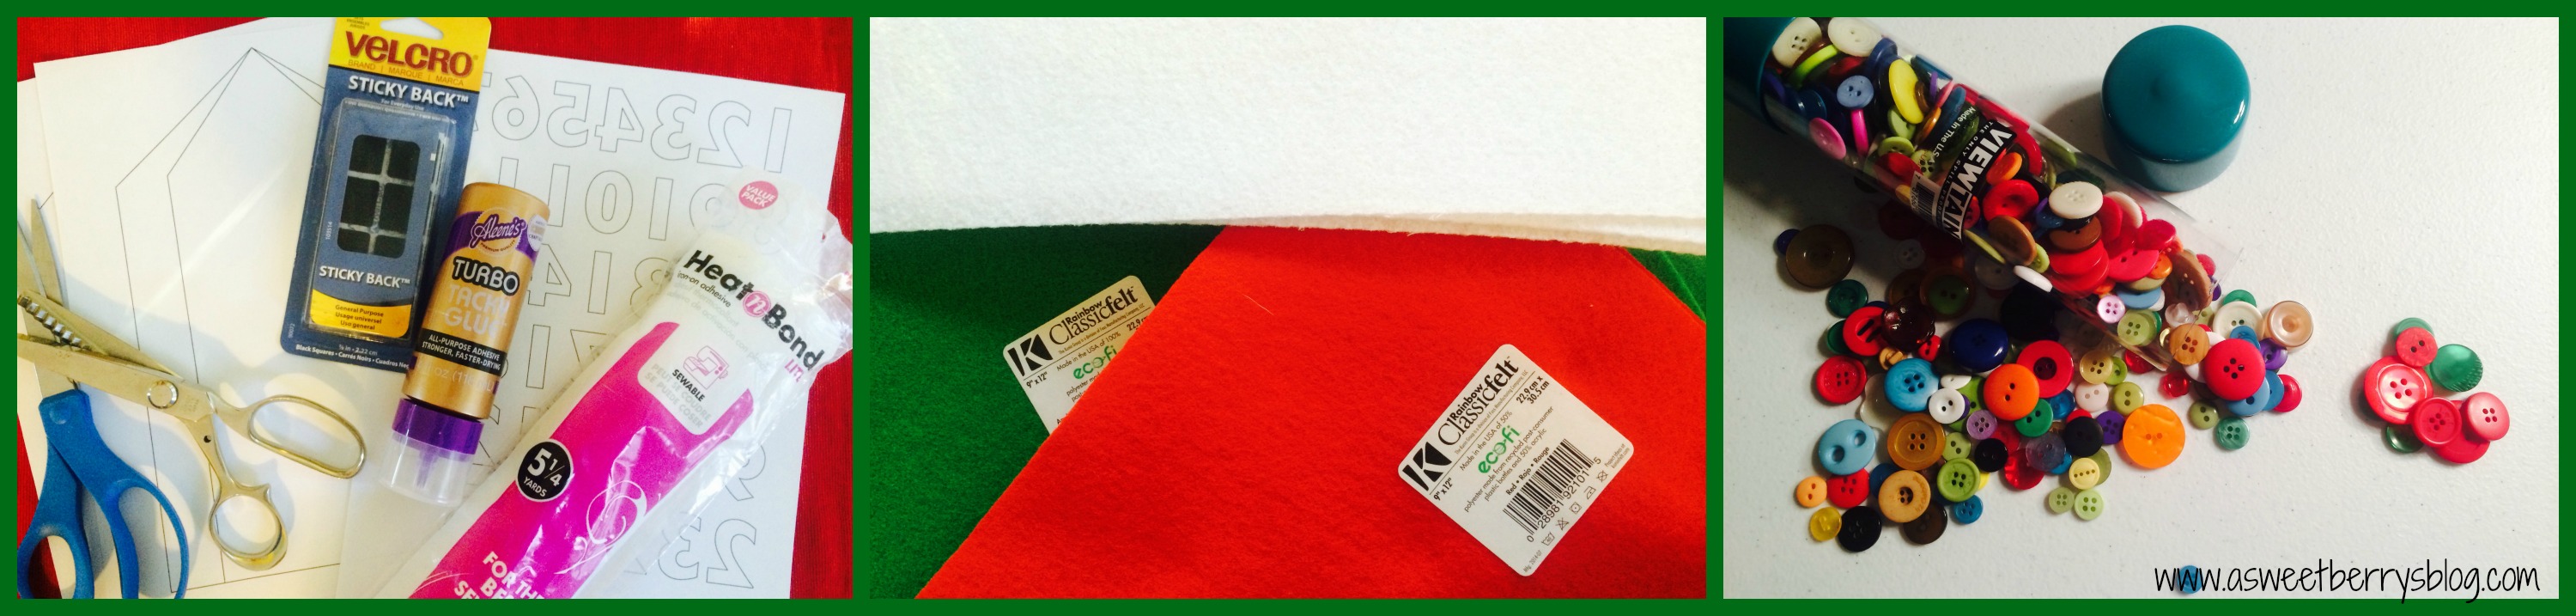
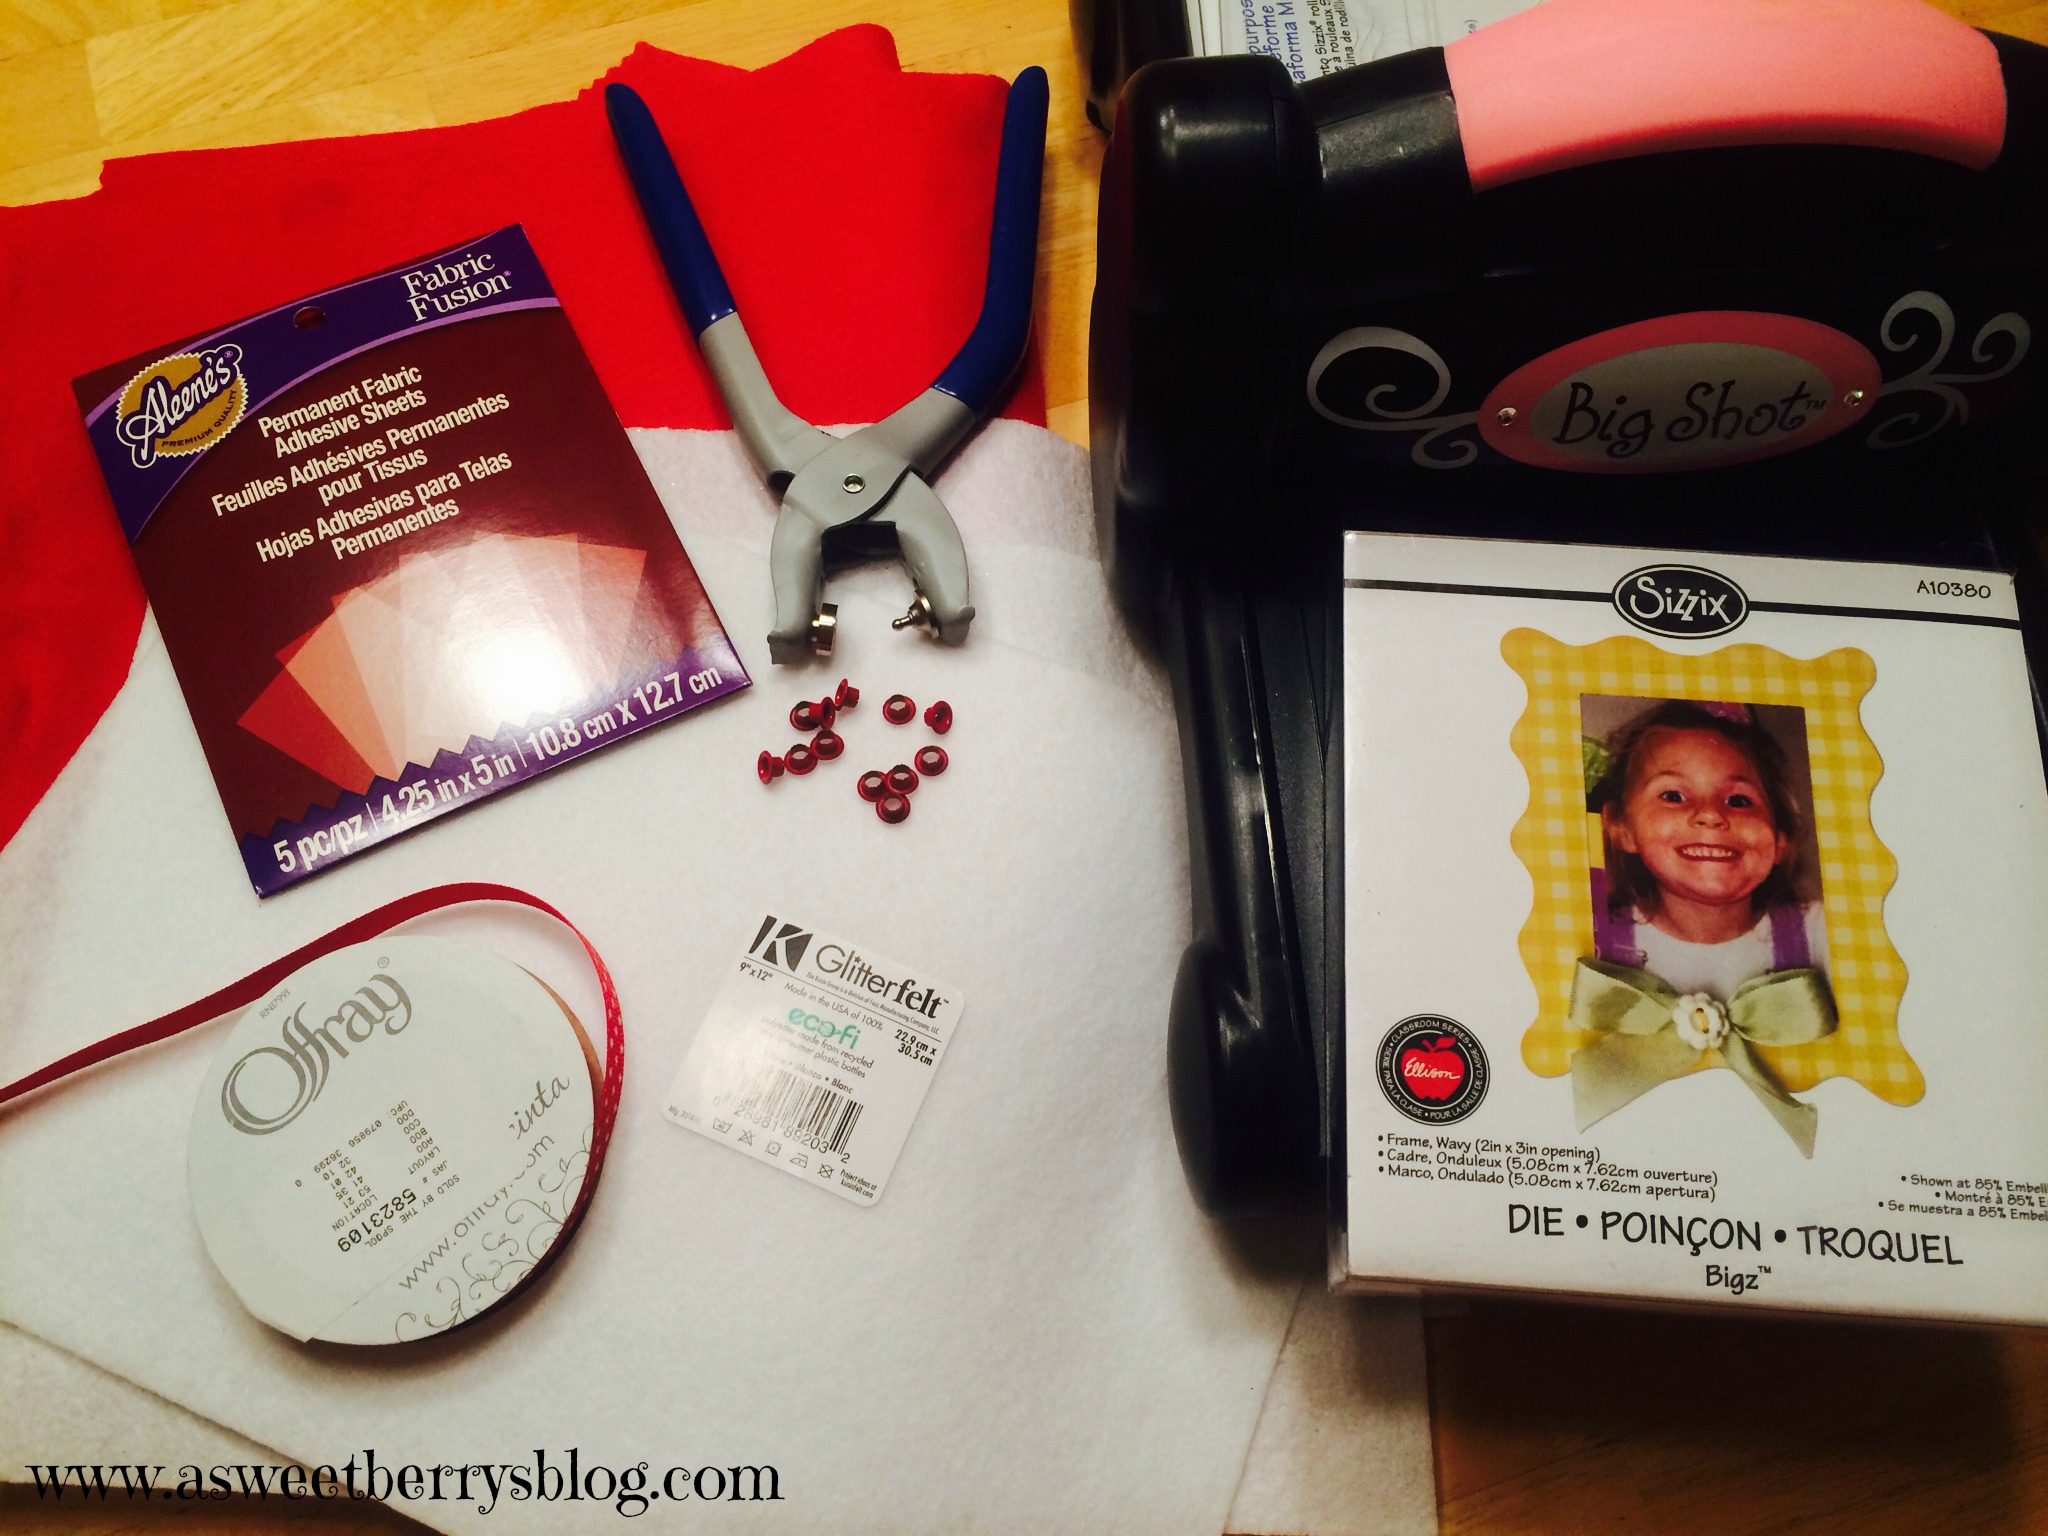
The materials that I used to make this banner were:
Kunin Red Felt
Kunin Glitter Felt
Aleene’s Fabric Fusion Permanent Fabric Adhesive Sheets
A Sizzix Frame Die (I used a wavy frame)
Sizzix Big Shot
Offray red with white polka dot ribbon
Eyelet Pliers and red eyelets
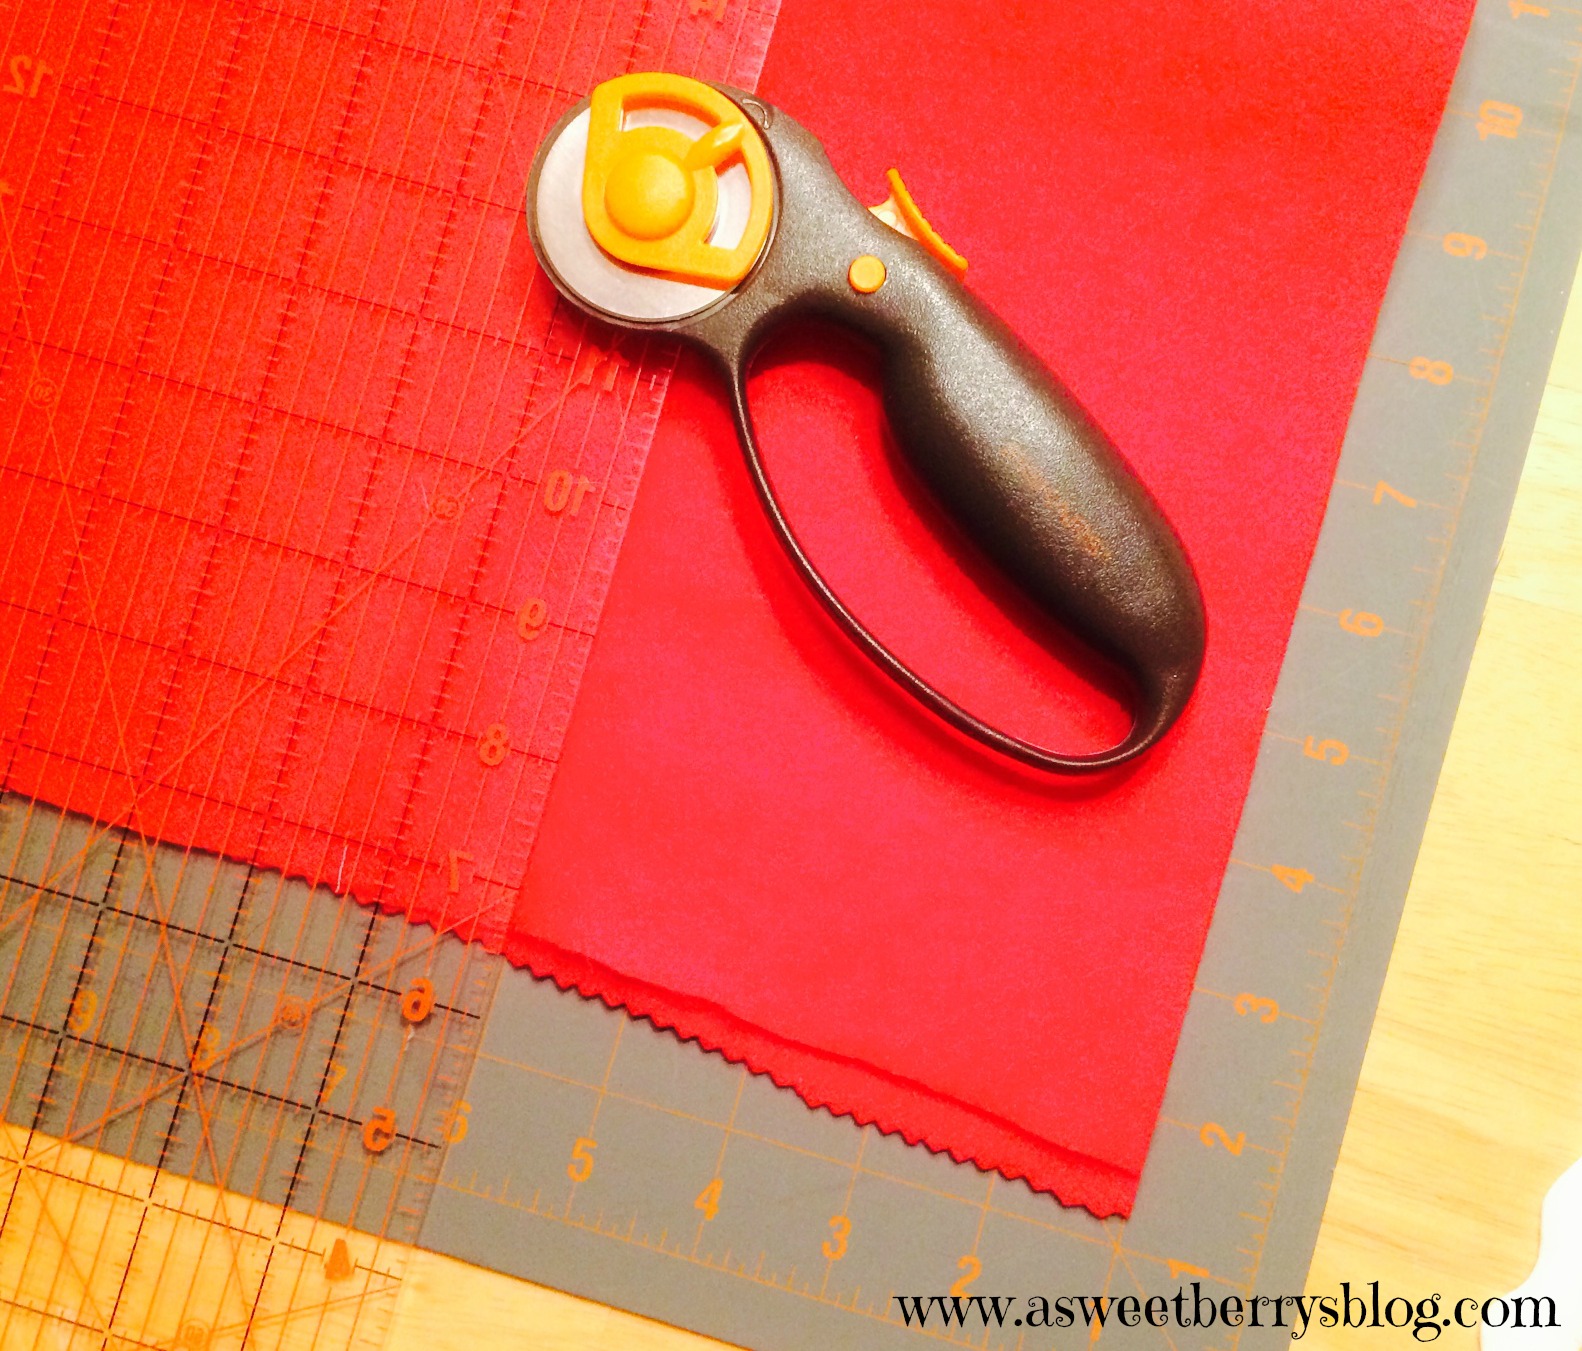
Rotary Cutter, Cutting Ruler and Cutting Mat materials
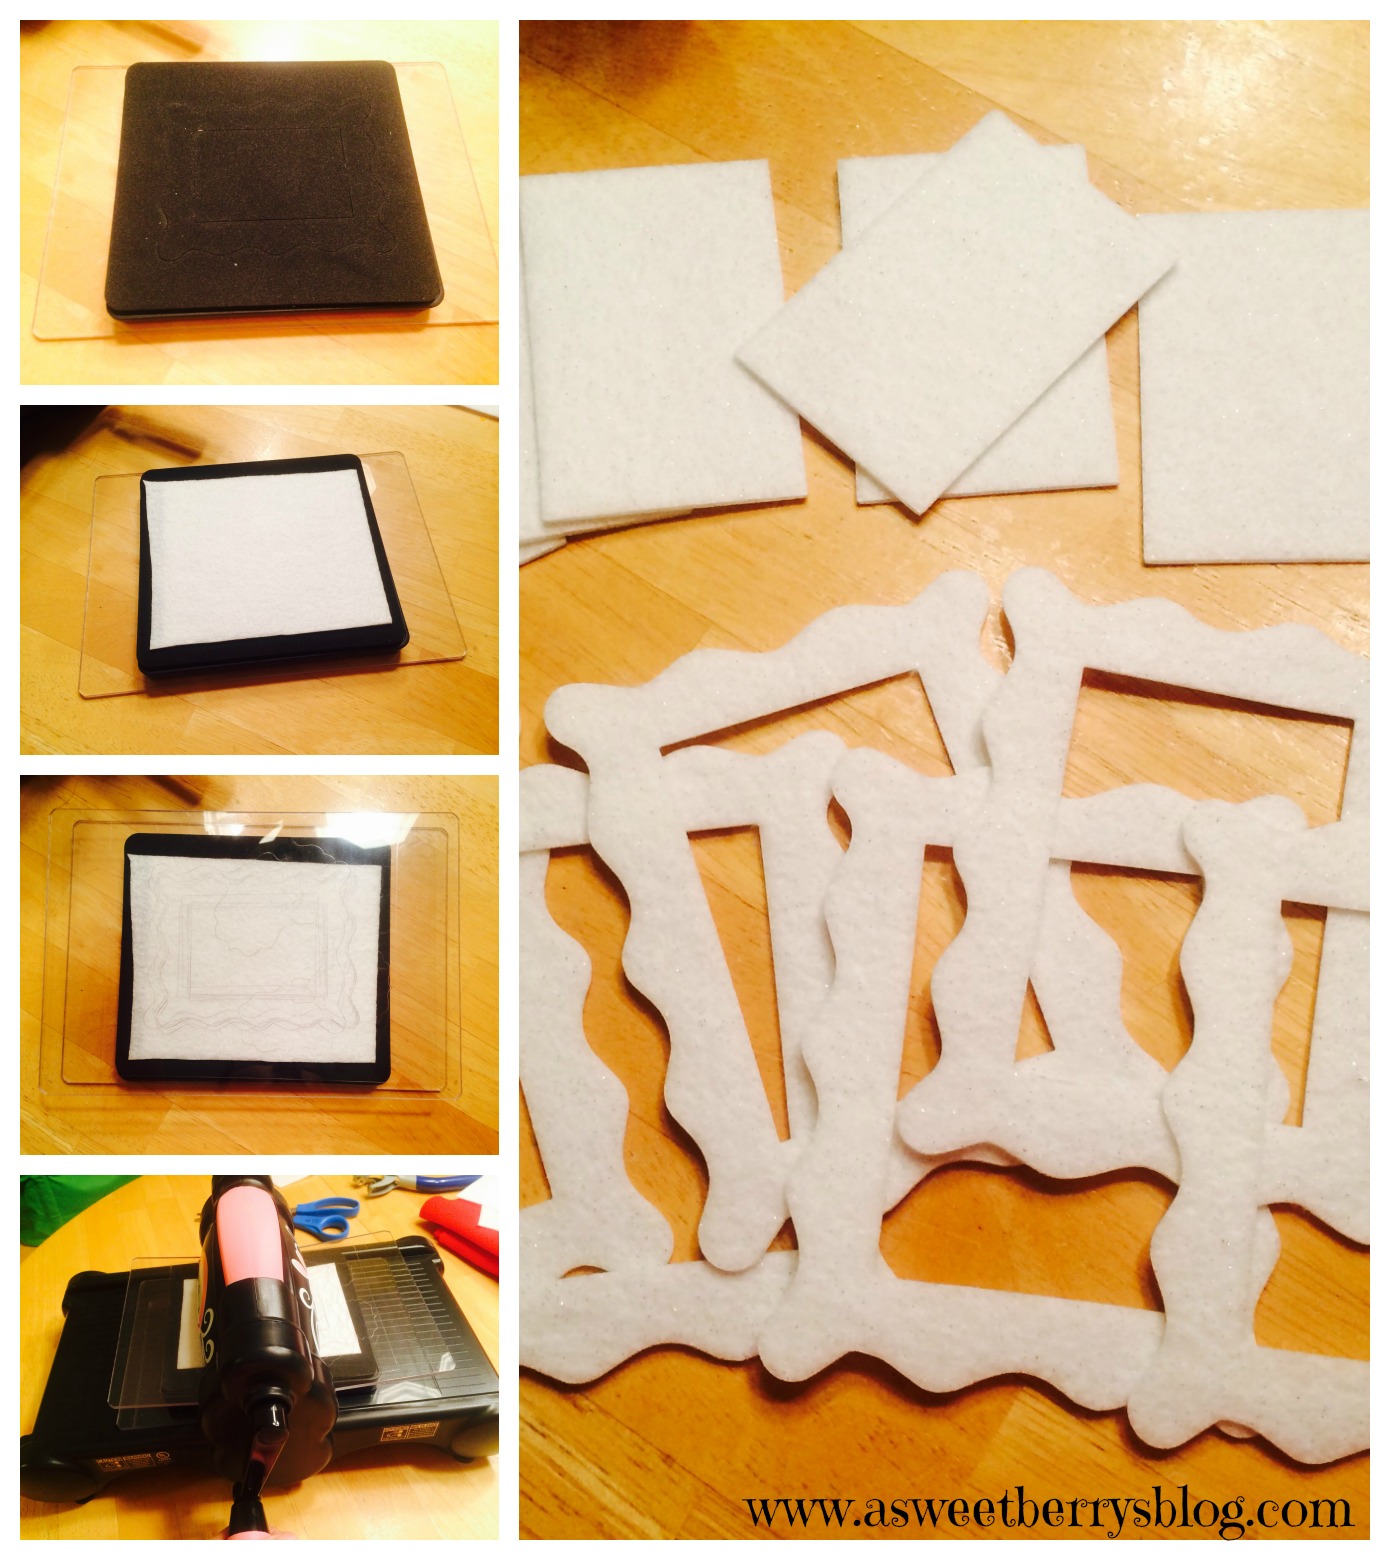
First, I applied the Aleene’s fabric fusion sheets to the back of my Kunin Glitter Felt and then cut it into smaller pieces.  I got 5 pieces out of one sheet.  I made sure that they were big enough to fit onto the die. fabric fusion
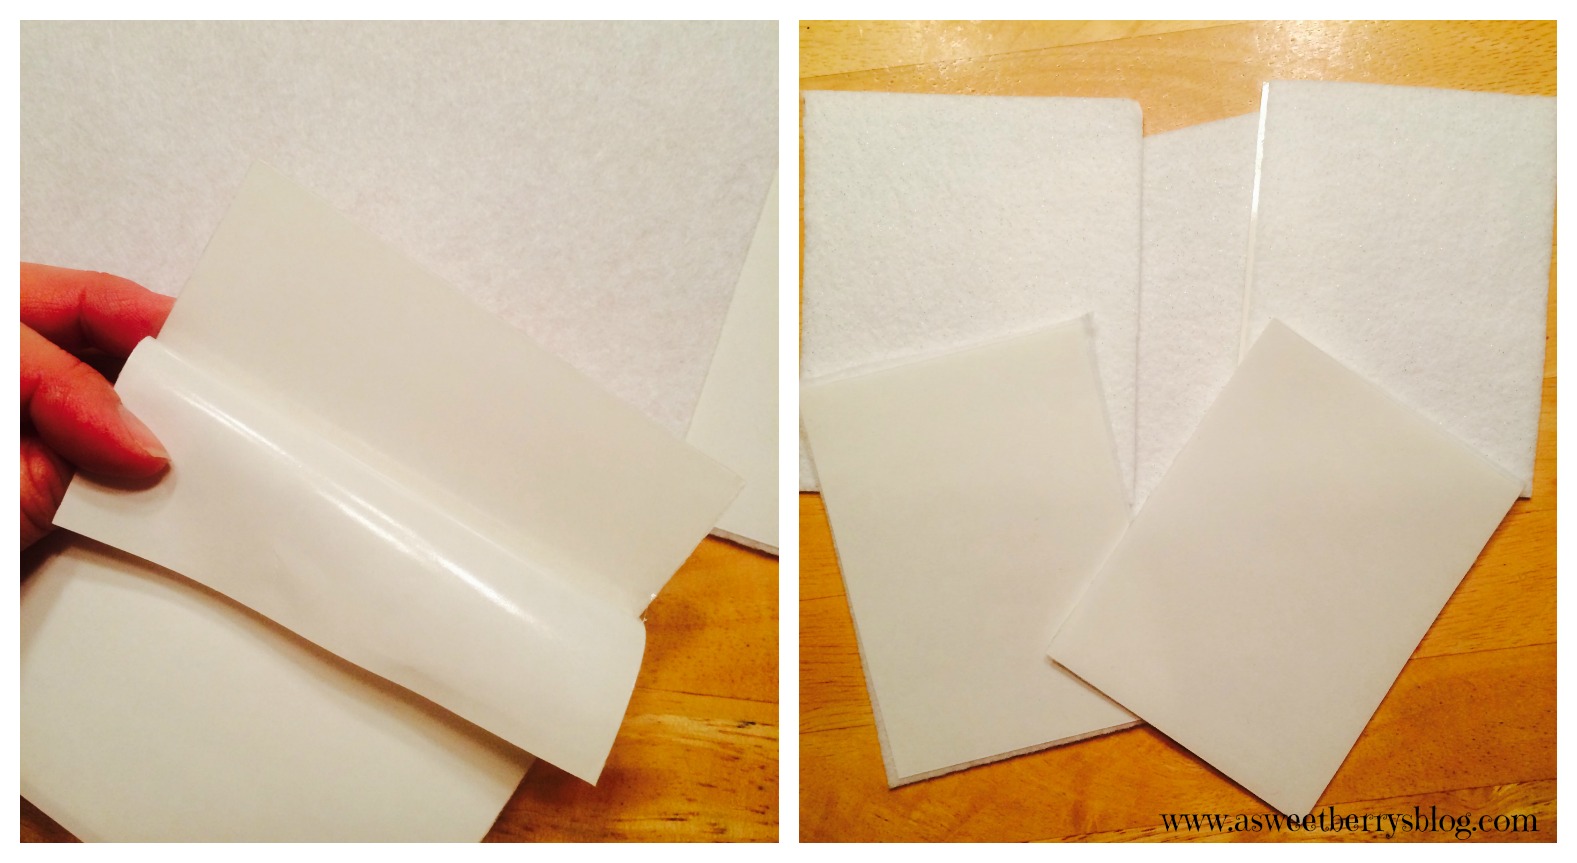
Using the Sizzix Wavy Frame Die, I placed it on my cutting pads.  Then, I placed my felt on the die making sure that I completely covered the frame cutout.  Next, I placed the top cutting pad over it and then ran it through the big shot die cutting machine.    frames
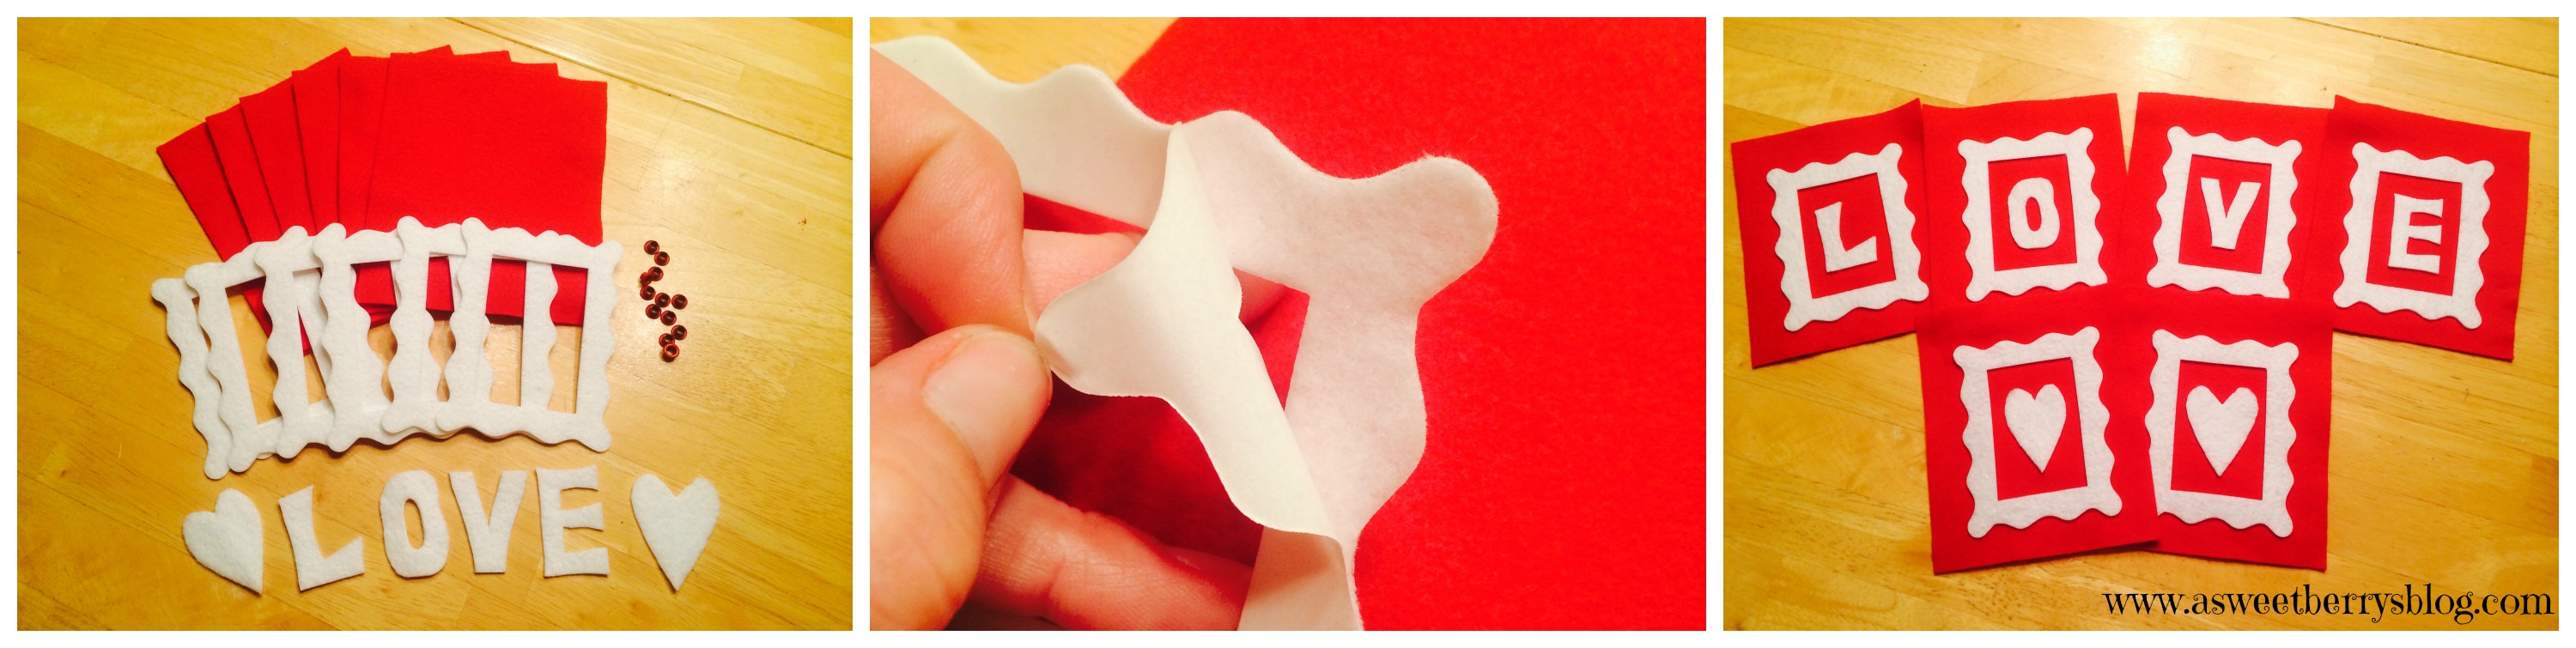
Using the middle pieces of the frame, I cut out two hearts and the letters L, O, V, E by hand. Love Letters

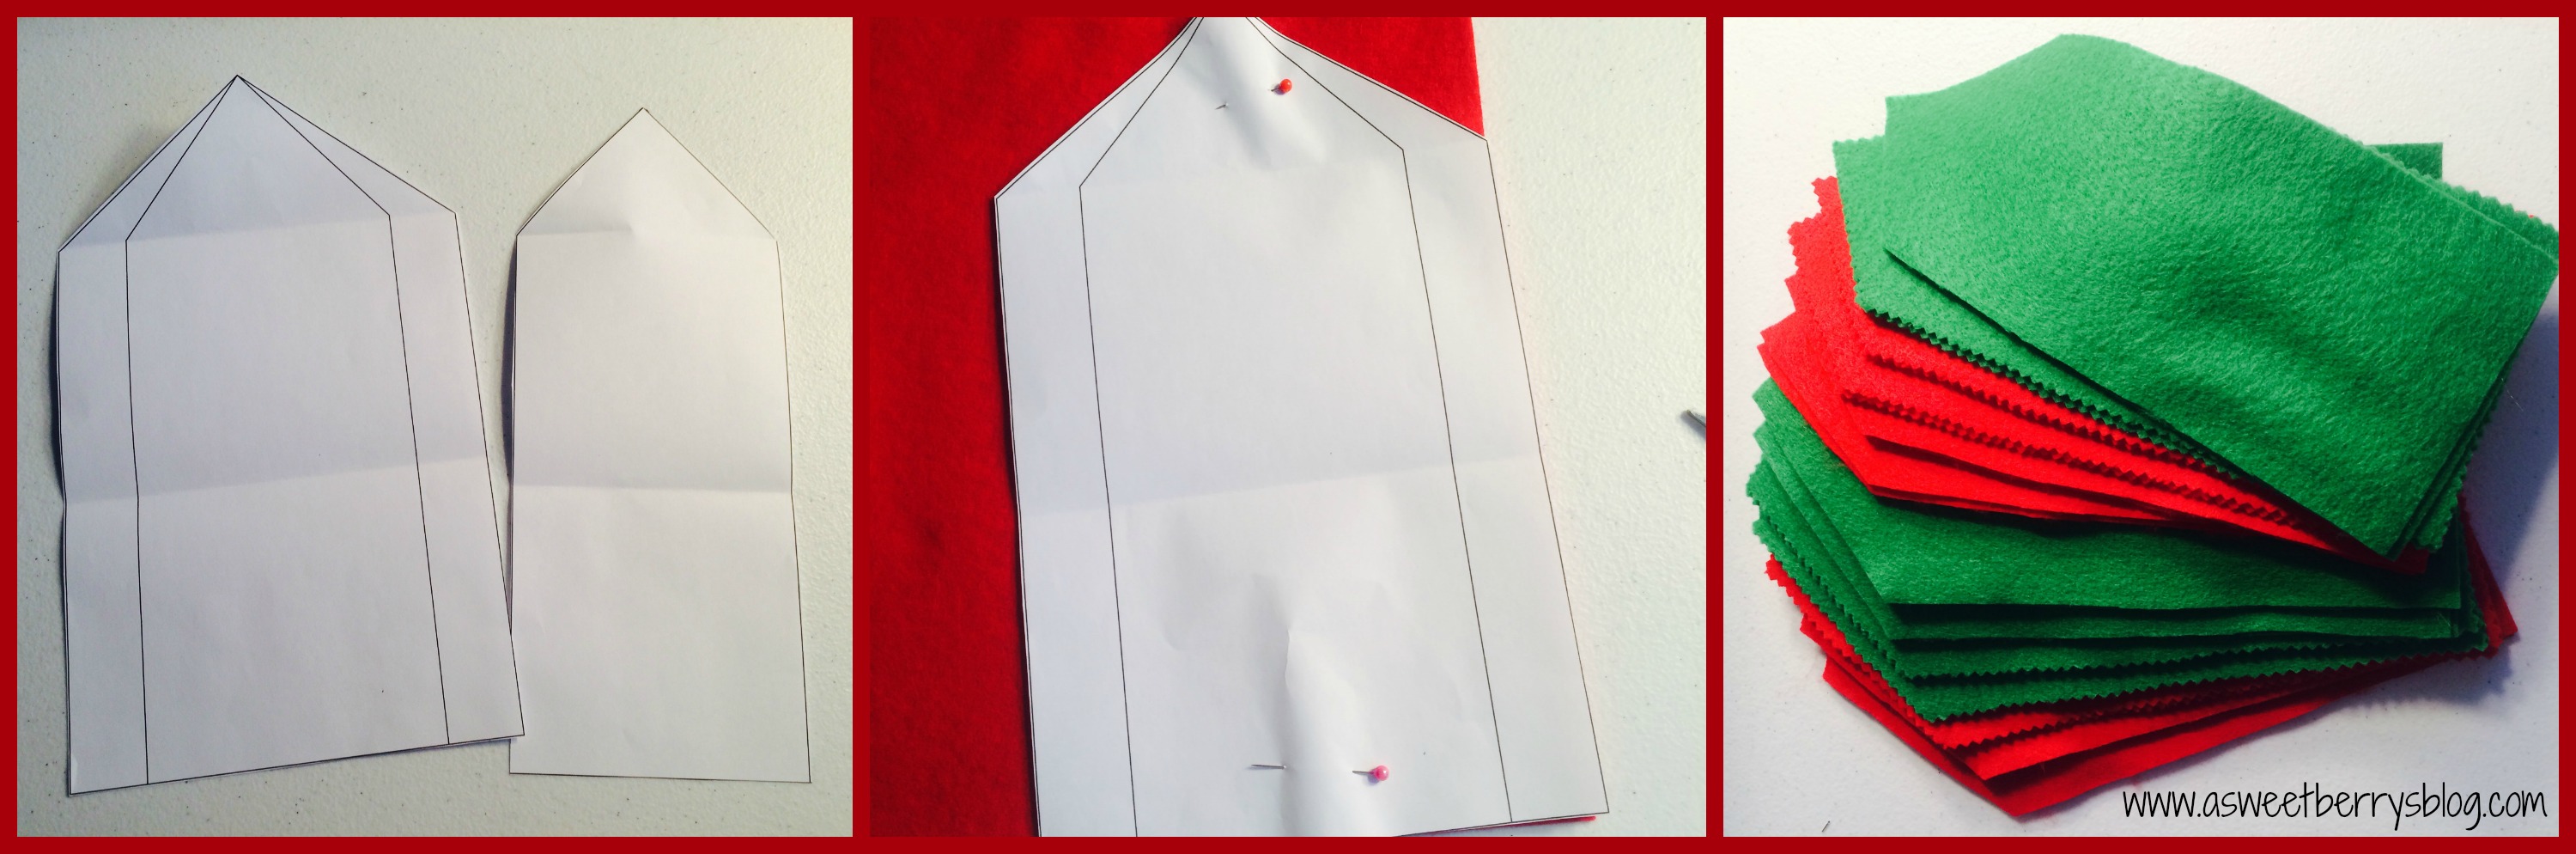
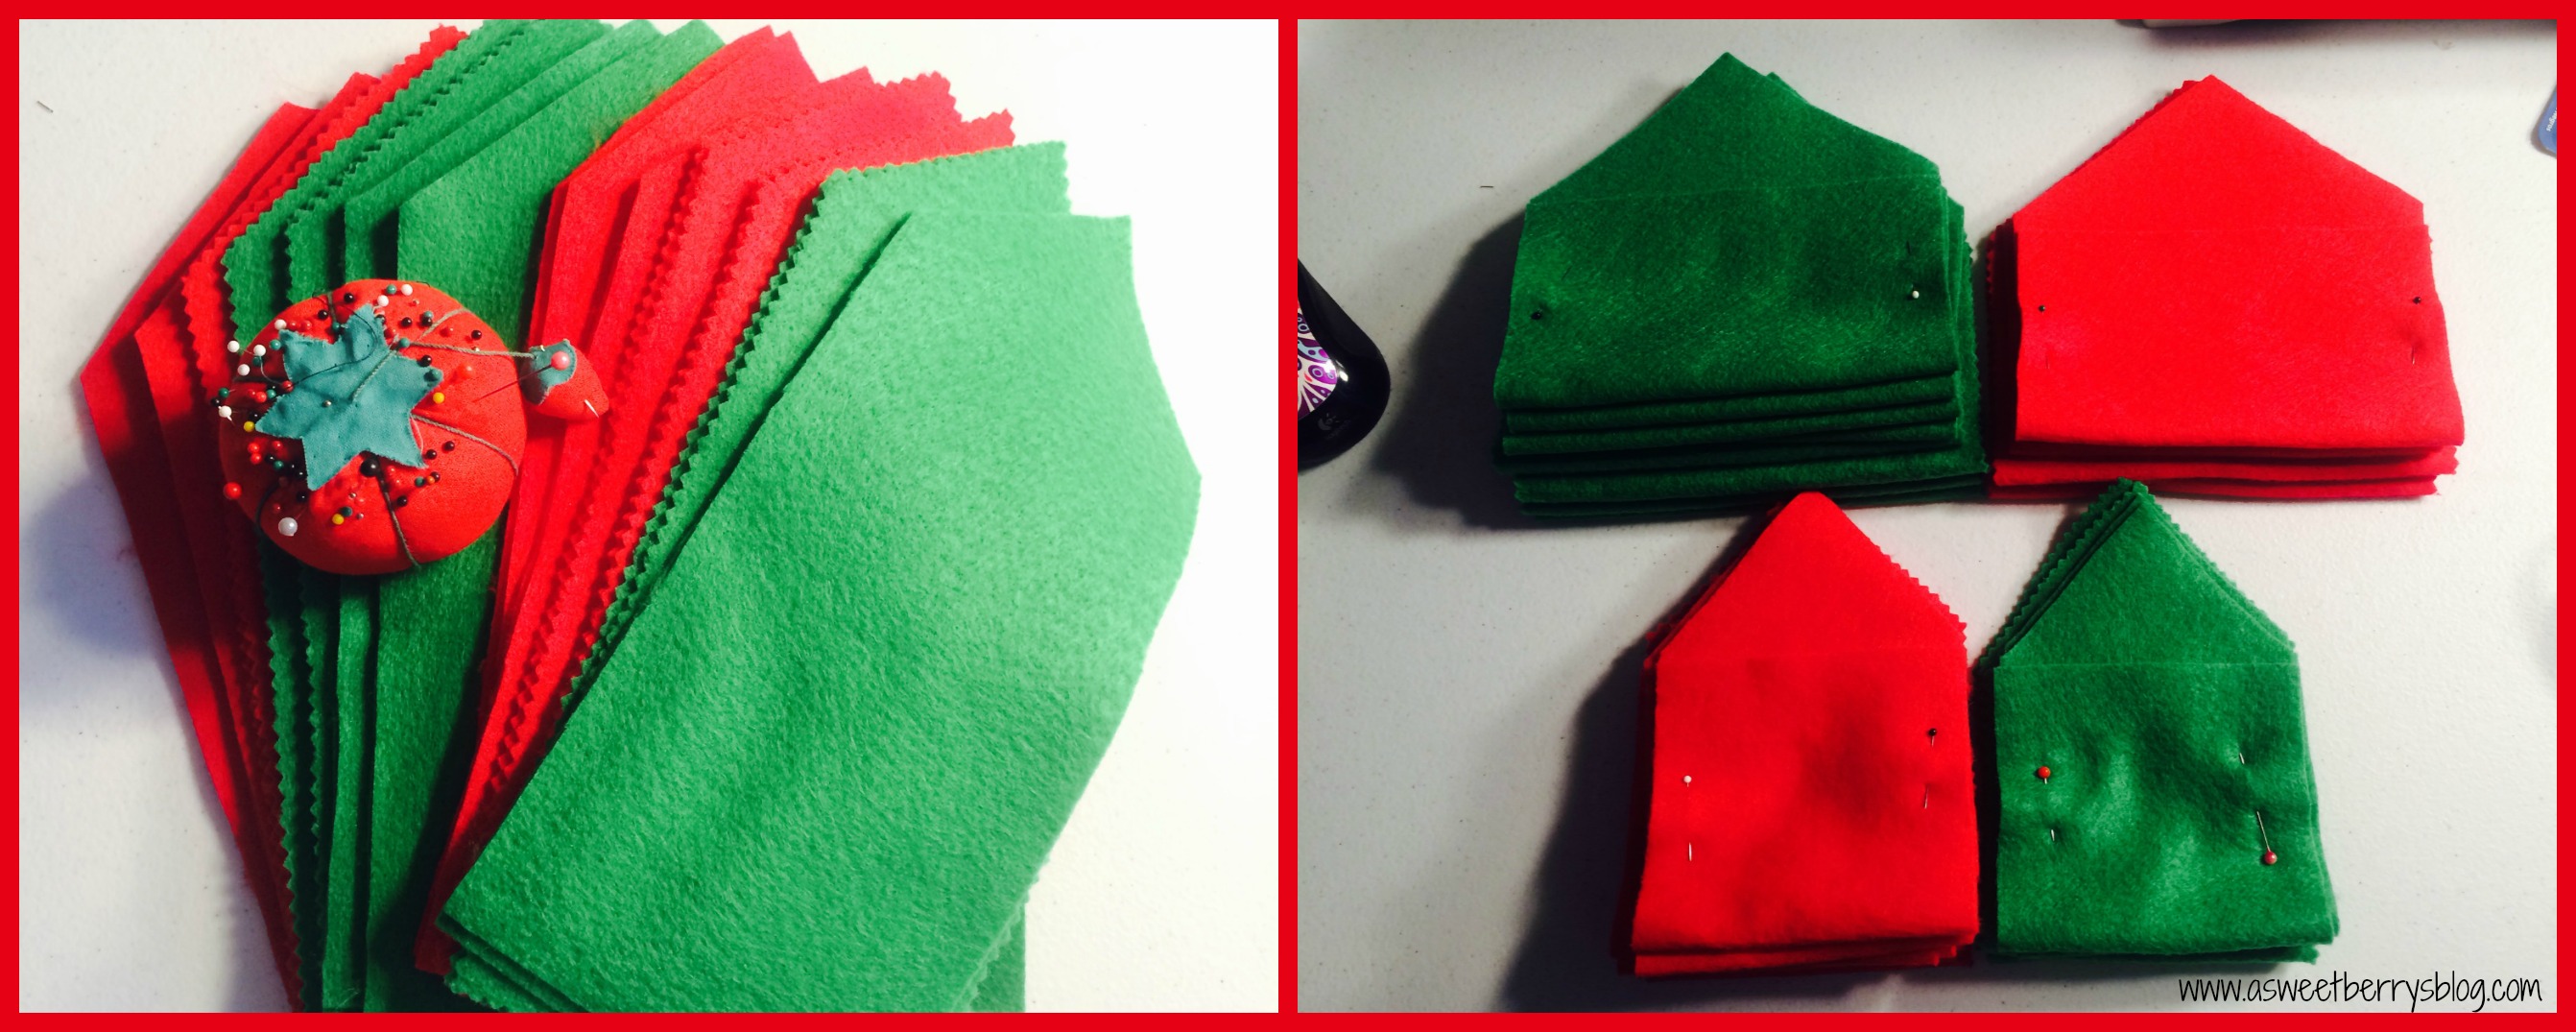
Using my rotary cutter, cutting mat and ruler, I cut out 5″ x 6″ rectangles. blocks
Once I had everything cut out, I peeled the paper off the back of the frames and stuck them on my red rectangle pieces, placing it closer to the bottom so that I had space to add my eyelets at the top. putting it together
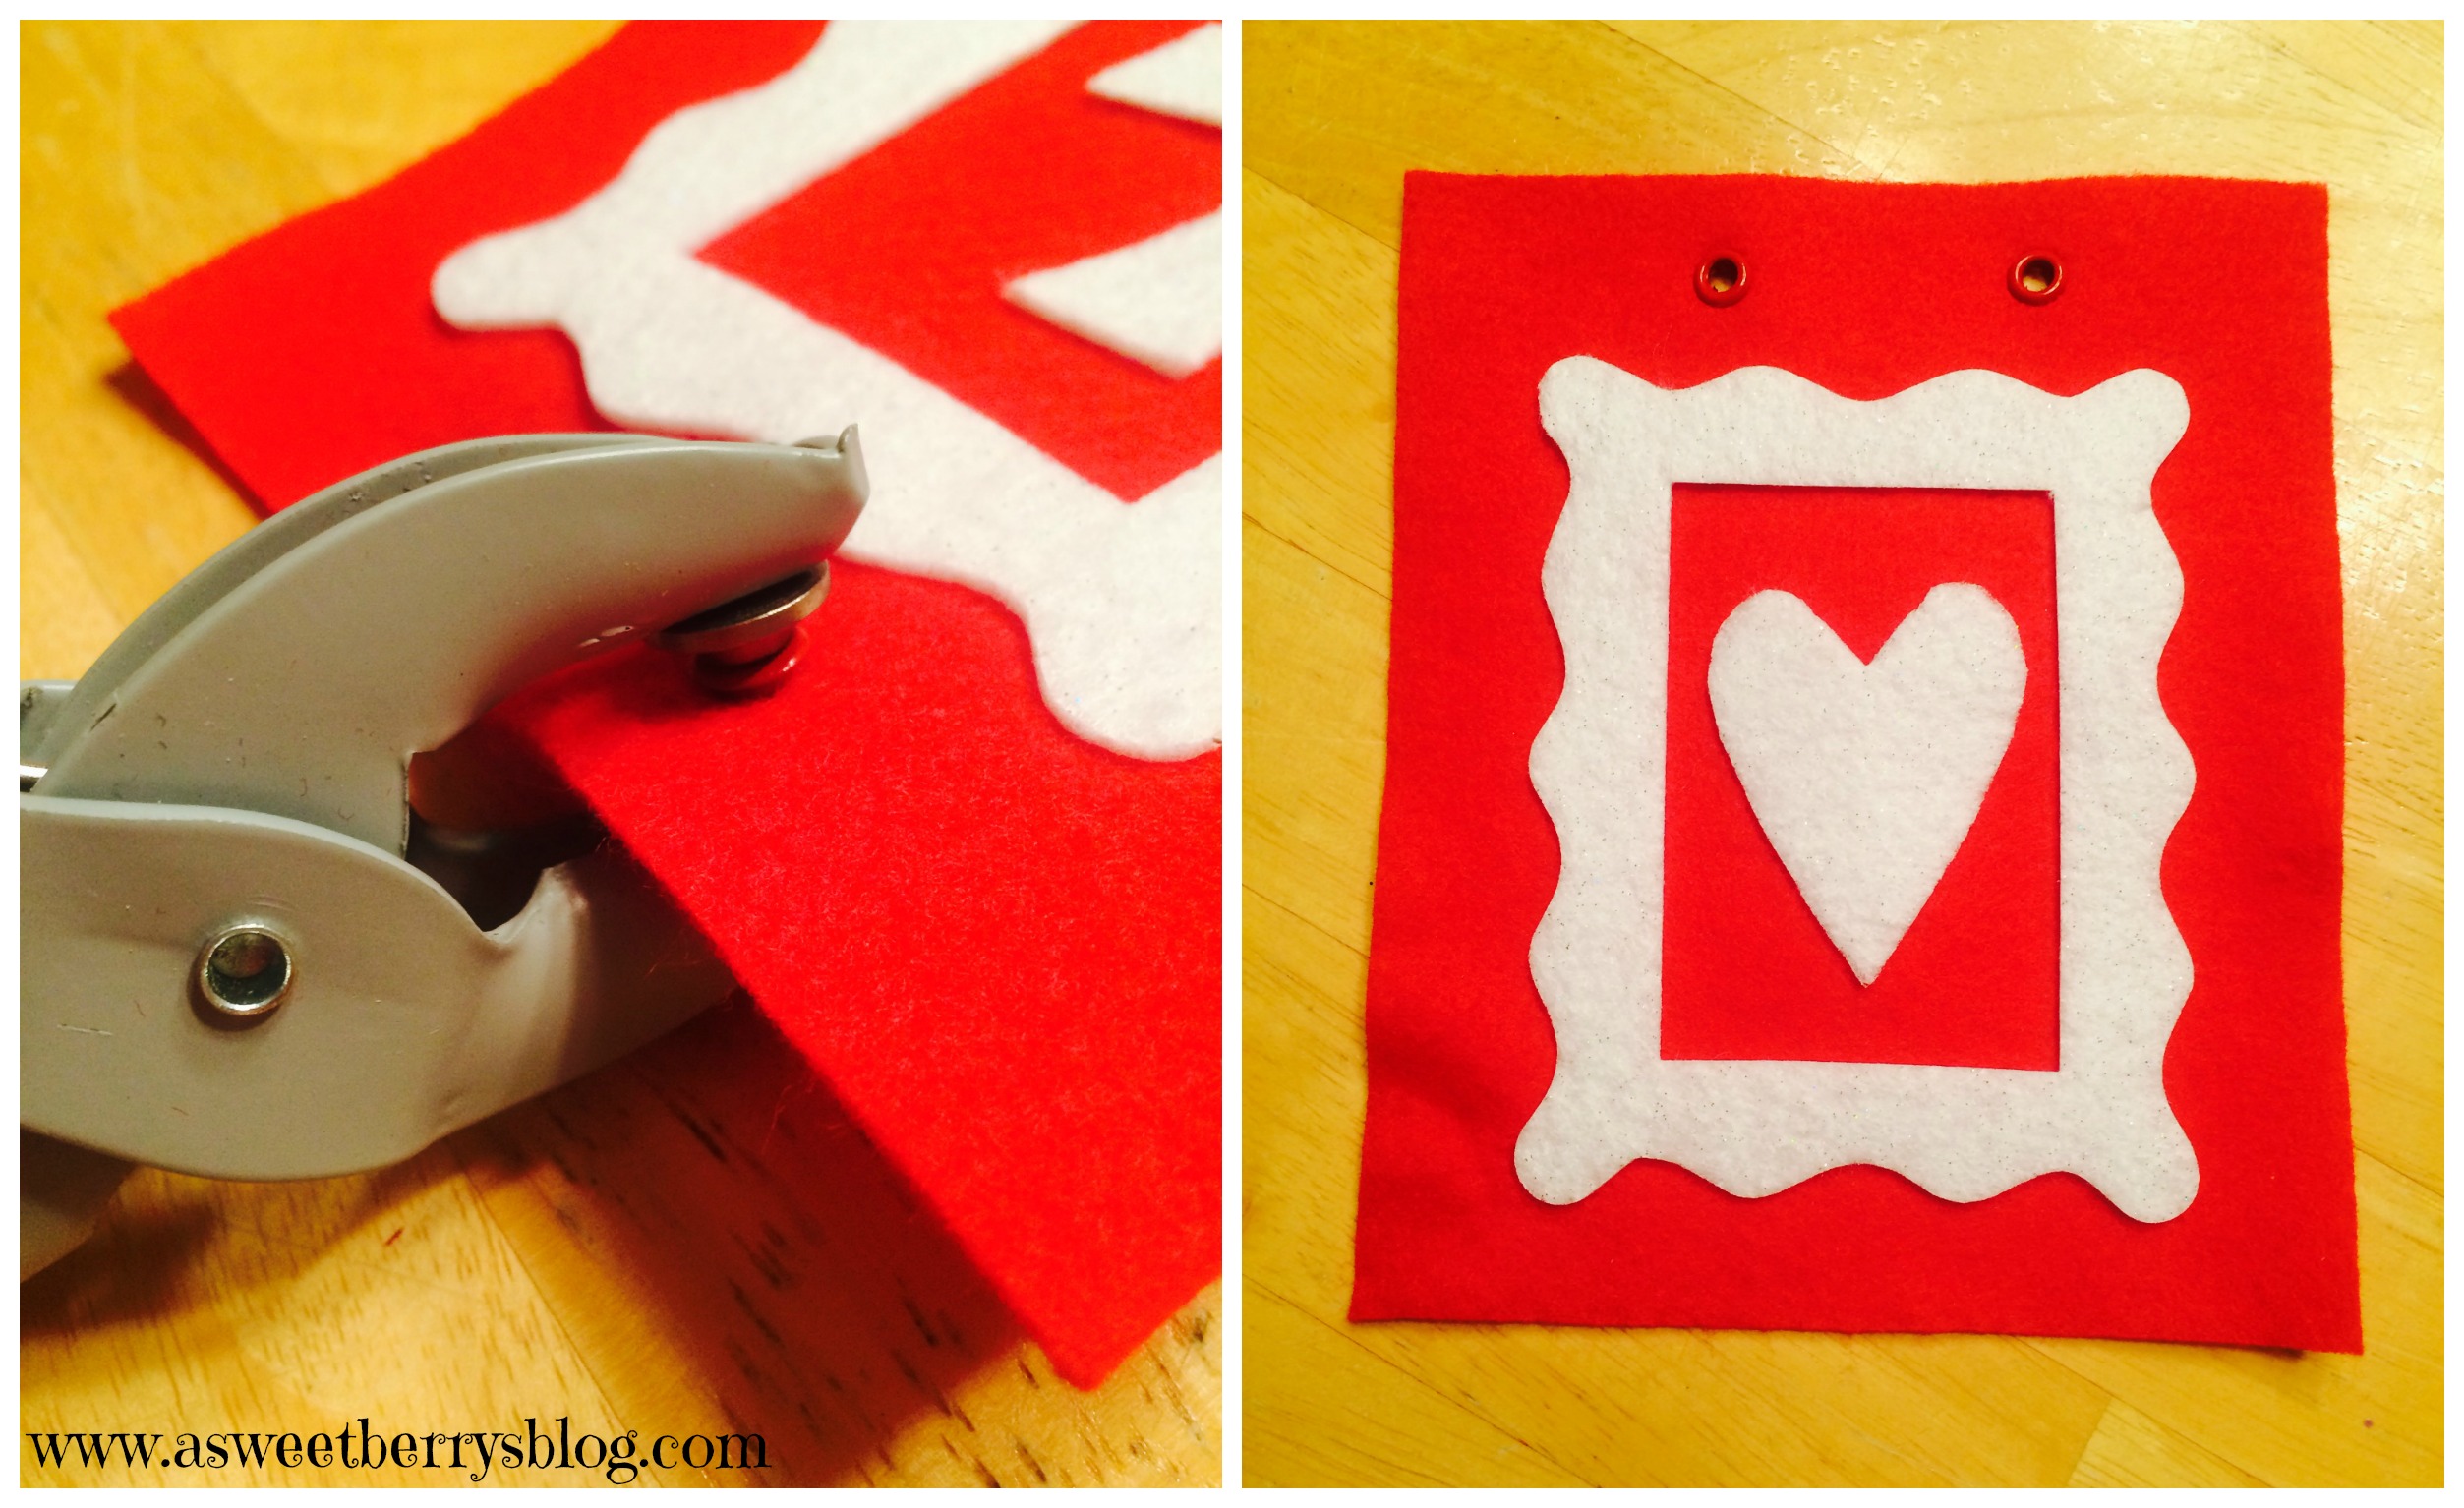
Using my eyelet pliers, I placed two eyelets at the top of my red felt rectangles.  Once I had two eyelets on each piece, I ran my red and white polkadot ribbon through front the backs. eyelet punch

And it made this super cute and super easy banner!   Final Banner If you don’t have die cuts or die cut machines, you can still create this banner, making your own frames by hand.  The Aleene’s Fabric Fusion Permanent Sheets make it a sewing free project!  And, you don’t necessarily have to put eyelets on the pieces.  You could just cut small holes to thread your ribbon through!

I hope you like my Love banner as much as I do!

Until next time……

XOXO


Huggable Felt Heart Softie

This Huggable Felt Heart Softie made with Kunin felt is super cute and super snuggly! Felt Heart Softie
The materials that I used for this Huggable Felt Heart Softie:
Kunin Felt : Red, White and Pink
Thread and my sewing machine
Scissors
Aleene’s Fabric Fusion
Poly-fil quilt batting

Click the link for the pattern and instructions on how I made my Huggable Felt Heart Softie:    Pillow Pattern
As you can see from the picture below, Benjamin is already snuggling up to it!
Benjamin
Hope you like my Huggable Felt Heart Softie!  I love working with Kunin felt!

Until next time…..


Personalized Christmas Stationery from Expressionery

This post is sponsored by Expressionery.com and Laura Kelly Designs.  Although I received product and financial compensation, all opinions are entirely my own. Written Words
Personalized Stationery from Expressionery.com is my favorite, especially when it has Laura Kelly’s Me and My Peeps on it!   There is a Peep for everyone, even your pets!   There are even Christmas time Peeps.   When the package from Expressionery.com came and my boys (Landon, age 7 and Benjamin, age 5) saw that they had their own Me and My Peeps Christmas stationery, they were so excited!   Landon is to the age that he loves writing notes, especially to his teachers and friends!

Expressionery.com has a gift for everyone.  Personalized stationery is the perfect gift for the holidays, Mother’s Day, Birthdays or even Teacher Appreciation.  Or, you can just order it for yourself!  Laura Kelly’s collection of stationary is super cute and fun!   Her designs are appropriate for children and adults!

A Little Christmas Ornament using our Me and My Peeps Stationery!

We decided to make a cute craft with one of our notecards.   They each made a Christmas ornament to send with the note that Landon wrote to his Mimi and Paw!  Each boy cut out their own Peep, leaving their name attached.
Cutting
Using Aleene’s Turbo Tacky Glue, they glued their Peep to a piece of Kunin’s red felt! Aleene's
After the glue dried, they cut the felt just a little bigger than their Peep! felt
Next, we used Eyelet Pliers and an eyelet to create a hole so that we could add a piece of string!   We used the elastic silver string that came wrapped around our stationery gift from Expressionery.com!! ornaments
These lovely homemade ornaments will be sent to Mimi and Paw’s house with the sweet little note that Landon wrote for them! Final Ornaments So, go to www.expressionery.com/laurakelly and order some personalized stationery for a gift or for yourself!  The deadline to order for Christmas is December 19th.  For 30% off site wide, used Promo Code:  PEEPS    Code expires on 12/30/14 and excludes embossed stationary and paperweights.  *Limited time offer valid through December 30, 2014 at 11:55 PM CST. Receive 30% off sitewide plus free standard non-trackable shipping and handling on orders over $50 with offer code “PEEPS” at checkout. Offer excludes embossed stationery and paperweights. This offer may not be combined with any other offer or discount, and shipping fees and sales tax are separate. To prevent abuse, prices, specifications, and availability subject to change without notice from Expressionery.com.
Enter for a chance to win a fantastic giveaway!
250VisaGiftCard_PRIZE_Pic
a Rafflecopter giveaway

Kunin Felt Advent Calendar

No December is complete without an Advent Calendar!   This year, I created my Advent Calendar using Felt from The Kunin Group!   My kids are super excited for December to arrive so that we can start opening them!

FINAL

materials
Materials used:
Felt from The Kunin Group (red, green, glitter white)
Sewing Machine with coordinating thread (green and red)
Envelope Patterns that I created using Adobe Illustrator
Letters that were reflected vertically that I created using Adobe Illustrator
Aleene’s Turbo Tacky Glue
Velcro
Laura Kelly Buttons from Buttons Galore & More
Heat & Bond
Pinking Shears
Scissors
Small clothes pins
Rope purchased from ACMoore

cutting
Using my envelope patterns, I cut out 24 envelopes.   I used both my regular scissors and my pinking shears just to change up the look.    Once I had them all cut out, I folded and pinned the sides to get them ready for sewing. pinning
My sewing machine does all kinds of cute little patterns, so I chose a couple of designs and sewed up the sides only to the top of the sides. sewing
Once they were all sewn up, I used my iron to help the flap on my envelopes to stay down. ironing
I didn’t think that a whole piece of velcro was needed, so I cut them into quarters and applied them to the inside of the flap.   Keeping the velcro pieces together, I closed my envelope so that they would line up.
velcro
Next, I was ready to cut out my numbers!   Using Heat & Bond, I ironed it to the back of my sheet of numbers, removed the backing and then ironed it to the back of the sheet of glitter white felt.  And then they were ready to cut out!  Once they were all cut out, I used an Excel knife to cut out the inside pieces of the numbers.
numbers
I really love Laura Kelly’s buttons from Buttons Galore & More and she has a great set of Christmas colors.   I chose a read and green for each envelope, glued them using Aleene’s Turbo Tacky Glue and then glued them to the flap of the envelope.  I also glued the numbers to the envelopes.
ButtonsAndGlue
After all of my envelopes were done, I decided to make a felt bow to attach to the string where I was going to clip my envelopes. BowAndRope

Once I was done, I attached the envelopes to the rope and hung it up! advent calendar

BrokenUp

   Ready for December!   And until next time…..

Halloween Popcorn Box Blog Hop

A year ago, my friend Laura Kelly started this Halloween Popcorn Box Blog Hop and then decided to do it again this year. I was so excited to get my box of goodies to do this project! It’s so much fun and exciting to see what everyone comes up with! This year, I decided to make a Cat!

popcornbox2014

Items I used:
Popcorn Box
Black Felt from Kunin
Phoomph for Fabric from Coats & Clark
Tulip Soft Black Fabric Paint
Scribbles 3D Fabric Paint
Laura Kelly Buttons from Buttons Galore & More
Floral Wire
Paint Brush
Aleene’s Turbo Tacky Glue

First, I painted my box using the Tulip Soft Black Fabric Paint. Yes, I know it’s fabric paint, but it still worked great on my box! I let it dry and then painted on another coat.
painted box
Next, I made my cats tail. I thought about this for a little while! I took a piece of floral wire and folded it in half and manipulated it to look a little like how a real cats tail would look. I placed black Phoomph onto some felt, placed the wire onto the Phoomph and then folded my felt in half. Then, I cut around the wire making the felt the same shape as the wire. Then i manipulated the wire with the felt again to make the tail curved.
Tail
Next was my cats ears. Again, I used black felt and Phoomph. I placed the Phoomph onto a black piece of felt. When I folded the felt over, I made sure that it didn’t completely cover the Phoomph because I knew that I wanted to use the exposed part of the Phoomph to attach the ears to the popcorn box. I used the orange Scribbles Fabric Paint to make the inside of the cats ears.
ears
Using Laura Kelly’s buttons, I fold some orange, yellow and black beads to use for the eye and then an orange one to use for the nose. Using Aleene’s Turbo Tacky Glue, I attached them to the box.
eyes
Using the end of the wire from the tail, I inserted it into the back of the box and bent it upward helping it stay in place. I then used the Aleene’s tacky glue to glue the tail in place, to give it an extra hold.
Glue tail and dry
Once everything was dry, I used White Scribbles Fabric Paint to create the mouth and the whiskers of my cat!
whiskers
And then he was complete!
popcornbox2014
I hope you liked my Halloween Cat Popcorn Box!
Until next time…….
Print
Be sure to enter for a chance to win some great prizes!
a Rafflecopter giveaway
Also, check out the other great Halloween Popcorn Box Blog Hop entries!!!