Category Archives: Crafts

Sculpey Necklace and Earrings

Clay is not just for kids!  I have always loved to work with clay.   And Sculpey is such an awesome clay to work with!   It’s soft and really easy to use.   And come in some really awesome colors!

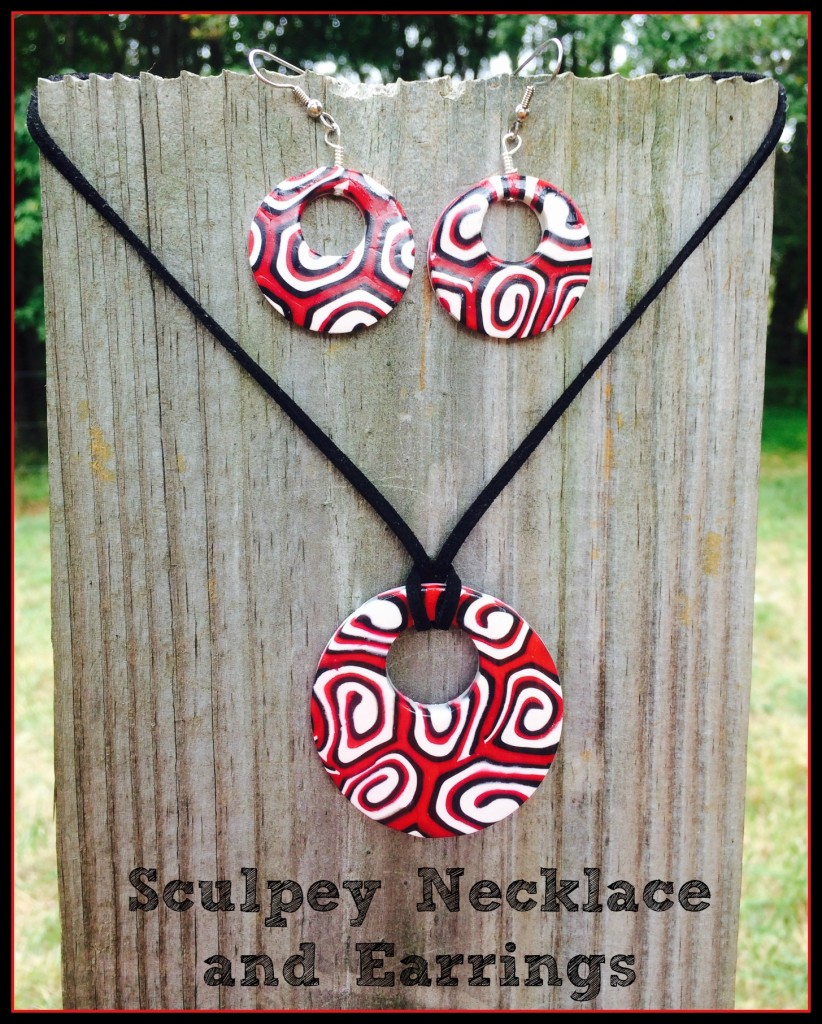
Below is a picture of the necklace and earrings that I made!
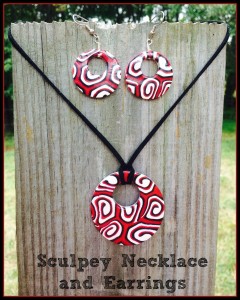
Final
The materials used for this project are as follows:
SculpeyIII Oven Bake Clay
Sculpey Acrylic Roller
Sculpey Super Slicer
Premo! Circle Cutters
Sculpey Bead Baking Rack
Sculpey Bead Making Kit
Sculpey Gloss Glaze
Paint Brush
Clay Conditioning Machine
Hook Earrings
Thin Head Pins
Rope Necklace
Round Nose Pliers
It’s always important to run your clay through a clay conditioning machine to make sure you get all of the air pockets out of the clay, so that it doesn’t break after it’s baked.  I ran my three different colors through multiple times before I got started.
I rolled my three colors out at the largest opening that the conditioning machine would allow.  Once they were rolled out, I piled them up and then cut to make a rectangle.  I made sure to press them together really good so that the air pockets were released.  Next, I began to roll the clay to make a cane.
getting started
I had a little helper.  He used my trimmings to play with the conditioning machine.  It provided about an hour of fun with just the little bit of leftovers that there were!   He just kept running it through the machine!
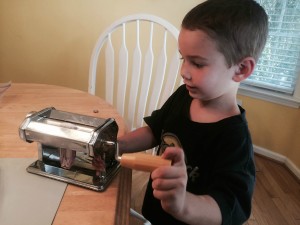
Benjamin
Once the cane was rolled, I gave the cane a squeeze to once again remove any air pockets.  Using my hand, I continued to rolled slightly pushing outward to make the cane longer and thinner. rolling
Using the Sculpey Super Slicer, I cut .25″ pieces off of the cane.   I rolled out a piece of white clay and then placed the slices on the white piece.  I didn’t make any specific design.  I just organized them the all fit, with barely any white showing.  The white was more for the back. slices
Using the Sculpey Acrylic Roller, I lightly began to roll over the slices, lightly applying pressure so that the slices began to mold together. flattened
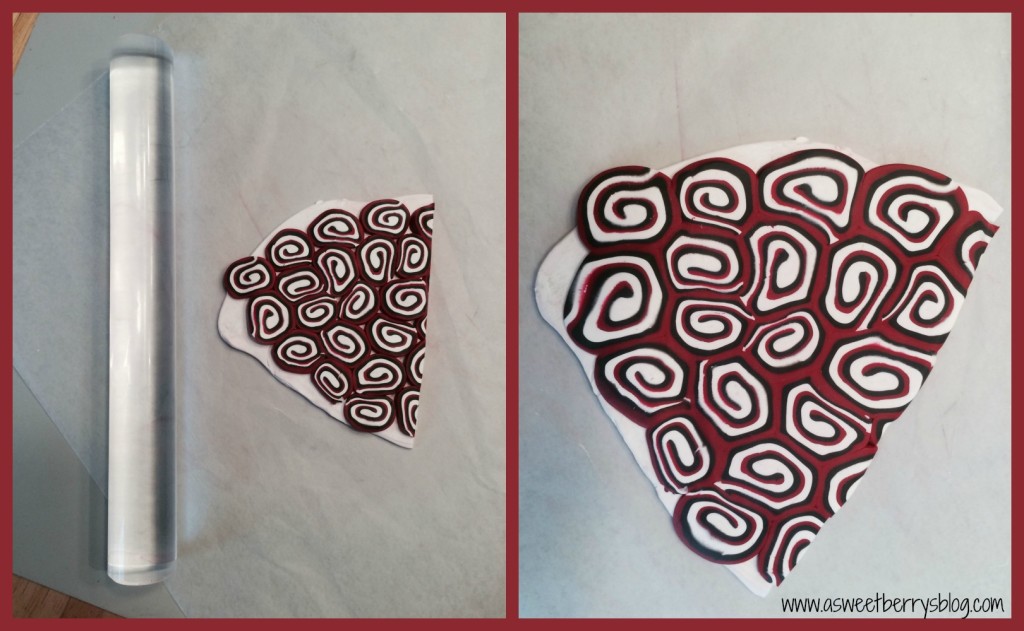
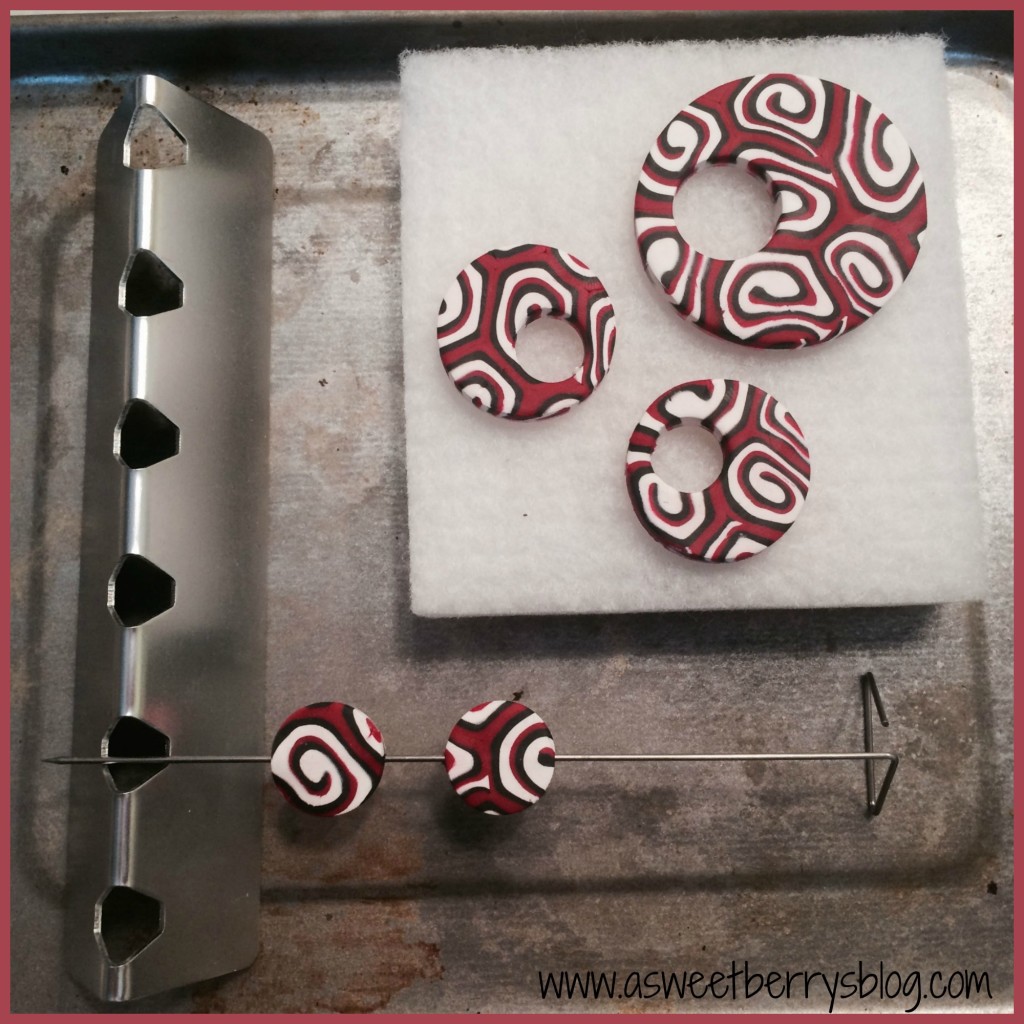
Once I had rolled it out to my liking, I used the Premo! Graduated Circle Cutters to cut two different size circles, one for the necklace and two for the earrings.  I then used a smaller circle cutter to cut a hole near the tops of the my circles. cuts
Once they were cut, I used the clay baking cushion from the Sculpey Bead Making kit to bake the pieces on.   The two pieces on the baking rack are for another project! bake
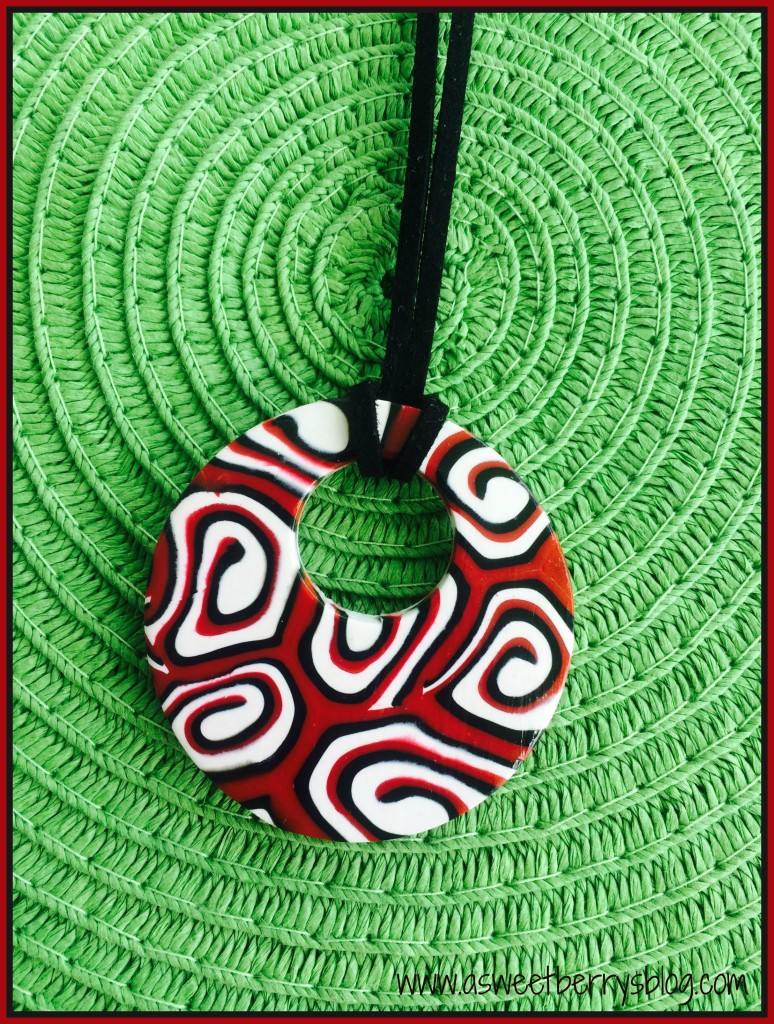
After the pieces were baked and cooled, I used the Sculpey Gloss Glaze and a paint brush to create a glossy look! glass glaze
Once the glaze was dry, I used a cord necklace to loop through the larger piece to create a necklace. final necklace
Then I used the thin head pins, the round nose pliers and the earring hooks to create my earrings! Earrings
And now they are ready to wear!  And these just happen to be the perfect colors for my favorite football team!   They are perfect for Game Day!! Final I hope that you like my Sculpey Necklace and Earrings!
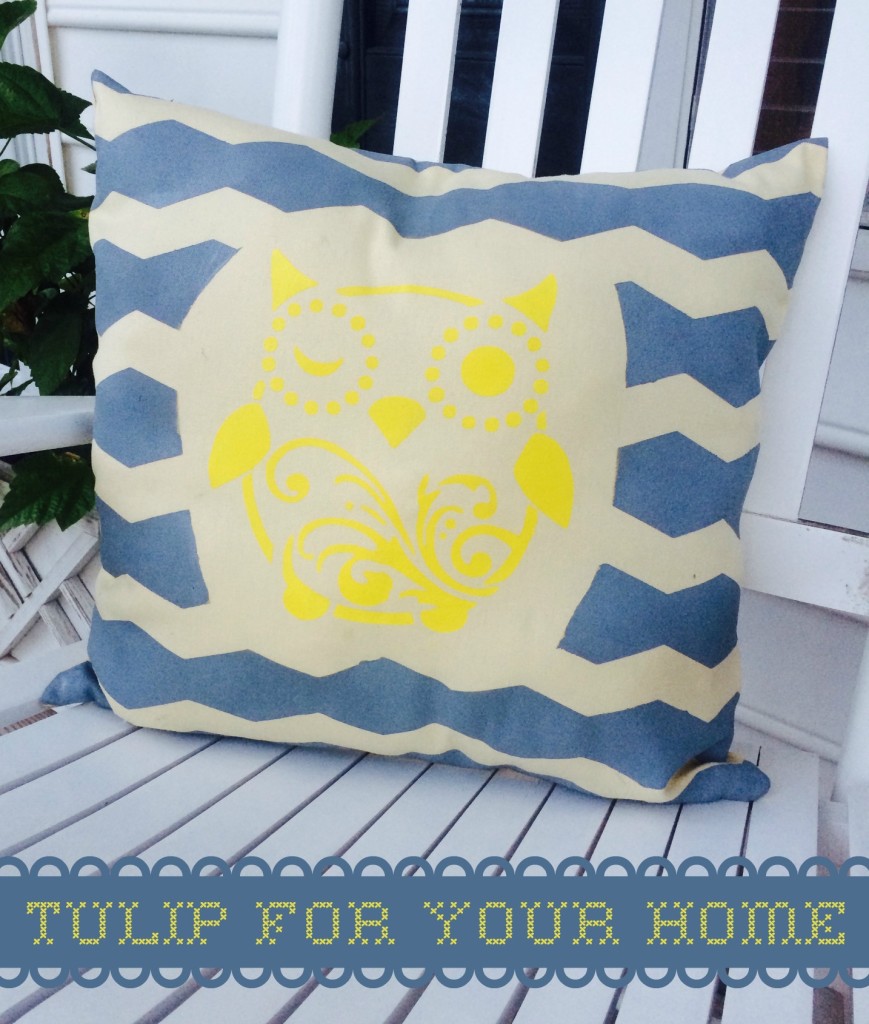
Tulip For Your Home

pillow
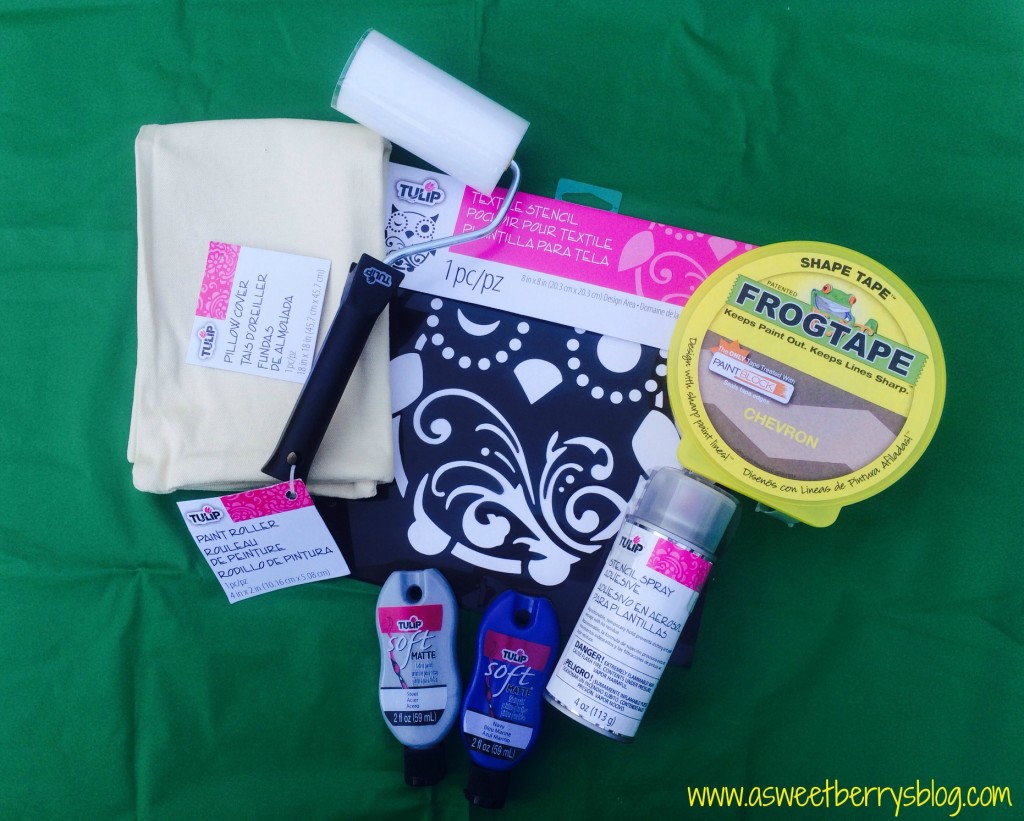
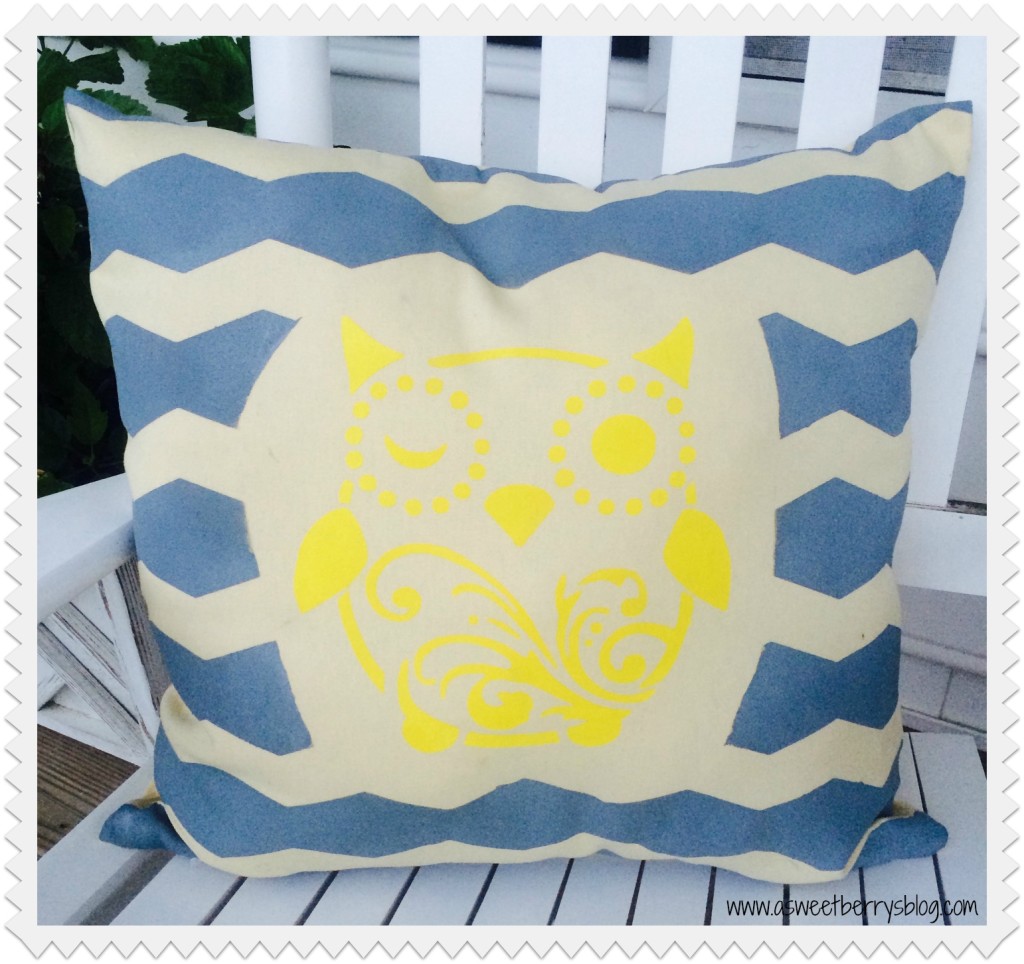
I love Tulip brand by ilovetocreate!  I have been using this brand forever!  This project is a Tulip For Your Home project. It is a pillow that I decorated with a Tulip stencil and Tulip Soft Fabric Paint.   Below is a photo of everything that I used for this project, with the addition of FrogTape to help create my Chevron background.
Materials:
Tulip Pillow Cover
Tulip Paint Roller
Tulip Textile Stencil
Tulip Stencil Spray Adhesive
Tulip Soft Matte Fabric Paint
FrogTape
materials
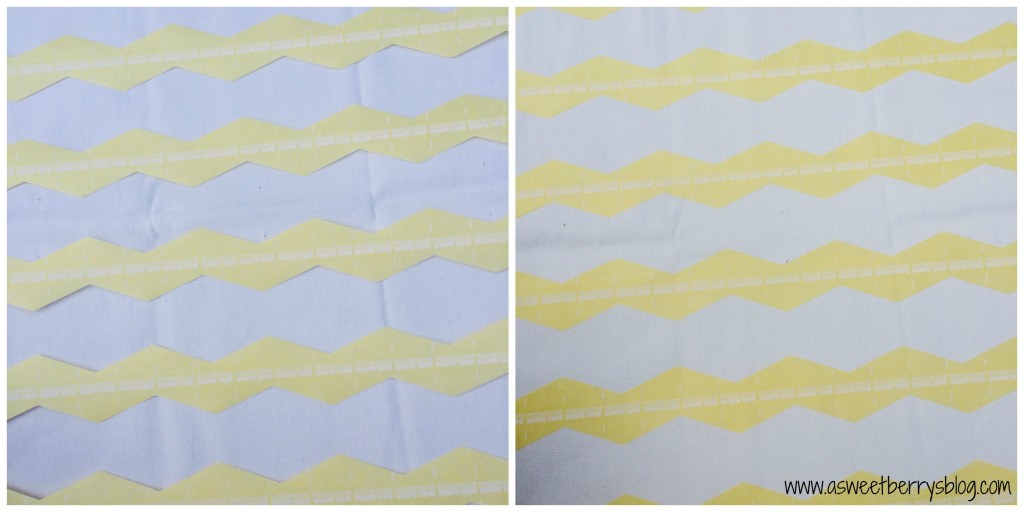
So, using the Chevron FrogTape, I created a Chevron pattern.  I did my placing with the backing still on before I actually removed the paper and stuck it to my pillow. FrogTape
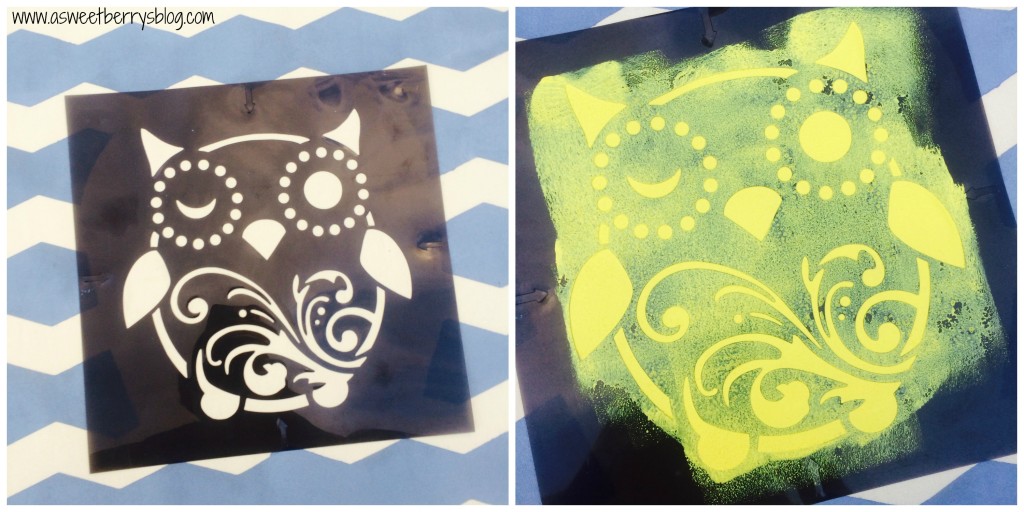
Once I was done placing my chevron pattern, I laid the owl stencil onto and then marked where my owl overlapped the FrogTape.  I only marked the tape, not the pillow.  After I made my marks, I removed the stencil and cut a section of the tape out so that I’d not have the chevron pattern behind my owl. owl cutout
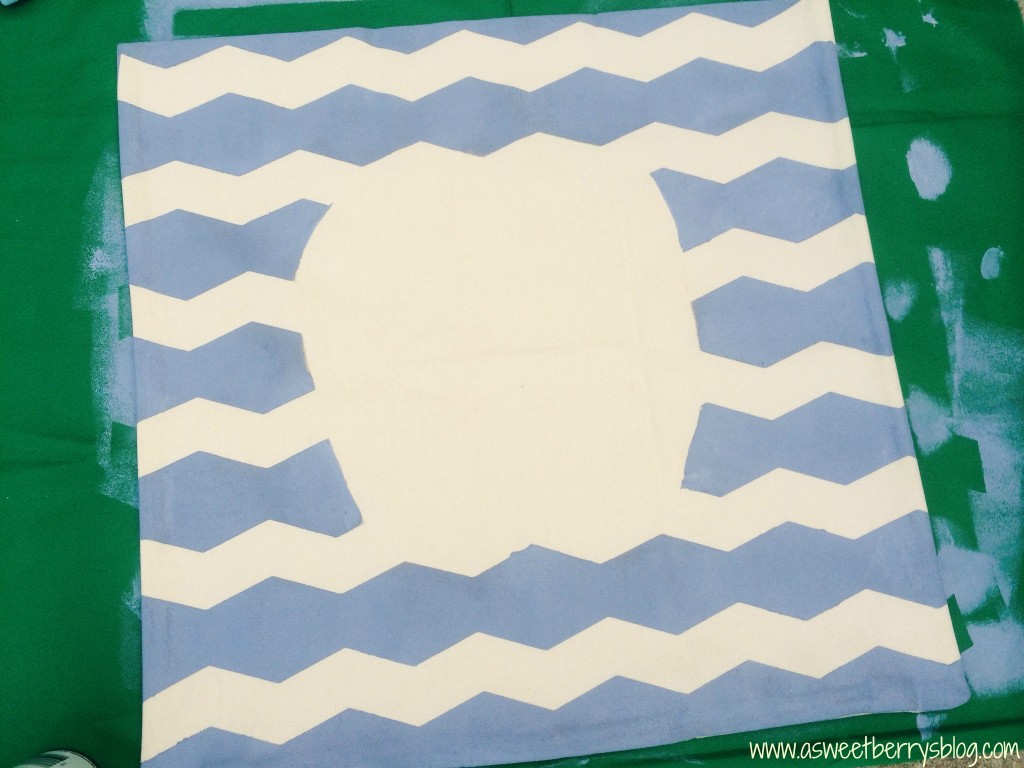
Using my roller, I applied the fabric paint around the cut out where my owl will be placed. painting chevron
After the paint dries, I removed the chevron FrogTape. readyforowl
Using my Tulip Stencil Spray Adhesive, I sprayed it on the back of the stencil and placed it in the open space on the pillow.   Don’t worry if you misplace it, the spray allows you to reposition the stencil.  Then it was time to paint the owl.   I did this using the roller after I cleaned it. painted owl
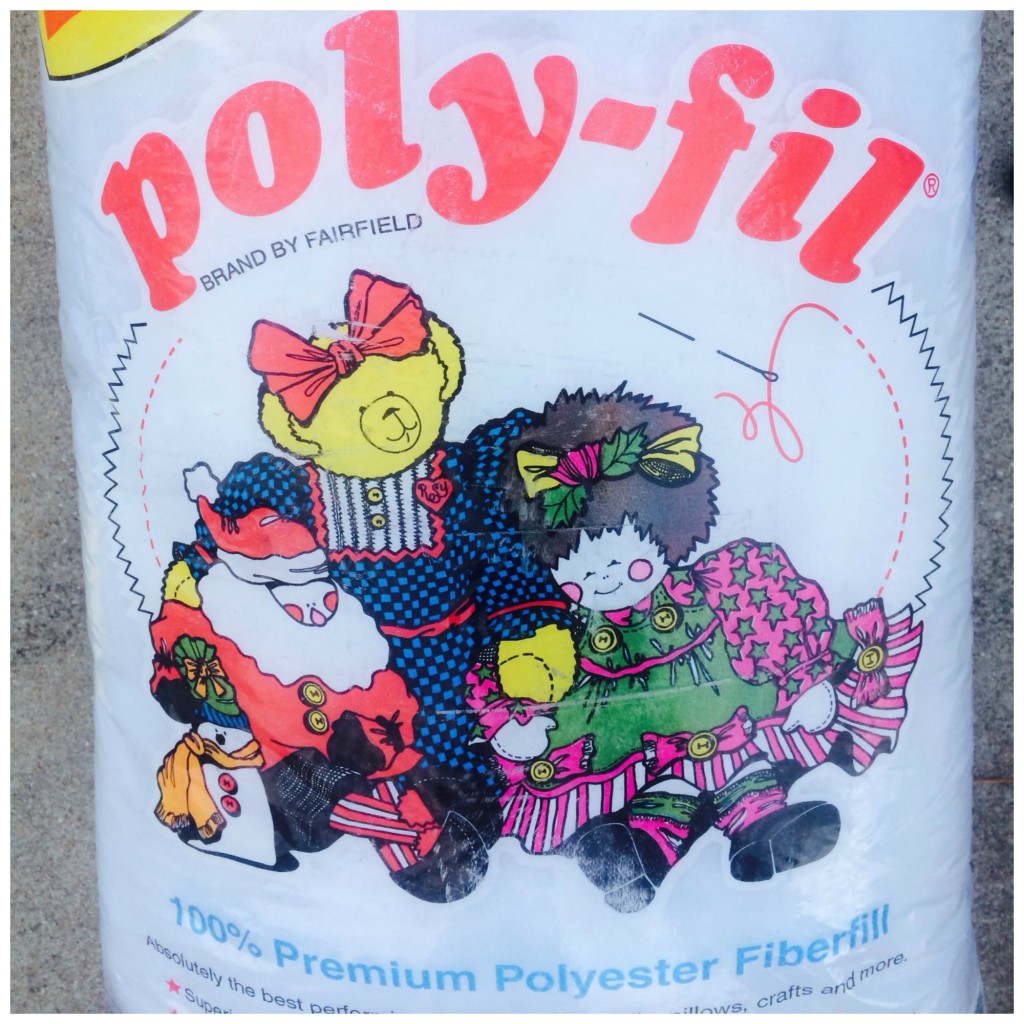
Instead of using a pillow to insert into the cover, I used some Poly-fil that I had at home! polyfil
I am totally obsessed with the results of my decorative Tulip pillow!  It was super easy and super fun!   So, why not create your own fun decorative pillows instead of buying them!!! IMG_4768
I hope you liked my Chevron Owl Pillow made using Tulip For Your Home!

Simple Felt Fabric

Frames

supplies

Supplies:
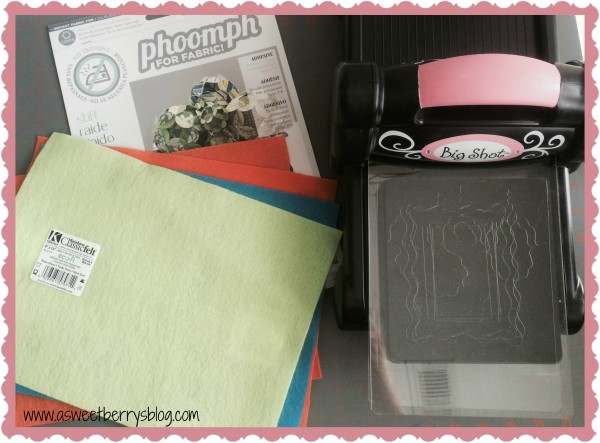
Big Shot Sizzix Machine
Sizzix Wavy Frame Die
Kunin Felt
Phoomph
rope from a gift bag handles that I had in my stash.

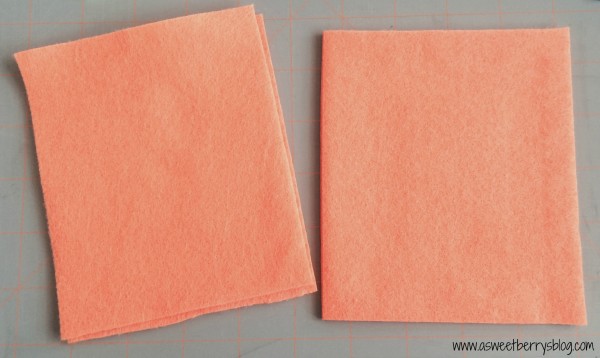
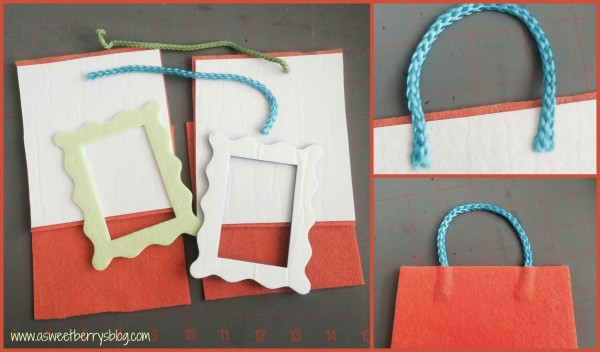
First I cut four orange rectangles that my frames would fit on.

background

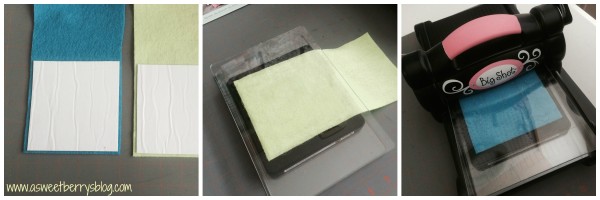
 Then, I cut my blue and green felt so that it was a little bigger than my die and added Phoomph to the back, only removing one side of the paper.  I ran it through the Big Shot with the die using the cutting pads. (To do it again, I would not cover the full back of the frame, so that when it is placed on the background, the photos could be changed out)

process

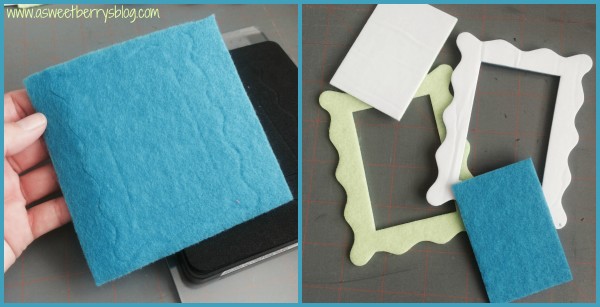
Then I had my frame cut outs.

frame cutouts

I removed the paper from the Phoomph that was on my orange piece of felt, added my rope to make a hanger and then placed a second piece of orange felt onto the Phoomph.

putting it together

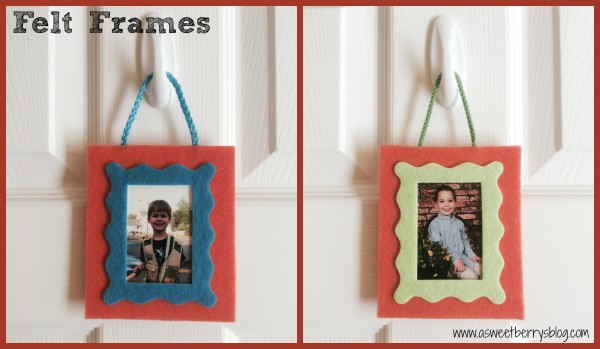
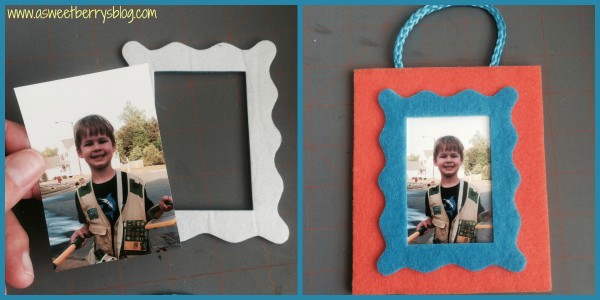
I took a photo of my boys and cut them to a size that would fit within my frame leaving a little of the Phoomph exposed, removed the paper from the back of my frames, stuck the photo on and then applied it to my orange background.

photo and frame

Then I had these cute little frames to hang on the boys bedroom doors!  They could also be made with Christmas colors and be used as Christmas ornaments!  Or a gift for a grandparent!
Frames

Hope you like my simple felt frames!

Until next time…..

ASWEETBERRYLOGO


Buttons Galore & More Creations Pendant Kit


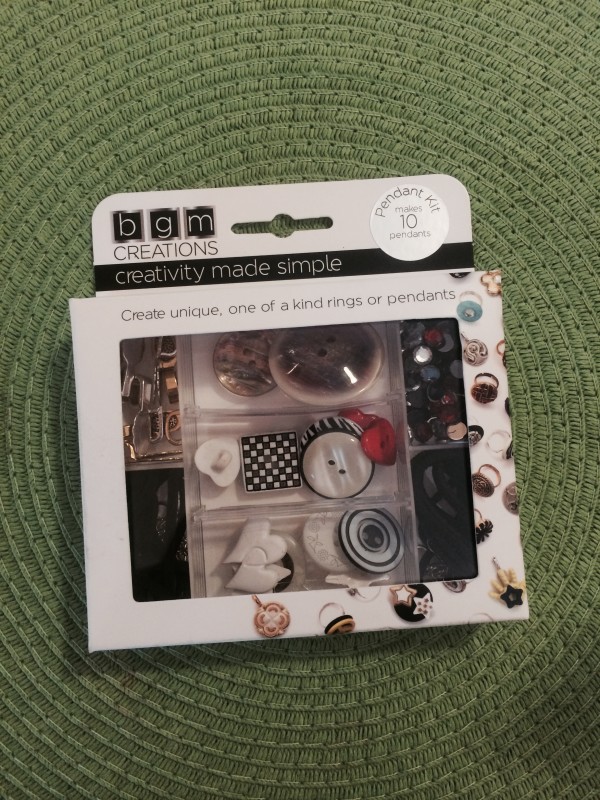
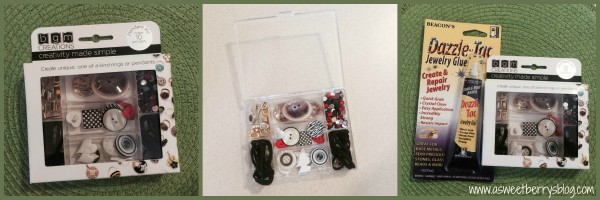
Buttons Galore & More has these really convenient Do it yourself jewelry making kits that are simple and fun!  This particular kit makes up to ten pendants for necklaces.  Everything is included except for the adhesive!  And the kit comes in a clear reusable box.

IMG_1440

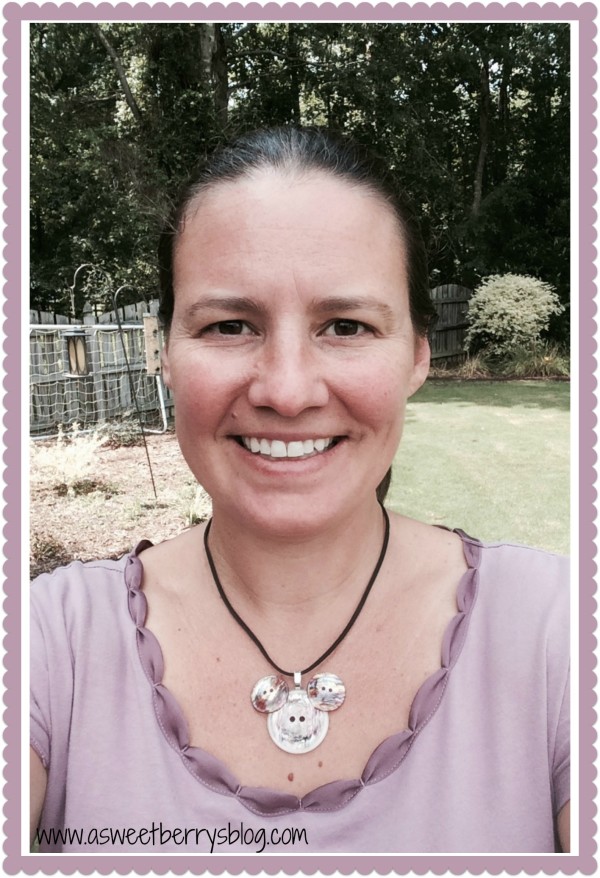
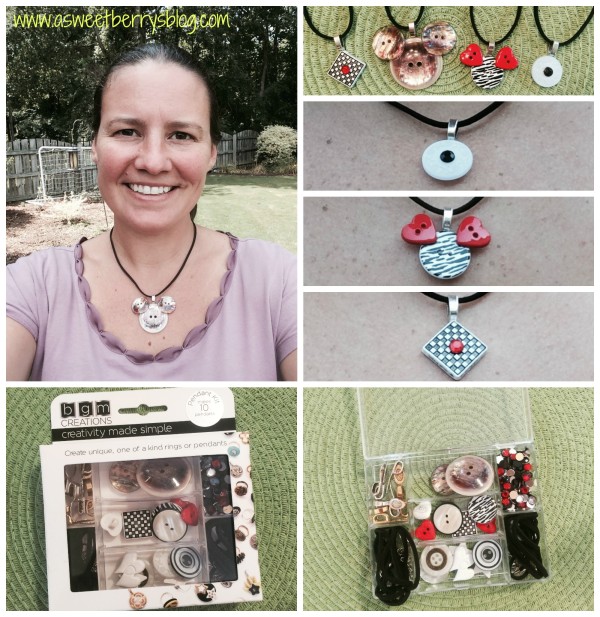
We are gearing up to go to Disney in the fall and I used that as my inspiration for the pendants that I created!

Final with me

The adhesive that I used was Beacon’s Dazzle-Tac Jewelry Glue.

BGM Kit pics

First, I came us with the pendants that I wanted to create.

before

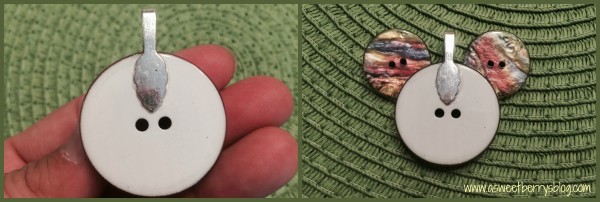
Using the adhesive, I attached the silver bail to the back of the buttons.   For this pendant, I added two buttons to the front of the big button to make it look like Mickey Mouse!!!

process

Check out the pendants that I came up with!   Two Mickey Mouse inspired pendants and two simple pendants!   Then I added them to the black cords that were included!

BGM Kit

Until next time……..

katie-asweetberry

Repurposed Fabric Coasters

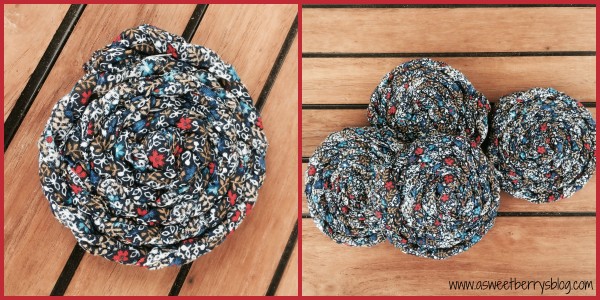
So, in trying to clean up my crafting area, I realized that I have a lot of scrap fabric laying around.  A lot of it is still good and enough fabric to do something with.  So, I decided to make fabric coasters with some of mine.

finals

 These coasters were super easy and even kids can help making them!

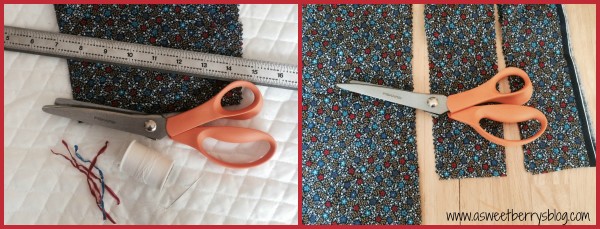
To make these awesome coasters, you will need:
-scrap fabric
-scissors
-a ruler
-thread (I used Coats & Clark) and needle
-bread ties

First, you are going to want to cut strips of fabric, roughly 3 inches by 24 inches.

needs

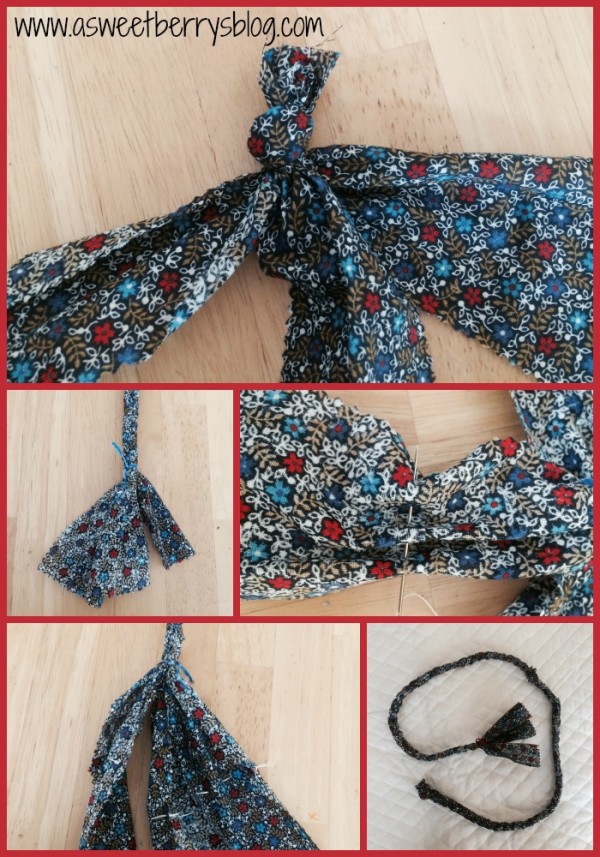
 Then, tie three strips together in a tight knot at one end.  Braid the strips until you get about three inches from the bottom.  Place the bread tie at the end of the braid to hold it into place.   Using a needle threaded so that you have double thread, sew another strip to each of the three braided strips.  This stitch can be loose, it’s just needed to make the strips longer and it will be braided in, so it won’t come apart.  After all three extra strips are sewn on, continue to braid until you are near the end.  Using another bread tie, secure it around the braid to hold it in place.

steps

After you have your braided strand, start with the end that has the knot.  Begin winding it. Run your needle and thread through the knot and then the part that is wound up, to hold it in place.  Continue winding your strand flat and place stitches through the strand as you keep winding it.  This will help hold everything in place and keep it from falling apart.  Once you get to the end, fold in and under the extra fabric and sew it to the wound up fabric to again hold it in place.

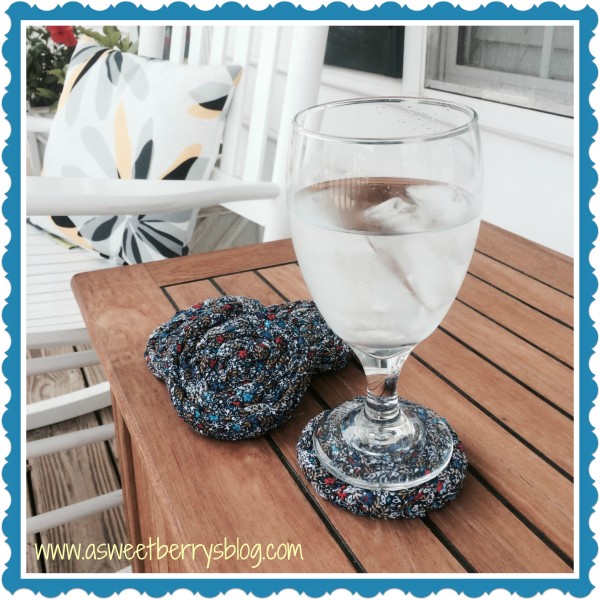
Then, place it on your table and put your glass on it!!!!!

CoastersFinal

I just love these and they look great on my front porch table for our evening rocks while the boys play!!!!

Hope you like these as much as I do!

Until next time……………

Surfs Up Magnet – Sculpey Fun

As a kid, I used to love playing with clay.  Through the years, I have found several clay cups, jewelry holders, and Christmas ornaments that I made as a kid.  But I have to say, I still love working with clay as an adult.  And I love working with my kids with clay.  My favorite brand of clay is Sculpey!  Sculpey is so easy to work with, even for the kids!

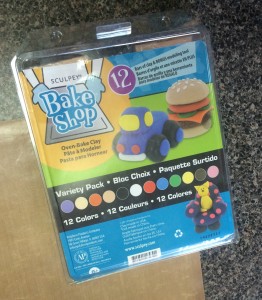
One of my favorite Sculpey products is their Bake Shop collection.  It’s super soft and easy for little fingers, such as Landon and Benjamin’s to use!  And it has a great variety colors!!

Bake Shop

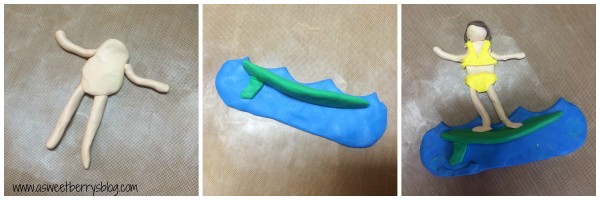
I used the Bake Shop Sculpey to create a Surfer Girl Magnet to put on my refrigerator to remind me of summer!!!!  She was super easy to create!

Steps

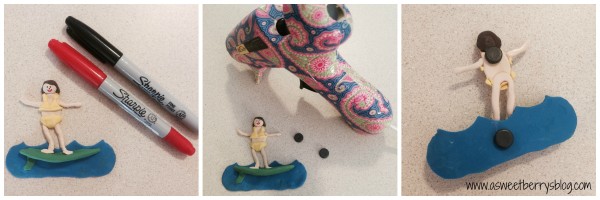
After I finished her, I baked her in the oven 275 degrees for 15 minutes, I let her cool.  Then, I drew on a face using Sharpie‘s and then using my Ad-tech glue gun, I added magnets. magnets

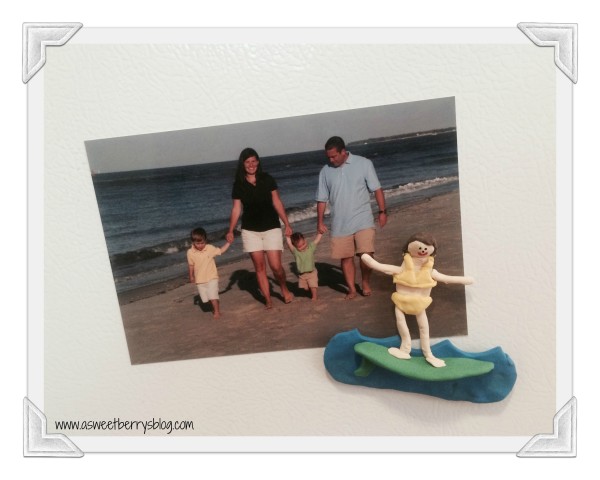
Then, I stuck my awesome yellow bikini clad surfer girl on the refrigerator with a  family beach picture.  Now I can think about the beach all year long!!!!

Final

Until next time…….

Tulip One-Step Tie-Dye Your Summer Party!!

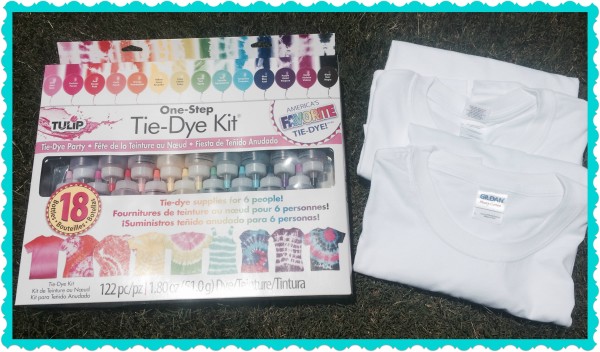
Together with I love to Create, Laura Kelly put together yet another awesome blog hop!  This one is a Tie-Dye Party!  Each blogger was sent an awesome One-Step Tie-Dye Kit for 6 people and two Gildan t-shirts.  The t-shirts could be used for practicing or for the actual project.  I chose to use mine for the project, along with some other size Gildan t-shirts I had.  We had a family tie-dye party!! kit

Tulip Tie-Dye T-Shirt Summer Necklace!

katie

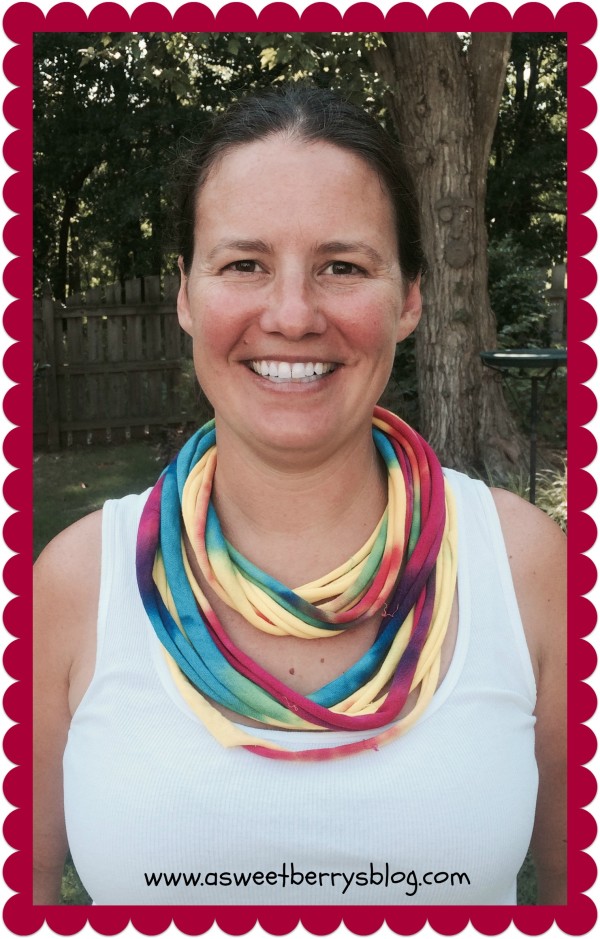
I have always wanted to make a t-shirt necklace!  I love bright and bold colors so I thought I’d tie dye one of my Gilden t-shirt with nice bright Tulip Tie-Dye colors (Fuchsia, Purple, Turquoise, and Yellow)!  I am obsessed with the swirl pattern for some reason, so that’s the one I used.

dye process

After my shirt was tie-dyed, set, washed and dried, I ripped the bottom of the shirt off, cutting just the side of the shirt so that I could get a good start for ripping.  Sometimes ripping through the seam can be a little difficult.  Next I cut just under the arm and ripped it across, so that I was left with just the bottom half of the shirt.  Then I cut 5 cuts on the sides, so that I could rip them across.

first steps

Once I had my strips, I grabbed the top piece of the shirt and did the same thing, making a cut by the seam and ripping it, giving me another strip.  I made one cut on the strip so that it was open.  I then gathered all of my strips, used my cut strip to wrap around my gathered strips, so that they would all stay together.

Last steps

Then my necklace was complete!  It was long enough that I wrapped it around my neck twice and made one shorter than the other, almost like an infinite scarf!!

  katie

Dad 4th of July Shirt!

Dad’s shirt was made using the starburst method. Pieces of fabric were gathered, making sure to grab both the front and the back of the shirt and wrapped a rubber band around it.  The gathered pieces were tie-dyed with red and then the rest of the shirt was tie-dyed with blue!

Dad shirt

Big Brother’s Tie-Dye Master Piece!

Landon wanted to create something different with his shirt.  He loves how it turned out, with his favorite colors of blue, green, yellow and red! big brothers shirt

Little Brother’s 4th of July Shirt

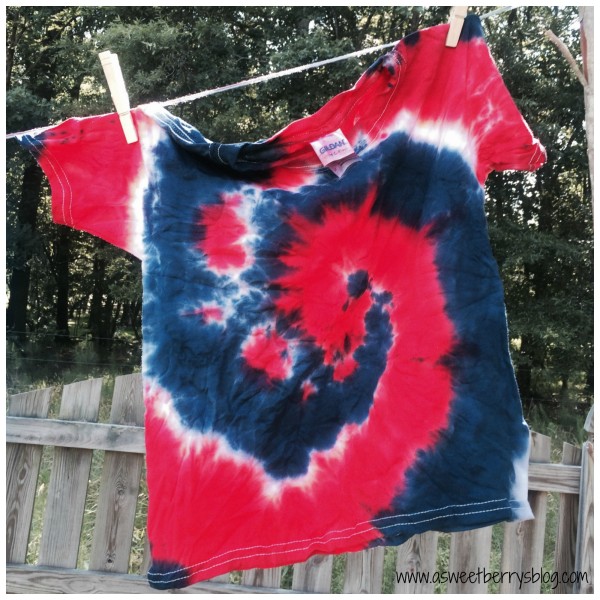
Benjamin loves the swirl method as well, so he will be rocking his shirt come the 4th of July!!!  This kid loves to tie-dye as much as I do! Little Brothers shirt

This one-step tie dye kit is perfect for a party of friends!  It comes with everything you need…bottles with dye, rubber bands, gloves and a plastic table cloth.

For other great summer tie dye ideas, hop on over to some other blog sites and see what they created using this great product!

Also, enter for a chance to win a Tulip One-Step Tie Dye Party Kit for 10!
a Rafflecopter giveaway

Rainbow Blog Hop 2014 – Little Blue Dude

Laura Kelly invited me to participate in the Rainbow Blog Hop 2014 and of course I RSVP’d “yes”!

RainbowHop_Button

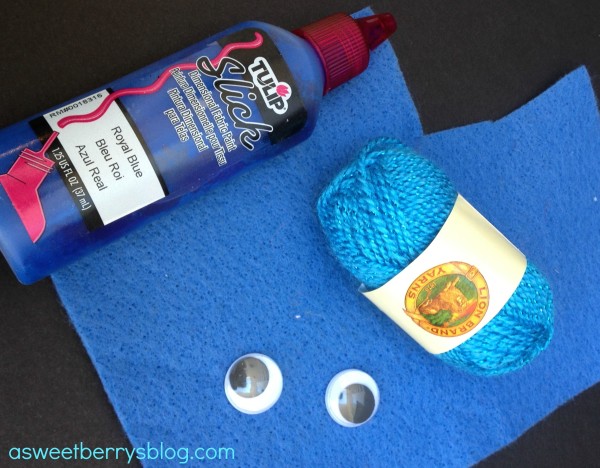
The color I got was blue and the material I received were random.  I sorted through them and chose these to work with.  I LOVE the Tulip Slick Fabric Paint and will be buying a full set of colors on my next crafty shopping spree!

Supplies
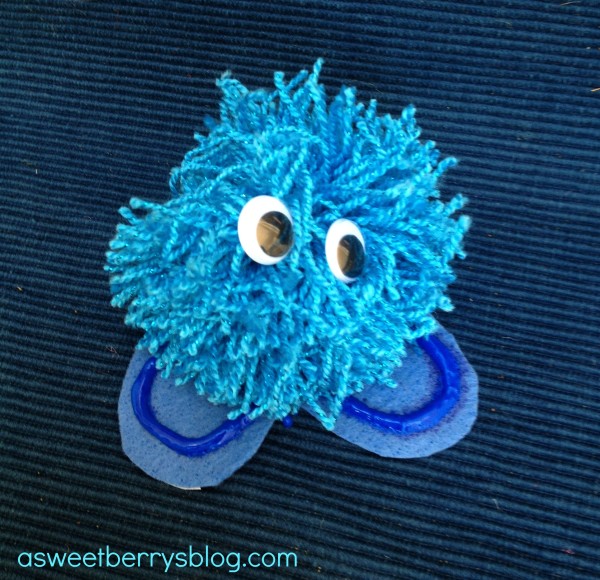
I made a large pompom ball with the yarn then added felt feet embellished with Tulip Slick Paint in Blue and glued on the google eyes with Aleene’s Tacky Glue.

Steps

Cute, don’t you think?!

BlueDudeFinal

There are lots of bright fun projects in this blog hop that create the colors to make a DIY rainbow of creativity.  Check them out!

And if you want to enter to win a prize, go for it. a Rafflecopter giveaway

Until I blog again (which might not be until May when I FINALLY graduate from college),


Katie

CHA 2014 – Craft & Hobby Association Mega Show!

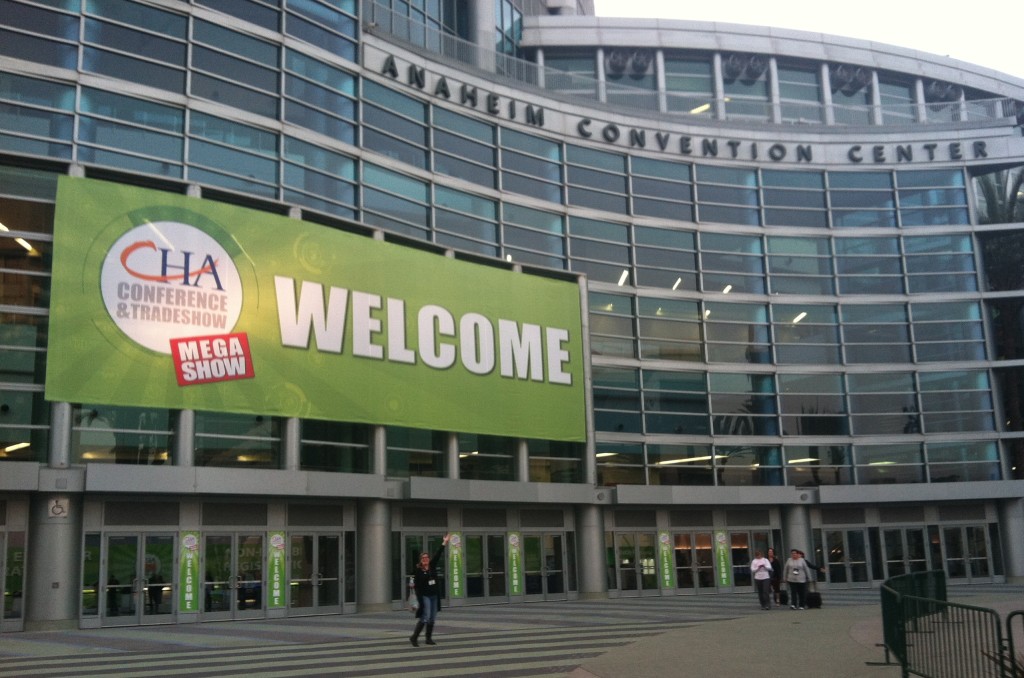
IMG_0231

Thanks to my great friend Laura Kelly, I had the privilege of attending CHA this year in Anaheim, CA!  For those of you that are unfamiliar, CHA is the Craft and Hobby Association.  Every year, they have a huge conference and trade show for exhibitors, buyers and designers in the craft and hobby industry.  I got to meet so many great people, see so many great products and even got to bring home some of those awesome products!  I even made my very first trip to Disney!!!  Stay tuned for more details of my trip to Anaheim and the great CHA!!!!!

Until next time…….

katie-asweetberry

Styrofoam Christmas Tree!

Christmas is my all time favorite time of the year!   And creating Christmas decorations is one of my favorite things to do, along with creating memories!!!

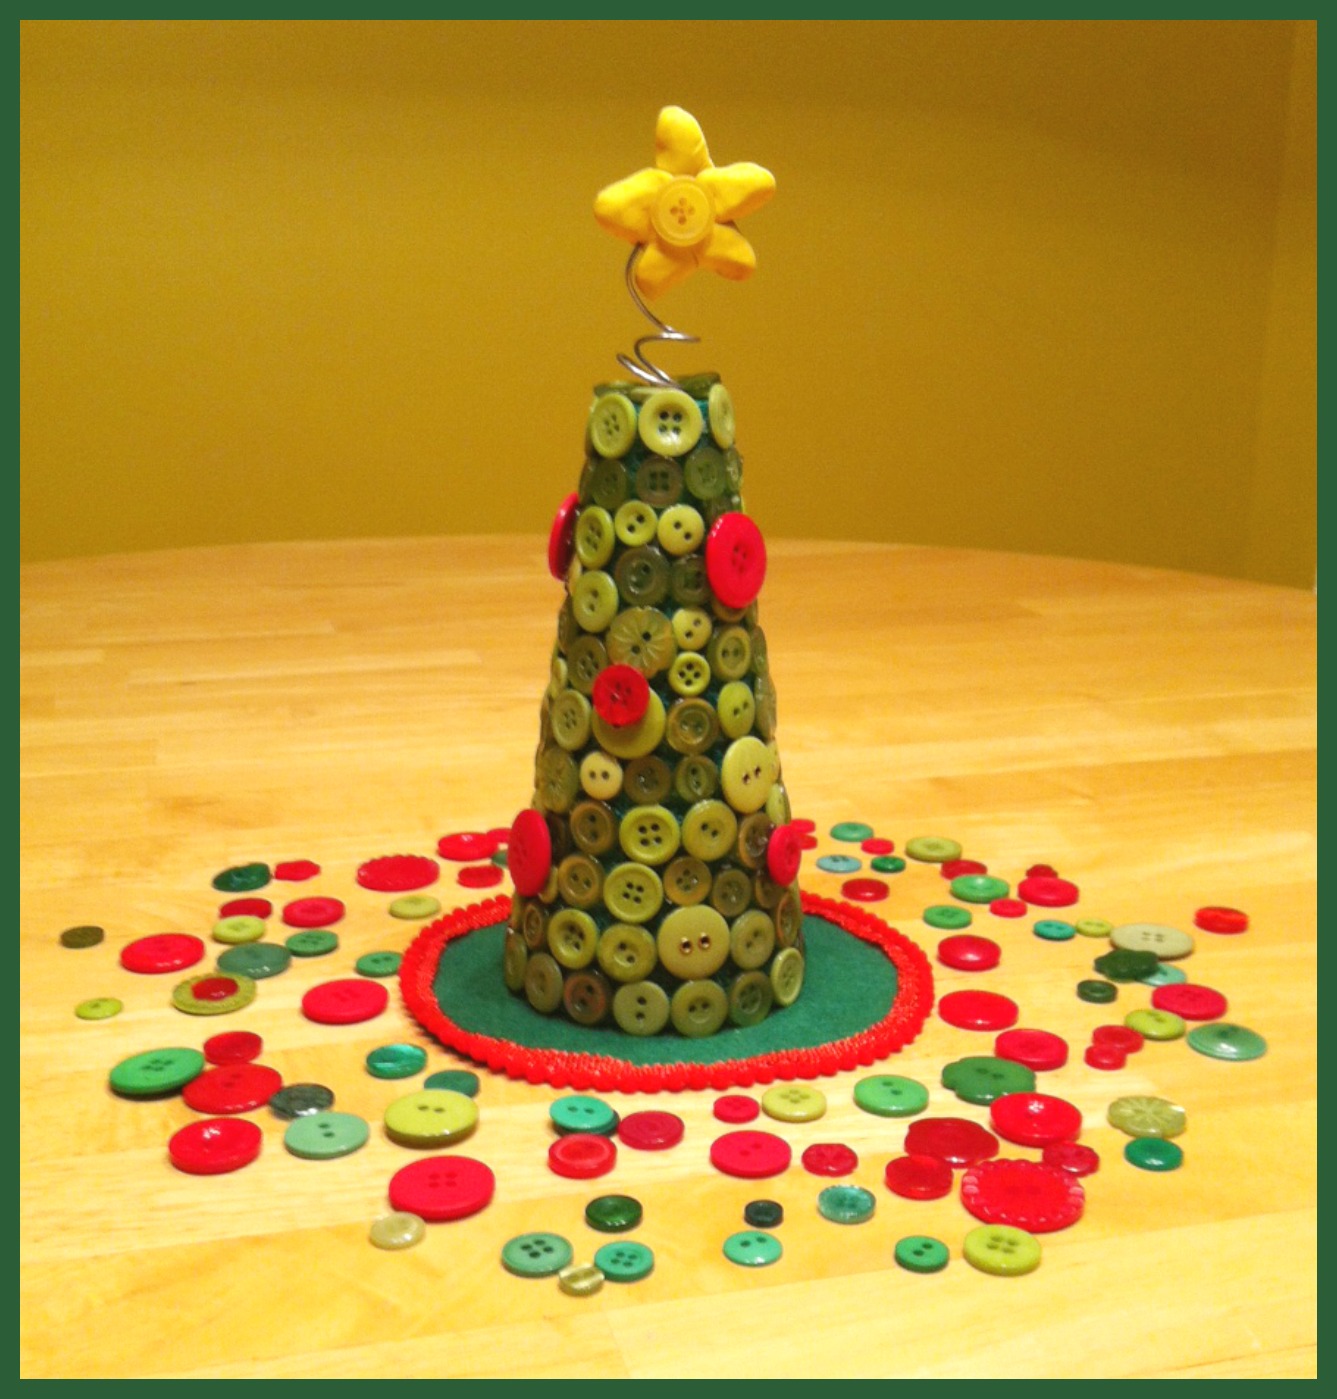
Check out this cute little tree I made using Styrofoam, Laura Kelly’s buttons from Buttons Galore and Sculpey Clay!!!!

tree

suppliesMaterials needed:

Styrofoam Cone

Sculpey Bake Shop Yellow Clay

Laura Kelly’s Radical Red and Candy Apple Green buttons from Buttons Galore & More

Wire

Folk Art Green Paint

Adtech Hot Glue gun and glue

Green Felt

Mini Pom Pom Ribbon from May Arts Ribbon

Fiskars Scissors

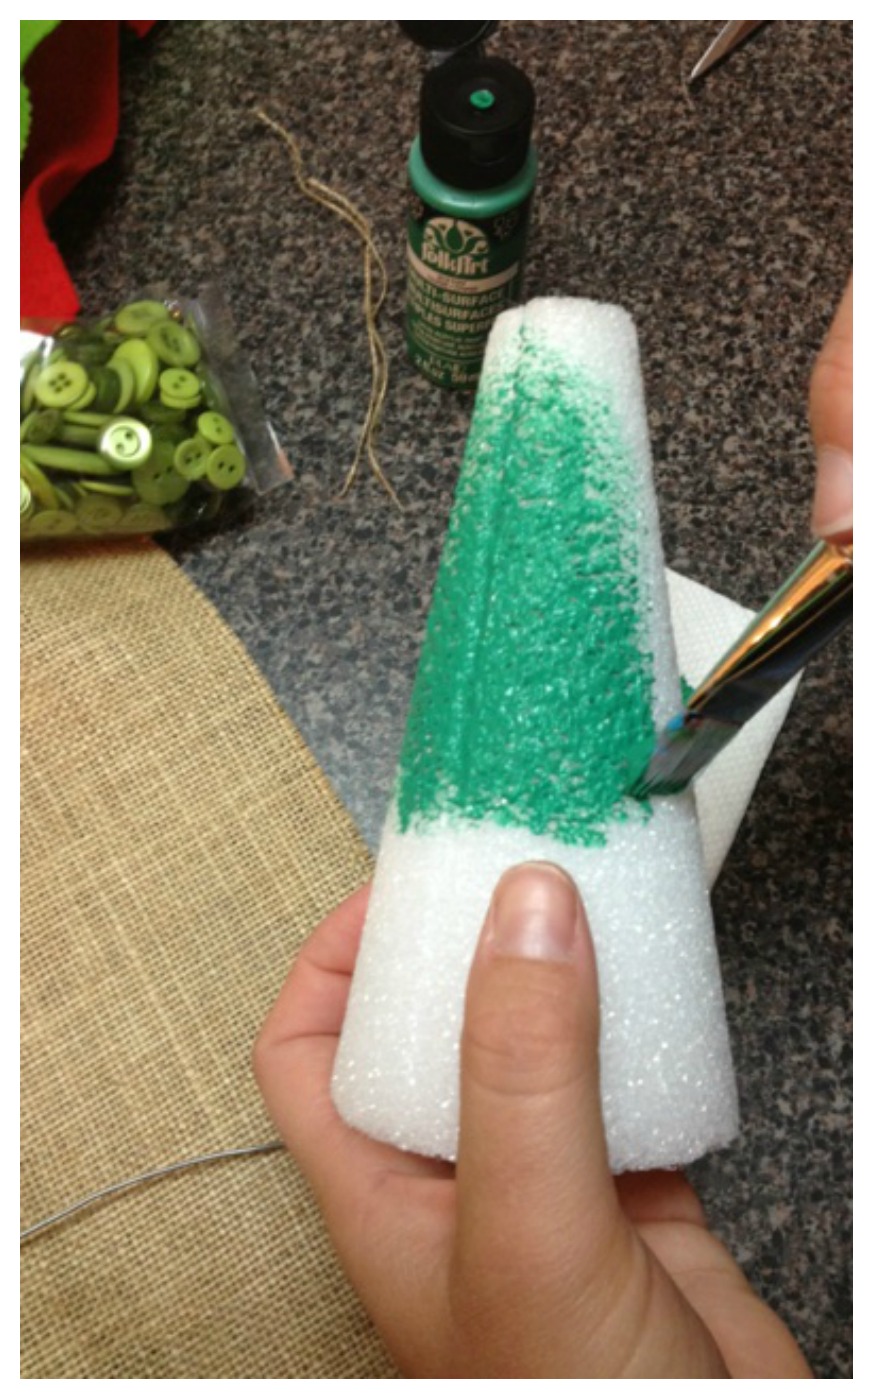
paintingI didn’t want the white cone to show, so I painted it green and let it dry before I started gluing the buttons on!

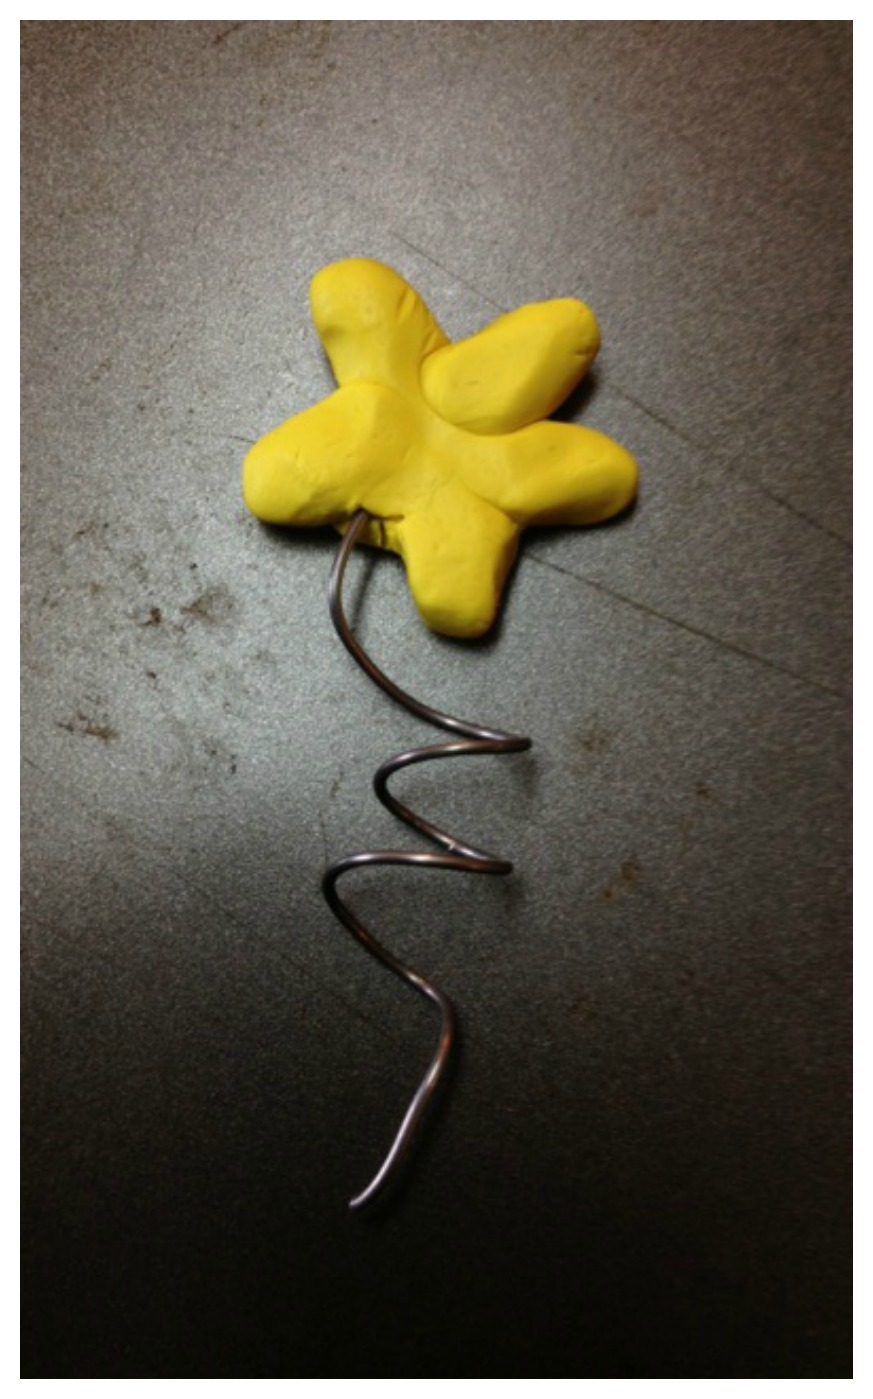
While it was drying, I made a star out of Sculpey Clay and added a curled wire.  I stuck it in the oven and baked it according to instructions.

clay starAfter the cone was dry, I used hot glue to attach the buttons in a single layer to cover the entire cone.  Then I added a few red ones as ornaments!  I also added a yellow button to the center of the star.

applying buttons

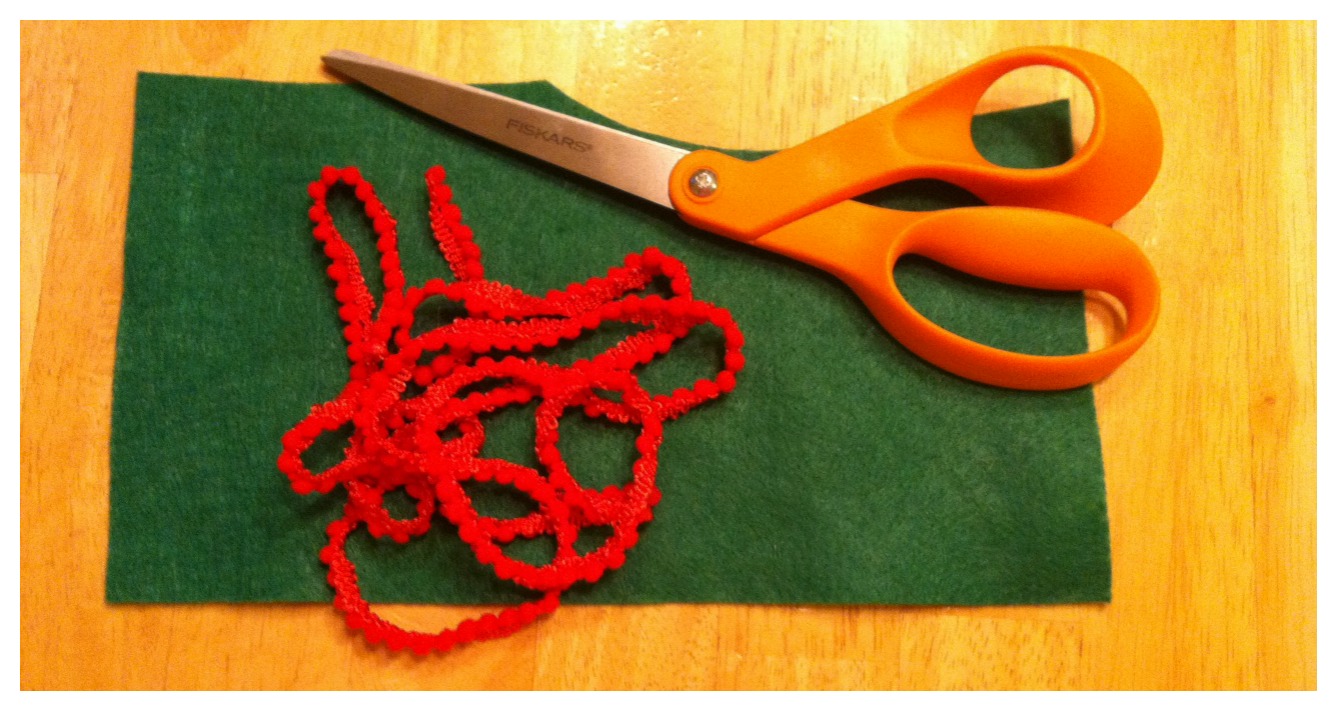
Using a scrap piece of green felt, Fiskars scissors and Mini Pom Pom Ribbon from May Arts Ribbon, I made a tree skirt.  I cut a circle out of the felt and then glued the ribbon around the edge of the circle.   It made a very cute little tree skirt to go with my styrofoam button tree!

skirt

tree

This lovely tree now sits on my dining room table as our center piece!  Hope you like it as much as my family and I do!!!!

I would like to thank my awesome friend Laura Kelly for the opportunity to work with her and to get the chance and the experience of working with so many amazing products!!!  Not only is she a great friend, but she has given me the opportunity to be her intern, as she has become the Resident Designer for Rit Dye!!!  Check her out on Rit Dye’s Blog!!!  Thank you Laura!  I love you!

Until next time……

ASWEETBERRYLOGO