Tag Archives: Laura Kelly

Candy Corn Fun with a Laura Kelly Printable!

It’s Candy Corn Time!!!! Candy Corn Fun

It’s that time of year again!   It’s now Fall and the weather is changing.   And if you go to your local stores, Halloween displays are out!   With the Halloween displays, comes the Candy Corn!  Yum!
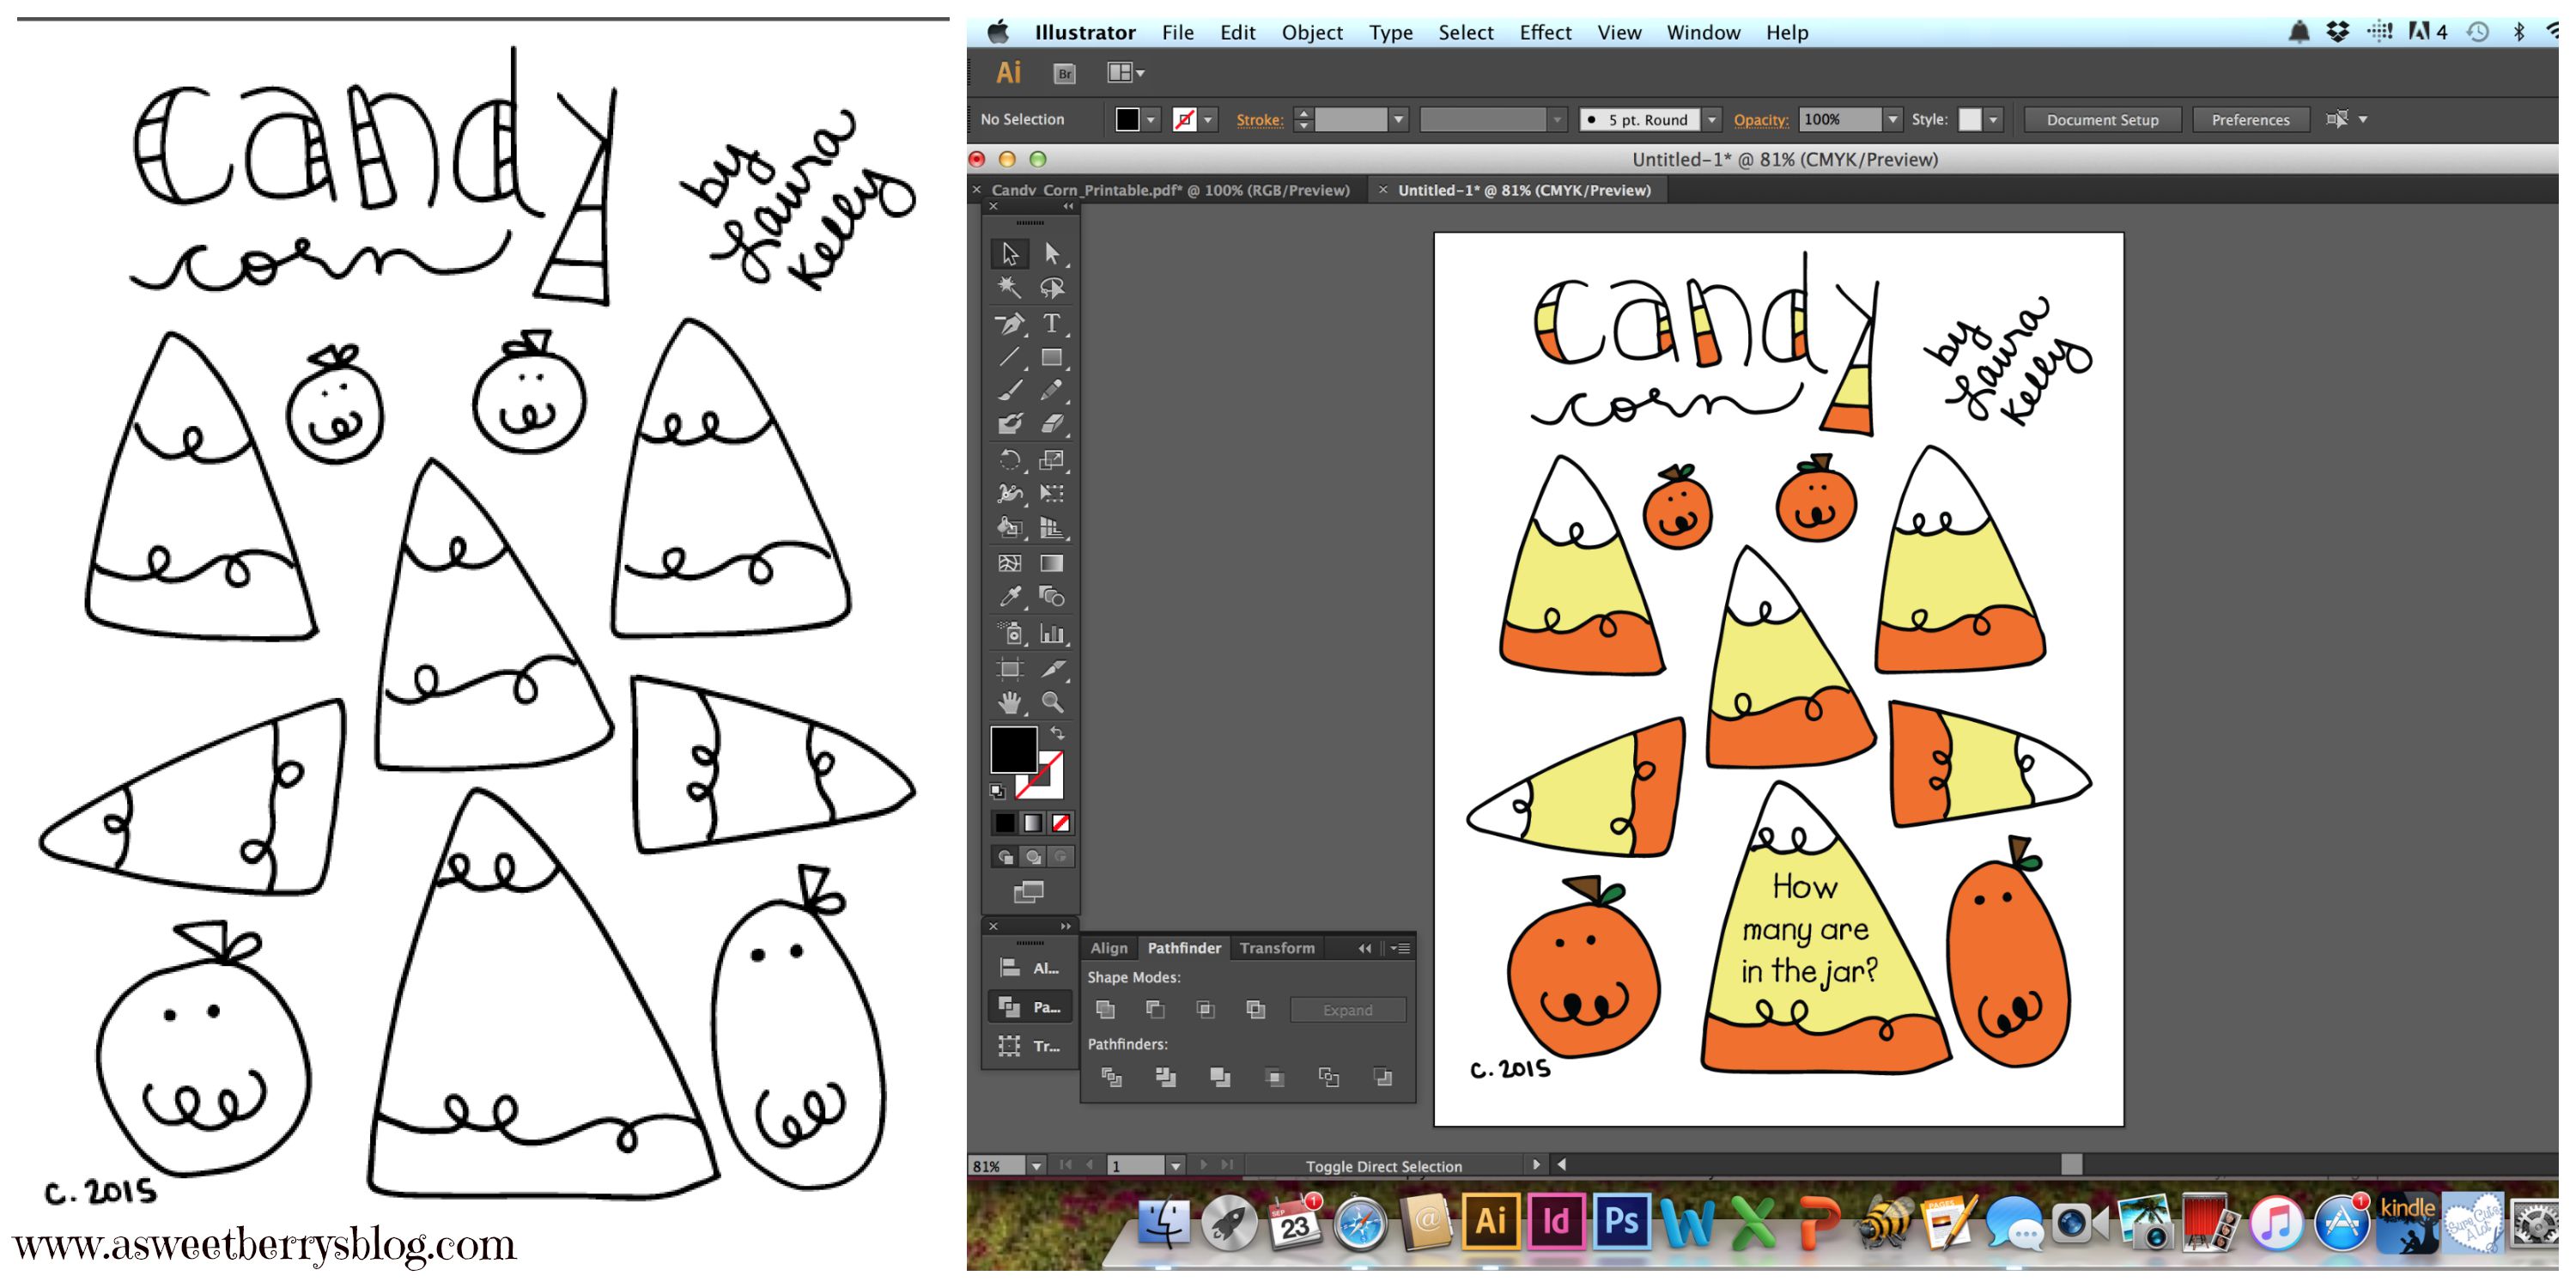
My friend Laura Kelly created a cute little Candy Corn Printable.  You can download it for free!  And if you make something with it, she’d love to see it!

I love to color by hand, but I also love using the Live Paint Bucket in Adobe Illustrator to color!  That’s what I did here with Laura’s printable!   I also added a few words on one of the pieces of Candy Corn that I planned to cut out and use for my Candy Corn guessing game! process
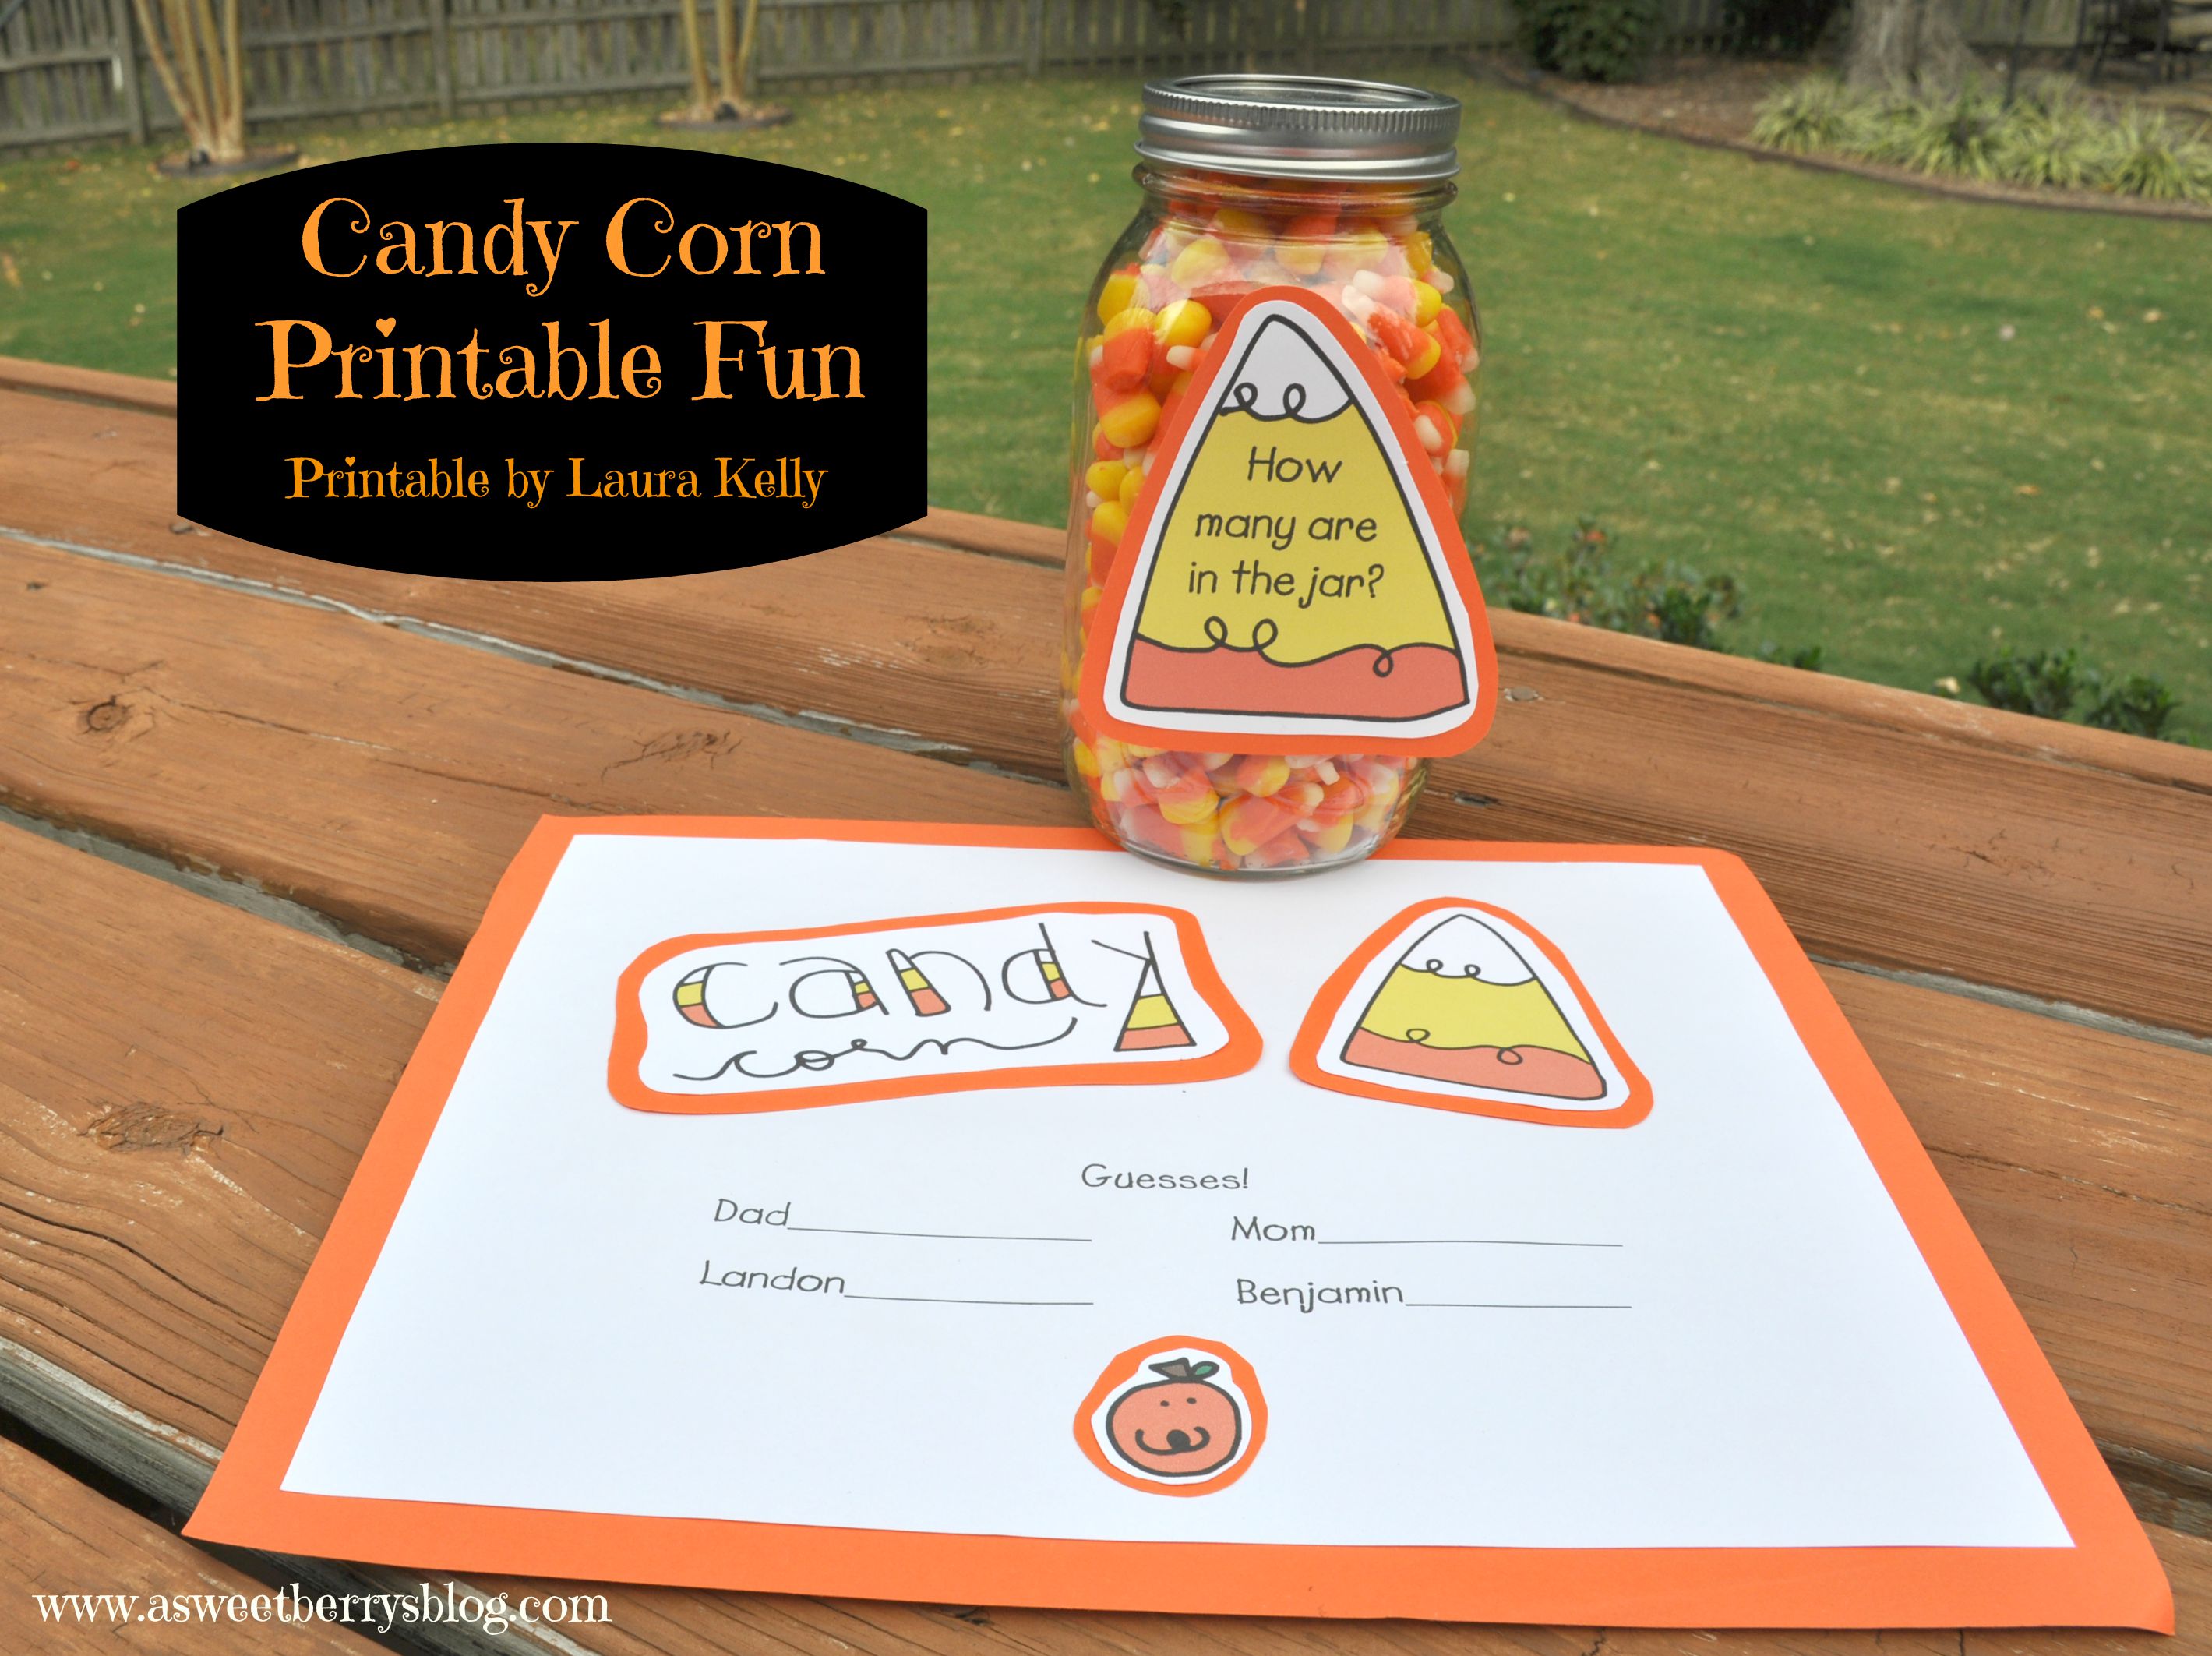
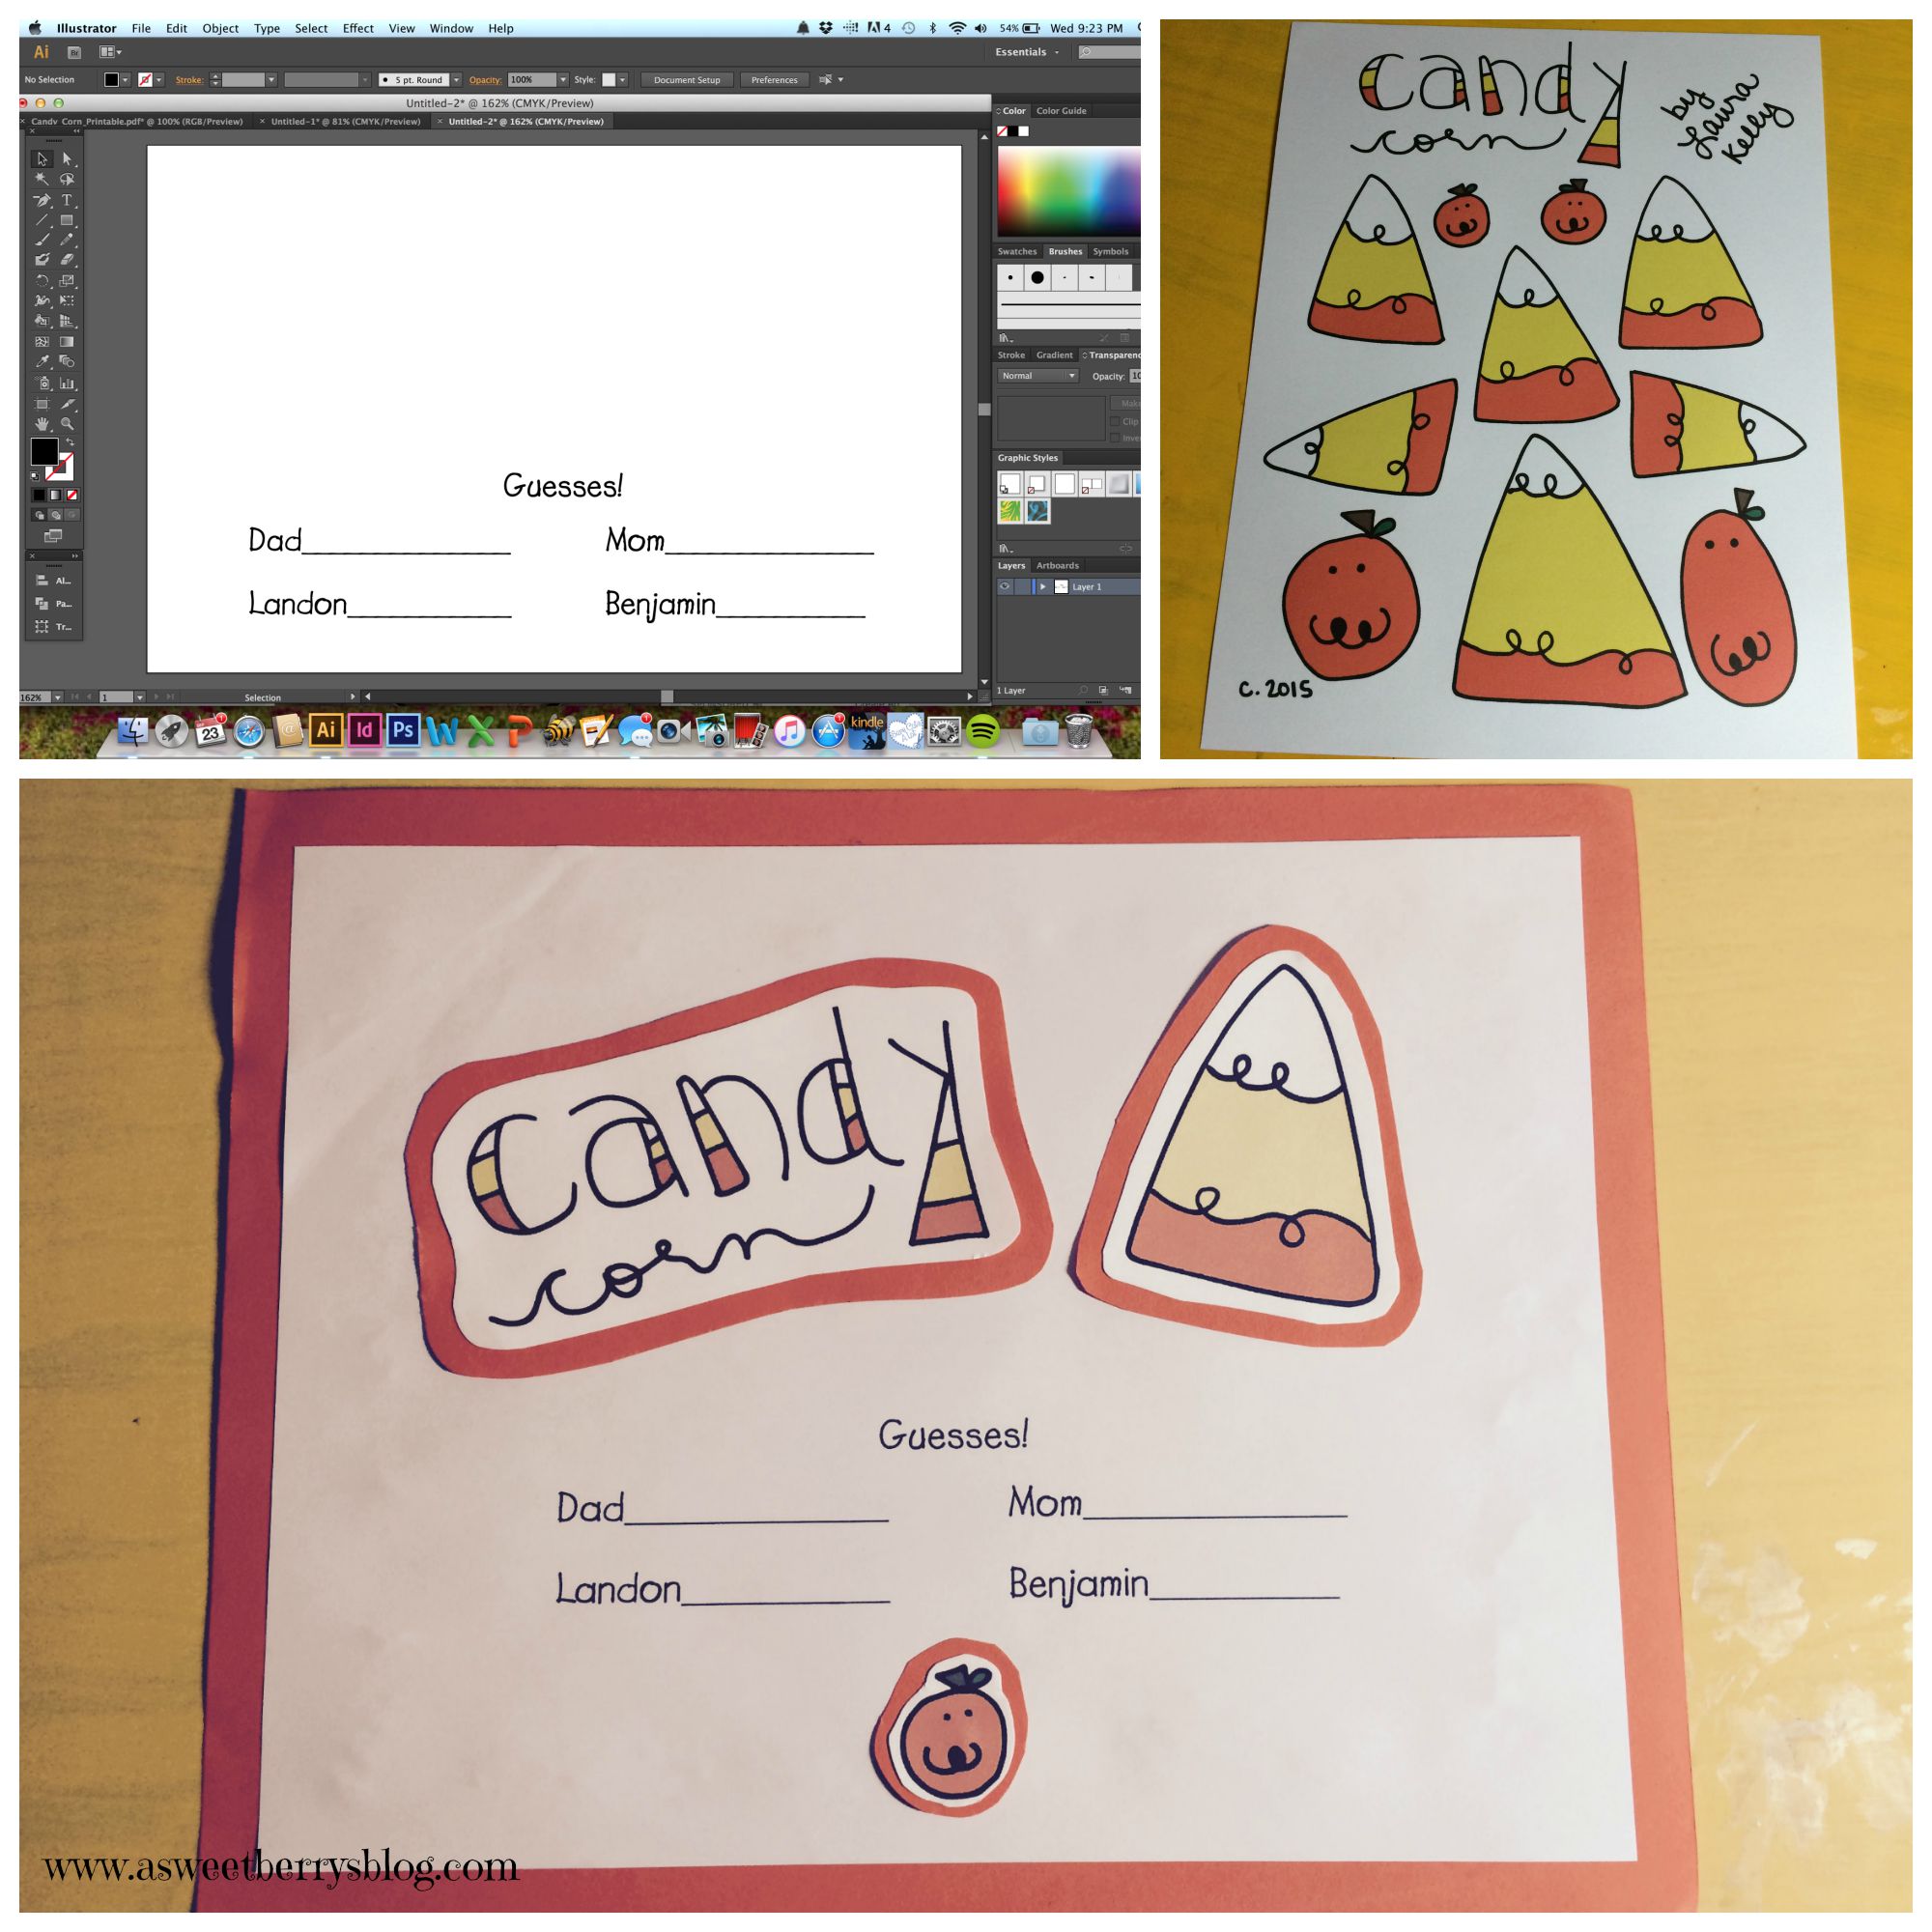
Once the sheet was all colored, I created a “Guesses!” sheet, leaving room at the top to add some of the colored pieces from the sheet.   I printed out my colored Candy Corn Printable, cut some pieces out and glued them to my “Guesses!” sheet! guess sheet
Now it’s time for everyone to make their guesses as to how many pieces of Candy Corn are in my mason jar!   I can’t wait to find out who gets the closest!  I did not count them yet, as I wanted to make a guess too!    Candy Corn Fun Hope you like my quick and fun idea of using Laura’s cute Candy Corn Printable!!!

Until next time………

Click here to check out other Candy Corn Printable Projects!

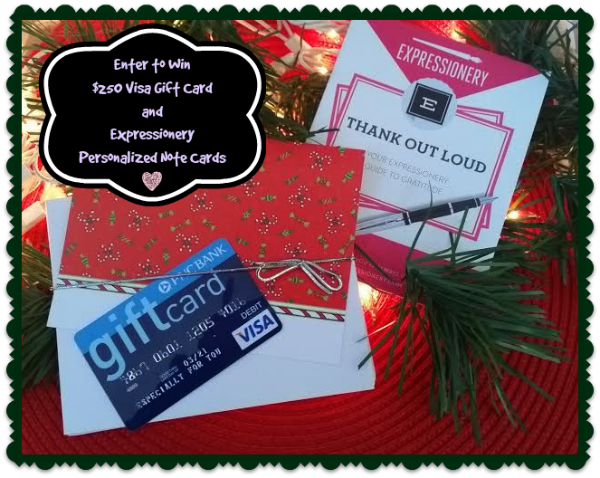
Also, enter to win!!
a Rafflecopter giveaway

National Watermelon Day 2015

National Watermelon Day is here!  I love that Watermelon has its own special day of celebration each year!   We will be celebrating at our house!
square final photo
My friend Laura Kelly is an amazing artist and has designed these awesome Wacky Watermelon Printables with some of her adorable watermelon art.  I cut them up and used them to decorate my party table! Laura Kelly Wacky Watermelon
While I was at the store today, I saw that Pillsbury now has a Funfetti Gluten Free Sugar Cookie mix!   OMG, they are delicious!   How cute are these watermelon cookies?!  I baked them, cut the tops off of some to make them look like a watermelon half, and then cut two sides off to make angles for a wedge!   Not realizing it, I picked up the Pillbury Sugar Free Vanilla frosting!   The kids had no clue and there were no complaints!!!  I love how they came out! cookies
Using Kunin felts, I made this adorable Watermelon Banner!  Click the photo below to see how I made it! watermelon banner
Did you see those adorable lollipops in the photo?  Those are from Lollipics, with Laura Kelly designs on them.  You can get your own with custom designs!  They are great for parties , weddings, or gifts! Lollipics
Hope you like what we have in store for National Watermelon Day!   And I hope you have a wonderful Yummy Watermelon filled day!

Until next time….

Pirate Fun featuring Laura Kelly’s Pirate Island!!!

Ahoy Matey!
Summer has begun and it going to fly by. With Benjamin heading into kindergarten on the year-round schedule, the boys only have a few weeks off before the new school year begins in July. We are going to make the most of it and plan to spend as much time being active as possible including hitting the beach and the pool. Both boys have tons of energy and love to be busy and on-the-go.

Sometimes finding things to do with two boys in the summer when the weather is poor or we are stuck in the car can be challenging. Of course they would be fine to play on their tablets but I prefer that we have a balance.

They both love to make stuff and solve puzzles so this little Pirate Games printable from Shop Laura Kelly is awesome.
Pirate Sheets
I am printing and packing them to have ready for the car ride tomorrow.
Pirate-Maze   Pirate-Wordsearch
They are a perfect match to the travel activity bags I made for the boys a while back.
Check that out HERE!
Katie_PirateBag
Benjamin saw them and was too excited to wait for the car ride to the beach!
maze word search    all done
Stay tuned for lots more Shop Laura Kelly printable ideas and fun coming soon.

Until next time……

Shop Laura Kelly – Button and Felt Heart Garland

ShopLauraKelly.com has some of the cutest craft kits put together by one of my best friends, Laura Kelly!  One of my favorite kits in the collection is the Button and Felt Heart Garland! banner
Laura is very creative and has licenses with several companies!  The kits that she has put together come with everything you need to put your projects together! kit
This particular kit includes felt hearts, ribbon, colorful embroidery floss, buttons and a needle. supplies
Instead of using my ribbon to hold the hearts for the banner, I decided to cut the ribbon into 4 inch strips and glued them together to make a little loop using Aleene’s Fast Grab Tacky Glue.  I then glued them to the backs of my hearts.  ribbon hooks
Once they were dried, I turned the hearts over and glued a coordinating color button to the front.
adding buttons
Then, I slid them onto my embroidery floss that I left together to look like a rainbow!
banner
It also makes a great necklace!  I love it!  So, go on over to ShopLauraKelly.com and check out Laura’s cute little craft kits!
necklace

Be sure to click through other great ShopLauraKelly project ideas below:


And enter to win!
a Rafflecopter giveaway

Until next time…….

Expressionery.com Self-Inking Stamps

Self-Inking stamps are so easy to use and Laura Kelly’s collection with Expressionery.com are super cute!   Expressionery.com has tons of different self-inking stamps to choose from!  I love my “Created with Love From” personalized stamp!  I use it on anything that I create that I am giving as a gift!   Here, I used it on a label for these awesome Scrappy Keychains that I made to go with my business cards for people that I meet at SNAP!   stamp
Click the photo below for Fifteen other fun ways to use Laura Kelly Stamps from Expressionery.com! Stamps
Right now, Expressionery.com is offering 30% off Sitewide with the code:  HAPPYSALE.  They are also offering free standard shipping on orders over $50!

Until next time…..


Happy Spring Button Greeting Card

I love Spring and I love Buttons!   I created this adorable Happy Spring greeting card using Laura Kelly’s Buttons and Lady Bug Buttons from Buttons Galore & More!
Final
Materials used:
Laura Kelly Buttons from Buttons Galore & More
Lady Bug Buttons from Buttons Galore & More
Card stock from Core-dination from Darice
Card/Envelope from Core-dination from Darice
Fabric Tag
Tulip Fabric Markers from ILoveToCreate
Hot glue gun and hot glue
Aleene’s Fast Grab Tacky Glue
Aleene’s Paper Glaze
I started by making paper rosette flowers.   I cut 3/4″ and 1/2″ paper strips with cute card stock.  Bending the paper back and forth, I created a zigzag strip.   Once I had them all folded, I used a hot glut gun to glue the strips to each other, connecting two strips together on each end.  Once they were connected and formed a circle, I positioned the sides together to form the rosette and hot glued the center and let it dry. rosettes
I cut my stems and leaves from a green striped card stock and glued them to a card using my Aleene’s Fast Grab Tacky Glue.  I added buttons to the paper rosette flowers!  I used green buttons for the grass!
puttingtogether
Buttons Galore & More has adorable little lady bug buttons, so I attached them to my card using Aleene’s Fast Grab Tacky Glue.  I added them to the paper rosette flowers, the stem and the grass! ladybugs
Using a fabric tag and Tulip Fabric Markers, I wrote Happy Spring and added lines and dots!  I applied it to the card using Aleene’s Paper Glaze and added a little ladybug to cover the hole on the tag. tulip fabric markers
I love this adorable little Happy Spring card and someone special will be receiving it soon! Final

Buttons Galore & More is offering free shipping on orders over $30!    They also offer Coupons for their buttons!

Once I completed my card, I used my Laura Kelly personalized self-inking stamp from Expressionery.com to stamp the back showing that I created this card with love! Expressionery.com

Expressionery.com is currently running a special of 25% off Sitewide with the code:  SPRINGSALE.   They are also offering free shipping with a purchase of $50 or more!

Hope you like this adorable card as much as I do!  You can make one yourself!

Until next time……

Personalized Christmas Stationery from Expressionery

This post is sponsored by Expressionery.com and Laura Kelly Designs.  Although I received product and financial compensation, all opinions are entirely my own. Written Words
Personalized Stationery from Expressionery.com is my favorite, especially when it has Laura Kelly’s Me and My Peeps on it!   There is a Peep for everyone, even your pets!   There are even Christmas time Peeps.   When the package from Expressionery.com came and my boys (Landon, age 7 and Benjamin, age 5) saw that they had their own Me and My Peeps Christmas stationery, they were so excited!   Landon is to the age that he loves writing notes, especially to his teachers and friends!

Expressionery.com has a gift for everyone.  Personalized stationery is the perfect gift for the holidays, Mother’s Day, Birthdays or even Teacher Appreciation.  Or, you can just order it for yourself!  Laura Kelly’s collection of stationary is super cute and fun!   Her designs are appropriate for children and adults!

A Little Christmas Ornament using our Me and My Peeps Stationery!

We decided to make a cute craft with one of our notecards.   They each made a Christmas ornament to send with the note that Landon wrote to his Mimi and Paw!  Each boy cut out their own Peep, leaving their name attached.
Cutting
Using Aleene’s Turbo Tacky Glue, they glued their Peep to a piece of Kunin’s red felt! Aleene's
After the glue dried, they cut the felt just a little bigger than their Peep! felt
Next, we used Eyelet Pliers and an eyelet to create a hole so that we could add a piece of string!   We used the elastic silver string that came wrapped around our stationery gift from Expressionery.com!! ornaments
These lovely homemade ornaments will be sent to Mimi and Paw’s house with the sweet little note that Landon wrote for them! Final Ornaments So, go to www.expressionery.com/laurakelly and order some personalized stationery for a gift or for yourself!  The deadline to order for Christmas is December 19th.  For 30% off site wide, used Promo Code:  PEEPS    Code expires on 12/30/14 and excludes embossed stationary and paperweights.  *Limited time offer valid through December 30, 2014 at 11:55 PM CST. Receive 30% off sitewide plus free standard non-trackable shipping and handling on orders over $50 with offer code “PEEPS” at checkout. Offer excludes embossed stationery and paperweights. This offer may not be combined with any other offer or discount, and shipping fees and sales tax are separate. To prevent abuse, prices, specifications, and availability subject to change without notice from Expressionery.com.
Enter for a chance to win a fantastic giveaway!
250VisaGiftCard_PRIZE_Pic
a Rafflecopter giveaway

Halloween Popcorn Box Blog Hop

A year ago, my friend Laura Kelly started this Halloween Popcorn Box Blog Hop and then decided to do it again this year. I was so excited to get my box of goodies to do this project! It’s so much fun and exciting to see what everyone comes up with! This year, I decided to make a Cat!

popcornbox2014

Items I used:
Popcorn Box
Black Felt from Kunin
Phoomph for Fabric from Coats & Clark
Tulip Soft Black Fabric Paint
Scribbles 3D Fabric Paint
Laura Kelly Buttons from Buttons Galore & More
Floral Wire
Paint Brush
Aleene’s Turbo Tacky Glue

First, I painted my box using the Tulip Soft Black Fabric Paint. Yes, I know it’s fabric paint, but it still worked great on my box! I let it dry and then painted on another coat.
painted box
Next, I made my cats tail. I thought about this for a little while! I took a piece of floral wire and folded it in half and manipulated it to look a little like how a real cats tail would look. I placed black Phoomph onto some felt, placed the wire onto the Phoomph and then folded my felt in half. Then, I cut around the wire making the felt the same shape as the wire. Then i manipulated the wire with the felt again to make the tail curved.
Tail
Next was my cats ears. Again, I used black felt and Phoomph. I placed the Phoomph onto a black piece of felt. When I folded the felt over, I made sure that it didn’t completely cover the Phoomph because I knew that I wanted to use the exposed part of the Phoomph to attach the ears to the popcorn box. I used the orange Scribbles Fabric Paint to make the inside of the cats ears.
ears
Using Laura Kelly’s buttons, I fold some orange, yellow and black beads to use for the eye and then an orange one to use for the nose. Using Aleene’s Turbo Tacky Glue, I attached them to the box.
eyes
Using the end of the wire from the tail, I inserted it into the back of the box and bent it upward helping it stay in place. I then used the Aleene’s tacky glue to glue the tail in place, to give it an extra hold.
Glue tail and dry
Once everything was dry, I used White Scribbles Fabric Paint to create the mouth and the whiskers of my cat!
whiskers
And then he was complete!
popcornbox2014
I hope you liked my Halloween Cat Popcorn Box!
Until next time…….
Print
Be sure to enter for a chance to win some great prizes!
a Rafflecopter giveaway
Also, check out the other great Halloween Popcorn Box Blog Hop entries!!!


Pink Button Bracelet

Pink Button Bracelet

I love dangly bracelets and this pink button bracelet is super cute and super easy!  And it can be worn in October to show your support for Breast Cancer Awareness.   Finished Bracelet

What you need:
Pink Button Bracelet Supplies
Laura Kelly’s Sweet Blush Collection Buttons from Buttons Galore & More
Jump Rings (two different sizes)
Chain (sized to fit your wrist)
2 piece toggle clasp set
Wire Looping pliers (round nose pliers)

Using my wire looping pliers, I opened all of my jump rings slightly, most of them big enough to get a button on them and then connect them to another button and the rest of them only big enough to connect to the chain.  As you can see in the picture below, I connected a few buttons to make a strand or just left them as singles.  I did try to make it even, so that it would not be too heavy on one end. I also used two jump rings to connect each piece of the toggle clasp to the ends of the chains.
Putting it together
After I had all of my buttons together with jump rings, I attached them to the chain.  And then it was complete!
Finished Bracelet
Hope you like my Pink Button Bracelet. Thanks for reading, and

Until next time…………
ASWEETBERRYLOGO

Tulip One-Step Tie-Dye Your Summer Party!!

Together with I love to Create, Laura Kelly put together yet another awesome blog hop!  This one is a Tie-Dye Party!  Each blogger was sent an awesome One-Step Tie-Dye Kit for 6 people and two Gildan t-shirts.  The t-shirts could be used for practicing or for the actual project.  I chose to use mine for the project, along with some other size Gildan t-shirts I had.  We had a family tie-dye party!! kit

Tulip Tie-Dye T-Shirt Summer Necklace!

katie

I have always wanted to make a t-shirt necklace!  I love bright and bold colors so I thought I’d tie dye one of my Gilden t-shirt with nice bright Tulip Tie-Dye colors (Fuchsia, Purple, Turquoise, and Yellow)!  I am obsessed with the swirl pattern for some reason, so that’s the one I used.

dye process

After my shirt was tie-dyed, set, washed and dried, I ripped the bottom of the shirt off, cutting just the side of the shirt so that I could get a good start for ripping.  Sometimes ripping through the seam can be a little difficult.  Next I cut just under the arm and ripped it across, so that I was left with just the bottom half of the shirt.  Then I cut 5 cuts on the sides, so that I could rip them across.

first steps

Once I had my strips, I grabbed the top piece of the shirt and did the same thing, making a cut by the seam and ripping it, giving me another strip.  I made one cut on the strip so that it was open.  I then gathered all of my strips, used my cut strip to wrap around my gathered strips, so that they would all stay together.

Last steps

Then my necklace was complete!  It was long enough that I wrapped it around my neck twice and made one shorter than the other, almost like an infinite scarf!!

  katie

Dad 4th of July Shirt!

Dad’s shirt was made using the starburst method. Pieces of fabric were gathered, making sure to grab both the front and the back of the shirt and wrapped a rubber band around it.  The gathered pieces were tie-dyed with red and then the rest of the shirt was tie-dyed with blue!

Dad shirt

Big Brother’s Tie-Dye Master Piece!

Landon wanted to create something different with his shirt.  He loves how it turned out, with his favorite colors of blue, green, yellow and red! big brothers shirt

Little Brother’s 4th of July Shirt

Benjamin loves the swirl method as well, so he will be rocking his shirt come the 4th of July!!!  This kid loves to tie-dye as much as I do! Little Brothers shirt

This one-step tie dye kit is perfect for a party of friends!  It comes with everything you need…bottles with dye, rubber bands, gloves and a plastic table cloth.

For other great summer tie dye ideas, hop on over to some other blog sites and see what they created using this great product!

Also, enter for a chance to win a Tulip One-Step Tie Dye Party Kit for 10!
a Rafflecopter giveaway